
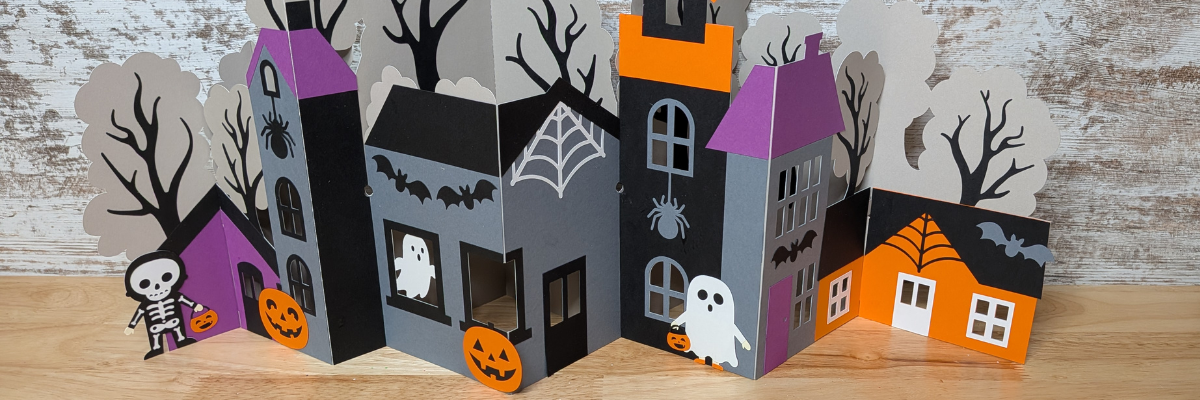

I love paper crafts! I started in the craft industry over 20 years ago with scrapbooking and I have always loved creating 3D paper craft projects. This XL Flat Fold Halloween Village is a large one, but not difficult to put together. I am sharing tips to working with the file and assembling it below.

Affiliate links may be present in the following blog post and as an Amazon Associate, I earn from qualifying purchases.
Supplies Used for Creating the Halloween Village:
- Silhouette Studio software
- Silhouette Cameo 5, Autoblade, Silhouette Cutting mat
- XL Flat Fold Halloween Village Scene by Lori Whitlock – Design #1291183
- Cardstock – Use code ELLYMAE10 to save
- Precision Glue Press
- Adhesive Tape Runner
- Optional: Score Board
Here is a look at the file when opened from the Silhouette library. Files that sync to the Silhouette library directly from the Silhouette Design Store are .studio files.

Once the file is open, I would recommend immediately use File > Save As to create a new working file to move the pieces around.
One thing I noticed after I had all of the piece’s cut was that on the original file, the dark gray piece that the red arrow points to is in front of several of the other elements. It is not an issue but can catch you off guard when looking at the file for assembly.

Once the dark gray piece is moved, it will reveal the pieces underneath it. When assembling this make sure to glue the dark gray piece directly onto the lighter gray cardstock sections and then the black window frames go on top.

The sections in this file may need to be ungrouped to move the colors around for cutting. Each section may vary in how many times it needs to be ungrouped.
One other thing to note when ungrouping the sections is that the score lines will also ungroup from the file. Make sure to select the score lines and the larger section and group together so the lines move with it.

Not the end of the world if it is moved and you lose it. Grab a scoring board and score the lines yourself. They are pretty easy to find when you open the original file. This is exactly what I did because I wasn’t paying close enough attention when I moved several of the pieces to the mat to cut.
I ungrouped the sections and moved them around to cut. I keep uncut pieces on the left side of my virtual cutting mat then move them onto the mat by color and then cut all of one color first. Once the pieces are cut, I move them off to the right side. I’ll share a photo of my working design file at the end of this post.
Once all the pieces are cut for the Halloween village, start matching them up and dry fit them before securing anything with adhesive. Open the original file again and use it as your guide to fit all the pieces in.

I worked on one section at a time, except the black tree branches. I left all of those until the very end and they were the last pieces I adhered down. I dry fit each section before gluing down. Once all the sections were done, then I glued the tabs together to create the 2 long sections.
Here is a close up look at the details. My Silhouette Cameo 5 and Autoblade cut it perfectly and I didn’t have to recut any piece until I glued one windowpane in the wrong spot.

Rather than force my well used blade through the cardstock on the first pass. I chose to use 2 passes at the Cardstock Textured setting and it worked well.
I watched the video by Lori Whitlock for this design style to see how the 2 pieces fit together.
The XL Flat Fold Halloween Village Scene looks much more complicated to put together than it really is.
Now I mentioned I’d share my working file. It’s a mess, but it is a system that I find works well. Normally I don’t have the pieces overlap each other after they are moved to the right side after being cut, however, this is a large file, so they are overlapping today.

And there are more of these files by Lori Whitlock too!
- XL Flat Fold Easter Village
- XL Flat Fold Christmas Village Scene
- XL Flat Fold Christmas Nativity Scene
Save this for future reference by pinning the image below.

Enjoy !
THANK YOU for your support! How can you help? Click HERE & buy a coffee.
Every little bit helps with the cost of running the site.

Silhouette Classes
Never stop learning! Let me help you take the anxiety out of learning with Silhouette and get to creating faster! My Silhouette classes are heavily focused on software, so you can take the skills & techniques taught and apply them to many future projects!


**This post may contain affiliate links. What that means is that I may receive compensation if you purchase through the links I have provided. The price you pay for the product or service is not higher, but I may get compensated for sharing.
Discover more from Silhouette Secrets-Swift Creek Customs
Subscribe to get the latest posts sent to your email.









