
This past weekend I had the opportunity to teach at the Terri Johnson Creates Silhouette Spring Retreat. This was an intermediate level retreat and not only did the attendees learn lots of new things, but I learned from both the attendees and my colleagues as well.
But, do you know what the most important part about the entire weekend was?
The people!
We had a fabulous time learning, creating, and laughing through the entire weekend!
The time goes so fast and the hardest part for me is getting photos of things.
But, here are a few I managed to snap before it was over.


Every single time I tell myself that we need to take photos on the first day when we are all refreshed and every time it is always on that last day after we have been learning new things and staying up late chatting.
The first day there are many new faces, but by the 3rd day so many new friendships have been formed. I almost think, even if we look tired, those are still our best photos and there are finished projects to show as well.
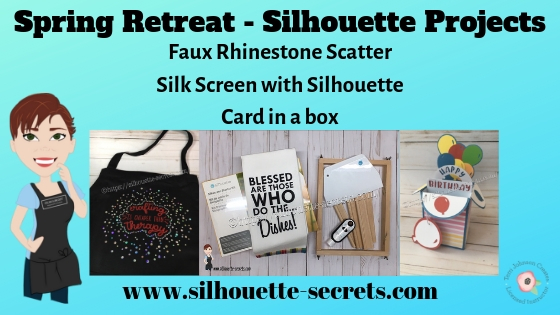
The first class I taught was how to create a Faux Rhinestone scatter with Siser Holographic HTV & Siser Red Glitter HTV that was applied to a black apron.

For this design we started with a Silhouette Design Store file – Crafting is Cheaper than Therapy by Sweet Afton – Design #206867 and created several offsets using the Offset Panel. Then we used the Rhinestone Panel, which is available with the Designer Edition upgrade or higher to create our rhinestone pattern.
This project was very interesting to create and took quite a bit of testing to get the scatter to be random instead of a set pattern.
Thank you to our sponsors for this Faux Rhinestone scatter project!
- Siser Holographic Rhinestone HTV was provided by Heat Transfer Warehouse,
- Siser Red Glitter HTV was provided by Heat Press Nation
- Silhouette Design Store file was provided by Silhouette America, Inc.
The next project I taught was a card in a box project. Every user comes from a different background, so for many cutting paper was something new for them.
I started as a papercrafter with the Silhouette, so I always love to pass on my tips and tricks for working with paper to others.

For this project, I showed the attendees how to open and work with a paper piecing file from the Silhouette Design Store. We used the Happy Birthday Balloons Card in a Box by Suzanne Cannon – Design #256894.
They used the Fill Color Panel, Replicate Panel and the Reveal mat option on the Page Setup Panel to position this design and cut multiple colors out on one cutting mat at the same time.
I use this method for almost all projects whether it is cardstock or vinyl. I find that it saves time and also saves the adhesive on my mat. Since I am not putting down a full sheet of material on top of the mat and then peeling it off, the adhesive remains sticky longer in the areas not used as much.
For more tips on extending the life of your cutting mat, check out this blog post HERE.
This was the first pieces that we cut.

And this is how it was set up on the Silhouette virtual cutting mat in the software.

After cutting the white and blue pieces of the design, we moved those off the mat and positioned the other pieces onto the mat, using the grid revealed on the Page Setup Panel.

Then we placed the colored cardstock on the mat in the same locations as it shows on the software and sent a second mat through to cut.

Now, all the pieces are cut in only 2 times loading into the machine and this fabulous card is ready to assemble.

We used Close to My Heart cardstock and patterned papers to complete this project. When cutting cardstock, the quality of the cardstock makes a big difference. I love using the Close to My Heart brand or the Michael’s Recollection cardstock. They both cut very well.
A big thank you to Silhouette America, Inc., for providing the Happy Birthday Card in a Box file for the attendees.
And the third project I taught was the Silk Screen with the new
Silhouette Silk Screen Starter kit.

We used a free cut file from Cutting for Business called Blessed Are Those Who Do the Dishes and applied it to a hand towel.

Thank you to Silhouette America, Inc. for the Silk Screen and Christine with Cutting for Business for allowing me to use her file to teach this class.
I started working with the Silhouette silk screen kit when it was first released in Fall of 2018 and just like anything else, it takes practice. I encourage you to try it out and keep on trying with it. I love that the screen is HTV and is reusable, just wash and let it dry. Then when needed, assemble it back in the frame and apply your paint.
I am making a list of ideas for Christmas gifts this year.
And finally, I do have to share with you the shirt I made to wear on the first day of the event. If you have followed me for any time or see me post on Facebook, I troubleshoot a lot when users post an issue and the first question I ask is
“Can I see a photo of your blade installed in the machine?”.
While that might be annoying to some, it is one of the most important things to start with any time there is a cutting issue. I was talking with Terri at Terri Johnson Creates one day and she said, “You need a shirt.”, so I create one and used the Silhouette Printable Heat Transfer for Dark Fabrics.
It turned out great! I’ve made several more shirts with this product and am loving it!
And this photo is taken after it was washed and dried, no special treatment.

And guess what, I fixed a few gaps in blades this weekend too!
So a tip for any user, always start with the blade. No matter which Silhouette blade you are using, if there is a gap in it, it can create cutting issues.
All blades need to sit with the lip of the blade flush with the housing.
![]()
The weekend was fabulous and even though you may feel tired by the end of the weekend, it is a refreshing tired and I get a sense of renewed energy being around other Silhouette users.
To keep up with events by Terri Johnson Creates, make sure to follow her blog HERE. There are still spaces left at the moment (it has sold out every time – so don’t wait too long) for the All Things Silhouette Conference in June in Peachtree City, GA outside of Atlanta, GA. It is the largest Silhouette conference in the U.S. and a great opportunity to learn from so many in the Silhouette Industry!
Find out all the details here – June All Things Silhouette Conference.
![]()
And new this year, there is a Pre-Day event with more hands on classes!
Join us for the Ultimate ATS Package!
Here is a short video showing a glimpse of the ATS conference – I get excited every time I see it.
You can also check to see if there is a Terri Johnson Creates Licensed Instructor in your area that may host retreats, workshops or even one on one classes.
I would love to see what you create – feel free to post on my Facebook group at
Silhouette Secrets+ with EllyMae.
Enjoy!

![]()
**This post may contain affiliate links. What that means is that I may receive compensation if you purchase through the links I have provided. The price you pay for the product or service is not higher but I may get compensated for sharing.
Discover more from Silhouette Secrets-Swift Creek Customs
Subscribe to get the latest posts sent to your email.


[…] And more tips to getting started on this post – The Curio – Getting Started. […]