The Silhouette Portrait is a great little machine, especially if you are looking to travel with a cutting machine. It’s light weight and very portable.
Affiliate links may be present in the following blog post and as an Amazon Associate, I earn from qualifying purchases.
I was asked about a storage tote for traveling with the Silhouette Portrait 4 machine and it took me a bit of time to order and find one that worked to fit not just the machine, but also supplies and keep them safe as well.
Silhouette Portrait 4 Cutting mat – NEW! sizing is different than older model Portrait mats *it will take time for all retailers to stock the new cutting mats
The Silhouette Portrait 4 now has a cutting width of 8.5″, which is a change from the older model Silhouette Portrait machines. This does make a difference and the cutting mat looks different, it has a different size adhesive area, and the actual dimensions of the cutting mat are different than older Portrait cutting mats.
The photo below shows a comparison of the older cutting mat and the new Portrait 4 cutting mat. You can see the difference in the design area and the actual size of the cutting mat is different.
This means that if you use an older model cutting mat in the new Silhouette Portrait 4, it will NOT line up with the on screen cutting mat that you see in the Silhouette Software.
This WILL affect your cut placement and print and cut projects!!!
Make sure when you are order additional cutting mats that you are ordering the correct one for your particular Silhouette Portrait model!
Find the Silhouette Portrait 4 cutting mats HERE. It will take time for retailers world wide to get these new cutting mats in stock and have availability.
Find more information on the Silhouette Portrait 4 HERE.
I hope these tips have helped and I can’t wait to see what everyone is creating with their Silhouette machines!
Save this for future reference by pinning the image below.
Enjoy !
THANK YOU for your support! How can you help? Click HERE & buy a coffee. Every little bit helps with the cost of running the site.
Silhouette Classes
Never stop learning! Let me help you take the anxiety out of learning with Silhouette and get to creating faster! My Silhouette classes are heavily focused on software, so you can take the skills & techniques taught and apply them to many future projects!
**This post may contain affiliate links. What that means is that I may receive compensation if you purchase through the links I have provided. The price you pay for the product or service is not higher but I may get compensated for sharing.
We are continuing the Let’s Explore v4 – Silhouette Organization series today with some tips to organizing additional files that you may be using for Silhouette.
As I mentioned in my previous posts in the series, there is no magic answer to organizing your files. I can share how I organize my personal files, but each user will need to determine what is going to work best for you and your work flow. And, your organization path may change over time and that is completely OK. I’ll share some tips and thinking points to help get you started with determining what might work for you.
My goals by writing this Organization series is to help you think about ways to organize your files and find a method that works for YOU! And for me personally too – I am right there with you in trying to get things organized better!
Affiliate links may be present in the following blog post and as an Amazon Associate I earn from qualifying purchases.
Note: the screen shots below are from a Windows computer, but all of the same concepts, tips, and techniques will work for MAC users as well.
First, let’s discuss design files.
Organizing Designs
Where to store design files?
The Silhouette Studio library is not designed as an all inclusive storage area, but as a syncing device. So I would highly recommend that you store your personal files outside of the Silhouette library. I use an external hard drive to store all my designs and fonts.
I know I mentioned this several times in the first 2 parts of the series, but I think it is a very important part of you Silhouette journey.
What is going to work best for you to store your files? Only you can decide that. I use an external hard drive for several reasons. I travel to teach at conferences (when life returns to “normal”). I can take my external hard drive and plug it into different computers and access my files. And I like to keep my computer cleaner by not storing files on it. But, I also have a backup to my external hard drive as well because nothing is 100% safe. More details on that in the Let’s Explore v4 – Backups tutorial.
Once you decide on the storage location, next you can start thinking of how you want to store your files.
How to organize design files
The basics of organizing are pretty simple. Create folders and move your files into those folders in the best way that will work for YOUR personal work flow.
I do not have the magic answer here. As I mentioned in the previous post, I started as a digital scrapbooker before getting my Silhouette. This meant I collected lots of digital supplies. I was on several Design Teams for digital designers, which meant that I collected a LOT of files. Personally, I’ve always organized it by the store or the designer where I got the files. That may or may not work for you. I have not changed my method of organizing in the 9+ years since I started with Silhouette. So this organization series is just as much for me as it is for you.
When I started getting into Silhouette, I created a folder called “Silhouette cut files” under my Digital files folder. And this is how I have continued to use it from the beginning. As you can see in the photo above, I have a lot of different folders with the store names or the designer names. Most of those are from my digital scrapbooking days and my cut files are thrown in there under the Silhouette cut files folder.
The reason I am explaining this is to show that there isn’t any magic way of doing it. There is no “right” answer. The only one is what works for YOU! It is not really something that someone can tell you exactly how to do because we all work differently. And what they do might not work best for you.
Here are some things to think about when deciding what will work for you: – do you want to organize by store, designer, or by categories? – seasons, holiday, colors, etc.? – how to do you work? – do you always buy from the same stores? – do you always buy from the same designers?
Each user is going to have their favorite stores or designers. This may be where you want to start. And it may change and evolve over your Silhouette journey.
What files types do I need to keep?
This is a question asked often, so I thought I’d share what I do.
I keep ALL the files. Especially if it’s a file I’ve purchased, I keep them ALL.
Why? Because I never know when I may want to use those other file types in another program or for another project. They really do not take up that much space and I’d rather have access to the best file type for my project in the future.
What is the best file type?
This is going to depend on what kind of project you are doing. As an example, if I were to be doing a print and cut, a png or jpeg of the file might be just fine to use since I do not need all the cut data. That is not saying the png or jpeg is better than the svg, but it may just be better for the specific project I’m working on.
But what I do, may not be the best method for you. Do you need to keep them all? That is something you will need to decide. For me, I know I’d rather have quick access than to hunt down where I got the file and see if I could still download the other formats that were offered when I’m doing a project.
Organizing Fonts
Another big question that is asked a lot is, can I organize fonts in Silhouette? Well, yes and no.
In the Let’s Explore v4 – Library Organization we cover how you can organize fonts in Silhouette that are from the Silhouette Design Store. These are the only fonts that can be “organized” within the Silhouette Studio software.
Fonts from outside locations are pulled from your C: drive on your computer fonts folder. Messing with the file organization of this folder can mess with other programs on your computer as other software pulls from the same folder. I do not recommend messing with this organization of the C: Fonts Folder.
However, I do keep the original font files on my external hard drive in a folder so I always have the original copies. This way when I get a new computer, I can easily plug in my external hard drive and install the fonts on a new computer.
I do keep my own sort of organization to keep track of what fonts I have for personal use versus commercial use and how I know which ones I’ve installed on my computer. So I’ll share those methods that work for me.
Commercial Use vs Personal Use
Each design or font that you download has a terms of use on how you can use that file. Personal use means for your own personal use in creating projects. Commercial use is if you were to make products to sell or using to create designs to sell. Each license can have different terms of use. For more information on the difference, I’d recommend checking out this post by Cutting for Business on Understanding Licenses on Cutting File, Designs, and Font.
For my organization only, I have 2 main folders for Fonts – CU (commercial use) and PU (personal use). This way I can easily search the folder for a font name to determine if I have the rights to use it for what I want.
Then I will organize it by store or designer within that folder. But, I know that I can easily open that folder, use the search feature in the folder, and type in a font name to verify that I do have the CU license if needed.
However, over the years of collecting fonts, I’ve decided that for my own use, I only download Commercial Use fonts now. (Unless I really, really like a font that is personal use only.) But for my work flow, I know if I need a font, I will generally need it to have a Commercial Use option. You can go “font crazy” and as you work with projects more and more, you will find you don’t always need to grab every single font. Keep in mind that the more fonts installed on your computer fonts folder, it takes up more space and takes longer for software programs to load all those fonts. I only recommend downloading and installing the fonts that you know you will use.
Again, these are just tips I’ve picked up over the years that work for me. I know that having too many fonts installed not only slows my computer/software down, but it also slows me down in the design process as I’m weeding through font choices to pick just the right one. Over the years of my Silhouette journey, I’ve started being selective and only downloading a font I know I will use for future projects.
How do I know which fonts I’ve installed?
When I get new fonts, I may not install them right away unless I am using them immediately. Sometimes I get a big bundle and I am grabbing it while it’s on sale, but I don’t necessarily need it right away.
I do not unzip the font until I am ready to install it. This way I can easily see which fonts I have already installed on my system and which ones I haven’t. Once I have unzipped the font, I install it and then delete the zipped folder.
This system works for me and my work flow. Personally I like to have the original copies of my font files. I have had several new computers over the years and having all my fonts in one location makes it easy for transferring those over. I have tried the copy and paste of the C: drive fonts folder from one computer to another and it doesn’t always work.
However, you decide to organize your digital Silhouette supplies, do what works best for YOU!
Hopefully, sharing my methods, while they aren’t anything special, may have given you some ideas how you can organize in a way that works best for you!
If you decide to move things around in your organization, I would highly recommend making a backup of the storage device before and again after you organize. Just in case, you don’t want any time spent organizing to be lost.
I would love to see what you are creating with your Silhouette software or machines! Or if you have any questions, feel free to post photos or questions on my Facebook group at Silhouette Secrets with EllyMae.
Save this for future reference by pinning the image below.
Enjoy !
THANK YOU for your support! How can you help? Click HERE & buy a coffee. Every little bit helps with the cost of running the site.
Or if you are looking for more in-depth, step-by-step classes, check out all of my online Silhouette classes on my Teachable site HERE.
**This post may contain affiliate links. What that means is that I may receive compensation if you purchase through the links I have provided. The price you pay for the product or service is not higher but I may get compensated for sharing.
In the first part of the Let’s Explore v4 Organization series we discussed backups and making a backup of all things Silhouette related and more. Find that tutorial HERE.
The next part of the series we are going to discuss the Silhouette Studio library and organizing it.
Tutorial written in Silhouette Studio v4.4.552 Affiliate links may be present in the following blog post and as an Amazon Associate I earn from qualifying purchases.
First there are 2 things I do want to highlight here
1 – The Silhouette Library is not designed as an all inclusive storage device.
While you can move outside files into the Silhouette library, the only files that Silhouette can guarantee to recover are those files from the Silhouette Design Store. Personally, I do not store many files to my Silhouette library. Since it is not designed as an all inclusive storage area, the storage space is limited. If you get close or exceed the storage space limit, it can cause issues within your software. Each user is given 1 GB of storage space. If you are a Silhouette Club member or a have a Silhouette Design Store subscription, you get 5 GB. (Use code SILSECRETS to save on the Design Store Subscription)
Silhouette Design Store file do NOT count towards this storage limit. Only files that you save to the library or store within the library.
The tips in this post will apply to both Silhouette Design Store files and files that you place in the library as well.
2 – Library organization may vary for each user.
How you organize your files may not be the same way I organize my files. I will share the tips on how you can do it, but you will need to decide what is going to work best for you.
The Silhouette Studio Library Tree
The Silhouette Studio library is accessed by clicking on the Library button in the top right corner or under File > Library in the top left corner menu.
The library tree is found on the left side. This is all the different folders that make up your library organization.
Before we do anything to change the library, let’s look at the parts of it.
Any folder with a + sign on it can be expanded out farther and may have subcategory folders.
The number next to the folder indicates how many files are in that folder.
The main folders are:
All Files – if selected, you are viewing all the files in the entire Silhouette library If you move files into folders from here, you will not see the files disappear from your view because you are viewing All Files. This will make a bit more sense farther down.
Favorites – you can designate favorite files to be added to this folder by clicking on the gray star in the bottom right corner of the design icon. The star should turn blue and will be added under the Favorites folder.
This is a great feature if you are working on a project or have a file you want to cut and don’t want to forget which one it is.
Fonts – only fonts from the Silhouette Design Store will appear in this folder. This folder can also be organized and we will discuss that in a bit.
Designs – this is where designs will download automatically from the Silhouette Design Store. Click the + sign and expand to see the subcategories.
Subcategories under Designs Folder
If you have downloaded any of the Silhouette eBooks, they will show up in their own folder. You can find those eBooks HERE.
Cameo 4 (all models) or Portrait 3 owners will have a folder called Free with Machine after they have completed the machine registration on a new machine.
If you have purchased a Project in the Silhouette Design Store, the designs in those Projects should show under the Project Designs folder.
Recycle Bin – when files are deleted from the library, they first go to this folder before you permanently delete them
Organizing the Library
The very first step to organizing the library is to Export your current library as is. I would recommend you do this BEFORE and AFTER you make any changes. I would recommend doing both a Library Export and Exporting User Designs (if available) export as well. How do you export the library? Check out this post – New Feature – Export Individual Files
The next thing I would suggest is to make sure that you are signed in to the library and the library is synced with the current date and time.
You will find this in the bottom left corner of the Library tab.
You can create your own folders by right clicking on a folder name and select ‘New Folder’ from the menu.
Then name the folder that was just created.
Now this is where you are going to have to decide what works best for you and your work flow. Do you organize by holiday, season, shape, type, etc?
As you can see, I have a lot of folders created in my library. But I also have 6,155 files in my Recent Downloads folder that have not been organized either. I am a work in progress too and get lazy about organizing. So I am doing this right along with you.
You can also create more subcategories under each of these folders by following the same steps as above.
To move files into those folders, grab the design you want and hold the left mouse button down and drag it into the folder.
To select multiple files to move at once, click on the first file, hold the Shift key down and click on the last file you want. Then move them as a group into the folder you want.
Note: in Silhouette Studio versions v4.4.8xx+ or higher the ability to move multiple files at one time is broken. You will need to move the files 1 at a time or go back to a lower version. I am using v4.4.552 in this tutorial and the multiple selection and movement works.
If you have the Recent Downloads folder selected, you will see the design icon disappear and the number increase next to the folder that you moved the design to.
If you have the All Files folder selected and move files into the folder, you will not see the file “disappear” because you are viewing the folder that shows all the files in the entire library.
Now, a very IMPORTANT part is to make sure that your library syncs with the current date and time after you are finished organizing.
If the library does not sync up with the current date and time, any file organization you created may not be saved.
After you are finished moving files, make another backup of the library by exporting it. (How to export files)
User Designs
The User Designs Folder can be organized in the same manner as the Recent Downloads folder. This User Design Folder is where you will save your personal designs or designs you move into the library.
Keep in mind that the Silhouette library storage is limited and any files you save to the library or add to the library in this section will use up that storage space.
Click on the + sign next to the Fonts folder to expand it if there are folders.
Right click on the Fonts folder and choose ‘New Folder’ to create a new folder. Name the new folder that was created.
I have 4 folders under my Fonts folder that I’ve created: Sketch, Monogram, Script, and Dingbats. And one lone ‘Untitled Folder’ that I must have created for a Demo at some point.
Then you can move the fonts into the folders by grabbing and dragging to the folder.
Note: there are some fonts that will not move to a created folder – these include fonts that are considered “Premium” fonts. These font files are usually the ones with a bunch of special characters in them. You will also find that you have to manually install these “Premium” fonts directly onto the computer to have full access to them.
This font organization shows up in the Text Style Panel.
Click on the Design Tab and open the Text Style Panel. Scroll up on the Text Style Panel and you will see the folders you’ve created and the fonts you’ve organized in those folders.
This does not mean that it takes it out of the main fonts list but it is a quicker way to see those fonts you’ve organized into categories.
So cool!
Why does it only apply to Silhouette Design Store fonts?
This is because those font files come directly from the Silhouette Design Store and “part” of the code is embedded in the Silhouette Studio software.
Fonts from outside sources are not downloaded into the software, but they are pulled from your computer Fonts Folder on the C: drive after they are installed and show up in the Text Style Panel.
Since the data is pulled from the C: drive on your computer, there is no way to organize it in Silhouette. I do not recommend messing with the organization in the C: Fonts folder as it can mess up other software programs on your computer as those fonts are also pulled into those programs.
Patterns
Another great area to organize is the Patterns Folder. Whether you add a pattern yourself or just have patterns from the Silhouette Design Store.
Right click and choose New Folder to create a folder and then name it.
If you have the Designer Edition upgrade or higher, you can add Patterns into the Patterns folder and they will also appear in the Fill Pattern Panel. These patterns that you are adding into the library do take up cloud storage space and something to keep in mind is patterns, which are typically jpeg files can be quite large. They are a photo file.
So many neat features!
Again, make sure to Sync the library after you make any chances. AND export a backup copy.
Favorites Folder
This folder does not allow new folders to be created. This is just a quick way to access a file that you know you would like to use. Add it to your Favorites folder so you find it easily.
Quirks
I am going to call these Quirks because they do not affect all users and sometimes just show up and/or disappear again. Maybe they should be grouped in with the gremlins.
Duplicate folders
This one isn’t particularly harmful, but I know can be annoying to some. Folders will appear that have a duplicate name, but are usually empty. Even if you delete it, they just come back.
Personally, I bounce between several versions as a Beta tester, so I can never remember what version my duplicates show in or don’t show in.
You can try to delete them and if they keep coming back, forget them! It’s not worth your time or effort to keep trying. Wait and see, they may resolve themselves.
Files Moved Don’t Stay Put
This one is definitely more of a headache!
This is why I recommend making a backup before and after you do the export. Then at least you will have a backup that you could try to import back in.
I don’t know why it happens and again, it doesn’t happen to all users.
That is a lot of information wrapped up in one place. How will you organize your library?
Now that we’ve gone through all the ways you can organize the Silhouette library, let’s get to it! I’m right there with you and it’s my goal this week.
I would love to see what you are creating with your Silhouette software or machines! Or if you have any questions, feel free to post photos or questions on my Facebook group at Silhouette Secrets with EllyMae.
Save this for future reference by pinning the image below.
Enjoy !
THANK YOU for your support! How can you help? Click HERE & buy a coffee. Every little bit helps with the cost of running the site.
Or if you are looking for more in-depth, step-by-step classes, check out all of my online Silhouette classes on my Teachable site HERE.
**This post may contain affiliate links. What that means is that I may receive compensation if you purchase through the links I have provided. The price you pay for the product or service is not higher but I may get compensated for sharing.
I see it asked often about how to organize designs, fonts, files, etc. So to kick 2022 off I will be doing a series on organizing different aspects of your Silhouette supplies. Let’s talk about Silhouette backups – this tutorial has a lot of details in it, but future you might thank past you for taking the time to review it all. This series will be focused on the digital side of things more than the physical products.
The one thing I want emphasize as you read this is that each Silhouette user will vary in what works best for them to backup. There is no perfect answer or solution to this. We all “work” and process things differently. What works for one individual, may not work the best for another.
And the next thing I want to emphasize is that it can be an ever evolving organization too! So no matter how you are doing it or how you want to do it, it may change in the future as you develop your best practices for YOU!
And I’m going to be completely honest with you and say that I have not kept up with making backups, organizing, or creating a good system. I was a digital scrapbooker prior to getting into Silhouette, so I just went with what I did before. Although I have gotten into some bad habits such as not backing up as often as I should. As a scrapbooker, we were always reminding each other to back up your photos constantly and to save in multiple locations as nothing is 100% safe. But I’ve gotten lazy and have slacked in this area. So let’s do this together!
Silhouette Backups
To start the series, we are going to discuss backing things up. All things! I’m going to share some tips and recommendations on backing it up, but you will need to decide what is going to work best for you. Hopefully this will give you some ideas to decide what is best for your work style.
What is a backup?
A backup is simply having a copy of your item(s) in a safe location in case something happens such as a computer crash, server crash, computer system update, etc.
The first point we should discuss is that there is nothing that is 100% safe. The best thing you can do is have a backup of your supplies whether that be photos, designs, fonts, files, etc.
And it’s a good idea to have a backup of your backup too!
What things should you backup?
All things you do not want to lose!
This could include: – Photos – Silhouette files – Designs – Fonts – Silhouette library – Your phone contacts
This is not a comprehensive list at all, but will give you an idea of where to start.
How often should you make a Silhouette backup?
This is going to vary by user, but a good start is monthly.
However, if you are a power user, business owner, or create/collect a lot of designs, fonts, etc. you may want to do it more often.
Next, set a time each month. If the beginning of the month is busy, set it for the middle of the month or another time that works well. But, make it consistent.
Let’s set an alarm. Pick a date for each month. Set an alarm in your phone and label it so you don’t forget why you set the alarm. Now, set the alarm to reoccur each month for 2022. And write it in your calendar too if you keep one.
Affiliate links may be present in the following blog post and as an Amazon Associate I earn from qualifying purchases.
What should you use to backup to?
This is also going to vary by user. There are many options available such as external hard drives, flash drives, cloud options, etc.
Personally, I keep all of my files on an external hard drive to keep my computer cleaner and not fill it up. I use an external hard drive so I don’t have to rely on having internet to access my files and when I travel, I have what I need with me.
Keep in mind that nothing is 100% safe, so having multiple options for a back up is always a good idea. And the best backup options are the ones that you are going to use! I have a daily use external hard drive and a “back up” external hard drive that I back up my daily one to several times a year.
What is the best external hard drive?
Most name brand external hard drives are good. I have owned Seagate, Hitachi, Toshiba, and Western. Why so many? Because as I grow with the blog and classes, I need more space and more backups.
Do you need that much space? You probably don’t, but it would last you many years. Or there are other options for 1 TB or 2 TB that you can choose from. For me, I do need more space, so it works great and it’s not too expensive. Keep in mind that it is something you will use all the time and for a long while. You can also find them in most places that sell computers. I’ve purchased at Sam’s Club or Best Buy in the past as well.
I also purchased a carry case for mine since I travel (at least before Covid). If you travel or even just to protect your external hard drive when you aren’t using it, I would recommend it. I purchased the Amazon Basics External Hard Drive case HERE.
When you buy an external hard drive, there are 2 types – portable and desktop. I had no idea what I was buying when I first started using one in 2007 and bought a desktop one. This style really is not meant to travel with, so keep that in mind.
MAC users, you will also want to make sure the external hard drive is MAC compatible or the external hard drive can be formatted for use with a MAC computer. This information should be found in the description of the external hard drive. As an example, this is the chart from the Toshiba External Hard Drive I linked above on Amazon. It lists that the MAC requires reformatting for 3 of the models before it can be used.
What is the best method?
The one that is going to work for you and you will use! You can have the best system available and if you do not use it, it doesn’t really work.
As I mentioned above, I own several. Some I have outgrown, while others are specific for certain file types. For instance, I keep my photos on one external hard drive versus one for my Silhouette digital supplies.
While I use an external hard drive, that may not be what works for you. There are many cloud options and I’d recommend researching each one to decide what method works for you. I will mention again, nothing is 100% safe and I have seen where even cloud options lose servers before and cannot recover that data. The safest place is in multiple locations!
Now that we have a few basics covered, let’s get started!
Backing Up Your Photos
While not directly related to Silhouette, I would bet most Silhouette users take photos in some form or fashion. You may be taking photos to use in your Silhouette projects or of your projects.
This is going to vary by person in how you back up. Do you take photos with your phone or a camera? Each process can be a bit different. Check into what the process is for your equipment. Can you plug the device into your computer and transfer images? Or do you have to download them from a cloud?
Personally, I use my phone a lot for photos from everyday photos to ones for the blog and classes. I have an Android phone through Google Fi and that means that my photos are all backed up automatically to Google. But, this also means that if I want to download them, I have to do so through Google Photo.
But I have become lazy backing up my photos and have misplaced some over the last couple years. Let’s change that in 2022.
If we do this monthly, it won’t seem like such a large task. However, that may vary depending on how many photos you take a month.
Silhouette Studio backups
There are few areas I would highly recommend backing up from Silhouette Studio.
Silhouette Studio Library Export
Note: the software version you are currently on may affect whether you see the same options I show. I will list other resources for older software below. Tutorial written in v4.4.552
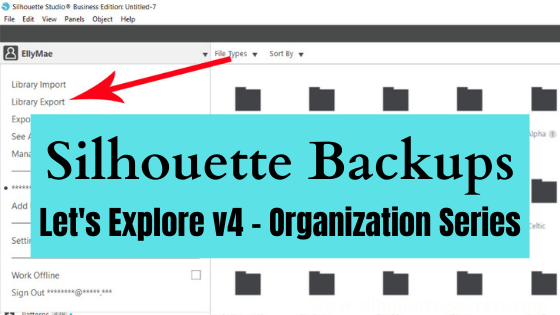
Library Export
Click on the Library tab in the top right corner. Then click on your name in the top left corner. Choose Library Export from the menu.
Choose a safe location to save your Library backup to.
I created a new folder on my external hard drive specifically for backup files and I add the date the file name when I save it, so I know the date it was done easily.
How long will it take to export?
This will depend on how many files you have in your Silhouette library. The more files, the longer it takes.
While we are discussing number of files, I want to briefly mention that the Silhouette library was not designed as an all inclusive storage area, but as a syncing device. This is so you can access files on multiple computers.
The only files that Silhouette can guarantee to recover are those files from the Silhouette Design Store. Personally, I do not store many files to my Silhouette library. (Updated 7/24/24 after a major website update and issues with the Silhouette library)
Since it is not designed as an all inclusive storage area, the storage space is limited. If you get close or exceed the storage space limit, it can cause issues within your software. Each user is given 1 GB of storage space. If you are a Silhouette Club member or a have a Silhouette Design Store subscription, you get 5 GB.
We will discuss the Silhouette library in more detail later in the Let’s Explore v4 – Organization series.
Since it is not designed as an all inclusive storage area, I would highly recommend making regular backups of the library if you do store files in it.
What is this Library Export?
This is a backup of your Silhouette library only. It is not a file that can be opened outside the Silhouette Studio software. It is only a backup that can be imported back into the software should something happen. It does not contain individual files.
Want an optional way to export Silhouette Design Store files that have synced to your library? Library Extraction might be an option – more details HERE – please read carefully. Note: this will only work for files that have been synced properly to the Silhouette library on the computer you are using. I have tested this and it worked for me. I am a Windows user.
Silhouette Studio Export User Designs
This is a brand new feature that is available in Silhouette Studio v4.4.552 or higher.
This is a different type of export and it will export all of your User Designs (personal designs) as individual files. As a note, when exporting these User Designs, it will export the entire library folder structure. However, any designs from the Silhouette Design Store, the folders will be empty. Only the user created designs will be exported. This is due to the proprietary nature of the .studio files and to protect the designers of those files from theft.
For more details on this new features, check out this post
If you are using an older version of Silhouette Studio prior to v4, check out the Silhouette Library Tips post published on January 3, 2019 found HERE, for further details on creating backups of the library.
Silhouette Snapshot
Another great option to set up and have available as a backup source is the Silhouette Studio Snapshot.
In the Library tab, click the gear icon in the bottom right corner and choose Library Snapshot.
Next, choose how you want the Snapshot to be captured. I have mine set to Daily, however, something to note is that it will only take a snapshot when you open the software. If you are a user that keeps the software open for days on end, it doesn’t do it until the software is closed and reopened.
While this method might be rarely needed, why not set it up just in case. I’ve had to instruct a few users over the years to restore a Snapshot and it has saved them when something went wrong in the library.
Again, you are probably tired of reading it, but the safest place is multiple locations. So this is a great option available to you for those “just in case” moments.
All the details are in the post I linked above on the Snapshot if you’d like to learn more, but I do want to mention that the Snapshot is computer specific. So if you are accessing Silhouette Studio on multiple locations, it will create new snapshots on each computer.
User Defined Settings
If you create your own custom cut settings in the Silhouette Studio software, it is a great idea to back those up. In fact, I would highly recommend you do it right now! You never know what can affect this area such as a corrupt file or preference.
On the Send tab, click on the More button.
Scroll down on the materials list to the end where the User Defined Settings are located. Right click on the Material name and choose Export ‘name’
It will ask you where to save the file. I saved to my Silhouette backups folder and added the date as well. This saves as a CSV file which can be imported back into the software if needed.
To select multiple settings to export at once – click on one, hold the Shift key down, and then click on the last one to select. Then right click and choose Export
For more details, check out the video on Let’s Explore v4 – Custom Cut Settings found HERE.
Back Up Your Files & Fonts
This one kind of goes along the same lines as backing up your photos.
Where ever you store your files, back them up to another source. For instance, I use my external hard drive for all my designs, fonts, and files. But, I have another external hard drive that I use as my backup hard drive and back up to it several times a year. I need to do this more often.
I use a program called SyncBackFree and have for many years in order to Sync from my “working” external hard drive to my “back up” external hard drive.
As you can see, it has been awhile since I last did my backup. I completed it right before we did our move last year. So guess what I am now doing as I type the rest of this. As a note, the computer does need to be active while it performs the backup or sync that you set up. If it goes to sleep, then the sync/backup will pause. So depending on how many files you have to backup, the time needed may vary.
As I was working on the details, the sync finished – whew! 1 step done to creating backups for this month!
If I’m working on a class and have a lot a time invested into it, I will also upload those videos or content to my Google drive as a “just in case”. It can be very frustrating when something happens and hours of work is lost.
That is a lot of information on making backups. While it may seem like a big task, the easiest way to get it done is to get started. Tackle one backup at a time!
Now that my external hard drive is synced up, photos are the next things on my to-do list. Since it’s been awhile, it will take me some time to get that done. But, if I start to do it at the same time each month, it will take less time.
I hope those have given you a few ideas of what you should be backing up and some ideas of how you can.
I would love to see what you are creating with your Silhouette software or machines! Or if you have any questions, feel free to post photos or questions on my Facebook group at Silhouette Secrets with EllyMae.
Save this for future reference by pinning the image below.
Enjoy !
THANK YOU for your support! How can you help? Click HERE & buy a coffee. Every little bit helps with the cost of running the site.
Silhouette Classes
Never stop learning! Let me help you take the anxiety out of learning with Silhouette and get to creating faster! My Silhouette classes are heavily focused on software, so you can take the skills & techniques taught and apply them to many future projects!
**This post may contain affiliate links. What that means is that I may receive compensation if you purchase through the links I have provided. The price you pay for the product or service is not higher but I may get compensated for sharing.
THANK YOU for your support! How can you help? Click the link to buy a coffee. Every little bit helps in the cost of running the site.