
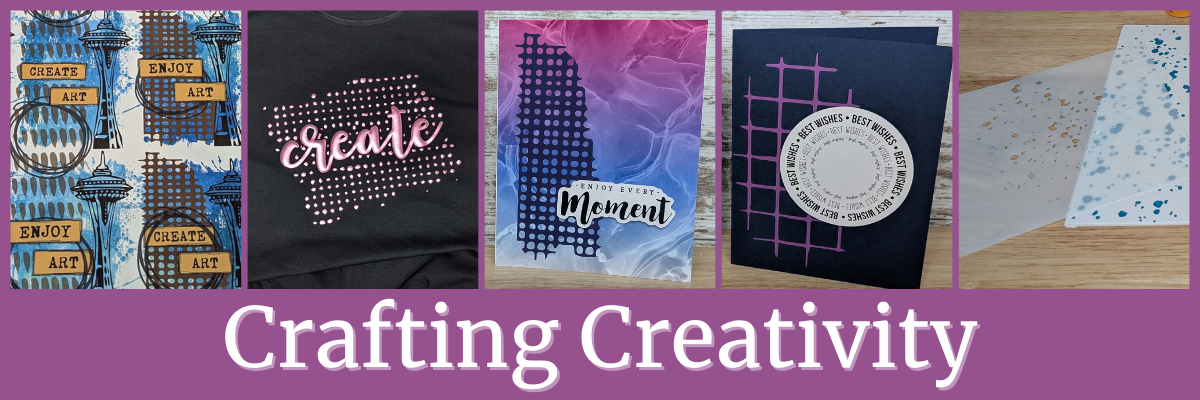

Welcome to this edition of Crafting Creativity! In this edition, I am sharing the vibrant world of mixed media digital design with the talented Sarah Hurley! In this post, we’re spotlighting sharing inspiring ways to incorporate Sarah’s digital elements into your own creative projects. Whether you’re crafting cards, journals, or home décor, you’ll find plenty of ideas to spark your next masterpiece. Let’s explore how digital and traditional techniques can come together to make something truly magical!
Last month was the 2025 Creativation by NAMTA event in Seattle and I was able to connect with Sarah Hurley in person. I’ve known Sarah for a couple years now and always enjoy getting together with her to connect and collaborate.

The Sarah Hurley Academy Pavilion was on the trade show floor and I loved hearing her Trend Report during the event. I was madly typing my notes in my phone during her presentation.
It was the perfect month to collaborate again with Sarah’s designs for the Silhouette Secrets+ newsletter.
Affiliate links may be present in the following blog post and as an Amazon Associate, I earn from qualifying purchases.

If you missed these files in the April newsletter, you can find these mixed media files in the Mixed Media Dingbat Font – Volume 2 HERE.

Sign up for the Silhouette Secrets+ newsletter HERE for future free files & project inspiration.
Let’s Get Creative with Digital Mixed Media
Project #1 – Artist Trading Cards – Mixed Media Background Elements
One of the projects the Creative Professionals did at the 2025 Creativation was create “found art” and place them all over the trade show floor for people to find and keep. I designed it all in Silhouette Studio using a collection of different elements, including the mixed media designs by Sarah Hurley.

I am not sure which one I like the most, but I love that I can create in the software and test things out before I print my projects. I wanted each one to be a bit different and I was able to achieve that easily.

I also designed these double sided so I could include my information on the backside.

The biggest thing about doing a double sided print and cut is your printer. Every printer is different and you have to figure out how the printer prints and how to insert the page back in the printer so everything lines up.
I printed these and then used my paper trimmer to cut to the size I needed. Since it was a simple rectangle I felt it was more efficient for this project. I cut between 60-70 cards to “hide” during the event.
Additional Resources:
- Mastering Print & Cut with Silhouette: Step-by-Step Class
- More Print and Cut Resources
- More Resources on Cards and Papercrafting
Supplies Used:
- Mixed Media Dingbat Font – Volume 2 by Sarah Hurley
- Printer: Canon TS9521C
- Neenah Bright White Cardstock
- Paper Trimmer
- Protector Sleeves
Project #2 – T-shirt with Siser Metallic Puff HTV & Mixed Media Designs
This may be my new favorite shirt! Not only is the Siser Tiger Lily Metallic Puff HTV gorgeous, but the mixed media background really made this design unique!

I duplicated the mixed media design, scaled it up, and then subtracted an offset of the text from the background.
Here is a closer look at the design.

I just love how the mixed media design puffed up. I’ll definitely be using more mixed media designs for backgrounds!
Specialty materials with shine are always so difficult to photograph and really capture how beautiful it is. I have had great luck with the Siser Metallic Puff HTV living up to it’s puff. Regular puff HTV and I have had a few issues, but the Metallic Putt HTV is so easy to use.
I share how I created this design on the Silhouette Secrets+ YouTube channel HERE.

Additional Resources:
- Create Custom HTV Designs in Silhouette Studio with Sarah Hurley Mixed Media Files
- Beginner Tips & Tricks for HTV
- Creating a Custom Knockout Design in Silhouette Studio step-by-step class
- Silhouette Studio Modify Panel in-depth
- Modify Panel Cheat Sheet
- More HTV Resources
Supplies Used:
- Mixed Media Dingbat Font – Volume 2 by Sarah Hurley
- Hello Friend Brush Script font by Gina Marshall
- Silhouette Cameo 5 – Crafter Cuts or Silhouette America
or Silhouette Curio 2 – Crafter Cuts or Silhouette America - Silhouette Autoblade – Crafter Cuts or Silhouette America
- Siser Tiger Lily Metallic Puff HTV
- Black T-shirt
Project #3 – Digital & Physical Backgrounds – Cards
I added the mixed media files on top of a patterned background and set it up as a print and cut for a 4.25″ x 5.5″ card background.

On the left side I used a pattern called Purple and Rainbow Bubble Background by Sarah Hurley, then placed the mixed media design on top on the left side. I used the eyedropper tool in the Fill Color panel to pull a color from the pattern and then adjusted it just a bit to make it pop.
On the right side, I used the background pattern created using the Gradient Fills in Silhouette from last month’s YouTube videos. I then added a different mixed media design on top and again pulled color from the pattern and adjusted to make it pop.
Check out more on how I created this background pattern in these videos:
- Mastering the Fill Gradient Panel in Silhouette Studio | Live Q&A and Demonstration
- How to Create Custom Background Patterns in Silhouette Studio | Easy Step-by-Step Tutorial
I wanted the sentiment to stand out a bit so added that as a separate piece to the print and cut file so I could pop it up with foam tape.
Here is a look at the print and cut file I created in Silhouette.

I used the Enjoy Every Moment by Sarah Hurley sentiment and added an offset around the design. For this design, I first made a larger offset to enclose everything and then made an internal offset to bring it back closer to the design. Once I had the offset as I wanted, I deleted the larger offset as it was not needed.
But I couldn’t stop there! These designs can be used for more than just digital projects too!
I cut these same designs from cardstock using the Silhouette Autoblade with the Cameo 5. Look at those cuts!

Then I added the designs on top of a dark blue card base to make them stand out.

Add a sentiment and you have a quick easy card design.
I did not just want to print and cut 2 designs, so I filled the page and had several options to choose from.

I drew a circle and centered the design inside, then with both the circle and design selected, chose Cut Edge on the Send tab. Once it was cut, I added foam tape to the back of the sentiments to give the card a bit of dimension.
Additional Resources:
- Silhouette Studio: Perfect Cut Settings
- Mastering Print & Cut with Silhouette: Step-by-Step Class
- More Print and Cut Resources
- More Resources on Cards and Papercrafting
Supplies Used:
- Mixed Media Dingbat Font – Volume 2 by Sarah Hurley
- Purple and Rainbow Bubble Background by Sarah Hurley
- Best Wishes Sentiment Circle Frames by Sarah Hurley
- Be Inspirational Word Circle by Sarah Hurley
- You Are Inspirational Word Circle Word Art by Sarah Hurley
- Silhouette Cameo 5 – Crafter Cuts or Silhouette America
or Silhouette Curio 2 – Crafter Cuts or Silhouette America - Silhouette Autoblade – Crafter Cuts or Silhouette America
- Printer: Canon TS9521C
- Neenah Bright White Cardstock
- Recollections Colored Cardstock
- Foam Tape
- AdTech Tape Glue Runner
- AdTech tape runner refills
- Scissors
- Bone folder
Project #4 – Stencils
Stencils can be from many different types of materials. I grabbed some scrap cardstock and also cut some plastic stencil material as well.

Scrap cardstock is a very economical way to test out a stencil design and it can hold up and work for many projects too. I know I have a lot of scrap cardstock in my stash, so it’s perfect to test with.
I also see many who want to cut plastic stencil materials and I have both 6 mil and 7 mil stencil material on hand. Something to keep in mind with plastic stencil material is that plastics dull a blade differently and often quicker than other materials. All stencil material will vary in the cut settings that will work well with it.

The one above is 6 mil stencil plastic and I used the Stencil Material setting in the software with a used blade, but increased the passes to 3. I still had to pop the bits out of place, but it actually cut better than some of the smaller areas did on my fibrous cardstock.
And then just have fun! I grabbed some of the DecoArt Paints and a Dynasty EvoArt paint brush and just started stenciling a background. I don’t know how this will turn out yet, but I’m going to keep adding to it and see what speaks to me.
If you are cutting lots of stencil material, I’d recommend having extra blades on hand and also know that you will need to increase the cut settings as the blade dulls.
I am always looking for sales or bundles to stock up on blades or mats. Check out Crafter Cuts for a blade bundle HERE and use coupon code SECRETS to save 10% on supplies too!

I love this background pattern so much and still don’t know what I want to do with it. I asked for suggestions from my community and one of them was to scan it and save it as a digital background. YES! I love this idea.
Additional Resources:
- Silhouette Studio: Perfect Cut Settings
- Troubleshooting Cut Issues written tutorial
- Troubleshooting Cut Issues video
Supplies Used:
- Mixed Media Dingbat Font – Volume 2 by Sarah Hurley
- Silhouette Cameo 5 – Crafter Cuts or Silhouette America
or Silhouette Curio 2 – Crafter Cuts or Silhouette America - Silhouette Autoblade – Crafter Cuts or Silhouette America
- Canvas Panel
- Stencil Material, 6 mil – 12″ x 12″
- Stencil Material, 7 mil – 12″ x 12″
- DecoArt Paints
- Dynasty EvoArt paint brush
- Paint Puck
- Cardstock Scraps: Recollections Colored Cardstock
A great big THANK YOU to Sarah Hurley for collaborating for the Silhouette Secrets+ newsletter!
Make sure to follow Sarah Hurley and watch for new designs:
- Silhouette Design Store: Sarah Hurley Designs
- Cut, Colour, Create Website
*use code ELLYMAE to save 10% on files at Cut, Colour, Create - Sarah Hurley Website
- Sarah Hurley Facebook Page
- Sarah Hurley on Instagram
Sign up for the Silhouette Secrets+ newsletter HERE so you don’t miss out on future collaborations.
Bringing mixed media designs by Sarah Hurley into your creative projects is a fantastic way to add personality, depth, and a unique flair to your crafts. Whether you’re layering textures, combining materials, or experimenting with color, these designs offer endless possibilities to explore your creativity. If you’ve enjoyed this project, be sure to check out the full Crafting Creativity series for even more inspiration, step-by-step ideas, and creative ways to make your projects truly stand out. Let your imagination lead the way—there’s always something new to discover! Check out the Crafting Creativity series HERE.
Save this for future reference by pinning the image below.

Enjoy !
THANK YOU for your support! How can you help? Click HERE & buy a coffee.
Every little bit helps with the cost of running the site.

Silhouette Classes
Never stop learning! Let me help you take the anxiety out of learning with Silhouette and get to creating faster! My Silhouette classes are heavily focused on software, so you can take the skills & techniques taught and apply them to many future projects!









