
Why not get an early start this year? It hasn’t been a typical year yet, right?
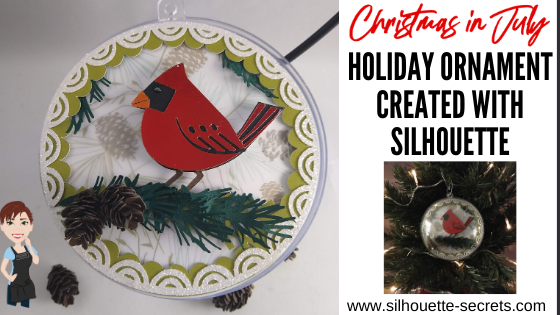
This year I am creating a Christmas in July ornament!

This is the Winter Bird design from the Silhouette Holiday Ornament kit.

Sponsored post.
The Holiday Ornament kit includes: 6 clear plastic ornaments (100 mm size), 6 sheets cardstock (8.5 in. x 11 in.), 6 ornament hooks, and an exclusive download card redeemable on the Silhouette Design Store for 10 pre-selected layered ornament designs
It is on sale for $10.00 (Retail value $19.99) with my code SILSECRETS.
Here is one of the designs in this Holiday Ornament kit.

Today I’m going to show you how you can take this design and go farther!
You can cut the design as is like this.

Or the best part about the Silhouette software is that the options are limitless to what you can do.
You can make it unique to you.
Here I’ve added some dimension with foam tape, a few branches, cut a few types of paper, and added 3-D paper pinecones.
All created using Silhouette Studio tools and cut with the Cameo.

You are the one that can decide what you want to create with it!
You know what it takes the most of?
Time
But, the end result can be so worth it!
This Silhouette Holiday Ornament kit is awesome in that it is an open 4″ ball that you can add dimension to and create an awesome scene inside. I got so excited as I was testing and creating things to add to it. I hope I am not the only one that still does a little happy dance when a project turns out or turns out better than it did in my head.
And it’s open on both sides, so you can make it double sided too!
Let’s take a look at how I created this scene using the design provided with the kit.
I used just a few tools in the software to make it go farther.
And I believe that any user can do this!
Also, at the end of the post is a video clip of how I assembled all the pieces and a supply list of what I used.
This is what the design looks like when opened from the Silhouette library.

Next, I moved the pieces off the design mat and changed the color of the designs using the Fill Color Panel, just so they would show more accurately of how I would cut them.
Or you can use the Quick Access Tool bar in the top left and change the color too.
The backing piece I changed to white and the green bird shape I changed to transparent.

I started with the bird piece first. To break this bird design up, right click and choose Release Compound Path. It will separate the cut lines into individual pieces.

Here you can see the design has multiple selection boxes around the individual pieces.

Next, I moved the circle off the cutting mat and made a copy. In one circle I added a pattern, using the Pattern Fill panel. This will be my patterned piece of paper I cut and is just to designate visually what piece is which. The other circle I added a white fill to and decreased the transparency. This is my vellum piece that will be cut.

Now, let’s work with the bird. The red bird piece on the left will be the top layer of the bird and cut out of a red metallic foil paper. But, I wanted additional layers to make the bird thicker and to stand out.
First, I’m going to use the Line drawing tools on the left side and draw a new beak and this will be cut out of an orange metallic foil paper.

Then I selected both of the beak pieces that were just drawn, moved them away from the bird, grouped them together, and filled them with orange.
And now we will do a little bit of point editing on the bird to create the full bird shape to make our figure. Double click on the red cut line of the bird to bring up the Edit Points.

Next, I deleted a couple of the edit points and then moved a couple out to the edge of the beak. I moved the orange beak back on top to adjust the outline of the bird’s beak exactly how I wanted, so it matched up and I had a solid bird background.

Now that the base bird outline is created, I needed to make several copies.
One white as the very back layer of the bird. This is so the eye will show up as white.
Next, I selected the bird and the circle for the eye, right clicked, and chose Make Compound Path. This bird I filled with black and made 3 more copies of.
And then 1 more copy of the bird that I filled with brown.

Next, I zoomed in on the brown bird and used the Knife tool to cut the feet away from the body. I used the Polygon Knife tool and unchecked the Auto Apply so I could verify exactly where I wanted the knife to cut before it did.

Once it is where you want, then click the Apply option in the Knife Toolbar.

Next, delete the top of the bird. All that is needed is the legs. And I want to make a small offset just to thicken them up a bit as they will be the top layer added on top of the black bird legs. I used the Offset Panel and added a 0.020″ distance offset.
Delete the inside brown legs and fill the offset with brown.
Select both the feet offsets, right click, and group them together.

Now, I have all the pieces I need to cut the design out. I arrange the pieces on my design mat and decrease the Transparency on the Page Setup Panel so I can reveal the cutting grid. Then I cut my papers down to the size needed and place them on the cutting mat.

You can also cut each color out separately on the design mats, but I find once you get the hang of this method I can send almost all the design pieces through to be cut on only a few times through the machine. I line up my design with the cutting mat grid on the screen and then place the materials in the same location on the design mat.
I also find that this saves adhesive on my cutting mat too as I’m not sticking a full sheet of each material down on all the adhesive.
Find more cutting mat tips click HERE.

And I continued to move pieces on and off the mat as needed to be cut until all the pieces were cut.

All ready for assembly.

And you don’t have to stop there.
Create a few more design to incorporate and make your design unique.
I took a Pinecone 3-D Miniature design by Snapdragon Snippets – Design #279267 and scaled the size down to 33% of the original using the Transform Panel – Scale Tab.

I also added the Evergreen Sprigs by Snapdragon Snippets – Design #170614 to give it more dimension too.
Check out the post on 3-D designs in Silhouette to see how I created the “baby” pinecones HERE.
The next step is to start adding glue to each piece and layering it on top of each other. I used a variety of different adhesives to give it dimension and get it to adhere.
A full supply list is at the bottom of this post.
Check out this video on the Silhouette Secrets+ YouTube channel HERE on how I assembled the design. I ended up cutting 2 of each piece and gluing it together once everything was dry to use both sides of this ornament.
I had so much fun creating this ornament from the Holiday Ornament kit by Silhouette. Make both sides the same or add a different element like fake snow to the design as well.

There really is no right or wrong way to create these projects.
Just have fun and try some new things!
I am excited to see what I can fill the other 5 ornaments with.
In this post we covered several different tools and features in the Silhouette software. I said at the beginning that I thought any user could do this and the thing it takes the most of is TIME!
Here are the tools I used in this post.
Click on each to learn more about those tools or features.
Fill Color Panel
Release & Make Compound Path
Pattern Fill
Line Drawing Tools
Edit Points
Knife Tool
Offset Tool
Page Setup Panel – Transparency
Tips to getting the most out of the Silhouette Cutting Mats
Transform Panel – Scale Tab
Many times you are using a lot of these tools without even thinking about it in the software. The more you do it, the more comfortable you will get with it.
In the video above, I did use a variety of adhesives to assemble this. Over the years working with paper, I’ve found certain adhesives work better on certain papers and that quality is a must. Each user will find the best ones that they like for their projects.
Here are the supplies I used to create this Winter Bird Design:
Silhouette Holiday Ornament kit
Winter Bird Bauble design – Design #30131 (included with kit)
Patterned Cardstock
Vellum Paper
Colored cardstock: medium green, dark green, white, black, brown – I used Recollections cardstock from Michaels
White Glitter Cardstock
Metallic Foil Cardstock from Michaels: red and orange for the bird
Liquid Glass adhesive
3-D Foam Tape
Scrapbook Adhesive E-Z Tape Runner
Scrappy Tape or Score Tape
Broad Tipped Glue Pen
Xyron Sticker Maker
E6000 Adhesive
I would love to see what you create with your Silhouette machines & software.
Feel free to post photos or questions on my Facebook group at
Silhouette Secrets with EllyMae.
Save this for future reference by pinning the image below.

Enjoy!


