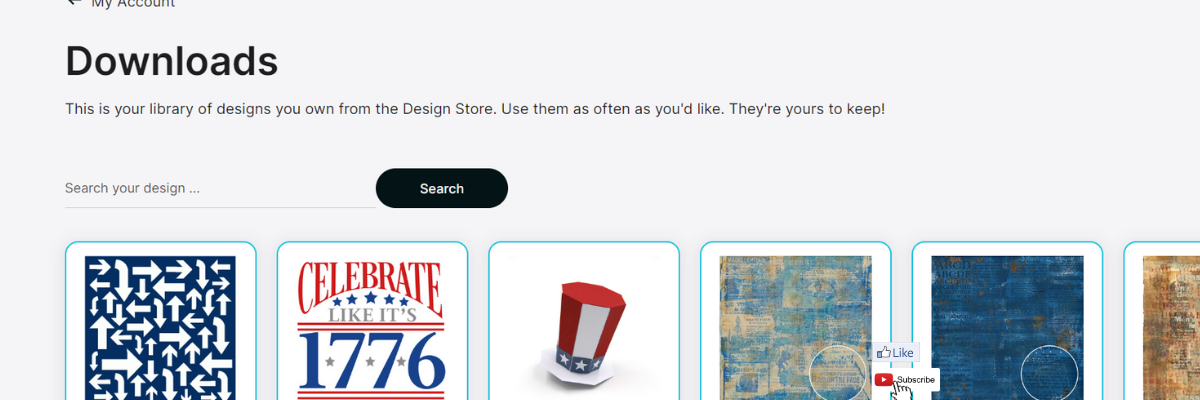
Just a quick post to share something I stumbled upon yesterday while I was writing the weekly Silhouette Secrets+ newsletter. There is now a Silhouette Design Store direct download search feature!!!!
Silhouette Design Store – Direct Download Search
If you have been following along we are now 70+ days after the Silhouette website started to be migrated. The migration started on May 22, 2024 and it’s been well… a mess. It did not go as planned and it’s still ongoing. Little by little there are small improvements such as a new search is now available under the Downloads section on your Silhouette Account. This is BIG! For more than 70 days users have had to direct download if their Silhouette library was not working properly. However, that has had major issues too. For users like myself, who have thousands of designs, it was impossible to view them.
In the video I share how the Silhouette Design Store direct download search currently works and also options for accessing direct downloads too! Slowly, one step at a time, the website is improving… it might be baby steps, but at least it’s progress in the right direction.
I have more tips in the Silhouette Library & Account Issues: What to Do? Recommendations video HERE too.
Sign up for the Silhouette Secrets+ Newsletter for tips delivered weekly to your inbox and a new free file each month too! Subscribe HERE. Then make sure to confirm your subscription too!
Want to learn more? Check out the Silhouette A to Z Guide on the website HERE.
Save this for future reference by pinning the image below.
Hope that helps!
THANK YOU for your support! How can you help? Click HERE & buy a coffee. Every little bit helps with the cost of running the site.
Silhouette Classes
Never stop learning! Let me help you take the anxiety out of learning with Silhouette and get to creating faster! My Silhouette classes are heavily focused on software, so you can take the skills & techniques taught and apply them to many future projects!
**This post may contain affiliate links. What that means is that I may receive compensation if you purchase through the links I have provided. The price you pay for the product or service is not higher but I may get compensated for sharing.
Affiliate links may be present in the following blog post and as an Amazon Associate, I earn from qualifying purchases.
Did you know that you can use the Silhouette software without EVER using the Silhouette library?
If you are reading this when it’s first published, we’ve been encountering an issue where we are currently 23 days into an outage of the Silhouette websites where there are issues syncing files to the Silhouette library and anything that “talks” to the Silhouette servers. It has worked a bit in the last 23 days, but for the most part users are dead in the water if they only use the Silhouette library and rely on it only.
But, you DO NOT have to rely on the Silhouette library at all! And, to be honest, you should NOT! You should not rely on 1 source as an absolute. You purchase files and you should have those files available to you whenever you need them.
First Thing First
Before I even begin to show you how you can use Silhouette without the library, the first thing I want to advise you is….
1 – Save your personal files to an outside location!!!
It’s really easy to do. File > Save As > Save to Hard Drive. Or if you are saving a file type besides .studio file I would recommend selecting your entire design and then using File > Save As > Save Selection and then choose the file type.
2 – Back up your files. Even if you save your files to an outside source. Back them up to another source! There is NOTHING that is 100% safe! Except multiple back ups.
More tips on backing up files, including what I’m currently using as my primary storage and back up sources – click HERE
I hate to say it but in general, we have all gotten complacent. We used to save Word documents every 5 minutes and that was the standard. It doesn’t really matter that technology has improved, it can still fail! Nothing is 100% fool proof except multiple saving a backup to multiple locations.
3 Ways to Use Silhouette Without the Library
1 – Design your own files using tools in Silhouette Studio
Every single user can create their own files! You do not have to have a degree to do this. Use the tools in Silhouette Studio software to create your own designs.
2 – Open a design in Silhouette Studio and use to cut. Silhouette Studio can open many file types from outside sources.
This method depends on what Silhouette Studio upgrade you have. The basic (free) software is limited on what file types it can open. Silhouette Studio upgrades will allows you to open more file types such as the common SVG file type that is a cut file.
3 – If you can access your Silhouette library, you can open from there. But what if you cannot access it for some reason – like the software update mess or another issue?
You can download the files direct to your computer and use them!
Check out this video on how you can download your files directly from the Silhouette Design Store and save to your external source on the Silhouette Secrets+ YouTube channel HERE.
You have the resources at your finger tips! Use them! Learn how to make Silhouette Studio software work for YOU!
Want to learn more on how you can make Silhouette Studio work for you? Check out the A to Z resource on the blog HERE.
Save this for future reference by pinning the image below.
I hope these tips help you on your journey, especially as we navigate the Silhouette Studio website issues we are currently experiencing as I type this.
Enjoy !
THANK YOU for your support! How can you help? Click HERE & buy a coffee. Every little bit helps with the cost of running the site.
Silhouette Classes
Never stop learning! Let me help you take the anxiety out of learning with Silhouette and get to creating faster! My Silhouette classes are heavily focused on software, so you can take the skills & techniques taught and apply them to many future projects!
**This post may contain affiliate links. What that means is that I may receive compensation if you purchase through the links I have provided. The price you pay for the product or service is not higher but I may get compensated for sharing.
We troubleshoot thousands of issues each week on social media and one of the questions we see often is about Library issues.
Most times it is a simple fix if the steps are followed properly.
One of the common ones we see is when a user’s library is showing as “Working Offline” in the bottom left corner. I find this happens if my internet connection changes such as when I’m traveling or the internet connection is dropped.
Check out that tutorial HERE. It still solves 98%+ of the library issues.
However, there are times that the above does not work, so I thought I’d share where you can find more information about specific library issues.
Silhouette America has recently updated their Support FAQ area and it is a bit more search friendly to find information you might need. Check out this post HERE on the Updates to the Silhouette America website.
Backup User Designs!!!!
As a note, it is ALWAYS recommended that you have any of your user designs backed up to an outside source. I do not recommend using the Silhouette library as your file storage as it is not designed as an all inclusive storage area but as a syncing device. This is one reason that the library is limited on storage space.
If you are using a Silhouette Studio version of v4.4.552 or higher, you can easily export individual user created designs as individual files and I HIGHLY recommend that you do this – right now if you have not already done it!
I want to share more information that can easily be found on the new Silhouette Support site. If you are experiencing any of these issues below, click on the title to be taken to step-by-step tips to help get you back on track.
Design Thumbnail Partially Missing Note: at the time of this publication, I am not recommending v4.5.152 – if you choose to update to fix this issue, I would recommend updating to Beta v4.5.171 – however, please note that Beta versions can have unknown bugs. But, I still would recommend it over the bugs that are in v4.5.152.
Silhouette Support has changed over the years since I started as an TJC Licensed Silhouette Instructor. At the time of this publication, they have not had phone support in 4-5 years. I can agree with this 100% as troubleshooting by telephone is very, very difficult – if not impossible in most situations. You cannot provide photos or videos of the issue you are having and the Support staff cannot provide a list of instructions that will help to solve the problem.
Currently, the only way to get in touch with Silhouette Support is through the online Support request found HERE or in the bottom right corner of the Silhouette America website.
Most issues that a user has could be solved by a quick search of the Silhouette America Support Solutions center and following the instructions exactly like they are written.
However, there are some cases where a Support tech is needed to address an issue. In that case, you will need to fill out all of the questions regarding the support request. And then make sure you complete it & that it gets fully submitted to them.
When you submit a request to Support, the best thing you can do is provide as detailed of a description as possible, photos of the issues, and/or video of the issue if necessary. This can help you get a diagnosis faster in most cases.
A support ticket that states “My machine won’t cut, fix it!”, really does not help you get an answer faster or help the Support Staff diagnose what issue you are having. It’s like throwing mud against the wall to see what sticks.
After you have submitted the issue to them, you will need to be patient and wait. The emails are answered in the order they are received in and you are in a line. There are other users with an issue that are ahead of you in that line and you don’t get to skip to the front because you feel your issue is more important.
Again, the more details you can provide when you submit your issue, the better chance you have of getting a diagnosis faster.
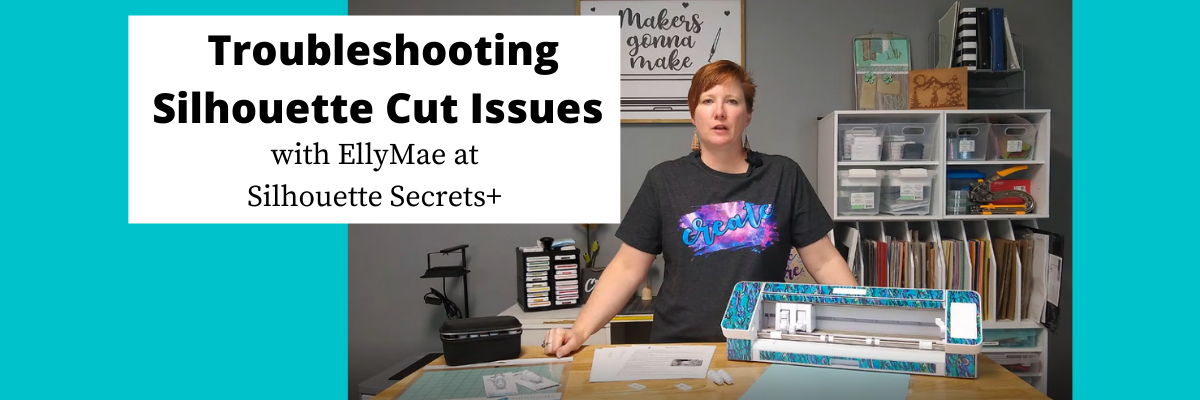
On that note, if you are having cut issues, follow this Troubleshooting Video HERE step-by-step and it fixes 98%+ of the cutting issues that we see.
We troubleshoot thousands of issues weekly across social media platforms and in most cases ask for photos and/or videos in order to diagnose the issue. You would probably be amazed at how many times we spot something in the photo or video that we weren’t even looking for that is culprit of a cut or software issue. Without seeing the photo or video, we would have never diagnosed it and the user would have continued to be frustrated.
When we ask for a photo of the blade installed in the machine with the mat loaded, it is NOT just to look at the blade installation. There are MANY things we can tell from this photo that can help in identifying the problem. Most times it’s a quick fix. Otherwise it can be like throwing mud against a wall to see what sticks….. And sometimes it’s not specifically what we are looking for but what doesn’t look right – for instance, an adjustment hole blocked or vinyl stuck to the bottom of the blade.
A photo is really worth a thousand words.
Here are just a few things I can identify from a photo: – blade housing alignment – is the cutting mat covering adjustment holes – adjustment holes have debris – adhesive build up on rollers – debris stuck in the machine – what machine model it is – what blade is being used – is the cutting mat loaded sideways And yes, if the blade is installed and locked in.
Those are just a few…. it would amaze you the little things we have picked up on that are the cause of a cut issue just from a photo. And until the underlying issue is identified and resolved, a user will continue to experience cut issues.
Silhouette “Secrets”
This blog post originally started as just troubleshooting for the Silhouette library and issues you may have. However, I couldn’t just stop there.
What is my “secret” to troubleshooting?
1 – Experience! On my recent trip to Italy with Siser, our tour guide in Venice said she would get so many people questioning how she knew something. She said it took her awhile but she finally came up with an answer. EXPERIENCE!
The more you do this, the more you watch your machine, the more familiar you become with the Silhouette software and the Silhouette machines, you will start to see how things work. Or be able to spot when something is “off” and then upon closer examination can figure out what is the cause.
I have been teaching Silhouette users since 2016 and I troubleshoot daily. I see a lot! I also watch my machines work and I listen to them! Yes, they will talk to you or at least you can hear when they yell at you when something might be wrong.
2 – I have no “secret”. I treat each case I troubleshoot as a new issue because there is no one button fix for all issues. No matter the experience level of the user, I follow the same steps in troubleshooting. To be honest, for experienced users it’s often harder to troubleshooting with them because they are not always as willing to following instructions or provide us the information needed to help them.
Tip: When asked to provide information, photos, or video – the faster you do it, the faster you are going to get help and fix any issue you are having. Help us, help you!
I hope these tips help you on your Silhouette journey!
And I have a coupon code to save 10% on your order Use code SECRETS at CrafterCuts Get free shipping with a $35 order I always recommend having extra blades and mats on hand for your projects!
We love seeing what you are creating with your Silhouette machines or software. Feel free to post photos or questions on my Facebook group at Silhouette Secrets with EllyMae.
Save this for future reference by pinning the image below.
Enjoy !
THANK YOU for your support! How can you help? Click HERE & buy a coffee. Every little bit helps with the cost of running the site.
Or if you are looking for more in-depth, step-by-step classes, check out all of my online Silhouette classes on my Teachable site HERE.
**This post may contain affiliate links. What that means is that I may receive compensation if you purchase through the links I have provided. The price you pay for the product or service is not higher but I may get compensated for sharing.
We troubleshoot hundreds maybe even thousands of Silhouette issues on the Silhouette Secrets with EllyMae Facebook group each week. Over the years of troubleshooting and teaching, we have found that most cut issues can be corrected by following a few simple steps. However, the biggest factor here is you have to start at Step 1. If you do not, you may only be applying a band-aid to the issue and not resolving the actual issue. You may have inconsistent cut results which can lead to more frustration if the source of the issue is not solved.
In December 2021 I published a troubleshooting tutorial on the blog and it has been extremely popular. Because this is such a big topic for Silhouette users, I’ve now released it in video format and in a free PDF printable format as well.
Check out the new YouTube Video on my channel HERE or clicking the photo below.
The free PDF Guide is available as a download exclusively for confirmed newsletter subscribers. Download the PDF and click on the blue links in the document to get more information and print it out for a handy reference.
I hope this helps you with any of your cutting issues you might have and save you some frustration!
Watching your machine and learning how it works can help you in pinpointing cut issues that you may encounter. This will save you time, frustration, and materials in the future.
Please let me know if you have any questions. Happy Cutting!
Save this for future reference by pinning the image below.
Enjoy !
THANK YOU for your support! How can you help? Click HERE & buy a coffee. Every little bit helps with the cost of running the site.
Silhouette Classes
Never stop learning! Let me help you take the anxiety out of learning with Silhouette and get to creating faster! My Silhouette classes are heavily focused on software, so you can take the skills & techniques taught and apply them to many future projects!
**This post may contain affiliate links. What that means is that I may receive compensation if you purchase through the links I have provided. The price you pay for the product or service is not higher but I may get compensated for sharing.
Have you been cutting along and then all of a sudden the Send button on the Send tab is no longer highlighted to press to send a job to cut?
Or the Silhouette machine is not being picked up on the Send tab? If there is no information on the right side of the Silhouette machine icon in the red rectangle area, then it is not being recognized properly.
Have you had a cut disconnect in the middle of cutting lately? Or you cannot get the cut settings to show up because the tool isn’t recognized?
If you are a Windows 10/11 user, the issue may be nothing related to your Silhouette machine at all, but could be because of a Windows update. In the two years I’ve noticed that Windows updates are changing and controlling more and more. This also includes shutting off power to the USB ports as it chooses.
4 Tips to Get Connected Again
#1 – Unplug all the cords from the Silhouette machine, including to the wall outlet and the power bank in the middle of the power cord.
Let it sit for 5 minutes. While it’s sitting do a complete computer shut down from the Windows Menu option, not just a restart.
Screenshot from Windows 11
Plug everything back in and try again.
A complete computer shut down can help to clear out everything and if it’s the #2 reason below it will reset it. Note: if it’s because of #2, it’s not a fix, but a short term resolution – read more under #2.
#2 – Power is being turned off to the usb port
One minute it shows as connected and you turn around and it’s no longer reading it. You see the “-” next to the machine icon.
So what is happening is Windows 10/11 is deciding on it’s own what it should turn off to “save power”. I had this happen to me on my brand new computer. I had disabled it in one location but it kept happening, so I had to do a little more digging and found there was one more location to disable the USB power save options.
I found the fix here and I would recommend for Silhouette users to change these settings if you are a Windows 10/11 user as well. This will help ensure you won’t lose connection in the middle of a cut or while you are working on a project. Follow Steps 2 and 3 at this link https://windowsreport.com/fix-windows-8-1-external-hard-drive-keeps-disconnecting/
And keep in mind that Windows updates hit user’s computers all at different times, so it may not be something that everyone experiences at the same time. I had not had the issue on my old computer, but when I started using the new computer regularly, it kept turning off my external hard drive access.
I have also had to do this every single time Windows does a new update since getting my new computer.
#3 – Uninstall USB port drivers and let them reinstall
If the above does not fix your connection issue, then I would suggest uninstalling the USB port drivers and letting them reinstall. I am also noticing that Windows updates are messing with this again too.
Or Google “Uninstall USB port driver” and several others pop up with instructions.
If you have had this happen in the past and are sitting scratching your head, hopefully this helped explain it. I know it can be very frustrating when it’s working and then it’s no longer there. I’ve was cussing at my new computer and external hard drive for a few days now. Unplugging it and plugging it back in restarted the power on it, but that was not a permanent “fix”. As much as I use my computer and external hard drive, I needed it to work all the time!
Once the Silhouette machine is recognized by the computer, it should show in the software like this.
The message next to the machine icon should say “Ready to Load”, “Ready”, “Available”, or possibly another term meaning it is ready to go and has been detected. The Send button at the bottom will be highlighted and the cut setting will appear for a Cameo 4, Cameo Plus, Cameo Pro, and Portrait 3 model that have the tool recognition.
If you see any messages in orange, that means something needs attention and it’s usually a Firmware update that is needed. This pertains to the Cameo 4, Cameo Plus, Cameo Pro, and Portrait 3 models as the firmware is automatically checked upon each connection to the machine. The firmware update can only be completed by USB connection.
You can switch between connections or machines by clicking on the Machine list icon at the bottom of the screen.
If you are still having issues, click HERE, choose PC or MAC, and follow these steps exactly. It is very important that steps are not skipped or it may not be resolved.
If you are a Cameo 1 or Portrait 1 user and you cannot get it to connect, it could also be due to Windows 10 but due to a different cause. You will need to update the firmware on the Cameo 1 or Portrait 1 in order to connect to a Windows 10 updated computer. Click HERE for step by step instructions on how to do that.
I’d love to see what you are creating with your Silhouette machines. Feel free post on the Silhouette Secrets+ Facebook Group. We love to see what you are doing and creating with your Silhouette machines!
Save this for future reference by pinning the image below.
Enjoy!
THANK YOU for your support! How can you help? Click HERE & buy a coffee. Every little bit helps with the cost of running the site.
Or if you are looking for more in-depth, step-by-step classes, check out all of my online Silhouette classes on my Teachable site HERE.
**This post may contain affiliate links. What that means is that I may receive compensation if you purchase through the links I have provided. The price you pay for the product or service is not higher but I may get compensated for sharing.
Have you been cutting along and then all of a sudden the Send button on the Send tab is no longer highlighted to press to send a job to cut?
Or the Silhouette machine is not being picked up on the Send tab? If there is no information on the right side of the Silhouette machine icon in the red rectangle area, then it is not being recognized properly.
Have you had a cut disconnect in the middle of cutting lately? Or you cannot get the cut settings to show up because the tool isn’t recognized?
If you are a Windows 10/11 user, the issue may be nothing related to your Silhouette machine at all, but could be because of a Windows update. In the last year I’ve noticed that Windows updates are changing and controlling more and more. This also includes shutting off power to the USB ports as it chooses.
#1 – Power is being turned off to the usb port
One minute it shows as connected and you turn around and it’s no longer reading it. You see the “-” next to the machine icon.
So what is happening is Windows 10/11 is deciding on it’s own what it should turn off to “save power”. I am seeing this issue pop up on the Facebook groups more and I just had it happen to me on my brand new computer. I had disabled it in one location but it kept happening, so I had to do a little more digging and found there was one more location to disable the USB power save options.
I found the fix here and I would recommend for Silhouette users to change these settings if you are a Windows 10/11 user as well. This will help ensure you won’t lose connection in the middle of a cut or while you are working on a project. Follow Steps 2 and 3 at this link https://windowsreport.com/fix-windows-8-1-external-hard-drive-keeps-disconnecting/
And keep in mind that Windows updates hit user’s computers all at different times, so it may not be something that everyone experiences at the same time. I had not had the issue on my old computer, but when I started using the new computer regularly, it kept turning off my external hard drive access.
I have also had to do this every single time Windows does a new update since getting my new computer.
If you are still having usb connection issues then proceed to the following: #2 – Uninstall USB port drivers and let them reinstall
If the above does not fix your connection issue, then I would suggest uninstalling the USB port drivers and letting them reinstall. I am also noticing that Windows updates are messing with this again too.
Or Google “Uninstall USB port driver” and several others pop up with instructions.
If you have had this happen in the past and are sitting scratching your head, hopefully this helped explain it. I know it can be very frustrating when it’s working and then it’s no longer there. I’ve been cussing at my new computer and external hard drive for a few days now. Unplugging it and plugging it back in restarted the power on it, but that was not a permanent “fix”. As much as I use my computer and external hard drive, I needed it to work all the time!
Once the Silhouette machine is recognized by the computer, it should show in the software like this.
The message next to the machine icon should say “Ready to Load”, “Ready”, “Available”, or possibly another term meaning it is ready to go and has been detected. The Send button at the bottom will be highlighted and the cut setting will appear for a Cameo 4, Cameo Plus, Cameo Pro, and Portrait 3 model that have the tool recognition.
If you see any messages in orange, that means something needs attention and it’s usually a Firmware update that is needed. This pertains to the Cameo 4, Cameo Plus, Cameo Pro, and Portrait 3 models as the firmware is automatically checked upon each connection to the machine. The firmware update can only be completed by USB connection.
You can switch between connections or machines by clicking on the Machine list icon at the bottom of the screen.
If you are a Cameo 1 or Portrait 1 user and you cannot get it to connect, it could also be due to Windows 10 but due to a different cause. You will need to update the firmware on the Cameo 1 or Portrait 1 in order to connect to a Windows 10 updated computer. Click HERE for step by step instructions on how to do that.
I’d love to see what you are creating with your Silhouette machines. Feel free post on the Silhouette Secrets+ Facebook Group. We love to see what you are doing and creating with your Silhouette machines!
Save this for future reference by pinning the image below.
Enjoy!
THANK YOU for your support! How can you help? Click HERE & buy a coffee. Every little bit helps with the cost of running the site.
Or if you are looking for more in-depth, step-by-step classes, check out all of my online Silhouette classes on my Teachable site HERE.
**This post may contain affiliate links. What that means is that I may receive compensation if you purchase through the links I have provided. The price you pay for the product or service is not higher but I may get compensated for sharing.
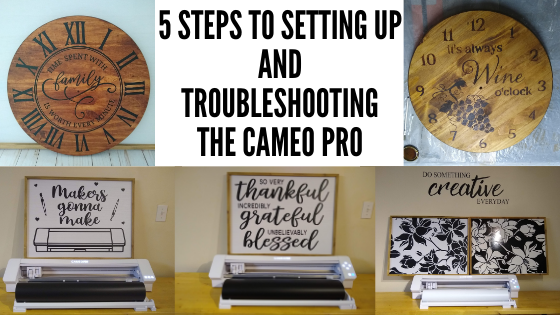
The Cameo Pro is the newest cutting machine released by Silhouette and I have loved creating larger projects with mine.
Today I have 5 tips for setting up the Cameo Pro. These steps can also be used for troubleshooting any cutting or feed issues you may be having with the Cameo Pro.
If you are new to the Cameo Pro and just taking it out of the box, I would highly recommend watching the Unboxing video HERE to get started with the setup.
This post has a lot of information and is photo heavy. I am also making this available as a printable PDF download exclusively for confirmed newsletter subscribers.
I would suggest starting at Tip #1 and working through the list every single time. If one of the first 2 things is the cause of the problems, no matter what else you change, you will continue to have an issue until those are corrected.
Affiliate links may be present in the following blog post and as an Amazon Associate I earn from qualifying purchases.
Tips for the Cameo Pro
Tip #1
Make sure the Autoblade is installed properly.
The Autoblade has to be installed with absolutely no gap at all between the lip of the blade and the housing.
The locking tab on the front of the blade housing should be pushed all the way in so the hooks grab the blade and hold it in securely.
If the blade does not look like this, take it out and reinstall it and lock it in place.
If you still cannot get the blade installed with no gap, please check out this video by Silhouette America on properly installing the blade in the machine. 4 Things to Remember About Your Silhouette Cameo 4 This installation video applies to all Cameo 4 models and the Portrait 3.
This is the #1 most important factor in getting the machine up and cutting properly. If the blade is not installed properly, it will not adjust or cut consistently and the issues you experience may just compound on each other.
The Cameo Pro comes with an Autoblade and a blue sketch pen adapter only. If you want to use other older model blades in the Cameo Pro, you will need to purchase the blade adapter set or the new soon to be released Premium blade or Deep Cut blade that will fit directly in Tool 1 housing (estimated March 2021 release for the U.S).
Tip #2
Loading the cutting mat or vinyl properly.
The first feature we should discuss is the Autoload feature. This is awesome since the cutting width is now 24″ and it is really hard to grow another arm/hand to help push the load button while holding the material up to the rollers.
The Autoload feature works by pressing the Load button which will start flashing. You have 6 seconds to hold the mat/material up to the rollers and it will pull it in. If it does not load straight or you do not feel it loaded securely. Press the unload button and load it again for best results.
Here is a demo of loading a 12″ roll of vinyl. The Autoload option has a little sensor on the left side of the machine that I point at in the video. Make sure this sensor is clear of debris or it may not work properly.
There are several options of media/mat sizes here so we will go through each.
Loading lined material in the Cameo Pro such as adhesive vinyl or HTV without a mat
In the video above, you see how I loaded a 12″ roll of vinyl. Let’s take a closer look at the details.
When cutting a smaller roll than 24″, the roller bar will need to be unlocked and the right roller moved over to the left so it is on the edge of the material to securely grip it.
The roller bar is locked when the lever points up, release the right side of the roller bar by turning it to the front as the arrow shows on the machine.
Do not force the roller lever release or turn it backwards. Doing so can damage the internal mechanisms.
Once the roller bar is released, the right side of the roller bar will raise and you can slide the right roller along the bar to the correct position. Note: the left roller is stationary and the bar does not lift on the left side. The roller can be moved to any of the gray arrows (circled below) on the Cameo and then rolls from 9″-24″ can be utilized. Move the “guides” along as you move the right roller and position them evenly across the material being cut. These help to prevent the materials from bubbling up in the middle.
There is a rectangle directly in the middle of the right roller and this should be lined up with the gray arrow on the machine for best results. If you look closely, you can see the right roller is directly under this rectangle in the middle of the white bar.
Once the right roller is lined up with the gray arrow that is on the edge of the width of the material you are cutting, carefully turn the roller bar lever back up to the locked position.
When cutting from a roll of material, you will adjust the roll feeder to fit the material as needed. Move the right side of the roll feeder in so it will be snug against the right edge of the material roll.
Then adjust the slides on both sides depending on the size of the material roll.
For a small roll the slides need to be moved out. Loosen the placement screw and then slide it out and tighten the placement screw again.
For the larger rolls adjust as needed, following the same steps.
Note: bulk rolls of vinyl may have issues with feeding properly. If you experience cut issues and you are using a bulk roll of vinyl, try making a smaller roll out of the larger bulk roll. It is a lot of weight to pull against a bulk roll of vinyl. If the vinyl is rolled too tight, you may also experience issues.
The left edge of the material when cutting without a mat, should be lined up with the line on the right side.
Press the Load button and then carefully hold the vinyl up to the rollers with the left edge of the material next to the line and the right side at the right roller. Make sure that the material loads straight. If it does not, hit the unload button and try again. Both sides of the vinyl should be held securely under the rollers or it can slip out during the cut.
The material should be smooth and not bubbled in the middle. You want it to roll in and out of the machine as straight as possible.
Now, let’s take a look at a 24″ roll.
The right roller will be moved to the far right gray arrow and the roller bar lever locked back in place. Spread the guides out evenly between the 2 rollers. The right sliding piece of the roll feeder should be on the edge of the right side of the roll of the material.
The load line stays the same for all widths of material that is cut without a mat.
Loading materials with a cutting mat
The Cameo Pro comes with a 24″ cutting mat. This sucker is a monster and will take some practice to get the hang of maneuvering, but I love having this option!
First, remove the protective cover sheet off of the cutting mat.
The load line is the far left line on the left side of the machine for the 24″ cutting mat.
The roll feeder should still be set up and make sure you are using the middle mat support.
The right roller should be lined up with the far right arrow.
Now, here is probably the biggest thing you will need to keep in mind when using a 24″ cutting mat. The full length of the cutting mat has to be fully supported on the front and the backside. The machine cannot work against gravity to pull the mat into the machine. It is just not possible with the weight of the mat. That is a lot of excess weight working against gravity. This means that you will need to have a work surface that has approximately 22″ on the front and backside of the machine that is flat and allows the mat to roll in and out flat the entire time.
Again, this is BIG! Not only the mat, but you will need to have it supported or the cuts will be off if it has to work against gravity. We built a table with extension for my Cameo Pro so that I am able to use it with the roll feeder as is, but if I need to use the 24″ cutting mat, I can use the extensions so it’s all fully supported.
Check out this video on the Cameo Pro stand with more tips HERE. We have made these plans available for confirmed newsletter subscribers HERE.
Once you are all set up on the machine and ready to load the cutting mat, press the load button and then hold the mat up to the rollers as straight and level as you can. The Autoload starts after 6 seconds.
If the mat did not load straight or you were not ready in time. The machine will still think it is loaded, press the unload button and try again. This is where the Autoload feature comes in handy to make it easier to just focus on loading the mat and not pressing the button at the same time. However, it may take a bit of practice to get used to loading a mat this size.
If you are working with a material that fits on a smaller size cutting mat, I would highly suggest using a smaller size. It will be easier to manage and extend the life on the 24″ cutting mat as well.
Other size cutting mats: 8″ Portrait, 12″ Cameo, or 15″ Cameo Plus mats
When using any cutting mat that is smaller than 24″, the load line is the line on the right side. The left edge of the cutting mat should be next to this line but not over top of it.
Make sure to adjust the right roller in the same manner as listed above when using smaller rolls of materials.
The right roller should always roll across the edge of the cutting mat and not across the adhesive part of the cutting mat. If the rollers are moving across the adhesive on the cutting mat, they can pick up the adhesive and start sticking. With the new design of the Cameo Pro, the rollers are underneath the roller bar and not accessible to clean easily. So I would highly recommend being mindful of where the rollers are placed on the cutting mat. Adhesive build up on the rollers can cause future cutting issues.
The mat support should be attached and moved over to support under the cutting mat as it rolls through the machine according to which size cutting mat you are using. This will help in feeding the mat in as straight as possible.
Tip #3 – Cut settings
The Silhouette Studio software does have a list of preset settings. These are just a suggestion of what to start out with. It is not a full comprehensive list and all material types or brands may vary.
With any machine, you will want to test the settings and see what might work best for the design, the material, and the blade.
For instance, on my Cameo 4 models for Oracal 651, I choose the Vinyl – Glossy setting and then increase my blade depth to a 2. This cuts well for me and my machine.
Or for Oramask 813, I use a bit different setting.
Since I was cutting Oramask quite a bit, I created my own custom setting by clicking on the More button and adding in a new User Defined Setting.
Will my settings work for you, there is no guarantee? Like I said, the preset settings are just a starting point. There are many factors that will play into it.
How do you know what will work? For that we move to #4.
Tip #4 – Test cut! Test cut! Test cut!
I almost feel like repeating that again. Test cut is a great habit to get into!
There is nothing like sending the full cut through only to find out that it did not cut right. And if you are using the automatic feed option on the Cameo Pro, there is no sending it back through to cut again since you have already fed the material out the back to the cross-cutter. Yes, speaking from experience! Even I do it because I think it will all work out. And I kick myself when it doesn’t turn out. It isn’t the Silhouette machines fault I didn’t use the test cut option.
There are 2 ways you can do a test cut.
1 – Use the Test Cut feature in the Silhouette software on the Send tab.
The default test cut option is in the upper left corner of either the mat or the material loaded.
Note: If using a 24″ cutting mat, you will notice that there is a 1/2″ of space on the left and right sides that does not have adhesive on it. That is because this is where the rollers roll and you do not want your material cemented to your cutting mat. This is cuttable space. However, if you are using a material that is less than 24″ wide, you will line up the material 1/2″ to the right of the grid edge, this is where the adhesive starts. Place the material on the cutting mat exactly as it shows on the design screen on the mat. There is also a new pop up that will show up in some versions of the Silhouette software when you go to Send a cut, as a reminder.
However, currently in the software (I am using v4.4.463 & in prior versions), the test cut will cut in the top left corner of the 24″ cutting mat in the default position and does not adjust if your material is less than 24″ wide.
You will need to move the test cut to the exact location you want it to cut on your material. To do this, use the arrows keys next to the test cut button on the Send tab in the software or the arrows on the Cameo touch panel on the right side.
To move the housing, you will need to move it both over to the right and down. The housing will perform the test cut in the exact location it is placed. If it is only moved over to the right, it will cut the top of the cutting mat.
Or the second way to do a test cut is use a shape or object.
I use a capital B that I type out and then I will place it on my virtual mat where my design is not located at. I love this way because it is faster than adjusting the housing and a bit more accurate since you place it where you want.
Click on the Send tab, click exactly on the design to select it and choose No Cut to turn the cut lines off on the design and only cut the capital B.
Select the material you are cutting and click the Send button at the bottom of the Send tab to cut the B. Did it cut? If not, adjust the settings, move the B and send it to cut again.
It is much better to use a small section of material to make sure the settings will work versus sending a full 20″ design and it didn’t cut well. This will save you both time and headache.
Note: if doing a print and cut project, you do not want the test cut to cut from the top left of the printed page or it can interfere with the reading of the registration marks.
You can also either change the Line Color or the Fill Color of the B and then use the Cut by Line or Cut by Fill color options to turn the cut lines on or off.
Tip #5 – Start small
Whether you are a new user or an experienced user, it is a new machine. Start by cutting out a small design versus sending a large design.
I know it’s tempting and I will fully admit I sent a full 22″ design to cut the first time I cut with the Cameo Pro. And guess what? I still have that 22″ design sitting behind me in a pile of excess material because it didn’t cut completely through and I couldn’t send it again.
It may not be the thing you want to hear and most experienced users will say “I got this.”, but if it does not cut right, all you can do is laugh at the choice to “go big” and start a pile like I have.
5 Tips
Those are the 5 main tips that I would suggest to anyone starting on the Cameo Pro or if you are having issues with cuts, feeding, etc. start at #1 and work your way down. But there is more!
If you are a beginner and the Cameo Pro is the first cutting machine for you, I would highly recommend the Beginner First Cuts & Setup class to get started and get the first cuts under your belt.
Those first cuts and getting the machine set up properly are the most important steps you can start with. As a beginner it is hard to know if it’s something not working properly on the machine setup or if it’s something that you are doing. This class can help eliminate some of the anxiety you may feel about getting started.
The video class shows a Cameo 4 – 12″ model, but the same steps will apply to the Cameo Pro as well.
Now, I know it’s a long post, but I can’t just leave it at that. Here are 5 additional tips:
Bonus Tip #1 – When cutting long vinyl designs, you can use the arrow keys on the right touch panel on the Cameo Pro (or other models) to roll the material through prior to cutting to see how it will track. This will help you to see if the rollers are gripping the vinyl securely.
The down arrow will not only move the housing down, but advances the materials through the machine.
Bonus Tip #2 – Make sure the cross cutter is securely on the left or right side and the cross cutter flipped up. This is the cutting mechanism on the backside of the machine.
If the cross cutter-blade is left in the middle or the cross-cutter bar has not been flipped back up, it will hinder the movement of the cutting mat or vinyl the next time you go to cut. Usually if this is the cause, you will hear some very odd noises as the material or mat is hitting the cross-cutter blade or bar.
Another indicator is that the design is cutting over top of itself and not cutting correctly.
Bonus Tip #3 – Reload the vinyl or the cutting mat until it is loaded straight. If it loads crooked, it may cut crooked or come out from under the rollers. The extra time to load it smooth and straight is well worth it.
Bonus Tip #4 – If the edge of the vinyl is curled from being rolled, try to flatten it out or advance the vinyl farther in the machine by pressing the down arrow on the right side panel before sending it to cut. This will help in that curled edge not getting hung up on the working parts in the machine and roll as flat as possible through.
Bonus Tip #5 – Make sure you have the adequate space needed for this machine. It is a large machine and needs to be fully supported.
I would highly suggest that you have it placed securely on a work space that fits the entire width of the cutting machine and allows for the roll feeder to be completely on the table as well.
If you are using a cutting mat, remember that the full length of the cutting mat needs to be supported on both the front and the backside in order for the machine to work properly and cut.
Hopefully with those steps above, you will be well on your way to cutting like a Pro with your Cameo Pro!
If you are up and cutting again after reading this with the Cameo Pro, let us know it helped you by commenting below.
Like what you see, buy us a “coffee” on Ko-fi. Your support of Silhouette Secrets+ is greatly appreciated.
I have also made this available as a downloadable for confirmed newsletter subscribers HERE.
Save this for future reference by pinning the image below.
Enjoy !
THANK YOU for your support! How can you help? Click HERE & buy a coffee. Every little bit helps with the cost of running the site.
Silhouette Classes
Never stop learning! Let me help you take the anxiety out of learning with Silhouette and get to creating faster! My Silhouette classes are heavily focused on software, so you can take the skills & techniques taught and apply them to many future projects!
**This post may contain affiliate links. What that means is that I may receive compensation if you purchase through the links I have provided. The price you pay for the product or service is not higher but I may get compensated for sharing.
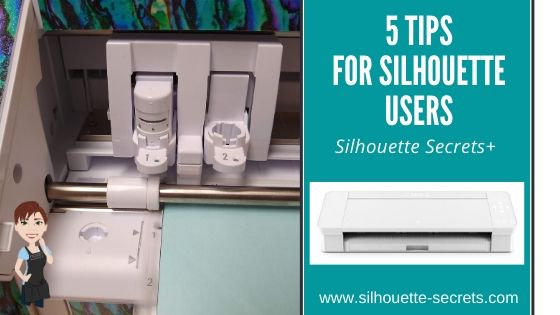
I’ve been seeing a lot of frustration on the Silhouette Facebook groups lately and that prompted me to create a list of the 5 most common causes that might cause this frustration.
5 Silhouette Tips
Tutorial created in Silhouette Studio v4.3.372
Tip #1 – Make sure the USB cord is plugged in correctly. While this may sound silly, this is especially important to take note of with the new Cameo 4 machine. The USB plug has a specific way to go into the port on the Cameo 4.
The curve of the USB plug should be facing down and the straight part facing up. Do not force the USB plug into the port or you could damage the connection.
If the USB plug is not inserted correctly, the Silhouette software will not pick up the Silhouette machine connection.
Tip #2 – Make sure the blade is installed properly. There should be no gap at all between the lip of the blade and the housing of the machine.
Cameo 4 Autoblade installation
To ensure that the blade is completely down in the housing, lift up on the front of the lock carefully as you install the blade. Then hold pressure down on the top of the blade as you push the lock in.
If you still have questions on proper blade installation, check out this video from Silhouette on installing the blade in the Cameo 4 – HERE.
If you are using a Silhouette black “ratchet” blade, make sure the fin of the blade is at the 6 o’clock position and there is no gap between the housing and the lip of the blade.
Ratchet blade parts
Cameo 3 blade installation
It does not matter which Silhouette machine you are using. The blade installation applies for all Silhouette machines.
If you are using a black “ratchet” blade, premium blade, or deep cut blade in the Cameo 4; make sure you are using the correct adapter and installing in the Tool 1 housing.
Tip #3 – Make sure the mat is loaded properly. There are only 2 ways the Silhouette cutting mat can be loaded properly in the machine. The cutting mat has specific dimensions and the left and right sides are narrower than the top and bottom margins.
New Silhouette cutting mat
With a new Silhouette cutting mat, there are 2 arrows designating the top and bottom of the mat. The cutting mat can be loaded in the machine with the arrow in. On an older Silhouette cutting mat, there may be only 1 arrow. The cutting mat can be loaded in the machine arrow in or arrow out.
Place the left edge of the cutting mat next to the line on the left that the arrows point to.
Load icon on Cameo 4
Gently hold the cutting mat up to the rollers and then press the Load button on the Cameo and the machine will pull it into the machine. If the cutting mat does not pull in evenly, press the unload button and load it again.
If you are using a Cameo 3 or Cameo 4, the Autoblade needs access to the adjustment holes on the left side. If the cutting mat or material is loaded too far to the left or sideways, the blade cannot hit those adjustment holes properly to adjust the blade correctly.
Tip #4 – Make sure the Page Setup Panel options are set correctly. The Page Setup Panel is where you tell the software what you are working with. This is where you set up your machine, cutting mat, and media size.
If you are cutting without a mat, the cuttable area is different than cutting with a mat. For more information on cutting without a mat click HERE or on this post about the roll feeder HERE.
Tip #5 – Make sure that the design is set up with cut lines. When you are ready to send the design to cut, make sure there are bold red cut lines showing on the Send tab around the design.
Affiliate links may be present in the following blog post and as an Amazon Associate I earn from qualifying purchases.
If there are no bold red cut lines around the design, the software has nothing to communicate to the Silhouette machine to cut.
Click on the design to select it. This is the most important part. If the design is not selected then there is nothing to change.
A .svg file, the cut lines should turn on if you have the Designer Edition upgrade or higher and have opened the file correctly. Find out more information on svg files HERE.
A .jpeg or .png file is a graphics file only and does not have cut lines. Most often when you choose cut the bold red cut lines show up in a rectangle or square around the design. Jpeg or png file will need to be traced to get cut lines. Find our more information on tracing HERE.
And just because I can’t stop there, here are a few other tips.
Bonus Tip #1 Make sure you have the correct material chosen on the Send tab before sending to cut.
Bonus Tip #2 Do a test cut. This will save you frustration and materials. You can either use the test cut in the software or create your own by typing out a capital ‘B’ to use. Check out this Beginner HTV post for more information on using your own test cut.
Make sure to unload the mat and reload it before you send the design to cut. There are currently some versions of the software that do not reset the blade housing to the same location after a test cut and the design may not cut in the correct location if the mat is not unloaded after a test cut.
Bonus Tip #3 Make sure the Registration marks are OFF. These are marks that are only used for print and cut, but I see many new users accidentally turn them on without realizing it.
If a new user is trying to type out text and presses the ‘M’ when not in text typing mode, the registration marks will appear on the screen. The keyboard shortcut is the letter ‘M’ or they can be turned off on the Page Setup Panel – Tab 3 – Registration Marks.
Registration Marks Explanation created in v4.2 software – 12/27/17
Troubleshooting Tip
If you run into cutting issues and post on a Facebook group asking for help, post a photo of the blade installed in the machine with the mat loaded.
If you have followed me on Facebook, you have probably noticed that is the first question I will ask a user when they are experiencing cutting issues. It is the #1 place to start no matter if you are a new user or experienced user.
Why?
Most issues start with the blade, however, there are many things we can tell by looking at a blade photo such as: which Silhouette machine it is, alignment of the blade housing, are there cracks in the blade, is there material stuck in the housing, is the mat loaded properly, has the packing material been removed, etc. and YES – is the blade installed correctly. But, it is not always just about the blade being installed correctly in the machine.
And sometimes, it is not what we are looking for but what might be off. It is not always easy to explain what we look for when troubleshooting but it is the first place to start when troubleshooting.
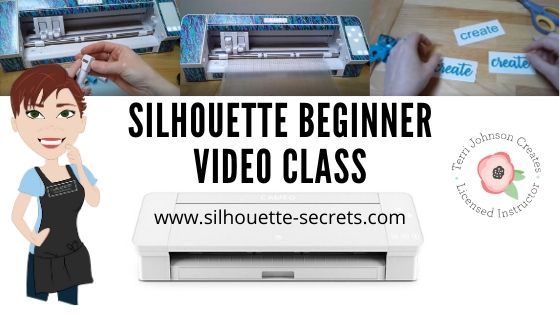
If you are still having issues getting started or are feeling overwhelmed, check out the new Beginner Video Class I created after so many users struggling with the same issues when getting started.
Save this for future reference by pinning the image below.
I’d love to see what you are creating with your Silhouette! Feel free to post photos or questions on my Facebook group at Silhouette Secrets with EllyMae.
Enjoy!
**This post may contain affiliate links. What that means is that I may receive compensation if you purchase through the links I have provided. The price you pay for the product or service is not higher but I may get compensated for sharing.
I have helped so many users these past few weeks on Facebook who are frustrated and having issues getting the Cameo 4 setup for their first cuts. So, I set to work this week on creating a Beginner video class.
This video class is created in the same way I would teach a private face-to -face lesson to a new student.
Even though this is labeled a “beginner” class, there is still a lot of information in it that I think any user could get out of it. But, it is a video course that I believe can also get a user started from opening the box to getting their first cuts. I have also included a bonus 24 minutes video on my troubleshooting tips and things I look for when cuts aren’t going as planned. Whether you are a brand new user or one with a little experience, I think it contains some tips for all users.
While this class features a Cameo 4 in the setup and presentation, the setup tips and instruction for the first cuts apply to all Silhouette machines. If you are a Curio user, I would suggest also checking out the Curio Unboxing video on YouTube and the Let’s Explore – The Curio – Getting Started post on the blog.
What does this class contain?
Course outline:
Pre-course: Cameo 4 Unboxing video I highly recommend watching this before starting the main course This video is also available on my YouTube channel HERE.
Main Course Cameo Setup & Blades – 20 minute video Designing in Silhouette & First Cuts – 1 hour 12 minute video Bonus – Blade cleaning & Troubleshooting – 24 minute video
Additional Resources mentioned in the video
If you are having issues with your cuts or are nervous about getting started, this video course is full of information to get your Cameo out of the box, setup properly, and cutting.
**This post may contain affiliate links. What that means is that I may receive compensation if you purchase through the links I have provided. The price you pay for the product or service is not higher but I may get compensated for sharing.
Share this:
THANK YOU for your support! How can you help? Click the link to buy a coffee. Every little bit helps in the cost of running the site.