Posted on 8 Comments

Heat Transfer Paper with Silhouette

Yesterday I shared a post on printing from Silhouette using a png file for sublimation.

But what if you do not have a sublimation printer?

There are still options for you. One of those is heat transfer paper that can be printed on your home printer.

Now, a couple things to keep in mind here are the brand of heat transfer paper, the ink/printer used, and the printer quality settings will all be factors in how well this turns out for you. The only way to know for sure is to test it.
Heat Transfer Paper can also be used on more apparel than sublimation prints. You do not have to worry having a high polyester content like you do with sublimation.

Tutorial written in Silhouette Studio v4.4.552
Affiliate links may be present in the following blog post and as an Amazon Associate I earn from qualifying purchases.

In today’s post, I’m going to be using Heat Transfer Paper to print the same design I showed in the recent
Print Sublimation Designs from Silhouette Studio – Basics post – found HERE.

I am using a file from the St Patrick’s Day Sublimation bundle available HERE
Download the file to be used and extract/unzip the folder.

I have tested several different brands and the two that I’ve had the best luck with are Silhouette Printable Heat Transfer and Neenah JetPro heat transfer paper for inkjet printers.

For today’s example, I am using the Silhouette Heat Transfer for dark colored fabrics.

You do want to make sure that whatever brand you are using is going to be compatible with your current printer. The Silhouette Heat Transfer for darks is compatible with inkjet printers only and not laser printers. If you are looking for laser compatible, Heat Press Nation has some options – find those HERE.

Not all brands of heat transfer paper will be created the same and the only real way to know what will hold up is to test it. I have seen many failures from store bought brands. I have also heard some failures with the Silhouette brand as well, but it has held up well for me. I have been surprised that shirts have lasted 1-3 years and I will fully admit that I have not followed the care instructions. All my laundry just gets thrown in together and in the dryer as well. For best results, follow the manufacturer’s care instructions.

This is an example that I created for my online Heat Transfer Paper Print & Cut lesson with Silhouette using the Jetpro for lights. This shirt lasted for almost 3 years before the image started to look really worn. And it was washed a lot as a kid’s shirt.

With Heat Transfer Paper, it does need to be set up to cut around the design as a print and cut. For detailed instructions on setting up a print and cut project, check out the Let’s Explore v4 – Print and Cut Basics found HERE.
I would recommend practicing with cardstock or copy paper until you have a good cut before you use the more expensive heat transfer paper.

The process of print and cut is the same no matter what materials you are printing and cutting on. I would highly recommend using the default registration marks to get the most accurate cut. This also eliminates many things that can be the cause of inaccurate cuts or misreads when doing a print and cut project. The biggest issues we see with print and cut are usually something in the setup – this can range from registration marks moved, page size not set right, mat hanging down in front, design interfering with the reading of the optical eye, etc.

For more in depth information and troubleshooting, check out the step-by-step
Print and Cut Basics to Design Files to Troubleshooting Course found HERE.
I have over 2+ hours of instruction that covers a wide variety of print and cut options.

Since we are using a png file, it will either need to be Traced or the Autotrace feature used in order to get cut lines around it. A png is a graphic image that has no cut data. So you may need to create that cut data by Tracing to get a cut line. The biggest thing about tracing is that every single design or image will be different in what might work for it. Practice is the only way to know what works best. I usually trace and then increase the Threshold up until everything I want turns yellow, then I trace it. For the most part that works well.

In this case, with the png image I’m using, it was designed for sublimation so it has transparent areas inside of the design that do not trace. But, we can still work with that.

After I traced the original png image, I did an Offset of the trace. Make sure after you use the Offset feature, you remove the original trace or it will cut too!

Now, do you have to do this with all images? No. Every image you use can vary because they are all created differently. The more you do this and work with things in the software, you will start to recognize patterns and start to see what you might need to do.

For this png image that I am using, what that means is that with the Heat Transfer Paper for darks, it will leave a white border around the entire design.
The biggest thing here to keep in mind is that all images and designs can vary in what they need to make them work.

Once the file is all set up, the next step is to Print it. Make sure to follow the directions for the Heat Transfer Paper that you are using.
For this Silhouette Heat Transfer it says Do Not Mirror.

Keep in mind that the print quality is going to be dependent on the settings you choose. I print on Heat Transfer Paper with the highest quality Photo Matte option especially if it’s going to be on a shirt that will be washed. I also like to select the Print Preview just to check it once more before it uses up my ink and paper.

Once printed, click on the Send tab in the top right corner and set the cut settings.
This is where you can check where the bold red cut border is and if it will cut where you want.

Make sure that you do not move anything on the file after it is printed. For print and cut projects, it has to match up exactly with what was printed or it may not work.

Load the printed page on the cutting mat exactly as it shows on the screen in the top left corner of the cutting mat.

Whenever you are cutting a new material, test cut! However, with print and cut you do not want the test cut to be in the default location or it can interfere with the reading of the registration marks. Type out a capital B and move that to a location outside your design and use it for your test cut. I share more details on how I use the B in this post HERE.

I ended up increasing the blade depth up to a 2 on this material. My blade is well used and a 1 just didn’t “cut it”.

Weed away the excess.

Carefully peel the heat transfer paper off the backing and place onto the object to be pressed on. I immediately cover with parchment paper as the heat transfer may start to curl when it’s close to heat.

Follow the directions for the brand of Heat Transfer Paper you are using. I found heat press instructions on the Silhouette website for pressing this material.
Find those instructions HERE.

I am using a Craft Pro 15″ x 15″ press from Heat Press Nation and I love the pull out bottom platen so I can get my object prepped without burning my knuckles. Mine is plain old white, but they have more colors available now.

It is a little bit different look but it is still an option to use designs like these without a sublimation printer. The best part about Heat Transfer Paper is that you can use it on colors and cotton shirts or materials. You are not as limited by only polyester or specially treated products for sublimation.

I would recommend waiting at least 24 hours before you wash, just like you would for any HTV or sublimation prints. No need to take any chances too soon after creating your project. And I’d recommend following the manufacturer’s care instructions for your garment. Unless you are a little daring like me…. but really, it’s more because I’m lazy and just throw the laundry in.

In 2019 I taught a class at the All Things Silhouette Conference using heat transfer paper and I found you could use it for all kinds of projects if you want to add graphics to them.
Check out the Print and Cut with Heat Transfer Paper post HERE
for more ideas on what you can do with it.

For step-by-step classes on Print and Cut and Heat Transfer Paper check out these 2 classes available on my Teachable site:
Silhouette Print and Cut Basics to Design Files to Troubleshoot Course
Heat Transfer Paper Print & Cut Lesson with Silhouette

If you are looking for tips on printing from Silhouette for Sublimation, check out these posts:
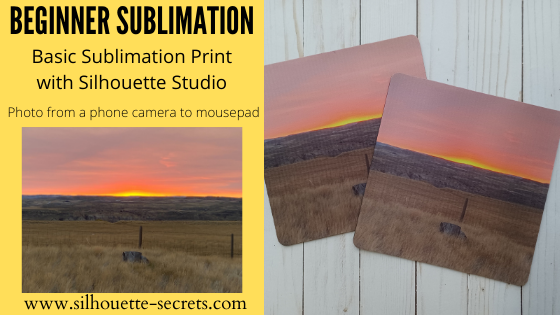
Beginner Sublimation – Basic Sublimation Print with Silhouette Studio
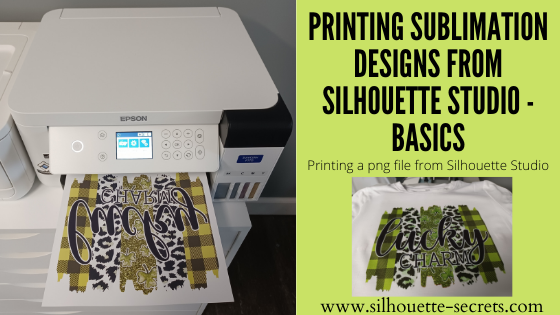
Printing Sublimation Designs from Silhouette Studio – Basics – PNG files

I would love to see what you are creating with your Silhouette software or machines!
Or if you have any questions, feel free to post photos or questions on my Facebook group at 
Silhouette Secrets with EllyMae.

Save this for future reference by pinning the image below.

Enjoy !

This image has an empty alt attribute; its file name is logo.jpg

THANK YOU for your support! How can you help? Click HERE & buy a coffee.
Every little bit helps with the cost of running the site.

Or if you are looking for more in-depth, step-by-step classes, check out all of my online Silhouette classes on my Teachable site HERE.

SS Logo snip it
**This post may contain affiliate links. What that means is that I may receive compensation if you purchase through the links I have provided. The price you pay for the product or service is not higher but I may get compensated for sharing.
Posted on 9 Comments

Printing Sublimation Designs from Silhouette Studio – Basics

One of the easiest ways to get started with sublimation is to use ready-made designs.

Print the design and press it.
That is the really the basics of sublimation.

Let’s take a look at a few tips that can help in printing png files from Silhouette Studio. Png files are a common file that is used in sublimation and can be opened with the Basic Silhouette Studio software, which is free.

Tutorial written in Silhouette Studio v4.4.552
Affiliate links may be present in the following blog post and as an Amazon Associate I earn from qualifying purchases.

Sublimation Prints From Silhouette Studio

The first thing I would recommend doing is to turn OFF Autotrace.

Autotrace is a new feature that was introduced in v4.4.247 of Silhouette Studio. There are still some bugs in the Autotrace feature and these vary by the software version you are using. However, the biggest thing is that while this is a neat feature if you are cutting around a png file, it is not necessary when you are just printing from Silhouette. It also adds more data to the file and takes longer to process when opening or working with the file because it traces the design to get a cut line when it’s opened.

Autotrace happens on transparent png files when opened and is ON as a software default when you are using any version higher than v4.4.247.

Some things you may notice if Autotrace is on are:
– The software takes a long time to open the file
– The software crashes when trying to open a png
– The software lags after the png file is opened
– The png file opens at a larger size than it should

For more details on Autotrace, check out this post
Let’s Explore v4 – Autotrace.

How to turn Autotrace OFF

Click on the gear icon in the bottom right corner of the Design tab.

Or in the top left menu, under Edit > Preferences
or
the keyboard short cut is Ctrl+K

Choose the Import tab and then uncheck the Auto-trace for png files.

Click Apply and Ok.

Since we are only printing from Silhouette, we do not need the cut lines around the png file. Turning it off can make designing in Silhouette Studio easier on you and your computer.

Printing from Silhouette Studio

I am using a file from the St Patrick’s Day Sublimation bundle available HERE
Download the file to be used and extract/unzip the folder.

In the Silhouette Studio software, use File > Open and find the location the png file is save to.

Measure the blank that you will be using to determine the size you want.

In the Silhouette software, on the left, choose the Draw Rectangle tool. Draw a rectangle and size it, using the Scale tools, to the size needed for your object.

I like to draw a template box using the drawing tools to fit my design in so I can see what size it is and how it will look.

You may notice that png files can open with extra space around the image, so the measurement may not be accurate on the design. It doesn’t happen to all png files, but if it does, that is why the template box is so nice to have to judge the size of the design.

This is most likely due to how the original file was saved. I did test several png files all the way back to v4.1.206 of the Silhouette Studio software and they opened the exact same way. So it’s not something that has changed in Silhouette, but I think we may see it now more than before because more people are using Silhouette Studio to print from for things like sublimation.


Extra tip: If you would really like to get a more accurate size of the png file, draw a rectangle or shape that just fits around the size of your design.
Notice in the photo below that the selection box is 10.1″ for the png file.

Select both the drawn shape and the png image. Then open the Modify Panel and choose Crop. This should crop the image down to the size of your shape you drew around it.
Make sure that the entire png was inside the boundaries of the drawn shape or it will be removed when you crop.

After the image is cropped, the selection box now measures what the shape drawn was. In this case, it is 7.2″ instead of the extra space with 10.1″.

This is not absolutely necessary in this project because we are using the original drawn “template” rectangle for our size, but it is an extra tip for future projects.


Once I have my design sized the way I want, I can move the original rectangle or delete it. It is only used as a sizing template.

Next, set up the Page Setup Panel.

Choose – Cutting Mat – none.
Since I am not cutting the design with my Silhouette, I do not need my mat set on the screen.

Set up the page size for the size being printed.
I am using letter size or 8.5″ x 11″ size sublimation paper.

And check the box next to the Show Print Border at the bottom.
This will show us what our maximum print borders are for the current printer selected.

Printing Tip – Does your design need mirrored?
I am using an Epson F170 Sublimation printer and since it’s set up as a sublimation printer, it automatically mirrors my design for me. If you are using a converted printer, you may need to manually do this yourself by right clicking on the design in the Design tab and choose Flip > Horizontally before printing.

Once it’s all set up to print, click File > Print.

I am using v4.4.552 and the print preview shows after clicking File > Print. I like this option as I can double check if anything looks off.
Click Print again to go to the Printer Menu.

Note: Printer menus can vary in look and options due to the different models and brands of printers and also between MAC and Windows computers.

Change the printer selection if needed.

Printing Menu Tip: If switching between printers or changing page sizes, you may need to click Apply and then Cancel and go back to the Design tab and start at File > Print again, just to double check the print margins adjusted. This will vary by user and printer.

The next step I like to do is click on the Preferences button in the printer options.

Then I check the Print Preview, just so I can make sure it’s going to print how I like before I use up my ink and paper. I’ve caught mistakes by doing this and so glad I did. But not everyone likes that extra step.

Click Ok and then click on Print.

With this preview, I can make sure that my design is going to print mirrored and is within the printer borders.
If everything looks good, click Print.

Note: as I mentioned in the Basic Sublimation with Silhouette Studio tutorial last week, the print will look dull. The heat and pressure is what brings out the full color in the transfer.

I don’t typically turn my heat press on until after I have printed my design. This is only a personal preference because it can take me so long to decide what I really want to print for my project.

Set the heat press to the time and temperature according to your sublimation blank or sublimation paper. I use 400 degrees for 60 seconds for most items, but still check for specific instructions on the objects I’m using.

I secure the print to my sublimation blank with heat tape. Then press the object. Make sure to use parchment paper on bottom and top to protect your heat press platens.

More tips on this in the Basic Sublimation with Silhouette Studio tutorial HERE.

Let it cool a bit after the press and then carefully remove the sublimation paper.

Sublimation is just another option that can be done with your Silhouette Studio software.
And hopefully with the tip provided about Autotrace, it will make it much easier for you to work with!

I am enjoying testing my new Epson F170 sublimation printer and look forward to playing with it more. Stay tuned for more information!

I would love to see what you are creating with your Silhouette software or machines!
Or if you have any questions, feel free to post photos or questions on my Facebook group at 
Silhouette Secrets with EllyMae.

Save this for future reference by pinning the image below.

Enjoy !

This image has an empty alt attribute; its file name is logo.jpg

THANK YOU for your support! How can you help? Click HERE & buy a coffee.
Every little bit helps with the cost of running the site.

Or if you are looking for more in-depth, step-by-step classes, check out all of my online Silhouette classes on my Teachable site HERE.

SS Logo snip it
**This post may contain affiliate links. What that means is that I may receive compensation if you purchase through the links I have provided. The price you pay for the product or service is not higher but I may get compensated for sharing.
Posted on 4 Comments

Let’s Explore v4 – File Organization

We are continuing the Let’s Explore v4 – Silhouette Organization series today with some tips to organizing additional files that you may be using for Silhouette.

Find the first 2 parts of the Let’s Explore v4 Organization series here:
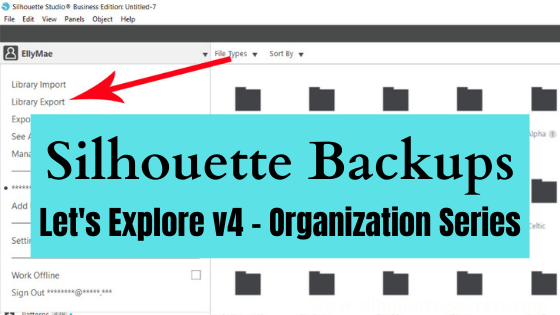
Let’s Explore v4 – Silhouette Backups
Let’s Explore v4 – Library Organization

As I mentioned in my previous posts in the series, there is no magic answer to organizing your files. I can share how I organize my personal files, but each user will need to determine what is going to work best for you and your work flow.
And, your organization path may change over time and that is completely OK.
I’ll share some tips and thinking points to help get you started with determining what might work for you.

My goals by writing this Organization series is to help you think about ways to organize your files and find a method that works for YOU!
And for me personally too – I am right there with you in trying to get things organized better!

Affiliate links may be present in the following blog post and as an Amazon Associate I earn from qualifying purchases.

Note: the screen shots below are from a Windows computer, but all of the same concepts, tips, and techniques will work for MAC users as well.

First, let’s discuss design files.

Organizing Designs

Where to store design files?

The Silhouette Studio library is not designed as an all inclusive storage area, but as a syncing device. So I would highly recommend that you store your personal files outside of the Silhouette library. I use an external hard drive to store all my designs and fonts.

The most recent one I’ve purchased is a
Toshiba Canvio Advance 4 TB Portable External Hard Drive found HERE.

I know I mentioned this several times in the first 2 parts of the series, but I think it is a very important part of you Silhouette journey.

What is going to work best for you to store your files?
Only you can decide that.
I use an external hard drive for several reasons. I travel to teach at conferences (when life returns to “normal”). I can take my external hard drive and plug it into different computers and access my files. And I like to keep my computer cleaner by not storing files on it. But, I also have a backup to my external hard drive as well because nothing is 100% safe. More details on that in the Let’s Explore v4 – Backups tutorial.

Once you decide on the storage location, next you can start thinking of how you want to store your files.

How to organize design files

The basics of organizing are pretty simple. Create folders and move your files into those folders in the best way that will work for YOUR personal work flow.

I do not have the magic answer here.
As I mentioned in the previous post, I started as a digital scrapbooker before getting my Silhouette. This meant I collected lots of digital supplies. I was on several Design Teams for digital designers, which meant that I collected a LOT of files.
Personally, I’ve always organized it by the store or the designer where I got the files. That may or may not work for you. I have not changed my method of organizing in the 9+ years since I started with Silhouette. So this organization series is just as much for me as it is for you.

When I started getting into Silhouette, I created a folder called “Silhouette cut files” under my Digital files folder. And this is how I have continued to use it from the beginning. As you can see in the photo above, I have a lot of different folders with the store names or the designer names. Most of those are from my digital scrapbooking days and my cut files are thrown in there under the Silhouette cut files folder.

The reason I am explaining this is to show that there isn’t any magic way of doing it. There is no “right” answer. The only one is what works for YOU!
It is not really something that someone can tell you exactly how to do because we all work differently. And what they do might not work best for you.

Here are some things to think about when deciding what will work for you:
– do you want to organize by store, designer, or by categories?
– seasons, holiday, colors, etc.?
– how to do you work?
– do you always buy from the same stores?
– do you always buy from the same designers?

Each user is going to have their favorite stores or designers. This may be where you want to start. And it may change and evolve over your Silhouette journey.

What files types do I need to keep?

This is a question asked often, so I thought I’d share what I do.

I keep ALL the files.
Especially if it’s a file I’ve purchased, I keep them ALL.

Why?
Because I never know when I may want to use those other file types in another program or for another project.
They really do not take up that much space and I’d rather have access to the best file type for my project in the future.

What is the best file type?

This is going to depend on what kind of project you are doing. As an example, if I were to be doing a print and cut, a png or jpeg of the file might be just fine to use since I do not need all the cut data. That is not saying the png or jpeg is better than the svg, but it may just be better for the specific project I’m working on.

For more about the different file types, check out this post
File Formats for Silhouette

But what I do, may not be the best method for you. Do you need to keep them all? That is something you will need to decide. For me, I know I’d rather have quick access than to hunt down where I got the file and see if I could still download the other formats that were offered when I’m doing a project.

Organizing Fonts

Another big question that is asked a lot is, can I organize fonts in Silhouette?
Well, yes and no.

In the Let’s Explore v4 – Library Organization we cover how you can organize fonts in Silhouette that are from the Silhouette Design Store. These are the only fonts that can be “organized” within the Silhouette Studio software.

Fonts from outside locations are pulled from your C: drive on your computer fonts folder. Messing with the file organization of this folder can mess with other programs on your computer as other software pulls from the same folder. I do not recommend messing with this organization of the C: Fonts Folder.

However, I do keep the original font files on my external hard drive in a folder so I always have the original copies. This way when I get a new computer, I can easily plug in my external hard drive and install the fonts on a new computer.

I do keep my own sort of organization to keep track of what fonts I have for personal use versus commercial use and how I know which ones I’ve installed on my computer. So I’ll share those methods that work for me.

Commercial Use vs Personal Use

Each design or font that you download has a terms of use on how you can use that file. Personal use means for your own personal use in creating projects. Commercial use is if you were to make products to sell or using to create designs to sell. Each license can have different terms of use.
For more information on the difference, I’d recommend checking out this post by Cutting for Business on Understanding Licenses on Cutting File, Designs, and Font.

For my organization only, I have 2 main folders for Fonts – CU (commercial use) and PU (personal use). This way I can easily search the folder for a font name to determine if I have the rights to use it for what I want.

Then I will organize it by store or designer within that folder. But, I know that I can easily open that folder, use the search feature in the folder, and type in a font name to verify that I do have the CU license if needed.

However, over the years of collecting fonts, I’ve decided that for my own use, I only download Commercial Use fonts now. (Unless I really, really like a font that is personal use only.) But for my work flow, I know if I need a font, I will generally need it to have a Commercial Use option. You can go “font crazy” and as you work with projects more and more, you will find you don’t always need to grab every single font. Keep in mind that the more fonts installed on your computer fonts folder, it takes up more space and takes longer for software programs to load all those fonts.
I only recommend downloading and installing the fonts that you know you will use.

Again, these are just tips I’ve picked up over the years that work for me. I know that having too many fonts installed not only slows my computer/software down, but it also slows me down in the design process as I’m weeding through font choices to pick just the right one. Over the years of my Silhouette journey, I’ve started being selective and only downloading a font I know I will use for future projects.

How do I know which fonts I’ve installed?

When I get new fonts, I may not install them right away unless I am using them immediately. Sometimes I get a big bundle and I am grabbing it while it’s on sale, but I don’t necessarily need it right away.

I do not unzip the font until I am ready to install it. This way I can easily see which fonts I have already installed on my system and which ones I haven’t.
Once I have unzipped the font, I install it and then delete the zipped folder.

This system works for me and my work flow. Personally I like to have the original copies of my font files. I have had several new computers over the years and having all my fonts in one location makes it easy for transferring those over. I have tried the copy and paste of the C: drive fonts folder from one computer to another and it doesn’t always work.

For more information on installing fonts, check out this tutorial
Let’s Explore v4 – Installing Fonts


However, you decide to organize your digital Silhouette supplies, do what works best for YOU!

Hopefully, sharing my methods, while they aren’t anything special, may have given you some ideas how you can organize in a way that works best for you!

If you decide to move things around in your organization, I would highly recommend making a backup of the storage device before and again after you organize. Just in case, you don’t want any time spent organizing to be lost.

Make sure to check out the other 2 parts to this Let’s Explore v4 – Organization series
Let’s Explore v4 – Silhouette Backups
Let’s Explore v4 – Library Organization

I would love to see what you are creating with your Silhouette software or machines!
Or if you have any questions, feel free to post photos or questions on my Facebook group at 
Silhouette Secrets with EllyMae.

Save this for future reference by pinning the image below.

Enjoy !

This image has an empty alt attribute; its file name is logo.jpg

THANK YOU for your support! How can you help? Click HERE & buy a coffee.
Every little bit helps with the cost of running the site.

Or if you are looking for more in-depth, step-by-step classes, check out all of my online Silhouette classes on my Teachable site HERE.

SS Logo snip it
**This post may contain affiliate links. What that means is that I may receive compensation if you purchase through the links I have provided. The price you pay for the product or service is not higher but I may get compensated for sharing.
Posted on 7 Comments

Basic Sublimation Print from Silhouette

Beginner Sublimation and Silhouette

Sublimation is becoming very popular and more and more users are using Silhouette Studio in their sublimation. Today we are going to go through a quick beginner tutorial on using Silhouette with Sublimation.

What is sublimation?

In very basic terms, sublimation is an ink transfer that uses high heat and pressure. The high heat and pressure turn the ink into a gas, which transfers to the object. Sublimation printing requires a designated printer using sublimation inks, printing onto sublimation paper, and then applying that to a sublimation blank. It cannot be applied to just any blank as the sublimation ink bonds to a special coating on the blank or to high polyester material.

Over the last couple years, we have seen a rise in not just sublimation printing, but in new sublimation markers, sublimation transfers, and infusible ink sheets.
These are perfect ways to test out the area of sublimation without investing in all the equipment necessary for sublimation printing.

For more information on Artesprix sublimation markers, check out this recent post
Sublimation Markers and Silhouette HERE

Affiliate links may be present in the following blog post and as an Amazon Associate I earn from qualifying purchases.

Sublimation Printing with Silhouette

Basic Supplies

– Sublimation printer: Sawgrass printer, Epson F170 (more details coming), converted Epson printer
– Sublimation ink – varies by printer
– Sublimation paper
– Heat tape: Craft Chameleon, Amazon
– Sublimation blanks: high polyester materials, mugs, mousepads, luggage tags, photo panels, ornaments, etc.
Parchment Paper or butcher paper
Heat Press that can go higher than 400 degrees F

Basics of Sublimation in Silhouette

Today we are going to cover the very basics of Sublimation with Silhouette Studio.

I do not feel that basic sublimation is difficult. The basics of it are just print and press.
You do not need to cut with the Silhouette machine for a basic sublimation print.

I am using a photo my husband took with his phone as an example.

Step 1 – Measure the blank. I am using a sublimation mouse pad that is 7-13/16″ square.
For a beginner project, I would recommend a flat object to start.

Step 2 – Open Silhouette Studio

Step 3 – On the Page Setup Panel, set the Media Size to the sublimation paper size to be printed on.

I am using a 8.5″ x 11″ paper, so I have it set up with Cutting mat = none (since I’m not cutting on the Silhouette machine it’s not needed) and the Media size = 8.5″ x 11″ for printing.

Tip: If using a page size larger than the cutting mat – you will need to choose No mat and change page size to the size you are using.

Step 4 – Check the box next to the Show Print Border at the bottom of the Page Setup Panel. This turns on your print border set by the current printer selected.
This will allow you to see if there are any changes that need to be made to the File > Print Page Setup.

Step 5 – Using the Drawing Tools on the left side, draw a template shape for blank.
Allow for a bit of overage on the design so you make sure to cover everything. I drew a 8″ square, which is a little bit bigger than the actual measurements of the sublimation mouse pad being used.

Step 6 – Open the photo or design in Silhouette Studio.
If using a photo, it may open at a large size. Photos can be large files. Resize it using the Quick Access Toolbar (QAT) – Scale tools to make it more manageable. I choose 33% or 50% usually to see what will work best.
Immediately after choosing the Scale Option, use the Center to Page option in the QAT and it will bring it back to your design mat.

If the photo opens on a new design mat, copy and paste it into the template file you created.

Step 7 – Add the photo or design to template shape to fill entire template

Step 8 – If needed, use the Crop tool in the Modify Panel to crop the image down to the size needed for the print.

Step 9 – Save the file
It is always a good idea to save every so often, especially if you are working with photo files, png graphics, graphic images, etc. as they can be very large files.

Step 10 – Once the file is ready, choose File > Print in the top left menu.
In v4.4 software versions the Print Preview pops up.

In later versions of v4.4, you have the option to disable this preview under the Preferences, however, I do not recommend that as it can be very helpful in catching any issues prior to printing and using your ink.

Click on Print in the bottom right corner and then select the printer if you need to switch.

Select the sublimation printer or Sawgrass Print Manager. This will vary based on what printer you are using for sublimation. I am using a Sawgrass 400 in this tutorial, so I choose the Sawgrass Print Manager.
(More information coming soon on my new Epson F170 printer and a comparison)

Note: if you do need to switch between the printer or your print border does not look correct, select the correct printer, then click Apply and Cancel. Then change what needs to be to changed, whether it is the page size or just going back to the Design Tab so the printer margins reset. Some users may need to save the file, close Silhouette, and open again in order to reset printer margins if the printer was changed.
This is needed in some versions of the v4.4 software.

Note: Sublimation prints need to be printed mirrored. If using a Sawgrass printer, Print Manager does it for you. If you are using another printer, you may need to flip your image prior to sending to print. Right click on it and choose Flip > Horizontal.

Step 11 – If everything looks good, click on Print.

If you are using a Sawgrass with the Print Manager, it will then open Print Manager and you have 1 more chance to make sure things are going to print correctly and choose your material that you are pressing on. This can make a difference in the print quality.
Then choose Print when ready.

Sublimation prints will be dull when printed. They do not reach their full potential until the heat and pressure is applied to it.

Step 12 – Center the blank on top of the printed page and apply heat tape to hold it in place so it does not move while pressing.

If the blank or the paper moves during the press at all, it can create a “ghosting” effect that will make the image blurred.

Step 13 – Heat up the heat press to the temperature needed. I used 400 degrees for 60 seconds for this mouse pad, but this will depend on the blank you are pressing it on to. A sublimation blank may vary in the time and temperature needed, please refer to the retailer or manufacturer for the recommended settings for the specific material you are using.

The key to this is you need high heat and firm pressure for the full time frame for sublimation to work properly.

I used my Craft Pro 15″ x 15″ heat press. I love this press as it has a pull out bottom platen which helps to save my knuckles from getting burnt when placing my materials on the press.

I love the 15″ x 15″ since I make large shirt sizes. Check out all the heat press options from Heat Press Nation HERE. They now have more color options and sizes than when I first bought mine.

Step 14 – Add butcher or parchment paper (NOT wax paper) on the bottom platen of the heat press – this is often referred to as “blow out” paper as it will protect your press surface from any ink that “blows out” of the paper.
Do not use a teflon sheet.

Note: if you get ink on the top or bottom platen, it can transfer to future heat press projects. Make sure to protect your press surface.

Step 15 – Place your blank, with the sublimation print, on top of the “blow out” paper.
Then add another layer of the parchment (blow out) paper to cover the top.
This makes your “sublimation sandwich”.

Press with medium/firm pressure depending on your blank for the set time and temperature.

Item will be HOT! Handle carefully. Let cool and carefully remove heat tape and sublimation paper from blank.

Yes, you will still see part of the image on the sublimation paper – that is normal.

And then sometimes things just happen and it doesn’t turn out. This was my second one. Maybe I put it in upside down. Maybe the pressure was not high enough. Not sure what happened. But, I can reprint and try again.

After pressing the 3rd one, I think I had it upside down. It just goes to show that it happens to us all. You aren’t alone!
And I would recommend buying extra sublimation blanks, especially while you are still learning and a beginner. I know no one likes to “waste” materials, but you are learning and it is a “learning” experience, not a waste.

My husband loved it. I gave him one for his home office and one for his work office. It was great to be able to take a photo he had taken and turn that into something he would use and see each day.

And that is it!
While I broke it down into 15 steps, it really is just print and press.
It is great that you can use the Silhouette Studio software to make the sizes needed, use shapes as templates, etc.

Where to find sublimation blanks

As the popularity of things grows, so do the list of places you can find sublimation blanks and materials.

Fabrics need a high polyester count in order for the sublimation ink to bind to it. So keep that in mind when shopping. The ink will just wash out of other materials such as cotton.

Here are a few places that I’ve found sublimation blanks. I have a collection started of blanks to try and gifts to make with them, so I have not been able to test them all yet.

These are listed in alphabetical order:
Artesprix – user code SARAH10 for 10% off
Craft Chameleon
Heat Press Nation
Johnson Plastics Plus
Amazon

I have so many things I want to try and before I get the chance something else catches my attention and I want to do that too!

I love that with the Silhouette software you can use it for more than just cutting!

Stay tuned for more information coming and a comparison with the new Epson F170 sublimation printer too!

I would love to see what you are creating with your Silhouette software or machines!
Or if you have any questions, feel free to post photos or questions on my Facebook group at 
Silhouette Secrets with EllyMae.

Save this for future reference by pinning the image below.

Enjoy !

This image has an empty alt attribute; its file name is logo.jpg

THANK YOU for your support! How can you help? Click HERE & buy a coffee.
Every little bit helps with the cost of running the site.

Or if you are looking for more in-depth, step-by-step classes, check out all of my online Silhouette classes on my Teachable site HERE.
SS Logo snip it
**This post may contain affiliate links. What that means is that I may receive compensation if you purchase through the links I have provided. The price you pay for the product or service is not higher but I may get compensated for sharing.


Posted on 8 Comments

Let’s Explore v4 – Library Organization

Let’s Explore v4 – Library Organization

In the first part of the Let’s Explore v4 Organization series we discussed backups and making a backup of all things Silhouette related and more. Find that tutorial HERE.

The next part of the series we are going to discuss the Silhouette Studio library and organizing it.

Tutorial written in Silhouette Studio v4.4.552
Affiliate links may be present in the following blog post and as an Amazon Associate I earn from qualifying purchases.

First there are 2 things I do want to highlight here

1 – The Silhouette Library is not designed as an all inclusive storage device.

While you can move outside files into the Silhouette library, the only files that Silhouette can guarantee to recover are those files from the Silhouette Design Store. Personally, I do not store many files to my Silhouette library. Since it is not designed as an all inclusive storage area, the storage space is limited. If you get close or exceed the storage space limit, it can cause issues within your software. Each user is given 1 GB of storage space. If you are a Silhouette Club member or a have a Silhouette Design Store subscription, you get 5 GB.
(Use code SILSECRETS to save on the Design Store Subscription)

Silhouette Design Store file do NOT count towards this storage limit. Only files that you save to the library or store within the library.

The tips in this post will apply to both Silhouette Design Store files and files that you place in the library as well.

2 – Library organization may vary for each user.

How you organize your files may not be the same way I organize my files. I will share the tips on how you can do it, but you will need to decide what is going to work best for you.

The Silhouette Studio Library Tree

The Silhouette Studio library is accessed by clicking on the Library button in the top right corner or under File > Library in the top left corner menu.

The library tree is found on the left side. This is all the different folders that make up your library organization.

Before we do anything to change the library, let’s look at the parts of it.

Any folder with a + sign on it can be expanded out farther and may have subcategory folders.

The number next to the folder indicates how many files are in that folder.

The main folders are:

All Files – if selected, you are viewing all the files in the entire Silhouette library
If you move files into folders from here, you will not see the files disappear from your view because you are viewing All Files. This will make a bit more sense farther down.

Favorites – you can designate favorite files to be added to this folder by clicking on the gray star in the bottom right corner of the design icon. The star should turn blue and will be added under the Favorites folder.

This is a great feature if you are working on a project or have a file you want to cut and don’t want to forget which one it is.

Fonts – only fonts from the Silhouette Design Store will appear in this folder.
This folder can also be organized and we will discuss that in a bit.

Designs – this is where designs will download automatically from the Silhouette Design Store. Click the + sign and expand to see the subcategories.

Subcategories under Designs Folder

If you have downloaded any of the Silhouette eBooks, they will show up in their own folder. You can find those eBooks HERE.

Cameo 4 (all models) or Portrait 3 owners will have a folder called Free with Machine after they have completed the machine registration on a new machine.

If you have purchased a Project in the Silhouette Design Store, the designs in those Projects should show under the Project Designs folder.

Files from the Silhouette Design Store will download into the Recent Downloads folder.

And a folder for User Designs where you can add or save files.

Patternsprintable pattern file types from the Silhouette Design store will download into this folder and then are accessible through the Fill Color Panel – Pattern Fill tab.
Cut patterns will not show up in this folder.

Recycle Bin – when files are deleted from the library, they first go to this folder before you permanently delete them

Organizing the Library

The very first step to organizing the library is to Export your current library as is. I would recommend you do this BEFORE and AFTER you make any changes.
I would recommend doing both a Library Export and Exporting User Designs (if available) export as well.
How do you export the library?
Check out this post – New Feature – Export Individual Files

The next thing I would suggest is to make sure that you are signed in to the library and the library is synced with the current date and time.

You will find this in the bottom left corner of the Library tab.

If you are not logged in or cannot get it to sync with the current date and time, follow the steps in this post exactly – Let’s Explore v4 – Designs Not Downloading

Designs

You can create your own folders by right clicking on a folder name and select ‘New Folder’ from the menu.

Then name the folder that was just created.

Now this is where you are going to have to decide what works best for you and your work flow. Do you organize by holiday, season, shape, type, etc?

As you can see, I have a lot of folders created in my library.
But I also have 6,155 files in my Recent Downloads folder that have not been organized either. I am a work in progress too and get lazy about organizing.
So I am doing this right along with you.

You can also create more subcategories under each of these folders by following the same steps as above.

To move files into those folders, grab the design you want and hold the left mouse button down and drag it into the folder.

To select multiple files to move at once, click on the first file, hold the Shift key down and click on the last file you want. Then move them as a group into the folder you want.

Note: in Silhouette Studio versions v4.4.8xx+ or higher the ability to move multiple files at one time is broken. You will need to move the files 1 at a time or go back to a lower version. I am using v4.4.552 in this tutorial and the multiple selection and movement works.

If you have the Recent Downloads folder selected, you will see the design icon disappear and the number increase next to the folder that you moved the design to.

If you have the All Files folder selected and move files into the folder, you will not see the file “disappear” because you are viewing the folder that shows all the files in the entire library.

Now, a very IMPORTANT part is to make sure that your library syncs with the current date and time after you are finished organizing.

If the library does not sync up with the current date and time, any file organization you created may not be saved.

After you are finished moving files, make another backup of the library by exporting it.
(How to export files)

User Designs

The User Designs Folder can be organized in the same manner as the Recent Downloads folder. This User Design Folder is where you will save your personal designs or designs you move into the library.

Keep in mind that the Silhouette library storage is limited and any files you save to the library or add to the library in this section will use up that storage space.

Fonts

Fonts from the Silhouette Design Store can be organized too!

Click on the + sign next to the Fonts folder to expand it if there are folders.

Right click on the Fonts folder and choose ‘New Folder’ to create a new folder. Name the new folder that was created.

I have 4 folders under my Fonts folder that I’ve created: Sketch, Monogram, Script, and Dingbats. And one lone ‘Untitled Folder’ that I must have created for a Demo at some point.

Then you can move the fonts into the folders by grabbing and dragging to the folder.

Note: there are some fonts that will not move to a created folder – these include fonts that are considered “Premium” fonts. These font files are usually the ones with a bunch of special characters in them. You will also find that you have to manually install these “Premium” fonts directly onto the computer to have full access to them.

If you need information on installing fonts, check out this post
Let’s Explore v4 – Installing Fonts

Now, here is the cool part!

This font organization shows up in the Text Style Panel.

Click on the Design Tab and open the Text Style Panel.
Scroll up on the Text Style Panel and you will see the folders you’ve created and the fonts you’ve organized in those folders.

This does not mean that it takes it out of the main fonts list but it is a quicker way to see those fonts you’ve organized into categories.

So cool!

Why does it only apply to Silhouette Design Store fonts?

This is because those font files come directly from the Silhouette Design Store and “part” of the code is embedded in the Silhouette Studio software.

Fonts from outside sources are not downloaded into the software, but they are pulled from your computer Fonts Folder on the C: drive after they are installed and show up in the Text Style Panel.

Since the data is pulled from the C: drive on your computer, there is no way to organize it in Silhouette. I do not recommend messing with the organization in the C: Fonts folder as it can mess up other software programs on your computer as those fonts are also pulled into those programs.

Patterns

Another great area to organize is the Patterns Folder. Whether you add a pattern yourself or just have patterns from the Silhouette Design Store.

Right click and choose New Folder to create a folder and then name it.

And this pattern organization will show up in the Fill Color Panel – Pattern Tab.

If you have the Designer Edition upgrade or higher, you can add Patterns into the Patterns folder and they will also appear in the Fill Pattern Panel.
These patterns that you are adding into the library do take up cloud storage space and something to keep in mind is patterns, which are typically jpeg files can be quite large. They are a photo file.

So many neat features!

Again, make sure to Sync the library after you make any chances.
AND export a backup copy.

Favorites Folder

This folder does not allow new folders to be created.
This is just a quick way to access a file that you know you would like to use. Add it to your Favorites folder so you find it easily.

Quirks

I am going to call these Quirks because they do not affect all users and sometimes just show up and/or disappear again. Maybe they should be grouped in with the gremlins.

Duplicate folders

This one isn’t particularly harmful, but I know can be annoying to some. Folders will appear that have a duplicate name, but are usually empty. Even if you delete it, they just come back.

Personally, I bounce between several versions as a Beta tester, so I can never remember what version my duplicates show in or don’t show in.

You can try to delete them and if they keep coming back, forget them!
It’s not worth your time or effort to keep trying. Wait and see, they may resolve themselves.

Files Moved Don’t Stay Put

This one is definitely more of a headache!

This is why I recommend making a backup before and after you do the export. Then at least you will have a backup that you could try to import back in.

I don’t know why it happens and again, it doesn’t happen to all users.

That is a lot of information wrapped up in one place. How will you organize your library?

Check out the video tutorial on my YouTube Channel HERE.


Now that we’ve gone through all the ways you can organize the Silhouette library, let’s get to it! I’m right there with you and it’s my goal this week.

Check out the rest of the Organization series here:
Part 1 – Let’s Explore v4 – Silhouette Backups
Part 3 – Let’s Explore v4 – Silhouette File Organization

I would love to see what you are creating with your Silhouette software or machines!
Or if you have any questions, feel free to post photos or questions on my Facebook group at 
Silhouette Secrets with EllyMae.

Save this for future reference by pinning the image below.

Enjoy !

This image has an empty alt attribute; its file name is logo.jpg

THANK YOU for your support! How can you help? Click HERE & buy a coffee.
Every little bit helps with the cost of running the site.

Or if you are looking for more in-depth, step-by-step classes, check out all of my online Silhouette classes on my Teachable site HERE.

SS Logo snip it
**This post may contain affiliate links. What that means is that I may receive compensation if you purchase through the links I have provided. The price you pay for the product or service is not higher but I may get compensated for sharing.
Posted on 7 Comments

Let’s Explore v4 – Silhouette Backups

Let’s Explore v4 – Organization Series

I see it asked often about how to organize designs, fonts, files, etc. So to kick 2022 off I will be doing a series on organizing different aspects of your Silhouette supplies. Let’s talk about Silhouette backups – this tutorial has a lot of details in it, but future you might thank past you for taking the time to review it all. This series will be focused on the digital side of things more than the physical products.

The one thing I want emphasize as you read this is that each Silhouette user will vary in what works best for them to backup. There is no perfect answer or solution to this. We all “work” and process things differently. What works for one individual, may not work the best for another.

And the next thing I want to emphasize is that it can be an ever evolving organization too! So no matter how you are doing it or how you want to do it, it may change in the future as you develop your best practices for YOU!

And I’m going to be completely honest with you and say that I have not kept up with making backups, organizing, or creating a good system. I was a digital scrapbooker prior to getting into Silhouette, so I just went with what I did before. Although I have gotten into some bad habits such as not backing up as often as I should. As a scrapbooker, we were always reminding each other to back up your photos constantly and to save in multiple locations as nothing is 100% safe.
But I’ve gotten lazy and have slacked in this area.
So let’s do this together!

Silhouette Backups

To start the series, we are going to discuss backing things up. All things!
I’m going to share some tips and recommendations on backing it up, but you will need to decide what is going to work best for you. Hopefully this will give you some ideas to decide what is best for your work style.

What is a backup?

A backup is simply having a copy of your item(s) in a safe location in case something happens such as a computer crash, server crash, computer system update, etc.

The first point we should discuss is that there is nothing that is 100% safe. The best thing you can do is have a backup of your supplies whether that be photos, designs, fonts, files, etc.

And it’s a good idea to have a backup of your backup too!

What things should you backup?

All things you do not want to lose!

This could include:
– Photos
– Silhouette files
– Designs
– Fonts
– Silhouette library
– Your phone contacts

This is not a comprehensive list at all, but will give you an idea of where to start.

How often should you make a Silhouette backup?

This is going to vary by user, but a good start is monthly.

However, if you are a power user, business owner, or create/collect a lot of designs, fonts, etc. you may want to do it more often.

Next, set a time each month. If the beginning of the month is busy, set it for the middle of the month or another time that works well. But, make it consistent.

Let’s set an alarm. Pick a date for each month.
Set an alarm in your phone and label it so you don’t forget why you set the alarm.
Now, set the alarm to reoccur each month for 2022.
And write it in your calendar too if you keep one.

Affiliate links may be present in the following blog post and as an Amazon Associate I earn from qualifying purchases.

What should you use to backup to?

This is also going to vary by user. There are many options available such as external hard drives, flash drives, cloud options, etc.

Personally, I keep all of my files on an external hard drive to keep my computer cleaner and not fill it up. I use an external hard drive so I don’t have to rely on having internet to access my files and when I travel, I have what I need with me.

Keep in mind that nothing is 100% safe, so having multiple options for a back up is always a good idea. And the best backup options are the ones that you are going to use!
I have a daily use external hard drive and a “back up” external hard drive that I back up my daily one to several times a year.

What is the best external hard drive?

Most name brand external hard drives are good. I have owned Seagate, Hitachi, Toshiba, and Western. Why so many? Because as I grow with the blog and classes, I need more space and more backups.

The most recent one I’ve purchased is a
Toshiba Canvio Advance 4 TB Portable External Hard Drive found HERE.

Do you need that much space? You probably don’t, but it would last you many years. Or there are other options for 1 TB or 2 TB that you can choose from.
For me, I do need more space, so it works great and it’s not too expensive.
Keep in mind that it is something you will use all the time and for a long while.
You can also find them in most places that sell computers. I’ve purchased at Sam’s Club or Best Buy in the past as well.

I also purchased a carry case for mine since I travel (at least before Covid). If you travel or even just to protect your external hard drive when you aren’t using it, I would recommend it.
I purchased the Amazon Basics External Hard Drive case HERE.

When you buy an external hard drive, there are 2 types – portable and desktop. I had no idea what I was buying when I first started using one in 2007 and bought a desktop one. This style really is not meant to travel with, so keep that in mind.

MAC users, you will also want to make sure the external hard drive is MAC compatible or the external hard drive can be formatted for use with a MAC computer.
This information should be found in the description of the external hard drive.
As an example, this is the chart from the Toshiba External Hard Drive I linked above on Amazon. It lists that the MAC requires reformatting for 3 of the models before it can be used.

What is the best method?

The one that is going to work for you and you will use! You can have the best system available and if you do not use it, it doesn’t really work.

As I mentioned above, I own several. Some I have outgrown, while others are specific for certain file types. For instance, I keep my photos on one external hard drive versus one for my Silhouette digital supplies.

While I use an external hard drive, that may not be what works for you. There are many cloud options and I’d recommend researching each one to decide what method works for you. I will mention again, nothing is 100% safe and I have seen where even cloud options lose servers before and cannot recover that data.
The safest place is in multiple locations!

Now that we have a few basics covered, let’s get started!

Backing Up Your Photos

While not directly related to Silhouette, I would bet most Silhouette users take photos in some form or fashion. You may be taking photos to use in your Silhouette projects or of your projects.

This is going to vary by person in how you back up.
Do you take photos with your phone or a camera?
Each process can be a bit different.
Check into what the process is for your equipment.
Can you plug the device into your computer and transfer images?
Or do you have to download them from a cloud?

Personally, I use my phone a lot for photos from everyday photos to ones for the blog and classes. I have an Android phone through Google Fi and that means that my photos are all backed up automatically to Google. But, this also means that if I want to download them, I have to do so through Google Photo.

But I have become lazy backing up my photos and have misplaced some over the last couple years.
Let’s change that in 2022.

If we do this monthly, it won’t seem like such a large task. However, that may vary depending on how many photos you take a month.

Silhouette Studio backups

There are few areas I would highly recommend backing up from Silhouette Studio.

Silhouette Studio Library Export

Note: the software version you are currently on may affect whether you see the same options I show. I will list other resources for older software below.
Tutorial written in v4.4.552

Library Export

Click on the Library tab in the top right corner.
Then click on your name in the top left corner.
Choose Library Export from the menu.

Choose a safe location to save your Library backup to.

I created a new folder on my external hard drive specifically for backup files and I add the date the file name when I save it, so I know the date it was done easily.

How long will it take to export?

This will depend on how many files you have in your Silhouette library. The more files, the longer it takes.

While we are discussing number of files, I want to briefly mention that the Silhouette library was not designed as an all inclusive storage area, but as a syncing device. This is so you can access files on multiple computers.

The only files that Silhouette can guarantee to recover are those files from the Silhouette Design Store. Personally, I do not store many files to my Silhouette library.
(Updated 7/24/24 after a major website update and issues with the Silhouette library)

Since it is not designed as an all inclusive storage area, the storage space is limited. If you get close or exceed the storage space limit, it can cause issues within your software. Each user is given 1 GB of storage space. If you are a Silhouette Club member or a have a Silhouette Design Store subscription, you get 5 GB.

We will discuss the Silhouette library in more detail later in the Let’s Explore v4 – Organization series.

Since it is not designed as an all inclusive storage area, I would highly recommend making regular backups of the library if you do store files in it.

What is this Library Export?

This is a backup of your Silhouette library only.
It is not a file that can be opened outside the Silhouette Studio software.
It is only a backup that can be imported back into the software should something happen.
It does not contain individual files.

Want an optional way to export Silhouette Design Store files that have synced to your library?
Library Extraction might be an option – more details HERE – please read carefully.
Note: this will only work for files that have been synced properly to the Silhouette library on the computer you are using. I have tested this and it worked for me. I am a Windows user.

Silhouette Studio Export User Designs

This is a brand new feature that is available in Silhouette Studio v4.4.552 or higher.

This is a different type of export and it will export all of your User Designs (personal designs) as individual files. As a note, when exporting these User Designs, it will export the entire library folder structure. However, any designs from the Silhouette Design Store, the folders will be empty. Only the user created designs will be exported.
This is due to the proprietary nature of the .studio files and to protect the designers of those files from theft.

For more details on this new features, check out this post

New Feature – Export Individual Files HERE

If you are using an older version of Silhouette Studio prior to v4, check out the Silhouette Library Tips post published on January 3, 2019 found HERE, for further details on creating backups of the library.

Silhouette Snapshot

Another great option to set up and have available as a backup source is the
Silhouette Studio Snapshot.

In the Library tab, click the gear icon in the bottom right corner and choose Library Snapshot.

Next, choose how you want the Snapshot to be captured. I have mine set to Daily, however, something to note is that it will only take a snapshot when you open the software. If you are a user that keeps the software open for days on end, it doesn’t do it until the software is closed and reopened.

For more details on how the Silhouette Snapshot works, check out this post
Let’s Explore v4 – Library Snapshot HERE.

While this method might be rarely needed, why not set it up just in case. I’ve had to instruct a few users over the years to restore a Snapshot and it has saved them when something went wrong in the library.

Again, you are probably tired of reading it, but the safest place is multiple locations. So this is a great option available to you for those “just in case” moments.

All the details are in the post I linked above on the Snapshot if you’d like to learn more, but I do want to mention that the Snapshot is computer specific. So if you are accessing Silhouette Studio on multiple locations, it will create new snapshots on each computer.

User Defined Settings

If you create your own custom cut settings in the Silhouette Studio software, it is a great idea to back those up. In fact, I would highly recommend you do it right now! You never know what can affect this area such as a corrupt file or preference.

On the Send tab, click on the More button.

Scroll down on the materials list to the end where the User Defined Settings are located.
Right click on the Material name and choose Export ‘name’

It will ask you where to save the file. I saved to my Silhouette backups folder and added the date as well. This saves as a CSV file which can be imported back into the software if needed.

To select multiple settings to export at once – click on one, hold the Shift key down, and then click on the last one to select. Then right click and choose Export

For more details, check out the video on Let’s Explore v4 – Custom Cut Settings found HERE.

Back Up Your Files & Fonts

This one kind of goes along the same lines as backing up your photos.

Where ever you store your files, back them up to another source.

For instance, I use my external hard drive for all my designs, fonts, and files. But, I have another external hard drive that I use as my backup hard drive and back up to it several times a year. I need to do this more often.

I use a program called SyncBackFree and have for many years in order to Sync from my “working” external hard drive to my “back up” external hard drive.

As you can see, it has been awhile since I last did my backup. I completed it right before we did our move last year. So guess what I am now doing as I type the rest of this.
As a note, the computer does need to be active while it performs the backup or sync that you set up. If it goes to sleep, then the sync/backup will pause. So depending on how many files you have to backup, the time needed may vary.

As I was working on the details, the sync finished – whew! 1 step done to creating backups for this month!

If I’m working on a class and have a lot a time invested into it, I will also upload those videos or content to my Google drive as a “just in case”. It can be very frustrating when something happens and hours of work is lost.

That is a lot of information on making backups. While it may seem like a big task, the easiest way to get it done is to get started. Tackle one backup at a time!

Now that my external hard drive is synced up, photos are the next things on my to-do list. Since it’s been awhile, it will take me some time to get that done. But, if I start to do it at the same time each month, it will take less time.


I hope those have given you a few ideas of what you should be backing up and some ideas of how you can.

Silhouette Backups is just the start of the Let’s Explore v4 – Organization Series.
I hope you will join me for the rest of the series.
Part 2 – Let’s Explore v4 – Silhouette Library Organization
Part 3 – Let’s Explore v4 – File Organization

I would love to see what you are creating with your Silhouette software or machines!
Or if you have any questions, feel free to post photos or questions on my Facebook group at 
Silhouette Secrets with EllyMae.

Save this for future reference by pinning the image below.

Enjoy !

THANK YOU for your support! How can you help? Click HERE & buy a coffee.
Every little bit helps with the cost of running the site.

Silhouette Classes

Never stop learning! Let me help you take the anxiety out of learning with Silhouette and get to creating faster! My Silhouette classes are heavily focused on software, so you can take the skills & techniques taught and apply them to many future projects!

Silhouette step-by-step Classes by Silhouette Secrets+

Silhouette Secrets+ with EllyMae
**This post may contain affiliate links. What that means is that I may receive compensation if you purchase through the links I have provided. The price you pay for the product or service is not higher but I may get compensated for sharing.