
I have so much fun playing with my Silhouette Curio and all the things it can do!
I want to share that with you!
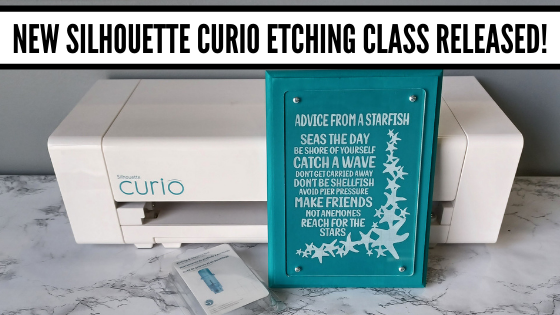
Join me in this Silhouette Curio class to create an acrylic etched panel!
Check out the class HERE.

This is an Advanced Beginner Curio class that will cover the setup step-by-step to getting the Curio ready to etch, creating a template in Silhouette Studio for the etching, and then creating the design to be etched. You will create your own word art design using tools in the Silhouette Studio software! Tips are shared throughout the video class for getting successful etches with your Silhouette Curio machine.
Check out the class
HERE

Here is a sneak peek at the class content and the videos included:
Supplies & Setup Video – 17:55 minutes
Creating the Etched Acrylic Panel Template in Silhouette Studio – 31:30 minutes
– Using the drawing tools to create a template
– Creating template with nail holes to avoid
– Alignment Tools
– Move By Tool
Designing & Etching the Acrylic Panel in Silhouette Studio – 1 hour 3 minutes
– Opening Starfish border Design #3653
– Compound paths
– Text Tool
– Creating the design with multiple lines of text
– Creating “word art” with text
– Adding an etch fill
– “Secret” to getting a tighter etch fill
– Setting up the Curio to etch
– Etching
– Finish and assembly

Class Supplies:
Affiliate links are present in the following supply list and as an Amazon Associate, I earn from qualifying purchases. The cost to you is no different, but I may earn a commission by you using the links provided.
-Silhouette Curio machine
– Silhouette Etching Tool
– New Silhouette Curio Cutting mat – highly recommend a sticky mat
– Starfish border Design by Calli Arroyo – Design #3653
– Fish Grill font by 7nTypes – Design #292330
– 4” x 6” Acrylic Panel with 4 holes from Craft Chameleon
– Double sided sticky tape from Craft Chameleon
– 6” x 8” Basswood board by Walnut Hollow – Amazon or Walnut Hollow
– #4 x ½” Sheet Metal Screws
– Dark colored paint or stain
– Paint brush
– Screwdriver
– Hand drill
– Weeding tool
– Optional: baby wipes, Teflon sheet, apron
Optional:
– LW Wide Marker Font by Lori Whitlock – Design #82132
– Acrylic Panel no holes from Craft Chameleon
– Wood stand
Additional Resources
No matter how many times I etch a project, even the same design, I still do a little happy dance when it’s finished!
Find this class on my Teachable site HERE
I love being able to customize my gifts & projects with the Silhouette Curio!
Want more ideas of what you can create with your Curio?
Check this out – Gift Ideas with your Silhouette Curio
Just getting started with your Curio?
The possibilities are endless in what you can create!
Check out the other Silhouette Curio class on my Teachable site HERE.
I would love to see what you are creating with your Silhouette software or machines!
Feel free to post on my Facebook group at
Silhouette Secrets with EllyMae.
Save this for future reference by pinning the image below.

Enjoy !
THANK YOU for your support! How can you help? Click HERE & buy a coffee.
Every little bit helps with the cost of running the site.


 The first one I applied the vinyl to was the one on the left in the photo above…. it was a bit trickier due to the curve and the varied size of the jar. I grumbling a bit when I went to apply the vinyl to the jar on the right and then it went on like a dream.
The biggest factor when applying your vinyl stencil to a glass item to etch is you want the edges of your design to have a great seal on them, so the etching creme doesn’t sneak up under the vinyl.
The flatter you can get the decal on your object the better, any creases are areas that the etching creme might sneak in to.
The first one I applied the vinyl to was the one on the left in the photo above…. it was a bit trickier due to the curve and the varied size of the jar. I grumbling a bit when I went to apply the vinyl to the jar on the right and then it went on like a dream.
The biggest factor when applying your vinyl stencil to a glass item to etch is you want the edges of your design to have a great seal on them, so the etching creme doesn’t sneak up under the vinyl.
The flatter you can get the decal on your object the better, any creases are areas that the etching creme might sneak in to.
 I love how they turned out but I do have to confess that after over a month of it sitting on my counter, it’s still empty…..
I don’t bake that often because then I end up eating them…..
One of these days, I’ll put something in it.
I love how they turned out but I do have to confess that after over a month of it sitting on my counter, it’s still empty…..
I don’t bake that often because then I end up eating them…..
One of these days, I’ll put something in it.


