The Silhouette Cameo Pro MK II was announced for future release at the 2024 Silhouette Summit. I attended the Silhouette Summit and asked a lot of questions regarding this new machine model. In this blog post, I’ll be sharing details that we learned at Summit. We were able to see this new model in action on both the demo floor and also a close up look where we could ask specific questions in a classroom setting.

This blog post is part of series of my account at Silhouette Summit 2024 because it’s a lot of information on new products and information. Find more details on Silhouette Summit 2024 – Part 1 – cloChé Heat Press announcement HERE. And I’ll add additional links as I publish information too!
Affiliate links may be present in the following blog post and as an Amazon Associate, I earn from qualifying purchases.
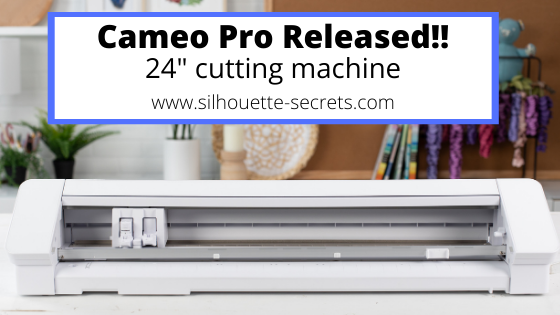
The Silhouette Cameo Pro MK II is now available at Silhouette America HERE or at CrafterCuts HERE.
*updated 12/12/24
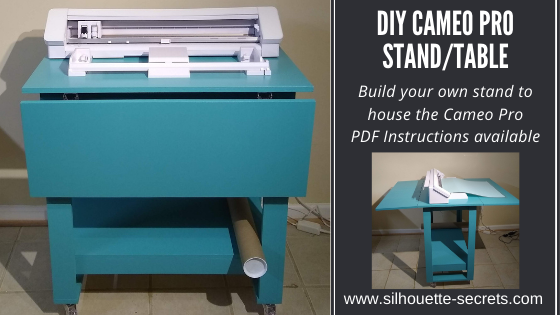
Silhouette Stand released 3/26/25 – available HERE
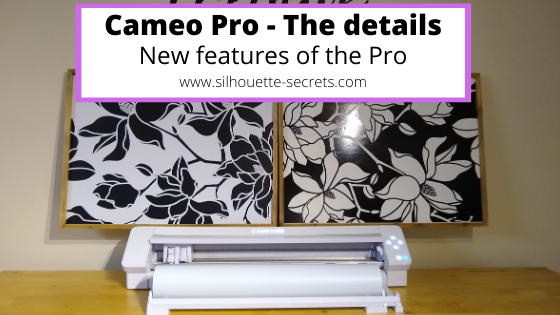
Silhouette Cameo PRO MK II
Please note that the following information & photos are all directly from the Silhouette Summit 2024 and at the time of writing this the Cameo Pro MK II is not yet available for purchase. I will be updating the post when we receive more information.
I also released 2 videos directly from Summit that can be found on the Silhouette Secrets+ YouTube channel HERE.
- Silhouette Summit 2024: Announcing the Cameo PRO MK II
- A Look at the Silhouette Cameo PRO MK II & Stand from Silhouette Summit 2024
Let’s get into some of the details of the new Silhouette Cameo PRO MK II.

First, this is NOT a Cameo 5 model. It is called a Cameo PRO MK II, which is a little bit to get used to saying as you’ll see me mention in the videos linked above.
Why is it not just called a Silhouette Cameo 5?
It is different and why it could not simply be called a 5. It is the Cameo Pro 4 body with all of the guts of the Cameo 5 model installed.
The Silhouette Cameo PRO MK II has:
- Updated chassis system for improved carriage stability and new belt drive minimizes deviation and vibration
- New design of the roller bar and rollers, which include the ability to move the right roller to more locations to be locked in securely
- 5 auxiliary rollers that are removable for additional support when cutting different widths of materials
- Dual cross cut option – the user can choose to use the Auto cross cut or the rear cross cut option (more on the auto cross cut feature HERE)
- Repeat Job now available – when a repeat job is enabled, the load button flashes. Press and hold the button for more than 3 seconds and it will repeat the last job sent.
- Powered Carriage 2 tool housing for use with powered Silhouette accessories
- NEW!!! 4 point registration mark for print and cut. There will now be registration marks on all 4 corners of a print and cut jobs.
**This will be an addition to the Silhouette software in a future release.
Basically, the Silhouette Cameo 5 guts installed in the Cameo 4 Pro body. Some of the updates from the Cameo 5 12″ and 15″ Plus are now in the Cameo Pro MK II.
The Silhouette Cameo PRO MK II is NOT compatible with the Silhouette Electrostatic Bed accessory. It does not have the powered connection on the front of the machine to connect to an electrostatic bed.
So bottom line is, it is a Cameo 4 Pro body with the improved guts of the Silhouette Cameo 5 models installed inside.
We did see the Silhouette Cameo PRO MK II in action both in the Summit demo room and in smaller classroom settings where we were able to ask questions and get a closer look.

Here is a look at the machine in action cutting a large decal. There were 3 class session times and they demonstrated it for all who attended those sessions. In the above photo you can also see the demos from the previous sessions behind the machine against the wall.

In the classroom session, there were 4 Cameo PRO MK II machines all set up and providing a close up look at the machine. These are smaller breakout sessions where it was much easier to ask questions, touch and feel, and really see if it was doing what they said it was.
I did check the cut after it was completed and it was successfully cut and was able to be weeded. They did offer to let me keep one of the decals, but I had no easy way to get it home successfully on the airplane.

Now, let’s take a closer look at some of the specifics mentioned above.
Silhouette Cameo PRO MK II – Auxiliary Rollers
The Cameo PRO MK II now has 5 auxiliary rollers to help in keeping materials as flat as possible while it’s being cut. Each auxiliary roller can be moved left to right along the roller bar. For best results, space the auxiliar rollers out evenly across the width of a material.
The auxiliary rollers on the Cameo PRO MK II are removable. This is the only machine model that the rollers are removable. If the auxiliary roller is removed, make sure to keep it in a safe place so you can find it again. Or move it to the right side of the machine and install on the roller bar (I show this tip in the video HERE)

When cutting wider widths of materials, the material needs to be held securely and as flat as possible while it’s cut. Any bunching or bowing of materials between the left and right rollers can cause cut issues.
The auxiliary rollers of the Silhouette Cameo PRO MK II can be used on the Silhouette Cameo 5 models (12″ and Plus 15″) that have the redesigned roller bar.
Note: the auxiliary rollers are NOT removable on the Silhouette Cameo 5 model machines.
NEW!!! 4 Point Registration Mark for Print and Cut
There will now be a 4th registration mark added to print and cut projects. This is designed for more accurate reading and to reduce the off-cuts in the bottom right corner.

Unfortunately, we did not get any really good photos of the examples shown on screen of this new feature and I only have the image from the media kit provided to me from Silhouette. It was not something that was demonstrated for us at Summit.
It will be something that is implemented into the Silhouette Studio software in a future release.
Silhouette Cameo PRO MK II Wrap Up
I am one of the original testers for the Silhouette Cameo 4 Pro model and have a lot of information out there on proper setup and usage (more details HERE). Most of the same information, tips, and recommendations will still apply to the Silhouette Cameo Pro MK II model.
I know there has been lots of users frustrated with the Cameo 4 Pro and the exact setup that it requires to function properly. I do feel the improvements to the Cameo Pro MK II will solve some of those user frustrations, however, it will still be very, very important to have the proper setup and space for a machine of this size to function properly. For all models of cutting machines, proper setup is important!
I did see many demonstrations of the Silhouette Cameo Pro MK II in action performing different functions and completing projects, but will not have real life experience with the machine until it is available for consumers. At the time of this publication we do not have a release date, but I will update with more information as I get it.
I did create a Silhouette Summit playlist on the Silhouette Secrets+ YouTube channel that can be found HERE to see videos released direct from Summit.
Silhouette Summit – Part 1 – cloChé Heat Press found HERE
Save this for future reference by pinning the image below.

Enjoy !
THANK YOU for your support! How can you help? Click HERE & buy a coffee.
Every little bit helps with the cost of running the site.
Silhouette Classes
Never stop learning! Let me help you take the anxiety out of learning with Silhouette and get to creating faster! My Silhouette classes are heavily focused on software, so you can take the skills & techniques taught and apply them to many future projects!