Posted on 11 Comments

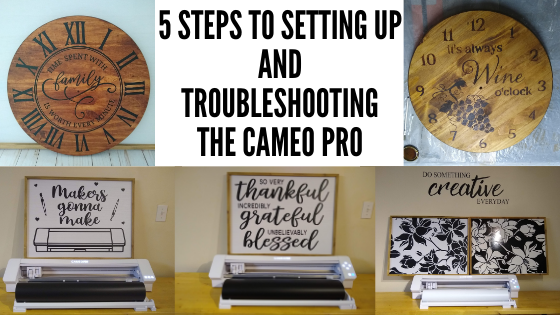
5 Steps to Setting Up and Troubleshooting the Cameo Pro

Cutting like a Pro with Your Cameo Pro

The Cameo Pro is the newest cutting machine released by Silhouette and I have loved creating larger projects with mine.

Today I have 5 tips for setting up the Cameo Pro.
These steps can also be used for troubleshooting any cutting or feed issues you may be having with the Cameo Pro.

If you are new to the Cameo Pro and just taking it out of the box, I would highly recommend watching the Unboxing video HERE to get started with the setup.

This post has a lot of information and is photo heavy. I am also making this available as a printable PDF download exclusively for confirmed newsletter subscribers.

Join the Newsletter

Subscribe to get our latest content by email.
    We respect your privacy. Unsubscribe at any time.

    I would suggest starting at Tip #1 and working through the list every single time. If one of the first 2 things is the cause of the problems, no matter what else you change, you will continue to have an issue until those are corrected.

    Affiliate links may be present in the following blog post and as an Amazon Associate I earn from qualifying purchases.

    Tips for the Cameo Pro

    Tip #1

    Make sure the Autoblade is installed properly.

    The Autoblade has to be installed with absolutely no gap at all between the lip of the blade and the housing.

    The locking tab on the front of the blade housing should be pushed all the way in so the hooks grab the blade and hold it in securely.

    If the blade does not look like this, take it out and reinstall it and lock it in place.

    If you still cannot get the blade installed with no gap, please check out this video by Silhouette America on properly installing the blade in the machine.
    4 Things to Remember About Your Silhouette Cameo 4
    This installation video applies to all Cameo 4 models and the Portrait 3.

    This is the #1 most important factor in getting the machine up and cutting properly.
    If the blade is not installed properly, it will not adjust or cut consistently and the issues you experience may just compound on each other.

    The Cameo Pro comes with an Autoblade and a blue sketch pen adapter only. If you want to use other older model blades in the Cameo Pro, you will need to purchase the blade adapter set or the new soon to be released Premium blade or Deep Cut blade that will fit directly in Tool 1 housing
    (estimated March 2021 release for the U.S).

    Tip #2

    Loading the cutting mat or vinyl properly.

    The first feature we should discuss is the Autoload feature. This is awesome since the cutting width is now 24″ and it is really hard to grow another arm/hand to help push the load button while holding the material up to the rollers.

    The Autoload feature works by pressing the Load button which will start flashing. You have 6 seconds to hold the mat/material up to the rollers and it will pull it in.
    If it does not load straight or you do not feel it loaded securely.
    Press the unload button and load it again for best results.

    Here is a demo of loading a 12″ roll of vinyl. The Autoload option has a little sensor on the left side of the machine that I point at in the video. Make sure this sensor is clear of debris or it may not work properly.

    There are several options of media/mat sizes here so we will go through each.

    Loading lined material in the Cameo Pro such as adhesive vinyl or HTV without a mat

    In the video above, you see how I loaded a 12″ roll of vinyl.
    Let’s take a closer look at the details.

    When cutting a smaller roll than 24″, the roller bar will need to be unlocked and the right roller moved over to the left so it is on the edge of the material to securely grip it.

    The roller bar is locked when the lever points up, release the right side of the roller bar by turning it to the front as the arrow shows on the machine.

    Do not force the roller lever release or turn it backwards.
    Doing so can damage the internal mechanisms.

    Once the roller bar is released, the right side of the roller bar will raise and you can slide the right roller along the bar to the correct position.
    Note: the left roller is stationary and the bar does not lift on the left side.
    The roller can be moved to any of the gray arrows (circled below) on the Cameo and then rolls from 9″-24″ can be utilized. Move the “guides” along as you move the right roller and position them evenly across the material being cut. These help to prevent the materials from bubbling up in the middle.

    There is a rectangle directly in the middle of the right roller and this should be lined up with the gray arrow on the machine for best results. If you look closely, you can see the right roller is directly under this rectangle in the middle of the white bar.

    Once the right roller is lined up with the gray arrow that is on the edge of the width of the material you are cutting, carefully turn the roller bar lever back up to the locked position.

    When cutting from a roll of material, you will adjust the roll feeder to fit the material as needed. Move the right side of the roll feeder in so it will be snug against the right edge of the material roll.

    Then adjust the slides on both sides depending on the size of the material roll.

    For a small roll the slides need to be moved out. Loosen the placement screw and then slide it out and tighten the placement screw again.

    For the larger rolls adjust as needed, following the same steps.

    Note: bulk rolls of vinyl may have issues with feeding properly. If you experience cut issues and you are using a bulk roll of vinyl, try making a smaller roll out of the larger bulk roll. It is a lot of weight to pull against a bulk roll of vinyl.
    If the vinyl is rolled too tight, you may also experience issues.

    The left edge of the material when cutting without a mat, should be lined up with the line on the right side.

    Press the Load button and then carefully hold the vinyl up to the rollers with the left edge of the material next to the line and the right side at the right roller. Make sure that the material loads straight. If it does not, hit the unload button and try again.
    Both sides of the vinyl should be held securely under the rollers or it can slip out during the cut.

    The material should be smooth and not bubbled in the middle. You want it to roll in and out of the machine as straight as possible.

    Now, let’s take a look at a 24″ roll.

    The right roller will be moved to the far right gray arrow and the roller bar lever locked back in place. Spread the guides out evenly between the 2 rollers.
    The right sliding piece of the roll feeder should be on the edge of the right side of the roll of the material.

    The load line stays the same for all widths of material that is cut without a mat.

    Loading materials with a cutting mat

    The Cameo Pro comes with a 24″ cutting mat.
    This sucker is a monster and will take some practice to get the hang of maneuvering, but I love having this option!

    First, remove the protective cover sheet off of the cutting mat.

    The load line is the far left line on the left side of the machine for the 24″ cutting mat.

    The roll feeder should still be set up and make sure you are using the middle mat support.

    The right roller should be lined up with the far right arrow.

    Now, here is probably the biggest thing you will need to keep in mind when using a 24″ cutting mat.
    The full length of the cutting mat has to be fully supported on the front and the backside. The machine cannot work against gravity to pull the mat into the machine. It is just not possible with the weight of the mat. That is a lot of excess weight working against gravity.
    This means that you will need to have a work surface that has approximately 22″ on the front and backside of the machine that is flat and allows the mat to roll in and out flat the entire time.

    Again, this is BIG!
    Not only the mat, but you will need to have it supported or the cuts will be off if it has to work against gravity.
    We built a table with extension for my Cameo Pro so that I am able to use it with the roll feeder as is, but if I need to use the 24″ cutting mat, I can use the extensions so it’s all fully supported.

    Check out this video on the Cameo Pro stand with more tips HERE.
    We have made these plans available for confirmed newsletter subscribers HERE.

    Once you are all set up on the machine and ready to load the cutting mat, press the load button and then hold the mat up to the rollers as straight and level as you can.
    The Autoload starts after 6 seconds.

    If the mat did not load straight or you were not ready in time. The machine will still think it is loaded, press the unload button and try again. This is where the Autoload feature comes in handy to make it easier to just focus on loading the mat and not pressing the button at the same time. However, it may take a bit of practice to get used to loading a mat this size.

    If you are working with a material that fits on a smaller size cutting mat, I would highly suggest using a smaller size. It will be easier to manage and extend the life on the 24″ cutting mat as well.

    Other size cutting mats: 8″ Portrait, 12″ Cameo, or 15″ Cameo Plus mats

    When using any cutting mat that is smaller than 24″, the load line is the line on the right side. The left edge of the cutting mat should be next to this line but not over top of it.

    Make sure to adjust the right roller in the same manner as listed above when using smaller rolls of materials.

    The right roller should always roll across the edge of the cutting mat and not across the adhesive part of the cutting mat. If the rollers are moving across the adhesive on the cutting mat, they can pick up the adhesive and start sticking. With the new design of the Cameo Pro, the rollers are underneath the roller bar and not accessible to clean easily.
    So I would highly recommend being mindful of where the rollers are placed on the cutting mat. Adhesive build up on the rollers can cause future cutting issues.

    The mat support should be attached and moved over to support under the cutting mat as it rolls through the machine according to which size cutting mat you are using. This will help in feeding the mat in as straight as possible.

    Tip #3 – Cut settings

    The Silhouette Studio software does have a list of preset settings. These are just a suggestion of what to start out with. It is not a full comprehensive list and all material types or brands may vary.

    With any machine, you will want to test the settings and see what might work best for the design, the material, and the blade.

    For instance, on my Cameo 4 models for Oracal 651, I choose the Vinyl – Glossy setting and then increase my blade depth to a 2. This cuts well for me and my machine.

    Or for Oramask 813, I use a bit different setting.

    Since I was cutting Oramask quite a bit, I created my own custom setting by clicking on the More button and adding in a new User Defined Setting.

    Will my settings work for you, there is no guarantee? Like I said, the preset settings are just a starting point. There are many factors that will play into it.

    How do you know what will work? For that we move to #4.

    Tip #4 – Test cut! Test cut! Test cut!

    I almost feel like repeating that again. Test cut is a great habit to get into!

    There is nothing like sending the full cut through only to find out that it did not cut right. And if you are using the automatic feed option on the Cameo Pro, there is no sending it back through to cut again since you have already fed the material out the back to the cross-cutter.
    Yes, speaking from experience!
    Even I do it because I think it will all work out.
    And I kick myself when it doesn’t turn out.
    It isn’t the Silhouette machines fault I didn’t use the test cut option.

    There are 2 ways you can do a test cut.

    1 – Use the Test Cut feature in the Silhouette software on the Send tab.

    The default test cut option is in the upper left corner of either the mat or the material loaded.

    Note: If using a 24″ cutting mat, you will notice that there is a 1/2″ of space on the left and right sides that does not have adhesive on it. That is because this is where the rollers roll and you do not want your material cemented to your cutting mat.
    This is cuttable space. However, if you are using a material that is less than 24″ wide, you will line up the material 1/2″ to the right of the grid edge, this is where the adhesive starts. Place the material on the cutting mat exactly as it shows on the design screen on the mat. There is also a new pop up that will show up in some versions of the Silhouette software when you go to Send a cut, as a reminder.

    However, currently in the software (I am using v4.4.463 & in prior versions), the test cut will cut in the top left corner of the 24″ cutting mat in the default position and does not adjust if your material is less than 24″ wide.

    You will need to move the test cut to the exact location you want it to cut on your material. To do this, use the arrows keys next to the test cut button on the Send tab in the software or the arrows on the Cameo touch panel on the right side.

    To move the housing, you will need to move it both over to the right and down. The housing will perform the test cut in the exact location it is placed. If it is only moved over to the right, it will cut the top of the cutting mat.

    Or the second way to do a test cut is use a shape or object.

    I use a capital B that I type out and then I will place it on my virtual mat where my design is not located at. I love this way because it is faster than adjusting the housing and a bit more accurate since you place it where you want.

    Click on the Send tab, click exactly on the design to select it and choose No Cut to turn the cut lines off on the design and only cut the capital B.

    Select the material you are cutting and click the Send button at the bottom of the Send tab to cut the B. Did it cut? If not, adjust the settings, move the B and send it to cut again.

    It is much better to use a small section of material to make sure the settings will work versus sending a full 20″ design and it didn’t cut well. This will save you both time and headache.

    Note: if doing a print and cut project, you do not want the test cut to cut from the top left of the printed page or it can interfere with the reading of the registration marks.

    You can also either change the Line Color or the Fill Color of the B and then use the Cut by Line or Cut by Fill color options to turn the cut lines on or off.

    Tip #5 – Start small

    Whether you are a new user or an experienced user, it is a new machine. Start by cutting out a small design versus sending a large design.

    I know it’s tempting and I will fully admit I sent a full 22″ design to cut the first time I cut with the Cameo Pro. And guess what? I still have that 22″ design sitting behind me in a pile of excess material because it didn’t cut completely through and I couldn’t send it again.

    It may not be the thing you want to hear and most experienced users will say “I got this.”, but if it does not cut right, all you can do is laugh at the choice to “go big” and start a pile like I have.

    5 Tips

    Those are the 5 main tips that I would suggest to anyone starting on the Cameo Pro or if you are having issues with cuts, feeding, etc. start at #1 and work your way down.
    But there is more!

    If you are a beginner and the Cameo Pro is the first cutting machine for you, I would highly recommend the Beginner First Cuts & Setup class to get started and get the first cuts under your belt.

    Those first cuts and getting the machine set up properly are the most important steps you can start with. As a beginner it is hard to know if it’s something not working properly on the machine setup or if it’s something that you are doing. This class can help eliminate some of the anxiety you may feel about getting started.

    The video class shows a Cameo 4 – 12″ model, but the same steps will apply to the Cameo Pro as well.

    Now, I know it’s a long post, but I can’t just leave it at that.
    Here are 5 additional tips:

    Bonus Tip #1 – When cutting long vinyl designs, you can use the arrow keys on the right touch panel on the Cameo Pro (or other models) to roll the material through prior to cutting to see how it will track. This will help you to see if the rollers are gripping the vinyl securely.

    The down arrow will not only move the housing down, but advances the materials through the machine.

    Bonus Tip #2 – Make sure the cross cutter is securely on the left or right side and the cross cutter flipped up. This is the cutting mechanism on the backside of the machine.

    If the cross cutter-blade is left in the middle or the cross-cutter bar has not been flipped back up, it will hinder the movement of the cutting mat or vinyl the next time you go to cut. Usually if this is the cause, you will hear some very odd noises as the material or mat is hitting the cross-cutter blade or bar.

    Another indicator is that the design is cutting over top of itself and not cutting correctly.

    Bonus Tip #3 – Reload the vinyl or the cutting mat until it is loaded straight. If it loads crooked, it may cut crooked or come out from under the rollers. The extra time to load it smooth and straight is well worth it.

    Bonus Tip #4 – If the edge of the vinyl is curled from being rolled, try to flatten it out or advance the vinyl farther in the machine by pressing the down arrow on the right side panel before sending it to cut. This will help in that curled edge not getting hung up on the working parts in the machine and roll as flat as possible through.

    Bonus Tip #5 – Make sure you have the adequate space needed for this machine.
    It is a large machine and needs to be fully supported.

    I would highly suggest that you have it placed securely on a work space that fits the entire width of the cutting machine and allows for the roll feeder to be completely on the table as well.

    If you are using a cutting mat, remember that the full length of the cutting mat needs to be supported on both the front and the backside in order for the machine to work properly and cut.

    Hopefully with those steps above, you will be well on your way to cutting like a
    Pro with your Cameo Pro!

    If you are up and cutting again after reading this with the Cameo Pro, let us know it helped you by commenting below.

    Like what you see, buy us a “coffee” on Ko-fi.
    Your support of Silhouette Secrets+ is greatly appreciated.

    I have also made this available as a downloadable for confirmed newsletter subscribers HERE.

    Save this for future reference by pinning the image below.

    Enjoy !

    THANK YOU for your support! How can you help? Click HERE & buy a coffee.
    Every little bit helps with the cost of running the site.

    Silhouette Classes

    Never stop learning! Let me help you take the anxiety out of learning with Silhouette and get to creating faster! My Silhouette classes are heavily focused on software, so you can take the skills & techniques taught and apply them to many future projects!

    Silhouette step-by-step Classes by Silhouette Secrets+

    **This post may contain affiliate links. What that means is that I may receive compensation if you purchase through the links I have provided. The price you pay for the product or service is not higher but I may get compensated for sharing.

    Posted on 2 Comments

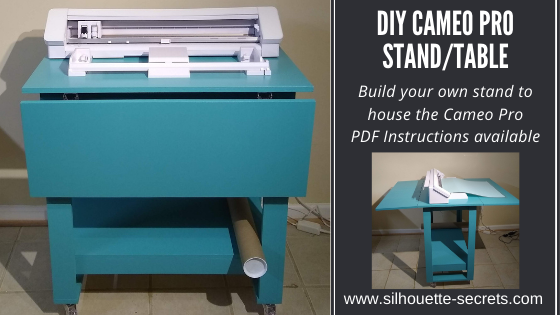
    Silhouette Cameo Pro DIY Stand/table

    I’ve shared a few glimpses of this DIY stand/table that we’ve been in the process of creating for the Cameo Pro. And it’s now finished – whew!
    Let me tell you, writing the instructions, filming the video, and writing the blog post took twice as long as actually building the stand.

    Whether you are considering building your own stand/table for a machine or not, I hope you’ll continue reading and watching as all Silhouette users can pick up some tips from the information in the video below. And maybe share a laugh too!

    The photos on the wall aren’t really crooked, just the angle of the photo – lol.

    If you are a Cameo Pro owner then you know how large this machine is and if you have been considering it, this is great information to know about so you can plan for it.

    Since the machine has a cutting width of 24″ it is much larger than the average Silhouette machine. The machine is approximately 35″ wide and you really want the entire width of the machine to be securely supported.

    You also want to consider whether you will be using a cutting mat with the machine or not. If you will be, the full length of that cutting mat needs to be fully supported and rolling in and out of the machine as flat as possible. The Pro simply cannot work against gravity and keep in mind that the mat and material on the mat is weight. If it is hanging down in front of the machine the cuts may not line up properly.
    And keep in mind that you need the clearance in the back of the machine whether you are using vinyl or a cutting mat.
    There has to be somewhere for the material to go.

    I just have to say that after filming the video above, there is never a dull moment in our house. If I get everything set up to record, then it never fails the microphone dies, I forget to push record, the camera is full and shuts off, I misspeak and say 12″ vinyl instead of 24″ vinyl, or you find something unusual where it shouldn’t be.
    It’s life! And sometimes you just have to laugh it off!

    Note: the sock is gone but new things appear. It’s like the Easter bunny or Santa leaving presents. You just never know what I’ll find.

    It’s life…. lol.
    Affiliate links may be present in the following blog post and as an Amazon Associate, I earn from qualifying purchases.

    Here are the supplies we used to create this DIY Cameo Pro stand:

    Necessary tools:
    Power Drill with #2 Phillips screw driver
    Saw & Miter Box
    Tape Measure
    – Pencil
    3/32-inch drill bit
    Sand Paper (120 grit, 180 grit, 220 grit)

    Recommended Tools:
    1 to 2 – 6-inch clamps
    Wood glue
    Miter Saw
    Countersink Drill Bit Set
    Spackle, Paint, Paint Brush
    – Power sander (quarter sheet or random orbital)
    Square
    Awl

    Supplies:
    – 1 – 4’ x 8’ sheet of 3/4 inch Sandeply (Home Depot/Lowes) *$40.98
    – 5 – 1 x 3 x 8’ (Home Depot/Lowes) *$36.05
    – 1 – 1 x 4 x 6’ (Home Depot/Lowes) – *$5.15
    – 100 – #8 x 1¼” Phillips wood screws (Home Depot/Lowes/Amazon) *$9.01
    – 100 – #8 x 3/4” Phillips wood screws (Home Depot/Lowes/Amazon) *$7.28
    – 4 – Drop Leaf Hinges (Amazon) or similar *$15.97
    – 4 – 3” Urethane Casters (Harbor Freight) *$15.96

    *Our cost – note prices may vary by location. Total cost of base table supplies = $130.40

    Both of the signs were creating using the Cameo Pro and the wider cutting space.

    This Cameo Pro stand was designed so that a crafter could complete the construction using basic tools. My biggest concern for any new Cameo Pro owner is that the machine is fully supported and stable so you can get the best use and most consistent cuts.

    The one thing I would highly suggest is reading the instructions and viewing the photos a couple of times before starting. Even though I was right in the middle of the build process, I still re-read the written instructions several times.

    We have written a step-by-step 27-page PDF document that is complete with photos and detailed instructions for the construction of this DIY Cameo Pro Stand.
    These instructions are available to confirmed newsletter subscribers.

    Join the Newsletter

    Subscribe to get our latest content by email.
      We respect your privacy. Unsubscribe at any time.

      Like what you see, buy us a coffee.
      We thank you for your support!

      Whether you build your own Cameo Pro stand or not, I hope that the video and photos have given you some tips and ideas to think about when setting up your own Cameo Pro.

      It is amazing how my to-do list for the Cameo Pro has grown. Just like everything else, it seems like a never ending list of projects I want to complete.

      Maker’s Sign details HERE
      Success or Fail Project HERE

      Check out the other Cameo Pro posts on the blog:
      Cameo Pro Released
      Cameo Pro – The Details
      Maker’s Sign – Cutting large adhesive decals
      Tips for the Cameo Pro – Tools, Materials, and Tips
      Wood Burning with Gun Powder
      Silhouette Fail or Success Project

      What are you creating with your Silhouette machine?

      Save this for future reference by pinning the image below.

      Enjoy !

      THANK YOU for your support! How can you help? Click HERE & buy a coffee.
      Every little bit helps with the cost of running the site.

      Silhouette Classes

      Never stop learning! Let me help you take the anxiety out of learning with Silhouette and get to creating faster! My Silhouette classes are heavily focused on software, so you can take the skills & techniques taught and apply them to many future projects!

      Silhouette step-by-step Classes by Silhouette Secrets+

      Silhouette Secrets+ with EllyMae
      **This post may contain affiliate links. What that means is that I may receive compensation if you purchase through the links I have provided. The price you pay for the product or service is not higher but I may get compensated for sharing.

      Posted on 3 Comments

      Silhouette Project Fail or Success? Both?

      Let me just start off with saying – I hate painting. I hate waiting for it to dry!
      I hate that you have to do it in so many stages! I hate when it doesn’t turn out!

      But I gave it another go! I really did try.
      I’ve been doing a lot of painting and I still don’t like it.

      But I’m going to show you. Not every project turns out perfect, however, there can be good things that do come out of it.

      If you’ve followed me lately, then you know the Cameo Pro has been released and I’ve been testing it for several weeks prior to the release. With that brought on a whole new list of project possibilities! That part has been exciting. The design process, the cutting process, and some of the application process – but, not the painting part. Some of you will completely understand and others will give me crazy eyes. You may enjoy painting and that is great! That is what makes the Silhouette machines so great, is that it opens up new avenues for everyone. Some work for me and some work for you.

      Affiliate links may be present in the following blog post and as an Amazon Associate, I earn from qualifying purchases.

      So, I started with the same size wood sign from Hobby Lobby as my Maker sign found HERE.

      And then I found a design I liked.
      I am using the Thankful Grateful Blessed by Jillibean Soup – Design #326141.

      I started out the same way with this project as the Maker sign and drew a rectangle using the Drawing tools on the left side, to the size of the area for the sign. Then I used the Transform Panel – Scale Tab on the right side to change the dimensions to my size needed.

      As you can see in the photo above, I actually drew 2 rectangles and rotated one, just so I could see how the design would look on the sign in a different orientation.

      I settled on the horizontal view.

      This design opens up with a dimension of 9” x 10”.

      My sign is much larger than that so I did some adjusting by grabbing the corner bounding box to scale it up proportionally. Then I grabbed the middle bounding box on the side and stretched it. Keep in mind that stretching a design by one dimension only may or may not work for a design. Each design you use will be different.

      If you want to further adjust the word arrangement in this design, right click on it and choose Ungroup. This will ungroup all the pieces individually and then you can select each word and right click and group it back together, so they move as one object. Just like in the Makers sign post, each design may vary in what steps need to be done to alter a design. It all depends on how the designer created it.
      Notice how when it is ungrouped, there are individual selection boxes around each piece.

      Once the design is how you like, click on the Send tab. Choose the Material setting, adjust the cut settings, and do a test cut! The test cut is one of the most important steps, especially when cutting large decals.
      Check out some other tips for cutting large decals in this blog post HERE.

      When I’m working with a design and have several different options on the design area, once I am ready to cut, I will copy the full design and then paste it onto a new design mat to cut. And don’t forget to save your work! So, I will save a “working file” and then a “cutting file”.

      Since I was painting this sign, I used Oramask 813 as my stencil and Oracal Transfer tape.

      Here is a video of the Cameo 4 Pro cutting, weeding, and application process. A time table is below the video for each process, so you can jump to a particular part of interest.

      If viewing in the blog click on the photo above to open the video

      Video Timeline
      Oramask 813 cutting – Start
      Weeding Oramask 813 – 2:26
      Applying Transfer Tape – 4:45
      Applying Stencil – 7:34
      Painting sign – 10:34
      Final photos – 13:06

      Now, I did a lot of time lapses and recording on that video.
      That 15-minute video process took hours.
      And after all that work – Epic Fail or Success?
      FAIL!!!!
      Remember me saying I don’t like to paint?

      Paint bled – sand it down and start over!!!

      So on to the next part! To heck with painting. Let’s cut some vinyl and apply it!

      The cutting process is the same and since I saved my design, I can just recut it with Oracal 651.

      If viewing in email, click on the photo above to open the video

      I love the finished project and it was much quicker than painting!
      More time for other projects!

      I hope this has sparked a little creative energy in you as you read and watched!

      I have had a lot of fun creating larger sign decals, not so much the paint ones, but each user will find what they truly enjoy creating!

      Can you do this same project on a Cameo 4, Cameo 3, 2, or Portrait? Yes, you can!
      you would just need to break up the design into smaller sections and apply it to the sign in a few applications. But, it can be done!

      I would love to see and hear about what you are creating on my Facebook group at 
      Silhouette Secrets with EllyMae.

      Save this for future reference by pinning the image below.

      Enjoy!

      This image has an empty alt attribute; its file name is logo.jpg

      THANK YOU for your support! How can you help? Click HERE & buy a coffee.
      Every little bit helps with the cost of running the site.

      Or if you are looking for more in-depth, step-by-step classes, check out all of my online Silhouette classes on my Teachable site HERE.

      SS Logo snip it
      **This post may contain affiliate links. What that means is that I may receive compensation if you purchase through the links I have provided. The price you pay for the product or service is not higher but I may get compensated for sharing.
      Posted on 7 Comments

      Cameo Pro Tips – Must Have Tools & Materials

      So now the new Cameo Pro has been released and I know many of you have been waiting on this!
      Now what?

      With the release news of this new 24” cutting machine, I have a few tips to share after testing it the last few weeks. I found that there were several tools that came in handy when using it.

      Affiliate links may be present in the following blog post and as an Amazon Associate, I earn from qualifying purchases.

      Tools to have on hand

      Cameo Pro machine – if you are in the market for a wider cutting machine.
      Find the Cameo Pro 24” cutting machine here:
      Grab it at Michaels HERE with FREE shipping too!
      Pre-order from Swing Design HERE
      they are estimating shipping beginning at the end of November to beginning of December
      Pre-order at Heat Press Nation
      or check at Silhouette America HERE.

      Wider materials – now that Pro can cut up to 24” materials, you may need to find a vinyl supplier that carries larger materials.

      The two companies I have been ordering from are U.S. Cutter and H & H Signs. As with many other things in the world right now, some colors of vinyl have been unavailable, but hopefully we are starting to see that turn around.

      Check out U.S. Cutter HERE

      Check out H & H Sign Supply HERE

      I would suggest seeing who has the items you need in stock. I found it didn’t take me long to hit the free shipping threshold at either company.

      Larger blanks – will you be making signs? Where will you get the larger wood blanks? Or just larger blanks in general. I grabbed them from Hobby Lobby and Home Depot. Whether you buy them premade or make them yourself, it is something to think about.

      Weeding tool – a good weeding tool is a must when working with vinyl big or small. These reverse tweezers by EK Success are my favorite and I have several pairs in my studio just in case one finds a very “safe” place to hide. Each user will find the tool that works best for them. I like these because they have a sharp point and then I can grab the vinyl.

      Tape measure – this is a must have when working with larger projects. This will come in handy to measure the blank you are working with.

      Scissors – handy to have to cut quickly or trim up pieces of vinyl or transfer tape.

      Rotary cutter & cutting mat – while not a necessity, these 2 items can come in handy when working with larger sections of materials

      Quilting ruler or acrylic ruler – another nice tool to have to go with the rotary cutter and cutting mat

      Vinyl Clips – these can come in handy to hold the vinyl rolls together as you are using them and swapping out colors.

      Tips

      Space for the machine to be setup – you will need space to have the Cameo Pro setup. And you will want to keep in mind the clearance on the front and the back of the machine.

      If you are using a 24” cutting mat, you will need an area that has 24” clearance on the front and 24″ on the backside. You will also need a workspace that supports the 24” cutting mat completely and does not leave it hanging down over the edge. If the mat is hanging down, because of gravity it can cause your cuts to be off as it cannot pull the mat in correctly each time.

      If the mat is hanging down over the edge of the table like the photo above, it can cause the cuts to be off because the machine is working against gravity to pull the weight of the mat in. This can affect not only the cut accuracy on materials, but also the accuracy on print and cut projects. For best results, have the mat rolling in and out the back of the machine as flat as possible.

      If you are using a large roll and cutting large length sections, you will need to have the clearance out the backside for the vinyl to roll out.

      Space to work – working with large sections of vinyl, you will also need to have a flat work space with enough space to maneuver weeding the vinyl and applying the transfer tape. I will admit in my house, there are not many flat, clear surfaces, so having a dedicated space for me was a must. 

      Practice – while testing this over the past few weeks, I found that even though I’ve worked with these materials for a few years, it still takes practice when working with the long sections of vinyl and transfer tape.

      Patience – take time to learn the machine and start off small. Or at least give yourself a break and be prepared to go through some materials if you do start off with a large project. I’ve gone through a lot of vinyl in testing this machine and have to say that a lot of the sections I’ve had to toss have been because of user error.

      Test cuts – test cut, test cut, test cut! I cannot say that enough. Not only is each machine different, but you also have the blade life, material differences, color difference within materials, etc. There are several factors that play into the cut quality. And then you also have human error! Make sure to double check your cut settings before you send them to the machine and do a test cut. Especially if you are using the feed option and having the vinyl feed out the backside to the cross cutter after the cut – there is no going back for a re-cut when you do this.

      Advance the vinyl just a bit after loading – this will help especially if the end of the roll is curled. Press and hold the down arrow on the Cameo touch panel and it will feed the vinyl in just a bit. This will help you save more materials in the long run versus the curled vinyl catching in the machine and causing the cuts to be off.

      Vinyl storage – think about where you will store these larger rolls of vinyl. I actually do not have an answer for you on this. You will need to find what works best for you. Right now, mine is still sitting in the shipping boxes as that is where it is the safest.

      Check out this video cutting with the Cameo Pro – I have sped up the video as it was a cut that took about 8 minutes.

      Keep in mind that this is an 8-minute cut that I have sped up to a video time of 2 minutes. The sound you are hearing is it cutting but also sped up as well.

      Silhouette Studio software tips

      Update the Silhouette Studio software.

      If you currently have a software version installed, you may need to update to the most current version that is available at the release time of the Cameo Pro. This is so that the software can recognize the new machine. You will need to use a software version of v4.4.281 in order for the Cameo Pro to be recognized. I would recommend updating direct on the Silhouette America website HERE.

      Choose the Cameo Pro in the machine selection menu on the Send tab.

      Change the cut preferences to minimize the roller movement.

      On the Send tab, click on the gear icon in the bottom right corner.

      Then choose “minimize roller movement”. This will help in re-ordering the cut order to minimize the machine pulling the material in and out more than it has to.

      Change the text cut lines to Cut vs the default of Cut Edge.

      With the release of v4.3 software version, text now defaults to Cut Edge vs regular old Cut. This makes it appear bold red fuzzy on the Send tab and doesn’t mean you necessarily have to manually weld it now. However, in some version of the software, it does affect how it cuts. It will still cut, but when you have a design and text, the Autoblade will reset the cut settings between cutting the design and cutting the text that is set to Cut Edge.

      This can be problematic if you have a large decal and it has cut the design first, so it’s rolled through the entire length of the design and then it has to roll it back to the beginning in order to adjust the Autoblade again before it will cut the text that is set to Cut Edge.

      Again, this is a bug and should be fixed in later versions of v4.4+, however, if you select all the text and change it to Cut on the Send tab before you send the design to cut, you can eliminate this possible issue. I learned this the hard way when I sent a group of designs that was 90” in length to cut and it went all the way to the end of the 90” and then rolled it back into the machine to adjust the blade for the text.

      Change the feed option for long decals and use the cross cutter on the backside

      Under the Preferences in the bottom right corner – gear icon – change the Feed option to Feed and it will then feed out the backside of the machine after the cut. This allows you to use the cross-cutter in the backside and get a straight cut on the vinyl.

      There are a few things to note here:

      No 2nd chance for a recut.

      If you feed it out the backside, there is no way to reset the design and recut it if it did not cut the first time.
      Test cuts will be very important here!

      Watch where the end of the design is before you use the cross cutter.

      You do not want to cut through the design, so double check that it has fed out far enough so the cross cutter does not cut through the design. If needed you can use the down arrow key on the Cameo touch panel to advance the vinyl a little bit more to have a clearance.

      Then use the cross cutter to cut the vinyl straight.

      Make sure to flip the cross cutter back up after use.

      If it is left down, you will have feed issues on the next cut.

      And make sure to change the feed back for other projects or the software will remember it the next time.

      Feed distance bug

      Currently there is a bug if you adjust the feed distance. It may feed out excess vinyl and you cannot roll it back into the machine before using the cross-cutter. To get around this, I would suggest leaving it at the 0.00 distance and then advance it with the arrow key on the panel as shown above. This should be fixed soon in the coming releases of v4.4+.

      24” cutting mat tip

      When using the 24” cutting mat and the materials are less than 24” wide, make sure to look at the cut border and the on-screen prompts. You will place the material ½” from the left edge so it does not roll under the roller.

      In the software when you click on the Send tab, you will also see pop up reminders of this new materials designation. While you can choose for the software to not remind you each time, I would suggest leaving it on for a bit of time to get used to it.

      Using other size cutting mats in the Cameo Pro

      The Cameo Pro can accept all the other sizes of the cutting mats as well. When you go to load the cutting mats you will choose the inner line that the arrows point to since the mat is shorter than 24″. This should then line up with the cutting grid on the Cameo mat and design screen.

      I would recommend that if your material is smaller and fits on the smaller size mats to use those vs wrangling the 24″ x 24″ cutting mat each time.
      However, I do love the option of the 24″ cutting mat for larger projects with larger materials.

      I hope that these tips help to get you started creating with the Cameo Pro a bit easier!

      I would love to see and hear about what you are creating on my Facebook group at 
      Silhouette Secrets with EllyMae.

      Save this for future reference by pinning the image below.

      Enjoy!

      This image has an empty alt attribute; its file name is logo.jpg

      THANK YOU for your support! How can you help? Click HERE & buy a coffee.
      Every little bit helps with the cost of running the site.

      Or if you are looking for more in-depth, step-by-step classes, check out all of my online Silhouette classes on my Teachable site HERE.

      SS Logo snip it
      **This post may contain affiliate links. What that means is that I may receive compensation if you purchase through the links I have provided. The price you pay for the product or service is not higher but I may get compensated for sharing.
      Posted on 1 Comment

      Maker’s Sign with the Cameo Pro

      When I first learned I would be getting the Cameo Pro 24” cutting machine, I started out by making a list of projects that I would want to create, started gathering large wood blanks, and started looking through my Silhouette designs in order to decide what I wanted to create.

      I don’t know about you, but settling on a design to make on a project can sometimes be the most time-consuming part for me. Or if I am creating the design, the actual design creation, is the most time consuming because I am overly critical of my design work.

      Affiliate links may be present in the following blog post and as an Amazon Associate, I earn from qualifying purchases.

      When I saw this design, I thought it would be perfect to add to my Studio/Office. I wanted to take the Cameo part and stretch it to be more like a 24″ cutting machine like the Pro.

      I had purchased a large sign blank from Hobby Lobby and started off by measuring the space I had to create the design. Then I drew a rectangle using the Drawing tools on the left and scaled it to the size I had measured of my design area on the sign using the Transform Panel – Scale tab.

      I then opened the Makers Gonna Make file by Planeta Silhouette – Design #324370.

      The design opens about 9.6” in size, so I grabbed the corner bounding box and scaled it larger.

      Since I have a large size, I want the design to be even larger to fit the space, but just stretching it may not look ok. I right clicked on the design & chose Release Compound Path. For this particular design ungroup was not an option. Each design may vary in what you need to do to adjust and alter it if desired. The easiest way to work with this right now is if I change the color of the rectangle and the design to be transparent under the Fill Color Panel.

      When the compound path is released, it breaks the design up into individual pieces.

      Notice that each piece now has a selection box around it. This includes the insides of the k, a, e, o. It takes the design apart. Now, we have to put each piece back together so when we move the design it all moves as one piece and when filled with color it will look normal again.

      Compound paths can be one of the hardest things for a Silhouette user to understand. Check out this post for more details & examples of compound paths and working with them – Compound Paths.

      Select the entire word of Make, including the insides of the a, k, e, and r. Then right click and choose Make Compound Path.

      There are multiple ways that you can select multiple objects together in the Silhouette software.

      Here are 2 ways:

      1 – Click on the red line of the object, hold the Shift key down on the keyboard and then click on each of the red lines of the other objects you want selected, keeping the Shift key held down the entire time.

      2 – Left click the mouse button and hold it down and drag it across the entire design making sure to touch each object you want selected. Whatever the selection box touches when you do this will be selected.

      You can double check that the Compound Path worked properly by filling the design with color after you have completed this step. For example, here is how it would look before and after the compound path is made.

      For all the objects that have multiple pieces, select the full design, right click, and choose Make Compound Path. For this design, that is everything except the hearts.

      Now, I can start adjusting the individual pieces of the design.

      Since my sign is 26.75” wide, I can stretch the design to fit this size, starting with the Cameo machine image. Since I now have a 24” Cameo Pro, I wanted it to resemble that as close as it can without distorting the image. Keep in mind that you can stretch a design lengthwise, but it may not always look the best when you do. Each design is going to be different in how it reacts.

      Adjust the design until you are satisfied and then click on the Send tab in the top right corner. Choose the Material and adjust the cut settings if needed.

      Do a test cut! I’ll say that one again. Do a test cut!
      The test cut will be your best friend and save you from wasting a whole lot of materials before you send your full design to cut and find it did not work.
      You can either use the test cut feature on the Send tab in the bottom right corner or create your own by typing out a capital B and then using that and moving it around the design mat as needed.

      And then after you have double checked the material settings and done the test cuts, click on the Send tab in the bottom right corner to send your design to cut.

      Note: the video speed has been increased on this video.
      The total cut time was approximately 8 minutes.

      After it’s been cut comes the time to weed and apply the transfer tape. Keep in mind that this video is a time lapse video and took much longer than the 7-minute video total.

      The 2 biggest tips I can suggest are to be patient with yourself and it takes practice to work with the large decals. I don’t even want to tell you how many times I cut and weeded this design. Here is one “oops” to show you.

      It all goes great until the very end! And that is just how it happens. Kick myself a little bit and then the best part is, I can go back to my machine and cut it again. It is all a learning experience.

      It will take time to practice working with large designs.

      And I love it in my Studio/Office!
      That space needed something and I think this fit just perfect!

      I can’t wait to share the other projects I’ve been creating with the Cameo Pro.

      For more information on the Cameo Pro, check out these 2 posts:
      Just Released – Cameo Pro 24″ cutting machine
      Cameo Pro – The details – New features of the Pro
      Find the Pro at Michaels HERE with FREE shipping too!
      Pre-order from Swing Design HERE
      they are estimating shipping beginning at the end of November to beginning of December

      Now, do you HAVE to have a Cameo Pro to complete this project. The answer is NO! You could ungroup this design and cut it in sections with any Silhouette machine, even the Portrait. You would just apply the vinyl in the sections that you cut it in individually on the wood board.

      I would love to see and hear about what you are creating on my Facebook group at 
      Silhouette Secrets with EllyMae.

      Save this for future reference by pinning the image below.

      Enjoy!

      This image has an empty alt attribute; its file name is logo.jpg

      THANK YOU for your support! How can you help? Click HERE & buy a coffee.
      Every little bit helps with the cost of running the site.

      Or if you are looking for more in-depth, step-by-step classes, check out all of my online Silhouette classes on my Teachable site HERE.

      SS Logo snip it
      **This post may contain affiliate links. What that means is that I may receive compensation if you purchase through the links I have provided. The price you pay for the product or service is not higher but I may get compensated for sharing.
      Posted on 10 Comments

      Cameo 4 Pro New Features

      Cameo 4 Pro New Features

      I’m so excited to be able to bring this to you and let you know the new features that the Cameo 4 Pro machine has available.

      First, here is an unboxing video of the Cameo 4 Pro. When I watched the replay of the video I had to laugh because I could see how excited I was to open it up and reveal everything. That was my first glimpse of the machine and the new features.

      Affiliate links may be present in the following blog post and as an Amazon Associate, I earn from qualifying purchases.
      Sponsored post. I was asked to test the machine prior to release and I put in a lot of machine hours putting it through the paces to see how it would perform.
      All opinions are my own and from hours of testing with the machine.

      If you are looking for the new Cameo Pro, find it at Silhouette America HERE.
      Or grab it at Michaels HERE with FREE shipping too!
      Pre-order from Swing Design HERE
      they are estimating shipping beginning at the end of November to beginning of December

      Signs from Hobby Lobby and measure 19.75″ x 26.75″ inside the frame. Decals were cut as one solid piece of vinyl.

      First, I will say that I never thought I would have a need for a machine this size. Now, that I’ve had it though, it has not been put away and is always ready for me to start a new project. I have been creating much larger projects than I ever thought I would and am loving it!!! I cannot wait to share those with you.

      New Features of the Cameo Pro

      The biggest new feature is – it is a 24” cutting machine.
      WOW! I know users were asking why only 20” when it was announced at the 2019 Silhouette Summit.
      Well, it’s here and it is 24”!!!

      New Roller bar – the roller bar on the Cameo 4 Pro has been redesigned and is no longer a roller bar, but a long rectangle bar with the rollers inside of it.

      The rollers are located under the bar next to the load lines

      And the right roller is under the tab on the right that adjusts along the bar

      New guides – with a new roller bar design the guides have also been re-designed. These can be moved along the roller bar to help provide assistance in keeping the material from bubbling up in between the rollers. Position the guides evenly on the material between the rollers for best results. If you look closely under the bar, you will see that they are small wire coils.

      New roll feeder – the new roll feeder comes in separate pieces that have to be set under the front of the Cameo Pro. Check out how to add them in the Unboxing video above.
      Here is how it should look when set up to cut with a cutting mat. The middle has a larger support to help in supporting the cutting mat as it feeds in and out of the machine. I would highly recommend if you are using a 24” x 24” cutting mat that you have it fully supported in the front and not hanging down at all, for best results.
      This may mean that you need to have it set up on a larger work surface.

      Here is how the setup should look if you are using it to cut off of a roll. The right side of the roll feeder assembly slides in to accommodate smaller rolls.

      The new roll feeder has white rollers on it to allow the rolls to smoothly roll back and forth as it’s fed into the machine. On the left and right side, the back white roller can be adjusted for larger or smaller rolls by unscrewing the knob and sliding the white roller in or out, depending on the size of the roll.

      Here is the setup for a large roll

      And here is the setup for a smaller roll of material. Unscrew the knob on the roll feeder and then slide the back white roller out. Then screw the knob back down to secure the roller.

      While I keep my roll feeder setup all the time, all the parts can be nested together for storage except the stability bar. Just make sure to keep all the pieces in a safe place that you will remember for when you need them next.

      New load lines – since it is a cutting width of 24” there are now 2 load lines for lining up the materials depending on whether you are using a 24″ cutting mat or no mat.

       Here is a photo showing vinyl loaded in the machine when cutting off a roll.

      New Autoload feature – this was released with the v4.4.270 software and works for all Cameo 4, Cameo Plus, and Cameo Pro machines. Tap the load button on the machine and it will begin to blink. Then hold the material or mat up to the rollers and the machine will pull it into the machine.

      This is the material/mat sensor that the machine uses to identify that a material has been placed up to the rollers. Make sure that this is free and clear of debris

      Keep in mind, if the material is not pulled in evenly on both ends, you may have cutting issues. Unload the material and try again for best results until it loads evenly on both ends.

      New software version – with each new machine release, a new software version has to be released in order for that machine to be recognized by the Silhouette software. At the time of release the software version is v4.4.280 and you will need to download that version or higher directly from the Silhouette website in order for the software to show the Pro options or recognize the Pro.

      I cut all of the Oramask stencil vinyl for my Halloween décor and all the vinyl for my front door decorations with the Pro and it worked awesome!
      Check out this post to see all the signs that I created with it.

      In the past few weeks, I have cut yards and yards of vinyl. I have also had lots of user error when testing out this new machine as well. None of it was the machines fault. Just a learning curve to working with much larger decals than I could previously cut in one piece.

      Just as a note, when testing a new machine, think twice before sending a set of designs that measure 90” in total all at one time. There was no need to send them all at once to cut, but I tried it. It worked for the most part. Live and learn!

      I have been having a ball testing this new 24” cutting machine and what it can do.
      Stay tuned for more tips & projects completed with the Cameo Pro.

      Want to add this new tool to your studio, find it here at Silhouette America HERE.
      Or grab it at Michaels HERE with FREE shipping too!
      Pre-order from Swing Design HERE
      they are estimating shipping beginning at the end of November to beginning of December

      I would love to see and hear about what you are creating on my Facebook group at 
      Silhouette Secrets with EllyMae.

      Save this for future reference by pinning the image below.

      Enjoy!

      This image has an empty alt attribute; its file name is logo.jpg

      THANK YOU for your support! How can you help? Click HERE & buy a coffee.
      Every little bit helps with the cost of running the site.

      Or if you are looking for more in-depth, step-by-step classes, check out all of my online Silhouette classes on my Teachable site HERE.

      SS Logo snip it
      **This post may contain affiliate links. What that means is that I may receive compensation if you purchase through the links I have provided. The price you pay for the product or service is not higher but I may get compensated for sharing.
      Posted on 2 Comments

      Just released!!! Cameo Pro 24” cutting machine

      It’s here! It’s finally here! I know some of you are thinking that right now.
      But, guess what, it’s even better than originally thought.

      Affiliate links may be present in the following blog post and as an Amazon Associate, I earn from qualifying purchases. Sponsored post.

      The Cameo Pro is a 24” cutting machine.

      Already know you want it – grab it at Silhouette AmericaHERE
      or keep reading for all the details!
      Or grab it at Michaels HERE with FREE shipping too!
      Pre-order from Swing Design HERE
      they are estimating shipping beginning at the end of November to beginning of December

      It was originally announced at the Silhouette Summit in May of 2019 as a 20” cutting machine. What we saw at the Summit was only a prototype, which means that it is not completely finished product. And that also means that they decide to change it and make it 24” for the final release. Yay!!!!

      I’ve been testing this for the past couple of weeks and while I never thought I’d need a 24” cutting machine – I LOVE IT! I have been creating larger projects than I thought I would want. I cannot wait to share those with you, but for now let’s talk details.

      Cameo Pro – 24” cutting machine

      The Cameo Pro comes with an Autoblade, a Silhouette wrench, and a blue sketch pen adapter.

      A 24” cutting mat

      The new roll feeder pieces

      Usb cord and power cord
      Setup card inside the box and on the inside flap of the box

      And here are the official specs:

      Machine features include:
      • 24-inch cutting width
      • Adjustable roll feeder for rolled materials with widths up to 24 inches
      • Built-in crosscutter to trim vinyl or heat transfer right from the roll
      • Matless cutting capabilities (see Tech Specs for full details)
      • Compatible with additional tools (sold separately) for more cutting options
      • 3 mm clearance
      • Automatic tool detection capabilities
      • Sleek, compact aesthetic with a sliding lid and a backlit, feather-light touch panel
      • Wireless cutting with Bluetooth® connectivity
      • Print & Cut registration capabilities
      • PixScan™ compatible
      • Driven by Silhouette Studio®, giving you limitless design options to customize your projects

      Contents:
      • Silhouette Cameo® 4 Pro
      • Cameo 4 Pro cutting mat (24 inches by 24 inches)
      • AutoBlade
      • Roll feeder and mat support pieces
      • Silhouette Studio® software (digital download)
      • 100 exclusive designs (digital download)
      • 1-month Silhouette Design Store subscription (available with tool registration)
      • Adapter for Silhouette Sketch Pens
      • Basic Instruction Guide (digital download)
      • Power and USB cables

      Where to find the Cameo Pro 24” cutting machine

      Right now, you can find this new machine at Silhouette America – check it out HERE
      Or grab it at Michaels HERE with FREE shipping too!
      Pre-order from Swing Design HERE
      they are estimating shipping beginning at the end of November to beginning of December

      Unboxing the Cameo Pro

      Want to see this machine – check out my Unboxing video HERE

      Grab the Cameo Pro 24” machine while it in stock HERE and get to creating!
      Or grab it at Michaels HERE with FREE shipping too!
      Pre-order from Swing Design HERE
      they are estimating shipping beginning at the end of November to beginning of December

      Check out this post – Cameo Pro New Features – for all of the in-depth details regarding the Cameo Pro machine.

      I would love to see what you are creating with your Silhouette machines!
      Feel free to share on my Facebook group at 
      Silhouette Secrets with EllyMae.

      Save this for future reference by pinning the image below.

      Enjoy!

      This image has an empty alt attribute; its file name is logo.jpg

      THANK YOU for your support! How can you help? Click HERE & buy a coffee.
      Every little bit helps with the cost of running the site.

      Or if you are looking for more in-depth, step-by-step classes, check out all of my online Silhouette classes on my Teachable site HERE.

      SS Logo snip it
      **This post may contain affiliate links. What that means is that I may receive compensation if you purchase through the links I have provided. The price you pay for the product or service is not higher but I may get compensated for sharing.