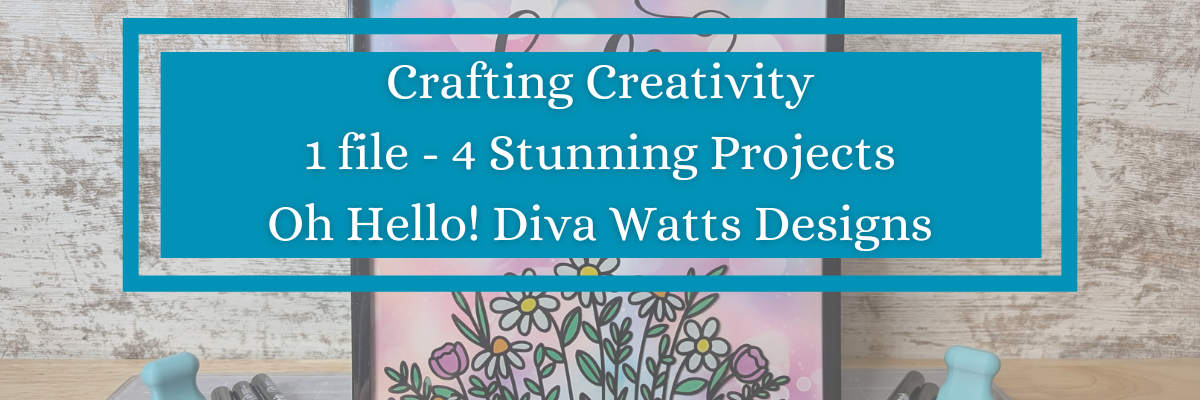

What can you do with one cut file? A lot. Each month I work with a featured designer in the Silhouette Secrets+ newsletter who provides a file for subscribers, and I share new projects each week during the month with that file. I typically start with the original file, add my own touches to it and then I create additional projects to show the versatility that one file can have. The Carrot Balloon Bunny Card by Studio Ilustrado is a perfect example. In this blog post I’m sharing 5 different design ideas that can be made with a Carrot Balloon Bunny Card design.
Affiliate links may be present in the following blog post and as an Amazon Associate, I earn from qualifying purchases.

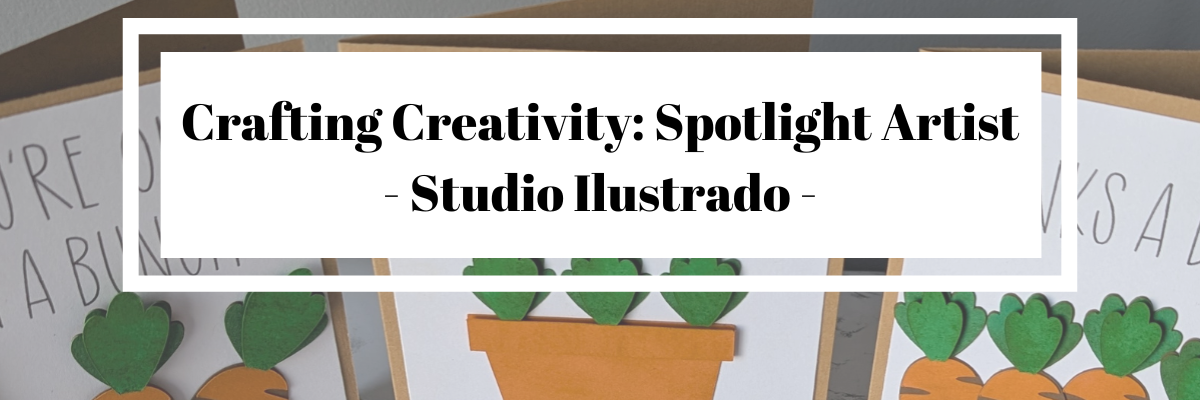
Crafting Creativity with Studio Ilustrado
One file, endless possibilities.

Project #1 – Bunny Carrot Balloon Card
I started out creating the design as originally intended by making the card and adding my own special touches with inking, paper shaping, and foam tape.

I had the Silhouette Curio 2 out from testing with the Silhouette Leather Carving Knife, so it was the machine I used to cut this card. Almost all the pieces were cut out using scraps from my stash. I love being able to use my scraps!
Look at these tiny details!

To be honest, I wasn’t sure if it would cut well with the electrostatic mat on the Curio 2, but it did! Especially using a scrap piece of cardstock with the Silhouette Electrostatic Mat.
Sometimes we all just need a little bit of help and taping down the cardstock scraps on the Electrostatic Mat can be that help. It just added a little bit more security to hold my scraps in place and get a successful cut with the Electrostatic Mat. I love this new technology that Silhouette has. While it does not work with all materials, it has saved me hours of time cutting cardstock.

While I used the Silhouette Curio 2 to cut the projects, any Silhouette machine could be used to create these projects.
Watch a bit of the behind-the-scenes on creating this project in this video – Creative Projects with Studio Ilustrado Designs – Bunny Carrot Balloon Card HERE

Supplies Used:
- Carrot Balloon Bunny Card by Studio Ilustrado
- Recollections cardstock
- Precision Glue Press by My Sweet Petunia
- Adhesive Tape Runner
- Double sided foam tape
- Various colors of stamping ink pads
- Sponge
- Fiskars Curling Tool
- Sizzix Tim Holtz Sculpting Tools
- Silhouette Curio 2
- Silhouette Autoblade
Project #2 – Peek-a-boo Bunny Box

The bunny made the perfect peeking addition to this gable box card. Don’t let the name of a design fool you either. The title of the box is called Christmas Gable Box by Studio Ilustrado, but it can be used for so much more!
Now here is one of my “secrets” – while the Silhouette machines can cut acetate for the window of this box card, I can cut it faster and with less headache.

I cut the window shape from a piece of cardstock using the Silhouette machine and then used it as a template to make a few quick snips with scissors and I was on my way to assembly. It doesn’t have to be perfect since it will be hidden inside the box. And I saved myself time, headache, and didn’t dull my blade.

However, if cutting multiples or a different design than a rectangle, it may be beneficial to set up the machine to cut acetate when needed. It’s great to have options.
Supplies Used:
- Carrot Balloon Bunny Card by Studio Ilustrado
- Christmas Gable Box by Studio Ilustrado
- Recollections cardstock
- Precision Glue Press by My Sweet Petunia
- Adhesive Tape Runner
- Adhesive double sided tape
- Clear Acetate sheets
- Scissors
- Bone Folder
- Silhouette Curio 2
- Silhouette Autoblade
Project #3 – Spring Round Wood Sign
I used my laser to cut this out of wood, but you could also use other materials such as cardstock too! Even though I have a laser machine, I started with a 12 inch wood round blank, which you could use as your backing board too.

I used the SVG file, opened it in Silhouette and made a few modifications to the file to be able to create the layers for cutting on wood. Since the wood has more thickness to it than a material such as cardstock, I had to add a layer behind the bunny and cut multiples to make it sit flush with the sign and balloon basket. The knife tool in Silhouette helped me to cut the bunny’s little feet off so it would sit flush on the balloon for this design. That sounds so bad when I type it out, but if you have designed in Silhouette, you’ll know exactly what I mean.

I used a combination of Posca Paint Markers and Deco Arts Paint for finishing out the sign.
Additional Resources:
Supplies Used:
- Carrot Balloon Bunny Card by Studio Ilustrado
- 12″ wood round blank
- Posca Paint Markers
- Deco Arts Paints
- Glowforge Pro laser machine
Project #4 – Seasonal Door Corner Design
As I was designing and cutting the first sign, another idea popped into my head too! Have you seen the door corner designs?

I drew out a skinny rectangle, made a copy and rotated it 90 degrees. Aligned the right edges and welded it together to make the corner. Then sized the bunny and welded the bunny background to the rectangles to sit on top. Next, I added letters down the right side. Before welding the letters, I made a copy so I could cut them out and layer on top for color and dimension.
Before you go to cut the design, make sure it’s all flush. I forgot to cut the bunny’s feet with the knife tool, but I didn’t realize it until after he was all cut out, so he sits a little bit higher on the top of the door. In this case, it wasn’t worth recutting the design simply because you can’t really tell on our door frame.
I love these little door corner designs, even if we only have a few door frames that I can add them to in our house because the previous owner used the wrong trim to frame out the doors or the frame is too close to the wall. It is a fun way to add a bit of decoration without putting another hole in the wall.
Additional Resources:
Supplies Used:
- Carrot Balloon Bunny Card by Studio Ilustrado
- Plywood
- Posca Paint Markers
- Deco Arts Paints
- Glowforge Pro laser machine
Project #5 – Creative Cards
I used the knife tool again, but not to cut off any bunny feet. Instead I cut the carrot off the design and used it to create a couple corny cards.

I used a Silhouette Black Glitter sketch pen and a font called BFC Rustic Cherry Farmhouse to sketch out the sentiment. I love the look of this glitter black pen, but it’s very difficult to photograph and show how it really looks.

I used the Silhouette Curio 2 to sketch this design using the electrostatic mat because that was the machine on my desk this week, but sketching can be done with any Silhouette machine model.

The clay pot was drawn in Silhouette Studio using basic shapes and adjusting the bottom edit points on a rectangle too!
Unlock your creativity by learning more about Silhouette. You never know where it will take you! Even making cards with carrots.

Supplies Used:
- Carrot Balloon Bunny Card by Studio Ilustrado
- Silhouette Black Glitter sketch pen
- Recollections cardstock
- Precision Glue Press by My Sweet Petunia
- Adhesive Tape Runner
- Double sided foam tape
- Various colors of stamping ink pads
- Sponge
- Silhouette Curio 2
- Silhouette Autoblade
Additional Resources:
- Sketching with Silhouette
- How to Create a Sketch Design in Silhouette video
- Live Sketching Tutorial with EllyMae
- Silhouette Sketch pen & Sketch Pen Design Class
- Knife Tool
- Drawing Tools
- Edit Points
- A to Z Silhouette Resources
Featured Designer – Studio Ilustrado
Find designs by Studio Ilustrado at:
Follow along with Studio Ilustrado on Facebook, YouTube, Instagram.
A great big thank you to Studio Ilustrado for contributing the free file for the Silhouette Secrets+ newsletter for the month of February! If you missed grabbing the free design in February, grab it HERE and start creating!
This year I started offering a free file each month for Silhouette Secrets+ newsletter subscribers. I love designing in the Silhouette Studio software and have shared some of my creations as well as look forward to collaborating with more artists in the future too!

Silhouette Secrets+ Newsletter
Never miss out on the news, tips, “secrets”, deals, classes, and more that I share on Silhouette Secrets+. Sign up for the newsletter and get information delivered to your inbox every Friday.
Unsubscribe at anytime.
Sign up for the weekly newsletter HERE to have information delivered direct to your inbox and grab each month’s new freebie.
Did this spark some new creative ideas for you? It’s always inspiring to see how a single design can be used in completely different projects! I had so much fun reimagining this one design across five unique creations and showing just how versatile a single file can be. If you’re looking for even more inspiration, tips, and creative project ideas, be sure to browse the Crafting Creativity section on the Silhouette Secrets+ website — click HERE to explore!
Save this for future reference by pinning the image below.

Enjoy !
THANK YOU for your support! How can you help? Click HERE & buy a coffee.
Every little bit helps with the cost of running the site.
Silhouette Classes
Never stop learning! Let me help you take the anxiety out of learning with Silhouette and get to creating faster! My Silhouette classes are heavily focused on software, so you can take the skills & techniques taught and apply them to many future projects!