Posted on Leave a comment

Crafting Creativity: 1 Design, 5 Stunning Projects with Flavir Design

Silhouette Secrets+ with EllyMae

A decorative floral crown made of paper flowers in warm colors and green leaves, arranged on a simple gold circular base.

A flat lay image featuring two large, colorful paper flowers - one yellow and one orange - with green leaves on a crafting mat. Surrounding the flowers are a hot glue gun, a sponge, a pen, and small squares of paper. Silhouette flower projects

Screenshot of Silhouette Studio software showing a design featuring leaf shapes outlined in orange, with settings for cutting cardstock on the right side of the screen.

A close-up view of two artificial flowers, one yellow and the other orange, adorned with green leaves, placed on a wooden background. Silhouette flower projects
A close-up of vibrant paper flowers in shades of yellow and orange, accompanied by green leaves, with the text 'Behind the Blooms' prominently displayed.

A handmade birthday card featuring a large pink flower, green leaves, and a glittery gold accent band. The card has a watercolor-like pink background and includes the text 'HAPPY BIRTHDAY' on a white banner. Silhouette flower projects

A handmade birthday card featuring a large pink flower, a gold glitter strip, and the text 'HAPPY BIRTHDAY' on a white banner. The background is a vibrant pink splatter design with green leaves. A crafting workspace with various tools and supplies is visible in the background. Silhouette flower projects

A vibrant pink paper flower with intricate petals sits on a textured card background, accompanied by green leaves and a glittery gold strip. The card features a banner reading 'HAPPY'. Silhouette flower projects

Two decorative paper flowers in teal and pink placed on geometric boxes, with a background featuring pink spray and floral shapes. Silhouette flower projects

A pink cherry flower box design displayed alongside details of its purchase options and features.

Screenshot of Silhouette Studio software displaying a digital pattern design for a box with a grid background.

A hand holding a sheet of paper with a grid pattern and an abstract shape on it, placed on a cutting mat in front of a cutting machine.

Close-up of a hand holding a piece of paper with a grid pattern, showcasing a cut-out shape on the paper.

Five decorative paper boxes with colorful paper flowers on top, displayed on a wooden surface. Silhouette flower projects

A digital design workspace displayed on a computer screen, featuring various bookmark designs with floral elements and motivational text phrases like 'Just one more page' and 'Your only limit is your mind.' The design software's page setup and customization options are visible on the right side of the screen.

Print preview of bookmark designs featuring motivational quotes and leaf patterns.

Close-up of a crafting machine applying gold foil to a textured surface with a red light indicator and patterned tape.

A close-up of foil packaging with an irregular cutout, revealing a textured silver surface underneath. The surrounding area features pastel colors and decorative elements.

Close-up of a textured background with blue floral designs and the phrase 'Just One More Page' in gold lettering.

A close-up of a decorative fabric featuring blue leaf patterns and the inspirational phrase 'Live Your Dream' in gold lettering.

A collection of five decorative bookmarks with motivational quotes on a wooden surface, accompanied by a craft machine and a pink scraping tool. Silhouette flower projects

Supplies Used:

A close-up view of a textured surface covered in green moss and adorned with pink fabric flowers, featuring a wooden structure in the backdrop. Silhouette flower projects

Screenshot of Silhouette Studio software showing two floral background designs, one with a pink and yellow gradient and the other with a pink bokeh effect.

A digital design workspace showing a pink and yellow flower background with yellow flowers and red heart shapes in the design software Silhouette Studio.

A crafting workspace featuring a cutting machine, pink paper flowers, and heart shapes on a wooden table. Scissors and a crafting tool are also visible.

A collection of small pink flower-shaped embellishments scattered on a black surface, with scissors and other crafting materials in the background. Silhouette flower projects

A vibrant handmade birthday card featuring a large pink flower and the text 'Happy Birthday', surrounded by colorful paper crafts.

Silhouette step-by-step Classes by Silhouette Secrets+

Silhouette Secrets+ with EllyMae
**This post may contain affiliate links. What that means is that I may receive compensation if you purchase through the links I have provided. The price you pay for the product or service is not higher but I may get compensated for sharing.

Posted on 2 Comments

Crafting with Abstract Florals: 5+ Creative Project Ideas Using Clikchic Designs

Silhouette Secrets+ with EllyMae

Welcome to this edition of Crafting Creativity, featuring the bold and beautiful abstract floral designs by Clikchic Designs! These eye-catching patterns are the centerpiece of a wide range of creative projects that highlight the versatility of digital designs. From a custom shaker card and sketch-style greeting cards to shrink plastic tool charms, bracelet charms, earrings, wine charms, and a personalized chalkboard sign—these florals bring a fresh and modern flair to every creation. You’ll also see them used in card backgrounds and oversized tags, offering endless possibilities for crafters of all kinds. Get ready to be inspired by how one design collection can do so much!

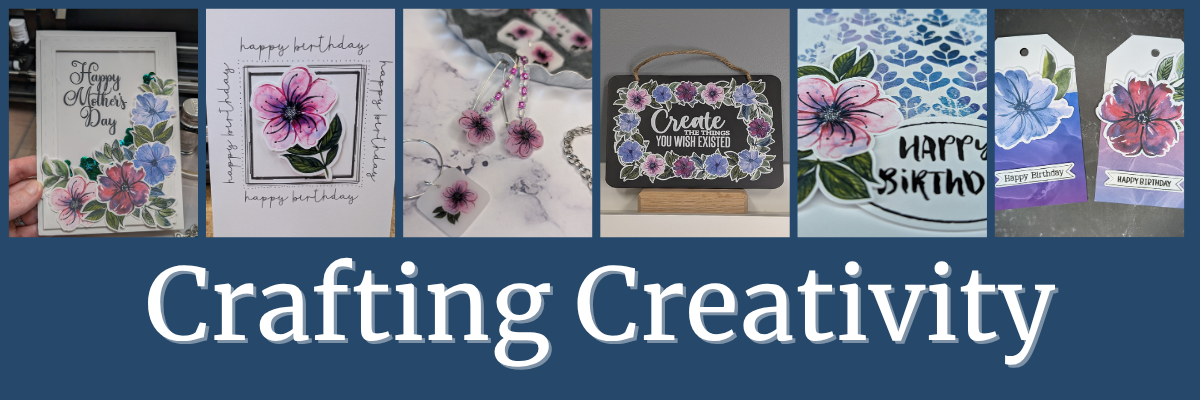
Collage of vibrant floral designs featured in various handmade projects including greeting cards, tags, charms, and bookmarks, showcasing the versatility of digital designs.

Affiliate links may be present in the following blog post and as an Amazon Associate, I earn from qualifying purchases.

A great big THANK YOU to Clikchic Designs for being the May contributing artist for the Silhouette Secrets+ newsletter. These gorgeous abstract floral designs can be found in Clikchic Designs artist store on the Silhouette Design Store site.

A collection of abstract floral designs in various colors, featuring purple, pink, and green blooms, as well as leaves, showcasing the artistry of Clikchic Designs.

Sign up for the Silhouette Secrets+ newsletter HERE for future free files & project inspiration.

Crafting Creativity with Clikchic Abstract Florals

Project #1 – Custom Shaker Card

A hand holding a Mother's Day card embellished with colorful floral designs, positioned in front of a crafting machine and various crafting tools.

I set this up to print on a 12″ x 12″ sheet of cardstock. The only thing that did not fit on one sheet was the frame. It could easily be cut using letter size cardstock too.

Digital design interface displaying a shaker card layout featuring floral elements and a 'Happy Mother's Day' greeting.

I added a bit of sparkle on top of the flowers with a shimmer pen and love it. The hardest part is getting that to show up well on photos.

Close-up of a hand-decorated card featuring colorful abstract floral designs in shades of pink, red, and blue, adorned with green leaves and sparkly embellishments.

My mom loved it!

Don’t forget to add your shaker bits before you adhere the acetate & frame down. I got excited and forgot, so I had to peel up a corner and add them in. Nothing like making a project harder than it needs to be.

Additional Resources:

Supplies Used:

Project #2 – Sketched Card Backgrounds

Two birthday cards featuring abstract floral designs, one with a pink flower and the other with a blue flower, placed on a wooden table beside a container holding more floral stickers. A black pen and a white gel pen are also visible.

I drew out 2 rectangles and applied different Sketch Effects to them to create the sketched squares, then added a sketch sentiment around the outer edge of the border using a font called Flannel Shirt Sketch.

I then added some foam tape on the back of the Abstract Floral designs and added those to the center of the sketched frame to give it some dimension.

Next, I sketched a couple more with a premade frame called Dot Frame Sketched.

Two handmade greeting cards featuring colorful floral motifs with the text 'just for you' at the top. The cards are displayed on a wooden surface alongside a Gelly Roll marker and a black pen, with additional floral stickers in the background.

I think this one is my favorite of them all, but I think I’m drawn to this pink flower for some reason.

A birthday card featuring a colorful floral design on a white background, surrounded by the text 'happy birthday' repeated around the frame. In the background, a cutting machine is partially visible.

They are all gorgeous when paired with the Abstract Floral designs by Clikchic Designs.

A birthday card featuring a watercolor-style pink flower with dark outlines, positioned centrally within a black frame. The words 'happy birthday' are printed around the frame in a playful font.

I added the random dots around the edge of the square frames by hand after the card was sketched. I could have set it up in the software and had the machine do it perfectly, but it might have also smooshed the tip of my pen. This gives each card a randomness to it as well and makes it unique.

Additional Resources:

Supplies Used:

Project #3 – Shrink Plastic Projects

Have you ever used shrink plastic before?

There are so many things you can create with shrink plastic. From wine charms, bracelet charms, earrings, tumbler charms, tool charms, and more!

A variety of shrink plastic charms and earrings featuring abstract floral designs, displayed on a silver tray. The collection includes two flower-themed earrings, decorative tags, and a bracelet adorned with floral motifs.

Here is a look at my printed page using Silhouette Shrink Plastic Sheets.

A hand holding a printed sheet featuring various colorful abstract floral designs, showcasing purple, pink, and blue flowers alongside the word 'INSPIRE'. The sheet is being prepared for use with a cutting machine in a crafting workspace.

I used the default settings in the Silhouette Studio software to start with. Here is a look at the Send tab when I sent this page to cut.

A digital design workspace in Silhouette Studio, showcasing colorful abstract floral elements with the text 'INSPIRE'. Various floral shapes are arranged for cutting on shrink plastic.

Larger shrink plastic designs can be interesting when they shrink and you just have to keep going to get them to flatten out. Sometimes, they will also not be a uniform shape at the end. I think that adds to their uniqueness and can be fun to see what happens.

Custom tool charms are a great way to mark your scissors either for a specific purpose or to identify them when you go craft with friends. They are also handy to help you locate them on your craft table if they like to hide in a “safe” place often.

A pair of beige scissors with a protective cover sits on a grey surface, alongside a handmade keychain featuring a bookmark that reads 'INSPIRE' decorated with pink flowers and colorful beads.

I love watching it shrink when heat is applied! Check out this quick video on the Silhouette Secrets+ Facebook Page, on Instagram, or on my YouTube channel.

Any type of plastic will dull the blade quicker than other materials, so it is not uncommon to have to increase the settings the more you cut.

There are several brands of shrink plastic out there and they can all be a bit different. I cut both Silhouette Shrink Plastic and Grafix Shrink Plastic during this process. I was using an older blade and I think it’s about done for now. It was having a hard time cutting through the Grafix Shrink Plastic in clear.

Test cuts are really the only way to know what is going to work with your blade and materials.

Two “secrets” of mine are:

  1. I’ll take a blade that isn’t cutting other materials such as cardstock or HTV well and move it to my shrink plastic blade. I get a bit more life out of my blades this way.
  2. Do not unload the cutting mat after the cut and check it first. If it did not cut through, you can increase the settings and send it again until it does cut.

Additional Resources:

Supplies Used:

Project #4 – Custom Sign or Chalkboard Sign

I started by measuring out the size of this chalkboard sign and then drew a rectangle the same size in Silhouette Studio. Then I just started adding the abstract floral designs and moving them around to create a floral frame.

A decorative black sign featuring a colorful floral border and the text "Create THE THINGS YOU WISH EXISTED" in white and pastel hues.

Did you know that vinyl goes bad? Yep! I started this project using Silhouette Printable Vinyl, which I love for the print quality. However, it must have been an old package because it would not weed properly and was separating. I ended up using Orajet 1917 that I’ve had in my craft stash for many, many years and it cut beautifully.

There is a shelf life for vinyl and other craft products such as pens, paint, string, inks, tape, etc.

What is the lifespan of vinyl? Well, there really isn’t an exact date or time as you never really know how long it’s sat on a retailers shelf or the manufacturer’s shelf, etc. And other factors play into it as well, such as temperature, humidity, etc. You will see many mention 2 years when stored properly. But, you never really know how it was treated before you bought it. I have some vinyl that I still try to cut even though I know it’s like 7 years old. Sometimes it works and sometimes it doesn’t.

How can you tell if it’s gone bad?

The 2 most obvious signs I have found is that it can separate when you try to weed it and it’s a bugger to work with no matter your troubleshooting or cut settings. These 2 things can present themselves by the adhesive can visibly be separating from the actual vinyl or the vinyl will not easily come off the backing paper.

Usually I try to push through and I always end up kicking myself for working so hard to try to salvage it.

However, the final way I know the vinyl has gone bad is when I get a new good piece and it weeds so smoothly. And that’s when I end up kicking myself.

For this project, I lost a few letters of the text in the middle, so I just ended up cutting the text from a scrap of Oracal 651 in white and adding that on to the project. A great use of scraps!

Additional Resources:

Supplies Used:

Project #5 – Cards with Unique Backgrounds

When I do a print and cut page, I will fill the page with extra designs and this month I had a good bunch of the florals left over to create with. So I set about brainstorming what I could do with the left overs.

A collection of colorful floral stickers featuring various flower designs in shades of blue, pink, and red, arranged on a light blue background.

I was browsing Pinterest and found an idea where they created custom backgrounds with a stencil and inks. Why not do that with a stencil design & digital patterns?

Here is a look at the first ones I created.

Four handmade birthday cards featuring abstract floral designs in various colors, each with the text 'Happy Birthday' displayed prominently. The designs include a mix of pink, blue, and purple hues, set against a white background.

The next set, I started playing around with the orientation and mixed it up a bit.

I had so much fun playing around and creating backgrounds with different pattern papers.

Here is a close up look at one of the cards.

A birthday card featuring a pink flower with green leaves, against a background of blue and purple leaf patterns, with the text 'HAPPY BIRTHDAY' prominently displayed.

You can do this too! Check out the video How to Make Stunning Card Backgrounds with Stencils & Digital Patterns in Silhouette on the Silhouette Secrets+ YouTube channel.

A digital tutorial for creating cards with stencils and patterned designs, featuring a split-screen image of the design process on a computer and finished card samples showcasing floral elements.

I am sharing my process of design creation, mistakes, and explanations of how and why I did things too!

Additional Resources:

Supplies Used:

Project #6 – Custom Tag Designs

Whether you need a design 2″ or 6″, you can do it with your cutting machine. You can create things whatever size you want.

These tags are 3.5″ wide and 6.125″ tall. I used the Project Wizard in Silhouette Studio to create the basic tag design and cut from 110 lb Neenah cardstock.

Two colorful birthday tags featuring floral designs, one with a blue flower and another with a red flower, both embellished with 'Happy Birthday' labels.

I used up the last 2 flowers and bits of greenery I had printed on cardstock and combined that with a patterned paper I designed and printed when I shared the tutorial on Creating Custom Background Patterns in Silhouette.

A person holding a printed page with an abstract blue and purple design, showcasing swirling patterns. In the background, there is a white printer and part of a calendar visible.

Additional Resources:

Supplies Used:

A great big THANK YOU to Clikchic Designs for collaborating for the Silhouette Secrets+ newsletter!

Find more designs by Clikchic Designs at:

Follow Clikchic Designs for more inspiration on her website, Facebook, and Instagram. I love watching the videos of how the designs are created. I love how she takes something that she has physically painted and turns it into a digital file so we can all enjoy and create with her amazing artwork!

Sign up for the Silhouette Secrets+ newsletter HERE so you don’t miss out on future collaborations.

From handmade cards to custom jewelry and home décor, the possibilities with these abstract floral designs by Clikchic Designs are truly endless. Each project in this Crafting Creativity edition showcases how one digital collection can be transformed into a wide variety of unique creations. Whether you’re crafting with paper, shrink plastic, or chalkboard materials, these versatile florals add a bold, artistic touch to every piece. We hope you’re inspired to explore new techniques and think outside the box with your next project.

Check out the Crafting Creativity series HERE.

Save this for future reference by pinning the image below.

A collage of various handcrafted projects featuring abstract floral designs, including greeting cards, jewelry, and a chalkboard sign, all showcasing the versatility of Clikchic Designs.

Enjoy !

THANK YOU for your support! How can you help? Click HERE & buy a coffee.
Every little bit helps with the cost of running the site.

Silhouette Classes

Never stop learning! Let me help you take the anxiety out of learning with Silhouette and get to creating faster! My Silhouette classes are heavily focused on software, so you can take the skills & techniques taught and apply them to many future projects!

Silhouette step-by-step Classes by Silhouette Secrets+

Silhouette Secrets+ with EllyMae
**This post may contain affiliate links. What that means is that I may receive compensation if you purchase through the links I have provided. The price you pay for the product or service is not higher but I may get compensated for sharing.
Posted on 1 Comment

Crafting Creativity: Spotlight Artist – Tanya Batrak – 3-D Design

Crafting Creativity Artist Tanya Batrak
Silhouette Secrets+ with EllyMae

In this edition of Crafting Creativity I’ll be sharing the projects I created through the month with the 3-D flower flamingo file from Tanya Batrak. This is a 3-D design file that is easy to assemble. A great big thank you to Tanya for providing the free file for the Silhouette Secrets+ June newsletter!

Tanya Batrak Website

Affiliate links may be present in the following blog post and as an Amazon Associate, I earn from qualifying purchases.

3D Flower Flamingo File – 3-D Design

This past month I created with this 3-D Flower Flamingo File by Tanya Batrak.

3-D Flower Flamingo Design by Tanya Batrak

My goal each month that there is a featured designer in the newsletter is to show how you can take 1 file and create several projects with it. I want to help you start thinking about different ways you can make your designs go farther!

Project #1 – Table or home decor decoration

I started with creating the 3-D Flower Flamingo at the original size it was designed with and cutting all the pieces out of cardstock for assembly.

Cardstock Creation 3-D Flower Flamingo by Tanya Batrak

I always love cutting and creating with cardstock! I recorded my assembly process of this file too! Check out the new video below.

Additional Resources:

Supplies Used:

Project #2 – Large Paper Flower

Next, I used the flower pieces from the 3-D Flower Flamingo file and scaled it up to create a large paper flower.

Large Paper Flower with Silhouette

After I created this, I looked at the final photo and I saw 2 flowers. This could easily be 2 separate flowers with a very unique look.

Additional Resources:

Supplies Used:

Project #3 – Shoe Charm

This next design was a request from my daughter for a shoe charm. She had been watching me create and design with Grafix Shrink Plastic and wanted a new charm for her shoe.

Shoe Charm with Shrink Film (Plastic)

I took 2 of the flower shapes and the little heart from the 3-D Flower Flamingo file and added color to them to print onto Grafix Shrink Film.

Silhouette Print and Cut with Grafix Shrink Film for Shoe Charms

I added several more designs for future projects to the sheet of Grafix Shrink Film and cannot wait to finish creating with those too!

After cutting the Shrink Film with Silhouette, then I placed in the convection oven for 3 minutes at approximately 350 degrees. I love to see the before and after of these shrink plastic designs. It’s so neat!
After it was cooled, I sealed the designs with UV Resin for protection, and then glued the pieces together.

Additional Resources:

Supplies Used:

Project #4 – Flocking Flamingos using Print and Cut

Next up, I really was considering doing some cupcake toppers, but just ran out of time. But these ones are calorie free!

Instead of paper piecing the bodies together, I set it up as a print and cut project using glossy photo paper instead.

Silhouette Paper Crafting with Print and Cut

I took the original file size and then deleted one side of the flamingo head. Made a copy and then right clicked and chose Flip > Horizontal, so I knew the design would be mirrored exactly.

Silhouette Print and Cut Flamingo Bodies

Next, I ungrouped the file so the score line at the bottom was separated. Selected all of the body parts, excluding the score line and used Cut Edge on the Send tab to cut only the outer edge of the flamingo body. Check out the video below showing how I did this step.

Then I cut all the flower pieces out of cardstock and assembled the entire design.

Additional Resources:

Supplies Used:

All of these projects were completed using just 1 file from Tanya Batrak! Find more amazing designs at:

Follow along with Tanya Batrak on their website, Facebook, and Instagram too!

Check out this neat video that first caught my eye when she released these designs HERE.

A great big thank you to Tanya for contributing the free file for the Silhouette Secrets+ newsletter for the month of June! If you missed grabbing the free 3D Flower Flamingo file in June, it is available in the Silhouette Design Store HERE.

This year I started offering a free file each month for Silhouette Secrets+ newsletter subscribers. I love designing in the Silhouette Studio software and have shared some of my creations as well as look forward to collaborating with more artists in the future too!

Silhouette Secrets+ Newsletter

Never miss out on the news, tips, “secrets”, deals, classes, and more that I share on Silhouette Secrets+. Sign up for the newsletter and get information delivered to your inbox every Friday.
Unsubscribe at anytime.

Sign up for the weekly newsletter HERE to have information delivered direct to your inbox and grab each month new freebie.

I hope this has given you some ideas on how one file can lead to many different projects!

Save this for future reference by pinning the image below.

Fabulous Flamingo File by Tanya Batrak Pinterest

Enjoy !

THANK YOU for your support! How can you help? Click HERE & buy a coffee.
Every little bit helps with the cost of running the site.

Silhouette Classes

Never stop learning! Let me help you take the anxiety out of learning with Silhouette and get to creating faster! My Silhouette classes are heavily focused on software, so you can take the skills & techniques taught and apply them to many future projects!

Silhouette step-by-step Classes by Silhouette Secrets+

Silhouette Secrets+ with EllyMae
**This post may contain affiliate links. What that means is that I may receive compensation if you purchase through the links I have provided. The price you pay for the product or service is not higher but I may get compensated for sharing.
Posted on Leave a comment

Crafting Creativity: Spotlight Artist – Wispy Willow Designs

Crafting Creativity - Artist Spotlight - Wispy Willow Designs
Silhouette Secrets+ with EllyMae

In this edition of Crafting Creativity I’ll be sharing the projects I created through the month with the butterfly file from Wispy Willow Designs. A great big thank you to Hannah from Wispy Willow Designs for providing the free file for the Silhouette Secrets+ May newsletter!

Wispy Willow Designs website

Affiliate links may be present in the following blog post and as an Amazon Associate, I earn from qualifying purchases.

Wispy Willow Designs is another one of my favorite designers that I’ve grown to collecting over the years. It was great to meet Hannah at the Silhouette Summit in September 2023 and put a face with the name in person.

Silhouette Summit Wispy Willow Designs and EllyMae at Silhouette Secrets+
Silhouette Summit 2023 Demo Room with Wispy Willow Designs

Wispy Willow Design Butterfly File

This past month I worked with Butterfly design – Design #345188

Silhouette Butterfly Wispy Willow Designs

My goal each month that there is a featured designer in the newsletter is to show how you can take 1 file and create several projects with it. I want to help you start thinking about different ways you can make your designs go farther!

Project #1 – Adhesive vinyl cut and layered

Flower Wreath Wood Sign designed with Silhouette

I created this flower wreath design in Silhouette Studio for a class I taught at Bella Con 2024. It sat for a couple weeks until I settled on a design for the center. The butterfly design is cut from black Oracal 651 and then orange glitter adhesive vinyl is layered on top.

Flower wreath wood sign created in Silhouette

It was perfect for the finishing touches on this wood sign creation!

Silhouette Cameo 5 intricate cuts

And look how small and detailed those cuts are! I cut this using the Silhouette Cameo 5 and the Silhouette Autoblade. It took a few exact moments to weed the design to make sure all the pieces stayed in one place, but it was totally worth it!

Additional Resources:

Supplies Used:

Project #2 – Card Embellishment with Holographic Cardstock

Silhouette Cardstock Butterfly with Holographic Cardstock

I’ve been wanting to use this holographic cardstock that I had purchased for awhile and this added that special sparkle to the card. I added some foam tape to the backside and popped it off the card.

The card base was one I had made previously for the Silhouette Cameo 5 & Curio 2 – Type C Pen Holder video where I showed sketching with the new pen holder. The sentiment was sketched and the card was just waiting for something more. 

Additional Resources:

Supplies Used:

Project #3 – Holographic Butterfly Stickers

Silhouette Print and Cut with Holographic Stickers

I used the pattern fill option in Silhouette Studio to add a different fill to each of the butterflies and make them all unique.

Glossy or holographic materials can sometimes be problematic for users to get an accurate print and cut on. Check out the video on the Silhouette Secrets+ YouTube channel where I shared the creation and tips too!

Silhouette Print and Cut Holographic Stickers with Patterns Video

Additional Resources:

Supplies Used:

Project #4 – Acrylic Etched with the Silhouette Curio 2

Acrylic Etching with the Silhouette Curio 2 and Power Engraver

Here is a look at the acrylic etchings that I tested. I had not intended to do more than 1, but then I messed up and didn’t decrease the spacing on the first one I did (middle), so I ended up going down the rabbit hole and etched 3 more with different etch fills and spacing.

And then I started playing around with some alcohol markers. The alcohol ink sort of spreads into the etching and can be fun to play with. Normally I do not fill my etchings in because I don’t have complete control and nothing is permanent when you color an etch in.

Acrylic Etching with the Curio 2 colored with Alcohol Makers

My favorite has to be the one on the far right, but I also like the look of the first one I etching with the larger fill pattern too. With each one I played with different techniques but they are all growing on me.

Acrylic Etching with the Curio 2 filled with color using alcohol markers

While I do not like the look of the Silhouette Power Engrave tool marks that show as a spiral on the single line outline (1st photo, top left), it does give a neat look once filled with the alcohol markers.

New video out on the Silhouette Secrets+ YouTube channel sharing a quick look at the process of etching these acrylics and testing the fills with the alcohol markers – check it out HERE.

Additional Resources:

Supplies Used:

All of these projects were completed using just 1 file from Wispy Willow Designs! Find more amazing designs by Wispy Willow at:

Follow along with Wispy Willow Designs on their website, Facebook, and Instagram too!

A great big thank you to Hannah at Wispy Willow Designs for contributing the free file for the Silhouette Secrets+ newsletter for the month of May! If you missed grabbing the free flower file in May, it is available in the Silhouette Design Store HERE.

This year I started offering a free file each month for Silhouette Secrets+ newsletter subscribers. I love designing in the Silhouette Studio software and have shared some of my creations as well as look forward to collaborating with more artists in the future too!

Silhouette Secrets+ Newsletter

Never miss out on the news, tips, “secrets”, deals, classes, and more that I share on Silhouette Secrets+. Sign up for the newsletter and get information delivered to your inbox every Friday.
Unsubscribe at anytime.

Sign up for the weekly newsletter HERE to have information delivered direct to your inbox and grab each month new freebie.

I hope this has given you some ideas on how one file can lead to many different projects!

Save this for future reference by pinning the image below.

Silhouette Projects with Wispy Willow Designs - Wood sign, Adhesive vinyl, Intricate cuts, Holographic Cardstock, Stickers with laminate overlay, Curio 2 Acrylic Etching

Enjoy !

THANK YOU for your support! How can you help? Click HERE & buy a coffee.
Every little bit helps with the cost of running the site.

Silhouette Classes

Never stop learning! Let me help you take the anxiety out of learning with Silhouette and get to creating faster! My Silhouette classes are heavily focused on software, so you can take the skills & techniques taught and apply them to many future projects!

Silhouette step-by-step Classes by Silhouette Secrets+

Silhouette Secrets+ with EllyMae
**This post may contain affiliate links. What that means is that I may receive compensation if you purchase through the links I have provided. The price you pay for the product or service is not higher but I may get compensated for sharing.
Posted on 1 Comment

Crafting Creativity: Spotlight Artist – Diva Watts Designs

Diva Watts Designs
Silhouette Secrets+ with EllyMae

I want to share a fabulous designer that I’ve had the privilege to collaborate with recently – Diva Watts Designs!!!

Diva Watts Designs website

Affiliate links may be present in the following blog post and as an Amazon Associate, I earn from qualifying purchases.

I have been a collector of Stacey’s designs in the Silhouette Design Store and in September 2023 was able to connect and meet her face-to-face at the Silhouette Summit.

Stacey from Diva Watts Designs and EllyMae with Silhouette Secrets+

I love meeting others in the industry and getting to put a face with a name in real life and getting to know them! At least as much as we can squeeze into a whirlwind trip at these conferences.

I took 1 file and each week in March shared a new project that I had created with just that single file. I wanted to share some of the possibilities that you can do featuring the design by Diva Watts Designs. I’ll include a supply list for each of the projects below too!

Here is a look at the Flower file from Diva Watts Designs – you can find it HERE.

Flower Design by Diva Watts Designs

One design from Diva Watts Designs = 5 projects

Project #1 – Paper Flowers to Embellish a Card

Paper Flowers Cut with Silhouette

I started out with simply cutting out the flower design from cardstock, adding some ink, and using paper shaping tools gave the flowers some dimension. The flowers were then glued onto a card base that I had sketched on.

I shared this process on the Silhouette Secrets+ YouTube channel video – Easily Create Paper Flowers with Silhouette. In the video, I am also demonstrating the Silhouette Electrostatic Bed that I used when creating this project.

Paper Flowers with Silhouette - Diva Watts Designs

Additional Resources:

Supplies Used:

Project #2 – Spring Chalkboard Sign

Spring Chalkboard Sign with Adhesive Vinyl

I created this design in the Silhouette Studio software so I would know how it looked prior to cutting.

Silhouette Studio Chalkboard Sign Mock Up

Once I had it just right, I cut each color out of adhesive vinyl and layered it onto the chalkboard sign.

I shared a quick video of the application process on the Silhouette Secrets+ Instagram account HERE.

Additional Resources for the tools I used to create the design:

Supplies Used:

Project #3 – 3-D Stemmed Paper Flowers

3-D Paper Flower Bouquet cut with Silhouette

Next, I cut multiples of the flower design in several sizes, added them onto a floral wire stem, and layered them together to create a 3-D flower arrangement. I had some crepe paper flower leaves from a different project that I added into the vase with the flowers too.

Paper 3-D Flowers cut with Silhouette

Supplies Used:

Project #4 – Earrings with Shrink Plastic

Shrink Plastic flower earrings

I had originally intended to create 2 sizes of earrings, but I cracked one during the process, so I ended up with 2 different projects. I used Silhouette Shrink Plastic and set it up as a print and cut project with the flower shapes filled with a watercolor pattern.

Silhouette Print and Cut Shrink Plastic Earrings - Diva Watts Designs

And as can happen, a project takes on a life of it’s own. I had originally designed and cut this so it was a layered earring design with the flower center facing forward. But after seeing it together, the center created a unique look showing through and I finished the project loving it even more!

Additional Resources:

Supplies Used:

Project #5 – Tool Charm with Shrink Plastic

Tool Charm with Silhouette Shrink Plastic - Silhouette - Diva Watts Designs

Since I cracked one of my flower designs after shrinking it, I wasn’t going to let the other one go to waste and decided it would make a great tool charm. I added a tassel onto the chain and attached it to my scissors with a lobster claw clasp.

Now these are MINE! This is a great way to designate scissors for different purposes or lay claim to your tools.

Supplies Used:

All of these projects were completed using just 1 file from Diva Watts Designs! Stacey has so many more amazing designs too!

Find designs by Diva Watts Designs at:

Follow along with Diva Watts Designs on the Diva Watts Designs websiteFacebook and Instagram too!

A great big thank you to Stacey at Diva Watts Designs for contributing the free file for the Silhouette Secrets+ newsletter for the month of March! If you missed grabbing the free flower file in March, it is available in the Silhouette Design Store HERE.

This year I started offering a free file each month for Silhouette Secrets+ newsletter subscribers. I love designing in the Silhouette Studio software and have shared some of my creations as well as look forward to collaborating with more artists in the future too!

Silhouette Secrets+ Newsletter

Never miss out on the news, tips, “secrets”, deals, classes, and more that I share on Silhouette Secrets+. Sign up for the newsletter and get information delivered to your inbox every Friday.
Unsubscribe at anytime.

Sign up for the weekly newsletter HERE to have information delivered direct to your inbox and grab each month new freebie.

Did this give you some ideas? How about how you can take 1 file and create a variety of projects with it. I had so much fun brainstorming, designing, and creating with this file. Thank you Diva Watts Designs!

Save this for future reference by pinning the image below.

Silhouette Projects - Paper flowers, shrink wrap, tool charm, spring sign, adhesive vinyl

Enjoy !

THANK YOU for your support! How can you help? Click HERE & buy a coffee.
Every little bit helps with the cost of running the site.

Silhouette Classes

Never stop learning! Let me help you take the anxiety out of learning with Silhouette and get to creating faster! My Silhouette classes are heavily focused on software, so you can take the skills & techniques taught and apply them to many future projects!
Silhouette step-by-step Classes by Silhouette Secrets+

Silhouette Secrets+ with EllyMae
**This post may contain affiliate links. What that means is that I may receive compensation if you purchase through the links I have provided. The price you pay for the product or service is not higher but I may get compensated for sharing.