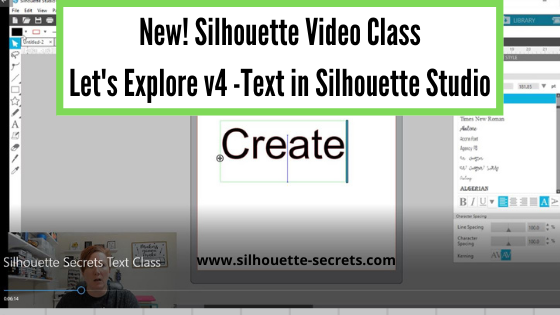
Let’s Explore v4 – 5 ways to get accurate text size in Silhouette
Text is awesome!
It is a great way to personalize any Silhouette project and the best part is that you can use any font that is installed on your computer.
Not sure how to install fonts on your computer, check out this post if you need help installing fonts
Let’s Explore v4 – Installing Fonts
But, I often see user’s ask about text size and why the text size doesn’t match the selection box. Or why the selection box says one size, but when the material is cut, the text is much smaller.

In this example, you can see that the text selection box shows a height of 1.117″, however, when you look at it, the actual text letters are not even 1″ in height. There is extra space on the top, bottom and sides of the text before the selection box.
Affiliate links may be present in the following blog post and as an Amazon Associate I earn from qualifying purchases.
Why is there extra space around the letters?
When you type out text it is editable text. This means that while it is “editable” text, you can still go back in and change the letters in the text box. Because of this, the software has to account for every single letter in the entire font file. All the g’s, y’s, p’s, and any other special characters that might be included in the font file. While a regular font file can have 26 characters, we are also now seeing new fonts that have massive amounts of characters. The extra characters are called Glyphs and some font files can have anywhere from a few to several hundred variations.
This means that the software has to be able to account for the possibility that you change the text to any one of those other letters or characters.
Each font file will vary because they each have different characters and spacing.
Let’s compare 2 fonts styles – Arial and Havana.
Arial is a default font on Windows computers and is a basic font.
Havana font is what is referred to as a “premium font” because it also contains 280 glyphs.

Havana font by Fallengraphic – Design #324033
Just looking at the Havana font image, you can see the extra glyphs which would extend above or below the line of the average letters.

When you compare the 2 font styles, you can see that the text selection boxes have different space above and below the actual letters. This is to allow for any text changes and accounts for additional characters that you might add if you were to change the text. The arrows are pointing to the top and bottom corners of the selection box for each example.
I find that if a user understands the “Why” about a certain tool or feature, it will help them remember how to work with it the next time they go to use it.
How to Get Accurate Sizing
Let’s talk about 5 ways to get accurate sizing.
Depending on the font style or project you are working on, one method may be better than another.
The first thing I recommend when you are working with text is to make a copy and pull it off to the left side of the cutting mat. This is called the holding area and can be used to “hold” parts of your design. Anything off of the cutting mat will not be cut. It is always a good idea to have an original copy of your text to go back to if needed.

Accurate text size method #1
If the font style is one that the letters do not overlap, such as the Arial example above, then you can right click on the text and choose “Convert to Path“.

This means that the “text” is no longer “editable text” but has been “converted to a path” or is now a vector design. The font style cannot be changed and you can no longer type new text in that box. It is now treated as a design element with design element properties.

When you “convert to path” this means that the software now only accounts for the exact letters that are in the “design” and does not have to remember all of the other characters in the font.
Look at how the spacing changes around the word. It is much closer to the letters on the Create on the right side that has been converted to a path.
This will give you a more accurate measurement of the text.
Accurate text size method #2
If the text is a script text that the letters overlap each other, then right click and choose Weld.

Changing the text in any way, such as welding, takes it out of “editable text” mode and it is now a “vector design”.

Notice how the selection box changes on the Create on the right side after choosing the “weld”.
When you weld text, if there is any letters that are not overlapping another letter, it will be broken up into it’s own selection box and separate from the welded portion of the text.

In this example, I’ve used a font called Handy Ink by Typhoon Type – Suthi Srisopha – Design #317262. Notice how there are 2 selection boxes after the text has been welded. Before doing anything else, right click and choose Group or use Ctrl+G for the keyboard shortcut, so the text all moves as one piece.
Accurate text size method #3
Another way to gauge accurate text size is to use the Silhouette cutting mat grid.
On the Page Setup Panel (top right icon), increase the transparency so that the cutting grid of the Silhouette mat is revealed. In older software versions, this is called “reveal”.

Each square on the cutting mat is 1″. Adjust the text size as needed and gauge how big it is.
Using the grid marks and measurements we can see that the text above is approximately 3/4″ tall by 3″ wide.
Accurate text size method #4
Use the Drawing Tools on the left side, draw a rectangle.
Use the Scale Tools to size the rectangle to the size needed either in the Transform Panel – Scale Tab on the right or in the Quick Access Toolbar at the top.

Then increase the size of the text to fit inside of the box.

Note: with script fonts you may still need to weld the text so it cuts all as one piece and doesn’t cut through each letter. In Silhouette Studio software versions v4.2.471 or higher, text defaults to Cut Edge, so welding is not necessary. This is why text appears fuzzy on the Send tab in any version after v4.2.471. In older versions of the software prior to v4.2.271, text does not default to cut edge and needs to be welded.

For user’s on older software than v4.2.471, I would highly recommend using method #2 above for accurate text size.
The rectangle can either be moved off the cutting mat, deleted, or used and cut as a “weeding box“. Just make sure if using it as a weeding box that the text lines do not overlap the lines of the rectangle or it will cut through.
Accurate text size method #5
Use Guides in the Silhouette software to use as boundaries.
This is probably not the fastest way to get accurate text sizes, but it does open up a lot of design possibilities and sizing within a certain amount of space.
Guides are an often under-utilized tool in the software, but every time I take a class with Jared Barbosa at Heat Press Nation, I am once again reminded about how useful they can be for all kinds of projects.

Guides are blue lines that can be pulled out from the ruler on the top or the right side. Often times I see user’s pull out a guide on accident and don’t know what it is. Guides are a Designer Edition upgrade feature and can be toggled on and off on the Page Setup Panel – Tab 2.

When a Guide is active, it is dark blue. Guides that are not active are lighter blue.
When a guide is dark blue , press delete on the keyboard to delete a Guide.
Guides do not print or cut.
Guides could be used in conjunction with the Transparency slider on the Page Setup Panel to place the guides where you need them.
One of those 5 methods should work well for any project you are creating with different font styles in the Silhouette software.
Practice is the best way to learn and remember what techniques work for any projects.
Play, play, play!
Want to learn more about Text?
Check out my video class Let’s Explore v4 – Text in Silhouette Studio on my Teachable site HERE.

We would love to see what you are working on!
Feel free post on the
Silhouette Secrets+ Facebook Group.
Save this for future reference by pinning the image below.

Enjoy!
THANK YOU for your support! How can you help? Click HERE & buy a coffee.
Every little bit helps with the cost of running the site.
Or if you are looking for more in-depth, step-by-step classes, check out all of my online Silhouette classes on my Teachable site HERE.