New video out on the Silhouette Secrets+ YouTube channel!! In this video I share step-by-step how I created a layered card design in the Silhouette Studio software using a digital kit by Nitwit Collections.
Affiliate links may be present in the following blog post and as an Amazon Associate, I earn from qualifying purchases.
This is the first Crafting Creativity project for the month of March that I shared with newsletter subscribers.
I love the bright colors Knick Knack kit by Nitwit Collections. This kit is exclusive to newsletter subscribers for the month of March and then will be available in their shop for purchase later.
Save this for future reference by pinning the image below.
Enjoy !
THANK YOU for your support! How can you help? Click HERE & buy a coffee. Every little bit helps with the cost of running the site.
Silhouette Classes
Never stop learning! Let me help you take the anxiety out of learning with Silhouette and get to creating faster! My Silhouette classes are heavily focused on software, so you can take the skills & techniques taught and apply them to many future projects!
**This post may contain affiliate links. What that means is that I may receive compensation if you purchase through the links I have provided. The price you pay for the product or service is not higher, but I may get compensated for sharing.
I am so excited to announce that I am an instructor again at this year’s Bella Con event hosted by Bella Crafts Publishing! This is a LIVE virtual crafting event bringing creative instructors together for four full days of inspiration and hands-on learning. And… I get to be on-site with the other instructors this year in Texas to share my classes too! Bella Con is happening March 25-28, 2026.
Affiliate links may be present in the following blog post and as an Amazon Associate, I earn from qualifying purchases.
This is a wonderful event full of inspiring and talented creators. Not only are there awesome classes, but each instructor also shares their tips, tricks, and wisdom throughout the entire event and that adds so much to the value.
BellaCon 2026 features 24+ LIVE workshops, creative tips and techniques, giveaways, and interactive sessions you can enjoy from the comfort of home. Every registered attendee receives access to all of the workshops, not just a single class.
One of the highlights of the event is the LIVE Pajama Party, where many of the instructors will be together in one location, coming to you live with mini workshops, prizes, surprises, and a chance to win giveaways from our generous sponsors.
If you love crafting, learning new ideas, and connecting with creative people, I would love for you to join us.
There are 2 options to join us:
SWAG option – this features a SWAG bag full of goodies from the sponsors plus access to all of the classes virtually shipped directly to you Don’t delay if you think you might want SWAG as it is limited to the first 125 and does tend to sell out quickly. Estimated retail value of SWAG bag is $200
Class supply lists will be available, and some classes will also have the option to purchase kits too!
I will be teaching 2 classes live from Texas, and they can be done with or without a cutting machine. These classes are designed to be customized and add your own creative flair to them. I’ll share my ideas and you can see where it takes you.
Rewriting the Story – Class Supplies Photo
Rewriting the Story…Creative Home Decor with Repurposed Books: Give old books a fresh new purpose in this creative home decor class. You’ll learn the basic steps for transforming repurposed books into a unique decorative piece, then take those ideas and make the project your own. A variety of craft supplies can be used, encouraging creative exploration and personal expression. This class will also share a cut file, background photo, and supply list, along with ideas for variations so every project is one of a kind.
For this class, I did a couple test rounds and love how they turned out! This is one of those projects that you can let your imagination run wild with and customize however you want. You never know what embellishment might speak to you in your craft stash to add this project.
Northern Lights Themed Book Decor
My first project with this is a Northern Lights themed design. Growing up in Montana I am drawn to the Northern Lights.
Custom Beaded Embellishment
I made a custom pendant piece using a beading technique I learned from Julianna the creator behind the Jewel Loom. The funny part is, I bought Julianna’s eBook when researching writing my own eBook and then I fell in love with the designs taught and that sent me down the rabbit hole of beading. Find the Jewel Loom Inspirations book HERE at Bella Craft Publishing under eBooks – just be careful, it can spark a whole new world of crafting energy!
Instead of making a full bracelet this time, I made it smaller and customized it with a custom pendant using the same image that is on the book decor. Find more on creating custom pendants HERE.
Fairy Themed Book Decor
The second one I made is a Fairy Garden theme. Ever since I made my first fairy garden in 2014 when we lived in California – back before they were even a “thing” – I’ve wanted to create another and when the fairy garden supplies all but jumped off the end cap into my cart at the Dollar Tree – the project design fell into place.
I used drywall spackle to create a “tree” texture as the base and then started embellishing from there.
I love how these both turned out and have them displayed in my home. This is a project you can turn into your own and make it personalized however you would like.
I will be teaching a spring themed design for this class at Bella Con 2026. I’m so excited to see how it turns out.
The second class I’ll be sharing is another one that is completely customizable too! Give your project a personality of it’s own and you might not know what that is until it’s almost finished.
Grow Your Style Class Supplies Photo
Grow Your Style…A Little Pot of Personality: Create a charming mini clay pot full of character in this playful and creative class. Using multi color green beads, you’ll design a unique style and finish your pot by adding a face and choosing its personality. Cute, quirky, sassy, or sweet, no two projects will look the same. This easy and relaxed project is perfect for all skill levels and can be completed with or without a cutting machine.
I’ll also be co-teaching a class with the amazing, talented artist Julie McGuffee and sharing a quick project for Artesprix too!
This event is filled with so much creative inspiration and talented artists! I am honored to be a part of it.
And those are only the classes I am teaching. There is so much more! Look at all those faces above.
Bella Con 2026 Class Sneak Peek
Here are a couple sneak peeks at the other instructors and their projects too! Find the full list HERE
Eilleen Hull is a maker, teacher, influencer, and creative community builder with a passion for helping others discover the joy of making. She licenses her art with leading craft manufacturers, including an 18-year partnership with Sizzix that resulted in hundreds of innovative die designs.
Julianna (aka Jewels) – the one who got me addicted to beading. Julianna is an award-winning innovator, product developer, bestselling Amazon author, and creative entrepreneur with over 25 years in the craft industry. She became a household name through thousands of appearances on shows such as Aleene’s Creative Living, The Carol Duvall Show, and HSN, inspiring millions to create.
Amanda is one of the founders of Pear Blossom Press, a company known for innovative products designed especially for paper crafters.
Julie McGuffee has been professionally involved in the arts and crafts industry since 1988. She hosted a scrapbooking television show for 15 years and has appeared as a guest and guest host on numerous craft shows over the past 30+ years, including popular shopping channels. As an all-around crafter and designer, Julie has authored over 150 “how-to” craft books covering a wide variety of techniques, from decorative painting to silk ribbon embroidery.
I wish I could list them all, but that might get a bit long. You can check out the full list of instructors and classes directly at Bella Con HERE. Then come back and click the link below to register.
I hope you’ll join us and soak up all the creative inspiration shared by these amazing instructors and artists. Bella Con is one of my favorite events of the year.
Thanks so much for using my links when you register for the event. This helps to cover the costs of developing the classes and travel expenses too!
I cannot wait to share more from the “Instructor Zone” in March!
Enjoy !
THANK YOU for your support! How can you help? Click HERE & buy a coffee. Every little bit helps with the cost of running the site.
Silhouette Classes
Never stop learning! Let me help you take the anxiety out of learning with Silhouette and get to creating faster! My Silhouette classes are heavily focused on software, so you can take the skills & techniques taught and apply them to many future projects!
**This post may contain affiliate links. What that means is that I may receive compensation if you purchase through the links I have provided. The price you pay for the product or service is not higher, but I may get compensated for sharing.
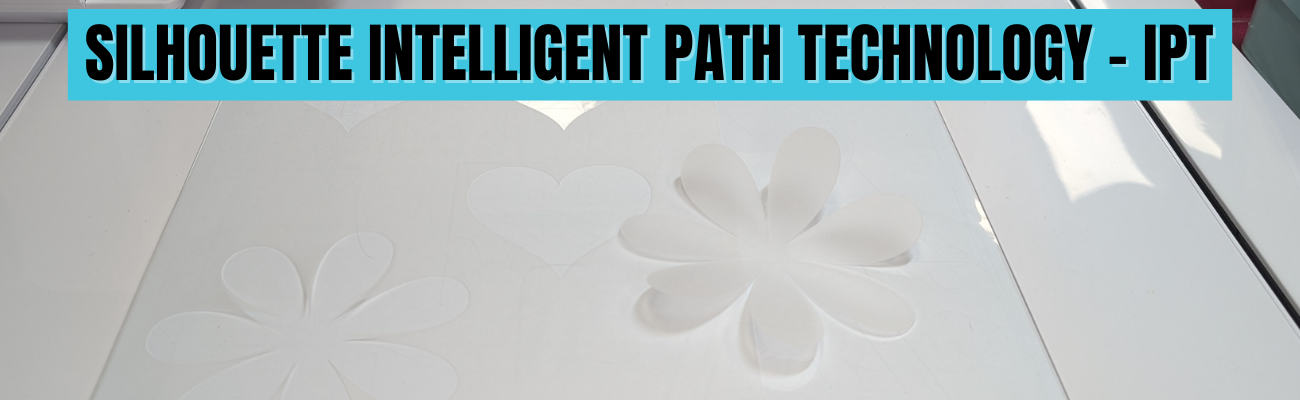
Silhouette IPT is short for Intelligent Path Technology and was first announced to us at the 2023 Silhouette Summit when the Silhouette Cameo 5, Curio 2, and Portrait 4 models were announced.
Affiliate links may be present in the following blog post and as an Amazon Associate, I earn from qualifying purchases.
In this blog post, I am sharing some of the details of the IPT setup and how it works. Read more details below and then watch the video tutorial with even more tips on the Silhouette Secrets+ YouTube channel HERE.
The Silhouette IPT is a patented cutting technology that changes the cut order of a design to “help” it stay in position and complete the cut. Depending on the design you have on the file, when it’s turned on, it will complete the cut of the design in segments versus a continuous cut around the entire design. The photo below shows the standard method of cutting on the left side, that would be from 1 starting point and cut around in one continuous cut back to the starting point on a heart. On the right side, the white dots are points of reference in how the design would be cut in segments, starting on the top right, then moving to the top left and then moving to complete the bottom on each side. This method is designed to “hold” the design in place and not have shifting as it’s being cut.
This new technology was created to help delicate materials such as vellum be more successful when cutting out designs and to cut through multiple layers of materials at once, such as several sheets of vellum stacked on top of the Silhouette Electrostatic Mat.
Here is the video we were shown at Silhouette Summit 2023 to explain the process.
This is a setting you have to set up and turn on in order for it to use the IPT cutting method and is not an automatic setting. It is compatible with the Silhouette Cameo 5, Curio 2, and Portrait 4 models.
Silhouette IPT settings can be found under the advanced settings on a preset setting, or you can turn it on for a custom cut setting. On the Send tab in Silhouette Studio, select the MORE button and you will see a box next to “Intelligent Path Technology”.
Here is a look at Silhouette Studio version 5
Screenshot Silhouette Studio v5.0.402
And a look at the Advanced Settings in Silhouette Studio version 4
Screenshot Silhouette Studio v4.5.815
If IPT is selected on a preset material setting, you will need to Save As to create a new material in order for it to be activated on the cut setting. If you simply check the box and X out of the preset material, it will not activate the IPT setting.
Screenshot Silhouette Studio v4.5.815
How Silhouette IPT (Intelligent Path Technology) Works
Let’s take a real world look at the IPT cut setting and the order that it takes. Keep in mind that the Silhouette software will change this order for every design, and you do not know what the order will be unless you watch and record the machine behavior.
I’ll be using the Silhouette Curio 2 for this demonstration, but it works the same for the Silhouette Portrait 4 and the Silhouette Curio 2. I am using Silhouette Vellum sheets for this test along with a brand new Silhouette Autoblade.
I used the same shape from the video by Silhouette from 2023. I drew the heart using the Flexishapes tool on the left side in Silhouette.
This was completed as a continuous cut, the blade never lifted.
Then I turned the cut lines off for the first heart and turned the cut lines on for the 2nd heart, which is an exact copy of the first one.
My first attempt at this IPT cut, I used the Vellum preset, checked the box, but then X’d out and found out that it did not activate the IPT setting. A new custom setting is required by clicking on Save As after checking the box.
So I made a 3rd copy of the heart and I clicked on the MORE button and checked the box next to Intelligent Path Technology and chose Save As. Then clicked the X in the top right and chose the new material of Vellum (1) as my setting. I then clicked on the MORE button to double check that IPT setting did save with the new material.
The IPT function did work and it cut the heart in 10 different line segments. However, the cut order was a bit different than the video by Silhouette from 2023 and I noticed it started the first cut in the bottom left area of the design. I am using Silhouette Studio version 4.5.815 for this demonstration. The order in which it cuts may vary by software version, which may be why the order is different than what the video shows from 2023.
Here is a diagram of the cut order using IPT with this heart shape
This heart with this specific material cut fine both ways. But, that won’t always be the case.
On a more complex design, such as this flower shape drawn with the Flexishapes and the control point adjusted to make a sharper petal, IPT did make a difference in the cut. Instead of tearing, smooshing, or ruining the corners on the interior of the petals, it was a clean sharp point and the design cut well.
For this flower shape that is approximately 4.3″ tall and 4.2″ wide, it did 51 segmented cuts. I am not going to study the video to diagram all that out, however, it was pretty neat to watch. And it was a success, with no smooshed corners or tears. I did have to “pop” out the flower carefully, but for some designs that extra little bit of care is worth it!
Here is a close up look at the interior cuts on the flower shape. Look at those crisp, cut edges! No tearing or smooshing using the IPT feature in Silhouette.
Vellum is a very delicate material and can be difficult to cut, especially on an intricate cut. Vellum will also curl as you can see in this photo, the flower immediately started to curl. Humidity can also affect the success of cutting vellum, well, really any paper is affected by humidity. For best results, store vellum in a sealed envelope and completely flat. The Silhouette Electrostatic Mat is awesome for cutting vellum designs and I share even more in the Silhouette Curio 2 – Out of the Box class found HERE.
Here are a few more vellum products I’ve tested with:
It is a setting you can turn on for a preset material, then Save As a new material.
It is a setting you can turn on for a custom setting.
It does take longer to cut a design because the blade will lift, move, and cut in a different order.
It will take longer on the Silhouette Curio 2 versus a Silhouette Portrait 4 or Silhouette Cameo 5 model due to the slower movement of the arm on the Silhouette Curio 2. It may only be a few seconds longer, but it will.
Testing is the only way you will know if it will work for a design and material.
The Silhouette software decides the order of IPT based on the shape, size, and design. The user does not see the order or know how many segments a design will be cut out in.
Don’t believe AI answers on what IPT does or in general how to use a Silhouette. AI has no experience using Silhouette machine and will come back with some very bad advice. Experience using a cutting machine will beat AI hands down – literally.
This is NOT the same as Cut Order Sorting options found under the Settings (gear icon) on the Send Tab in Silhouette Studio.
Screenshot from version 5 Silhouette Studio
Here is a look at where to find the Cut Order Sorting options in Silhouette Studio version 4
It did take more time to cut, but I was able to successfully cut out a rolled flower design using the Silhouette Electrostatic Mat and IPT setting. This has been something I have troubleshot with users several times and the intricate design just couldn’t be held in place to complete the cut using the standard cutting methods with the electrostatic mat.
I am thrilled with how this worked out!
Does Silhouette IPT Work?
Yes – but not for every design, material, or project. I thought it worked great with the flower design above as that is one of those highly likely designs to smoosh and tear on the sharp corners.
Personally, I do not typically like the little tabs it left, similar to pop out cutting. However, it might be beneficial for those materials or designs that just will not cut the standard way. The only way to know is to test it and see what happens. If you do use it, I would recommend a sharp pair of detail scissors to snip the little connections and care when separating it from the full sheet.
The second part of IPT method for cutting through multiple layers of materials, proved to be much more finicky with mixed results. I spent hours and hours testing and was never really impressed with the results. The more layers of material, the less desirable the cut results were. It is not something I’ve spent more time testing. Maybe someday I’ll try again.
I hope those tips give you a better idea of how this new cut path technology works. You never know until you try and hopefully that will help your trials go a bit easier.
Next time you have a design that is just giving you fits with a standard, continuous cut setup – you might try out the IPT setting and see if it makes a difference in the success with your material.
Good luck!
Save this for future reference by pinning the image below.
Enjoy !
THANK YOU for your support! How can you help? Click HERE & buy a coffee. Every little bit helps with the cost of running the site.
Silhouette Classes
Never stop learning! Let me help you take the anxiety out of learning with Silhouette and get to creating faster! My Silhouette classes are heavily focused on software, so you can take the skills & techniques taught and apply them to many future projects!
**This post may contain affiliate links. What that means is that I may receive compensation if you purchase through the links I have provided. The price you pay for the product or service is not higher but I may get compensated for sharing.
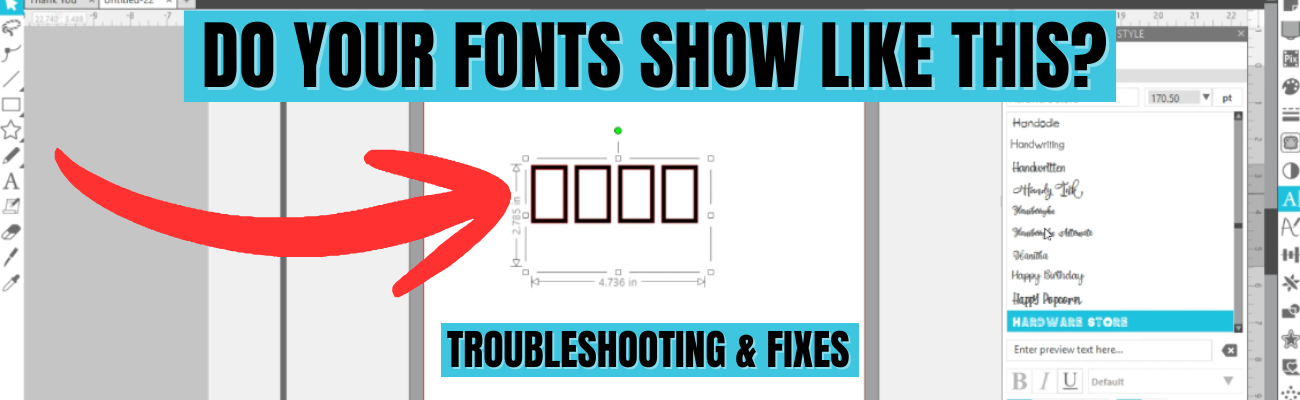
Have you ever opened Silhouette Studio, started designing with text, and instead of a beautiful font you’re greeted with rectangles, boxes, or missing letters? Font issues in Silhouette Studio are a common frustrations that we see when troubleshooting with users—whether fonts don’t show up at all, won’t display correctly, or refuse to work the way you expect. The good news? These problems usually have simple explanations and easy fixes once you know what to look for.
Affiliate links may be present in the following blog post and as an Amazon Associate, I earn from qualifying purchases.
I just shared a brand new video on the Silhouette Secrets+ YouTube channel that walks you through exactly why font issues happen in Silhouette Studio and how to troubleshoot them. In this tutorial, you’ll learn why fonts show up as rectangles, a glimpse at previewing fonts, why fonts can go missing or seem like they are missing, and how to reinstall fonts correctly—including whether OTF or TTF files work best. If you’ve ever wondered “Why is my font doing that?” this video will help you get back to designing quickly and show how to avoid some of these issues.
If you’re ready to go beyond troubleshooting and really learn how to use fonts to create your own designs in Silhouette Studio, come join us in the Creative Community with EllyMae | Crafting & Troubleshooting site. Our February 2026 exclusive member video covers working with text, fonts, and design techniques so you can move from simply typing words to confidently creating custom designs with fonts. It’s the perfect next step if you want to unlock the creative power of text in Silhouette Studio and design projects that are truly your own. In the 96 minutes step-by-step video tutorial I cover everything from where fonts are stored, font storage, designing with glyphs, offsets, compound paths, combining shapes, and more! Create 10 unique designs in less than 2 hours and then take and use those techniques to create even more!
Save this for future reference by pinning the image below.
Enjoy !
THANK YOU for your support! How can you help? Click HERE & buy a coffee. Every little bit helps with the cost of running the site.
Silhouette Classes
Never stop learning! Let me help you take the anxiety out of learning with Silhouette and get to creating faster! My Silhouette classes are heavily focused on software, so you can take the skills & techniques taught and apply them to many future projects!
**This post may contain affiliate links. What that means is that I may receive compensation if you purchase through the links I have provided. The price you pay for the product or service is not higher but I may get compensated for sharing.
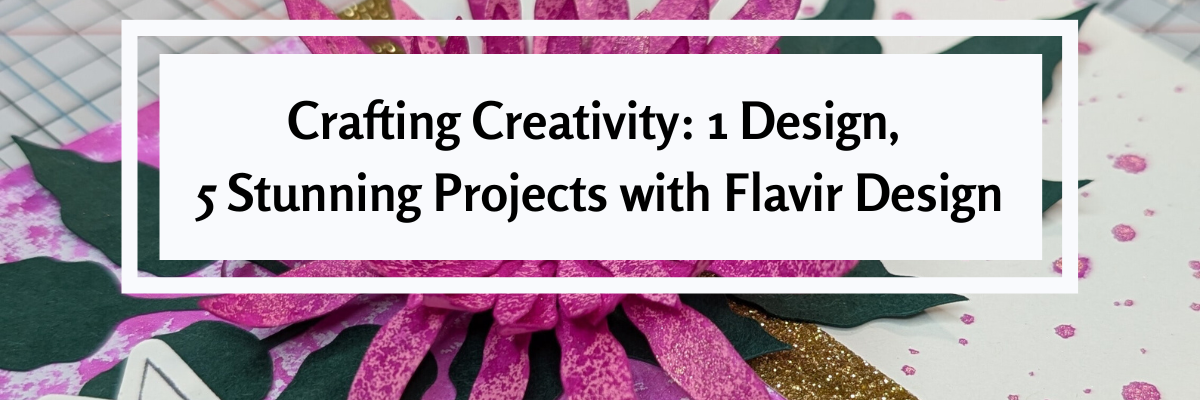
Creativity truly blooms when you learn how to stretch a single design into multiple handmade projects. In this Crafting Creativity blog post, I’m sharing how one flower design by Flavir Design can be transformed into five stunning Silhouette flower projects using a cutting machine and paper crafting techniques. From a layered paper flower bouquet and custom greeting cards to a paper flower box topper, custom bookmarks with patterned backgrounds, and even miniature flowers, this project series is all about getting more value, versatility, and inspiration from one cut file. If you love Silhouette crafting, paper flowers, and creative ways to maximize your digital designs, this post will spark new ideas for your next crafting session.
Affiliate links may be present in the following blog post and as an Amazon Associate, I earn from qualifying purchases.
Crafting Creativity Flowers & Greenery by Flavir Design
Daniela Moscone is the creative artist behind Flavir Designs and can be found in the Silhouette Design Store or on their website HERE. Make sure to check out their YouTube channel HERE for assembly videos too!
Project #1 –Flower Bouquet
I typically start out each month creating the file in the way it is shown. I decided at the last minute to take the pieces and add them to wire to create a bouquet to add to a vase. The best part about this is, if I change my mind, I can easily clip off the wires and add it to a wreath as the original image.
I love all the layers of these flowers and you can change it up however you want. And, with flowers, there is no wrong way because flowers are not perfect in nature, so if one petal has a chunk out of it, perfect! A bug took a bite. When was the last time you saw a flower in nature that didn’t have an imperfection?
I grabbed some Bazzill smooth cardstock to cut these bright colored flowers. Now, typically I’ve shied away from thicker cardstock like Bazzill and in some cases, Bazzill can be difficult to cut. I knew my blade and my cutting mat were on the older side, so I increase my settings just a bit and then used 3 passes and I had perfect, crisp cuts.
Since my mat is older and starting to lose it’s stick, I did secure it down really well with a squeegee. Or you can use a brayer. I was lazy and didn’t go grab it in the other room. Now, if the paper had started to shift, I would have gotten up and gotten the brayer or grabbed a new cutting mat.
I sponged on color to the flowers and the leaves and then shaped them before assembling all together. It can make a big difference in the final results of the project with just a few simple touches.
This project started out totally different than a card design. I love it and it’s a good thing I can create more otherwise it might never leave my studio.
I was playing around with a Two-Tone Metallic Spray – Fuchsia & Gold by Hero Arts and now I feel like using it on all my projects. Everything needs to be bright pink with gold flecks right! Well, maybe not everything. Hero Arts has other colors too!
The idea started out with spraying the flower layers to add coloring to the solid pink cardstock. I sprayed it on top of my Glassboard mat and then used a sheet of mixed media paper and picked up excess ink to create a background paper that I cut up for the bottom half of the card. The Glassboard mat is so easy to clean up that I find myself working with more mixed media and messy things.
The flowers and greenery were scaled down to fit this 4.25″ x 5.5″ card design. I added a few splatters of the Two-Tone Metallic Spray – Fuchsia & Gold to the card base. Instead of spraying it on, I took the cap off and splattered it to give it a different look.
I used a paper curling tool to give the flower layers dimension and next reached for my shaping kit to hand embossed the greenery to add more texture to it too. After that I curled the leaves a bit with a curling tool too. Then grabbed an extra Happy Birthday sentiment from a previous project and popped that up with some foam tape. For this card, I also used 2 other adhesives – an adhesive tape runner for the large piece adhered to the bottom of the card base and the Precision Glue Press with the glue it came with to adhere the flower layers together, the greenery to the card, and the flower on top.
I added some gold shimmer trim that is adhesive backed in the middle of the card base. Unfortunately, this is a Close to My Heart product that is no longer made, but I’m using my stash.
Add flowers on top of a box to create a unique gift box or decoration. I used both flower shapes in the flower design to create these box toppers.
This box is originally designed with a cherry flower top, but why stop there! Swap out the flowers and watch it change the look of this Silhouette flower project.
This box is a unique design and easy to put together too! But if needed, there is an assembly video too – find that HERE.
I used several patterns and printed my own pattern paper for the boxes.
For this one, I didn’t even use the registration marks to print it. I added an offset of the box only and then filled the offset design with the pattern. Using a Silhouette mat and loading the mat next to the load line, I sent it to cut. With the manual print bleed, even if it was off by just a little bit, you won’t be able to notice.
I don’t recommend this method if you are needing completely accurate cuts, but it can work for some designs and projects such as this one.
By adding the print bleed around the entire design, I gave myself a better chance that it wouldn’t matter if the cut was off by a little bit.
3-D Flower file as a background pattern – say what! Yes! I took the flower and a leaf design and added a pattern fill to both, then used it as a background to create bookmarks.
Here is a look at the file in Silhouette. I set up the bottom 2 bookmarks to use foil on, even though it looks the same in the software as the print and cut, the bottom 2 have a sketch fill added to them, so when I go to print, it is not going to print that design.
I will say, it is much faster to just simply print and cut a design. Foiling does add setup and completion time, but sometimes it can be so worth it!
However, any time you add another factor into a project, you also increase the chances of something going wrong. I should have known better and either test foiled or not trusted Silhouette settings. In this version of Silhouette Studio 5 that I am using, it does not have a material preset for foiling on cardstock, so I had to add that in. And then the preset for force is 15 set by Silhouette. We have told them many, many times that it is too much and I should have decreased it even more. I changed it down to a 10 and that was still too much.
I just let it finish – it was ruined anyhow. If this happens to you – you are perfectly normal. Well, at least we are in the same boat together – I’m not sure I’d say I’m “normal”. LOL!
Let’s just say – HOT MESS!
But, don’t give up! I adjusted the force down to a 2, which is still probably too high and I sent the second design to foil.
Once the foiling was done, I added a holographic overlay sheet on top of the bookmarks and sent that to cut.
In the end, I have 5 new bookmarks created with the flower design from this month’s collaboration. And one design that’s got some blank foiled areas and extra glitter on it where it shouldn’t. But it could still be used as a bookmark.
These little pink flowers started out much bigger. I cut the flower shape from Silhouette Shrink plastic and then watched it transform under a heat gun. Instead of letting the shrink plastic flatten out, like you would with charms, I shaped them instead. Once they curled up, I stopped applying heat and pushed the end of the Silhouette spatula into the center to form the middle of the flower. Then I glued in a yellow bead. And the finishing touch was painting on Mod Podge Sparkle to give it a bit more fairy touch.
I wanted to maximize the space I could on using the Silhouette Shrink Plastic. Since I was cutting a flower shape out of the material and did not need accurate placement, I added a fill pattern to a 8.5″ x 11″ rectangle and centered that on the letter size media page. I used a Pastel Pink Bokeh Background pattern by Sarah Hurley – Design #469254 in my final print.
I then printed out the entire page. I checked the “Show Print Border” so that I knew where the edges of the print out would be on my printed page and I could then place the designs within that gray border.
Then I simply filled the page with different sizes of the flowers and cut out the shapes from the printed page. No registration marks needed.
I didn’t need the entire page of flowers, so I added in some hearts with another project in mind. Here is a look before adding heat to shrink them down.
I would recommend cutting extras of whatever you are working with and playing with the shrink plastic. It can be a bit unpredictable when you add that heat and take a few practice runs to get it to mold how you want.
This was actually the second sheet of flowers I had cut because I wasn’t quite thrilled with the first color pattern I’d chosen. I didn’t feel it was a bright enough pink for the project and the vision in my head.
A few tips for working with shrink plastic:
colors can change & darken as it shrinks – keep this in mind when choosing a pattern or color palette. The color gets condensed when it shrinks down. If you have dark colors, it can look black after shrinking.
any type of plastic can dull the blade quicker than other materials. The settings may need to be adjusted or a new blade needed the more you cut. It’s always a good idea to have an extra blade on hand.
carefully remove the shrink plastic from the backing layer after it’s cut. It can tear or break off during this process if handled too rough or if the design is too intricate.
Printing an entire page with a background can be an option for some projects. If you do need exact placement around a printed design, then I would recommend using registration marks so the machine knows where the design is.
A great big thank you to Daniela at Flavir Design for contributing the free file for the Silhouette Secrets+ newsletter for the month of January! If you missed grabbing the free design in January, grab it HERE and start creating!
This year I started offering a free file each month for Silhouette Secrets+ newsletter subscribers. I love designing in the Silhouette Studio software and have shared some of my creations as well as look forward to collaborating with more artists in the future too!
Silhouette Secrets+ Newsletter
Never miss out on the news, tips, “secrets”, deals, classes, and more that I share on Silhouette Secrets+. Sign up for the newsletter and get information delivered to your inbox every Friday. Unsubscribe at anytime.
Sign up for the weekly newsletter HERE to have information delivered direct to your inbox and grab each month’s new freebie.
Did this spark some new creative ideas for you? It’s always inspiring to see how a single flower and greenery design can bloom into so many completely different projects! I had so much fun reimagining this one design across five unique creations and showing just how versatile a single file can be. If you’re looking for even more inspiration, tips, and creative project ideas, be sure to browse the Crafting Creativitysection on the Silhouette Secrets+ website — click HERE to explore!
Save this for future reference by pinning the image below.
Enjoy !
THANK YOU for your support! How can you help? Click HERE & buy a coffee. Every little bit helps with the cost of running the site.
Silhouette Classes
Never stop learning! Let me help you take the anxiety out of learning with Silhouette and get to creating faster! My Silhouette classes are heavily focused on software, so you can take the skills & techniques taught and apply them to many future projects!
**This post may contain affiliate links. What that means is that I may receive compensation if you purchase through the links I have provided. The price you pay for the product or service is not higher but I may get compensated for sharing.
Creating shaped & layered paper flowers is all about the details. In Creating Layered Paper Flowers with a Silhouette Cameo: A Behind-the-Scenes Crafting Process, I’m sharing a closer look at the full creative journey behind my layered paper flower bouquet. This blog post goes hand in hand with the new YouTube video, where I walk through the behind-the-scenes process, helpful cutting tips, shaping techniques, and see the complete supply list below too. You’ll see how flat paper designs can be transformed by adding dimension, shaping each layer, and assembling them together to create full, eye-catching paper flowers using the Silhouette Cameo.
Affiliate links may be present in the following blog post and as an Amazon Associate, I earn from qualifying purchases.
Watch the Video & See the Details!
Head over to the Silhouette Secrets+ YouTube channel to catch the full behind-the-scenes video, then scroll down to explore the finished flower photos and the complete supply list for creating your own layered paper flower bouquet.
I had so much fun creating these layered paper flowers and greenery. Time is the key factor to completing projects like this. Enjoy the creative process!
Save this for future reference by pinning the image below.
Enjoy !
THANK YOU for your support! How can you help? Click HERE & buy a coffee. Every little bit helps with the cost of running the site.
Silhouette Classes
Never stop learning! Let me help you take the anxiety out of learning with Silhouette and get to creating faster! My Silhouette classes are heavily focused on software, so you can take the skills & techniques taught and apply them to many future projects!
**This post may contain affiliate links. What that means is that I may receive compensation if you purchase through the links I have provided. The price you pay for the product or service is not higher but I may get compensated for sharing.
The Silhouette Curio 2 Leather Carving Knife opens the door to a whole new level of creative possibilities for leather projects—and getting great results starts with knowing how to use it correctly. In this post, I’m sharing my brand new video tutorial that walks through using the Silhouette Leather Carving Knife with the Curio 2, including setting up custom cut settings, what to watch for during carving, and real Day 1 testing results. If you’re curious about carving leather with the Silhouette Curio 2 or want practical tips to avoid common mistakes, this guide will help you get started with confidence.
Affiliate links may be present in the following blog post and as an Amazon Associate, I earn from qualifying purchases.
Ready to see the Silhouette Curio 2 Leather Carving Knife in action? Watch the full video tutorial on the Silhouette Secrets+ YouTube channel to see my real Day 1 results, custom settings, and tips for success—then try it out on your own leather projects!
These were the results after 5-6 hours of testing on a full sheet of tooling leather. I cannot wait to share more!
Save this for future reference by pinning the image below.
Enjoy !
THANK YOU for your support! How can you help? Click HERE & buy a coffee. Every little bit helps with the cost of running the site.
Silhouette Classes
Never stop learning! Let me help you take the anxiety out of learning with Silhouette and get to creating faster! My Silhouette classes are heavily focused on software, so you can take the skills & techniques taught and apply them to many future projects!
**This post may contain affiliate links. What that means is that I may receive compensation if you purchase through the links I have provided. The price you pay for the product or service is not higher but I may get compensated for sharing.
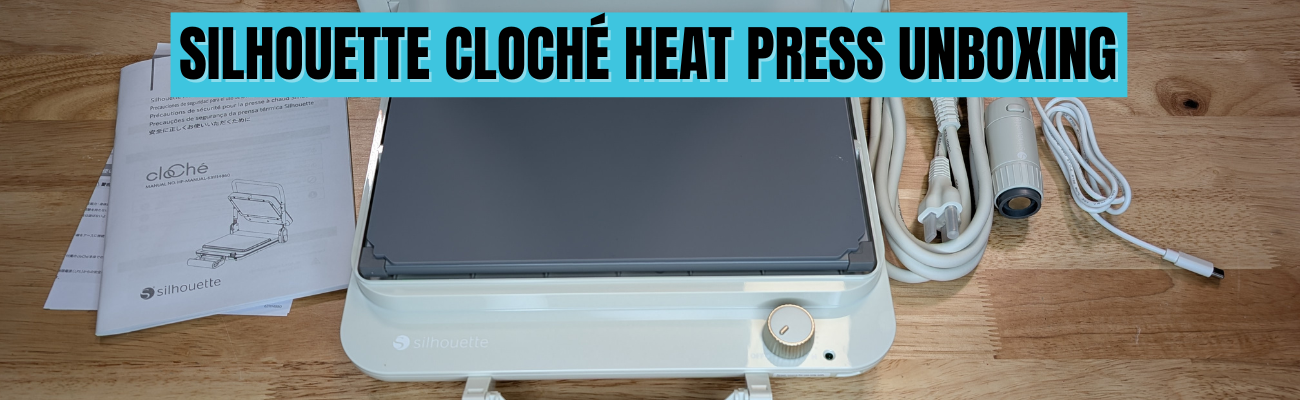
When the Silhouette cloChé Heat Press first arrived, I am so glad I didn’t rush to put out an unboxing. With time and testing, my first impression has changed. In this post, I’m sharing a full Silhouette cloChé heat press unboxing and in-depth review, including my initial impressions, the testing I did, the projects I completed, and my honest thoughts five months after unboxing. If you’re wondering whether the cloChé (or cloChé Petite) is worth adding to your craft room, this long-term, real-use review is designed to help you decide with confidence.
Affiliate links may be present in the following blog post and as an Amazon Associate, I earn from qualifying purchases.
In this blog post, I’m sharing my thoughts and recommendations along with some still shots below, but you can also find the full unboxing and review on the Silhouette Secrets+ YouTube channel HERE.
The Silhouette cloChé can be found at Silhouette America and is available in Milky White, Chiffon Pink, and Ice Green. Mine is Milky White.
In full disclosure, Silhouette America did send me the Silhouette cloChé Heat Press for testing. I was not paid to do this review and all results and opinions are my own.
Silhouette cloChé Heat Press Unboxing
This little Silhouette cloChé Heat Press is well packaged. In the box is the main heat press body, the power cord, the cloChé Petite with it’s power cable, and an instruction manual with supporting papers.
The Silhouette cloChé is small, compact, and weighs 11 lbs. It has a unique design that reminds many of a panini press. The heat press platen is 6″ x 10″.
The Silhouette cloChé Petite is an accessory that is only available with the Silhouette cloChé Heat Press. It comes packaged in a bag along with the Silhouette cloChé Heat Press power cord in the box. It can be stored on the underside of the Silhouette cloChé Heat Press.
The Silhouette cloChé Petite can be powered by plugging in the included cord to the front of the Silhouette cloChé Heat Press.
Silhouette cloChé Heat Press Unique Features
The Silhouette cloChé Heat Press has some unique features to it that makes it stand out. One is the handle on the front of the machine. This is how the heat press closes and creates the pressure.
Photo from Silhouette Summit 2024 taken by me
This handle design takes a bit to get used to locking and unlocking. While these features seem awkward at first, the more you use it the easier it gets.
The handle is composed of several moving parts and it can come apart. That doesn’t mean it’s broken. It can easily be put back together. Simply and carefully “pop” it back into place. I mention this because it can catch you off-guard if you don’t know before it happens. It happened when my friend and colleague, Sarah, first used it at the demo at Silhouette Summit 2024, which caused the Silhouette staff member to quickly fix it, so we were aware of this already. I’ve had it happen a couple times in the 5 months of testing before I write this.
Another unique feature is the lock when you raise the top platen of the Silhouette cloChé Heat Press. For me, this also takes some getting used to pressing the lock before you can lower the top platen again. This is a safety feature and just like the handle, just takes time to get used to.
The next unique feature is the On/Off switch. This is a dial that does not have temperatures. It does have several different settings indicated with a L-M-H setting dial.
This is very different than any other heat press and definitely takes time to get used to. For most regular HTV, I’ve been using the M setting. In the User Manual it does show this table.
The guide is in degrees Celsius. L is approximately 120 °C = 248 °F, M is approximately 160 °C = 320 °F, H is approximately 200 °C = 392 °F.
This definitely takes some getting used to and you just need to test with your materials. One thing I have found is that letting things cool a bit before peeling the carrier sheet can help.
The Silhouette cloChé also has a 45 second timer that begins when you close the press and lock the handle. I ignore the timer completely and just count myself. Then test. This is another area that will require some testing and seeing what works for you.
I did test a sublimation design which I’ll share later in this post and I cranked it up to the High setting and the blank only needed 45 seconds. If you are sublimating and the blank needs longer than 45 seconds, you will either need to listen to the beep or risk lifting the platen and closing the press again to reset the timer.
There are a couple disclaimers in the User Manual that I think are important to point out.
The first is that it requires a 30+ minute cool down period after 1 hour of usage.
The Silhouette User Manual states: “Do not use the machine continuously for more than 1 hour since it may lead to machine failure. If using the machine again, wait for more than 30 minutes before reconnecting the power cable.”
For this reason, I do not feel it is ideal for a business owner or use at an event. If the machine overheats, it can have issues. When at events, most don’t normally have time to give a 30 minute cool down period every hour when making personalized items.
This was stated at Silhouette Summit in 2024 when it was first announced, so it came as no surprise to me. I am glad to see that it made it into the User Manual, so it is clearly communicated to all users.
Silhouette cloChé Heat Press Initial Impression
My first day using the Silhouette cloChé Heat Press was a bit frustrating. This was due to user errors and simply that it is a new piece of equipment. Basically, I got in my own way which caused more frustration than it should have.
It is NOT like other heat presses and I was trying to compare it to others I use.
If I had released the unboxing video after Day 1, it would have been very different than what I’m sharing today. I did not like the Silhouette cloChé Heat Press the first day. However, I’ve been using it for many other projects and the more I use it, the more I do like it and believe it is useful for certain projects and uses.
I would NOT recommend starting with can koozies as a first project. I was looking for something small to create and ended up making my “quick” project much harder. Can koozies can be difficult with a normal press, but I did succeed.
Silhouette cloChé Heat Press Testing
I first started by testing the heat press platen with a digital thermometer. I did this over and over again the entire afternoon.
I tested all 4 corners and the center of the platform and wrote down each reading. The results were inconsistent every single time. Some of the readings would be close to the same temperature, but after repeated results over hours, I gave up on that.
Conclusion: it’s just a different type of press and it will not be a consistent reading across the platen. It can be close, but not perfect.
This is also referenced in the User Manual as well in the photo above – “The L to M to H ranges do not support fine temperature control, and should be used as a guide only.”
So I set it to M and began my first project. First project = first failure.
At least I got the failure out of the way right out of the gate. This was 100% user error. Like I mentioned above, can koozies probably are not the best first project. In general, I think it’s best to let it cool a bit before peeling the carrier sheet off. I did not and that equaled a project failure. I flipped it over and used the other side.
The good news after the frustrating afternoon is that I was successful with my project! Whether it was from determination or stubbornness – the end result was a success.
It worked once I started testing it and stopped trying to make it work like other heat presses. I just kept going.
I also used the Silhouette cloChé Petite to add some individual hot fix rhinestones to the can koozies. That worked too! Again, a little bit of a learning curve and referencing the User Manual to get the Silhouette cloChé Petite connected and powered up.
Once it was finished, I had to test it out with a can in the koozie and it worked. The HTV has stayed in place and the rhinestones were secured. I tried to pick them off with my fingernail and they didn’t budge.
Day 2 with the Silhouette cloChé Heat Press went much better. I came at it from a different mind set and just started playing, testing, and seeing what worked and what didn’t.
Next I tested a full design with Siser Easyweed Adhesive HTV. This is typically designed to be used with deco foils, but I wanted to see what it would look like just by itself on a black shirt.
And then I turned the dial up on the Silhouette cloChé and tested a sublimation project using Artesprix sublimation supplies and a luggage tag. This particular blank only required a 45 second press, so it was perfect to test with.
And then I did another t-shirt design.
For larger blanks such as a t-shirt, you do have to roll the bottom of it up in order to close the handle on the press. This is different and takes time to get used to, but it does work!
I’ve worn this shirt often since creating it and it’s been washed and dried and the HTV still looks great!
The Silhouette cloChé and I had made progress. Day 2 was a success with less frustration than Day 1.
More Silhouette cloChé Projects
Since I did not get the unboxing out right away, I’ve had time to create more projects with the Silhouette cloChé and find I do like/love it more than Day 1. It is a useful little machine, that is also light weight, and compact to store.
I tested Siser EasyPuff Glitter HTV on a canvas zipper bag. Puff HTV can be finicky at times. I used a small pressing pillow with the Silhouette cloChé to account for the seams and get pressure on the design area. It worked!
More faux leather with Siser Easyweed Adhesive HTV. As a note, some faux leather changes colors after being pressed, just in case you decide to try it.
I figured the longer it took me to get the unboxing video edited and the blog post written, the more projects I’d get done to share.
The faux rhinestone design above is with the Silhouette Heat Transfer Vinyl – Silver and is the most recent project as I write this and I had the Silhouette cloChé Heat Press set up on a flimsy folding table. Since the machine creates it’s own pressure with the handle on the front, you don’t have to have a heavy duty table to set the press on. It’s 11 lbs and doesn’t require you to press down to close the top platen, so a lighter table will do.
Pros and Cons of the Silhouette cloChé Heat Press
Pros of the Silhouette cloChé Heat Press
lightweight at 11 lbs
compact
stylish
heats up fast
can be used on a light weight table like a folding table
travels easily
easy to store
Silhouette cloChé Petite included for small projects
Cons of the Silhouette cloChé Heat Press
different than other heat presses
no temperature reading
45 second timer
timer cannot be changed
limited on thickness of items it can press (0.5 mm maximum thickness Silhouette stated)
larger items need rolled for the handle to close
6″ x 10″ platen may require multiple presses of large designs
1 hour usage and then 30+ minute cooldown
Who is the Silhouette cloChé for?
Please keep in mind that this is my opinion only from my background using larger, more industrial heat presses and testing the Silhouette cloChé.
I’d love to say the Silhouette cloChé is for everyone, but that’s simply not the reality. Of course, the same can be said for a large 15″ x 15″ heat press as well. There is no one product that will work for all users 100% of the time.
I would not recommend this for business use unless you are planning to use it for a specific project and can stick within the 1 hour usage time and let it cool down properly before powering on again.
I would say it’s a neat little press for traveling. It’s light-weight and compact, which means it can travel easier than an industrial heat press. I’ve had (2) 9″ x 12″ heat presses that I’ve used for classes and both weight in at 35 lbs. That can be manageable, but also has it’s negatives too when traveling with them. I’ve also traveled with my big presses that are 75 lbs and while it can be done, those suckers are heavy.
The Silhouette cloChé would be good for a crafter who is limited on space and does not need to use a press all day long.
I am loving it for smaller projects and the t-shirts I’ve done have all been successful so far. And now that I found out it will work on my little folding table, I no longer have to clear a spot off my work bench to use it.
It did work for sublimation, but it will have it’s limits on those types of projects due to temperature and press time.
Conclusion
This little Silhouette cloChé has grown on me since Day 1 when I started out frustrated with trying to make it fit into my own heat press idea box. Once I let that go, I’ve had a lot of fun creating with it. I do love that it heats up quickly.
I think you will either love it or hate it. Just like everything else in life. And only you can make that decision. Between the unboxing video and the information I shared above, hopefully it gives you an idea of what it’s all about and if you do get it, don’t judge it too quickly. Give it some time and you might find that the little thing grows on you too!
And additional details on the Silhouette cloChé from Silhouette Summit 2024 can be found HERE.
Save this for future reference by pinning the image below.
Enjoy !
THANK YOU for your support! How can you help? Click HERE & buy a coffee. Every little bit helps with the cost of running the site.
Silhouette Classes
Never stop learning! Let me help you take the anxiety out of learning with Silhouette and get to creating faster! My Silhouette classes are heavily focused on software, so you can take the skills & techniques taught and apply them to many future projects!
**This post may contain affiliate links. What that means is that I may receive compensation if you purchase through the links I have provided. The price you pay for the product or service is not higher but I may get compensated for sharing.
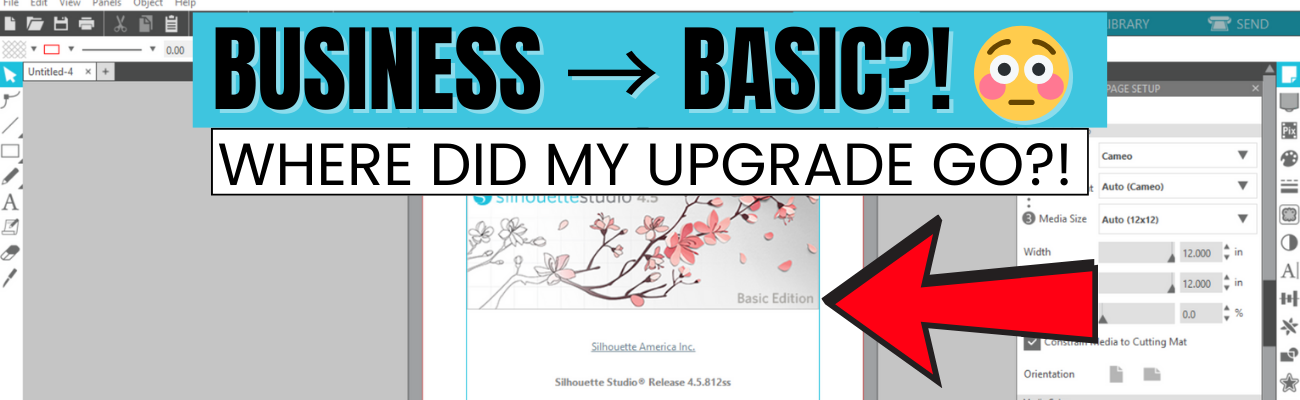
If you’re suddenly seeing Silhouette Studio revert from Business to Basic (or Designer Edition or Designer Edition Plus to Basic) and panicking because your Silhouette upgrade is missing, take a deep breath—you’re not alone, and you didn’t lose your purchase. This is one of the most common Silhouette software issues users run into, and it usually comes down to account login and/or activation, hiccups. In this post, I’ll break down why this happens, what to check first, and how to get your paid features back where they belong. I’ll also link to a detailed video on the Silhouette Secrets+ YouTube channel where I walk through the fixes step by step and share additional troubleshooting tips.
Affiliate links may be present in the following blog post and as an Amazon Associate, I earn from qualifying purchases.
The good news is – YOU can fix this easily. I am providing written information below and have also released a video on the Silhouette Secrets+ YouTube channel that can be found HERE.
Why Silhouette Studio software upgrades disappear?
The most common reasons for a software upgrade to disappear are:
Silhouette Software version update – this does not happen every time you update software versions, but can happen
Computer OS (Operating System) updates – this is on both Windows and MAC computers. Computer OS updates can happen in the background without a user knowing it.
New computer – software upgrade activations are not automatically loaded when you install the software on a new computer
How to Activate a Silhouette Software Upgrade Easily
If you previously had a upgrade active and the Silhouette upgrade is missing, you can easily activate this again simply by going to the top left menu in Silhouette Studio, select Help > Apply Upgrade Edition.
Enter your email address and password associated with your Silhouette account.
At the time I am writing this and recorded the video, I am not recommending Silhouette Studio version 5 due to many bugs in it. If you have a Silhouette Cameo5α (Alpha), then you HAVE to use version 5 and we would recommend v5.0.402 as there a some major issues we’ve seen with v5.0.414. For most Silhouette users, I am recommending v4.5.812 which the screenshots are from above.
Here is a look at Silhouette v5.0.402 and you can see you’ll find it in the same location, however, there is a new splash screen when you open version 5 that you cannot bypass. You can find the Help menu on the new Home Page or on the other tabs in the version 5 software.
If you have never activated a Silhouette software upgrade and you purchased it from a Silhouette retailer, you will first need to apply the upgrade to your Silhouette Account. Please follow these steps to apply the code.
Move to the top right and move the mouse over the person icon, select My Account.
On the left side menu, choose License Keys and apply the Silhouette software upgrade code.
Then follow the instruction shown above to activate the code in the Silhouette Studio software.
This new method of easily activating the Silhouette software upgrades is available in any version of Silhouette v4.4.552 or higher.
Missing Tools & Features in Silhouette Studio?
This is the most common reason Silhouette users notice that a software upgrade has reverted to Basic Edition.
You can easily check what software version and upgrade is active on your Silhouette Studio software and determine if your Silhouette upgrade is missing and not active.
Instructions for Windows users:
Click on Help in top left menu
Then choose About Silhouette Studio
Instructions for MAC users:
Navigate to the top left of Silhouette Studio and select Silhouette Studio in the menu
Then select About
This About window will tell you what version is open and the upgrade that’s active.
If you have a Silhouette software upgrade and it is currently showing Basic Edition in this window, please follow the instructions above to activate the upgrade on your computer.
Silhouette Studio Upgrade Information
Silhouette Studio software upgrades are a one time fee and you do not have to purchase again if it disappears.
The Silhouette upgrades can be active on up to 3 computers or 3 active devices.
With this new system, if you have 3 devices active and log into a new device or Silhouette Web, it will deactivate the software upgrade on the device that is oldest used date. This means you can easily activate the software upgrade on multiple devices, but it will only be active on up to 3 devices at one time.
Something new to mention here is that the new Silhouette Web (still being developed and in beta as I write this), that counts as one of the activations of the software upgrade license. This technically means that if you are logged into Silhouette Studio on your device and you log into the Silhouette web (web based software) on the same device, that it will use 2 software upgrade codes, even though it is the same device.
This is not an issue, but it can catch you off guard when you see the message that one device will be deactivated if you exceed the 3 upgrade log ins.
Silhouette Web is a web based program that allows users who do not have a full computer operating system, such as a Chromebook to connect to a Bluetooth enabled Silhouette machine. It does not have the full Silhouette Studio software option. However, it does have some different features than Silhouette Studio and some of these are only available with a software upgrade. At the time I am writing this, it is still being developed and is changing.
I don’t feel it is stable and there are bugs and issues with it, so I have not done any tutorials with it. To be honest, if you have a computer with Silhouette Studio, I would recommend that to design in.
Another thing to mention here is, if you do decide to try it out, for MAC users, please note that you cannot cut directly from Silhouette Web. This is due to restrictions from Apple that it will not allow a web browser to connect to any outside systems. For Apple users, you would design in Silhouette Web, then open in Silhouette Go (mobile app) in order to connect to a Bluetooth enabled Silhouette machine in order to cut.
Troubleshooting Silhouette Upgrade Activation
If you encounter issues when trying to activate a Silhouette software upgrade, there are a few steps you can do before contacting Silhouette Support.
Try again to log in with the email and password to make sure there was no mistypes or missed keystrokes.
Log into the Silhouette America website HERE. Select My Account under the person icon in the top right > License Keys and do you see your software upgrades?
Log into the Silhouette Design Store website HERE. Can you log in at both websites? The email and password has to be the same on both sites and in the Silhouette library.
If you cannot log in to those 2 websites or the information is not the same on both sites, you can try resetting your password. The password reset is supposed to send a OTP (One Time Password) to your email account. Since the website migration (May 2024), there are issues with this and the OTP does not always come through.
If you still cannot log in or cannot reset your password, then you will need to contact Silhouette Support – support@silhouetteamerica.com
Tips for Contacting Silhouette Support
If you encounter any issues with your Silhouette account and the steps above have not resolved those, you will need to contact Silhouette Support.
Silhouette Support is the only one that can access your account information and investigate or reset things for you.
Here are some tips to help you get resolutions faster:
Email Silhouette Support at support@silhouetteamerica.com – we often have seen users complain they are not getting responses and they didn’t actually contact Silhouette, but had a mistype in their email submission
Provide as much information about the issue you are encountering as possible. Be clear and concise and provide the exact issue encountered as well as the steps you have tried already.
Do not email simply stating “I can’t log in.” That will not get a quick resolution and can be a million different issues.
Provide photos of what you are seeing so the support agent will hopefully understand what you are experiencing.
Follow any instructions and respond to the Support agent with descriptive information on what you did.
Continue to contact Silhouette Support until the issue is resolved.
Don’t be surprised if you get an AI response. This is new and it is Silhouette Supports “quick response”. It will be sent on to an agent after the AI response has been sent. Follow the instructions sent and reply back to their communication.
Don’t be surprised if the Silhouette Support Agent responds with the same response as the AI bot. This is not unusual. Both the AI bot and Support Agent use the Silhouette FAQ to provide initial responses. This is why it’s so important that a user provides as much information as they can when they first contact Support.
Remember that contacting Silhouette Support and stating a basic issue such as “I can’t log in.” or “My machine isn’t cutting.” does not give the Support agent enough information to provide a good troubleshooting answer and they have to start at a million reasons and narrow it down to 1. That can take time and a lot of back and forth with Support. The more information you can provide, the faster your resolution will be … hopefully.
This is one of the most common issues we see users encounter. I hope those tips have helped!
Looking for additional Silhouette Troubleshooting? I have been teaching Silhouette and troubleshooting Silhouette issues since 2016. We have seen a lot of changes and have helped a lot of users. I have launched the new Creative Community with EllyMae where I provide troubleshooting assistance and exclusive monthly tutorials. Find more details on that HERE.
I also have step-by-step classes to help you learn the Silhouette software and your machine – find those HERE.
Save this for future reference by pinning the image below.
Enjoy !
THANK YOU for your support! How can you help? Click HERE & buy a coffee. Every little bit helps with the cost of running the site.
Silhouette Classes
Never stop learning! Let me help you take the anxiety out of learning with Silhouette and get to creating faster! My Silhouette classes are heavily focused on software, so you can take the skills & techniques taught and apply them to many future projects!
**This post may contain affiliate links. What that means is that I may receive compensation if you purchase through the links I have provided. The price you pay for the product or service is not higher but I may get compensated for sharing.
Big news for 2026! I’m thrilled to announce the launch of the Creative Community with EllyMae, a subscription-based space dedicated to crafting creativity and expert Silhouette troubleshooting.
This year, I’ll continue helping crafters troubleshoot their Silhouette projects—but now in a more interactive, subscription-based community. Your subscription supports the costs of hosting, administration, testing, and one-on-one troubleshooting time, while giving you exclusive access to tools, tips, and creative inspiration.
The first month’s exclusive video tutorial is now live inside the Community Forum, and it’s packed with value! I planned for a 1-hour tutorial… but it quickly grew into 1 hour and 30 minutes, plus a 6-minute bonus video where I break down an unexpected tool behavior I encountered during the project. While the design may look simple, this tutorial covers step-by-step instruction, real-time problem solving, and detailed troubleshooting.
Inside this tutorial, you’ll explore Silhouette Studio tools and features, including:
Drawing tools, scaling, offsets, fill colors, line colors, and thickness
Compound paths and the Replicate panel
Spacing tools, turning cut lines on and off, and Move By
Undoing alignment
Print & Cut tips and troubleshooting
…and that’s just the beginning.
Subscription Benefits:
Private Facebook Creative Community: Share projects, ask questions, and get Silhouette troubleshooting help from experienced users. Exclusively for subscribers.
Exclusive Monthly Video Tutorial: Receive detailed tutorials and bonus insights each month.
Future Perks: Additional benefits may be added as the community grows.
Other ways to stay connected and inspired in 2026:
Silhouette Secrets+ Facebook Page: Updates, tips, and inspiration — Follow here
Step-by-Step Classes: Hosted directly on my website with new releases planned for 2026 — Explore classes
Weekly Newsletter: Projects, artist collaborations, news, and sales — Subscribe here
Website Tutorials & Blog Posts: Ongoing tutorials and guides — Silhouette Secrets
If you’ve ever wanted a space focused on education, explanations, and real-world crafting solutions, this community was built for you.
👉 Find all the details about the Creative Community Subscription and join us today!Join Here
Save this for future reference by pinning the image below.
Enjoy !
THANK YOU for your support! How can you help? Click HERE & buy a coffee. Every little bit helps with the cost of running the site.
Silhouette Classes
Never stop learning! Let me help you take the anxiety out of learning with Silhouette and get to creating faster! My Silhouette classes are heavily focused on software, so you can take the skills & techniques taught and apply them to many future projects!
**This post may contain affiliate links. What that means is that I may receive compensation if you purchase through the links I have provided. The price you pay for the product or service is not higher but I may get compensated for sharing.
THANK YOU for your support! How can you help? Click the link to buy a coffee. Every little bit helps in the cost of running the site.