Posted on Leave a comment

DIY Fun Magnetic Bookmarks with Silhouette

Magnetic Bookmarks with Silhouette
Silhouette Secrets+ with EllyMae

Looking to add a touch of personality to your reading experience? Or give these as a gift for an avid reader? Or maybe encourage someone else to read more? In this tutorial, I’m sharing how to create your own unique magnetic bookmarks using Silhouette.

Fun Magnetic Bookmarks with Silhouette

Affiliate links may be present in the following blog post and as an Amazon Associate, I earn from qualifying purchases.

You can head over to the Silhouette Secrets+ YouTube channel for a video tutorial creating these fun magnetic bookmarks or keep reading for the written tutorial below.

Design Fun Magnetic Bookmarks with Silhouette YouTube video

Design Fun Magnetic Bookmarks with Silhouette video HERE

Supplies Used:

*This project can be made with any model of Silhouette cutting machine.

DIY Fun Magnetic Bookmarks with Silhouette

1. Open Silhouette Studio and start by setting up the page size on the Page Setup Panel.

Page Setup Panel Silhouette

2. Click on the Page Setup Panel – Tab 3 and turn on the registration marks. Click on the Restore Defaults button.

Registration Marks in Silhouette for Print and Cut

The default registration marks are where the most accurate print and cut results will be so we always recommend starting there. The farther you move the marks out or smaller you make them, the greater chance of an inaccurate cut.

Check out these tutorials HERE for setting up print and cut for successful results.

3. Use File > Merge to open the graphic if the file is saved to an outside source. If the file is in the Silhouette library, right click on it and select Merge to bring it onto the page you have set up.

Merge Files in Silhouette Studio

I used a transparent PNG file and have Autotrace turned off. Autotrace is a great feature to have, but is not needed for this project. I do not need to excessive data that Autotrace creates when it opens high resolution PNG files. The Autotrace feature can cause slowness and lag on the computer because it has to recalculate all of the cut data each time the user makes a change to the design. Check out this tutorial HERE for more details on the Autotrace feature.

4. Scale the design to the size you want.

Scale Design

Keep in mind if using a PNG or JPEG image, that it is a flattened photo file and you can scale down without losing image quality, but in most cases cannot scale up or it will become pixelated.

Tip: If the PNG or JPEG file opens large, easily resize it by using the Scale down 50% or 33% in the Scale Tools depending on your project and then use the Center to Page to bring it onto the workspace.

5. Open the Trace Panel, click Select Trace Area, and draw a box around the design. Increase the threshold to 100%. Click Trace at the bottom.

Tracing in Silhouette Studio

A basic outline of the design is all that’s needed and it does not have to be perfect.

6. Move the original image away from the cut line. Right click on the cut line and choose Release Compound Path.

Release Compound Path in Silhouette

This will separate any “artifacts” from the outer cut line.

7. Hold the Shift key down and click on the outer cut line only. This will deselect the outer cut line and only the artifacts will be selected. Press delete.

Cleaning up a Trace in Silhouette

Alternate option: Click off the image entirely to deselect everything. Click back on the outer cut line and move it away. Left click and drag the mouse from the top left to the right and down to the bottom right of the original area of the trace area. All artifacts should be selected. Press delete.

8. Click on the trace cut line and open the Offset Panel. Next click on Offset and adjust as desired. Then click Apply or press enter to apply the offset.

Offset in Silhouette

9. Move the original trace cut line off the mat. Keep the original in case you need to go back to it later.

10. Select both the cut line and the design, then Center Align. Then group the cut line and design together (right click choose Group or Ctrl+G is the shortcut)

Center Align Design

In most cases, the design will be exactly centered with the cut line, however, sometimes it will be slightly off. Simply adjust it manually to be centered as desired.

11. Select the design and click on the Replicate Panel. Choose Mirror Above. Use the arrow keys to move the mirrored copy up as desired.

Replicate Mirror Design in Silhouette

Tip: if using text, you do not want to mirror or it will be backwards. Since text is not mirrored, it can affect the outline edge of the offset and they may not line up when folded together. Each design can vary in what you need to adjust to make it match. I’d recommend starting with images first and then play with text as you get more comfortable with the process.

12. Draw a rectangle or shape between the cut lines of the 2 designs. Make sure that the shape overlaps the cut lines.

Connect Designs with a Shape Drawn

If needed, activate the Edit Points by double clicking and move the edit points so that the cut lines are overlapping or make the rectangle larger. Each design may vary in what works best.

13. Ungroup the design from the offset cut lines on both.

14. Select the offset cut line of 1 design, hold the Shift key, select the rectangle in the middle, and select the 2nd offset cut line. Right click and choose Weld.

Weld Offset and Shape to Create Bookmark Background

If something goofy happens with the graphic design, that means it was selected and not the cut line. Use Undo and start again selecting only the cut lines. Click exactly on the red line for it to be selected and use the Zoom tools if needed.

15. Group the entire design together and arrange on the print and cut page.

Designing a Magnetic Bookmark in Silhouette

16. Save a copy of the design.

17. Repeat those steps to create additional designs to fill the page. Save your work along the way.

Magnetic Bookmark Designs

If you have a design that doesn’t have defined outer edges, like the watercolor Crazy Cat image on the top right, you can also use simple shapes like a rectangle for the bookmark shape.

And here is a tip to getting the image to be the exact same distance from the bottom of the bookmark on both sides.

I drew a long rectangle, then sized the image to fit inside of the rectangle design and then used the Align tools to align the bottom of the image with the bottom of the rectangle.

Silhouette Studio Align to Bottom

Then click off the design to deselect it and click back on the image only. Select the Move By Tool, enter the distance amount and press the directional arrow you want it to move.

Silhouette Studio Move By Tool

This moves the image the exact distance in the direction selected. Group the bottom image with the rectangle.

Repeat the same steps for the top image. Align to the top of the rectangle and then used the Move By tool and selected the down arrow. Group the image with the rectangle so nothing moves out of place. Now it is perfectly aligned the same distance on either end of the rectangle shape.

The Move By Tool is a very handy tool to use in designing. Find more information HERE.

18. Print out the page of designs on the desired material. I tested with both the Koala Glossy Photo paper and 110 lb Neenah cardstock. The photo paper was a bit thin, but still worked with the laminate on top of it.

Canon Printer with Print and Cut through Silhouette Studio

19. Apply laminate on top if desired. This will help to protect the bookmark with use.

Apply Laminate on top of printed page

Tip: For best results, do not cover the registration marks of the print and cut with the laminate surface. The Silhouette optical eye can have a difficult time reading accurately on glossy materials due to reflections from that material. This can affect the cut accuracy.
However, the newer Cameo 5 and Portrait 4 are supposed to read better on glossy surfaces, so you’ll see me test that in the Magnetic Bookmark video found HERE. It worked, but it may not work for all users.

20. Place the printed page on the Silhouette cutting mat exactly as it shows on the Silhouette software screen in the top left corner. Make sure to test cut for your materials. And then send the job to cut.

Silhouette Cameo 5 Print and Cut on Glossy Materials

Check the cut before pressing the unload button and if it did not cut through completely, send the job again until you get a clean cut.

Check the Cut Before Unloading

21. Unload the mat, flip the mat over and carefully peel the cutting mat away from the materials.

Flip the Mat over after the cut to Remove

22. Fold the bookmark designs over, line the edges up exactly, and use a bone folder to crease the top.

Line Up and Fold Bookmark with Bone Folder

23. Test the magnets to make sure they will stick to each other.

Test the Magnets

Polarity matters and if the magnet doesn’t line up properly, it will not work. Magnet strength also matters, so make sure to test before applying to the project.

24. With the magnets together, peel the backing off the adhesive side and press down to the inside of the bookmark design.

Adhere Magnets Inside Bookmark

If not using adhesive backed, you will need to add adhesive to one side of the magnet for it to stick to the inside of the bookmark.

25. Peel the backing off the other side and carefully press the bookmark closed along the fold line. This should line up the magnetic bookmark evenly.

26. Relax, read a book, and enjoy! Or give as a gift and share the joy with others too!

Silhouette Cameo 5 DIY Magnetic Bookmarks

But, fair warning…. once you start creating these fun magnetic bookmarks, it can be hard to stop.

Save this for future reference by pinning the image below.

Magnetic Bookmarks with Silhouette Pinterest

Enjoy !

THANK YOU for your support! How can you help? Click HERE & buy a coffee.
Every little bit helps with the cost of running the site.

Silhouette Classes

Never stop learning! Let me help you take the anxiety out of learning with Silhouette and get to creating faster! My Silhouette classes are heavily focused on software, so you can take the skills & techniques taught and apply them to many future projects!

Silhouette step-by-step Classes by Silhouette Secrets+

Silhouette Secrets+ with EllyMae
**This post may contain affiliate links. What that means is that I may receive compensation if you purchase through the links I have provided. The price you pay for the product or service is not higher but I may get compensated for sharing.
Posted on 2 Comments

Waterproof decals with Oracal 651 & Silhouette Printable Vinyl

This post has been sitting on my to-do list for the past year. Yes! An entire year, but I guess all things have their timing. In this case, I made these water bottle decals over a year ago and they are still holding up amazing. So I can share how I did it and share also the longevity of it.

Affiliate links may be present in the following blog post and as an Amazon Associate I earn from qualifying purchases.

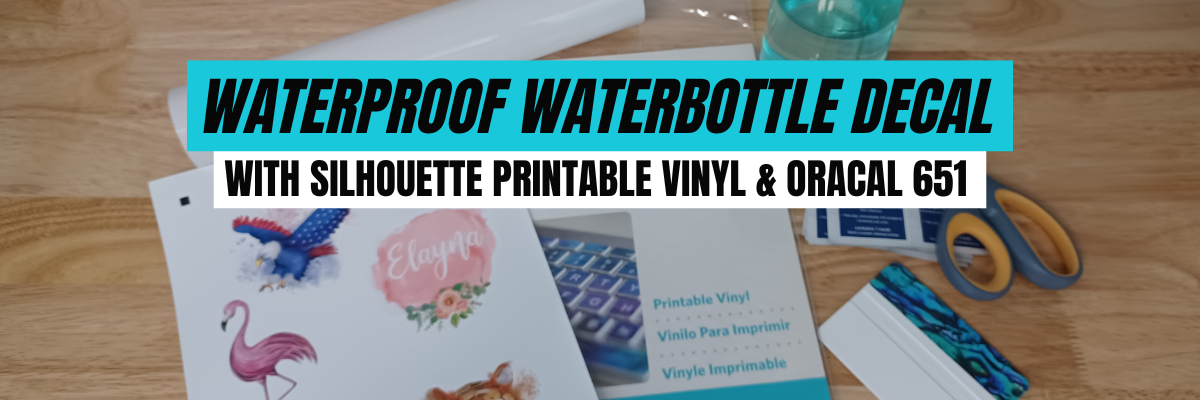
Waterproof Water Bottle Decals with Silhouette

For this project, I used Silhouette Printable Vinyl and Oracal 651 clear adhesive vinyl to create the waterproof decals.

Now, the first thing I want to emphasize is that if you are creating decals to sell, this is probably not the method for you. But, it is a great option for personal use. I’ll explain a bit more as we go through the tutorial.

Supplies used for Waterproof Water Bottle Decals

Designs used in this project:

Creating the Waterproof Decals

Check out the video tutorial on the Silhouette Secrets+ YouTube channel HERE or find the written tutorial below.

Since this was a project for my daughter, she helped with the entire process.

First was picking the designs and setting them up to print and cut with Silhouette.

Once the file was set up, we sent it to the printer.

Make sure that the ink is completely dry before touching when you are doing print and cut. You do not want any part of the design, including the registration marks to smear. Smeared registration marks can affect the accuracy of a print and cut with Silhouette.

After printing, we placed it on the cutting mat and sent it through the Silhouette to cut around the design.

Find more tutorials on Print and Cut with Silhouette HERE or check out my Silhouette class on Teachable – Silhouette Print and Cut Basics to Design Files to Troubleshooting Course HERE.

Next, it was time to setup the offset with the Oracal 651 clear. I recommend saving this file and then using File > Save As to save a file with the offsets, just in case you want to come back to this project later.

Silhouette makes this so easy with Offset Panel. Adjust the distance as needed for your project and your design.

When creating the offset, keep in mind that it’s designed to keep water out. I’d recommend a good size offset, but you don’t want it larger than necessary. Clear as mud right! Each project & design may vary. You want to make sure that the printed material is well protected so water doesn’t sneak in under it.

For more details on Offset in Silhouette, check out this post – Let’s Explore v4 – Offset Panel HERE

I no longer need the graphics or the original cut lines, so I can arrange the offset cut lines to maximize my space on my material and then send this to cut out of Oracal 651 clear.

Clean the surface of the blank with alcohol and allow it to dry. This gets rid of any oils or debris that could interfere with a clean adherence.

Weed the excess away from the Silhouette printable vinyl and the Oracal 651 clear.

Then simply apply the Oracal 651 clear over top of the printed design as centered as possible.

I’m sure you could find many ways to get it lined up exactly perfect, but in reality, I just eyeballed it. If I mess up, I can reprint and recut – So Simple!

It turned out fantastic! Here are the original photos on the day it was created.

That was in August 2022 and it has held up so well. A year later here is what it looks like.

There are a few nicks and dings where she dropped it and some residue from other stickers she thought she could add to it. Those “stickers’ didn’t last through the first wash.

She was headed out the door for her first day of school and we snapped these photos. As you can see it has held up nicely, even with ice water and extended use through an entire year.

Now, a few more tips for success!

  • Make sure to clean the surface of your blank, so you get the best adhesion with your materials.
  • After applying the decal, wait 48 – 72 hours prior to use. I’d recommend 72 hours. This allows the adhesive on the material and vinyl to set up or cure.
  • Then hand wash, no picking, no scrubbing, no dishwasher for best results.

Now, I mentioned at the beginning that if you are a seller, this probably isn’t the best method. Why?

Well, there are few reasons.

  1. The method I used is not UV safe. So it’s not recommended for outdoor use.
    It has worked great for water bottles used daily, but they aren’t out in the sun.
  2. It may not be efficient for mass production. After applying the Oracal 651 clear layer to the printed material, if it’s left too long it could start to cure to the backing of the printed material. For best results, I would recommend for immediate application. But, you never know until you try.

It has worked great for my daughter’s water bottle that she has used almost daily for an entire year and is still going strong.

Save this for future reference by pinning the image below.

Enjoy !

THANK YOU for your support! How can you help? Click HERE & buy a coffee.
Every little bit helps with the cost of running the site.

Silhouette Classes

Never stop learning! Let me help you take the anxiety out of learning with Silhouette and get to creating faster! My Silhouette classes are heavily focused on software, so you can take the skills & techniques taught and apply them to many future projects!

Silhouette step-by-step Classes by Silhouette Secrets+

SS Logo snip it
**This post may contain affiliate links. What that means is that I may receive compensation if you purchase through the links I have provided. The price you pay for the product or service is not higher but I may get compensated for sharing.
Posted on 2 Comments

Summer Days of Downloads!!!

Affiliate links may be present in the following blog post and as an Amazon Associate I earn from qualifying purchases.

We are seeing some cooler temperatures here and in a short time the kids will be headed back to school. The summer has gone too fast!

Although I do enjoy Fall and the cooler temperatures, maybe we can hang onto that summer feeling a little bit longer….

The Summer Days of Downloads hosted
by Heat Transfer Warehouse

I’m so excited to be participating in this!
Heat Transfer Warehouse sent out a request and I’m so glad I answered the call. I love a good challenge and I love learning new things! I’ve been designing in the Silhouette Studio software for over 10 years now and I love to create things!

Grab free designs on the Heat Transfer Warehouse website that are created by other crafters and influencers like me and have fun!

I love how this turned out!!!

Grab the free SVG file HERE at Heat Transfer Warehouse.

I used Siser EasyColor DTV and print and cut with the Silhouette to create my design, but you can use the SVG file for any materials you want to cut it out of! Adhesive vinyl, HTV, cardstock, and more!

And I have a new video out on the Silhouette Secrets+ YouTube channel sharing how I used the file HERE.

I am sharing it all!!! I ran into some issues and things did not go perfect, but I’m going to share how I made it a successful project in the end. From printer issues to user error, I’ll show you how I fixed both!

I love Siser EasyColor DTV and have been using it for over a year now! My shirts have been through 30+ washes and still look awesome! I wear some of them almost weekly. The biggest thing is to follow the directions for Siser EasyColor DTV exactly!
I have several tutorials and updates on my Siser EasyColor DTV results HERE.

Behind-the-Scenes Look

I’ll be sharing a how-to video soon showing the exact steps I took to create this design in the Silhouette Studio software. The hardest part is coming up with the design idea, well…. actually, the hardest part is picking fonts for me. And in this case, I had to use fonts that I knew had a commercial use license and allowed designs to be created and shared.
Make sure to read those terms of use for the fonts and designs you get and know exactly what they can be used for!!!

Here is a behind-the-scenes look at my creation process.

I save my work in many steps along the way in case I mess up or change my mind. Now, this is my working file and I started saving as a back up file along the way too! This way if anything happened, I had something to fall back on and I didn’t lose all the hours of work.

It did take time, but I loved it! I love being able to create things and sometimes I lose track of that in all the hustle and bustle!!! I thrive off of being able to create!

Now, let’s zoom in and did you see these color palettes next to my design?

These color palettes helped me to choose colors for my design! So simple!

Check out this tutorial – Create Custom Color Palettes in Silhouette HERE
I show you exactly how you can use color palettes in your creations!
Want to change up the colors of my SVG file? You can! And you can use color palettes to help too!

Want to create something with this design or simply collect it – grab the file HERE

I would love to see what you create with it!
Feel free to share on the Silhouette Secrets+ with EllyMae Facebook group HERE.

And stay tuned for a how-to video coming soon! I’ll post the link here when it’s complete!

Save this for future reference by pinning the image below.

Enjoy !

THANK YOU for your support! How can you help? Click HERE & buy a coffee.
Every little bit helps with the cost of running the site.

Silhouette Classes

Never stop learning! Let me help you take the anxiety out of learning with Silhouette and get to creating faster! My Silhouette classes are heavily focused on software, so you can take the skills & techniques taught and apply them to many future projects!
Silhouette step-by-step Classes by Silhouette Secrets+

SS Logo snip it
**This post may contain affiliate links. What that means is that I may receive compensation if you purchase through the links I have provided. The price you pay for the product or service is not higher but I may get compensated for sharing.
Posted on 2 Comments

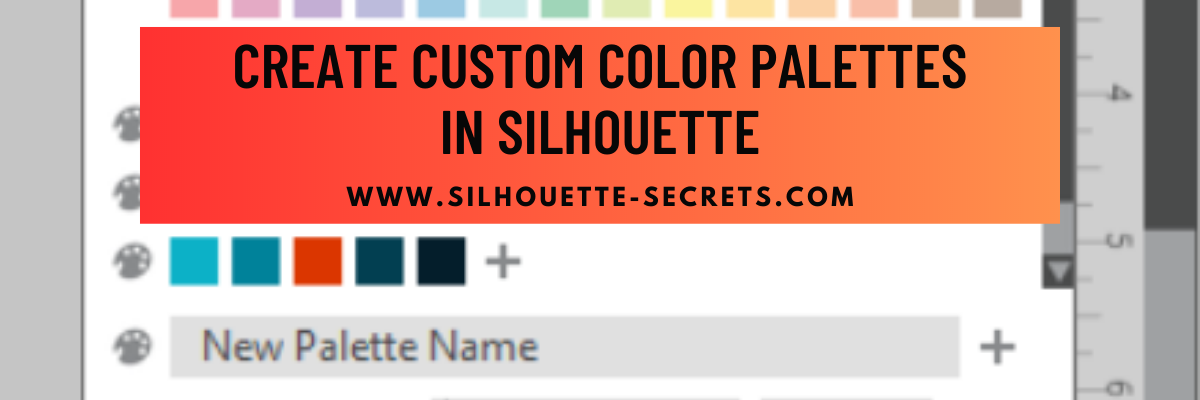
Let’s Explore v4 – Custom Color Palette in Silhouette Studio

Did you know you can add your own custom color palette into the Silhouette Studio software?

This is a feature that was first introduced in version 4.3.263 in September 2019, but I don’t think a lot of users know about it still.

Custom Color Palette in Silhouette Studio

This tutorial is written in v4.5.196.

Today I wanted to share some examples of how you can use this in your projects.

There are a few limits to mention before we get started.

The first I want to mention is that custom color palette’s are computer specific. They are not saved with you “cloud” data, so will not show if you use the software on multiple computers. But, you could easily add them into another computer by saving the original file to your Silhouette library and open on the new computer. Then follow the same steps below to add that custom palette to the other computer.

As you can see in the photo above, the panel space is limited so you will only see a few custom palettes displayed if you create lots.
This can also depend on your screen size. Smaller screens sizes can’t fit as many icons as a larger screen size could. You’ll also see this in the panels displayed along the right side and in the QAT at the top too.
There is a scroll bar on the right side of the panel so you can scroll down and see more of the options you have created.

Also keep in mind that the colors that show on your computer screen may be different than what your printer actually prints. The only way to know what color will print is to test it.

And the media that you are printing on can make a difference in the final color outcome as well. Different brands of media, different types of paper, glossy, photo, matte, etc. can all vary in the final color outputs.

Check out this recent video on the Silhouette Secrets YouTube channel where I shared my results from different brands of sticker paper. I used the same exact print settings for each one and they all had differences.
Silhouette Studio Print Quality Tips and Testing Video HERE

Affiliate links may be present in the following blog post and as an Amazon Associate I earn from qualifying purchases.

How to Create a Custom Color Palette

Let’s take a look at the basics to create a custom color palette.
Here is a video from Silhouette America on how to create a custom palette

Now that we know how it works, let’s take a look at how we can use it in projects.

Now you may be the type of crafter who can pick and choose color combinations easily, but I need help. I found this really neat website called Paper Heart Design Co. and I reached out to the artist, Anne Stout, to ask if I could share in a tutorial.

Anne is a graphic designer and has these amazing color palette’s on her website that caught my eye one evening as I was scrolling through Pinterest and I fell in love.
Not only does she provide a visual of the photo used for the colors, but she also provides the Hex code as well.

When you view the color palette’s on the Paper Heart Design Co. website, the HEX code is listed below the color palette.

This gives you a couple options for working in the Silhouette Studio software.
We can use the eyedropper tool to grab the colors or at the bottom of the Fill Color Panel, you can enter the Hex code for each color.

I saved the specific color palette from Paper Heart Design Co. and then opened it into the Silhouette software. This will be the reference I use to create a custom color palette and change the colors in my design. By creating the custom color palette, I can come back and use that palette over and over again without the setup work.

Using Custom Color Palettes in Silhouette Studio for Designing
Summer by Jillibean Soup – Design #414187

The eyedropper can be found in the top of the Fill Color Panel, while the HEX code can be found at the bottom of the Fill Color Panel.

I created a Summer Color Palette and then used it to change the colors in my design.

Custom Color Palettes in Design with Silhouette Studio Software

I actually really like the navy color the original design had in it, so I worked with it as well, but you could also mix and match additional color palette to add more colors in.

Now, if I want to come back and use this same colors on a different design, it’s all in my Fill Color Panel and ready to go.

You could use this for so many things from printing on actual projects or creating mock-ups to see how a design or color combination can work together.

Here are a couple more that I created using palettes from Paper Heart Design Co.

Use all the colors or just a few from the palette created.

Head on over to the Paper Heart Design Co. website to view the color palettes and find your favorites or check out the ones I’ve pinned on my Color Ideas Pinterest board HERE to help get you started.

Here is another example of using a custom color palette on a more complex project.
This was a class taught by my colleague Barbara Foster of Let’s Go Silhouetting at the All Things Silhouette Conference in 2022.

Adding Custom Color Palettes for Use in Silhouette Studio
Butterfly Flower Mandala by Wispy Willow Designs – Design #320100

We created a custom color palette with the colors of Oracal 8300 we were using for the faux stained glass design and then it also helped to be able to Select by Color and group all the pieces of the design when we went to cut.

Faux Stained Glass project with Oracal 8300 and Silhouette

As I mentioned above, this tool can have many uses.
Here are a few ideas:
– Print and Cut projects: cards, home décor, scrapbook layouts
– custom branding for theme projects
– visual only on screen
– creating mock ups
– testing out material colors
– selecting colors to cut easier on complex designs

Hopefully this information has sparked a creative thought process on how you might use this tool in your projects.

Save this for future reference by pinning the image below.

Create Custom Color Palettes Pinterest

Enjoy !

THANK YOU for your support! How can you help? Click HERE & buy a coffee.
Every little bit helps with the cost of running the site.

Silhouette Classes

Never stop learning! Let me help you take the anxiety out of learning with Silhouette and get to creating faster! My Silhouette classes are heavily focused on software, so you can take the skills & techniques taught and apply them to many future projects!

Silhouette step-by-step Classes by Silhouette Secrets+ with EllyMae

SS Logo snip it
**This post may contain affiliate links. What that means is that I may receive compensation if you purchase through the links I have provided. The price you pay for the product or service is not higher but I may get compensated for sharing.
Posted on 1 Comment

Silhouette Print and Cut Success

Have you tried print and cut with your Silhouette?

It is just one of the many things that you can do with the Silhouette machine.

Today I’m sharing the link to a video tutorial released on the Silhouette Secrets+ YouTube channel that is
5 Tips for Print and Cut Success with Silhouette – Consistent Success!

We troubleshoot thousands of issues each month and in most cases, it’s often something really easy to fix.

In the video I am sharing the top 5 things we see when troubleshooting.

Check it out HERE

I hope these tips help!
For more on Print and Cut check out the header on the blog HERE.

Save this for future reference by pinning the image below.

Enjoy !

THANK YOU for your support! How can you help? Click HERE & buy a coffee.
Every little bit helps with the cost of running the site.

Looking for more in-depth, step-by-step classes, check out all of my online Silhouette classes on my Teachable site HERE.

SS Logo snip it
**This post may contain affiliate links. What that means is that I may receive compensation if you purchase through the links I have provided. The price you pay for the product
Posted on Leave a comment

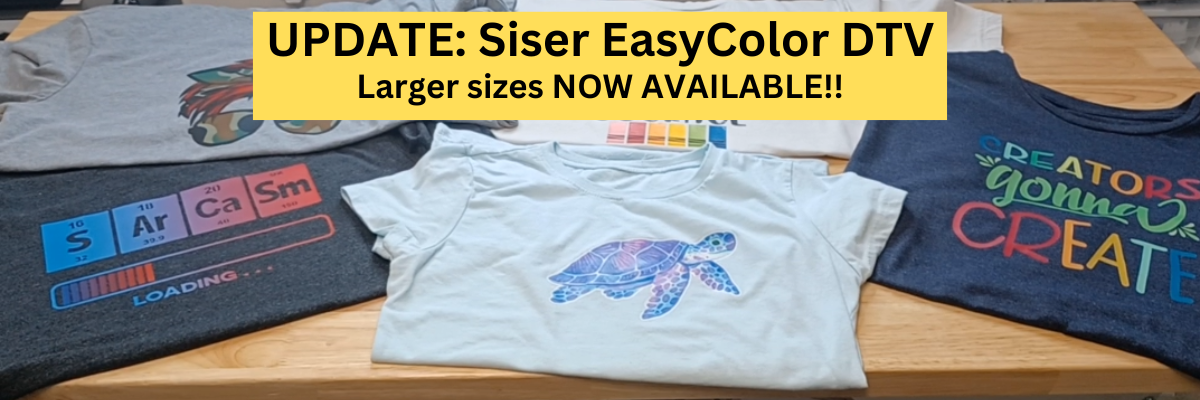
Siser EasyColor DTV UPDATE!!!

Siser EasyColor DTV was released in August 2022 and I have been loving it!

Today I have an update for you on some of the Siser EasyColor DTV projects that I have done and it is now available in larger sizes! Yay!

I wear several of the shirts I made when I first received Siser EasyColor DTV almost weekly.
This means they have been washed over 20+ times and they are still looking great!

Affiliate links may be present in the following blog post and as an Amazon Associate I earn from qualifying purchases.

First, I mentioned above that larger sizes for the Siser EasyColor DTV are now available.
You can grab those HERE at The Vinyl Spectrum.

Supplies used:
Siser EasyColor DTV
Siser TTD Mask (when needed)
Canon TS9521C inkjet printer
T-shirt or blank to apply it to

These are all shirts that I created when I first received my Siser EasyColor DTV in August 2022 and have been washing almost weekly for most of them.
That is 20+ washes for most of them and they still look fantastic.
I can see where the shirts themselves have shrunk or worn, but the DTV is still in great shape!

This is the very first shirt that I made using the Siser EasyColor DTV.
Periodic Table Sarcasm design by Suzanne Cannon – Design #298890

Creators Gonna Create design by Jamie Lynn Designs – Design #295352

Seaturtle Watercolor Printable by La La Shiba – Design #327519

Creativity Takes Courage design by Jillibean Soup – Design #416662

The biggest thing about the Siser EasyColor DTV is we’ve learned new things since it’s first release date.
Check out the instructions from Siser HERE and follow them EXACTLY for the best results.

Here are the biggest things to do for best results
1. Print on plain paper settings.
2. If using TTD Easy Mask, wait 24 hours before masking.
3. After pressing Siser EasyColor DTV, wait 24 hours and wash in cold.
Washing prior to wearing washes out any excess ink that is not soaked into the DTV.
If worn without washing, any contact with water can create water spots in that excess ink and even stain the shirt. It is recommended to wash prior to wearing and I’ve had great results with that!

All printers vary in the amount of ink that is laid down when it’s printing. Test your printer with the specific instructions linked and listed above for the best results.

This new Siser EasyColor DTV has been very, very popular and now with the larger sizes, I know we will see more coming too!

In my experience it has held up well and I am loving it!

Grab yours today HERE and have a play with it!

If you follow me on my Silhouette Secrets+ YouTube Channel or the Swift Creek Customs YouTube channel, you’ll see me wear these often in my videos.

I’ve also put together a quick video update showing up close looks at each of these Siser EasyColor DTV projects on the Silhouette Secrets+ YouTube Channel.
Check it out HERE or below.

Check out more tips for the Siser EasyColor DTV HERE

I’d love to see what you create!
Feel free to post on the Silhouette Secrets+ with EllyMae Facebook Group HERE
or on the Creating with Siser Juliet & Romeo Cutting Machine Users Facebook group.

Save this for future reference by pinning the image below.

Enjoy !

THANK YOU for your support! How can you help? Click HERE & buy a coffee.
Every little bit helps with the cost of running the site.

Looking for more in-depth, step-by-step classes, check out all of my online Silhouette classes on my Teachable site HERE.

SS Logo snip it
**This post may contain affiliate links. What that means is that I may receive compensation if you purchase through the links I have provided. The price you pay for the product or service is not higher but I may get compensated for sharing.