Posted on 7 Comments

Cameo Pro Tips – Must Have Tools & Materials

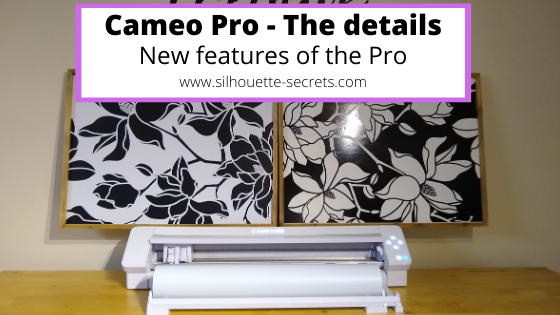
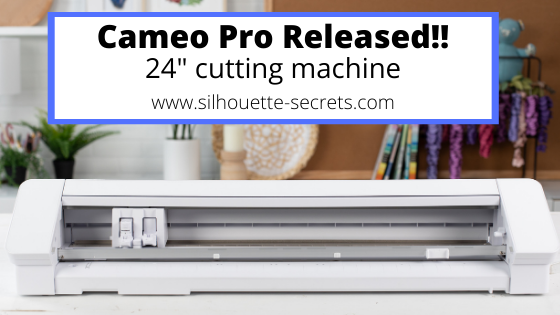
So now the new Cameo Pro has been released and I know many of you have been waiting on this!
Now what?

With the release news of this new 24” cutting machine, I have a few tips to share after testing it the last few weeks. I found that there were several tools that came in handy when using it.

Affiliate links may be present in the following blog post and as an Amazon Associate, I earn from qualifying purchases.

Tools to have on hand

Cameo Pro machine – if you are in the market for a wider cutting machine.
Find the Cameo Pro 24” cutting machine here:
Grab it at Michaels HERE with FREE shipping too!
Pre-order from Swing Design HERE
they are estimating shipping beginning at the end of November to beginning of December
Pre-order at Heat Press Nation
or check at Silhouette America HERE.

Wider materials – now that Pro can cut up to 24” materials, you may need to find a vinyl supplier that carries larger materials.

The two companies I have been ordering from are U.S. Cutter and H & H Signs. As with many other things in the world right now, some colors of vinyl have been unavailable, but hopefully we are starting to see that turn around.

Check out U.S. Cutter HERE

Check out H & H Sign Supply HERE

I would suggest seeing who has the items you need in stock. I found it didn’t take me long to hit the free shipping threshold at either company.

Larger blanks – will you be making signs? Where will you get the larger wood blanks? Or just larger blanks in general. I grabbed them from Hobby Lobby and Home Depot. Whether you buy them premade or make them yourself, it is something to think about.

Weeding tool – a good weeding tool is a must when working with vinyl big or small. These reverse tweezers by EK Success are my favorite and I have several pairs in my studio just in case one finds a very “safe” place to hide. Each user will find the tool that works best for them. I like these because they have a sharp point and then I can grab the vinyl.

Tape measure – this is a must have when working with larger projects. This will come in handy to measure the blank you are working with.

Scissors – handy to have to cut quickly or trim up pieces of vinyl or transfer tape.

Rotary cutter & cutting mat – while not a necessity, these 2 items can come in handy when working with larger sections of materials

Quilting ruler or acrylic ruler – another nice tool to have to go with the rotary cutter and cutting mat

Vinyl Clips – these can come in handy to hold the vinyl rolls together as you are using them and swapping out colors.

Tips

Space for the machine to be setup – you will need space to have the Cameo Pro setup. And you will want to keep in mind the clearance on the front and the back of the machine.

If you are using a 24” cutting mat, you will need an area that has 24” clearance on the front and 24″ on the backside. You will also need a workspace that supports the 24” cutting mat completely and does not leave it hanging down over the edge. If the mat is hanging down, because of gravity it can cause your cuts to be off as it cannot pull the mat in correctly each time.

If the mat is hanging down over the edge of the table like the photo above, it can cause the cuts to be off because the machine is working against gravity to pull the weight of the mat in. This can affect not only the cut accuracy on materials, but also the accuracy on print and cut projects. For best results, have the mat rolling in and out the back of the machine as flat as possible.

If you are using a large roll and cutting large length sections, you will need to have the clearance out the backside for the vinyl to roll out.

Space to work – working with large sections of vinyl, you will also need to have a flat work space with enough space to maneuver weeding the vinyl and applying the transfer tape. I will admit in my house, there are not many flat, clear surfaces, so having a dedicated space for me was a must. 

Practice – while testing this over the past few weeks, I found that even though I’ve worked with these materials for a few years, it still takes practice when working with the long sections of vinyl and transfer tape.

Patience – take time to learn the machine and start off small. Or at least give yourself a break and be prepared to go through some materials if you do start off with a large project. I’ve gone through a lot of vinyl in testing this machine and have to say that a lot of the sections I’ve had to toss have been because of user error.

Test cuts – test cut, test cut, test cut! I cannot say that enough. Not only is each machine different, but you also have the blade life, material differences, color difference within materials, etc. There are several factors that play into the cut quality. And then you also have human error! Make sure to double check your cut settings before you send them to the machine and do a test cut. Especially if you are using the feed option and having the vinyl feed out the backside to the cross cutter after the cut – there is no going back for a re-cut when you do this.

Advance the vinyl just a bit after loading – this will help especially if the end of the roll is curled. Press and hold the down arrow on the Cameo touch panel and it will feed the vinyl in just a bit. This will help you save more materials in the long run versus the curled vinyl catching in the machine and causing the cuts to be off.

Vinyl storage – think about where you will store these larger rolls of vinyl. I actually do not have an answer for you on this. You will need to find what works best for you. Right now, mine is still sitting in the shipping boxes as that is where it is the safest.

Check out this video cutting with the Cameo Pro – I have sped up the video as it was a cut that took about 8 minutes.

Keep in mind that this is an 8-minute cut that I have sped up to a video time of 2 minutes. The sound you are hearing is it cutting but also sped up as well.

Silhouette Studio software tips

Update the Silhouette Studio software.

If you currently have a software version installed, you may need to update to the most current version that is available at the release time of the Cameo Pro. This is so that the software can recognize the new machine. You will need to use a software version of v4.4.281 in order for the Cameo Pro to be recognized. I would recommend updating direct on the Silhouette America website HERE.

Choose the Cameo Pro in the machine selection menu on the Send tab.

Change the cut preferences to minimize the roller movement.

On the Send tab, click on the gear icon in the bottom right corner.

Then choose “minimize roller movement”. This will help in re-ordering the cut order to minimize the machine pulling the material in and out more than it has to.

Change the text cut lines to Cut vs the default of Cut Edge.

With the release of v4.3 software version, text now defaults to Cut Edge vs regular old Cut. This makes it appear bold red fuzzy on the Send tab and doesn’t mean you necessarily have to manually weld it now. However, in some version of the software, it does affect how it cuts. It will still cut, but when you have a design and text, the Autoblade will reset the cut settings between cutting the design and cutting the text that is set to Cut Edge.

This can be problematic if you have a large decal and it has cut the design first, so it’s rolled through the entire length of the design and then it has to roll it back to the beginning in order to adjust the Autoblade again before it will cut the text that is set to Cut Edge.

Again, this is a bug and should be fixed in later versions of v4.4+, however, if you select all the text and change it to Cut on the Send tab before you send the design to cut, you can eliminate this possible issue. I learned this the hard way when I sent a group of designs that was 90” in length to cut and it went all the way to the end of the 90” and then rolled it back into the machine to adjust the blade for the text.

Change the feed option for long decals and use the cross cutter on the backside

Under the Preferences in the bottom right corner – gear icon – change the Feed option to Feed and it will then feed out the backside of the machine after the cut. This allows you to use the cross-cutter in the backside and get a straight cut on the vinyl.

There are a few things to note here:

No 2nd chance for a recut.

If you feed it out the backside, there is no way to reset the design and recut it if it did not cut the first time.
Test cuts will be very important here!

Watch where the end of the design is before you use the cross cutter.

You do not want to cut through the design, so double check that it has fed out far enough so the cross cutter does not cut through the design. If needed you can use the down arrow key on the Cameo touch panel to advance the vinyl a little bit more to have a clearance.

Then use the cross cutter to cut the vinyl straight.

Make sure to flip the cross cutter back up after use.

If it is left down, you will have feed issues on the next cut.

And make sure to change the feed back for other projects or the software will remember it the next time.

Feed distance bug

Currently there is a bug if you adjust the feed distance. It may feed out excess vinyl and you cannot roll it back into the machine before using the cross-cutter. To get around this, I would suggest leaving it at the 0.00 distance and then advance it with the arrow key on the panel as shown above. This should be fixed soon in the coming releases of v4.4+.

24” cutting mat tip

When using the 24” cutting mat and the materials are less than 24” wide, make sure to look at the cut border and the on-screen prompts. You will place the material ½” from the left edge so it does not roll under the roller.

In the software when you click on the Send tab, you will also see pop up reminders of this new materials designation. While you can choose for the software to not remind you each time, I would suggest leaving it on for a bit of time to get used to it.

Using other size cutting mats in the Cameo Pro

The Cameo Pro can accept all the other sizes of the cutting mats as well. When you go to load the cutting mats you will choose the inner line that the arrows point to since the mat is shorter than 24″. This should then line up with the cutting grid on the Cameo mat and design screen.

I would recommend that if your material is smaller and fits on the smaller size mats to use those vs wrangling the 24″ x 24″ cutting mat each time.
However, I do love the option of the 24″ cutting mat for larger projects with larger materials.

I hope that these tips help to get you started creating with the Cameo Pro a bit easier!

I would love to see and hear about what you are creating on my Facebook group at 
Silhouette Secrets with EllyMae.

Save this for future reference by pinning the image below.

Enjoy!

This image has an empty alt attribute; its file name is logo.jpg

THANK YOU for your support! How can you help? Click HERE & buy a coffee.
Every little bit helps with the cost of running the site.

Or if you are looking for more in-depth, step-by-step classes, check out all of my online Silhouette classes on my Teachable site HERE.

SS Logo snip it
**This post may contain affiliate links. What that means is that I may receive compensation if you purchase through the links I have provided. The price you pay for the product or service is not higher but I may get compensated for sharing.
Posted on 1 Comment

Maker’s Sign with the Cameo Pro

When I first learned I would be getting the Cameo Pro 24” cutting machine, I started out by making a list of projects that I would want to create, started gathering large wood blanks, and started looking through my Silhouette designs in order to decide what I wanted to create.

I don’t know about you, but settling on a design to make on a project can sometimes be the most time-consuming part for me. Or if I am creating the design, the actual design creation, is the most time consuming because I am overly critical of my design work.

Affiliate links may be present in the following blog post and as an Amazon Associate, I earn from qualifying purchases.

When I saw this design, I thought it would be perfect to add to my Studio/Office. I wanted to take the Cameo part and stretch it to be more like a 24″ cutting machine like the Pro.

I had purchased a large sign blank from Hobby Lobby and started off by measuring the space I had to create the design. Then I drew a rectangle using the Drawing tools on the left and scaled it to the size I had measured of my design area on the sign using the Transform Panel – Scale tab.

I then opened the Makers Gonna Make file by Planeta Silhouette – Design #324370.

The design opens about 9.6” in size, so I grabbed the corner bounding box and scaled it larger.

Since I have a large size, I want the design to be even larger to fit the space, but just stretching it may not look ok. I right clicked on the design & chose Release Compound Path. For this particular design ungroup was not an option. Each design may vary in what you need to do to adjust and alter it if desired. The easiest way to work with this right now is if I change the color of the rectangle and the design to be transparent under the Fill Color Panel.

When the compound path is released, it breaks the design up into individual pieces.

Notice that each piece now has a selection box around it. This includes the insides of the k, a, e, o. It takes the design apart. Now, we have to put each piece back together so when we move the design it all moves as one piece and when filled with color it will look normal again.

Compound paths can be one of the hardest things for a Silhouette user to understand. Check out this post for more details & examples of compound paths and working with them – Compound Paths.

Select the entire word of Make, including the insides of the a, k, e, and r. Then right click and choose Make Compound Path.

There are multiple ways that you can select multiple objects together in the Silhouette software.

Here are 2 ways:

1 – Click on the red line of the object, hold the Shift key down on the keyboard and then click on each of the red lines of the other objects you want selected, keeping the Shift key held down the entire time.

2 – Left click the mouse button and hold it down and drag it across the entire design making sure to touch each object you want selected. Whatever the selection box touches when you do this will be selected.

You can double check that the Compound Path worked properly by filling the design with color after you have completed this step. For example, here is how it would look before and after the compound path is made.

For all the objects that have multiple pieces, select the full design, right click, and choose Make Compound Path. For this design, that is everything except the hearts.

Now, I can start adjusting the individual pieces of the design.

Since my sign is 26.75” wide, I can stretch the design to fit this size, starting with the Cameo machine image. Since I now have a 24” Cameo Pro, I wanted it to resemble that as close as it can without distorting the image. Keep in mind that you can stretch a design lengthwise, but it may not always look the best when you do. Each design is going to be different in how it reacts.

Adjust the design until you are satisfied and then click on the Send tab in the top right corner. Choose the Material and adjust the cut settings if needed.

Do a test cut! I’ll say that one again. Do a test cut!
The test cut will be your best friend and save you from wasting a whole lot of materials before you send your full design to cut and find it did not work.
You can either use the test cut feature on the Send tab in the bottom right corner or create your own by typing out a capital B and then using that and moving it around the design mat as needed.

And then after you have double checked the material settings and done the test cuts, click on the Send tab in the bottom right corner to send your design to cut.

Note: the video speed has been increased on this video.
The total cut time was approximately 8 minutes.

After it’s been cut comes the time to weed and apply the transfer tape. Keep in mind that this video is a time lapse video and took much longer than the 7-minute video total.

The 2 biggest tips I can suggest are to be patient with yourself and it takes practice to work with the large decals. I don’t even want to tell you how many times I cut and weeded this design. Here is one “oops” to show you.

It all goes great until the very end! And that is just how it happens. Kick myself a little bit and then the best part is, I can go back to my machine and cut it again. It is all a learning experience.

It will take time to practice working with large designs.

And I love it in my Studio/Office!
That space needed something and I think this fit just perfect!

I can’t wait to share the other projects I’ve been creating with the Cameo Pro.

For more information on the Cameo Pro, check out these 2 posts:
Just Released – Cameo Pro 24″ cutting machine
Cameo Pro – The details – New features of the Pro
Find the Pro at Michaels HERE with FREE shipping too!
Pre-order from Swing Design HERE
they are estimating shipping beginning at the end of November to beginning of December

Now, do you HAVE to have a Cameo Pro to complete this project. The answer is NO! You could ungroup this design and cut it in sections with any Silhouette machine, even the Portrait. You would just apply the vinyl in the sections that you cut it in individually on the wood board.

I would love to see and hear about what you are creating on my Facebook group at 
Silhouette Secrets with EllyMae.

Save this for future reference by pinning the image below.

Enjoy!

This image has an empty alt attribute; its file name is logo.jpg

THANK YOU for your support! How can you help? Click HERE & buy a coffee.
Every little bit helps with the cost of running the site.

Or if you are looking for more in-depth, step-by-step classes, check out all of my online Silhouette classes on my Teachable site HERE.

SS Logo snip it
**This post may contain affiliate links. What that means is that I may receive compensation if you purchase through the links I have provided. The price you pay for the product or service is not higher but I may get compensated for sharing.
Posted on 10 Comments

Cameo 4 Pro New Features

Cameo 4 Pro New Features

I’m so excited to be able to bring this to you and let you know the new features that the Cameo 4 Pro machine has available.

First, here is an unboxing video of the Cameo 4 Pro. When I watched the replay of the video I had to laugh because I could see how excited I was to open it up and reveal everything. That was my first glimpse of the machine and the new features.

Affiliate links may be present in the following blog post and as an Amazon Associate, I earn from qualifying purchases.
Sponsored post. I was asked to test the machine prior to release and I put in a lot of machine hours putting it through the paces to see how it would perform.
All opinions are my own and from hours of testing with the machine.

If you are looking for the new Cameo Pro, find it at Silhouette America HERE.
Or grab it at Michaels HERE with FREE shipping too!
Pre-order from Swing Design HERE
they are estimating shipping beginning at the end of November to beginning of December

Signs from Hobby Lobby and measure 19.75″ x 26.75″ inside the frame. Decals were cut as one solid piece of vinyl.

First, I will say that I never thought I would have a need for a machine this size. Now, that I’ve had it though, it has not been put away and is always ready for me to start a new project. I have been creating much larger projects than I ever thought I would and am loving it!!! I cannot wait to share those with you.

New Features of the Cameo Pro

The biggest new feature is – it is a 24” cutting machine.
WOW! I know users were asking why only 20” when it was announced at the 2019 Silhouette Summit.
Well, it’s here and it is 24”!!!

New Roller bar – the roller bar on the Cameo 4 Pro has been redesigned and is no longer a roller bar, but a long rectangle bar with the rollers inside of it.

The rollers are located under the bar next to the load lines

And the right roller is under the tab on the right that adjusts along the bar

New guides – with a new roller bar design the guides have also been re-designed. These can be moved along the roller bar to help provide assistance in keeping the material from bubbling up in between the rollers. Position the guides evenly on the material between the rollers for best results. If you look closely under the bar, you will see that they are small wire coils.

New roll feeder – the new roll feeder comes in separate pieces that have to be set under the front of the Cameo Pro. Check out how to add them in the Unboxing video above.
Here is how it should look when set up to cut with a cutting mat. The middle has a larger support to help in supporting the cutting mat as it feeds in and out of the machine. I would highly recommend if you are using a 24” x 24” cutting mat that you have it fully supported in the front and not hanging down at all, for best results.
This may mean that you need to have it set up on a larger work surface.

Here is how the setup should look if you are using it to cut off of a roll. The right side of the roll feeder assembly slides in to accommodate smaller rolls.

The new roll feeder has white rollers on it to allow the rolls to smoothly roll back and forth as it’s fed into the machine. On the left and right side, the back white roller can be adjusted for larger or smaller rolls by unscrewing the knob and sliding the white roller in or out, depending on the size of the roll.

Here is the setup for a large roll

And here is the setup for a smaller roll of material. Unscrew the knob on the roll feeder and then slide the back white roller out. Then screw the knob back down to secure the roller.

While I keep my roll feeder setup all the time, all the parts can be nested together for storage except the stability bar. Just make sure to keep all the pieces in a safe place that you will remember for when you need them next.

New load lines – since it is a cutting width of 24” there are now 2 load lines for lining up the materials depending on whether you are using a 24″ cutting mat or no mat.

 Here is a photo showing vinyl loaded in the machine when cutting off a roll.

New Autoload feature – this was released with the v4.4.270 software and works for all Cameo 4, Cameo Plus, and Cameo Pro machines. Tap the load button on the machine and it will begin to blink. Then hold the material or mat up to the rollers and the machine will pull it into the machine.

This is the material/mat sensor that the machine uses to identify that a material has been placed up to the rollers. Make sure that this is free and clear of debris

Keep in mind, if the material is not pulled in evenly on both ends, you may have cutting issues. Unload the material and try again for best results until it loads evenly on both ends.

New software version – with each new machine release, a new software version has to be released in order for that machine to be recognized by the Silhouette software. At the time of release the software version is v4.4.280 and you will need to download that version or higher directly from the Silhouette website in order for the software to show the Pro options or recognize the Pro.

I cut all of the Oramask stencil vinyl for my Halloween décor and all the vinyl for my front door decorations with the Pro and it worked awesome!
Check out this post to see all the signs that I created with it.

In the past few weeks, I have cut yards and yards of vinyl. I have also had lots of user error when testing out this new machine as well. None of it was the machines fault. Just a learning curve to working with much larger decals than I could previously cut in one piece.

Just as a note, when testing a new machine, think twice before sending a set of designs that measure 90” in total all at one time. There was no need to send them all at once to cut, but I tried it. It worked for the most part. Live and learn!

I have been having a ball testing this new 24” cutting machine and what it can do.
Stay tuned for more tips & projects completed with the Cameo Pro.

Want to add this new tool to your studio, find it here at Silhouette America HERE.
Or grab it at Michaels HERE with FREE shipping too!
Pre-order from Swing Design HERE
they are estimating shipping beginning at the end of November to beginning of December

I would love to see and hear about what you are creating on my Facebook group at 
Silhouette Secrets with EllyMae.

Save this for future reference by pinning the image below.

Enjoy!

This image has an empty alt attribute; its file name is logo.jpg

THANK YOU for your support! How can you help? Click HERE & buy a coffee.
Every little bit helps with the cost of running the site.

Or if you are looking for more in-depth, step-by-step classes, check out all of my online Silhouette classes on my Teachable site HERE.

SS Logo snip it
**This post may contain affiliate links. What that means is that I may receive compensation if you purchase through the links I have provided. The price you pay for the product or service is not higher but I may get compensated for sharing.
Posted on 2 Comments

Just released!!! Cameo Pro 24” cutting machine

It’s here! It’s finally here! I know some of you are thinking that right now.
But, guess what, it’s even better than originally thought.

Affiliate links may be present in the following blog post and as an Amazon Associate, I earn from qualifying purchases. Sponsored post.

The Cameo Pro is a 24” cutting machine.

Already know you want it – grab it at Silhouette AmericaHERE
or keep reading for all the details!
Or grab it at Michaels HERE with FREE shipping too!
Pre-order from Swing Design HERE
they are estimating shipping beginning at the end of November to beginning of December

It was originally announced at the Silhouette Summit in May of 2019 as a 20” cutting machine. What we saw at the Summit was only a prototype, which means that it is not completely finished product. And that also means that they decide to change it and make it 24” for the final release. Yay!!!!

I’ve been testing this for the past couple of weeks and while I never thought I’d need a 24” cutting machine – I LOVE IT! I have been creating larger projects than I thought I would want. I cannot wait to share those with you, but for now let’s talk details.

Cameo Pro – 24” cutting machine

The Cameo Pro comes with an Autoblade, a Silhouette wrench, and a blue sketch pen adapter.

A 24” cutting mat

The new roll feeder pieces

Usb cord and power cord
Setup card inside the box and on the inside flap of the box

And here are the official specs:

Machine features include:
• 24-inch cutting width
• Adjustable roll feeder for rolled materials with widths up to 24 inches
• Built-in crosscutter to trim vinyl or heat transfer right from the roll
• Matless cutting capabilities (see Tech Specs for full details)
• Compatible with additional tools (sold separately) for more cutting options
• 3 mm clearance
• Automatic tool detection capabilities
• Sleek, compact aesthetic with a sliding lid and a backlit, feather-light touch panel
• Wireless cutting with Bluetooth® connectivity
• Print & Cut registration capabilities
• PixScan™ compatible
• Driven by Silhouette Studio®, giving you limitless design options to customize your projects

Contents:
• Silhouette Cameo® 4 Pro
• Cameo 4 Pro cutting mat (24 inches by 24 inches)
• AutoBlade
• Roll feeder and mat support pieces
• Silhouette Studio® software (digital download)
• 100 exclusive designs (digital download)
• 1-month Silhouette Design Store subscription (available with tool registration)
• Adapter for Silhouette Sketch Pens
• Basic Instruction Guide (digital download)
• Power and USB cables

Where to find the Cameo Pro 24” cutting machine

Right now, you can find this new machine at Silhouette America – check it out HERE
Or grab it at Michaels HERE with FREE shipping too!
Pre-order from Swing Design HERE
they are estimating shipping beginning at the end of November to beginning of December

Unboxing the Cameo Pro

Want to see this machine – check out my Unboxing video HERE

Grab the Cameo Pro 24” machine while it in stock HERE and get to creating!
Or grab it at Michaels HERE with FREE shipping too!
Pre-order from Swing Design HERE
they are estimating shipping beginning at the end of November to beginning of December

Check out this post – Cameo Pro New Features – for all of the in-depth details regarding the Cameo Pro machine.

I would love to see what you are creating with your Silhouette machines!
Feel free to share on my Facebook group at 
Silhouette Secrets with EllyMae.

Save this for future reference by pinning the image below.

Enjoy!

This image has an empty alt attribute; its file name is logo.jpg

THANK YOU for your support! How can you help? Click HERE & buy a coffee.
Every little bit helps with the cost of running the site.

Or if you are looking for more in-depth, step-by-step classes, check out all of my online Silhouette classes on my Teachable site HERE.

SS Logo snip it
**This post may contain affiliate links. What that means is that I may receive compensation if you purchase through the links I have provided. The price you pay for the product or service is not higher but I may get compensated for sharing.
Posted on 15 Comments

Let’s Explore v4 – Line Effects

If you have been around the Silhouette software for awhile, you may or may not have noticed that there was a change in the software. This change seemed to happen overnight and it’s not one that would severely impact a user, but you may see the differences in tutorials.
With the release of v4.2.479, the Sketch Panel changed to the Line Effects Panel.
With this new change came a few more options.

Let’s take a look at the Line Effects Panel and what it looks like in versions v4.2.479 and higher.

Tutorial is written in Silhouette Studio v4.3.372

If a user only has the Basic (free) Silhouette software, then they will have less options in their Line Effects Panel. This is also a change from before. In versions prior to v4.2.479, you didn’t have the option to select anything under the Sketch Panel in the basic version.

If a user has the Designer Edition, Designer Edition Plus, or Business Edition upgrades they will see several more options in the Line Effects Panel.

Line Effects Settings

Let’s take a look at the sections on the Line Effects Panel.

1 – Fill Effects
Add a sketch fill to any design.
The options include: grid, stripe, concentric, spiral, zig-zag, curly, cross-hatched, scribble, and charcoal.

Each of these fills will act differently depending on the design being applied to. Change the Spacing and Angle to see what will look best for the design.

2 – Edge Effects
Add a sketch line to the outside edge of a design.
The options include: plain, scribble, double effect, curly, rough, and charcoal.

3 – Release Effects
Releasing the sketch when it’s finished takes it out of editable sketch mode and then makes it a vector design.

This opens up a whole new world of possibilities in editing your sketch design. Once the sketch is released, then you can access individual point editing on the sketched design and can manipulate it how you like.

Each of the gray points is an edit point that can be manipulated in this design.
Now, not only do you have the gray edit points, but the sketch fill lines have been released so you can move those as well. Keep in mind that a red dot means that it is an open point and not a closed object, so you will not be able to fill this with color. You can move the red dots towards each other and connect the dots to change the sketch fill.
For more information on Edit Points check out this post HERE.

Each of the red lines you see on the screen is a sketch line.
When a design is filled with line style fills, each line is more data. Be patient with your computer in processing all of this data.

On the 2nd tab of the Line Effects Panel, there are even more options that you can adjust the sketch fills with.

Each has multiple options and varies according to what fill and edge effects you have chosen to start with.

Each design you choose is going to vary in what sketch fill looks good, what spacing might work, what angle might work, etc.

The best way to see what is going to work is to just start playing around with your design.

Affiliate links may be present in the following blog post and as an Amazon Associate I earn from qualifying purchases.

I am going to use 3 Fall Leaves by Lori Whitlock – Design #33053 as an example.

Here is the Scribble fill with the spacing adjusted up and the Scribble edge effects.

Here is the cross-hatched fill with the double edge effect.

Here is the curly fill effect with the rough edge effect.

And here is the zig-zap fill effect with the charcoal edge effect.

As you can see, each line effects fill & edge effect will give you a different look.

Now, something to keep in mind is that when you fill the object with sketch fills, you are adding more data with each red line that you add in. This demo page took over 75 minutes to sketch out. There is one drag mark on the page and that is from when it rolled back through to the starting point. I could adjust it a little bit and try to prevent that for future projects. The more you do it, the more comfortable you will feel with it.

You can also add in a cut line, change the color of the cut line, and then use the Cut/Sketch by Line Color to cut out around the sketch designs as desired.
Since I am using a Cameo 4, I do need to swap out the tools, but that just takes a second.
By using the Sketch/Cut by Line Color, I can turn on and off the line color I want to work with so it allows me time to swap out the tools. Just make sure you do not unload the cutting mat after it’s done sketching.

For more information on the Cut/Sketch by Line Color, check out this post HERE.

Sketching can be a lot of fun and give your projects a unique look. Whether you are using a design that you have filled with a Line Style effect or are using the sketch pens with a sketch design as shown below, they are a lot of fun to play with.

I would love to see what you are creating with your Silhouette machines!
Feel free to share on my Facebook group at 
Silhouette Secrets with EllyMae.

Save this for future reference by pinning the image below.

Enjoy!

This image has an empty alt attribute; its file name is logo.jpg

THANK YOU for your support! How can you help? Click HERE & buy a coffee.
Every little bit helps with the cost of running the site.

Or if you are looking for more in-depth, step-by-step classes, check out all of my online Silhouette classes on my Teachable site HERE.

SS Logo snip it
**This post may contain affiliate links. What that means is that I may receive compensation if you purchase through the links I have provided. The price you pay for the product or service is not higher but I may get compensated for sharing.
Posted on 1 Comment

Let’s Explore v4 – Color Fonts

Have you seen these new fun designs called Color Fonts?

I say “new” but they have been around for quite awhile. These have become very popular in the past year or so and the Silhouette Design Store has quite a selection of them.

Affiliate links may be present in the following blog post and as an Amazon Associate I earn from qualifying purchases.

What are Color Fonts?

These are actual font files that contain full graphic images for each letter in the font file. These are graphic images that would be used for print and cut projects. They are not cut files with individual pieces to fit together. It is one image per letter.
Some of these font files may also need to be installed directly onto your computer fonts folder in order to be fully assessible.
Check out Installing Fonts HERE.

The first important thing about Color Fonts is that you have to use a Silhouette Studio version of v4.2.279 or higher in order to access those. A user could still purchase these font styles in the Silhouette Design Store, however, they will not be able to access the file in Silhouette unless they have v4.2.279 or higher.

Next, let’s take a look at an example –
October Monogram Banner Color Font by ScrapNfonts – Design #332495

I am using the Text Tool on the left side, typing out a capital H, and then choosing the Font Style in the Text Style Panel on the right side.

You could also access the font characters under the Glyphs Panel for a specific font style as well. Click on the Text Style Panel – Tab 2 for the Glyphs and then double click on the glyph or character that you want to choose.
The Glyphs Panel is available to those who have the Designer Edition software upgrade or higher.

Notice that the glyphs do not show in full color in the panel, but when you double click on the glyph it will be added to the top left corner of the design mat and show in full color.
You can also increase the size of the icons using the slider bar at the bottom of the
Glyphs Panel.

After the glyph is on the page, click off to deselect it and click back on it one time and you can use the corner bounding box to resize it.

Color fonts are designed as a graphic design to be printed. These are not files that contain individual pieces to cut out and layer on a project.

Click on the Send tab to see the bold red cut lines around the design. You may notice that there are fuzzy, bold red cut lines around the design and that is because it is text. In the v4.3+ software versions, text automatically defaults to Cut Edge and why it appears fuzzy. You can click on the design to select it and then choose Cut and it will smooth out, however, it is only a visual on the screen and does not affect the cut
(unless you are working with text that needs to be welded).

Now for these Color Fonts for most projects, you will want to set it up as a print and cut project in order for the Silhouette machine to read where the design is on the printed page.
For tips on how to set up a Print and Cut project check out this Print and Cut Basics post
HERE.

There is one big thing to note about Color Fonts.

Color Fonts found in the Silhouette Design Store cannot be changed in any way such as welding, converting to path, or releasing the compound path. They have to be used in the exact format that they type out as or they will lose their color formatting.

Check out this quick video demonstration of changing the file.

Color Fonts can be a great addition to your Silhouette supplies!

Heat Transfer Paper applied to a canvas.

Have you tried Color Fonts?
Feel free to share on my Facebook group at 
Silhouette Secrets with EllyMae.

Save this for future reference by pinning the image below.

Enjoy!

This image has an empty alt attribute; its file name is logo.jpg

THANK YOU for your support! How can you help? Click HERE & buy a coffee.
Every little bit helps with the cost of running the site.

Or if you are looking for more in-depth, step-by-step classes, check out all of my online Silhouette classes on my Teachable site HERE.

SS Logo snip it
**This post may contain affiliate links. What that means is that I may receive compensation if you purchase through the links I have provided. The price you pay for the product or service is not higher but I may get compensated for sharing.
Posted on 2 Comments

DIY Halloween Decor with Silhouette

The first thing I’ll say is I don’t like painting very much. And I have been doing a lot of painting. I am not a patient person in some areas. And watching and waiting for paint to dry is one of them. But, I cannot wait to show you all the projects happening behind the scenes here.

This year we decided to decorate for the month of October and Halloween. Our house is at the entrance to the neighborhood, so everyone has to drive by to enter and leave their house. With all of the craziness of the year, we decided to do something fun to hopefully give a few laughs.

I am not sure how your projects start, but this one started as a small idea where I was going to alter a few (6) Styrofoam gravestones and stick them in the yard. Well, that didn’t work and it ended up growing into a much larger project than I originally thought.
But my kids loved it, so it’s all worth it.

Note: this blog post is photo heavy

Affiliate links may be present in the following blog post and as an Amazon Associate I earn from qualifying purchases.

My Silhouette machine was a big help in this project and it would not have been completed without it.

Since altering the Styrofoam gravestones did not work out, we ended up getting a sheet of plywood and some gray paint. I invaded my husband’s workshop (with his permission) and started prepping the plywood. I used a gray exterior paint from Sherwin Williams and painted both sides, so hopefully this decor will last a few years.

After the paint was dry, we started cutting it down to gravestone sizes. Each of the gravestones is an approximately 10″-11″ wide and 12″-14″ tall.

In the end, we ended up with 14 gravestones of varying sizes and shapes. After the stone shapes were cut, they needed another coat of paint in some areas on the edges and the stakes to help seal them.

During the entire process, I was working on the designs and getting the stencils cut out of Oramask 813 stencil vinyl. Remember I said I do not like painting and waiting for it to dry, well this was one way to keep working while waiting for the paint to dry completely, which took several hours per coat.

Here is a quick time lapse video of applying the Oramask 813 stencils.

Keep in mind that this video is a time lapse and in real life it is much slower. Take your time taking the backing off and you can see if there are any areas that do not stick and can push those back down.

I used the font LW Vintage Sign Font by Lori Whitlock – Design #252472 for all of the designs.

And then came the process of taping the signs off and spray painting them.

Each sign was a little bit different in what worked to cover it for painting. In the end, making the stencil cover the majority of the wood and then taping off the edges was the fastest method.

This was one of the first ones I painted and only used cardboard as my barrier around the stencil and you can see how it sprayed in under the cardboard pieces.

Once the spray paint was dry, then came removing the stencils and letting the signs dry completely.

Once they were all complete, we had a gorgeous day to set up the yard and the kids enjoyed helping lay it all out.

The kids added in some skeleton arms coming out of a few graves. These are from the Dollar Tree and supposed to glow in the dark. Here is the left side of the cemetery.

And then the right side of the cemetery.

It is definitely hard to get photos of them at night.

And this year “Jack” our skeleton came back to visit after going on vacation when the pandemic hit.

Check out this post from last October on Silhouette Designs – Part 1 to see some of Jack’s various disguises.

Each time we decorate the door, the kids get to help in selecting what goes on it.
This time my youngest said she wanted Jack to have a thought bubble.
Here are the designs used to create the door decor:
Thought Bubble by Calli Arroyo – Design #223173
LW Bones font by Lori Whitlock – Design #277409
Fence from Halloween Elements font by Sarah Hurley – Design #274612
Tombstone and Crow by Loni Stevens – Design #33479
Jack the Positionable Skeleton by Samantha Walker – Design #4828
and the No Soliciting sign is up year round
No Soliciting by Jillibean Soup – Design #276179
This one has really cut down on the sales people knocking on our door.

A few more things added to the yard decor and I am calling this project finished for this year.

I had been looking for a design for the garden flag that fit in with the rest of the Cemetery theme and knew as soon as I saw this one that it was perfect.
Must Have Wine Design by Megan Hardy – Design #303383

We had a white corrugated sign that was blank on the backside, so I used Oramask 813 as a mask and added my text, then spray painted the entire thing black and removed the Oramask so the white could show through.

This is what the neighbors see as they drive out.

I used Oramask 813 to create a stencil for the signs.

Make sure to let the paint dry well before removing the Oramask 813 stencil. There were a few areas that bled because of the wood roughness and it was easily touched up with a small brush.

And it’s done! The kid’s are already planning things to add to it next year.
I am not ready for that.

Do you have any small projects that morphed into a much bigger project than you thought it would be?
I would love to hear or see it on my Facebook group at 
Silhouette Secrets with EllyMae.

Save this for future reference by pinning the image below.

Enjoy!

This image has an empty alt attribute; its file name is logo.jpg

THANK YOU for your support! How can you help? Click HERE & buy a coffee.
Every little bit helps with the cost of running the site.

Or if you are looking for more in-depth, step-by-step classes, check out all of my online Silhouette classes on my Teachable site HERE.

SS Logo snip it
**This post may contain affiliate links. What that means is that I may receive compensation if you purchase through the links I have provided. The price you pay for the product or service is not higher but I may get compensated for sharing.
Posted on Leave a comment

Silhouette – Friday Favorites

As I write this post, it is Friday. And I need Friday! It’s been a long week and sometimes I just sit down and the only thing I want to do it turn my brain off and scroll through the new designs in the Silhouette Design Store. No thinking, no schedules, no late assignment notifications for virtual school – just mindless shopping.
Maybe there are a few more of you out there with me today!

So today I’m going to quick share a few designs that caught my eye just because!

Affiliate links may be present in the following blog post and as an Amazon Associate I earn from qualifying purchases.

In the Silhouette Design Store is a “New” category and I sit down a couple of times a week, during “mind-less” time and browse it. This section is reset every Monday morning to feature the new items that are released into the store during the week. If I like something, I’ll click on the heart and if I love it and want it now, I add it to my cart.

This week there are almost 500 new designs in the “New” category and why I sometimes shop several times a week.

The Impossible Card Skeleton by Lori Whitlock – Design #332855

While the name says impossible, these cards are pretty easy to assemble.
Check out this post where I created the Happy Fall Impossible Card HERE.

Something Wicked This Way Comes by Sarah Bailey – Design #332770

I’ve been working on Halloween decor, which I cannot wait to show you all!
This one caught my eye for a possible garden flag for October.

Good Witch Until Run Out of Coffee by Megan Hardy Designs – Design #332631

This design has both coffee and wine designs, which are right up my alley.
Of course, I grabbed both!

Scrabble Words Happy Birthday To You by Alaa’ K – Design #332545

I am grabbing this one to add to birthday cards. I am thinking of turning it into a print and cut design for a quick card.

October Monogram Banner Color Font by ScrapNfonts – Design #332495

I grabbed this one earlier this week thinking ahead to a Fall banner after the Halloween decor comes down.

Those are just a couple of the designs that caught my eye this week. I find I like to relax and check out the store “New” category each week, so I don’t have to scroll through so many pages when a really super sale comes up. If they are in my Wishlist, I can find them easily.

Don’t forget the weekly sale in the Silhouette Design Store!
This week is the Autumn Sale – 25%-40% off all designs in the ‘Autumn’ category

And don’t forget about the weekly FREE design!
Grab it with the svg and the Commercial Use license for FREE each week!
This week is It’s Spooky Season by Silhouette – Design #331926

I would love to see which design have caught your eye in the Silhouette Design Store recently.
Feel free to share on my Facebook group at 
Silhouette Secrets with EllyMae.

Save this for future reference by pinning the image below.

Enjoy!

SS Logo snip it
**This post may contain affiliate links. What that means is that I may receive compensation if you purchase through the links I have provided. The price you pay for the product or service is not higher but I may get compensated for sharing.
Posted on 2 Comments

Let’s Explore – Silhouette Layered files

I often see posts or comments on files from the Silhouette Design Store that open up like this.

Blog post written in Silhouette Studio v4.3.372
Affiliate links may be present in the following blog post and as an Amazon Associate I earn from qualifying purchases.

Why?

Why does it open with no color?
Why are all the pieces separated?
Why does it not look like the original example photo?

Trout Card by Jennifer Rush – Design #136886

So let’s take a look at this and hopefully you will understand a little bit better why the files open like this and how to work with them.

Why does it open with no color?

There are probably a couple of reasons this is.
One reason is adding color to a file increases the data size of the file. When I first started with Silhouette 7+ years ago, this is how most files opened. A lot of things have changed in that 7 years with computers, file sizes, and program capabilities.
Keep in mind that any digital file that is loaded somewhere takes up storage space.
Adding color into the file, or multiple colors, adds more code into that file and increases the data size.

Designers create files in different ways and with different programs. Over the years, this has also evolved in that designers are now creating files that will open in multiple programs for multiple machines. They are not just creating a file for Silhouette use only.
Which means that a file has to be universal for all programs.

Why are all the pieces separated?

The reason files were created has also changed over the years. When I first started most files were created for cardstock and paper piecing. Which means that you cut each piece out of a different color of cardstock and then glued them together.
This is what the Trout card example shows.

In the past couple of years, the trend has moved more towards cutting vinyl.
There is also the option to cut by Fill Color which means that you don’t necessarily have to move the colors around on the design mat to cut the file.
This was not an option when I started with my Silhouette years ago.

Something to keep in mind is that once a file is created, the designer doesn’t typically go “re-do” the file just because the trends have changed.
Knowing how to work with files in both ways will be beneficial to you in the future.

Why does it not look like the original example photo?

Typically, the image you see in the file preview is a photo of the completed design. For instance in this example, it is a photo of the completed card.

Tip: when in the Silhouette Library tab, move the mouse over top of the design icon and a little square bracket appears in the bottom left corner. Click on this and a image of the design with information will pop up. This can be a larger photo or clearer photo than what you can see from the Silhouette Design Store page.

How do I work with a file like this?

The great thing about the Silhouette software is that you have the freedom & tools to do so much in it.
You control how things work!

The first thing I do is bring a photo of the design. I am working on a PC, so I use the Snipping Tool. I keep this Snipping Tool pinned to my taskbar because I use it so much.
You can also use a screen shot of the design file as well.

I copy this “snip” and then paste it onto my design workspace. Then increase the size if needed. Note that you may see a yellow triangle appear in the top left corner of the design area. This just indicates that if you printed this image, it would most likely be low resolution and fuzzy. I don’t need image clarity to print as this is just for a visual of the project.

Now, we can start working with the file.
Click on the file and in this case it is all Grouped together. I need to right click on it and choose Ungroup, so then the pieces are all individual pieces and can be edited.

Notice once it is Ungrouped, there are individual selection boxes around each piece. Click off of the grouping and then back on each piece to select individually.

Select each piece and then use the Fill Color Panel and add color to it using the image as a guide.

Keep in mind that the colors do not have to be perfect unless you are doing a print and cut project, the colors do not matter. It will cut out of whatever color material you place on your cutting mat.

Now, if you want, you can move the pieces around to position the image to reflect how it will look when finished. In this case, I do not really need to do this since I will be cutting each piece out of a different color of cardstock and then placing them together.
But, here is a photo of what it would look like if I did. I am going to copy all of the pieces to show it off to the side.

Notice the smaller pieces are all still grouped together. In this case, that is because they will be cut out of cardstock and it is designed to keep them close together to save on materials. You could ungroup it and move them around on the fish to place them, but that is only necessary if you were to turn this file into a print and cut file.

What you will notice is that designs and files you work with will all be different. Whether it is differences in designers and how they are creating the files or in what the original purpose of the file was created for. The more familiar you can get with the Silhouette software, the easier it will be for you to figure out what each file needs in order to complete your particular project.

It is not that the file is created wrong or is a bad file. It is just created differently than others. Some files will require a little bit more work to get it how you want.
I will be 100% honest, there are some files I’ve opened and I just don’t feel like it at the time to work with it. Some days I have the patience to play with it and others I do not.

For instance, this was one of those “nope” days. I know the card will be cute once created, but I just didn’t have the patience to complete it.

Fisherman A7 Card by Snapdragon Snippets – Design #83517

Do you have to fill it with color to use it?

No, it is just an easier way to visualize what colors are cut out of what materials and keep track of what you have cut and haven’t cut.

Cutting the file

Next, on this file, I want to double check the size of the card it will cut.

One of the great things about the Silhouette software is that you can size a design to whatever size you need. If the file is in a file format that can be resized without losing image quality, such as a .studio or .svg file, then you should not encounter an issue.
If it is a jpeg or png file, those are graphics files and cannot be resized without losing image quality in most cases, since the pixel size is set and it’s a flattened graphic.

I used the Transform Panel – Rotate Tab to turn the card design horizontal and I can tell by the measurements on the edges of the card that it is 5.5″ x 8.5″, which means that folded my card will be 4.25″ x 5.5″.
This is a standard card size.

Make sure that if you increase the size of the card, that you also select the entire design and increase the size of it at the same time.

Now, I am ready to cut my file.
When I’m working with a file that has multiple pieces to cut out of several colors, I start with all my pieces on the left side and then as I finish cutting with them, I move them off the cutting mat to the right side. This way I can keep track of what I’ve cut and what still needs to be done.

I also use the Transparency (Reveal) option on the Page Setup Panel to reveal my cutting grid on my mat and then I cut down each color I need and place it in the same location as I have placed on my design mat as shown above.

This saves me time and the adhesive on my cutting mat, so it can make my mats last longer because I’m not removing a full sheet of cardstock/material each time I cut a piece out.
Find more tips on getting the most out of your cutting mats HERE.

After all the pieces are cut, use adhesive to piece the design together.

The more you do things in the software, the more you will pick up.
The best way to learn is to play, play, play.
Check out the full “Let’s Explore v4” series HERE for more information on tools and features in the software.

We’d love to see what you are creating with your Silhouette machine!
Feel free to post photos or questions on my Facebook group at 
Silhouette Secrets with EllyMae.

Save this for future reference by pinning the image below.

Enjoy!

SS Logo snip it
**This post may contain affiliate links. What that means is that I may receive compensation if you purchase through the links I have provided. The price you pay for the product or service is not higher but I may get compensated for sharing.
Posted on Leave a comment

Let’s Explore v4 – Offset & Subtract All

Creating a Layered Design using the Offset & Subtract All in Silhouette Studio

There are times with some designs or materials that you do not want to layer on top of each other. For instance, when working with Glitter HTV, it is not recommend by most manufacturers to layer glitter on glitter. In those cases, you may want to subtract or knock-out a part of the design, so the layers are not on top of each other.

In today’s quick video tutorial I show how to do this using the Offset & Subtract All tools in the Silhouette software.

Blog post & video are created in Silhouette Studio v4.3.372
Affiliate links may be present in the following blog post and as an Amazon Associate I earn from qualifying purchases.

Check out more information on the tools used in the video here:

Let’s Explore v4 – Offset Panel

Let’s Explore v4 – The Modify Panel

The best way to learn the software is to play, play, play. Just open it up and start using the tools. The more you do it, the more comfortable you will get at it.

Follow along using the video and see if you can create a design.
I would love to see what you create on my Facebook group at
Silhouette Secrets with EllyMae.

Enjoy!

SS Logo snip it
**This post may contain affiliate links. What that means is that I may receive compensation if you purchase through the links I have provided. The price you pay for the product or service is not higher but I may get compensated for sharing.