Posted on — 31 Comments

Let’s Explore v4 – Setup Panel – Tab 2

Welcome back to my new series “Let’s Explore v4“!
If you are just joining me you can check out my first post of the series HERE – about Tab 1 of the Page Setup Panel.

Today I am going to be going through the features of Tab 2 on the Page Setup Panel in Silhouette Studio v4.
This panel is located on the right side of your v4 software at the very top.

Tutorial written in v4.1.206

Affiliate links may be present in the following blog post and as an Amazon Associate I earn from qualifying purchases.

This panel is about your Grid spacing. Do you want your Grid to show? Do you want your designs or fonts to ‘Snap to grid’? What increments do you want your grid to show at? What color do you want your grid?

So let’s jump in and go through each option that is available to you. It is all a matter of personal preference and once you understand what each feature does, then you can decide what you want to use.

1 – Show Grid
This option allows you to turn the Grid lines on or off on your Design mat. These grid lines can be useful when you are designing and spacing out objects.Show Grid copy

2 – Snap to Grid
If you have this option checked then your design will jump from grid line to grid line. If you un-check this option you have more control over moving your design in smaller increments.

3 – Show Guides
By checking this option, you can pull “Guides” down from the top ruler or over from the right side ruler. If you click on the ruler, either on the top or right side and hold down and drag, it will drag a “guide” line out and you can place it where you’d like on your design mat. This is another tool used to line up designs or for example make sure you have a design in a square. These “guide” lines do not cut and they do not save to your file. Rulers are an upgrade feature, therefore this is an option only for those who have the Designer Edition upgrade or higher.Guides copy

4 – Snap to Guides
This works the same way as the ‘Snap to Grid’ feature does. If you have it checked and have placed guides on your Design mat, when you move your design, it will snap to the guide lines you have placed.

5 – Ruler
You can turn the rulers that are along the top & right side on & off by selecting this. Rulers are an upgrade feature available in the Designer Edition upgrade or higher.

6 – Crosshairs
This will toggle a cross-hair pointer at the end of your mouse pointer on your screen. If you look closely, you can see the lines running horizontally & vertically from the red square.
Cross hairs_copy

7 – Square vs Isometric
You can choose whether your grid lines show up in a square pattern or for further design purposes, you can change them to an Isometric pattern. Below on the left, I have Square chosen and on the right I have chosen the Isometric.

8 – Spacing
This is used to change the spacing of your grid lines to the increment you want. You can change the spacing by using the slider bar left or right, highlight & type a new number or by the arrow keys to the right of the number.

9 – Divisions
You can choose the number of divisions that your grid spacing is divided into. Below you will see I have my grid spacing set at 2″ for both photos, but the photo on the left I have my Divisions set for 5 and on the right my Divisions are set at 10.

10 – Color
You can change the color that your grid lines show on the screen. There are several colors pre-selected to choose from or you can select a custom color from the color box.Color

These are the features of the Page Setup Panel – Tab 2.
Most of these features are used for designing purposes within the software and you will find each user develops their own preferences for what they see on their screen.

I like to have my mat revealed 100%, while another user may not like that look at all. Now, you know what each feature is and what it does, so you can decide how you like your design mat to look when you are using the software.

I did mention that a few of the features are upgrade features. This means that in order for them to appear on your screen you would need a software upgrade. There are 3 steps of upgrades – Designer Edition, Designers Edition+, and Business Edition. You can find out what features are unlocked with each software upgrade by viewing the chart HERE at the Silhouette America website.
If you would like to purchase an upgrade to your software, I recommend buying through an authorized Silhouette retailer such as Swing Design. After your purchase, you are sent a instant code and can enter the code and activate your upgrade immediately.
Click HERE to be directed to the Swing Design site.

I hope you have enjoyed learning more about the Silhouette Studio v4 software today.

I have made a video of everything covered in the series today.
Check it out here:

The design used in today’s video is called Drink Your Wine We Have Crafts to Do by Lori Whitlock and can be found HERE.

Feel free to post your questions & project photos on my Facebook group at Silhouette Secrets with EllyMae.

Save this for future reference by pinning the image below.

Enjoy !

THANK YOU for your support! How can you help? Click HERE & buy a coffee.
Every little bit helps with the cost of running the site.

Looking for more in-depth, step-by-step classes, check out all of my online Silhouette classes on my Teachable site HERE.

SS Logo snip it
**This post may contain affiliate links. What that means is that I may receive compensation if you purchase through the links I have provided. The price you pay for the product or service is not higher but I may get compensated for sharing.
Posted on — 1 Comment

3D Lantern

As we are all thinking of packing away that Christmas decor, I thought I would share a 3-D project I made to add to my Christmas decor this year. I love working with paper crafts and 3-D items.

Affiliate links may be present in the following blog post and as an Amazon Associate I earn from qualifying purchases.

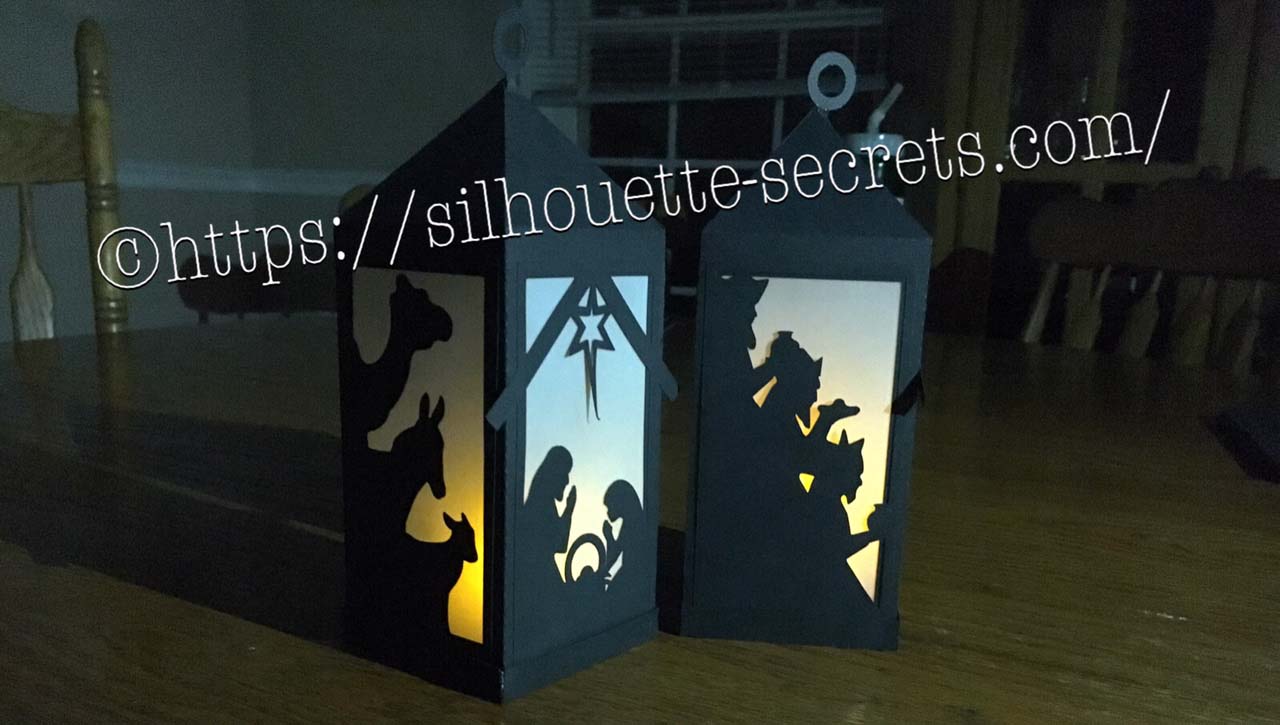
This 3-D Nativity Scene Lantern is from the Silhouette design store.

I have to say this file was pretty easy to work with. When you first open this or any layered design up, it may look a bit intimidating but I promise the more you play with them, the easier it becomes to turn it into a masterpiece.

Nativity Lantern copy

This design has 2 colors – the black for the entire 3-D box and the vellum papers for the “glass” of the lantern, so very easy to cut. First, you right click on the entire design and ungroup. This will separate all your pieces of the lantern out and you can move them around. Then, I will select the like items and group them back together. In this design, I grouped the bottom 3 rectangles back together because they will all be cut from the vellum.  Then I move my other parts around on my 12 x 12 design mat to get as many to fit in the space as I can. In this case, you can move the circle hangers to the middle of your cutout, as shown below, to get a little more use out of your cardstock or position where ever you want on the mat. It is really a personal preference how much you move them around to cut. I like to get as much on one page as possible to send it through the Cameo one time.

Nativity Lantern 2 copy

I then choose the Textured Cardstock setting and Send to cut on my Cameo. After it’s cut, I flip my mat over and peel it away from the cardstock. This helps with the paper not curling as much, keeps the adhesive on your mat and helps it release a bit better. Your Silhouette cutting mat is very flexible and can be rolled back quite a ways. That doesn’t mean they won’t crack, because they can – yep I’ve done that… but it’s was an old mat too…. so it had a lot of miles on it.

In the Silhouette Studio, I move the pieces I’ve cut off my Design mat and then move the other pieces on to the mat to cut them. Or you can copy and paste the designs that are off the Design mat to a new Design mat and cut that way. Either way works and I use both methods depending on what I’m cutting.

Now comes the assembly. These are all scored where you need to fold and then you glue into place. I use a liquid glue called Liquid Glass by Close to My Heart for most of my 3-D projects. You place a small amount along the length of where you are gluing and then I hold for 10 seconds. As long as you didn’t use too much glue, it has a pretty good hold after that 10 seconds. And then you want to allow the entire project to dry completely before using. You work you way around the design until it is all assembled together.

The designer, Jennifer Rush, has also included a link to assembly instructions in the description of the design. You can find those instructions HERE as well.

And now, here are a couple images of the finished project….

IMG_9953_cropped

There are so many cool projects and so little time to make them.

I encourage you to take a design for a spin. Try it out, play and learn as you go.

Now, these neat decorations will get packed away in a shoe box for safe keeping when the Christmas decor comes down this week.

I hope you enjoyed this project! Let me know what you have created below in the comments.

Enjoy !

THANK YOU for your support! How can you help? Click HERE & buy a coffee. Every little bit helps with the cost of running the site.

Looking for more in-depth, step-by-step classes, check out all of my online Silhouette classes on my Teachable site HERE.

SS Logo snip it

**This post may contain affiliate links. What that means is that I may receive compensation if you purchase through the links I have provided. The price you pay for the product or service is not higher but I may get compensated for sharing.

Posted on — Leave a comment

Butcher print painted sign

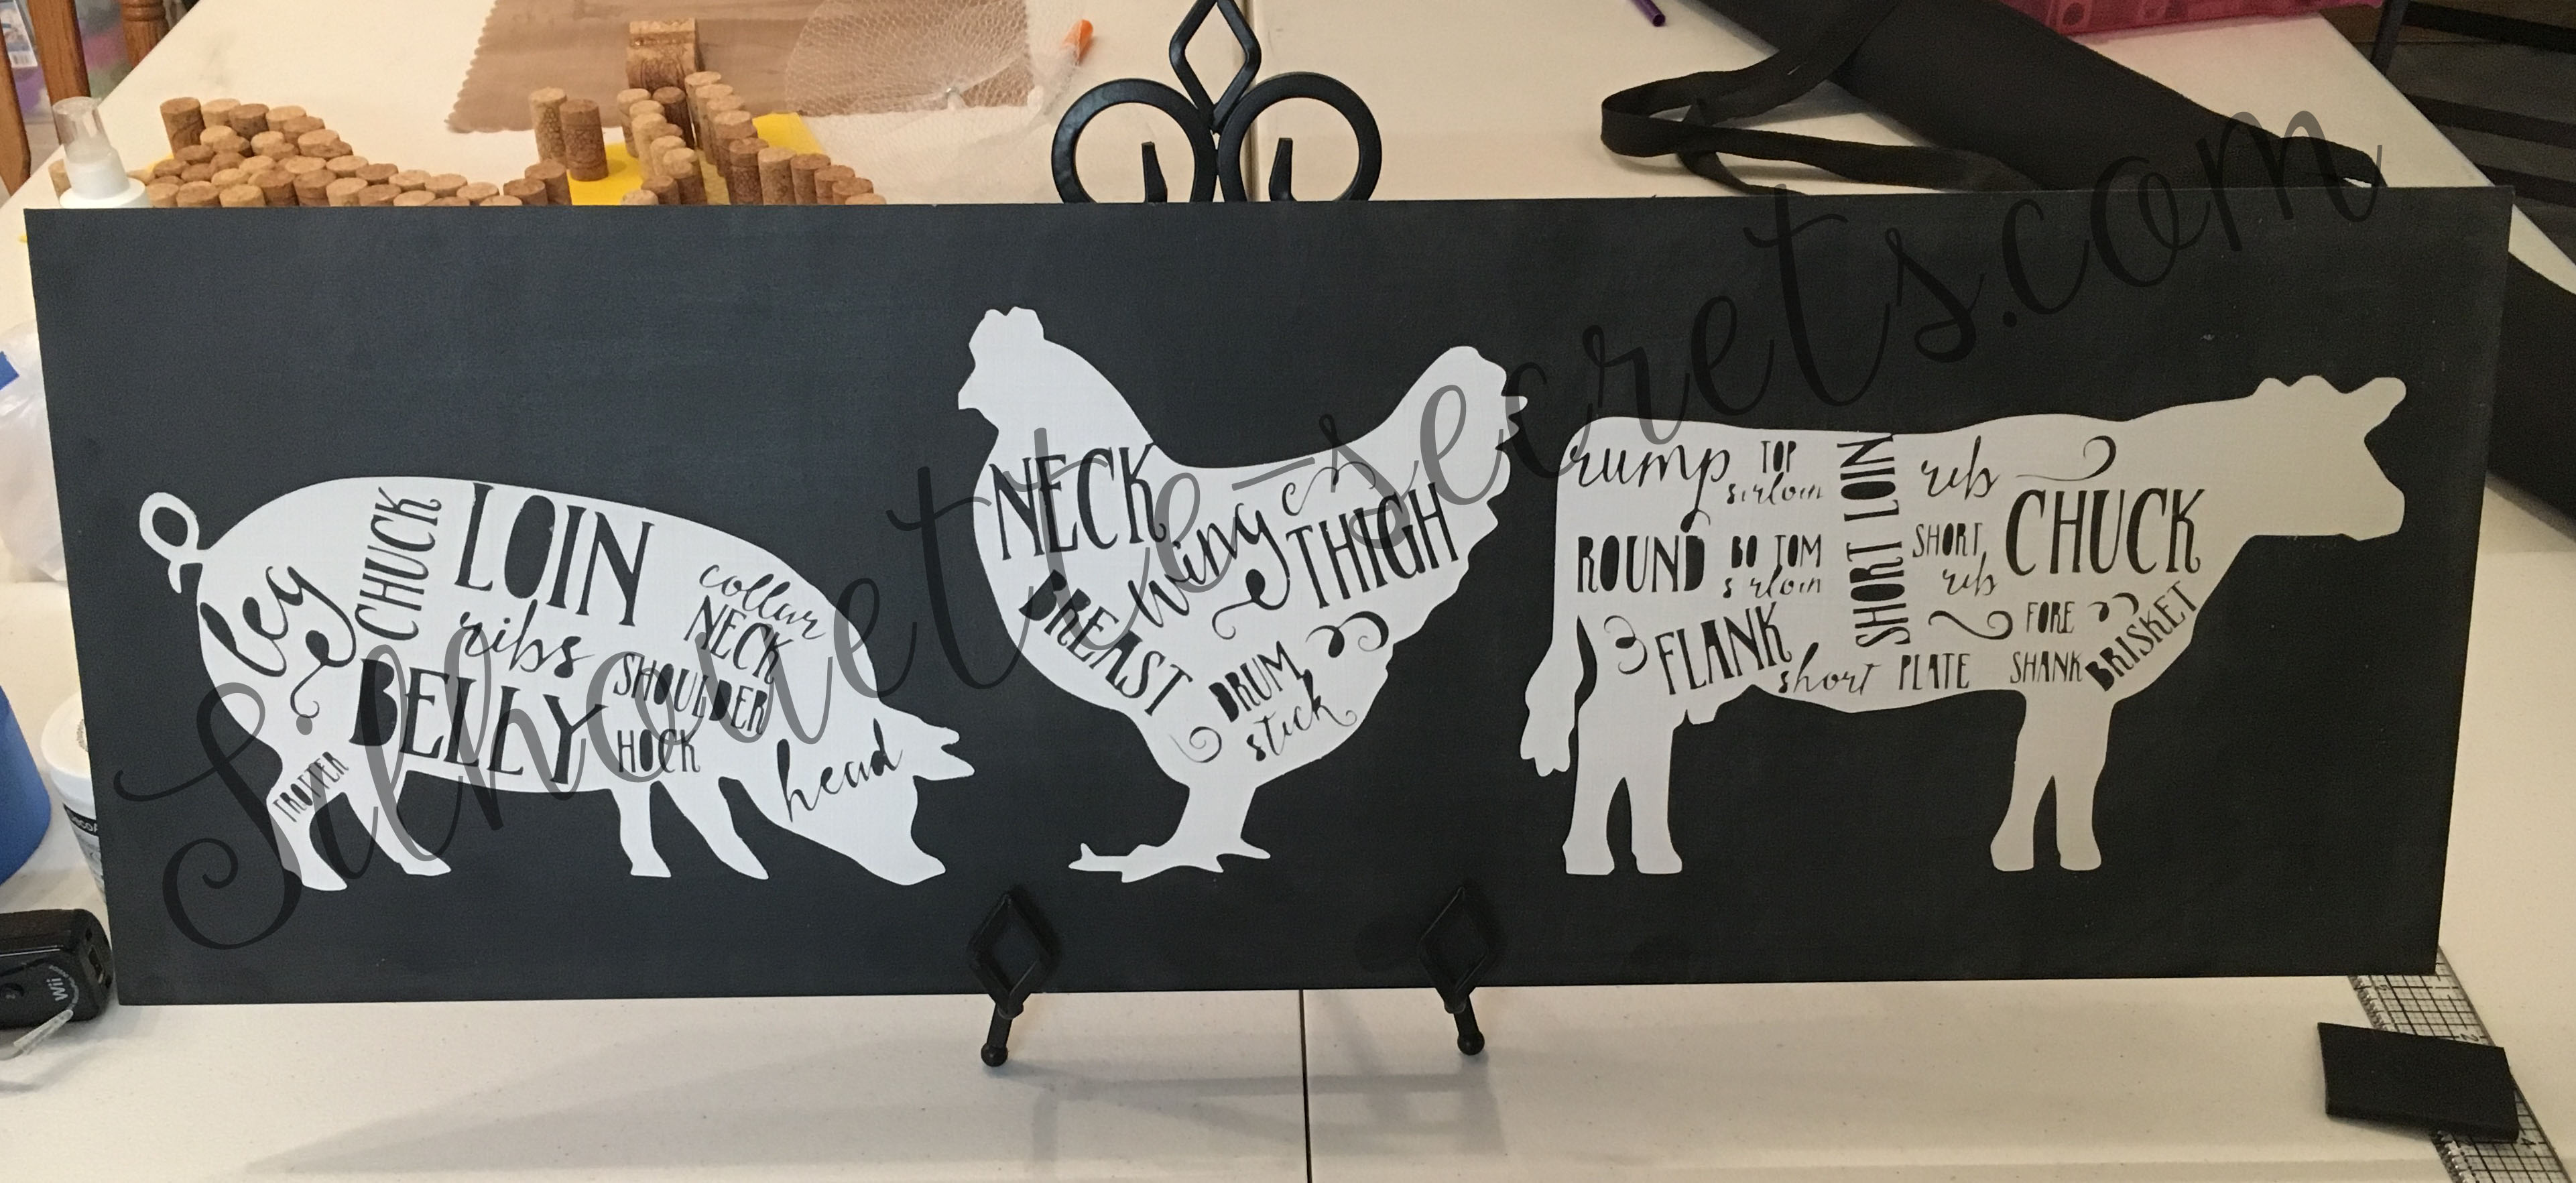
I do not usually get in to the painted sign projects, but I needed a bit of kitchen decor and thought I would make one. You may be asking…. “Well, why doesn’t she paint signs?”

Well, I know I can do it and my hubby has a shop full of woodworking tools. But, honestly, it takes too long for me…. I like to slap a vinyl decal on something & call it good. That is what works for me.

I found the images here at The Mountain View Cottage’s blog.

I do want to note that these files are for personal use only and using them to sell items you make is illegal. The designer has provided the free printable files for personal use only and I ask that you keep that in mind when using. You can find out more information on Personal Use vs Commercial Use licenses on Cutting For Business‘ blog, which is a great resource.

Now on to how I did it. First, I pulled the printable file in to the Silhouette Studio program. It was a PDF file and in order to open that file type you need to have the Designer Edition Upgrade or higher of the Studio program. When I opened the PDF, I chose the option to import “As an image”.Next, was to trace my images. Since these were black printable files, they traced really nicely. I am using Silhouette Studio v4.1.201 and chose the Trace Panel on the right side of the Studio.

  Trace Panel copy

Then you choose “Select Trace Area” and draw a rectangle around your object. Your object will then turn yellow and you want it to be as solid yellow where ever you want it to trace.  For some objects, you may need to play with the settings in the Trace Panel to get the highest level possible for a good trace. I then clicked on the Trace option at the bottom of the Trace Panel.

Trace options copy

There are 3 Trace options at the bottom and the one I use the most is the top trace button that has the inner & outer butterfly shape. It will trace around the areas that have yellow on them, inside and outside of the object.

Once I had all of my objects traced, I then click on them to Select and use the Fill Color Panel to fill them all with color. This helps to visualize your design and makes it easier to move them around the software. I then measured my board and decided how big I wanted to make the design.

Silhouettesecrets_Fridgesign

I decide to give it a go cutting my vinyl without a mat. This is one of the perks of using a Silhouette machine, you do not have to use a mat if you are cutting a material that has a backing attached, such as adhesive vinyl or HTV. One thing to note when you are cutting without a mat is that you cannot cut as wide as you can with a mat. If you look at my photo above you can make out my red cut border around the edge of the white area, this is the software telling me it will not cut outside of that range. If you have a piece of 12″ vinyl, then it will take about 1/2″ of cutting area off of each side. You will also notice that it starts the cutting area on the edge of the vinyl on the left where the arrow is, this means it will start cutting almost immediately on your vinyl if that is where your image is. This differs from using a mat because the machine has to account for the edges around the grid area on the mat. So it makes a big difference if you tell the software you are cutting with or without a mat. You will also notice the Cut border on the right side of the design ends about an inch before my page size ends. This is the software telling me that it will stop cutting before it reaches the end of my material because the machine needs the space to grip the material & keep it in the machine.

Now, I will tell you that I highly recommend using a mat when you can for several reasons. The mat provides support for your material and gives it a solid surface to use when cutting. It also helps to hold your vinyl in place and there is less of a chance that it will move around and ruin your cut. However, the Silhouette does give you the ability to cut without a mat and it is a great feature, especially if you are cutting a lot of decals at once or one long decal. This ability to cut up to 10′ long sets it apart from other cutting machines.

On my Cameo 3, I needed to move my right roller in to the left just a bit to grip the vinyl. To do this, you unlock your roller and move it and then make sure to lock it back in place. The lock on the roller is very hard to see and is right next to the white roller, you twist to lock it back in. If you do not, then your vinyl will slide all over the place. You then line your vinyl up with the blue line & arrows on the left side and press load. After it cut, I then weeded out the parts of my design that would be my stencil and applied transfer paper.

Silhouettesecretsplus_vinylnomat

I painted my board with Black Chalkboard paint from my stash and let it dry a full 24 hours…. again, this is why I say I don’t paint boards often….. time involved.. watching paint dry. While it dried, I gathered my supplies and worked on other projects.

Silhouette-secrets001

I then applied my stencil using the hinged method, so I could get it as straight as I possibly could and not have it shift during application since it was so large.

Silhouette-secrets002

After I applied my stencil, it occurred to me that using black vinyl as a stencil on a black board was probably not the best idea. But, you go with it at this point. I then added a border of painters tape around the edges of my vinyl and board, so I would not accidentally paint an area I didn’t want to.

Silhouette-secrets003

I then sponged on my DecoArt Chalky Finish white paint. And let it dry for a couple hours. I had read a lot of posts that said to peel your stencil off while it was still wet, so I just kept coming back to check on it. You don’t want to do it while it’s too wet or it will smear and if you wait too long, then the vinyl could peel up more paint than you want.

Silhouette-secrets004

Now, after removing my big piece of stencil, came the task of weeding out all the little pieces inside of each animal……

Silhouette-secrets005

After I finished weeding out the inner pieces of vinyl, I let the entire piece dry for a good 48 hours. Once dry, I took a white piece of chalk and turned it sideways and “seasoned” the entire board to make it look more realistic.

Silhouette-secrets006

And here is my finished kitchen decor board… well, almost finished. It still needs a frame, which will require more time.

Silhouette-secrets007

The supplies I used for this project are:

Silhouette Studio Designer Edition software Cameo 3 cutting machine Oracal vinyl Transfer paper a board from my husband’s woodshop Craftsmart Black chalkboard paint from craft store DecoArt White Americana Decor Chalky Finish in white from craft store White Chalk

I am happy with how this sign turned out for my kitchen. The end result was exactly what I wanted, but it was no simple, quick project.

While I know that painting wood signs is not my preferred method…… I still encourage you to try a project out at least once. I may not paint a new sign every week, but I may have a few more in my future.

Enjoy !

THANK YOU for your support! How can you help? Click HERE & buy a coffee. Every little bit helps with the cost of running the site.

Looking for more in-depth, step-by-step classes, check out all of my online Silhouette classes on my Teachable site HERE.
SS Logo snip it

**This post may contain affiliate links. What that means is that I may receive compensation if you purchase through the links I have provided. The price you pay for the product or service is not higher but I may get compensated for sharing.

Posted on — 4 Comments

Silhouette vs Cricut

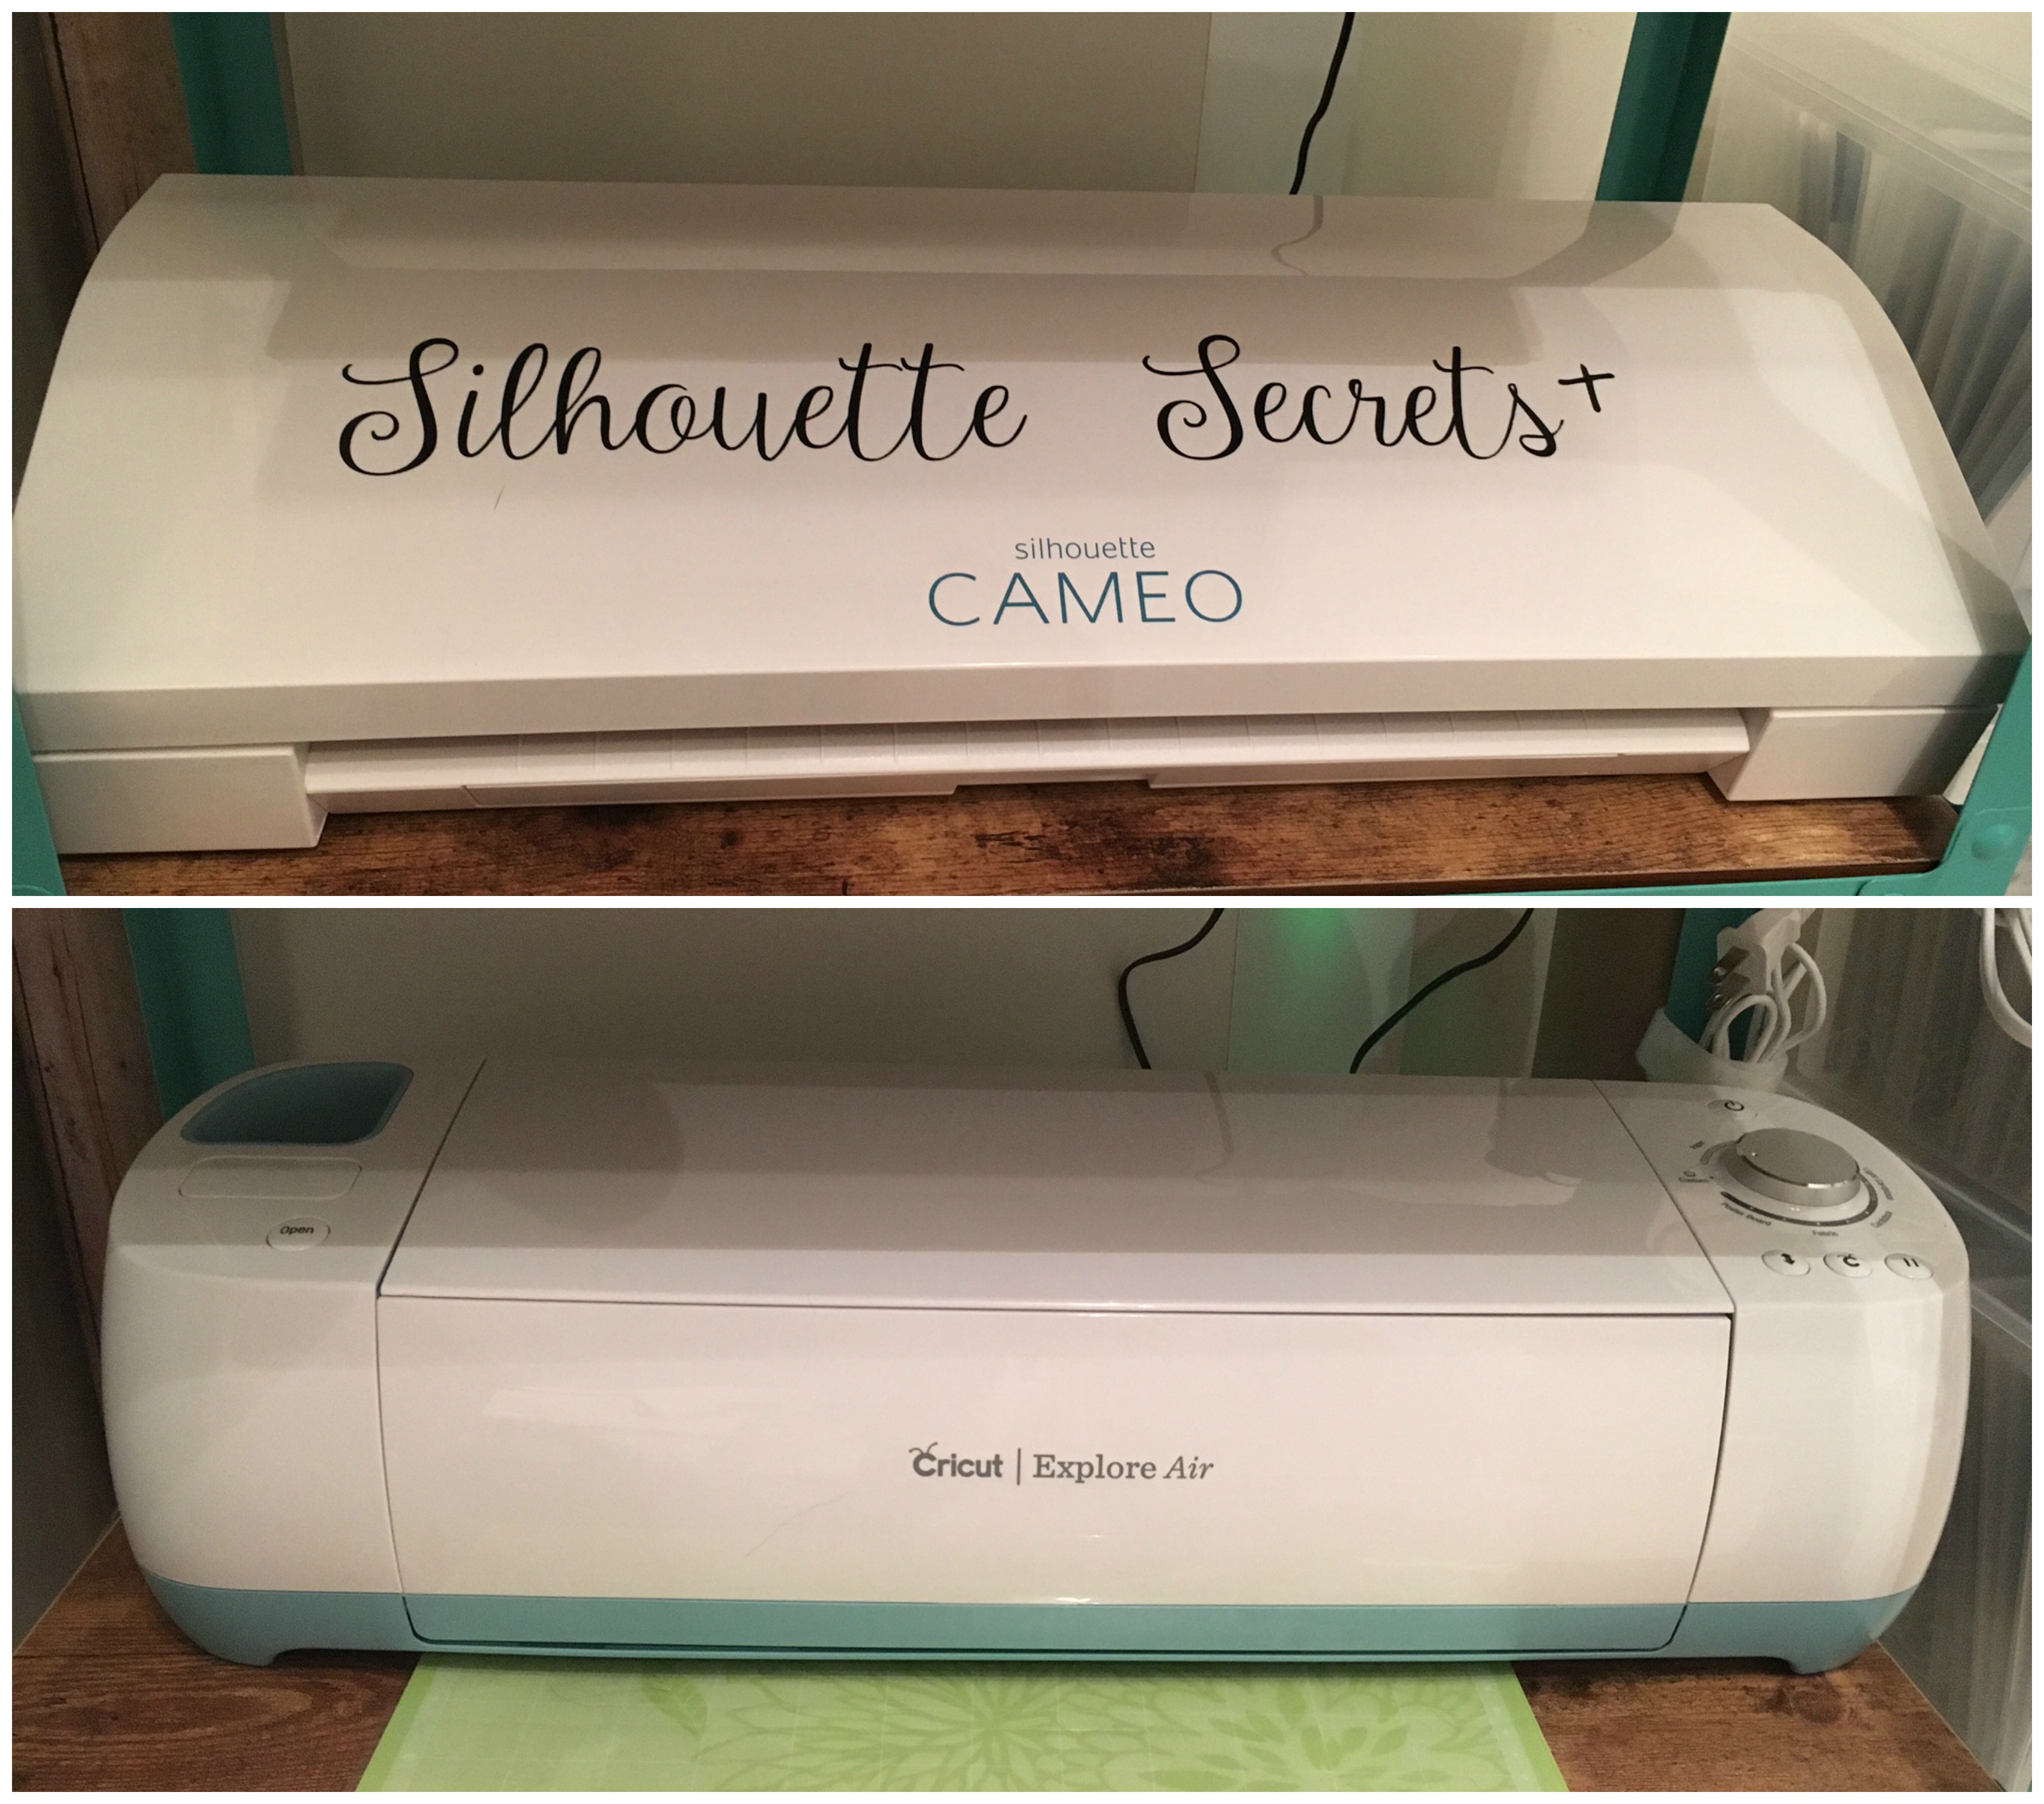
Photos shows a Silhouette Cameo 3 on above a Cricut Explore Air

That is the question and here is my answer…..

I see and hear this asked all the time and it’s been on my to do list to give you my recommendation.

Now please realize that this post is all my own opinion, no one has paid me to do it and I don’t get anything as reimbursement for this post. I am speaking only as a cutting machine user for many years. There are many, many posts out there comparing the two machines and you can read until your eyes cross, but only you can make the choice on which one is for you. I have many friends who are Cricut users and I have many other friends who are die-hard Silhouette users, like me.

Did you catch those few little words…. I have many friends who are from both sides. No matter what machine you use, you can still be friends. I promise!

Some people have a better time with a certain machine than others. All I can tell you is from my own experience.

So a bit of background on me, the owner behind Silhouette Secrets+. I purchased my very first machine many, many moons ago. It was the original Cricut machine, or commonly called the baby Cricut. It can cut 6″x 12″ and was perfect for a new beginner scrapbooker as myself. I thought it was great that I wouldn’t have to purchase letter stickers anymore for my layouts. I actually used this machine so much that I burned it up… literally, it started smoking & shorted out – it had a good life though & was well used. I then purchased a Cricut Create machine and had also purchased the Design Studio (the original Design Studio – an offline, on your computer software program), which I became very proficient at using and could do a lot in…. however, I felt the software was very limited and was frustrated that it just wouldn’t do as I wanted. I still kept on with it, because I am just that way. If I needed a bigger machine, I would borrow a friends and just kept plugging away with my cartridges.

The friend I borrowed the Expression from had once told me that I should really check out this new machine called a Silhouette and she could see me doing great things with it. I looked it up & at that time just couldn’t afford spending that much on my hobby as a Stay at Home mom. (ever wish you could go back and choose another path – I would have bought a Silhouette machine sooner – lol and she wouldn’t be able to tell me I told you so)

Now fast-forward a few years, we’ve moved to California, I’ve purchased my own Cricut Expression and I win a Silhouette Portrait in a digital scrapbooking contest. Let me tell you, I was over the moon. I fell in love at first use. And I immediately told my husband that this small Portrait wasn’t enough, I needed the bigger Cameo machine. And I did, I turned around and bought it, it was a must have.

That was 5 years ago. There was hardly a bit of information out there on how to use it, how to do this or that in the program. If it was out there, I found it & studied it. I played, I learned, I created…. I played more, I learned more and I created more….. I still love it.

Now, there is lots & lots of information on how to use your machine & how to make projects with your machine… Sometimes I feel there is too much, but that’s a post for another day.

Now we’ve moved to Virginia and I’ve had the opportunity to add several things to my resume. I’ve been able to attend a hands on retreat with Terri Johnson & was able to attend to the first ever TJC Licensing event. I felt that since I was now teaching people how to use their machines, as a Terri Johnson Licensed Instructor, that I should also be able to speak a bit on the other machine out there…. so I purchased a Cricut Air. And let me tell you, for months I regretted it…. actually being honest… I still do. It was money I could have spent on supplies to create with….. but, I’m here to tell you why I think that.

So here are my Pros and Cons on the Cricut Explore Air.

IMG_8839

Pros:

  • the Bluetooth connected quickly, very quickly – I learned the hard way that my computer was not equipped with a Bluetooth, so I did have to purchase a Dongle to get it to connect.
  • it is much quieter when it’s cutting
  • the purchased cut file I used worked beautifully
  • Close to My Heart has Exclusive Cricut cartridges and they are AMAZING! Over 700 images on one cartridge. Now that is a great value!!!

Cons:

  • the cut file I used was 12 pages and it had no color designations by paper, so I had to eyeball it and get my papers in order to cut them
  • the software to design & create your own designs is more difficult, it’s not just like other basic programs that you can use shortcuts and copy & paste, etc.
  • it is only accessible online – did you get that? You have to have a high speed internet connection at all times to use the program. That means if you are at a retreat & the wifi is slow…. you won’t be able to use your Cricut machine. Hope you packed other stuff 🙂
  • It will use up your data – something to keep in mind if you are limited to a certain amount of data each month, especially with the latest release of the DS3 software, it uses even more data than before
  • they are doing away with physical cartridges, so you will have to access everything online through their software
  • you can only save your designs to the Cricut program and if they are lost, they could be gone forever
  • the Cricut freebies are only good for a limited time, then you have to purchase the file to use it – many don’t realize this until they try to cut something a week after it was a freebie
  • I found it odd that after you’ve loaded the paper & clicked Go in the software, you then have to push Go on the machine itself…. I mean, really what is the point of the Bluetooth connection if you have to be within arms reach to get the machine to start cutting by pushing the button?

and now the Pros and Cons to the Silhouette machines:

IMG_8840

Pros:

  • I can save my designs where ever I want them – my external hard drive is my safe place… but the point is… it’s my design, I can save it outside of the program – always remember to back up your files to an outside source as well
  • there is a weekly freebie from the Silhouette store & I get to keep it in my Silhouette library forever, it’s FREE and it’s mine – they don’t take it away or make me pay for it – once I’ve downloaded it, it’s mine
  • the software is very much like other software programs – Ctrl + C is copy & Ctrl +v is paste, hold down the Alt button and move an image and it copies it…. so many of the same software things I’m used to are the same in this program
  • I can create my own designs within the program and they are mine.
  • I can work OFFLINE – this is a BIG one for me. I can work anywhere I want that has electricity. If I plan to not have any internet access, I can plan ahead and download any designs that I might think I want. Or I can just work with what I have in my library, my external hard drive, or anything I can create. I love not being tied to the internet access because we all know that it can be unpredictable.
  • You can upgrade your software to unlock additional features within the program – while some would disagree with me that it’s a pro, this is how I think of it. The Basic software is free to download for anyone. It is designed so you can cut any design within the Silhouette Design store easily. However, if you want to use an outside file such as an .svg file type, you would need to upgrade the software to allow it to open it. Much like an upgrade in a vehicle…. for it to do fancier stuff, you need to pay a fee for that.
  • I only need to be connected to the internet if I want to download a design. I can work completely offline if I’d like to.

Cons:

  • it is louder than the Cricut – but it’s a machine, it’s moving & working – I’m ok with that
  • the Bluetooth is still unreliable – I just find it’s much more efficient to plug it into my computer. While the idea of the Bluetooth is a nice feature, I can work around that.

So you are probably asking me “Why do you still have the Cricut? If you don’t like it, why keep it?”

Well there are a couple reasons:

  1. I tried to resell it. I couldn’t sell it for anything close to what I had invested in it. I didn’t even have one person interested.
  2. I was am a Close to My Heart consultant as well as a TJC Silhouette Instructor – remember me saying you can have friends on both sides – well, I love the fact that CTMH has Cricut cuts that match the stamp sets… I don’t like to fussy cut around images and this is great. Their Cricut exclusive cartridges have over 700 images on them and I use those when I create with my Close to My Heart products and in my monthly card kits. (shhh don’t tell anyone…. I use my Silhouette too)
  3. What is 1 more cutting machine? I’m sure I don’t win the prize but I know you might ask or be curious….. I own….. – an original Cricut (in craft heaven), a Cricut Create, an Expression, an Explore Air, a Silhouette Cameo 1, a Silhouette Cameo 3 and just recently (still in the box) a Silhouette Curio. So is 6 cutting machines too many? I guess that is up for each person to decide. Each one does serve a purpose and have some life left in them… I have 3 kids and someday I’ll let them use my older Cricuts when they have a project they need complete themselves.

Now, remember when I said I have Cricut friends and I have Silhouette friends…. well we can all still be crafty friends!!! Tell me – which one are you? Team Cricut or Team Silhouette?

Whether you are Team Cricut or Team Silhouette, I encourage you to get that machine out and play with it. Create with it, cut with it, make projects with it. Learn one thing and then move on to the next. If you don’t like it, maybe you need to switch sides. You are investing in a machine & it should work for you. Have fun with your machine!!!

Again, please remember this is my own personal views on the machine as an owner & crafter for many years. I am sure that I didn’t mention several pros & cons of the machines & I’m sure that I will think of something as soon as I click on publish. If you think of one, just comment below – I would love to hear your thoughts.

I hope this post helps anyone who is wondering about the differences in the machines. Like I said before, each person is different and will have their reasons why they like a machine. If it works for you & you are using it, that is what matters. Now, go enjoy your machine!

Enjoy !

THANK YOU for your support! How can you help? Click HERE & buy a coffee. Every little bit helps with the cost of running the site.

Looking for more in-depth, step-by-step classes, check out all of my online Silhouette classes on my Teachable site HERE.

SS Logo snip it
**This post may contain affiliate links. What that means is that I may receive compensation if you purchase through the links I have provided. The price you pay for the product or service is not higher but I may get compensated for sharing.
Posted on — Leave a comment

Quick gifts

Photo shows a design on a kitchen towel that says My Kitchen My Rules on a cutting board shape with HTV.

I love being able to whip up a quick gift to send to a friend.

I had a towel in my stash & it seemed to be whispering my name. So I went shopping in the Silhouette Design store to find a cut file I liked.

After a measurement error & my 2nd scrap of black HTV, I ended up with a nice, simple gift I could throw in my care package.

Yes, even seasoned Silhouette users make mistakes. And do you know, often times you learn more from making a mistake than not. At least in my experience, I remember things better the next time when I’ve made a mistake or had to research how to do something. Does that mean I won’t make the same mistake again? No! But I may laugh at myself more the next time!

How do you learn to use the machine? You play, you practice, you research, you create!

I love learning what new technique or new project I can do with my Silhouette Cameo.

Enjoy !

THANK YOU for your support! How can you help? Click HERE & buy a coffee. Every little bit helps with the cost of running the site.

Looking for more in-depth, step-by-step classes, check out all of my online Silhouette classes on my Teachable site HERE.

SS Logo snip it

**This post may contain affiliate links. What that means is that I may receive compensation if you purchase through the links I have provided. The price you pay for the product or service is not higher but I may get compensated for sharing.

Posted on — Leave a comment

Classroom decor

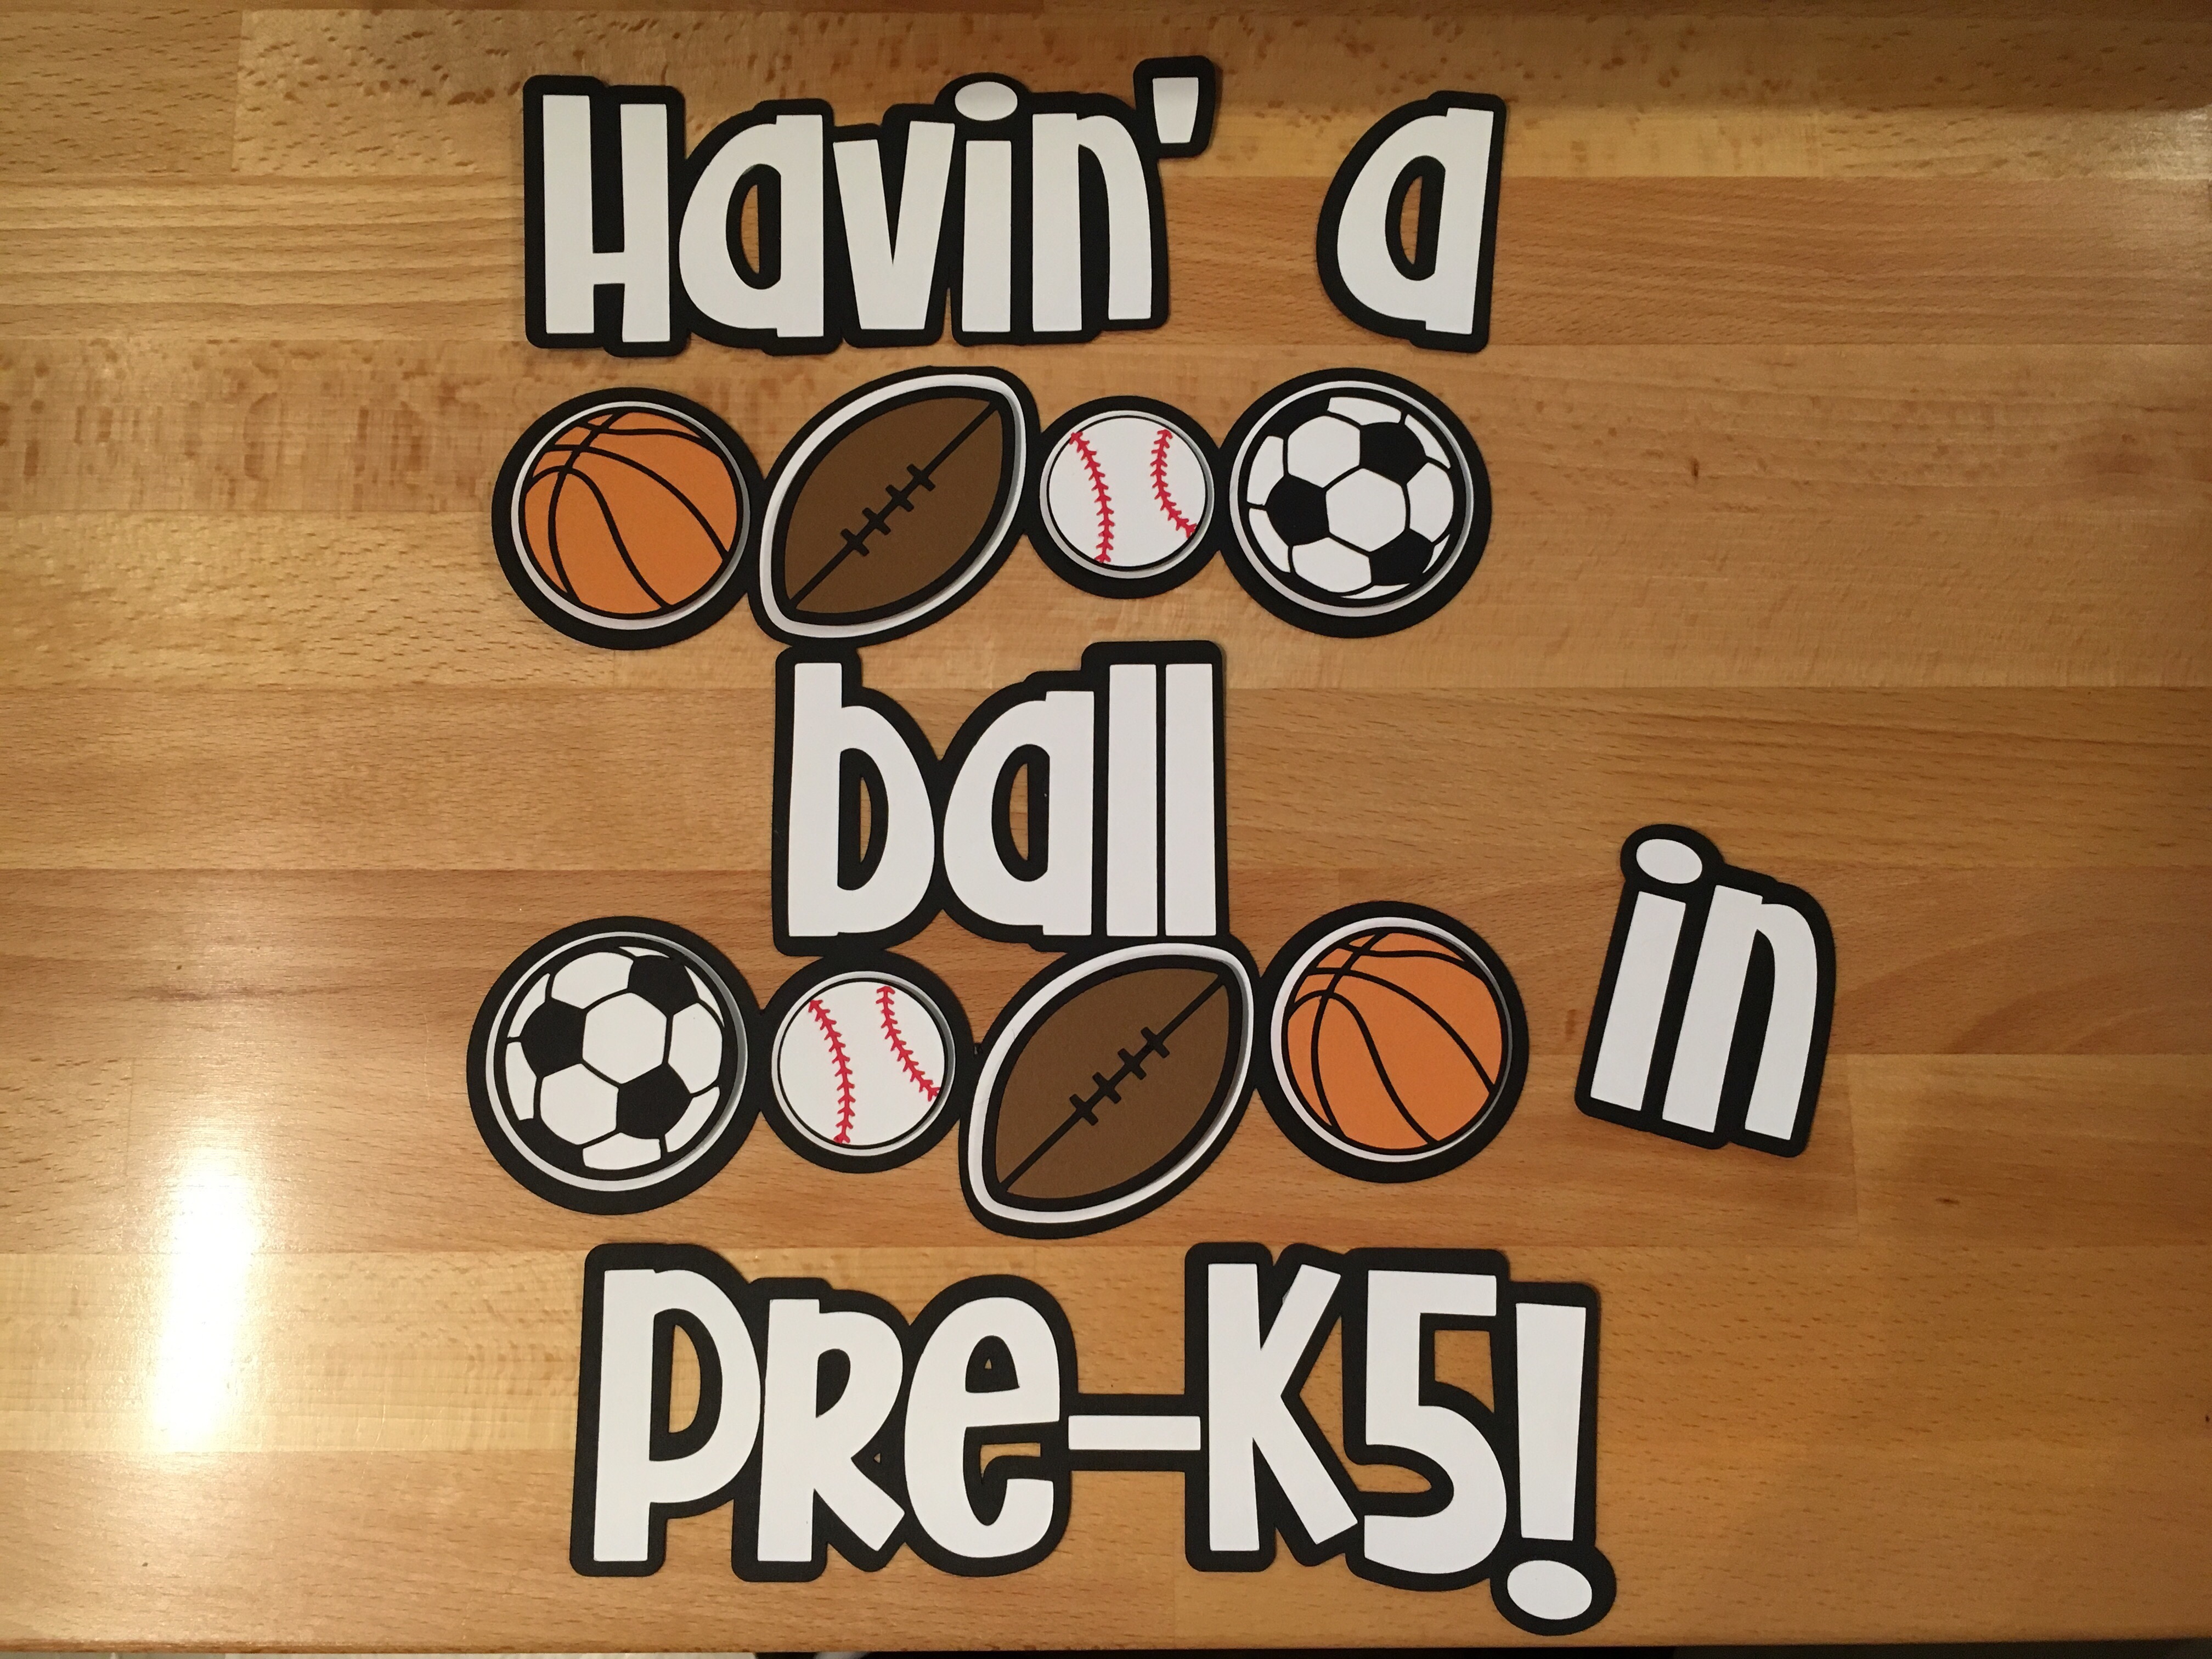
Photo shows a layered cardstock design saying Havin' a ball in Pre-K5

One thing I love about having my Silhouette Cameo is being able to help out my kid’s teacher’s with bulletin boards and other projects they have in the classroom.

I feel out teacher’s could use all the help they can get in the classroom and since I have little ones at home, I am unable to be in the classroom and volunteer, so I want to offer my help in other ways.

This year I have made a few things for my son’s Pre-K classroom including these decorations for the Dad’s Sports Night.

My love for the Silhouette started with paper crafts and has expanded to so much more, but I have not let the paper crafting go. I recommend having a separate blade for each type of medium you cut, such as vinyl, card stock, fabric, etc. I start my blade when it’s brand new as a vinyl blade and when it gets to where it’s not cutting as crisp, I graduate it into a card stock blade and just rotate it to a new job. When it gets to the point it’s not cutting well at all, then it’s time for a new one.

img_6101-1

Affiliate links may be present in the following blog post and as an Amazon Associate I earn from qualifying purchases.

I found a couple sports related images in the Silhouette Design store and just click buy and start cutting.

One thing that helps when cutting paper is having the right adhesive to glue things down. I love this Dual Action Glue Pen from Close to My Heart when I’m working with small detailed images.

img_6102

When working will really small details such as the baseball stitches I love the Xyron sticker maker. As you can see I don’t even use the little “X” part of the machine any longer… I just stick my object in the adhesive roll and pull it out the other end and use scissors to cut it off.

img_6103

For all the larger paper areas my favorite adhesive is this tape runner by Scrapbook Adhesive 3L.  It has been my go to for as long as I can remember and I’ve found a great online store to stock up on this as I go through it quickly when making cards. I highly recommend Scrapbookpal.com and order from them when I need to replenish my supplies. They even have free shipping over $25 and it’s quick.

img_6104

Here is the titles I made for the classroom door.

I typed out my title and then created an offset around it and welded that offset, so I would be able to cut the outline in black.

img_6108 img_6109

Owning a Silhouette Cameo allows me to be creative and help out in so many ways and I enjoy every minute of it.

What are our working on today?

Enjoy !

THANK YOU for your support! How can you help? Click HERE & buy a coffee. Every little bit helps with the cost of running the site.

Looking for more in-depth, step-by-step classes, check out all of my online Silhouette classes on my Teachable site HERE.

SS Logo snip it

**This post may contain affiliate links. What that means is that I may receive compensation if you purchase through the links I have provided. The price you pay for the product or service is not higher but I may get compensated for sharing.

Posted on — Leave a comment

Halloween decor – yes that’s right!

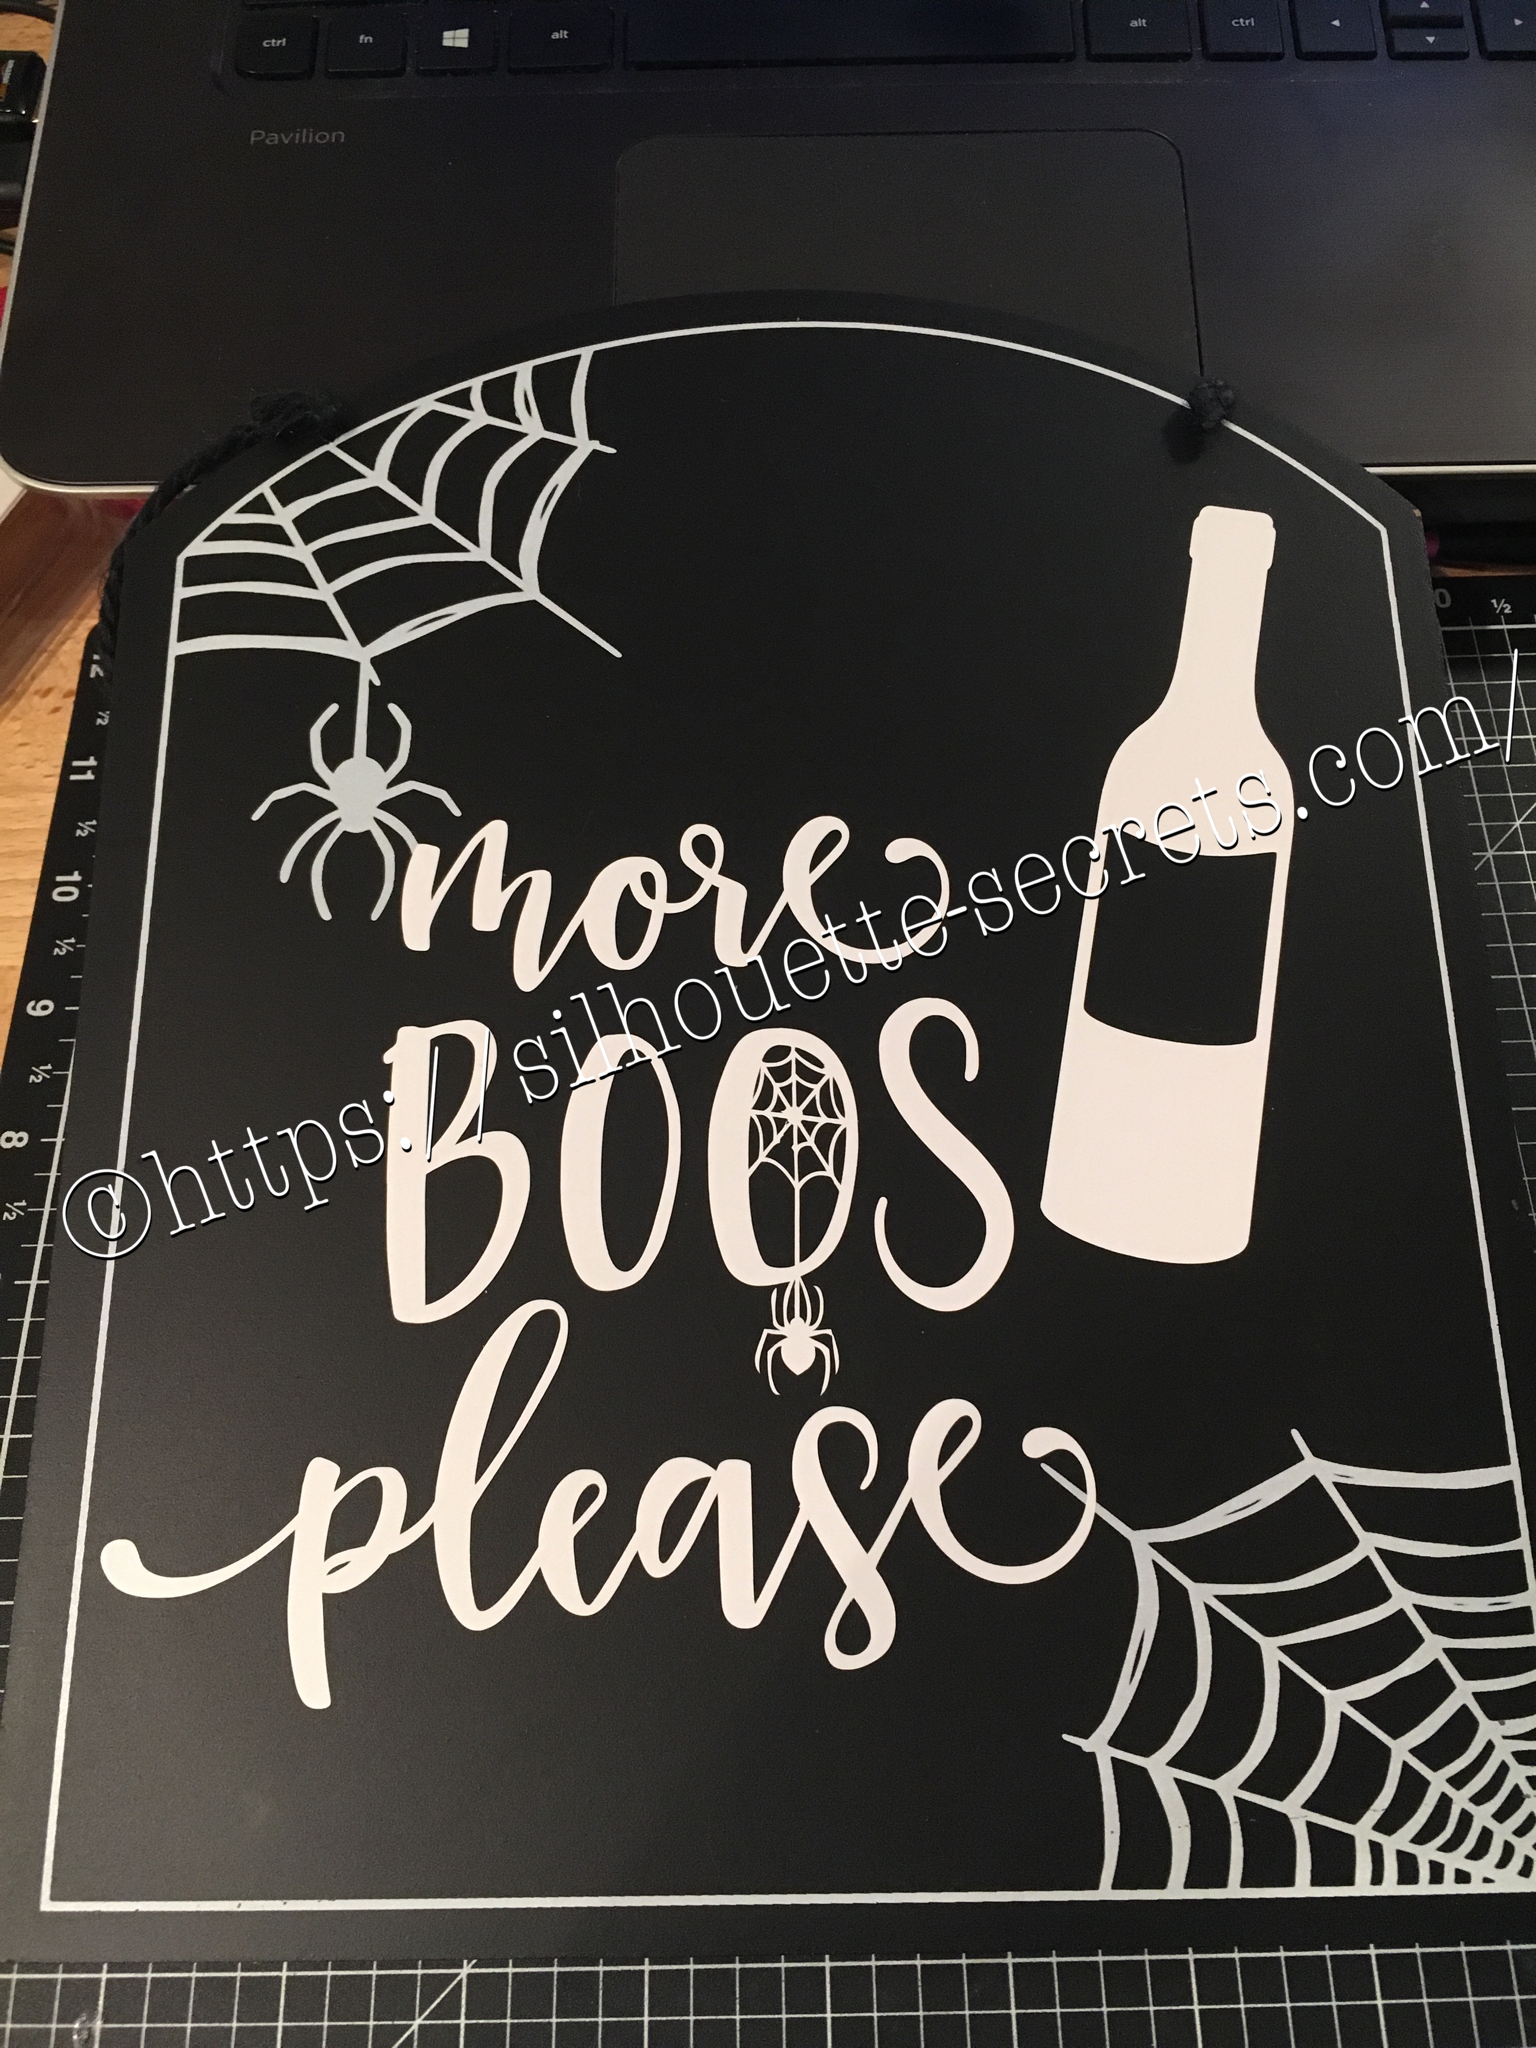
Photos shows a black sign that says more Boos please with a wine bottle, spiders, and webs.

Halloween is of course several months in the past, but when you can pick something up on clearance…. why wait until next year to finish it.
I found a couple signs at Target that were perfect to add vinyl to.

I had a couple files from the Silhouette store & they were perfect for these…..

img_6072-1

With my first design, I weeded the large area first & then I applied my transfer tape & uses a technique commonly called “reverse weeding” in the Vinyl crafting lingo.

How do you reverse weed?

Burnish your design well, so it all sticks to your transfer tape.
Then peel the backing off of your vinyl design & very carefully weed out the bits of vinyl from the delicate parts of your image.
This works especially well if you have small eye pieces or small dots for letters, etc. It does take some practice to get the hang of it.
The first time I did it, I hated it because my transfer tape kept sticking to me.
But, the more you practice & get the hang of it, the more you fall in love with the technique & use it for those delicate designs that you don’t want your pieces moving on.
In my design, I used this for the spider web that was in the center of my “O”.

After weeding my design, I then carefully placed my design on my sign & burnished it down really well. Then I carefully peeled the transfer tape off, watching for any vinyl that did not come off the transfer tape and I would put it back down & burnish it some more to get it to stick.

img_6074-1

And my second design, also from the Silhouette Design Store.


img_6075-1

Now these are ready to pull out for next year and will go perfectly in my dining room that has a wine theme.

Whenever you get the chance to grab some decor items at a discount, grab them, but don’t let them sit around too long without adding all the finishing touches.

Enjoy !

THANK YOU for your support! How can you help? Click HERE & buy a coffee. Every little bit helps with the cost of running the site.

Looking for more in-depth, step-by-step classes, check out all of my online Silhouette classes on my Teachable site HERE.

SS Logo snip it
**This post may contain affiliate links. What that means is that I may receive compensation if you purchase through the links I have provided. The price you pay for the product or service is not higher but I may get compensated for sharing.
Posted on — 2 Comments

Customized cards with my Silhouette Cameo

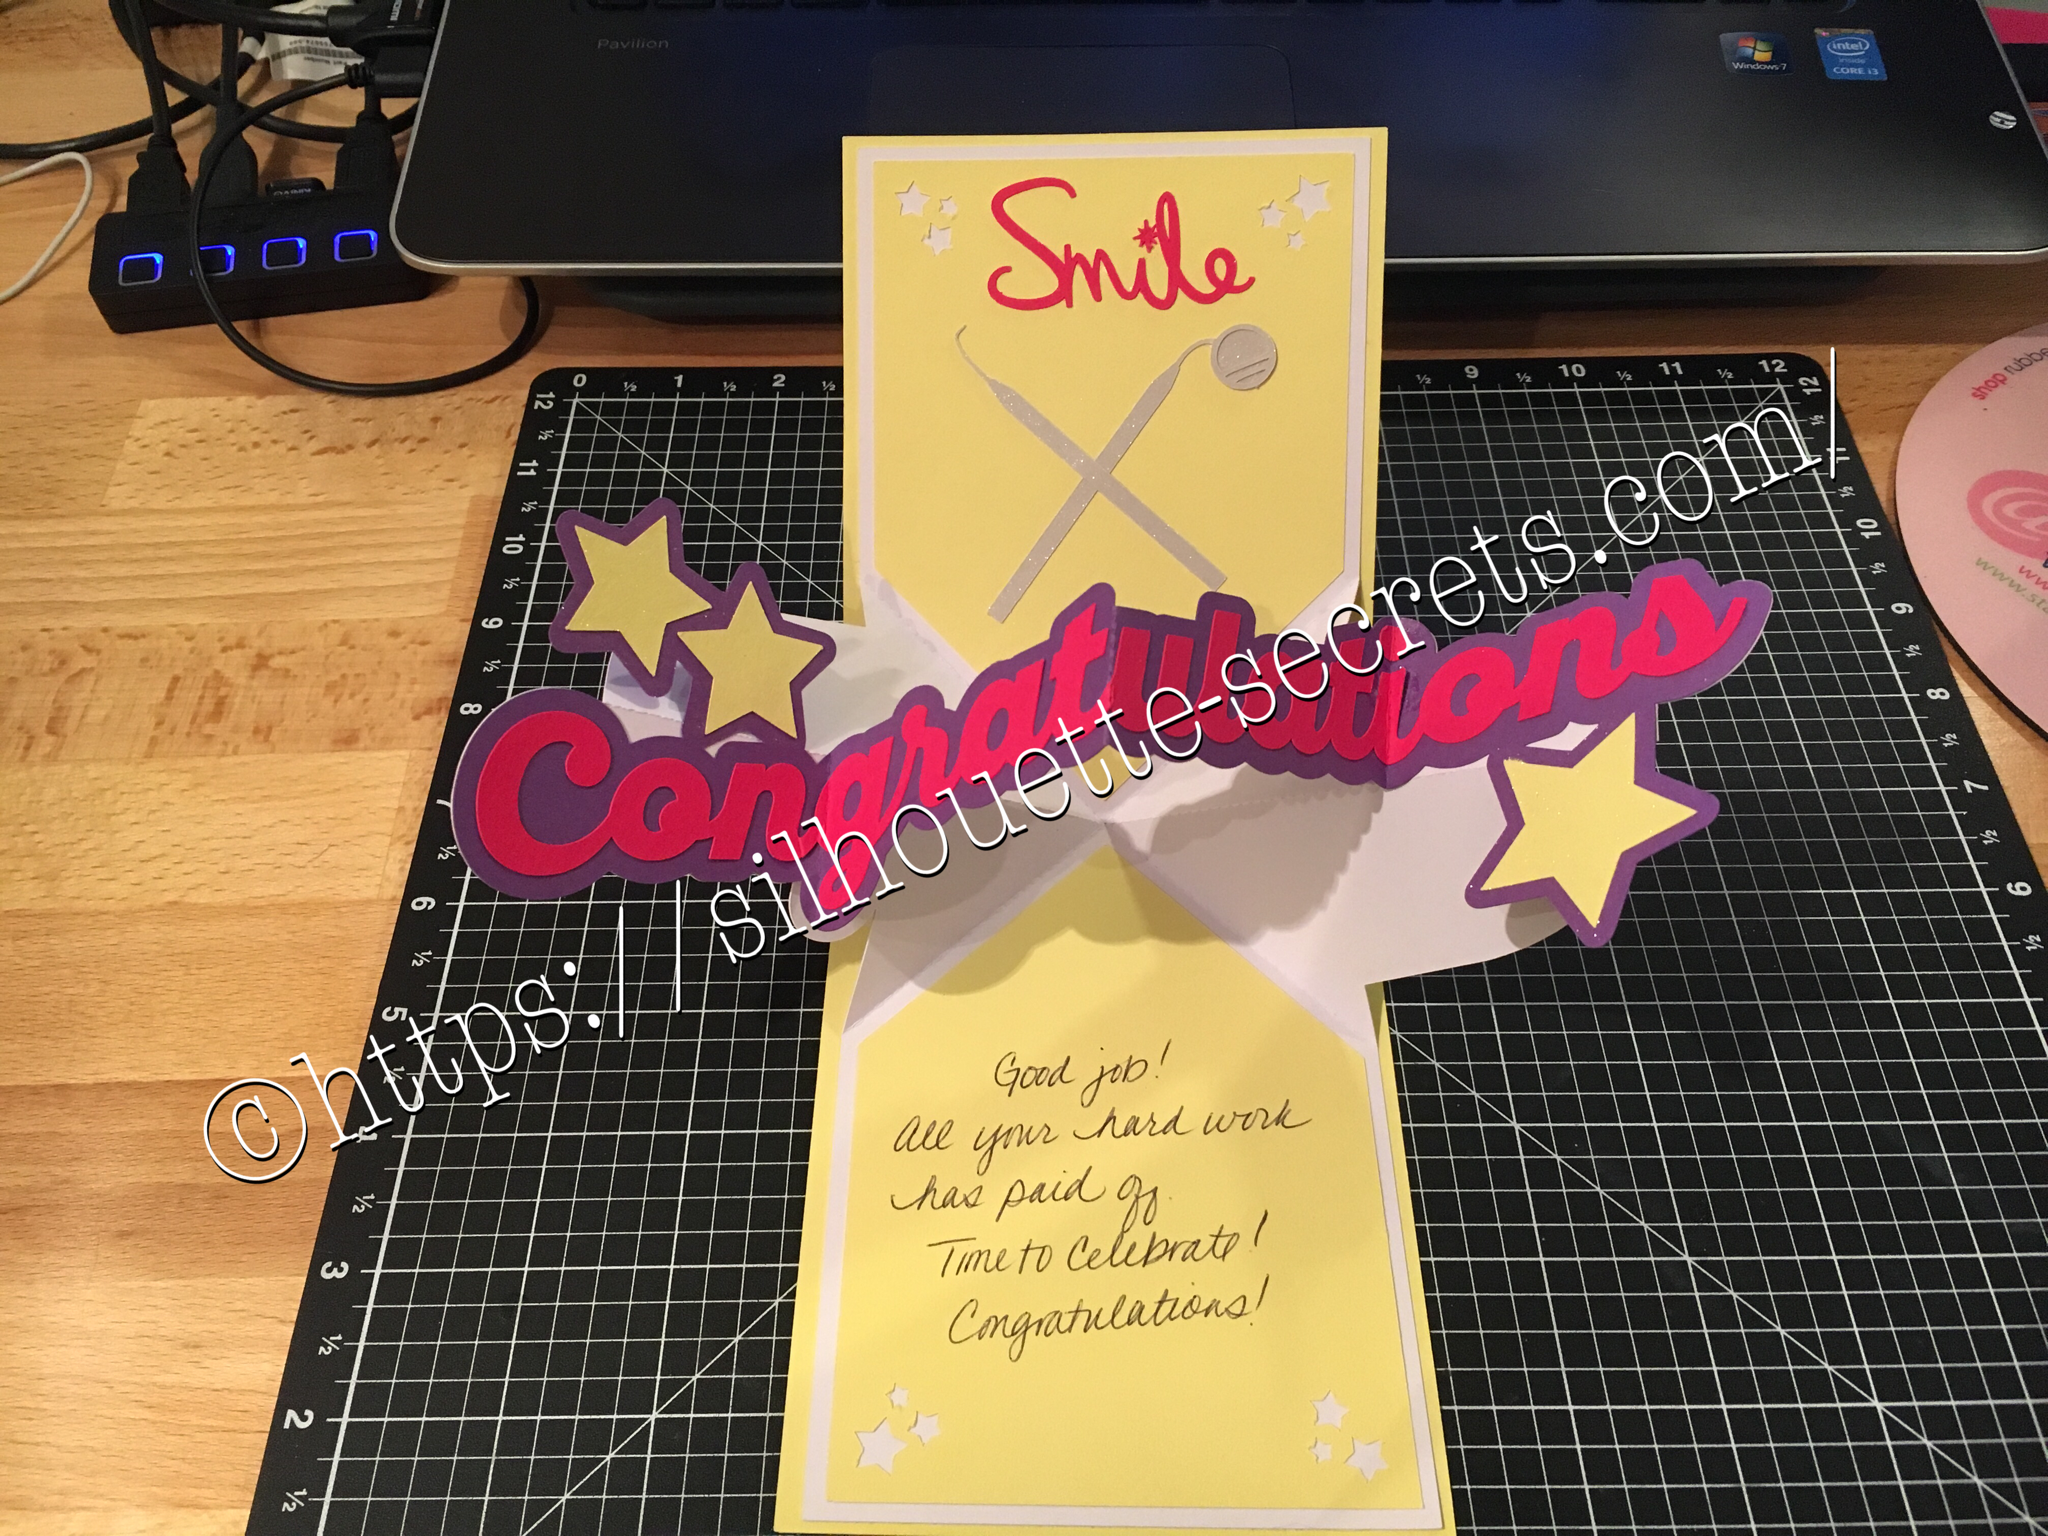
Photo shows a Congratulations pop up card.

I love being able to create these customized cards for friends, especially for special occasions… A friend of mine just received the results of her dental hygiene exam and I thought I would create a unique card for her. I found all the designs in the Silhouette Store and loved that I could just click buy and then get to cutting. You can find the Congratulations Pop & Twist card file HERE. Find the Tooth file HERE. Find the Dentist tools HERE.

img_6006 img_6180

You can see a short video of how this card works HERE.

img_6005

I took the tooth cut file and resized it down to make a bunch of teeth confetti to include inside the pop & twist card. And then I stuffed it into the envelope. Just a tip… I even measured this card and it was under the weight limit but U.S.P.S still returned it for more postage. You just never know. Sometimes with these fancy fold cards they can get to be a bit thick and you need to allow for extra postage. I thought I was good this time, but guess not!

Now while you can find instructions on how to create these fancy cards such as Twist & Pop or Cards in a Box, I still prefer to use my Cameo machine and let it do the work for me.

What kind of fancy cards will you try with your Cameo?

Enjoy !

THANK YOU for your support! How can you help? Click HERE & buy a coffee. Every little bit helps with the cost of running the site.

Looking for more in-depth, step-by-step classes, check out all of my online Silhouette classes on my Teachable site HERE.

SS Logo snip it
**This post may contain affiliate links. What that means is that I may receive compensation if you purchase through the links I have provided. The price you pay for the product or service is not higher but I may get compensated for sharing.
Posted on — 1 Comment

Bouquet of roses

The other night my husband shows me a photo on his phone and asks me, “Can you make this?” It was a pop up card with flowers in the middle…. so of course….. challenge accepted!!!

I start looking for cut files that I can make something similar and found several. This one I found in the Silhouette Design store and it was so easy to click buy and cut.

You can find the design HERE.

On this particular design there was also information in the product description that leads you to the designer’s blog for instructions on how to assemble and I referenced this several times to know the order that each was glued into the card. You can find the instructions for this card HERE as well.

This card in a box was easy to assemble since everything was included in the one cut file and all you had to do was un-group and arrange the cuts according to the color you wanted to cut. However, do keep in mind that if you want to mail this card, it does need to be resized smaller to fit in a regular size envelope.

img_5854

I cut all my pieces and set them aside to assemble everything at once. I used several adhesive types: Liquid Glass when gluing the card box, roses & stems together, foam tape to attach the greenery inside the card and then a Xyron sticker maker for the word valentine.

img_5855

Liquid glass is my go to adhesive for a quick secure hold on these card in a boxes or on rolled flowers…. I use a small amount and hold the paper in place for 10 seconds, sometimes maybe a bit longer, and then give it a few to dry and it holds so well.

img_5856

Above is my card once all the roses are attached inside the box.

img_5900

And above is my finished card. I did resize the card, so I would be able to put this in a 5 x 7 envelope and mail it.

img_5930

After making this smaller version, I decided that I wanted to make some for the teacher’s. Because really, who doesn’t want to receive a dozen roses? And ones you don’t have to water or take care of in any way – bonus!

img_5929

I hope you take some time to “Do something Creative today.”

Enjoy !

THANK YOU for your support! How can you help? Click HERE & buy a coffee. Every little bit helps with the cost of running the site.

Looking for more in-depth, step-by-step classes, check out all of my online Silhouette classes on my Teachable site HERE.
SS Logo snip it

**This post may contain affiliate links. What that means is that I may receive compensation if you purchase through the links I have provided. The price you pay for the product or service is not higher but I may get compensated for sharing.

Posted on — Leave a comment

Friendly Flamingos

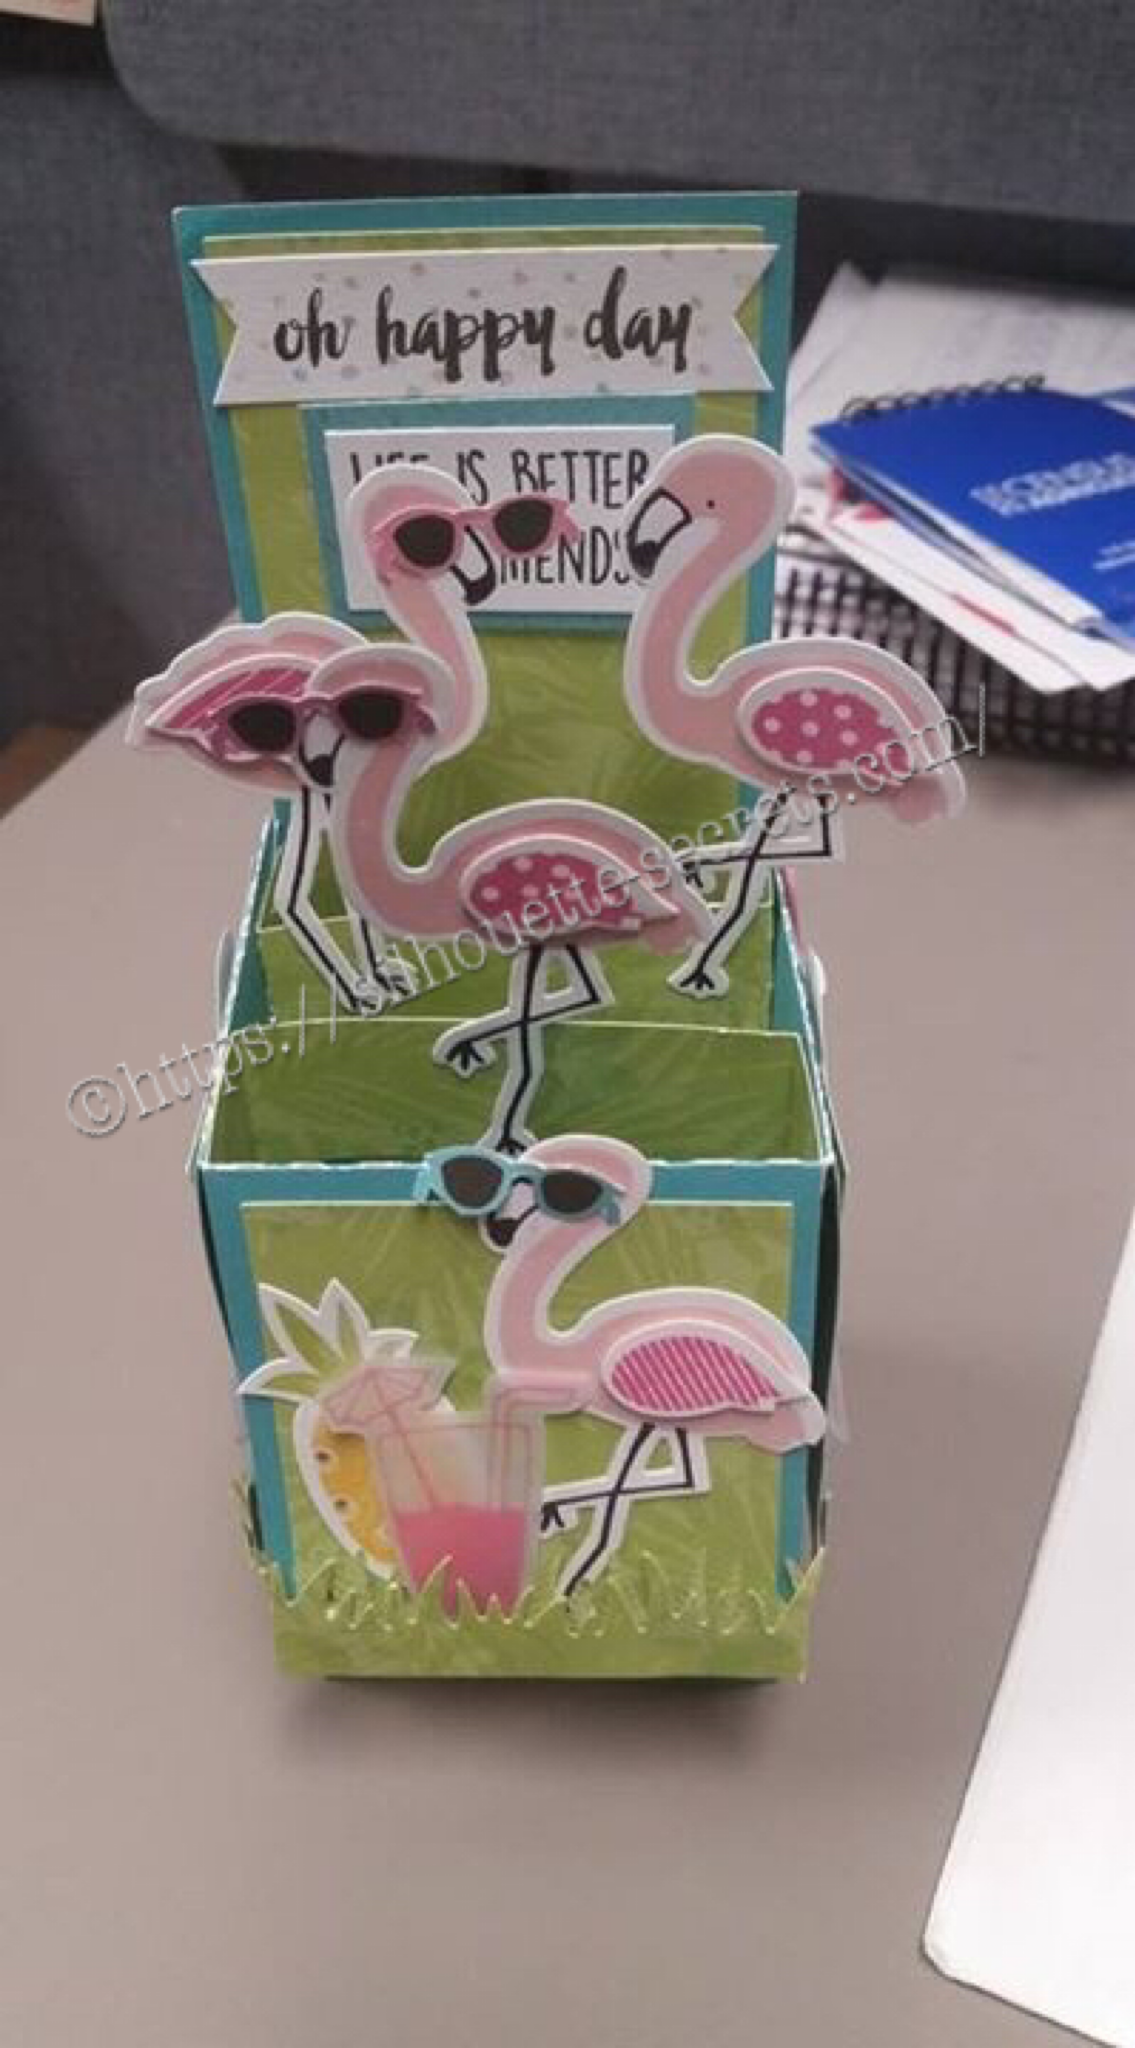
Photo shows a completed box card design with flamingos saying Oh Happy Day

A friend had a birthday coming up and I thought it was a perfect time to pull these guys out. I love these card in a box cards! I found my box template at Myscrapchick.com HERE and cut it with my Silhouette Cameo. The box cut file cuts out the box to assemble, the pieces of paper that will fit in the spaces of the box and the inner brace parts. I then just added all the embellishments to the card all over.

img_5924 img_5925 img_5926

These flamingos and papers are retired from Close to My Heart, but they are always coming out with new & fresh ideas and supplies. Grab them before they retire too on my CTMH website: EllyMae.ctmh.com

One of my Facebook groups has a challenge for the month of February…. finish projects! And that is what I’m focusing on…. making a list of what I want to do and getting it done. What are you getting done?

Enjoy !

THANK YOU for your support! How can you help? Click HERE & buy a coffee. Every little bit helps with the cost of running the site.

Looking for more in-depth, step-by-step classes, check out all of my online Silhouette classes on my Teachable site HERE.

SS Logo snip it

**This post may contain affiliate links. What that means is that I may receive compensation if you purchase through the links I have provided. The price you pay for the product or service is not higher but I may get compensated for sharing.