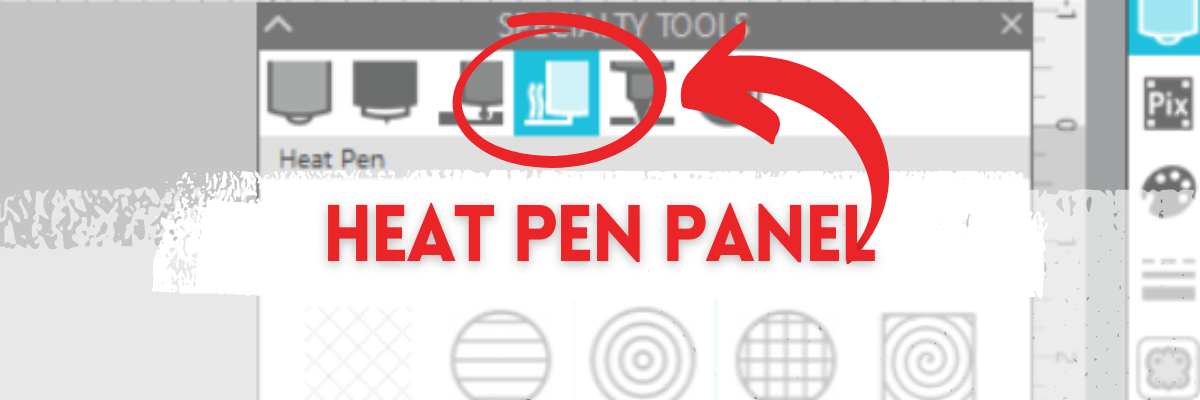
Under the new Specialty Tools Panel on Tab 4 in Silhouette Studio, is the Heat Pen Panel.
This tutorial was written in Silhouette Studio version 4.5.770.
The Specialty Tools Panel was released in v4.5+ software versions. If you don’t see it on the right side of the Silhouette Studio, your software version may be older than v4.5.
Affiliate links may be present in the following blog post and as an Amazon Associate, I earn from qualifying purchases.
Here is a look at the details of the Heat Pen Panel in Silhouette Studio.
1 – Heat Pen Fill Patterns – choose from None, Lined, Concentric, Cross-hatched, and Spiral
All designs will vary in how the pattern fills in the area. I used Hi by Diva Watts Design – Design #399489 and at the size shown, there isn’t much inside the Concentric Pattern fill at a 0.079 spacing. Testing is the only way to know what fill pattern and spacing will look good on the finished project.
2 – Spacing– Increase or decrease the grid spacing between the lines of the pattern. A spacing of 0.004″ will fill in the design more, but depending on the pattern chosen, there can still be some bare spots.
In this example, the Concentric fill pattern at a 0.004″ spacing fills in most areas, but there are still some white spaces in certain areas. Zoom in on your designs so you can see the tight fills and how each pattern fills in the designs.
These spaces may or may not affect the outcome of the final project. Testing is the the only way to know what will work and all designs will vary.
This is another area where you are changing a lot of data at one time, so be patient with your computer if it is thinking.
3 – Angle – Change the angle of the fill pattern.
4 – Release Heat Pen Fill – selecting this option will take the fill from an editable fill pattern and makes it a vector design.
When using this feature, be aware that once the fill has been released and file saved and closed, it is a permanent change to that file. If the design needs to be adjusted, you would need to start over.
Save this for future reference by pinning the image below.
Enjoy !
THANK YOU for your support! How can you help? Click HERE & buy a coffee. Every little bit helps with the cost of running the site.
Silhouette Classes
Never stop learning! Let me help you take the anxiety out of learning with Silhouette and get to creating faster! My Silhouette classes are heavily focused on software, so you can take the skills & techniques taught and apply them to many future projects!
**This post may contain affiliate links. What that means is that I may receive compensation if you purchase through the links I have provided. The price you pay for the product or service is not higher but I may get compensated for sharing.
There are a few things I want to give you a heads up about this month for Silhouette users.
Affiliate links may be present in the following blog post and as an Amazon Associate, I earn from qualifying purchases.
New Silhouette software version 4.5.791 released
At this time, I cannot recommend v4.5.791 for users. Normally a version is released to Closed Beta testers for a bit prior to being pushed to release on the Silhouette website. Sometimes that “bit” is only a few hours, but we usually get a small heads up at least. This version went to public release and none of the Beta testers knew about it.
For the average user, I would suggest just staying where you are. If you get the notice to install a new version, click Later.
I always recommend downloading direct from the Silhouette website for any updates, for best results. In the past, there have been hang ups with the updates through the software, especially for MAC users. It seems to go much smoother if updates are completed direct through the website.
I would recommend v4.5.770 for most users, however, if you are experiencing no issues with the version you are on, stay there!
At this time, it is a wait and see how this new version affects users and what the bugs might be. We have asked for clarification from Silhouette, but have not had any updates so far. Here are the public release notes, which don’t really say much and are missing quite a few things that were updates between v4.5.770 and v4.5.791 that were being tested by Beta testers.
Hopefully we will find out more soon on what it includes.
I have started seeing issues posted by users, however, they are all a bit different and the only way to try to identify what might be causing them is to troubleshoot with each user. Not all users are willing to troubleshoot, which means it can take longer to identify the issues and get them fixed.
We cannot report issues unless we’ve done the troubleshooting first and have information and data to report with the claim. If we get the information needed, we can report direct to Silhouette. However, please understand, while we can report the issue, we have no control over the investigation time or the fix being released. We can only do the things that are in our control, which is collect information and report.
Silhouette America website and Silhouette Design Store
The Silhouette websites will be updating sometime in the near future. I do not have exact dates and it could be delayed even farther out, but that means we have time to prepare.
Anytime there are big updates to a website, there can be hiccups along the way. Technology is our friend, until it isn’t….. and I’d rather be prepared and help you prepare too!
So my motto going into this is… plan for the worst and hope for the best. Or be prepared! This is not to panic anyone, but to inform you of things YOU can do (and should be doing 😉 on a regular basis. I hate when any user has an issue and if there are some tips I can provide to help you out, that’s my goal.
What can you do?
Export User Design – if you store any personal files in the Silhouette library. This is super easy to do now if you are using software version v4.4.552 or higher. Details HERE
Set Up Library Snapshot – just in case, it’s a good fall back and a good idea to check that it’s working. Details HERE
Back up Silhouette Library – this is different than exporting user designs. The file that saves is a backup file only. It does not contain individual files and cannot be opened outside the software, but if needed can be imported back into the software. Details HERE.
I have the resources that can help and I’ve linked those above. So there really is no reason not to do it, right?
Again, I don’t know the exact dates of the website updates, but I can tell you, there are updates coming. While we do try to troubleshoot with users, there are limits too. We do NOT have access to your account. All account issues have to be handled by Silhouette Support.
Now, I would HIGHLY recommend that you add this to your calendar and start doing it on a regular basis. It can save you a lot of frustration down the road.
Silhouette Users: Log In Info
After the website update, you may need to log in again on all devices. This is pretty routine when a connection is interrupted. I would highly recommend that you make sure you know your Silhouette account information – this includes the email address and password to log in. Write it down! Do not rely on your computer’s auto fill. We have seen issues in the past few months with computer systems and their auto fill systems.
Silhouette Users: Sync the Silhouette Library
If you do store files to the Silhouette library, not only should you be backing those files up to an outside source, but I’d highly recommend that you are verifying that the files are synced completely with the current date and time after you save them.
If you are experiencing issues with the Silhouette library syncing at any time, please follow the steps in this tutorial EXACTLY and if you continue to have an issue, reach out to Silhouette Support with a detailed description and photos. The more information they have to start troubleshooting the better.
*as a note, during the update, the website and Silhouette Support may not be available – that is why I’m sharing this information in advance. I recommend you do it now, not later.
Just like weathering a storm…. it’s better to be prepared and not need it, then to be unprepared. Can you tell I live in the mid-west and it’s storm season – lol!
I hope those tips will help you. Now it’s your turn to take action!
Enjoy !
THANK YOU for your support! How can you help? Click HERE & buy a coffee. Every little bit helps with the cost of running the site.
Silhouette Classes
Never stop learning! Let me help you take the anxiety out of learning with Silhouette and get to creating faster! My Silhouette classes are heavily focused on software, so you can take the skills & techniques taught and apply them to many future projects!
**This post may contain affiliate links. What that means is that I may receive compensation if you purchase through the links I have provided. The price you pay for the product or service is not higher but I may get compensated for sharing.
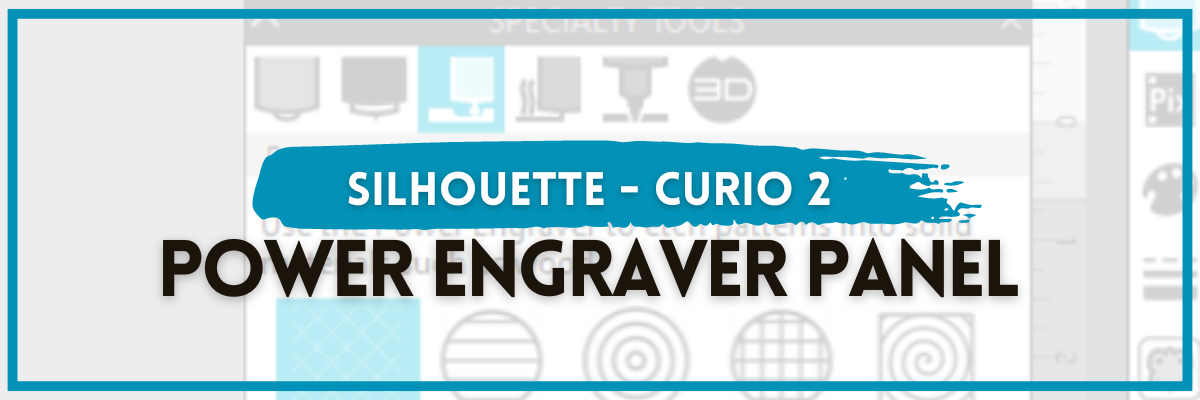
Under the new Specialty Tools Panel on Tab 3 in Silhouette Studio, is the Power Engraver Panel.
This tutorial was written in Silhouette Studio version 4.5.770. The Specialty Tools Panel was released in v4.5+ software versions. If you don’t see it on the right side of the Silhouette Studio, your software version may be older than v4.5.
Affiliate links may be present in the following blog post and as an Amazon Associate, I earn from qualifying purchases.
The Power Engraver is specific to the Silhouette Curio 2 and is one of the new powered tools that was announced and released in September 2023.
The backside of the Power Engraver features a power plug that sits in the Carriage 2 housing and powers the device through the Silhouette Curio 2 machine. The end of the tool is a router tip that spins to perform the engrave process. It functions like a Dremel tool and sounds like one too. The sound changes depending on the materials being used.
And I’ll just say – I love it!
Specialty Tools Panel – Power Engraver – Tab 3
Here is a look at the details of the Power Engraver Panel in Silhouette Studio.
1 – Power Engraver Etch Fill Patterns – choose from None, Lined, Concentric, Cross-hatched, and Spiral
2 – Spacing– Increase or decrease the grid spacing between the lines of the pattern. The dark red star shows a 0.004″ spacing – a really tight etch fill
This is another area where you are changing a lot of data at one time, so be patient with your computer if it is thinking.
3 – Angle – Change the angle of the etch pattern.
4 – Release Engraving Fill – selecting this option will take the fill from an editable fill pattern and makes it a vector design.
This can be helpful if you are trying to stack multiple layers of etch for engraving on harder materials. It is not necessary to do this with simple etch designs or softer materials such as acrylic.
When using this feature, be aware that once the fill has been released and file saved and closed, it is a permanent change to that file. If the design needs to be adjusted, you would need to start over.
Find the Silhouette Curio 2, Power Engraver Tool, and the Curio Debris Tray at either CrafterCuts, Silhouette America, or Amazon. CrafterCuts has free shipping on orders over $35 and use code SECRETS to save 10% on supplies & accessories (not valid on machines). Silhouette America has free shipping on orders over $50 if you are a Silhouette Club member.
Save this for future reference by pinning the image below.
Enjoy !
THANK YOU for your support! How can you help? Click HERE & buy a coffee. Every little bit helps with the cost of running the site.
Silhouette Classes
Never stop learning! Let me help you take the anxiety out of learning with Silhouette and get to creating faster! My Silhouette classes are heavily focused on software, so you can take the skills & techniques taught and apply them to many future projects!
**This post may contain affiliate links. What that means is that I may receive compensation if you purchase through the links I have provided. The price you pay for the product or service is not higher but I may get compensated for sharing.
Under the new Specialty Tools Panel on Tab 2 in Silhouette Studio, is the Score & Emboss Panel.
This tutorial was written in Silhouette Studio version 4.5.770. The Specialty Tools Panel was released in v4.5+ software versions. If you don’t see it on the right side of the Silhouette Studio, your software version may be older than v4.5.
Affiliate links may be present in the following blog post and as an Amazon Associate, I earn from qualifying purchases.
The score & emboss process is designed to cut a shallow line before embossing, intending to deepen the embossing.
This option is available to Silhouette Curio 1, Silhouette Curio 2, and Silhouette Cameo 5 model owners. If one of these machines is not plugged in and recognized, the panel will gray out, and you may not be able to select the options.
Specialty Tools Panel – Score & Emboss – Tab 2
Here is a look at the details of the Score & Emboss Panel.
1 – Tool Selection – Choose either the Fine or Wide Embossing tool according to what you are using.
Fine Embossing tool is a 1 mm tip and designated by a light blue/green top. Wide Embossing tool is a 3 mm tip and designated by a darker blue top.
2 – Passes – choose the number of passes for the tool to complete from 1 – 10 3 – Fill – check this to add a fill to the object selected. 4 – Apply Score & Emboss Lines – selecting this confirms to the software that you want to apply both these actions to the selected object
Score & Emboss on the Send Tab in Silhouette
Once you apply the Score & Emboss, clicking on the Send tab will display both a red cut line and a blue emboss line around the design.
Carriage 1 performs the red cut line with a blade installed, and Carriage 2 performs the blue emboss line with the embossing tool.
To be honest, I tested both with and without the Score line and it did not make a difference that I could tell with my cardstock, except that scoring increased the time & caused more debris. All cardstock will vary and testing is the only way to know what will work best with your brand and thickness of cardstock.
Here is a look at the Score & Emboss results. I noticed that it created debris and separation in some areas where it scored and embossed.
Results may vary depending on the actual cardstock being used. Silhouette does have a Score & Emboss paper that they recommend for this method. However, you can test with any cardstock and simply select the Score & Emboss Paper as the material on the Send tab.
Tips to Keep in Mind with Score & Emboss
When using the Score & Emboss feature, keep in mind that it increases the time for the project to complete because you have 2 tools working consecutively. Depending on what you tell the software to do, it can be a lot of data to process, so be patient with your computer if it is thinking.
Embossing is available on the following Silhouette model machines: Curio 1, Curio 2, Cameo 5.
At the time of publishing this post, a bug persists in the Silhouette software for the Silhouette Cameo 5 causing it not to emboss where it shows on the screen. I will not release a tutorial until this bug is fixed, as I don’t want users to ruin their $30 embossing mat, as I did on the first try.
If you do attempt to do this with the Silhouette Cameo 5, I would highly recommend that you use a full 12″ x 12″ sheet of cardstock to protect the entire emboss mat surface.
Cutting completely through a material on top of the Silhouette Embossing mat is not recommended as it can damage the embossing pad and tear it up.
As new information is released and the bugs are fixed, I will add additional resources for embossing.
Silhouette Cameo 5 additional resources found HERE
Silhouette Curio 2 additional resources found HERE
Silhouette Studio Specialty Tools Panel Tabs (coming soon)
Specialty Tools Panel – Tab 3 – Power Engraver – details HERE
Save this for future reference by pinning the image below.
Enjoy !
THANK YOU for your support! How can you help? Click HERE & buy a coffee. Every little bit helps with the cost of running the site.
Silhouette Classes
Never stop learning! Let me help you take the anxiety out of learning with Silhouette and get to creating faster! My Silhouette classes are heavily focused on software, so you can take the skills & techniques taught and apply them to many future projects!
**This post may contain affiliate links. What that means is that I may receive compensation if you purchase through the links I have provided. The price you pay for the product or service is not higher but I may get compensated for sharing.
New for the Silhouette Studio version 4.5+ software is the Specialty Tools Panel on the right side of the Silhouette Studio software. It originally started with only a few options showing available, such as the Silhouette Emboss Panel and Alta options. When Silhouette released the Cameo 5 and Curio 2 along side software version 4.5.735+, they introduced more options.
If you are using older software prior to v4.5, check out this post on the Emboss Panel HERE.
Affiliate links may be present in the following blog post and as an Amazon Associate, I earn from qualifying purchases.
The Specialty Tools Panel resides on the right side, just below the Page Setup Panel. Upon its addition, all other icons shifted downward, and the Silhouette Emboss Panel became nested under the Specialty Tools.
The Emboss Panel is available to Silhouette Curio 1, Silhouette Curio 2, and Silhouette Cameo 5 model owners. If one of these machines is not plugged in and recognized, the panel will appear grayed out, and you may not be able to select the options.
Specialty Tools Panel – Emboss Tab – Tab 1
1 – Deboss – the design will be created as seen on the screen & will press the design down into the material exactly as seen on screen. For example, if using cardstock, it will create a valley where the design is. Emboss – the design is flipped horizontally so it is mirrored BUT it does not show this on the screen. You will place your material face down on the embossing mat and the design will be pressed mirrored. When it’s finished, you will flip it over and the design should be raised on the side that was face down on the mat.
2 – F – This tells you which way to put the material on the mat.
For deboss, put the material face up.
For emboss, put the material face down.
3 – Embossing Patterns – Choose between 5 options: none, lined, concentric, cross hatched, or spiral.
Each design will vary in which pattern may look better for the emboss. Again it is a matter of personal preference. I prefer the look of the cross hatched pattern for most projects. However, the only way to know what might look best on any material is to test it.
5 – Spacing– Increase or decrease the grid spacing between the lines of the pattern. The dark blue heart shows a 0.004″ spacing – a really tight Deboss
If we zoom in on the design, you will see the pattern.
This is another area where you are changing a lot of data at one time, so be patient with your computer if it is thinking.
If you ever encounter a blue square/rectangle with an X in it, it may be smaller than what the Silhouette can process. Use the up arrow and increase the spacing just a bit or delete and type in a number just a bit higher than the current spacing, until the box disappears. Remember, be patient and go slow, it is processing a lot of data.
Here is an example of what it might look like.
5 – Angle – Change the angle of the deboss or emboss pattern.
6 – Release Emboss– Releases the lines of the emboss pattern. When you are satisfied with the pattern, click the Release Emboss button. You will not really see it do anything, but it is no longer an editable fill pattern. Once you release the emboss/deboss, you can add another pattern on top if you choose to.
Embossing is available on the following Silhouette model machines: Curio 1, Curio 2, Cameo 5.
At the time of publishing this post, a bug persists in the Silhouette software for the Silhouette Cameo 5 causing it not to emboss where it shows on the screen. I will release a tutorial until this bug is fixed, as I don’t want users to ruin their $30 embossing mat, as I did on the first try.
If you do attempt to do this with the Silhouette Cameo 5, I would highly recommend that you use a full 12″ x 12″ sheet of cardstock to protect the entire emboss mat surface.
Cutting completely through a material on top of the Silhouette Embossing mat is not recommended as it can damage the embossing pad and tear it up.
On the Send tab, select Score & Emboss paper to have the settings for embossing. If you want the emboss settings with any other material, you would need to create your own custom setting.
And then test, test, test! Remember that the preset settings in the Silhouette Studio software are just a starting point to test!!! All cardstock and materials will vary and there is no perfect setting for all materials worldwide. More information on Perfect Cut Settings found HERE.
Additional resources
I will add additional resources for embossing as new information is released and the bugs are fixed.
Silhouette Cameo 5 additional resources found HERE Silhouette Curio 2 additional resources found HERE
Silhouette Studio Specialty Panel Tabs 2-6 Info (coming soon)
Specialty Tools Panel – Tab 3 – Power Engraver – details HERE
Save this for future reference by pinning the image below.
Enjoy !
THANK YOU for your support! How can you help? Click HERE & buy a coffee. Every little bit helps with the cost of running the site.
Silhouette Classes
Never stop learning! Let me help you take the anxiety out of learning with Silhouette and get to creating faster! My Silhouette classes are heavily focused on software, so you can take the skills & techniques taught and apply them to many future projects!
**This post may contain affiliate links. What that means is that I may receive compensation if you purchase through the links I have provided. The price you pay for the product or service is not higher but I may get compensated for sharing.
This months video for the Artesprix YouTube channel took a turn when I had too much ink leftover and I loved the end result of my “accident” better than my original idea. I used the Artesprix Sublimation Stamp Ink Refills, mixed media paper, and Artesprix Satin Ribbon to create some fun and awesome creations. For my original idea, I used a paint brush and painted brushstrokes for my design, but then when I went to clean up my excess ink, I found that I loved the pattern it created so much better!
Affiliate links may be present in the following blog post and as an Amazon Associate I earn from qualifying purchases.
Do you ever have that happen? Think you have a plan and then it all changes and turns out even better than your original idea?
Watch how I made these custom ribbons with the Artesprix Sublimation products and added it to make custom ribbon in the new tutorial HERE on the Artesprix YouTube channel.
Artesprix Sublimation Supplies
Here is a list of the supplies I mentioned and demonstrated in the new YouTube video:
THANK YOU for your support! How can you help? Click HERE & buy a coffee. Every little bit helps with the cost of running the site.
Silhouette Classes
Never stop learning! Let me help you take the anxiety out of learning with Silhouette and get to creating faster! My Silhouette classes are heavily focused on software, so you can take the skills & techniques taught and apply them to many future projects!
**This post may contain affiliate links. What that means is that I may receive compensation if you purchase through the links I have provided. The price you pay for the product or service is not higher but I may get compensated for sharing.
I want to share a fabulous designer that I’ve had the privilege to collaborate with recently – Diva Watts Designs!!!
Affiliate links may be present in the following blog post and as an Amazon Associate, I earn from qualifying purchases.
I have been a collector of Stacey’s designs in the Silhouette Design Store and in September 2023 was able to connect and meet her face-to-face at the Silhouette Summit.
I love meeting others in the industry and getting to put a face with a name in real life and getting to know them! At least as much as we can squeeze into a whirlwind trip at these conferences.
I took 1 file and each week in March shared a new project that I had created with just that single file. I wanted to share some of the possibilities that you can do featuring the design by Diva Watts Designs. I’ll include a supply list for each of the projects below too!
Here is a look at the Flower file from Diva Watts Designs – you can find it HERE.
One design from Diva Watts Designs = 5 projects
Project #1 – Paper Flowers to Embellish a Card
I started out with simply cutting out the flower design from cardstock, adding some ink, and using paper shaping tools gave the flowers some dimension. The flowers were then glued onto a card base that I had sketched on.
Next, I cut multiples of the flower design in several sizes, added them onto a floral wire stem, and layered them together to create a 3-D flower arrangement. I had some crepe paper flower leaves from a different project that I added into the vase with the flowers too.
I had originally intended to create 2 sizes of earrings, but I cracked one during the process, so I ended up with 2 different projects. I used Silhouette Shrink Plastic and set it up as a print and cut project with the flower shapes filled with a watercolor pattern.
And as can happen, a project takes on a life of it’s own. I had originally designed and cut this so it was a layered earring design with the flower center facing forward. But after seeing it together, the center created a unique look showing through and I finished the project loving it even more!
Since I cracked one of my flower designs after shrinking it, I wasn’t going to let the other one go to waste and decided it would make a great tool charm. I added a tassel onto the chain and attached it to my scissors with a lobster claw clasp.
Now these are MINE! This is a great way to designate scissors for different purposes or lay claim to your tools.
A great big thank you to Stacey at Diva Watts Designs for contributing the free file for the Silhouette Secrets+ newsletter for the month of March! If you missed grabbing the free flower file in March, it is available in the Silhouette Design Store HERE.
This year I started offering a free file each month for Silhouette Secrets+ newsletter subscribers. I love designing in the Silhouette Studio software and have shared some of my creations as well as look forward to collaborating with more artists in the future too!
Silhouette Secrets+ Newsletter
Never miss out on the news, tips, “secrets”, deals, classes, and more that I share on Silhouette Secrets+. Sign up for the newsletter and get information delivered to your inbox every Friday. Unsubscribe at anytime.
Sign up for the weekly newsletter HERE to have information delivered direct to your inbox and grab each month new freebie.
Did this give you some ideas? How about how you can take 1 file and create a variety of projects with it. I had so much fun brainstorming, designing, and creating with this file. Thank you Diva Watts Designs!
Save this for future reference by pinning the image below.
Enjoy !
THANK YOU for your support! How can you help? Click HERE & buy a coffee. Every little bit helps with the cost of running the site.
Silhouette Classes
Never stop learning! Let me help you take the anxiety out of learning with Silhouette and get to creating faster! My Silhouette classes are heavily focused on software, so you can take the skills & techniques taught and apply them to many future projects!
**This post may contain affiliate links. What that means is that I may receive compensation if you purchase through the links I have provided. The price you pay for the product or service is not higher but I may get compensated for sharing.
I’m playing with paint this month on the Artesprix YouTube channel. Specifically, the new colors of the Artesprix Sublimation Paints. I made a fun potholder for my craft room.
Yes, you read that right! Since I’m often playing with sublimation blanks, they get HOT! This will come in handy in my craft room and brighten up the place a bit. But, you can also create these to brighten up your kitchen. Function and fun all in one!
Affiliate links may be present in the following blog post and as an Amazon Associate I earn from qualifying purchases.
THANK YOU for your support! How can you help? Click HERE & buy a coffee. Every little bit helps with the cost of running the site.
Silhouette Classes
Never stop learning! Let me help you take the anxiety out of learning with Silhouette and get to creating faster! My Silhouette classes are heavily focused on software, so you can take the skills & techniques taught and apply them to many future projects!
**This post may contain affiliate links. What that means is that I may receive compensation if you purchase through the links I have provided. The price you pay for the product or service is not higher but I may get compensated for sharing.
I get so excited each time I create a new class and this one is no different. This one is a faster paced class where you will create your own designs in the Silhouette Studio software completely from scratch. Introducing the Designing a Layered Card in Silhouette Studio – Intermediate class.
In this class, you will learn how to create designs using the tools in the Silhouette Studio software to make it your own! The entire design is created start to finish in Silhouette Studio.
This class is listed as an Intermediate class due to the faster pace, however, any level of Silhouette user can do this project and create their own designs. If you are a brand new beginner the tools and terminology may be unfamiliar and it may take longer to digest the information, but that’s also why I offer a lifetime access option to the classes, so you can watch as many times as needed.
Silhouette Studio tools used to create this card design include:
Drawing Tools
Flexishapes
Line Drawing Tools
Offset
Point Editing
and more!
This class also includes instruction on the card assembly and adding dimension and inking for paper flowers too!
But, there’s more! Not only will you learn how to design in the Silhouette software, but the design ideas can be used to create even more projects than just this card! I have also included a bonus class showing how to create a few additional elements in the the Silhouette software and make 5 additional projects too!
Here is a closer look at one of the 3-D paper flower projects created with just 1 of the designs you will create.
*Note: this class was taught during the March 2024 Card Maker Success Summit. If you purchased a VIP All Access Pass to that event, you have lifetime access to the main class through that event. The bonus class is available to purchase HERE.
Affiliate links may be present in the following blog post and as an Amazon Associate, I earn from qualifying purchases.
The design portion of this class only requires the Silhouette Studio Business Edition upgrade, but if you want to create the projects, there are additional supplies needed. I have listed those supplies below and there are downloads in the class for easy access too!
Supplies for Designing in Silhouette Class:
Silhouette Studio software found HERE – basic software is free to download
Silhouette Business Edition upgrade – more information on upgrades HERE
I had so much fun creating all of these projects, I hope you do too!
Find the Designing a Layered Card in Silhouette Studio class HERE. Find all of the Silhouette classes available on my Teachable site HERE.
Save this for future reference by pinning the image below.
Enjoy !
THANK YOU for your support! How can you help? Click HERE & buy a coffee. Every little bit helps with the cost of running the site.
Silhouette Classes
Never stop learning! Let me help you take the anxiety out of learning with Silhouette and get to creating faster! My Silhouette classes are heavily focused on software, so you can take the skills & techniques taught and apply them to many future projects!
**This post may contain affiliate links. What that means is that I may receive compensation if you purchase through the links I have provided. The price you pay for the product or service is not higher but I may get compensated for sharing.
Looking to add a touch of personality to your reading experience? Or give these as a gift for an avid reader? Or maybe encourage someone else to read more? In this tutorial, I’m sharing how to create your own unique magnetic bookmarks using Silhouette.
Affiliate links may be present in the following blog post and as an Amazon Associate, I earn from qualifying purchases.
You can head over to the Silhouette Secrets+ YouTube channel for a video tutorial creating these fun magnetic bookmarks or keep reading for the written tutorial below.
Design Fun Magnetic Bookmarks with Silhouette video HERE
*This project can be made with any model of Silhouette cutting machine.
DIY Fun Magnetic Bookmarks with Silhouette
1. Open Silhouette Studio and start by setting up the page size on the Page Setup Panel.
2. Click on the Page Setup Panel – Tab 3 and turn on the registration marks. Click on the Restore Defaults button.
The default registration marks are where the most accurate print and cut results will be so we always recommend starting there. The farther you move the marks out or smaller you make them, the greater chance of an inaccurate cut.
Check out these tutorials HERE for setting up print and cut for successful results.
3. Use File > Merge to open the graphic if the file is saved to an outside source. If the file is in the Silhouette library, right click on it and select Merge to bring it onto the page you have set up.
I used a transparent PNG file and have Autotrace turned off. Autotrace is a great feature to have, but is not needed for this project. I do not need to excessive data that Autotrace creates when it opens high resolution PNG files. The Autotrace feature can cause slowness and lag on the computer because it has to recalculate all of the cut data each time the user makes a change to the design. Check out this tutorial HERE for more details on the Autotrace feature.
4. Scale the design to the size you want.
Keep in mind if using a PNG or JPEG image, that it is a flattened photo file and you can scale down without losing image quality, but in most cases cannot scale up or it will become pixelated.
Tip: If the PNG or JPEG file opens large, easily resize it by using the Scale down 50% or 33% in the Scale Tools depending on your project and then use the Center to Page to bring it onto the workspace.
5. Open the Trace Panel, click Select Trace Area, and draw a box around the design. Increase the threshold to 100%. Click Trace at the bottom.
A basic outline of the design is all that’s needed and it does not have to be perfect.
6. Move the original image away from the cut line. Right click on the cut line and choose Release Compound Path.
This will separate any “artifacts” from the outer cut line.
7. Hold the Shift key down and click on the outer cut line only. This will deselect the outer cut line and only the artifacts will be selected. Press delete.
Alternate option: Click off the image entirely to deselect everything. Click back on the outer cut line and move it away. Left click and drag the mouse from the top left to the right and down to the bottom right of the original area of the trace area. All artifacts should be selected. Press delete.
8. Click on the trace cut line and open the Offset Panel. Next click on Offset and adjust as desired. Then click Apply or press enter to apply the offset.
9. Move the original trace cut line off the mat. Keep the original in case you need to go back to it later.
10. Select both the cut line and the design, then Center Align. Then group the cut line and design together (right click choose Group or Ctrl+G is the shortcut)
In most cases, the design will be exactly centered with the cut line, however, sometimes it will be slightly off. Simply adjust it manually to be centered as desired.
11. Select the design and click on the Replicate Panel. Choose Mirror Above. Use the arrow keys to move the mirrored copy up as desired.
Tip: if using text, you do not want to mirror or it will be backwards. Since text is not mirrored, it can affect the outline edge of the offset and they may not line up when folded together. Each design can vary in what you need to adjust to make it match. I’d recommend starting with images first and then play with text as you get more comfortable with the process.
12. Draw a rectangle or shape between the cut lines of the 2 designs. Make sure that the shape overlaps the cut lines.
If needed, activate the Edit Points by double clicking and move the edit points so that the cut lines are overlapping or make the rectangle larger. Each design may vary in what works best.
13. Ungroup the design from the offset cut lines on both.
14. Select the offset cut line of 1 design, hold the Shift key, select the rectangle in the middle, and select the 2nd offset cut line. Right click and choose Weld.
If something goofy happens with the graphic design, that means it was selected and not the cut line. Use Undo and start again selecting only the cut lines. Click exactly on the red line for it to be selected and use the Zoom tools if needed.
15. Group the entire design together and arrange on the print and cut page.
16. Save a copy of the design.
17. Repeat those steps to create additional designs to fill the page. Save your work along the way.
If you have a design that doesn’t have defined outer edges, like the watercolor Crazy Cat image on the top right, you can also use simple shapes like a rectangle for the bookmark shape.
And here is a tip to getting the image to be the exact same distance from the bottom of the bookmark on both sides.
I drew a long rectangle, then sized the image to fit inside of the rectangle design and then used the Align tools to align the bottom of the image with the bottom of the rectangle.
Then click off the design to deselect it and click back on the image only. Select the Move By Tool, enter the distance amount and press the directional arrow you want it to move.
This moves the image the exact distance in the direction selected. Group the bottom image with the rectangle.
Repeat the same steps for the top image. Align to the top of the rectangle and then used the Move By tool and selected the down arrow. Group the image with the rectangle so nothing moves out of place. Now it is perfectly aligned the same distance on either end of the rectangle shape.
The Move By Tool is a very handy tool to use in designing. Find more information HERE.
18. Print out the page of designs on the desired material. I tested with both the Koala Glossy Photo paper and 110 lb Neenah cardstock. The photo paper was a bit thin, but still worked with the laminate on top of it.
19. Apply laminate on top if desired. This will help to protect the bookmark with use.
Tip: For best results, do not cover the registration marks of the print and cut with the laminate surface. The Silhouette optical eye can have a difficult time reading accurately on glossy materials due to reflections from that material. This can affect the cut accuracy. However, the newer Cameo 5 and Portrait 4 are supposed to read better on glossy surfaces, so you’ll see me test that in the Magnetic Bookmark video found HERE. It worked, but it may not work for all users.
20. Place the printed page on the Silhouette cutting mat exactly as it shows on the Silhouette software screen in the top left corner. Make sure to test cut for your materials. And then send the job to cut.
Check the cut before pressing the unload button and if it did not cut through completely, send the job again until you get a clean cut.
21. Unload the mat, flip the mat over and carefully peel the cutting mat away from the materials.
22. Fold the bookmark designs over, line the edges up exactly, and use a bone folder to crease the top.
23. Test the magnets to make sure they will stick to each other.
Polarity matters and if the magnet doesn’t line up properly, it will not work. Magnet strength also matters, so make sure to test before applying to the project.
24. With the magnets together, peel the backing off the adhesive side and press down to the inside of the bookmark design.
If not using adhesive backed, you will need to add adhesive to one side of the magnet for it to stick to the inside of the bookmark.
25. Peel the backing off the other side and carefully press the bookmark closed along the fold line. This should line up the magnetic bookmark evenly.
26. Relax, read a book, and enjoy! Or give as a gift and share the joy with others too!
But, fair warning…. once you start creating these fun magnetic bookmarks, it can be hard to stop.
Save this for future reference by pinning the image below.
Enjoy !
THANK YOU for your support! How can you help? Click HERE & buy a coffee. Every little bit helps with the cost of running the site.
Silhouette Classes
Never stop learning! Let me help you take the anxiety out of learning with Silhouette and get to creating faster! My Silhouette classes are heavily focused on software, so you can take the skills & techniques taught and apply them to many future projects!
**This post may contain affiliate links. What that means is that I may receive compensation if you purchase through the links I have provided. The price you pay for the product or service is not higher but I may get compensated for sharing.
THANK YOU for your support! How can you help? Click the link to buy a coffee. Every little bit helps in the cost of running the site.