Posted on Leave a comment

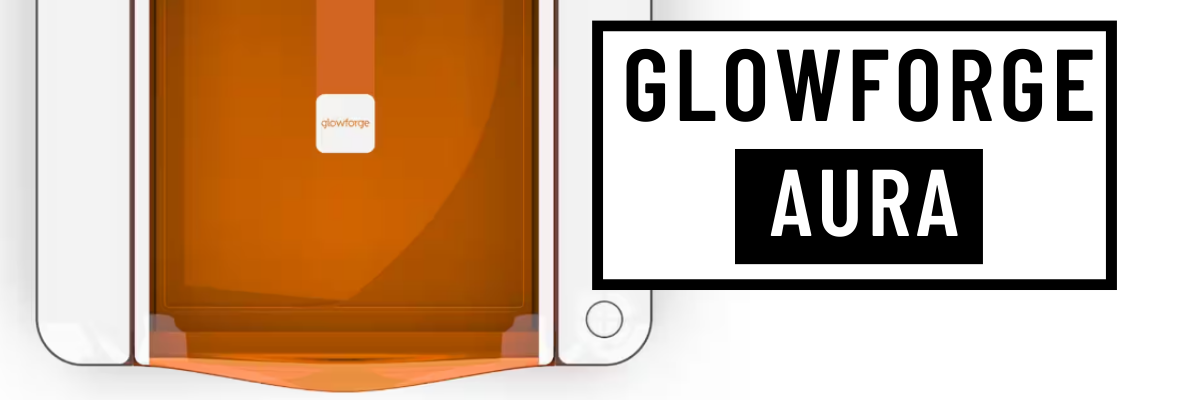
Glowforge® Aura – new “craft” laser

Affiliate links may be present in the following blog post and as an Amazon Associate I earn from qualifying purchases.

Did you hear? Glowforge® recently announced the release of a new “craft” laser machine called Aura™. You can find the Glowforge® Aura™ at Michaels or Joann stores currently.

A “craft” laser sounds pretty cool and enticing. I think one thing that’s appealing to most is the price tag. While other models of Glowforge® have increased in price, the Glowforge® Aura™ is coming into the market at $1299 $1199. This is a lot less than a larger Glowforge® model, so I can see how it might be appealing.

But, I think there is more to it than just the price to consider.

Is the Glowforge® Aura™ right for you?

I cannot answer that, but I can give you some information about it and some things to think about in your decision making process.

I currently own a Glowforge® Pro and having a laser machine is pretty cool. I love using the Silhouette Studio Business Edition to create designs for use in the laser and I even have class on it too (more on that below).

While having a laser machine is cool, I think there are some things to note about it before diving in. And I would highly recommend doing your own research as well too! I’ll share some resources for more information at the end.

Things to Think About

“Craft” laser machine

What does that mean? Basically, it’s not as powerful as the other models of Glowforge® lasers. If you are looking for a laser machine to produce items to sell, this may not be the machine for you. The Aura™ is not going to be an efficient, high production machine. It is slower than other Glowforge® models, much slower.

The Glowforge® Aura™ is a 6 watt diode laser machine. This is what makes it slower than the other models of Glowforge® that are CO2 machines. To compare, the Glowforge® Pro, which is the model I have, is a 45 watt CO2 laser. From what I’ve seen in comparison watching it all unfold, it is about 4 times slower than the Glowforge® Pro.

Since it is a diode laser at 6 watts, it cannot cut all of the same materials that the CO2 lasers can. So make sure to research that as well to make sure it’s going to cut what you want.

The Glowforge® Aura™ has a bed that is 12″ x 12″. The smaller footprint is also what makes it a “craft” laser and more appealing for a crafter’s space.

Filter or Venting

Just like it’s bigger laser friends, the Glowforge® Aura™ has to be vented or used with a filter. This is something to consider before you purchase any laser.

I have my Glowforge® Pro vented out of a window in my space. I open the window and place the venting prop that my husband built in the window and close it down. It is constructed out of scrap plywood, nothing fancy.
We have pets, so leaving the window open while using the machine is not ideal.

He installed a dryer vent on the outside of the window prop, so it opens when the Glowforge® fan turns on.

If you live in an area that has fluctuating temperatures, I would recommend having a system that you can pull the venting back inside when not in use.

Glowforge® did release an air filter that can be used with the Glowforge® Aura™. It is $399 to purchase and is a replaceable filter. However, I have not been able to find any information on how much a replacement filter is. They do not seem to be available yet. The Glowforge website says the filter has a lifetime of 100 hours of printing.

On that note, I have followed several Glowforge® groups in the past 2 years and always see comments about users who cannot get replacement filters as they are always out of stock. It does not seem to be a matter that they sell out quickly, but they have been low inventory the last few years. If you are looking into a Glowforge®, I would highly recommend joining some Facebook groups and watch the posts and comments as part of your research.

Personally, I’d recommend venting it out a window if you are able to do that.

WIFI Connection

In order to use a Glowforge® laser machine, you have to be connected to WIFI at all times when using the software/app and machine. This means you need a good internet connection. And it requires a 2.4 GHz WIFI connection. It does not work off a 5 GHz connection.

The filter for the Glowforge® Aura™ connects by WIFI as well.

Materials

Another area you will want to research is materials. Materials used in the Glowforge® or any laser machine need to be laser safe. Not all materials are laser safe and some can be toxic when used with a laser.

I’d highly recommend starting with proof grade materials. This takes the guess work out of the settings and gives you a better chance of success quickly.

What are proof grade materials? These are Glowforge® materials that they know work in the machine. Materials by Glowforge® have a QR code on it and the camera reads it and recognizes the material. This makes getting started easier than a bunch of testing to find out what settings work.

Safety

A laser machine is fire. The machine should never be left unattended or running without supervision.

I’d recommend having a fire extinguisher or fire suppressant next to the laser machine just in case.

Another thing I’d highly recommend is laser safety glasses. While the Glowforge® Aura™ is a lower wattage laser, you only get one set of eyeballs. Please be safe in your use with lasers.

Maintenance

One of the biggest things I see that users run into problems with their machines is in the maintenance. Keeping the machine clean and following the cleaning instructions will help to increase the lifespan of your machine and decrease the likelihood of running into issues. A lot of issues can be prevented if the machine is cleaned regularly.

The materials that are used in the Glowforge® will make a difference in how often it needs cleaned. For instance, cutting or engraving wood produces different dust than cutting and engraving acrylic.

Location, Location, Location

Think about where you would put a laser machine. According to the Glowforge® website, the recommended operating temperature is 60 degrees F – 75 degrees F.

A location that is not temperature controlled can affect the lifespan of the equipment. Too hot or too cold of temperatures is not good for laser equipment.

The Glowforge® Aura™ has a 12 month warranty, however, if you are not following the guidelines recommended by Glowforge®, the warranty does not cover that. It is not their fault if you are operating outside of the recommendations.

Read more on the details HERE

Terminology

Glowforge® uses the term “printing” for everything. Even though it’s a laser that cuts and engraves, “print” is the terminology they use. So just keep that in mind when you are researching. It is not a printer like we think of that prints with ink on paper.

That is a lot of information, but I hope that it’s given you a few things to think about in your decision making process.

Resources

Silhouette and Glowforge®

If you do have a laser machine and it uses svg files, you can design in the Silhouette Studio Business Edition software and export it as a svg to use with the laser machine. I love the ability to customize and create my own designs to use with my Glowforge® Pro.

By request I designed a class called Creating SVG files in Silhouette Studio – Great for Laser machine owners or designers! The class shows you how to create a design for use in the laser machine and I show a demonstration with bringing it into the Glowforge® app/software to cut with your machine.

Glowforge® Aura Information

This was not written with the intention of detouring you from getting a Glowforge® Aura™, but to provide information for you to make the best decision for you.
As I mentioned above, I would highly recommend doing your own research to make sure that the machine you choose is going to be right for you. If you are an occasional user, it may not be worth the investment in a laser at this time or the Glowforge® Aura™ might be just right for you. If you are a business owner or looking to invest in a machine to get started with selling laser products, you might find that a bigger, faster machine is more efficient and will save you time and money for running a business.

If you are looking at a larger Glowforge model, click HERE to save a bit. With my referral link you could get the equivalent of $500 USD off a Pro, $250 USD off a Plus, and $125 USD off a Basic.

Here are a few additional resources for Glowforge® and the Glowforge® Aura™:

Glowforge website
Country Chic Cottage
Hey Let’s Make Stuff
Jennifer Maker

I hope that has helped to give you some thinking points on if a laser is the right equipment to add to your space!

Enjoy !

THANK YOU for your support! How can you help? Click HERE & buy a coffee.
Every little bit helps with the cost of running the site.

Silhouette Classes

Never stop learning! Let me help you take the anxiety out of learning with Silhouette and get to creating faster! My Silhouette classes are heavily focused on software, so you can take the skills & techniques taught and apply them to many future projects!

Silhouette step-by-step Classes by Silhouette Secrets+

SS Logo snip it
**This post may contain affiliate links. What that means is that I may receive compensation if you purchase through the links I have provided. The price you pay for the product or service is not higher but I may get compensated for sharing.
Posted on Leave a comment

Designing in Silhouette – Circle Frame with Basic Tools

Designing in Silhouette Studio does not have to be difficult or complicated. With a few basic tools, you can create your own designs to use in projects.

Anyone can do this! Yes – that means you! Let me show you how!

Check it out HERE on the Silhouette Secrets+ YouTube channel.

This technique could be used for a variety of projects from adhesive vinyl, heat transfer vinyl, cardstock and more! It is how I created the Swift Creek Customs logo that my husband and I use for our shirts, social media logos, project creations, watermarks, and more!

What would you use it for? Let us know below.

————————–

Updates and News

As social media evolves and followers are seeing less and less of what they want, there are 2 additional ways you can follow along with Silhouette Secrets+ and get information direct to your inbox.

Blog Notifications

Subscribe to the blog below – this means you will get notified by email each time a new blog post is published on the Silhouette Secrets+ website.

Weekly Newsletter

– Subscribe to the weekly newsletter – New! Subscribe HERE
Every Friday I will publish a newsletter that features tips, “secrets”, tutorials, and more. Sign up for the weekly newsletter and get information delivered straight to your inbox. No more relying on social media to show you information I share!

Enjoy !

THANK YOU for your support! How can you help? Click HERE & buy a coffee.
Every little bit helps with the cost of running the site.

Silhouette Classes

Never stop learning! Let me help you take the anxiety out of learning with Silhouette and get to creating faster! My Silhouette classes are heavily focused on software, so you can take the skills & techniques taught and apply them to many future projects!

Silhouette step-by-step Classes by Silhouette Secrets+

SS Logo snip it
**This post may contain affiliate links. What that means is that I may receive compensation if you purchase through the links I have provided. The price you pay for the product or service is not higher but I may get compensated for sharing.
Posted on 7 Comments

Let’s Explore v4.4 – Page Setup Panel – Updated

Over the years the Silhouette Studio software has changed. If you’ve been using Silhouette for a while, you may have seen it, but if you are new, you may not have noticed these changes.

I’m sharing an updated tutorial today on the Page Setup Panel in the Silhouette Studio software v4.5+. With new versions, new features are added or moved. This means the panels change and sometimes they can change quickly.

If you are still using an older version of software or yours looks a bit different, that is ok – you do NOT need to update. Check out these older tutorials HERE for more details. This is all dependent on your software version.
Again, I DO NOT recommend you update just so it looks like this tutorial, especially if your software is running just fine.

I’ve also created a video tutorial that you can find on the Silhouette Secrets+ YouTube channel HERE as well.

This tutorial is written in version 4.5 of the Silhouette software.
*Note: tutorial is photo heavy

What software version are you currently using?

Here is how to find out this information.

On a Windows computer, in the top left corner, click on Help > About Silhouette.

Software version

On a MAC, navigate to the top left menu, click on Silhouette Studio, and then click on About Silhouette.

MAC About Silhouette copy


(Thanks Libby Ashcraft for this MAC screenshot!)

This little window tells us a lot of information.

From this screen we can tell what the exact software version is and what level of upgrade the user has. This helps immensely in troubleshooting issues with users as some bugs can be version specific.

Let’s Explore v4 – Page Setup Panel

The Page Setup Panel is found in the top right corner of the Silhouette Studio software and it opens automatically when you open the software.

It is one of the most important panels in the software because it’s where you tell the program, and ultimately your Silhouette machine, exactly what you are doing.

Simply click the top right icon if you need the Page Setup Panel to open again.

Now, let’s take an in-depth look at what is included on this panel. As I mentioned above, it is one of the most important panels in the setup for your projects.

At the top of the Page Setup Panel is the Design Area Setup.

This is where you tell the software and machine exactly what you are using.

#1 – Machine
This where you tell the software what machine you will be using.

With the release of v4.4 software, several changes were added and you have more options in the machines selection, even if you do not own that particular model machine.

#2 Feed Type
This one you may or may not see. It is completely dependent on what Silhouette model machine you have. This option will show up when the Cameo 4, Cameo Plus, Cameo Pro, or Portrait 3 models are selected. This is only an option for the Silhouette Auto Sheet Feeder.

If you do not have a Silhouette Auto Sheet Feeder, you do not need to do anything here.
For more information on the Silhouette Auto Sheet Feeder, click HERE.

#3 – Cutting Mat
This is where you tell the software & machine what size cutting mat you are using or if you are not using a cutting mat.

When a cutting mat is selected, you will see the cutting mat appear on the screen. Notice the gray border around the cuttable area. The Silhouette software virtual mat is calibrated exactly to a Silhouette cutting mat. This is how the machine knows how far in to pull the cutting mat before it starts the cut.

The black arrow is ALWAYS the top of the cutting mat that is the leading edge going into the machine, no matter what direction it is turned on the screen.

When no mat is selected, you will only see a white page and you are telling the machine to start the cut at the top of the material.

#4 – Media Size
This means your page size or your material size. Media = material.

Select from the preset option in the drop down or set your own custom size in the width and height boxes.

Transparency
Slide the transparency slider over to reveal the cutting mat below the media page.

At 0.0% it means the media will be white*
(*read below for additional information)

As you slide the Transparency up, it reveals the cutting mat below. The media becomes more transparent on the mat. The photo above shows at 65% transparency.

I use this option all the time when making projects. It is how I line up multiple colors of material on one cutting mat and send it through the machine to cut once.
Check out this tutorial on Cutting Multiple Colors at Once HERE.
It also is how I make my mats last longer and save the adhesive on my cutting mat. Shhhh don’t tell anyone!

Constrain Media to Mat
This was introduced in v4.4 and it is often confusing for users. Basically it means with this option checked that the media will not go outside of the cutting mat borders, no matter what the user sets it to.

As as example, if I set the media size to 14″ wide and 11″ height, with the Constrain Media not checked, the page/media will hang off the edge of the cutting mat as shown in the photo.

With the Constrain Media to mat, it will not allow you to set the custom media size to larger than the cutting mat size. It will automatically recalculate that based on the machine selected and cutting mat selected.

Orientation
This is in reference to your media size. Portrait Orientation is vertical and Landscape is horizontal. Here is an example of Portrait Orientation.

With the release of v4.4 software versions there was a bug released that we call the “orientation bug”. It is a bit difficult to explain in photos and this tutorial is already photo heavy, so I would recommend checking out the video tutorial HERE for more details on that. At the time I write this, the “orientation bug” has been present since July 2020, so I don’t really see it going away. I explain in the video how it works and why.

Now let’s take a look at the bottom half of the Page Setup Panel.

Media Color
This is new and was introduced somewhere around v4.4.8xx.

This was implemented as a user request to make it easier to see what a design might look like on top of a particular color instead of drawing a rectangle behind the design and filling it with color.

It does not print or cut, but simply changes the color of the background of the media set in #4 at the top of the Page Setup Panel.

Rotate View
This is a visual reference only! Rotate the cutting mat or material (set to no mat) on the screen for better viewing while you are designing.

No matter what direction you rotate the mat on the screen, the black arrow is ALWAYS the top of the cutting mat or leading edge of the material that gets fed into the machine.

I show you how you can use this to “fix” the orientation bug in the video on the Silhouette Secrets+ YouTube channel HERE.

Print and Cut Borders

Show Print Border
Check this option and a gray box appears around the area that is set by the current printer set up with your computer. I recommend checking this box anytime you are doing a print and cut project or printing from the Silhouette Studio software.

The Print border does NOT affect your cutting ability. It only affects printing and if your design is outside of your print border, it will not print. This is especially important if your registration marks for a print and cut are outside of this area and do not print properly.

Show Cut Border
Check this option to see a red border for the maximum cuttable area on the media size you have setup.

If you do not see your Cut Border extended to the edge of the page and you want it to, click the gear icon in the bottom right corner to open the Preferences Panel. Then select the Defaults tab and check the box to Cut to Edge of Page. Click Apply (if available) and OK.

I work with my Cut Border on the majority of the time. It is especially handy when you are cutting without a mat and need to know the space you have to place your design so it will cut.

Look at where the red cut border is adjusted to when cutting without a mat. This is for a very specific reason! The left and right margins and the 1″ on the backside are for the rollers on the machine to securely grip the materials as it’s being cut. If you try to “trick” the machine, you risk the material falling out of the machine when it’s cutting. It’s an easy way to waste a good piece of vinyl.

Whew! Who knew the Page Setup Panel contained so much information! It is one of the most important panels as it’s where you start with the setup of your project!

Save this for future reference by pinning the image below.

Enjoy !

THANK YOU for your support! How can you help? Click HERE & buy a coffee.
Every little bit helps with the cost of running the site.

Silhouette Classes

Never stop learning! Let me help you take the anxiety out of learning with Silhouette and get to creating faster! My Silhouette classes are heavily focused on software, so you can take the skills & techniques taught and apply them to many future projects!

Silhouette step-by-step Classes by Silhouette Secrets+ with EllyMae

SS Logo snip it
**This post may contain affiliate links. What that means is that I may receive compensation if you purchase through the links I have provided. The price you pay for the product or service is not higher but I may get compensated for sharing.
Posted on 1 Comment

New machine release – Cricut Venture™

Cricut® announced the release of a new machine called the Cricut Venture™ and I’ve been asked by several my thoughts on it. I figured this would be the easiest way to answer that.

Thoughts on the new Cricut Venture™ Cutting Machine

First, please understand these are my personal opinions only from my experience! And we can all be friends!!! No matter what cutting machine we choose to use, we can still be friends. Each user may have different purposes or reasons for the machine that they choose. The following information is my own personal opinion and not everyone will agree 100% with me…. AND that is OK!

Next, please understand that I do not have a Cricut Venture™ machine and do not plan to get one as I publish this, as that is not the direction I am going. However, I do have years of experience with Cricut® products as that is what I started with almost 20 years ago and I work with many users who are still Cricut® owners, but might be utilizing the Silhouette Studio Business Edition software as an alternative to Cricut Design Space®.

My ultimate goal is to help YOU choose a cutting machine that will be the best fit for YOU! The best one for YOU…. is the one YOU will take out of the box and use. If it just sits in the box, it isn’t doing anyone any good.

On that note, whatever cutting machine you do get.
GET IT OUT OF THE BOX!
I say this for several reasons.
First, it is not doing you any good just staring at the box. It’s not going to bite you and it’s not going to be magic straight out of the box! Get it out!
Next, almost all cutting machines have a limited time warranty on them. All brands! Get it out of the box and start using it just in case there might be an issue with the machine! This is NOT machine specific, but in general!!! All electronic equipment has a chance of not working properly or having some random issue that happens.
If you wait a year or two to open the box and you encounter an issue, there is NOTHING you can do about that! The machine warranty is over! You now have a giant paper weight and that is not the company/brands fault.

I highly recommend this especially for a user buying a new machine that’s just been released! Get it out of the box and use it!

Affiliate links may be present in the following blog post and as an Amazon Associate I earn from qualifying purchases.

—————–

Again, please understand this is my opinion only. If you are still reading, I hope that you will read the entire post completely so you’ll understand why I share what I do.

I am going to cover some very basic things that stand out to me right off the bat. This will not be an in-depth comparison post, but hopefully will give you some thinking points to consider.

First thoughts on the Cricut Venture

The Cricut Venture™ was announced as a new innovative large format cutting machine with a unique space saving design.

Price

It comes in with a hefty price tag of $999.99 upon the initial release.

Why do I use the word “hefty”?
I add this adjective because it is quite a bit higher than other comparable machines on the market.

As a comparison, the Silhouette Cameo Pro and the Siser Romeo machine both come in at a lower price point than the new Cricut Venture™.
Silhouette Cameo Pro retail value $499.99
Siser Romeo retail value $699.99
*sale prices may be lower than the retail value

Both the Silhouette Cameo Pro and the Siser Romeo are 24″ cutting machines that can cut matless with any lined material and with a cutting mat too!

These 2 large format cutting machines have been on the market for a bit now. The Silhouette Cameo Pro was released in November 2020 and the Siser Romeo was released in November 2022.

I do own, use, and am proficient in both of these 24″ cutting machines.
No matter what machine you have, especially in a large format cutting machine, they do require a very specific setup for best success!
We troubleshoot a lot with both Silhouette and Siser machine users and the biggest issue we see is someone not having the machine set up properly and not taking the time to learn it! Those are 2 of the most important factors with any machine!

Limitations

When comparing the new Cricut Venture™ to the Silhouette Cameo Pro or the Siser Romeo, I see several limitations right away.

Software

All Cricut® machines utilize the Cricut Design Space® software. This is an online software and they control it and whatever you create in it.

This is ultimately the reason that I outgrew Cricut®. I had maxed out my capabilities with their software and I wanted more.

Cricut Design Space® also does not allow you to export your work from their program. They control you and your work!
This is a limit to any business owner in my opinion or even a crafter.
For more information, I would highly recommend you read the Cricut® terms of use closely. No one does, but it might surprise you what is included in that fine print that you agree to.

While they are now releasing a large format cutting machine that is being promoted for business owners, they still control YOU. If their server is down, so are you!

I’ve had many argue with me that they do have an “offline” option as well, but it’s not really offline if you have to take special steps to save things into the “offline” form in order to be able to access offline. In my opinion, that’s not the true meaning of offline.
Completely offline to me means that you do not need internet at all to use it!

Do you need to have Cricut Access™ to use the new Cricut Venture™?

I asked this question on the Cricut Facebook Page and the answer I received was
“The Cricut Venture will use Design Space.” – Cricut.

That does not answer my question and leaves me with even more.
Anyone can use Cricut Design Space®, but there are certain features they have rolled out for Cricut Access™ only and you cannot use unless you have Cricut Access™.

Since they did not say yes or no to my question, I’ll watch and see if you do have to pay for Cricut Access™ in order to use the new Cricut Venture™.

*Update – I asked an influencer & Cricut Access is not needed.

Materials

The new Cricut Venture™ can cut matless, however, it is specifically designed to cut Cricut Smart Vinyl™. The Cricut Smart Vinyl™ comes in 13″ and 25″ widths.
This is a major limitation in my opinion!
One of the main reasons a user would invest in a large format cutting machine is to be able to cut matless.

If we look at cost alone, especially for a business, bulk rolls of Oracal adhesive vinyl and Siser HTV are much more cost effective when selling or even just creating in general.

There are 2 roller lock positions on the Cricut Venture™.
At the 13″ width and the 25″ width. It was designed intentionally with these limits, so the Cricut Smart Vinyl™ is the only product that it can use matless.

Find the Cricut Venture™ supplies available at Michaels HERE to compare prices.

Cutting Mats

The Cricut Venture™ has 2 sizes of cutting mats that can be used.
A 12″ x 24″ and a 24″ x 28″ cutting mat.
These are specially designed cutting mats for the Cricut Venture™ only.

It CANNOT utilize the other Cricut cutting mats for older models.
Now, on this point, I fully agree with specific cutting mats for the machine.

The larger you go with a cutting mat, the heavier the mat is. This also means that the machine has to be designed in a way that it can securely grip the mat in the machine all the time. This means stronger rollers. And with the new design of the “space saving” feature, it is really going to have to hold on tight to work against gravity with the cutting mats. This also means that the cutting mats have to be designed to withstand the pressure of the stronger rollers too!

Print then Cut

This is one I’ve seen asked a lot with this new machine.

Is the print then cut space larger?

The answer is yes, if you have a larger format printer to allow you to print larger sizes.
However, it doesn’t affect the print then cut space of smaller media types.
There are still limits to the print then cut size on the average crafter size materials.
Maybe they will change that in the future as it’s one of the things I see requested by users.

Design

One of the features of the new Cricut Venture™ is the unique 45° angle of the machine. This feature is designed as a “space saver” feature and being promoted that you do not need as much space to use the new machine as other 24″ cutting machines.

My first thought is, that it does not seem like a good idea for functionality and lifespan, especially when working with a large format cutting mat. Now, working with rolls of vinyl, you may not have too many issues (Cricut Smart Vinyl™ of course).
But, a cutting mat is a different monster!

I’ve been using the Silhouette 24″ x 24″ cutting mat since before it was released in November 2020 as one of the original tester. It is the same thickness as a Silhouette 12″ x 12″ cutting mat but it is 4x the size. Extra size = extra weight.
The Cricut Venture™ cutting mats are redesigned from the original Cricut® mats for durability with the Cricut Venture™.

And we are all still living on Earth, so we are still affected by GRAVITY!
Not only is the cutting mat heavy but gravity is also affecting that.

Only time will tell how that affects the machines lifespan.
But, lifespan on a machine has never been a goal of Cricut®, as we have seen several past models no longer supported.

—————–

Now, those are my first thoughts and my own personal opinion based on my experience with cutting machines.

That does not mean it isn’t the right machine for YOU!

It might be and that is great!
I hope it does everything you want it to do and more!

I was asked my thoughts several times and these are the things that jumped out at me first. Over time we will see what happens.

I know there will be some who do invest in a Cricut Venture™ and I would love to hear your experiences with it! Both initially and down the road with extended use.

I will be following along on the journey through other Cricut®bloggers as well.

—————–

If you are still reading this, thank you for sticking around and hearing my thoughts!

I want to briefly touch on how most Cricut® users find and follow me.
That is typically through the Silhouette Studio software!
Well, not the software directly but the fact that I’ve been teaching and troubleshooting the Silhouette Studio software since 2016.

If a Cricut® user starts to feel the limitations of designing or working in Cricut Design Space®, using outside software to design in is an option.
Cricut Design Space® does allow the import of SVG files.
This is great!

With the Silhouette Business Edition upgrade, you can design and save SVG files.
As with any new software program you are using, it does take time to learn!
And that’s where my background is.

The Silhouette Studio Business Edition upgrade can be found at these locations:
Crafter Cuts (use code SECRETS to save 10%)
Check for additional sales at Silhouette America The Vinyl SpectrumSwing Design

Find more tutorials on the Silhouette Secrets+ website to help learn the Silhouette Studio Business Edition software HERE

I also have step-by-step Silhouette classes available on my Teachable site HERE. While I use a Silhouette machine to cut, each class is heavy on designing in the Silhouette software and could be used to learn how to create files you can use and export as a SVG.

For more details on how to Save as a SVG from Silhouette Studio Business Edition,
check out this post
Let’s Explore v4 – Save as a SVG

No matter what cutting machine you choose, get it out of the box!
And use it!

If you are in the market for a large format cutting machine, where can you find it?
Cricut Venture™
Silhouette Cameo Pro – use code SECRETS to save 10%
Siser Romeo

Or you may be ready for a more professional plotting machine to invest in.

If you are a Silhouette Cameo Pro user or a Siser Romeo user, I have more resources that can help too! Remember I said that the setup is one of the most important steps!

Check out this video on the Swift Creek Customs YouTube channel
Siser Juliet, Romeo, and Silhouette Cameo 4 Cutting Machines – 5 Differences

Find more on the Silhouette Cameo Pro HERE
Find more on the using Siser Romeo HERE

Enjoy creating!

THANK YOU for your support! How can you help? Click HERE & buy a coffee.
Every little bit helps with the cost of running the site.

Silhouette Classes

Never stop learning! Let me help you take the anxiety out of learning with Silhouette and get to creating faster! My Silhouette classes are heavily focused on software, so you can take the skills & techniques taught and apply them to many future projects!

Silhouette Step-by-Step Classes

SS Logo snip it
**This post may contain affiliate links. What that means is that I may receive compensation if you purchase through the links I have provided. The price you pay for the product or service is not higher but I may get compensated for sharing.
Posted on 2 Comments

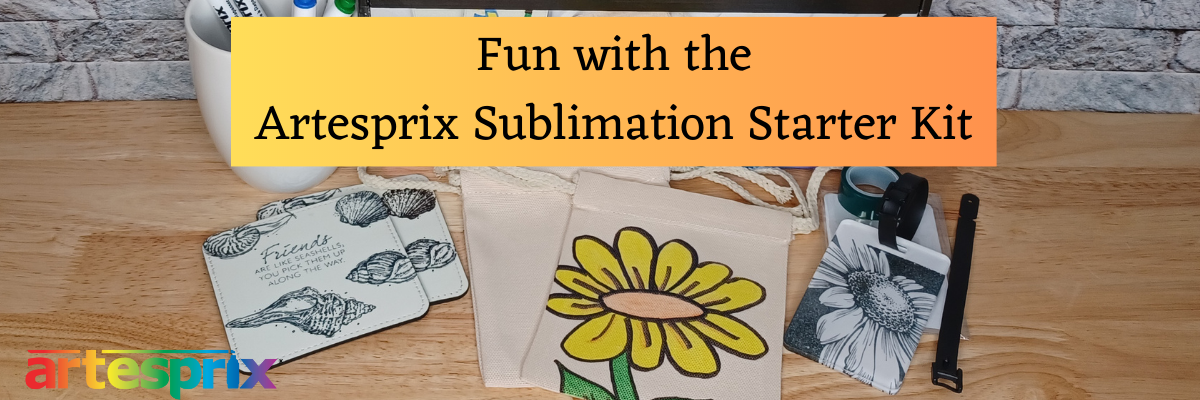
Fun with the Artesprix Sublimation Starter Kit

Affiliate links may be present in the following blog post and as an Amazon Associate I earn from qualifying purchases.

This month I got to play with the Sublimation Starter kit from Artesprix for the new YouTube video. Everything you need to get started is in the box!

Check out the new video HERE on the Artesprix YouTube channel.

In the new video, I share how I easily drew a design with pencil and then colored in with the markers. This would be a great way to create a custom gift bag!
I am in no way and artist and just doodled out on the copy paper to see what would happen.

This is a great way to start if you have never used the Artesprix Sublimation supplies!

Artesprix Sublimation Supplies

Here is a list of the supplies I mentioned and demonstrated in the new YouTube video:
Artesprix Sublimation Starter Kit
Includes: Sublimation Mark Basic Chisel 10 ct, (6) Craft Express blanks, Heat Tape, Protective Paper
Artesprix Protective Mat
– NEW! Artesprix Siliconized Protective Paper 60’ roll
– Heat Source that reaches 400 degrees
I used a Siser 9″ x 12″ Heat Press
– Other supplies: copy paper, pencil, scissors

Check out the new YouTube video HERE.

It is so much fun to play with these supplies. I’ll have another video out soon sharing how I created these sublimation acrylic tags that are in the kit too!

Additional supplies pictured above
Artesprix Black Stamp Pad
Artesprix Stamp Block
Stampers Anonymous Tim Holtz Bold Botanicals Stamp Set

I’ll be sharing more so make sure to follow Artesprix on social media to see more projects!
Artesprix YouTube channel
Artesprix Blog
Artesprix Facebook Page
Artesprix Iron-on-Ink Inspirational Group

Save this for future reference by pinning the image below.

Grab some Artesprix sublimation products and get to creating today!

Enjoy !

THANK YOU for your support! How can you help? Click HERE & buy a coffee.
Every little bit helps with the cost of running the site.

Silhouette Classes

Never stop learning! Let me help you take the anxiety out of learning with Silhouette and get to creating faster! My Silhouette classes are heavily focused on software, so you can take the skills & techniques taught and apply them to many future projects!

Silhouette step-by-step Classes by Silhouette Secrets+

SS Logo snip it
**This post may contain affiliate links. What that means is that I may receive compensation if you purchase through the links I have provided. The price you pay for the product or service is not higher but I may get compensated for sharing.
Posted on Leave a comment

3 Ways to Work with Rhinestones

Have you seen all the possibilities with rhinestone designs?

In this post, I’ll share 3 ways you can work with rhinestones.

Rhinestone Design Created in Silhouette Studio

Affiliate links may be present in the following blog post and as an Amazon Associate I earn from qualifying purchases.

Let’s Add Bling!
3 Ways to Work with Rhinestones

1. Create Your Own Rhinestone Designs

If you have the Silhouette Studio software Designer Edition upgrade (or higher), you can easily create your own rhinestone designs that can be cut out of rhinestone flock.

Rhinestone Template Material

I share how the Rhinestone Panel in Silhouette Studio Designer Edition works in this tutorial in the Let’s Explore v4 series
Let’s Explore v4 – Rhinestones

I also have a step-by-step class where I share how to create 4 different rhinestone designs and give tips for working with pre-made rhinestone designs, how to make your own, and how make faux rhinestone designs as well!

Silhouette Design & Rhinestone Class

Designing with Rhinestones – Creating 4 Projects on Teachable HERE

And there are even more options!
If you have the Silhouette Studio Business Edition upgrade, you can also create the rhinestone design and export as a svg file. This means that other cutting machine users could also use the svg file or you could use a different machine to cut the rhinestone flock for the template as needed.
As always, you would need to test with your specific cutting machine to find out the cut settings that work best.

Check out these tutorials for more details on
Saving as a SVG file and Perfect Cut Settings

To create your own rhinestone designs does require some additional supplies. Here is a list of the supplies I used in the Designing with Rhinestones class.

Supply list

– Silhouette Studio Software
– Silhouette Studio Designer Edition upgrade
at Crafter Cuts (use code SECRETS to save 10%)
Check for additional sales at Silhouette America The Vinyl SpectrumSwing Design
Hot Fix Rhinestones
Rhinestone Template Material
Hot Fix Transfer Tape
Siser Glitter HTV
– Blanks: zipper bagshirt, bag, etc.
Trim paint brush
– Tools: Scissorssharp weeding toolSilhouette Pick Me Up ToolSilhouette Spatula
– Optional: Rhinestone scoop, Rhinestone Supplies at The Rhinestone World ,
Bead ScoopLarger Trim Paint brushPaper TrimmerLint RollerTool Kit
– Silhouette cutting machine (or another cutting machine model)
– Heat Source: Siser Heat Press

In the class, I used a few more project specific designs.
Find all the details HERE or directly on Teachable HERE.

2. Order Pre-Made Rhinestone Transfers

Maybe you don’t want to invest in the supplies to cut designs out of rhinestone flock and make your own.

You can still create with bling!

I recently ordered some rhinestone transfers from Heat Transfer Warehouse to test.

Sure I could have made them on my own, but once I saw the prices, I ordered a few.
Well, maybe more than a few!

Here is one I ordered for my daughter to wear.

And of course I couldn’t pass this one up.

These are as easy as ordering and pressing according to the instructions.
Bing, bang, bling!

The most difficult part about rhinestone designs is getting a good photograph.
It is so hard to capture the sparkle and bling on these designs.
I have more to apply in the future too!

Check it out HERE

3. Order Custom Rhinestone Transfers

Do you have a custom design you want to have made with rhinestones?
Maybe you don’t have all the colors of the rhinestones you need or it is just too complex or it is cheaper to purchase than to create?

Heat Transfer Warehouse also offers custom transfers as well.

Custom Rhinestone Design by Heat Transfer Warehouse

Prices will vary depending on the size, color, and complexity of the design.

Check it out at Heat Transfer Warehouse HERE!

And have fun!
So many projects on my list for the future!
Hope you’ll continue on this journey with me!

Save this for future reference by pinning the image below.

3 Ways to Work with Rhinestone Designs with Silhouette

Enjoy !

THANK YOU for your support! How can you help? Click HERE & buy a coffee.
Every little bit helps with the cost of running the site.

Silhouette Classes

Never stop learning! Let me help you take the anxiety out of learning with Silhouette and get to creating faster! My Silhouette classes are heavily focused on software, so you can take the skills & techniques taught and apply them to many future projects!

Silhouette Step-by-Step Classes

SS Logo snip it
**This post may contain affiliate links. What that means is that I may receive compensation if you purchase through the links I have provided. The price you pay for the product or service is not higher but I may get compensated for sharing.
Posted on 2 Comments

HTV, DTV, DTF, DTG, Oh my! – What does it all mean?

There are a lot of letters out there floating around in the industry right now and lots of places to get confused about what they all mean.

So let’s take a look at the basics of what each of these terms mean and then you may have a better idea if you want to look into each one a little bit further.

Affiliate links may be present in the following blog post and as an Amazon Associate I earn from qualifying purchases.

What is what?

HTV = Heat Transfer Vinyl

Heat transfer vinyl is a product that can be applied to fabric. The adhesive on heat transfer vinyl is heat activated and the adhesive melts into the fabric.

Siser Easyweed HTV Design - Relax Everything is Out of Control

Relax Everything Is Out of Control by Sophie Gallo – Design #436898

There are many brands and types on the market worldwide.
I use Siser Easyweed HTV and other Siser specialty HTV the most in my projects.

The primary purpose of HTV is for fabric and materials, however, you will see some apply it to other surfaces as well. I see mixed results with these methods and it is always good to test what you plan to do.

For more details, tips, tutorials, projects, and classes on HTV
Click HERE

Siser Easyweed HTV White - Cat Mom Design

Cat Mom by Erica Digital Design – Design #377246
Peeking Cat by Erica Digital Design – Design #353053

DTV = Direct to Vinyl

Siser EasyColor DTV is a product that was released in the Fall of 2022. It is a heat transfer vinyl that can be printed on with an inkjet printer.

Siser EasyColor DTV - Sarcasm Loading Printable HTV

Periodic Table Sarcasm design by Suzanne Cannon – Design #298890

I love Siser DTV!!!
I’ve had great success and my shirts have been washed well over 20+ times.

For more details on Siser EasyColor DTV
CLICK HERE

Creators Gonna Create design with Siser EasyColor DTV - printable HTV

Creators Gonna Create design by Jamie Lynn Designs – Design #295352

Siser DTV is great for being able to add graphics or multi-color designs using a home printer without having to cut and layer multiple colors of HTV.
Grab some Siser EasyColor DTV in a variety of sizes at The Vinyl Spectrum HERE.

Make sure to follow the instructions from Siser on printing, pressing, and washing for best results!

DTV is not the same as Heat Transfer Paper.
Heat Transfer Paper was an alternative before Siser EasyColor DTV was released. But it is not vinyl, even though many use the terms interchangeably.
Find more on Heat Transfer Paper HERE.

DTF = Direct to Film

Direct to Film is a printer that prints onto a film that is used to transfer the design to a blank. This can be a great for heavy graphic images that you do not want to layer or if you have a lot of one design that you are using for a project.

DTF designs ordered from 143Vinyl

Here is a sheet of DTF prints I ordered to test from 143Vinyl.com.
Cut them apart and heat press to your shirt or blank.
Done!

Backside of a DTF print ordered from 143Vinyl

Here is a look at the backside of a DTF print.

This is not your everyday at home printer, but can be useful if you run a business.
If you are interested in investing in a DTF printer, you can find more details on printers and supplies at Heat Transfer Warehouse or Swing Design.

If you are like me and don’t want to invest in a DTF printer or have no need to, then I’d recommend ordering some DTF prints to try out.
Check out 143vinyl.com and order today!
(Note: 143Vinyl is currently upgrading equipment as this post is published and DTF ordering is on hold)

Butterfly DTF design from 143Vinyl

You can either upload your own image or use their image library. I chose to use the Image library for my first round to test it out, but mostly because it takes me forever to decide on a design that I want and even longer to create it.

Make sure to follow all their instructions for submissions if you upload your own images.

Vintage Truck DTF print from 143Vinyl

I have also seen a lot of mention about DTF “hacks”. Keep in mind that it may or may not have the same results or longevity. It is all a process of experimentation.
The only way to know is to test it, if you decide to go down that road.

DTG = Direct to Garment

Direct to garment is another specialized printer and not your ordinary, average home printer. This printer type allows you to print directly onto a shirt or other blank.

Both a DTF or a DTG printer are a serious investment, so I would recommend doing a bit of research before diving into that, but it can be a great option for a small business that is growing.

Check out more on DTG printers at Swing Design HERE.

For me as an everyday crafter, a DTF or DTG printer are not in my list of must haves for my studio as I do not think they would be utilized enough.

Vinyl

Vinyl is a general term that can be used in reference to many different products.
Often times it is used so generically, that we have to clarify what the user is wanting to do before we can advise on information they are looking for.

There is adhesive vinyl, HTV, specialty vinyl, and also things like sticker paper and heat transfer paper that get lumped into the “vinyl” category.

Oracal 651 Adhesive Vinyl Intricate Mandala Design - Take what you have and use it to build what you want

If you are looking for more on adhesive vinyl, check out these tutorials HERE.

I wanted to keep this very basic in explaining what each meant. It can be very confusing when you see the terms thrown out there and sometimes used incorrectly.

I hope this information helps to give you an idea if you would like to explore more on a certain area that might be helpful to your future projects or business!

Save this for future reference by pinning the image below.

HTV, DTV, DTF, DTG what does it mean

Enjoy !

THANK YOU for your support! How can you help? Click HERE & buy a coffee.
Every little bit helps with the cost of running the site.

Silhouette Classes

Never stop learning! Let me help you take the anxiety out of learning with Silhouette and get to creating faster! My Silhouette classes are heavily focused on software, so you can take the skills & techniques taught and apply them to many future projects!

Silhouette step-by-step Classes by Silhouette Secrets+

SS Logo snip it
**This post may contain affiliate links. What that means is that I may receive compensation if you purchase through the links I have provided. The price you pay for the product or service is not higher but I may get compensated for sharing.
Posted on Leave a comment

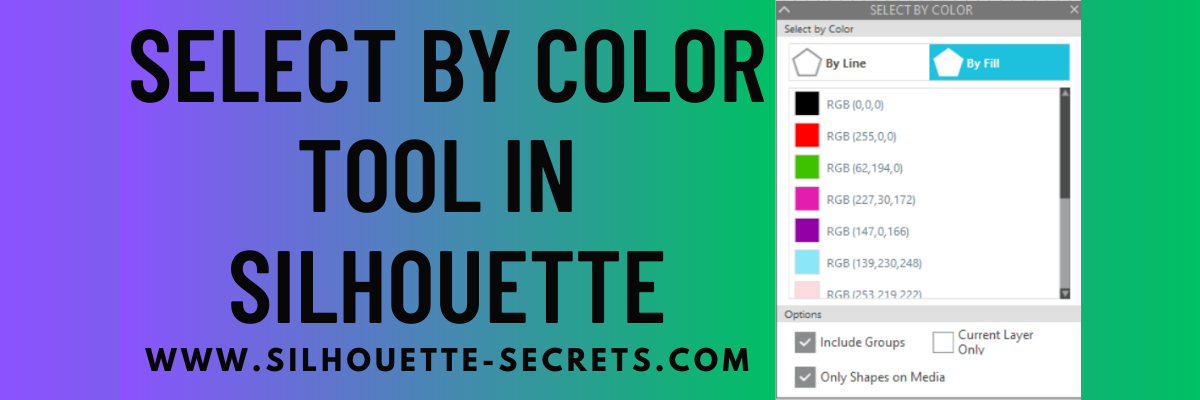
Let’s Explore v4 – Select by Color

Have you used the Select By Color Tool in the Silhouette Studio software?

Affiliate links may be present in the following blog post and as an Amazon Associate I earn from qualifying purchases.

Select By Color Panel

This is a very helpful tool if you have a complex design and want to select all of the same color either by line color or fill color.

The Select By Color tool can be found in two location in Silhouette Studio.

The fastest way is the Select By Color icon in the top toolbar of Silhouette Studio as shown above.

Butterfly Flower Mandala Design Faux Stained Glass with Silhouette
Butterfly Flower Mandala by Wispy Willow Designs – Design #320100

But, you can also find it under the Edit menu in the top left corner of the Silhouette Studio software too.

Select by Color Panel in Silhouette Studio

Once you have selected the tool, a panel will open on the right side and you have several options that you can use.
Click on either the By Line or the By Fill option at the top and you will see a list of colors for the design on the screen show up.

Select by Fill Color in Silhouette Studio

Select a color of your choice and all of the pieces of that same color will be selected at once. This comes in handy when you have multiple pieces throughout a design and want to easily group them together quickly or select them all for any reason.

Select by Color in Silhouette Studio

At the bottom of the Select By Color Panel, you have a few more options to further specialize the way the tool works.

Select by Color Options in Silhouette Studio

The Select By Color tool worked awesome when creating this faux stained glass design with Oracal 8300 transparent vinyl and black Oracal 651.

Faux Stained Glass with Oracal 8300 and Silhouette

Check out my recent blog post about Custom Color Palettes HERE and how they can help you in your project creation too! It came in real handy for the butterfly project as well!

So many tools in the Silhouette Studio software that can help you in your projects now and in the future!

Don’t miss out on any Silhouette tutorials, classes, or news!
Sign up below to get email notifications every time I publish a new blog post.
My goal is for 1 new post a week, unless there is exciting news to share in between.
I know we are all busy and daily emails are not my thing.

Save this for future reference by pinning the image below.

Select by Color in Silhouette Studio Pinterest

Enjoy !

THANK YOU for your support! How can you help? Click HERE & buy a coffee.
Every little bit helps with the cost of running the site.

Silhouette Classes

Never stop learning! Let me help you take the anxiety out of learning with Silhouette and get to creating faster! My Silhouette classes are heavily focused on software, so you can take the skills & techniques taught and apply them to many future projects!

Silhouette step-by-step Classes by Silhouette Secrets+

SS Logo snip it
**This post may contain affiliate links. What that means is that I may receive compensation if you purchase through the links I have provided. The price you pay for the product or service is not higher but I may get compensated for sharing.
Posted on 2 Comments

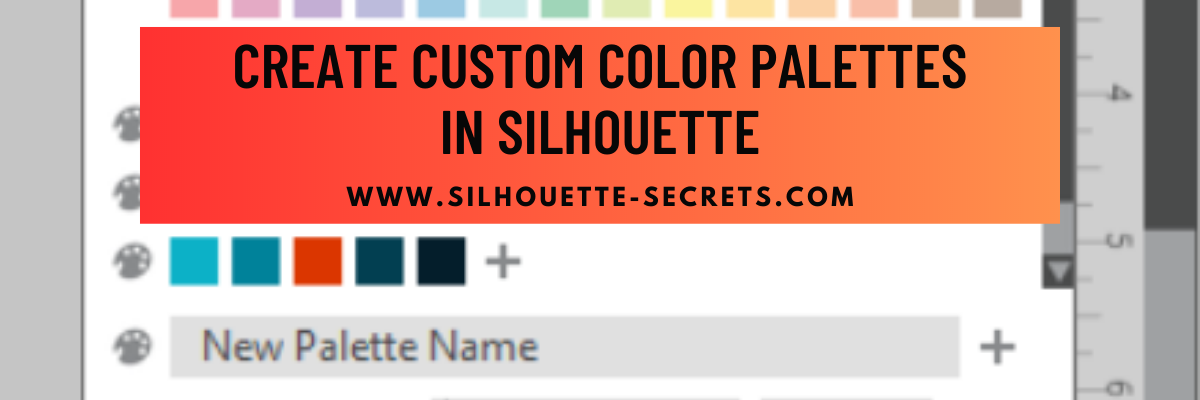
Let’s Explore v4 – Custom Color Palette in Silhouette Studio

Did you know you can add your own custom color palette into the Silhouette Studio software?

This is a feature that was first introduced in version 4.3.263 in September 2019, but I don’t think a lot of users know about it still.

Custom Color Palette in Silhouette Studio

This tutorial is written in v4.5.196.

Today I wanted to share some examples of how you can use this in your projects.

There are a few limits to mention before we get started.

The first I want to mention is that custom color palette’s are computer specific. They are not saved with you “cloud” data, so will not show if you use the software on multiple computers. But, you could easily add them into another computer by saving the original file to your Silhouette library and open on the new computer. Then follow the same steps below to add that custom palette to the other computer.

As you can see in the photo above, the panel space is limited so you will only see a few custom palettes displayed if you create lots.
This can also depend on your screen size. Smaller screens sizes can’t fit as many icons as a larger screen size could. You’ll also see this in the panels displayed along the right side and in the QAT at the top too.
There is a scroll bar on the right side of the panel so you can scroll down and see more of the options you have created.

Also keep in mind that the colors that show on your computer screen may be different than what your printer actually prints. The only way to know what color will print is to test it.

And the media that you are printing on can make a difference in the final color outcome as well. Different brands of media, different types of paper, glossy, photo, matte, etc. can all vary in the final color outputs.

Check out this recent video on the Silhouette Secrets YouTube channel where I shared my results from different brands of sticker paper. I used the same exact print settings for each one and they all had differences.
Silhouette Studio Print Quality Tips and Testing Video HERE

Affiliate links may be present in the following blog post and as an Amazon Associate I earn from qualifying purchases.

How to Create a Custom Color Palette

Let’s take a look at the basics to create a custom color palette.
Here is a video from Silhouette America on how to create a custom palette

Now that we know how it works, let’s take a look at how we can use it in projects.

Now you may be the type of crafter who can pick and choose color combinations easily, but I need help. I found this really neat website called Paper Heart Design Co. and I reached out to the artist, Anne Stout, to ask if I could share in a tutorial.

Anne is a graphic designer and has these amazing color palette’s on her website that caught my eye one evening as I was scrolling through Pinterest and I fell in love.
Not only does she provide a visual of the photo used for the colors, but she also provides the Hex code as well.

When you view the color palette’s on the Paper Heart Design Co. website, the HEX code is listed below the color palette.

This gives you a couple options for working in the Silhouette Studio software.
We can use the eyedropper tool to grab the colors or at the bottom of the Fill Color Panel, you can enter the Hex code for each color.

I saved the specific color palette from Paper Heart Design Co. and then opened it into the Silhouette software. This will be the reference I use to create a custom color palette and change the colors in my design. By creating the custom color palette, I can come back and use that palette over and over again without the setup work.

Using Custom Color Palettes in Silhouette Studio for Designing
Summer by Jillibean Soup – Design #414187

The eyedropper can be found in the top of the Fill Color Panel, while the HEX code can be found at the bottom of the Fill Color Panel.

I created a Summer Color Palette and then used it to change the colors in my design.

Custom Color Palettes in Design with Silhouette Studio Software

I actually really like the navy color the original design had in it, so I worked with it as well, but you could also mix and match additional color palette to add more colors in.

Now, if I want to come back and use this same colors on a different design, it’s all in my Fill Color Panel and ready to go.

You could use this for so many things from printing on actual projects or creating mock-ups to see how a design or color combination can work together.

Here are a couple more that I created using palettes from Paper Heart Design Co.

Use all the colors or just a few from the palette created.

Head on over to the Paper Heart Design Co. website to view the color palettes and find your favorites or check out the ones I’ve pinned on my Color Ideas Pinterest board HERE to help get you started.

Here is another example of using a custom color palette on a more complex project.
This was a class taught by my colleague Barbara Foster of Let’s Go Silhouetting at the All Things Silhouette Conference in 2022.

Adding Custom Color Palettes for Use in Silhouette Studio
Butterfly Flower Mandala by Wispy Willow Designs – Design #320100

We created a custom color palette with the colors of Oracal 8300 we were using for the faux stained glass design and then it also helped to be able to Select by Color and group all the pieces of the design when we went to cut.

Faux Stained Glass project with Oracal 8300 and Silhouette

As I mentioned above, this tool can have many uses.
Here are a few ideas:
– Print and Cut projects: cards, home décor, scrapbook layouts
– custom branding for theme projects
– visual only on screen
– creating mock ups
– testing out material colors
– selecting colors to cut easier on complex designs

Hopefully this information has sparked a creative thought process on how you might use this tool in your projects.

Save this for future reference by pinning the image below.

Create Custom Color Palettes Pinterest

Enjoy !

THANK YOU for your support! How can you help? Click HERE & buy a coffee.
Every little bit helps with the cost of running the site.

Silhouette Classes

Never stop learning! Let me help you take the anxiety out of learning with Silhouette and get to creating faster! My Silhouette classes are heavily focused on software, so you can take the skills & techniques taught and apply them to many future projects!

Silhouette step-by-step Classes by Silhouette Secrets+ with EllyMae

SS Logo snip it
**This post may contain affiliate links. What that means is that I may receive compensation if you purchase through the links I have provided. The price you pay for the product or service is not higher but I may get compensated for sharing.
Posted on 1 Comment

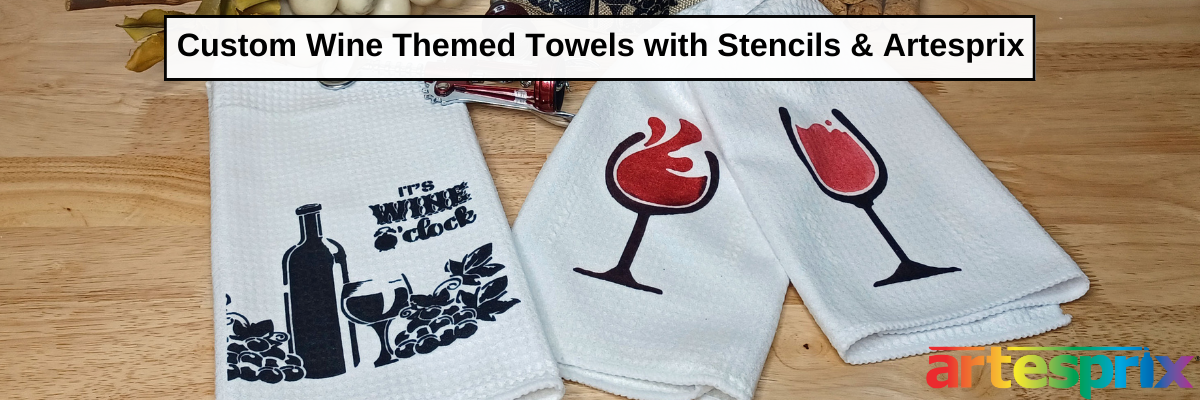
Custom Wine Themed Towels with Stencils & Artesprix

Silhouette Secrets+ with EllyMae

Looking for a creative and personalized way to elevate your kitchen or gift-giving game? Custom wine-themed towels using stencils and Artesprix sublimation products are the perfect solution! This DIY project combines the versatility of Artesprix sublimation markers with the precision of stenciling to create vibrant, professional-looking designs that celebrate your love for wine. Whether you’re crafting for yourself or preparing a thoughtful gift, these custom towels are a fun and easy way to add a touch of elegance and personality to any space. Let’s dive into the step-by-step process to create your own stunning wine-themed towels!

Affiliate links may be present in the following blog post and as an Amazon Associate I earn from qualifying purchases.

This month for the new Artesprix YouTube video I am sharing tips & tricks to using stencils with the Artesprix sublimation projects and creating custom kitchen towels.
With the Artesprix products, there is no sublimation printer required, so you can play and create without a huge investment into equipment.

Wine Themed Kitchen Towels using Artesprix sublimation inks

Check out the new video HERE on the Artesprix YouTube channel.

I share how you can use either the Artesprix stamp pads or the Artesprix markers with the stencils to create a project. Each one can give you just a little bit different look and it’s so fun to see what those differences are.

Artesprix Sublimation inks with stencils for custom kitchen towels

You can see there is a bit of color variation in each of the designs above. I love it!

Wine Themed Kitchen Towels and Wine bag with Artepsrix Sublimation Inks

I found my wine stencils on Amazon, but you could also cut your own stencils using your cutting machine and a stencil material or plastic, even cardstock would work for short term designs. I fell in love with these wine glass designs and just had to use them.

Artesprix Sublimation Supplies to Create Custom Wine Themed Kitchen Towels

Artesprix Sublimation Supplies

Custom Wine bag with stencil and Artesprix Sublimation Inks

Check out the new YouTube video HERE.

I knew I had one final touch to add to these kitchen towels to display them in my kitchen. Check out the post HERE where I added that touch.

I absolutely love working with Artesprix products—they always spark my creativity and leave me inspired with even more ideas for future projects. Find more projects I’ve created using the Artesprix sublimation products HERE.

I’ll be sharing more so make sure to follow Artesprix on social media to see more projects!
Artesprix YouTube channel
Artesprix Blog
Artesprix Facebook Page
Artesprix Iron-on-Ink Inspirational Group

Save this for future reference by pinning the image below.

Custom Wine Themed Kitchen Towel with Artesprix Sublimation Products Pinterest

Grab some Artesprix sublimation products and get to creating today!

Enjoy !

THANK YOU for your support! How can you help? Click HERE & buy a coffee.
Every little bit helps with the cost of running the site.

Silhouette Classes

Never stop learning! Let me help you take the anxiety out of learning with Silhouette and get to creating faster! My Silhouette classes are heavily focused on software, so you can take the skills & techniques taught and apply them to many future projects!

Silhouette step-by-step Classes by Silhouette Secrets+

Silhouette Secrets+ with EllyMae
**This post may contain affiliate links. What that means is that I may receive compensation if you purchase through the links I have provided. The price you pay for the product or service is not higher but I may get compensated for sharing.