Posted on 6 Comments

Let’s Explore v4 – Preferences – Tools

When you use the drawing tools in the Silhouette Studio software, does every click of your mouse continue to draw another shape?

Did you know that you can change this behavior within the software?

Click on the Preferences icon in the bottom right corner of the Design Tab or click on the Edit option in the top left menu & choose Preferences.

Preferences copy

Then choose the Tools tab at the top of the Preferences window.

If the software continues to draw shapes with each click of the mouse, this preference can be found under the “Action After Tool Use” section of the Tools tab.

After drawing Tools

I change the After Creating a Shape and the After Drawing Freehand to “Choose Select” then choose Apply and Ok.

Choose Select

Now when you choose a Drawing Tool or the Line Drawing Tool, it will go back to the selection arrow instead of continuing to draw shapes.

Tip: I keep the Eraser and the Knife tool as “Continue Using” because typically I will continue using the eraser or knife. I have the After Using Zoom set to “Choose Select” because I don’t want each click of my mouse to keep zooming in on the design. I prefer to have my selection tool again and if I need to zoom in more, I will choose zoom again.

Sometimes these defaults can get reset in the software, but after you know what they are and how to adjust them, you can easily go in and change it to what you prefer.

Each user will have a preference on how they like to work in the software. I prefer to draw one shape and then have the selection arrow as my next option as I am rarely drawing more than 1 of an item at a time when I’m designing.

Feel free to post your comments and questions below or on my Facebook group at Silhouette Secrets with EllyMae.

Enjoy!

SS_Signature copySS Logo snip it

**This post may contain affiliate links. What that means is that I may receive compensation if you purchase through the links I have provided. The price you pay for the product or service is not higher but I may get compensated for sharing.

Posted on 14 Comments

Mastering the Line Tools in Silhouette Studio: Your Ultimate Guide to Precision Design

Silhouette Studio Line Tools
Silhouette Secrets+ with EllyMae

Let’s Explore v4 – Line Tools in Silhouette Studio

When it comes to creating stunning designs in Silhouette Studio, the Line Tools are your secret weapon for precision and creativity. From drawing simple straight lines to crafting intricate custom shapes, these tools open up endless possibilities for your crafting projects. Whether you’re a beginner exploring the basics or an experienced designer looking to refine your techniques, understanding how to use the Line Tools effectively can take your designs to the next level. In this guide, we’ll walk you through each Line Tool, share pro tips for maximizing their potential, and show you how to incorporate them into your next Silhouette masterpiece. Let’s dive in!

Sometimes, I think that the tools on the left side of the Silhouette Software get lonely. There is so much that you can do within the software in creating your own designs and I love seeing what everyone comes up with.

First, let’s take a look at the Design Tab. On the left side are the Tools in the software and on the right side are the Panels which control the properties of the objects created.

Silhouette Studio: Tools vs Panels copy

Check out the Let’s Explore v4 series (HERE) to see more information on the Panels on the right side and how they can be used.

And if you need a little more detailed diagram of the Design tab, don’t forget to grab the FREE PDF in this post – HERE.

Silhouette Studio: Let's Explore v4 diagram

Silhouette – Line Tools

Today, we are going to cover the Line Tools located on the left side of the Silhouette Studio software. This is available for all users, no matter if you have a software upgrade or not.

Silhouette Line Tools on left side

Here is a close up of the options available in the Line Tools menu – Draw a Line, Draw a Polygon, Draw a Curved shape, and Draw an Arc

Silhouette Line Tools Close Up

Draw a Line

This will draw a simple line from Point A to Point B. Holding down the Shift key will make it a vertical, 45 diagonal, or horizontal line.

Silhouette: Draw a Line

I often will draw a line if I have to separate designs when cutting without a mat to make it easier to weed.

Silhouette Line as Weeding Lines

Sometimes, I’ll use the Weeding Lines within the Silhouette software, but other times, it’s just as easy to draw my own line.

If you want to connect 2 separate lines together, check out this post on How to Connect Lines in Silhouette HERE.

Draw a Polygon

This tool will continue to draw lines until you connect the red dots together to close the shape or double click to end the line.
Holding down the Shift key will also make it a vertical, horizontal, or 45 degree angle line.

Silhouette Polygon Line Tool

Have some fun and see what kinds of shapes you can draw. Turning on the Snap to Grid found under the Page Setup Panel – Tab 2, can also help in making sure that you get even spacing and help with drawing objects.

I’ll use this tool or the Draw Curve Shape to create my own weeding lines around a detailed design or when I’m cutting multiple designs on a page.

Silhouette Polygon Line Tool as Weeding Lines

A combination of tools can make it easier to weed a detailed design or a page filled with designs like the one above by allowing you to weed smaller areas instead of having a full sheet of Oracal 651 stick back to itself.

Draw a Curve Shape

This tool will draw a line each time you click the mouse, but the point will be a curved point.

Silhouette Draw a Curved Shape

Continue clicking the mouse to add points and curves in the shape. Double click to end the line or connect back to the first red dot to complete the shape.

After the design is complete, double click on the line and the Edit Points will pop up and the design can be altered more.

Silhouette Edit Points

Each point has 2 blue squares that are handles that can be adjusted. Or select an option from the Point Edit Panel on the right hand side.

Silhouette Edit Point Demo

Draw an Arc

Select this tool and click onto the design mat, this will be the starting point of the Arc line. Move the mouse and the next click completes the Arc.

Silhouette Draw an Arc Tool

In the center of the arc, there is a grab handle that can be moved in or out to alter the Arc even more.

Click off of the design and an arc line is left.

Silhouette Arc Tool

There are so many fun things that can be created with the tools in the software. You can create your own shapes, add weeding lines, or add Text to the Path you have created.

Silhouette Line Tools Text to Path Demo

What will you use the Silhouette Line tools for?

Save this for future reference by pinning the image below.

Silhouette Line Tools Pinterest

Enjoy !

THANK YOU for your support! How can you help? Click HERE & buy a coffee.
Every little bit helps with the cost of running the site.

Silhouette Classes

Never stop learning! Let me help you take the anxiety out of learning with Silhouette and get to creating faster! My Silhouette classes are heavily focused on software, so you can take the skills & techniques taught and apply them to many future projects!

Silhouette step-by-step Classes by Silhouette Secrets+

Silhouette Secrets+ with EllyMae
**This post may contain affiliate links. What that means is that I may receive compensation if you purchase through the links I have provided. The price you pay for the product or service is not higher but I may get compensated for sharing.
Posted on 13 Comments

Let’s Explore v4 – Library Snapshot

Library Snapshot

One of the new features in the Silhouette Studio v4.2 software is a Library Snapshot.

Library Snapshot General copy

This takes a “Snapshot” of the library as it is right now and also allows you to revert back to this “snapshot” of the library if needed.

To access and setup the Library Snapshot, click on the Library tab in the top right corner.

Library tab copy

Then click on your name in the top left corner.
You will need to be logged in to the Silhouette library.
Then choose Settings.

Library Snapshot copy

A Library Snapshot Options window will pop up.

Snapshot details copy

At the top of the Library Snapshot Options box is the log of all the snapshots that are taken of the software.

Close up copy

The middle section gives you options to create, delete, browse, or revert snapshots manually.

The bottom section allows you to set up automatic snapshots of the Silhouette library.
I would recommend setting the Snapshot option to Daily.
It never hurts to have multiple copies.

The Library Snapshots are computer specific. Depending on how it is set up, the snapshot will occur when you open the software.
If I have my snapshots set to daily but I leave my software open on my computer overnight, it will not take a snapshot the next day until I have closed and reopened the software again.

These snapshots are only stored on the computer you are accessing at the moment. Each computer will create a snapshot when the software is opened on it. So if I access my software from my computer upstairs, that snapshot is saved on my upstairs computer only. It is not stored in the cloud and synced between computers.

Does this replace making a backup of the library? No!

I would still highly recommend making a backup of your library on a regular basis and I would also recommend having your personal files saved to an outside source, which is also backed up as well too. There is nothing that is 100% safe and just like a computer crash, you cannot predict when something will happen.

Do you remember years ago when typing in Word documents and we were taught to save often? It is still a great habit to get into.
Save & backup often and you will not regret it.

Exporting a Backup

To make a backup of your library in Silhouette Studio v4, open the Library tab.
Click on your name in the top left corner (must be logged in).
Choose Library Export.

Library Export copy

A “Select Location” pop up window will come up.

Library Backup copy.jpg

Choose Browse and then select a safe location to save the backup file to.

This is a backup file only. It cannot be opened outside of the software and only can be imported back into the software if needed.
It does not contain individual files.
If you want the files saved individually, you will need to open each file and choose File > Save As > Save to Hard Drive.

I add the date to the file name and save in a Backup folder that I can find if needed.
I’d recommend making a backup of the library on a regular basis, just in case because you just never know.

If you ever need to import the backup back in, click on your name in the top left and choose Library Import.

Library Import

The Library Snapshot is just one of the new features in the v4.2 software.
Hopefully, you will never need to use it, but it is great that it is there.

Now, it’s a great time to go make a backup of your Silhouette library, no matter what version you are using and if you are in v4.2, set up the snapshot to your specifications.

Have questions or comments feel free to post below or on my Facebook group at Silhouette Secrets with EllyMae.

Enjoy!

SS_Signature copySS Logo snip it

**This post may contain affiliate links. What that means is that I may receive compensation if you purchase through the links I have provided. The price you pay for the product or service is not higher but I may get compensated for sharing.

Posted on 5 Comments

Let’s Explore v4 – Silhouette Studio PDF Diagram

Silhouette Studio Design Tab Diagram

Original post written in July 2019. Updated on May 21, 2020 with the current diagram link. Updated 5/31/25.

In January 2018, I started the “Let’s Explore v4” series with the intention of breaking down each of the panels on the right side of the Silhouette v4 software and explaining the parts of them. When I started, I had no idea how far it would go and it has grown to so much more than my original thought. I have learned so much by writing these posts and exploring other tools in the software that I have never used because I get stuck in the same old routines. It is so exciting to see something come to life in the Silhouette software and I love learning new things and being able to share those.

I do feel that the software is the key no matter what Silhouette machine you have. If you learn how to do something in the software, you can apply that to so many other projects that you create.

Today, I want to share a free PDF chart I created that maps out the Design tab of the Silhouette Studio v4 software.

Diagram of the Design Tab in Silhouette Studio v4 software, featuring various tools and panels labeled for user reference.

Click HERE or on the image above to download this PDF diagram.

This can either be printed as a reference guide or opened on a computer. When the file is opened on a computer with a PDF viewer, all of the blue titles have been linked to the blog post in the Let’s Explore v4 series that it corresponds with it.

I have had such great feedback on this series and I hope that it has helped you learn a little bit more about this powerful software by Silhouette!

Now, keep in mind that Silhouette is always adding new things into the software and I think this is awesome! What that means is that this chart is good for today and for users who are using a version of the Silhouette software that contain these features.

Just like many things in life, things change. Change can be hard for most of us, but it can also be good. I will update this free PDF with future changes, once I know those changes will be sticking around.

If you are not using the Silhouette Studio v4.2 software yet, I would highly encourage you to do so. You can download the current version of the software direct from the Silhouette America website HERE. I am using v4.2.279, which can be found under the Legacy section and it is what I’d recommend today.
As always with any software, they may be a “bug” or two in it. This happens with all software programs. There are 2 that are known in this version 4.2.279 I am recommending, but they are more just annoyances than anything.

I explain those “bugs” and how you can work with them in this post –
Let’s Explore v4 – Bugs.

And if you are considering updating or even if you are not, it is always a good time to backup the Silhouette library if you store personal files there – for more tips on the Silhouette Library prior to version 4.2 check out this post – Silhouette Library Tips.

Shape up your Silhouette Library copy

While you are exporting a backup, don’t forget to export your custom cut settings if you have those in the Silhouette software too! This is an awesome feature.
Check out how to do that in this post –  Add Cut Settings & Export.

Export Header copy

Don’t forget to grab the free PDF diagram of the Design Tab in the Silhouette Studio v4 software and save it some place safe on your computer to refer back to when needed.

Design Tab diagram

I’d love to hear your feedback or suggestions for things you would like to see in the future!

Enjoy !

THANK YOU for your support! How can you help? Click HERE & buy a coffee.
Every little bit helps with the cost of running the site.

Silhouette Classes

Never stop learning! Let me help you take the anxiety out of learning with Silhouette and get to creating faster! My Silhouette classes are heavily focused on software, so you can take the skills & techniques taught and apply them to many future projects!

Silhouette step-by-step Classes by Silhouette Secrets+

Silhouette Secrets+ with EllyMae

**This post may contain affiliate links. What that means is that I may receive compensation if you purchase through the links I have provided. The price you pay for the product or service is not higher but I may get compensated for sharing.

Posted on 15 Comments

Let’s Explore v4 – Recovered Documents

Recovered Documents

Did you know that the Silhouette software has an Auto-save feature?
When you open the Silhouette Studio program, is there a Recovered Documents Panel that pops up?
Recovered documents copy

This Panel can also be found under the File menu in the top left corner, then Open Recovered.

File Open Recovered copy

The Auto save feature will save a copy of the files you have open if for some reason the software closes unexpectedly or perhaps the computer decides to do an update and shuts everything down.
Windows updates have been getting me lately when I leave my computer on and I come back and notice that my Silhouette software is no longer open.

While this is a great feature, I would not rely on it to keep your files safe. It is a nice feature to have as a back up, but it may not save it exactly where you would want it to and some work may be lost. So it is recommended to save your work often.

But, this is something I see often when I’m in a lesson or teaching at an event. A student opens the software and has a lot of files in the Recovered Documents Panel.

This takes up precious computer power!

Every time that the software is opened, those files in the Recovered Documents Panel have to load. The software is remembering those files and that can eat up computer power and make the software run slower because it has all those files open.

Each of the files can be clicked on and opened. This way you can check to make sure that all the changes you’ve made have been saved before the software last closed.

Discard Recovered Documents

Discard those Recovered Documents and the software should run a lot smoother because it is not having to load those files each time.

Discard All copy

I always recommend this to my students in our lessons and they are amazed at how much they notice a difference in how the Silhouette software reacts.

Just like making a library back up, this is a good habit to get into and help keep the software running smoothly.
A few clicks and you will be ready to create your next Silhouette project with the software all ready to go.

Feel free to post your comments and questions below or on my Facebook group at Silhouette Secrets with EllyMae.

Enjoy!

SS_Signature copySS Logo snip it

**This post may contain affiliate links. What that means is that I may receive compensation if you purchase through the links I have provided. The price you pay for the product or service is not higher but I may get compensated for sharing.
Posted on 3 Comments

Let’s Explore v4 – Selection Preferences

Did you know that you can change your Selection Preferences in the Silhouette software?

To open the Preference Panel, click on the gear icon in the bottom right corner of the Design tab or click on the Edit menu in the top right corner and choose Preferences.

Selection Preferences copy

Selecting an Object

There are several ways to select objects on the Silhouette design mat.

1. Click on the object to select it.
To select multiple objects at the same time, hold down the Shift key and click on each object you want selected.

2. Click and hold the left mouse button, then drag a selection box around all the objects you want selected.

3. Use the Lasso tool (Designer Edition & v4.2 feature).
Click the Lasso Tool on the left side and lasso the objects you want to select.
Lasso Tool copy copy

Selection box

One way to know the object is selected is a selection box appears around the object.

Selection box copy

Measurements – on the left & bottom side of the object are the height & width of the object or selected designs as a whole.

Control Points – these points can be grabbed and adjust the scale of the design. Grabbing the corners of the design will scale it proportionally versus grabbing the middle control point which will only change one direction of the design.

Rotate – the green circle at the top of the design can be grabbed and the design can be rotated manually.

Preferences Panel Selections

Here are the different options under the Selection Tools in the Preferences Panel.

Selection Preferences1 copy

Selection Tools: When Drag Selecting
When Drag Selecting copy
When the left mouse button is held down and a drag box is drawn across the objects on the screen, you can choose to have them selected by the drag box only touching the object or being fully enclosed by the drag box.

Touching the object:
Drag Selection Touching copy

Enclosed:
Drag Selection Enclosed copy
Notice that the glove is not selected because the drag box has not fully enclosed it.

Selection Tools: When Many Shapes Selected
Many shapes copy

Single Bounding Box
Many Shapes Selected single selection box copy
Notice that there is one large selection box and the measurements are of all the objects selected as one.

Multiple Selection Boxes
If I want to size the glove and know exactly what size it is while still having all the objects selected, then choose Multiple Selection boxes as the option.
Many Shapes Selected multiple selection box copy
Now, each object has the individual selection boxes around it and each has the measurements of that object. So I could grab one of the control points and enlarge the design while knowing exactly how big the glove is. This way I could make a glove 8″ and still have all the other pieces sized at the same time to keep the proportions correct.

Selection Tools: When Right-clicking Subsequent Shapes

When Right clicking copy

New Shape becomes selected – the object that you right click on will be the selected object and the right click menu appears.
Right Click object selected copy

Original Shape Remains Selected – right clicking anywhere on the design mat, the original shape is still selected and the right click menu appears. So if the glove is the selected object, even if I right click on the stitches, the glove is still the selected object and the right click menu appears.
Right Click Original Shape selected copy
Notice how the menu appears on top of the stitches that I right clicked on, but the glove is still the selected object. This means that the features in the right click menu that are chosen will apply to the selected object – in this case, the glove.

Selection Tools: Selection Lasso style
Selection lasso tool copy.jpg

The Lasso Tool is a new v4.2 feature that is available with the Designer Edition upgrade or higher. It is found on the left tool bar in the Silhouette v4.2 software.
Lasso Tool copy copy

The options for the Lasso tool include: touches or enclosed. To use this tool, click on the Lasso tool on the left side and then hold down the left mouse button and move the mouse on the design mat. A dotted line will appear that shows where the Lasso is.

Touches – the lasso tool selects any object that it touches.
Lasso Tool touches copy

Enclosed – the lasso tool will only select the objects that are completely enclosed by the lasso dotted line.
Lasso Enclosed copy
The Lasso tool can be very helpful if you have a lot of pieces of a design on the screen and only want to select certain ones in an area.

For instance, on this Paw Print Mandala design, if I want to select only the pieces that make up the inner half circle of this shape, I would set the Lasso Tool to Touches and then draw the lasso around the inner circle.
Lasso Tool example copy

Instead of holding down the Shift key and then clicking on each piece, I can use the Lasso tool to select all those in the center very easily.
Lasso Tool Example selected copy

It is all a matter of personal preference and how you use the software.

What are my Selection preferences set at:
My Preferences copy
This is how I keep mine. I know I can change them at anytime by opening up the Preferences menu, choosing a new option, clicking Apply, and then OK.

I used it this week in sizing and cutting the glove for my Spring door decorations, as I wanted the glove to be close to real size.

I changed the Selection option of the When Many Shapes are Selected to Multiple Bounding Boxes & was able to see the size of the glove, instead of the size of all the objects selected together.

Many Shapes Selected multiple selection box copy

Spring flowers brings Solicitors and Softball in our neck of the woods.

IMG_20190429_144932346_HDR

Did you know the Preferences Panel existed? It is full of great choices and we will be exploring more of it in the future.

Designs used in this post are from the Silhouette Design Store:
Baseball Set by Studio Illustrado – Design #60502
Watering Can by Silhouette – Design #291326
No Soliciting by Jillibean Soup – Design #276179
Lori Whitlock Background Shapes – Design #42924
Baseball Hat by Snapdragon Snippets – Design #39347
Positionable Skeleton by Samantha Walker – Design #4828

Feel free to post your comments and questions below or on my Facebook group at Silhouette Secrets with EllyMae.

Enjoy!

SS_Signature copySS Logo snip it

**This post may contain affiliate links. What that means is that I may receive compensation if you purchase through the links I have provided. The price you pay for the product or service is not higher but I may get compensated for sharing.

Posted on 37 Comments

Mastering Edit Points in Silhouette Studio: A Guide

Silhouette Edit Points

Silhouette Secrets+ with EllyMae

Have you seen edit points pop up in Silhouette Studio before?
Do they intimidate you?
Well let’s see if we can change that.

Affiliate links may be present in the following blog post and as an Amazon Associate, I earn from qualifying purchases.

What are Edit points?

Edit points are basically the data points the Silhouette reads to make a particular shape of the object. Each edit point has qualities on how it is supposed to act such as straight line, corner, curved, etc. and this is how a shape is made up.

Edit Points copy

The edit points will come up on an object if you double click on the object or use the keyboard shortcut letter “A” with the object selected.

If you draw a circle, it is made up of 4 edit points.

Circle edit points copy

A square also has 4 edit points but the type of edit point are different than the above circle.

Square edit points copy

By clicking on an edit point, you can see what property it has in the Point Editing Panel.

Why Edit Points Might Not Show

In order for the edit points to appear, the object has to be a single object and an ungrouped object.

For instance, if I type out text, it is not treated as a design. So the edit points won’t appear.

If it is converted to a path, the edit points still will not appear because even though it’s acting as a design, it is still grouped together. If the design is ungrouped the edit points will appear because all the pieces are now separate.

Ungrouped copy

Or if the design is made into a Compound Path, then the edit points will appear.

Compound Path copy

Altering Edit Points

There are many ways to change the edit points.

By clicking on an existing point, it turns white, indicating that it is the point selected.

Selected point copy

It will tell you what kind of edit point it is. This one is a corner. Grab the blue squares on either end and this will adjust the outcome of this edit point.

Selected point moved copy

To select multiple edit points, hold down the Shift key & drag the selection box around all the points you would like to select. Then make changes to a group of edit points all at one time by moving or choosing a new property for those selected.

Select multiples copy

All edit points that are selected will show as white points.

Point Editing Panel

When the editing points are active, the Point Editing Panel should pop up or click on the Edit Points tool on the left side menu.

Point Edit Tool copy

This panel has many options for how you can alter an edit point(s). The name of each tells you exactly what behavior it will have.
Each design you work with will react differently to what is changed.

Edit Points Panel copy

Remember, edit points are the data points that your Silhouette software relays to your Silhouette machine to connect the cut.

The Cameo machine needs to hit every single one of those edit points in order to make the cut. Some files such as dxf files or traced images can have lots of edit points and this can make the Cameo sound odd when cutting. The Cameo is not broken, but has to connect each of those edit points to make the cut.

Simplifying Edit Points

Some files can have the edit points simplified without changing the look of the design.
For instance, this Leafy Mandala by Rhonna Farrer from the Silhouette Design Store has a lot of edit points when I first opened it.

Leafy Mandal edit points original copy

In the Edit Points Panel, select Simplify.

Simplify copy

You should notice less edit points in the design.

Leafy Mandal edit points simplified copy

In this case, the design did not change in the look at all, but the edit points are now much less.

Leafy Mandal comparison copy

The best way to learn how edit points act is to find a design and just play around with the different options.

While they can look intimidating when they pop up on the screen, once you understand their purpose and how they work, I think it makes it seems a lot less daunting when you see them.

Designs used in this post are from the Silhouette Design Store:
#MoreCoffee by Kolette Hall – Design #179647
Leafy Mandala by Rhonna Farrer – Design #215137

Feel free to post your comments and questions below or on my Facebook group at Silhouette Secrets with EllyMae.

Save this post for future reference by pinning the image below.

Enjoy !

THANK YOU for your support! How can you help? Click HERE & buy a coffee.
Every little bit helps with the cost of running the site.

Silhouette Classes

Never stop learning! Let me help you take the anxiety out of learning with Silhouette and get to creating faster! My Silhouette classes are heavily focused on software, so you can take the skills & techniques taught and apply them to many future projects!

Silhouette step-by-step Classes by Silhouette Secrets+

Silhouette Secrets+ with EllyMae
**This post may contain affiliate links. What that means is that I may receive compensation if you purchase through the links I have provided. The price you pay for the product or service is not higher but I may get compensated for sharing.
Posted on 3 Comments

Let’s Explore v4 – Designing with shapes Part 2

Last week, in Part 1 of Designing with shapes, we used the tools in the Silhouette software to draw an egg shape. Now, we will use those same tools to draw decorations for that egg.
Check out the previous post HERE to see 2 different ways to draw an egg shape.

Draw Oval copy

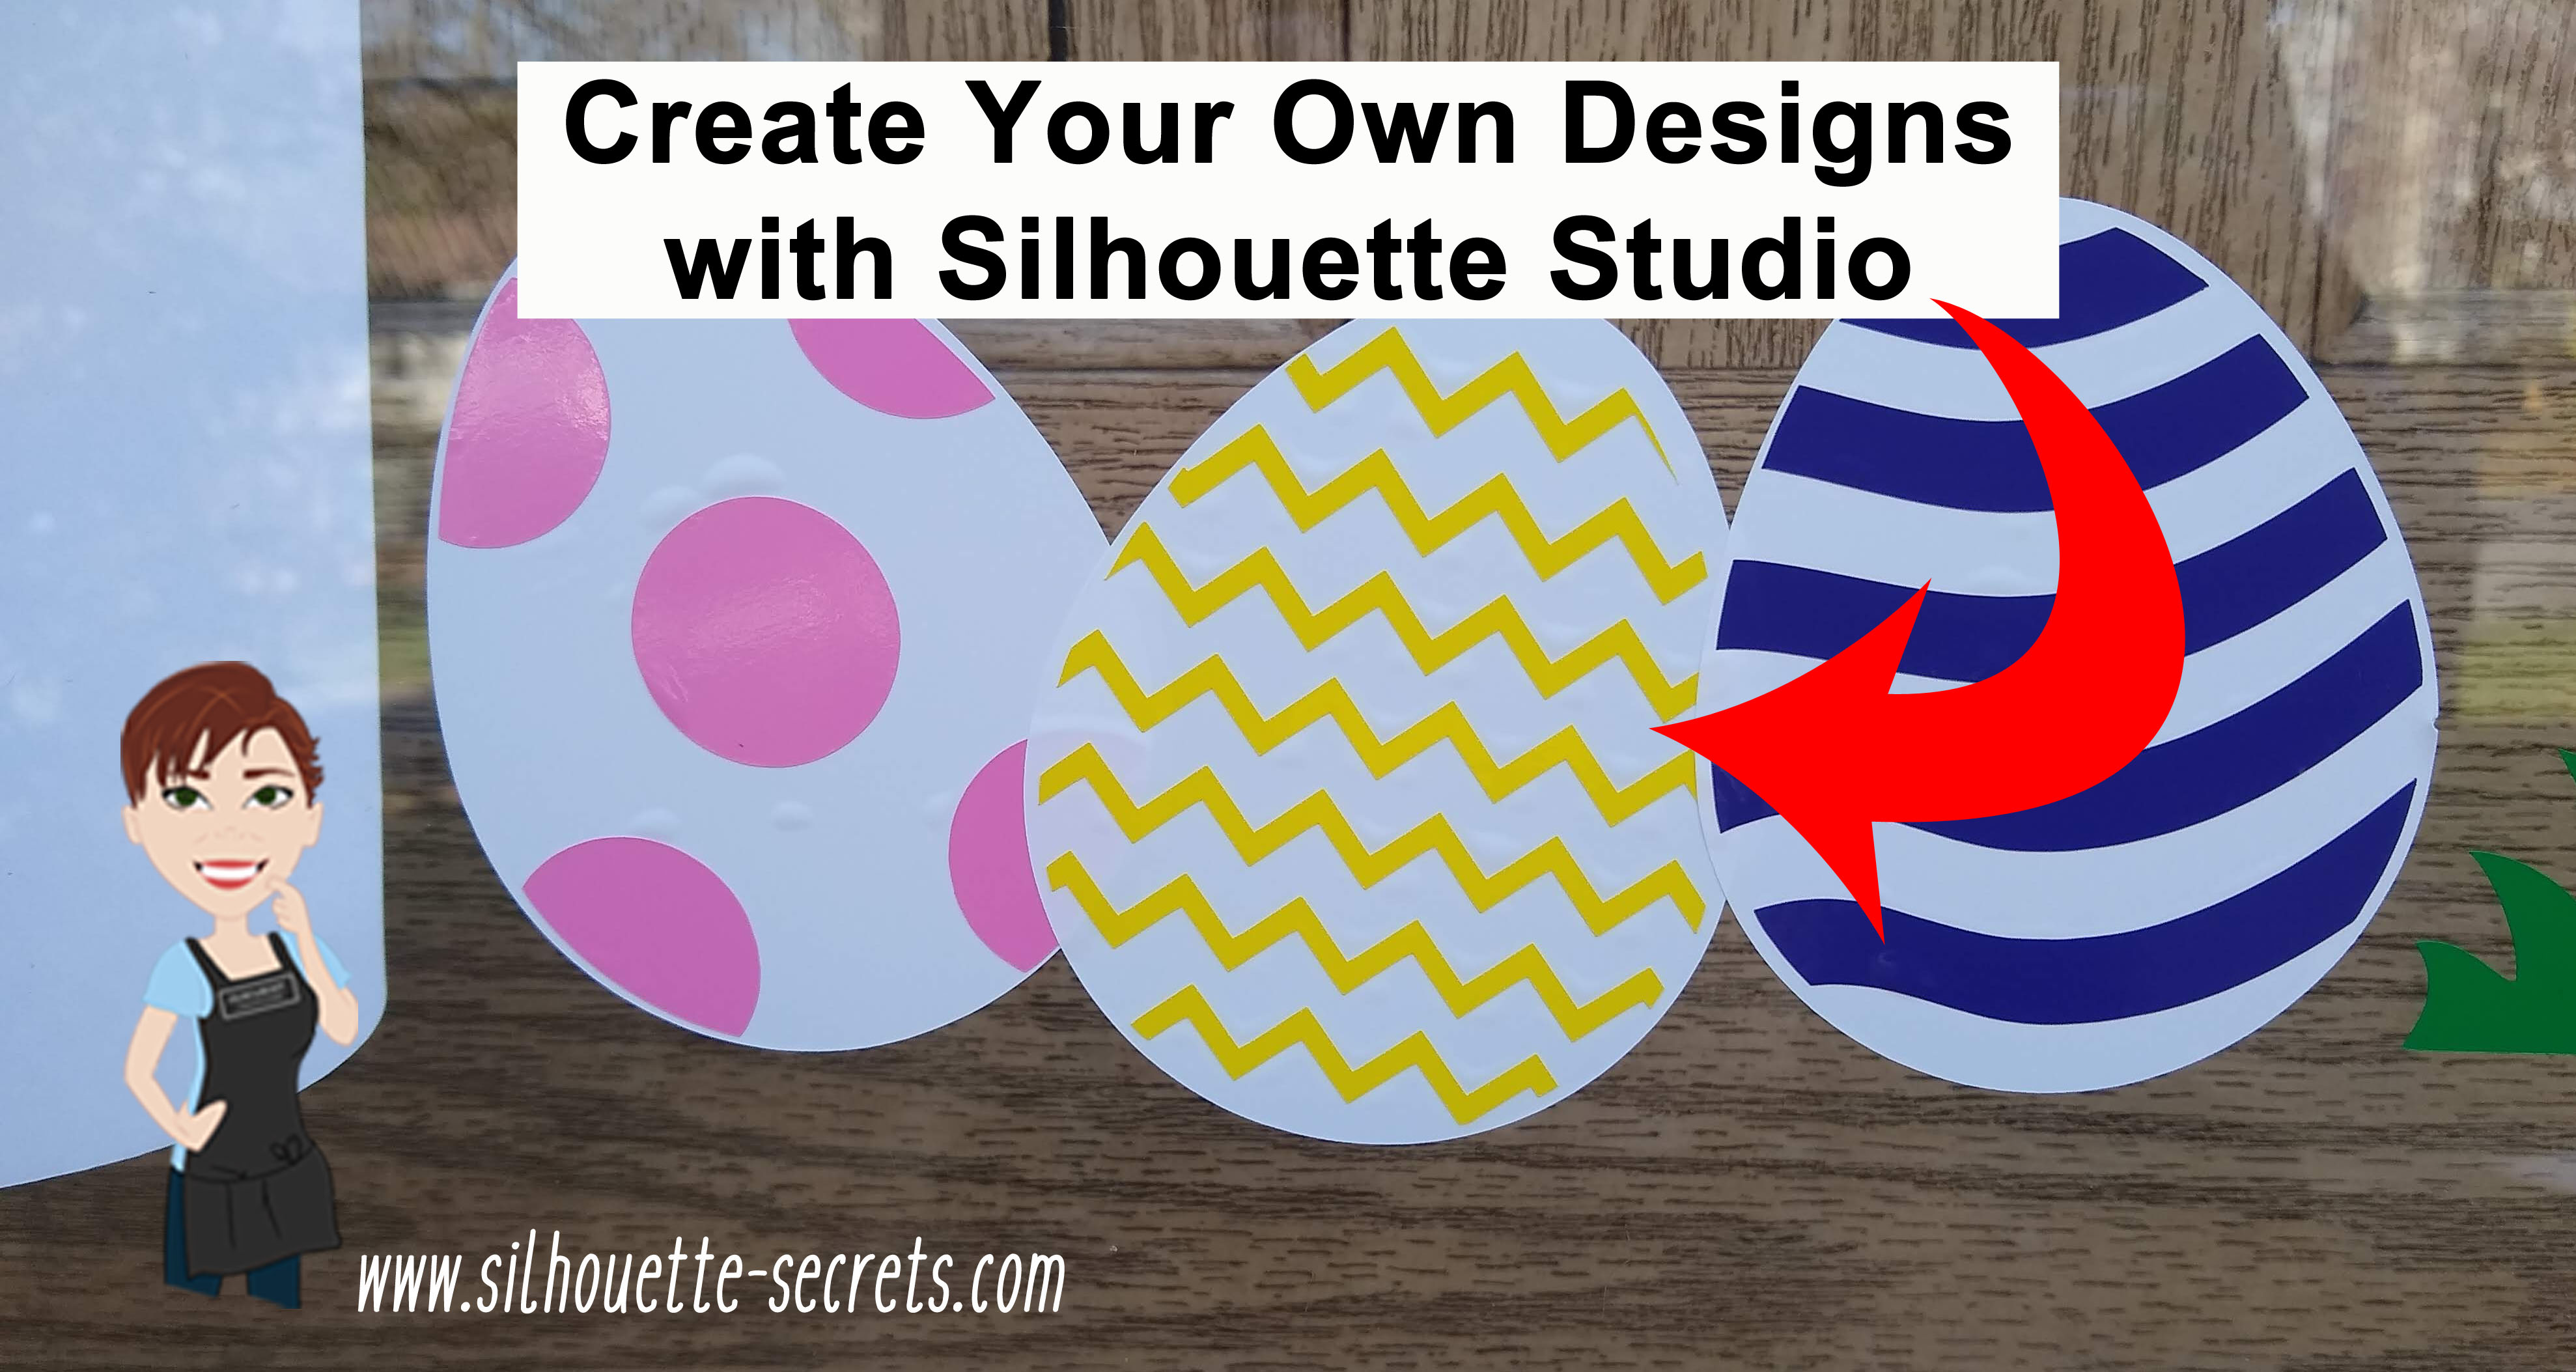
I had 3 eggs from the Easter Eggs by Echo Park – Design #187432, but I wanted another option. So I drew the zig-zag design inside the egg and created it to match the other eggs.

Easter Egg Design Store file copy

Just like in the last post, we will go through 2 ways to create this – with the Flexi-shapes  or by using the basic drawing tools.

First, let’s start by opening the egg file that we’ve created from Part 1.

In the original eggs, the design is offset internally from the outer edge of the egg.

Select the Egg design, click the Offset Panel, choose Internal Offset, and change the Distance to 0.80 inches.

Offset copy

The exact distance is a matter of personal preference, it will vary by the project you are creating.

We will be using the inner offset shape to create the design. Move the original egg shape off the design mat.

*Note: The line thickness of the designs has been increased to make it easier to see for the blog post.

Part 2 – Decorating the Egg 

Drawing with Flexi-shapes

Flexi-shapes are a newly released feature with the v4.2 software and are available if you have the Designer Edition Plus or Business Edition upgrade.
*check out the end of this post for a coupon code for the upgrades too!

The Flexi-shape option is in the toolbar on the left side of the v4.2 software.

Flexi shapes copy.jpg

Select the zig-zag option. Click on the design mat to start the shape and then move the mouse to where you want it to end and click again.

Adjust the Flexi-shape by using the slider bar in the middle to increase or decrease the number of  points in the zig-zag. Use the red dots to adjust the width of the the zig-zag.

Once you are happy with the design, right click and choose Convert to Path. This will change the design from an editable shape to a fixed shape.

Now, to fill the egg, either continue drawing more zig-zag patterns or copy and paste the zig-zag to fill the rest of the egg.

Zig Zag copied copy

My favorite way to copy and paste is to hold down the Alt button on the keyboard and click and drag a copy away.

To space the zig-zag pattern evenly, select all the zig-zags & use the Align option – vertical spacing that is found either in the QAT (Quick Access Toolbar) or under the Transform Panel – Tab 1.

Align option copy

Once the zig-zags are spaced how you like, right click and choose Group.

Now, make a copy of the entire design and move it off the design mat. This way there is an original to go back to if needed.

Select both the egg shape and the zig-zag shape, open the Modify Panel, choose Crop.

Modify Panel copy.jpg

Group all the pieces together before clicking off the design.

If there is a stray part of the design that you see, delete that before grouping.

Stray copy.jpg

Move the original egg shape back and then use the Center Align tool to center the zig-zag on top of the egg.

Center Egg copy

You have just created your own design to cut out of any colors you want using the Flexi-shape option.

Do you want to get the vinyl lined up exactly?
Check out this post – Layering Vinyl – to find out more on using layering marks.

Using the Drawing Tools to create the egg decoration

For those that do not have v4.2 or the Designer Edition Plus or Business Edition upgrade, let’s use the drawing tools and make the egg decoration.

Start with the inner offset egg shape.

On the Page Setup Panel – Tab 2, check the Show Grid & Snap to Grid options.

Choose the Draw Polygon tool on the left side. Click onto the design mat and start drawing the zig-zag shape. With the Snap to Grid option turned on, it will snap the points to each grid spacing as you move the Polygon tool.

Draw Polygon copy

Continue drawing the polygon until you get back to the starting point and then connect the dots.

Edit points copy

Once the polygon shape is closed, changes can be made by double clicking on the shape and bringing up the edit points. Each of these points can be selected and moved. To select multiple points at the same time, hold down the Shift key and click on the points or left click on the mouse and drag the cursor across the edit points to select any that are enclosed in the selection box.

Turn off the Snap to Grid & Show Grid options under the Page Setup Panel – Tab 2, if you choose to. I prefer to design without all the distraction of the lines, unless I need something to be exact and then I turn them on.

Make copies of the zig-zag pattern and fill the egg.

Draw - Align vertical copy

Select all of the zig-zag designs, then use the Vertical Spacing Alignment tool to space the design evenly vertically.

Group the zig-zag pattern together.
To group the design – select all the zig-zag designs, right click and choose Group or use Ctrl + G as the keyboard shortcut (Command+G = MAC).

Group copy

Now, make a copy of the entire design and move it off the design mat. It is always a good idea to have a copy of the original of any design or font to go back to, in case you have to start fresh.

Select both the egg shape and the zig-zag shape, open the Modify Panel, choose Crop.

Draw - Modify - crop copy

With all the pieces selected, right click and choose Group.

Move the Original egg shape back onto the Design mat and use the Align Center tool to line the egg with the pattern.

Draw - Align Center copy

And that is how I created my own chevron patterned egg for the door decor.

Eggs photo

While I could have just found another egg design to buy, drawing my own means it is my own creation. The Silhouette software is such a powerful graphics program, you are only limited by what you know how to do. The more you use these tools, the quicker it will become to create your own designs.

I would highly recommend upgrading the software to the full Business Edition upgrade to have the full power and all the features that the Silhouette software has to offer.
I think it is a great investment and I love not having to question if something is available to me.

Use my code SECRETS10 to save on the Software upgrades from Swing Design.

Software upgrades copy

*Prices in photo above are current as of 4-17-19

Want to know what features are unlocked with each upgrade?
Check out this comparison chart at Silhouette America HERE.

I love being able to customize and change things around. My kids love that I can create different scenes for them, birthday gifts, or almost any other thing they can imagine.
They are already thinking up ideas on how to decorate the skeleton after Easter.

Silhouette_Secrets_skeleton

What designs can you think to create today?

Feel free to post your comments and questions below or on my Facebook group at Silhouette Secrets with EllyMae.

Enjoy!

SS_Signature copySS Logo snip it

**This post may contain affiliate links. What that means is that I may receive compensation if you purchase through the links I have provided. The price you pay for the product or service is not higher but I may get compensated for sharing.

Posted on 3 Comments

Let’s Explore v4 – Designing with shapes

In October of 2018, I put up a vinyl skeleton on our front door. After Halloween, my kids & husband asked me to leave it up because they thought it would be fun to decorate all year long.
They tell me the ideas that they would like to accessorize the skeleton with and I cut and apply it from vinyl.

Silhouette_Secrets_skeleton

While I was cutting the eggs for the door, I had 3 shapes from the Silhouette Design Store but I wanted a fourth egg with a different design.

With the Silhouette software and the tools in it, you can create pretty much anything you can imagine.

Part 1 – Drawing the Egg

Let’s start with the egg shape.

Now, the easiest way would be to use the Flexi-shapes with the v4.2 software. But, we will discuss both ways.

Drawing with Flexi-shapes

Flexi-shapes are a newly released feature with the v4.2 software and are available if you have the Designer Edition Plus or Business Edition upgrade.

The Flexi-shape option is in the toolbar on the left side of the v4 software.

Flexi shapes copy

Check out all these shapes!

Flexi shapes 2 copy

Click on the oval shape and then click and drag the mouse on the design mat.

Egg flexishape copy

To adjust the shape after the original drawing, grab one of the white circles and move it. The shape will adjust as these points are moved.

Once the shape is to your liking, right click on it and choose Convert to Path.

Convert to Path copy

Now, that is one way to get an oval shape.

Using the Drawing Tools to create shapes

For those that do not have v4.2 or the Designer Edition Plus or Business Edition upgrade, let’s use the drawing tools and draw an egg shape.

Since the egg is wide at the bottom than at the top, I am going to use 2 shapes.
First, on the left toolbar, select the Draw Ellipse tool.

Draw Ellipse tool copy

Hold down the Shift key and drag the mouse to draw a perfect circle.

Choose the Draw Ellipse tool again and draw an oval.

Draw Oval copy

Select both the circle and the oval, using the Transform Panel – Align Tab to align the horizontal centers.

Align Oval copy

Then right click and choose Weld.

Weld copy

Next, double click on the welded shape and this will bring up the edit points. By deleting a few edit points we can change the shape of this design.

Delete Edit points copy

Alter the edit points to achieve the desired effect.

Delete Edit points2 copy.jpg

Still not the exact shape or as symmetrical as you’d like? Take it one step farther.

Alignment for knife copy

Open the Page Setup – Panel Grid Options.
Move the oval shape so that the top bounding box is centered on one of the grid lines.
Click on the Knife Tool on the left tool bar.
Make sure the Solid option is selected in the Quick Access Toolbar at the top left.

Knife tool copy

Hold down the Shift key and draw a line from the top to the bottom on the grid line with the bounding box.

Select the right side of the oval and delete it.

Open the Replicate Panel. Select the left side of the oval and choose Mirror Right.

Replicate Panel copy

Select the right side and press the left arrow key 1 time. This will move the design slightly so it is overlapping the left side of the oval.

Select both sides, right click and choose Weld.
The weld option can also be found under the Modify Panel on the right side too.

Weld2 copy

Now you have a symmetrical shape.

This can be done with all kinds of designs. You can create and draw anything in the software by breaking it down into basic shapes or using the Flexi-shapes.

How about a heart? Draw your own with 2 circles & a square and then edit using the same techniques listed above or use the Flexi-shape if available.

Heart shape copy

Or a flower?
Draw an oval and use the Advanced Replicate Panel to replicate and rotate the oval.
I chose 8 copies and 30 degrees for the rotation.

Flower copy

In the next blog post, we will take a look at how to create shapes to decorate the egg.
Part II – Decorating the Egg Shape

Eggs photo

What will you use the software to draw and experiment with today?

Feel free to post your comments and questions below or on my Facebook group at Silhouette Secrets with EllyMae.

Enjoy!

SS_Signature copySS Logo snip it

**This post may contain affiliate links. What that means is that I may receive compensation if you purchase through the links I have provided. The price you pay for the product or service is not higher but I may get compensated for sharing.

Posted on 9 Comments

Let’s Explore v4 – Warp Templates

The warp templates area new to the v4.2 software release. They are available with the Designer Edition upgrade or higher and a version higher than v4.2.279 of the Silhouette software.

To update the Silhouette software version, I would highly recommend going to the Silhouette website and downloading the update direct from there.

Before updating the software version, I would highly recommend making a backup of the library. You can find more details on the Silhouette library for versions before v4.2 in this post – Let’s Explore v4 – Silhouette Library Tips.

Warp Templates

The warp templates are found under the Warp Panel on the right side. Depending on your screen size, you may have a pop out menu or you may see the full list of panel icons on the right side.

Warp Panel copy

In the left photo, you will see the fly out menu for a smaller screen and on the right side, you will see the full panel list expanded. Again, this is dependent on screen size.

There are 6 different options for Warp Templates.

Here are the first 3 on the left side of the Warp Panel.

Warp first 3 shapes copy

And here are the 3 templates from the right side of the Panel.

Warp last 3 shapes copy

The templates can be used as is or you have even more options to customize the text.

Points copy

By grabbing and moving the points, you can edit the text even further.

Move points copy

Another tool that would come in handy here is the Snap to Grid feature. Most times when I use the software, I like the freedom to move my design freely and in small increments.
With the Snap to Grid option, it will move to the next grid space measurement that you have selected. This can help in aligning the points of a warped shape.
For instance, if you move the left bottom point and you want to make sure that you move the right bottom point so it’s perfectly aligned.

Snap to Grid option copy

Open the Page Setup Panel – top right icon. Click on the 2nd tab at the top to bring up the Grid Options.

Check the box next to Show Grid and Snap to Grid. Now, when the orange points are moved, they will snap to the grid spacing.

I love letting the software do the work for me!

At this point, the text can still be changed by double clicking in it to get the text cursor.

Change text copy

When you are satisfied with the changes to the text, then choose the Release Warp option and it will change it take it out of the Warp edit.

Release Warp copy

Notice that it separates each letter and you will need to group the design back together for it to move as one object.

If the changes are not what you had in mind, choose the Restore Original Shapes option and the text will revert back to the original design.

Restore original copy

And there is more!!!

Grab the slider on the right side of the panels and it reveals more Warp Template options.

Slider more options copy

So much fun to play with all the options available to you in the software.

Left side 2 copy

Right side 2 copy

Now, what are some ideas that you can think of to create Word Art with these Warp Templates?

Final copy

Feel free to post your comments and questions below or on my Facebook group at Silhouette Secrets with EllyMae.

Enjoy!

SS_Signature copySS Logo snip it

**This post may contain affiliate links. What that means is that I may receive compensation if you purchase through the links I have provided. The price you pay for the product or service is not higher but I may get compensated for sharing.