Posted on — 47 Comments

Let’s Explore v4 – Fill Color Panel

Today we are going to explore the Fill Color Panel located on the right side of Silhouette Studio v4.

Fill Color Panel copy

I use this feature a lot when I design in the Silhouette software for many reasons. Now, understand that by filling a design with color, it does not cut in that color. The color you fill it with will be a visual reference only, unless you are making a Print and Cut project. If you are creating a Print and Cut project, then the colors will be a representation of what colors will print on your printer.

I fill my designs and fonts with color so I can visualize the design better. Typically, I just fill it with black, but if I’m creating a multi-color image, I can then choose the colors that will best match my design. Another reason to fill it with color is to be able to select the design or font easier. When an image is transparent, you have to click on the red outline of the image to select it, which can sometimes be difficult. However, if you fill it with a color, you can click anywhere on that color to select the object.

For today’s example, I am using a font from the new SoFontsy site called Wine Not and will be creating my own design.

Wine not design2

You can see in my photo above that when I use the Text tool and type in my font, that it comes in transparent. Also, notice that the font name has a few extra letters in front of it, this is the Designer’s signature and something to keep in mind when you download fonts. You may need to pay close attention to the full font name to find it in your Text Style list.

Something else to point out here is the extra space around the font, as you can see my text selection box is 2.218″ in height but if you look at the grid spaces, the font is really less than 2″ in height. Check out this guest post I wrote at the Silhouette School blog on Forcing Accurate Text Sizes for more information on that.

So, how do you fill something with color? First, make sure your object is selected. You will see the selection box around it when it is selected. Then, you can click on the Fill Color Panel on the right side of your Silhouette software or it can also be found in the top left corner of the QAT (Quick Access Toolbar).

Fill Color demo copy

Now let’s Explore the Fill Color Panel.

Fill Color Panel1 copy

  1. Color Palette Selection – In this area click on one of the blocks of color and the design selected will change to that color.
  2. Eyedropper color selection – Click on this and then click on another color on your design mat to pick up that color and use it.
  3. Color Selection – This is the color that is currently chosen as the Fill color with the Eyedropper tool.Transparency copy
  4. Transparency – This changes the transparency of the Fill color chosen. In the above photo, the design at the top has my website placed over the top as you would place a watermark and the Transparency is decreased to 71% versus the design on the bottom that is still at 100%.
  5. Advanced Options – Opens up a panel where you can move the color selection around manually or under the color graph you can input the specific numbers for a certain color that you would like.
  6. Fill Gradient – Here you have many options to change the color and the gradient fill and change the properties of how the design looks. You can also decrease the transparency of the gradient, adjust the color even more, and change the angle of the gradient.Gradient fill copy
  7. Fill Pattern – Here there are many patterns for you choose from or you can add new patterns into the library and those will show up here. You also have the ability to change the Transparency of the pattern and under Advanced Options can choose to mirror, change the aspect ratio, rotate, change the angle, scale, and pan the pattern.
In the photos above, on the left, you can see I just clicked on the Fill Pattern option and chose a polka dot pattern, I did not change anything else. On the right, I changed the mirror, angle of the pattern, increased the scale, and panned the pattern so that it was a bit different.

As you can see, you have many options available when you are designing and using the Fill Color Panel. Keep in mind, that while you can change the color, gradient and pattern fills on the screen, the Cameo will still cut the color that you place on your mat. If you want the design to be how you have filled it on the screen, you need to look at creating a Print & Cut project. Check out more information here on last weeks exploration of Registration Marks for Print and Cut projects.

For our project today, I have used a font called Wine Not by Design Shark available on the new SoFontsy site. All the designs on the site come with a 100% Commercial Use license and are cuttable files.

And I’ve included the design used in the post as a freebie!

SS_winenot_freebie2

You can download this free Studio cut file HERE. Personal Use Only.

The graphics I used also came from the font file and I accessed them through the Glyphs Panel in my Silhouette Studio software. The Glyphs Panel is available in the Silhouette software for those who have the Designer Edition upgrade and higher than v4.1.197 of the Silhouette software. You can find great prices on the software upgrades at Swing Design if you need to purchase it. I highly recommend upgrading to at least the Designer Edition upgrade.

I hope you learned a bit about the Fill Color Panel and how useful it can be when you are creating in your Silhouette software.

Check out the entire “Let’s Explore v4” series HERE.

Check out my Silhouette Instructions and Events tab for more information on Personalized Silhouette Instruction.

Enjoy !

THANK YOU for your support! How can you help? Click HERE & buy a coffee. Every little bit helps with the cost of running the site.

Looking for more in-depth, step-by-step classes, check out all of my online Silhouette classes on my Teachable site HERE.

Enjoy !

THANK YOU for your support! How can you help? Click HERE & buy a coffee. Every little bit helps with the cost of running the site.

Looking for more in-depth, step-by-step classes, check out all of my online Silhouette classes on my Teachable site HERE.

SS Logo snip it

**This post may contain affiliate links. What that means is that I may receive compensation if you purchase through the links I have provided. The price you pay for the product

Posted on — 28 Comments

Let’s Explore v4 – Registration Marks

Welcome back! Today we are talking something that I love to do – Print & Cut.

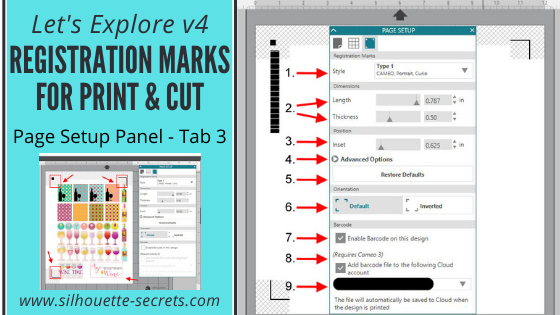
We have explored Tab 1 – Page Setting and Tab 2 – Grid setting the last two weeks and now it’s time to talk Tab 3 – Registration Marks. On the Page Setting Panel, the 3rd tab over is your Registration marks tab and you only use these when doing a Print and Cut project.

Tutorial written in v4.1.206

For software version v4.3+ check out this post HERE for updated information.

Registration Marks

Affiliate links may be present in the following blog post and as an Amazon Associate I earn from qualifying purchases.

First you will need to set your page size. If you have a printer that will only print Letter Size, then you need to change your Page Size to “Current Printer” (check out the Page Settings post on changing Page Size). This will adjust your page size down to the exact area that you can print. Turn your Orientation to the Portrait Orientation and it also helps to check the box next to ‘Show Print border’ and ‘Show Cut Border’.

Page Setup page size copy

Now, we are ready to click on the 3rd tab on the Page Setup Panel.

I first want to start out with a warning. While you can change a lot of the options on the Print and Cut, I highly recommend that you try cutting at the Default settings first and get to know the Print and Cut features before you go changing too many things.
I have great success with just the default settings and find I don’t have to change them, even though it is possible.

1 – Style – Under Style you have 3 options: Off, Type 1 & Type 2. Almost all users will choose the Type 1 option. Type 2 is only used for the Original or SD machines which are rare, they do still exist and are still going strong, but only a few users.
Choose Type 1 – Cameo, Portrait, Curio.
Style copy

2 – Length & Thickness – You can change the length and thickness of the Registration marks. Below I have shown 2 examples of changing the measurements and you can see the marks in the bottom left & top right change.

3 – Inset – Here you can change the placement of the Registration marks. The higher the number, the closer it moves to the Center of your page.
Inset

4 – Advanced Options – If you click on this, it will open up more options for you to change the Inset dimensions.
Advanced copy

5 – Restore Defaults – This is probably my favorite. This will reset anything you have changed to the Defaults of the original Print and Cut. Length at 0.787 in, Thickness at 0.50 in and Inset at 0.625 in. So if you get a wild hair to change things, you can always go back to basics and click on ‘Restore Defaults’ to change it back.

6 – Default vs Inverted – This will change the direction of where the Print and Cut is placed on your mat. Notice the direction of the arrow on the cutting mat, Inverted places it on the opposite corner of the mat & moves the registration marks on the page.

7 – Enable Barcode on this Design – This adds a barcode to the side of your page and it stores all of the cut settings data in the bar code that the Cameo 3 will read.
This is a Business Edition upgrade feature only.
Barcode copy

8 – Add Barcode file to the following Cloud account – Check this and the information will be saved to your Cloud account.

9 – Email address – this is the cloud account email address that the file will be saved to when you print it.

Some tips for Print and Cut: 

Start with the default settings and print the file from there first.

The design cannot be in any of the cross hatched areas of the Print and Cut screen. This is the area that the Optical scanner needs to read on the paper and if the design is in that area, then you may get a registration error.

You only need the Registration marks on if you are doing a true Print and Cut project, by printing first through your printer and then cutting the image with your Cameo.

The ‘M’ key on the keyboard toggles the Registration marks on and off. You can turn them on very easily without realizing it.

Feed the paper into the printer one sheet at a time.
If you have a tray or feed multiple sheets into the printer and print multiple copies of the page at once, the printer can pull it in too early or too late compared to the first print and this can affect where the print is on the page. This can give you a registration mark error.

So let’s check out my example. This is a design I purchased from the Silhouette store called Wine Themed Planner Stickers by Sandi Idleman Design #205613.

I can tell right away that if I sent this to print there will be issues.

PNC Example copy

I opened the file and know that I have to turn my registration marks on.
As you can see the alignment is off. There are areas of the design that are in the cross-hatched areas of my print and cut and the entire design is a bit too large for my print and cut area. So I will need to Select All and resize everything.

Final PNC

I have some Silhouette Clear Sticker paper so I’m going to load that in my printer and then click on the Printer icon in the top left tool bar.

Printer icon copy

Here is my printed page.

PNC page

And I am ready to place my design on my mat and click on the Send tab. When you place your printed image on the cutting mat, you want to make sure that you place it in the exact same location that you have it on your Design screen, in the top left corner.
Choose Sticker paper – Clear in my Cut settings & double check that all my cut lines are how I want them. And then load my mat, do a test cut to make sure my settings are correct and then click Send.

PNC2

And it cut beautifully!

Sticker final

Now I have some wine sticker for my planner.

Have you used the Print and Cut feature?
Tell me what you have used it for below in the comments.

Hope you enjoyed today’s overview of the Page Settings – Registration Marks tab!

Check out the entire “Let’s Explore v4” series HERE.

I would love to see what you are creating! Feel free to post on my Facebook group at Silhouette Secrets with EllyMae.

Save this for future reference by pinning the image below.

Enjoy !

THANK YOU for your support! How can you help? Click HERE & buy a coffee.
Every little bit helps with the cost of running the site.

Looking for more in-depth, step-by-step classes, check out all of my online Silhouette classes on my Teachable site HERE.
SS Logo snip it
**This post may contain affiliate links. What that means is that I may receive compensation if you purchase through the links I have provided. The price you pay for the product or service is not higher but I may get compensated for sharing.
Posted on — 31 Comments

Let’s Explore v4 – Setup Panel – Tab 2

Welcome back to my new series “Let’s Explore v4“!
If you are just joining me you can check out my first post of the series HERE – about Tab 1 of the Page Setup Panel.

Today I am going to be going through the features of Tab 2 on the Page Setup Panel in Silhouette Studio v4.
This panel is located on the right side of your v4 software at the very top.

Tutorial written in v4.1.206

Affiliate links may be present in the following blog post and as an Amazon Associate I earn from qualifying purchases.

This panel is about your Grid spacing. Do you want your Grid to show? Do you want your designs or fonts to ‘Snap to grid’? What increments do you want your grid to show at? What color do you want your grid?

So let’s jump in and go through each option that is available to you. It is all a matter of personal preference and once you understand what each feature does, then you can decide what you want to use.

1 – Show Grid
This option allows you to turn the Grid lines on or off on your Design mat. These grid lines can be useful when you are designing and spacing out objects.Show Grid copy

2 – Snap to Grid
If you have this option checked then your design will jump from grid line to grid line. If you un-check this option you have more control over moving your design in smaller increments.

3 – Show Guides
By checking this option, you can pull “Guides” down from the top ruler or over from the right side ruler. If you click on the ruler, either on the top or right side and hold down and drag, it will drag a “guide” line out and you can place it where you’d like on your design mat. This is another tool used to line up designs or for example make sure you have a design in a square. These “guide” lines do not cut and they do not save to your file. Rulers are an upgrade feature, therefore this is an option only for those who have the Designer Edition upgrade or higher.Guides copy

4 – Snap to Guides
This works the same way as the ‘Snap to Grid’ feature does. If you have it checked and have placed guides on your Design mat, when you move your design, it will snap to the guide lines you have placed.

5 – Ruler
You can turn the rulers that are along the top & right side on & off by selecting this. Rulers are an upgrade feature available in the Designer Edition upgrade or higher.

6 – Crosshairs
This will toggle a cross-hair pointer at the end of your mouse pointer on your screen. If you look closely, you can see the lines running horizontally & vertically from the red square.
Cross hairs_copy

7 – Square vs Isometric
You can choose whether your grid lines show up in a square pattern or for further design purposes, you can change them to an Isometric pattern. Below on the left, I have Square chosen and on the right I have chosen the Isometric.

8 – Spacing
This is used to change the spacing of your grid lines to the increment you want. You can change the spacing by using the slider bar left or right, highlight & type a new number or by the arrow keys to the right of the number.

9 – Divisions
You can choose the number of divisions that your grid spacing is divided into. Below you will see I have my grid spacing set at 2″ for both photos, but the photo on the left I have my Divisions set for 5 and on the right my Divisions are set at 10.

10 – Color
You can change the color that your grid lines show on the screen. There are several colors pre-selected to choose from or you can select a custom color from the color box.Color

These are the features of the Page Setup Panel – Tab 2.
Most of these features are used for designing purposes within the software and you will find each user develops their own preferences for what they see on their screen.

I like to have my mat revealed 100%, while another user may not like that look at all. Now, you know what each feature is and what it does, so you can decide how you like your design mat to look when you are using the software.

I did mention that a few of the features are upgrade features. This means that in order for them to appear on your screen you would need a software upgrade. There are 3 steps of upgrades – Designer Edition, Designers Edition+, and Business Edition. You can find out what features are unlocked with each software upgrade by viewing the chart HERE at the Silhouette America website.
If you would like to purchase an upgrade to your software, I recommend buying through an authorized Silhouette retailer such as Swing Design. After your purchase, you are sent a instant code and can enter the code and activate your upgrade immediately.
Click HERE to be directed to the Swing Design site.

I hope you have enjoyed learning more about the Silhouette Studio v4 software today.

I have made a video of everything covered in the series today.
Check it out here:

The design used in today’s video is called Drink Your Wine We Have Crafts to Do by Lori Whitlock and can be found HERE.

Feel free to post your questions & project photos on my Facebook group at Silhouette Secrets with EllyMae.

Save this for future reference by pinning the image below.

Enjoy !

THANK YOU for your support! How can you help? Click HERE & buy a coffee.
Every little bit helps with the cost of running the site.

Looking for more in-depth, step-by-step classes, check out all of my online Silhouette classes on my Teachable site HERE.

SS Logo snip it
**This post may contain affiliate links. What that means is that I may receive compensation if you purchase through the links I have provided. The price you pay for the product or service is not higher but I may get compensated for sharing.
Posted on — 1 Comment

Glass etching with the Cameo

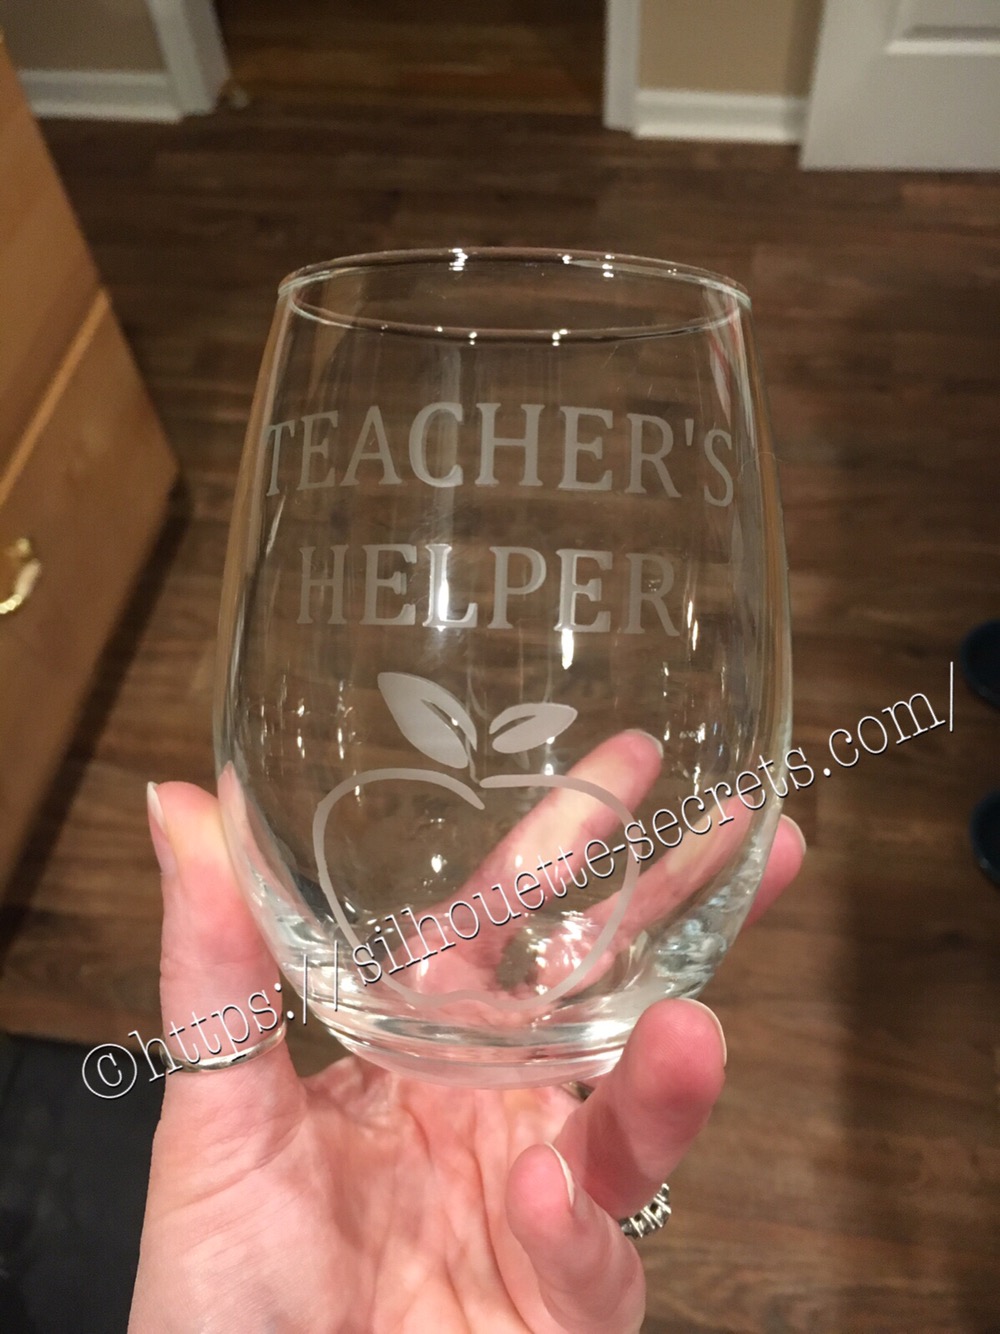
Photo shows a hand holding a stemless wine glass with Teacher's Helper etched on it.

With the end of the school year also comes end of the year gifts for teachers, aides, bus drivers, and many others who have helped throughout the school year.

I love having my Cameo to help me create a personalized gift to show my appreciation.

I cut my stencil from Oracal 651 vinyl, apply it to my clean surface and then apply my Etchall cream. I let my etching cream sit on my object for 20-30 minutes, scrape off the excess & put it back in the bottle. I love the fact that Etchall cream is reuasable!

img_7837-1 I always pick up a new tip when I’m doing a project….

Today’s tip….. even when you are rushing, don’t forget the painters tape on the edges of your vinyl to prevent any of the etching cream from oozing off the edges of the vinyl & touching the glass in a place you don’t want etched.

I hope you explore all the different possibilities that you can create with your Cameo machine!

Enjoy !

THANK YOU for your support! How can you help? Click HERE & buy a coffee. Every little bit helps with the cost of running the site.

Looking for more in-depth, step-by-step classes, check out all of my online Silhouette classes on my Teachable site HERE.

SS Logo snip it

**This post may contain affiliate links. What that means is that I may receive compensation if you purchase through the links I have provided. The price you pay for the product or service is not higher but I may get compensated for sharing.

Posted on — 2 Comments

Glass cutting board design

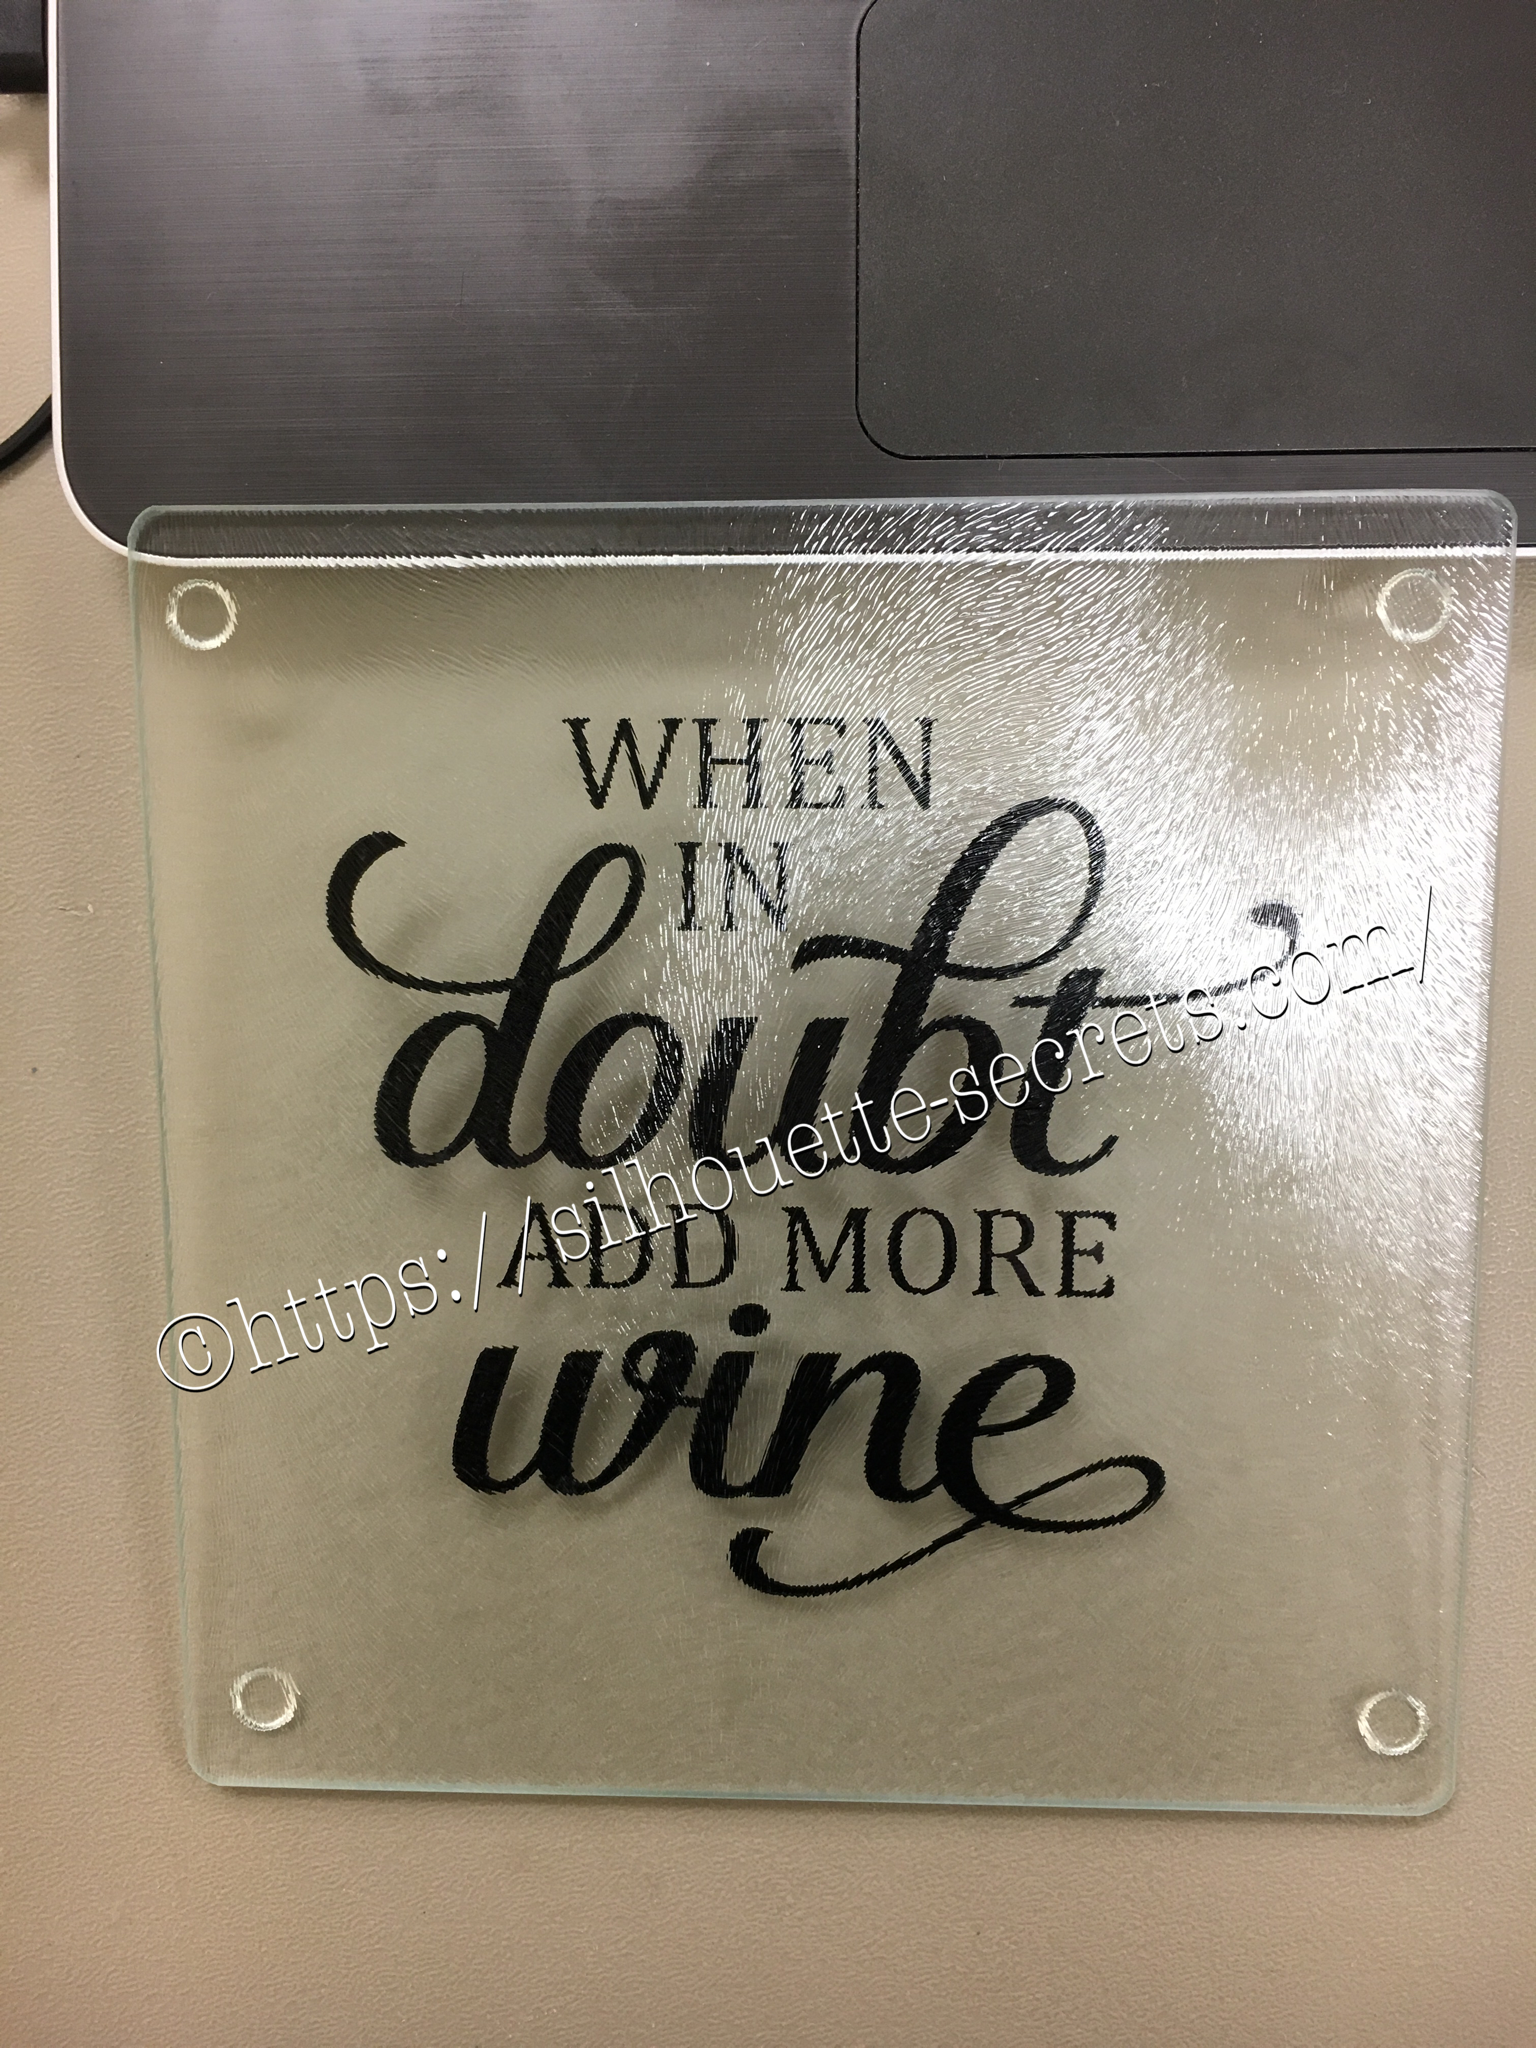
When in Doubt Add More Wine on backside of the glass cutting board.

This is a great project for a a great personalized gift. These glass cutting boards are textured on the top. Personally, I don’t think they make a good cutting board as they are textured on top but it makes a great coaster in my craft room. Of course, if you have been following my blog or my Facebook group, you know I like wine designs…. wine decor, wine…. well anything wine – lol.

With these glass cutting boards, you mirror your image on the Silhouette software before you cut it and then apply on the back side of the cutting board. I used Oracal 651 vinyl on this project, so it has a more “permanent” bond.

img_6042 Once you have the design cut, you can carefully weed the design and leave the image you want to transfer onto your project. Using your transfer tape to place your image on the back of the cutting board. Also as a note, vinyl is not food safe, so this is a great reason to apply it to the back of the cutting board. Next, you burnish your design down really good and carefully peel back your transfer tape. Done!

img_6047 There you go – a quick simple project! Now, I found this cutting board at our local Dollar Tree… however, they keep getting harder to find. You can pick up a glass cutting board anywhere and personalize it. These would be hand wash only as vinyl is not dishwasher safe. Also as a note, vinyl is not food safe, so this is a great reason to apply it to the back of the cutting board.

Enjoy !

THANK YOU for your support! How can you help? Click HERE & buy a coffee. Every little bit helps with the cost of running the site.

Looking for more in-depth, step-by-step classes, check out all of my online Silhouette classes on my Teachable site HERE.

SS Logo snip it
**This post may contain affiliate links. What that means is that I may receive compensation if you purchase through the links I have provided. The price you pay for the product or service is not higher but I may get compensated for sharing.
Posted on — Leave a comment

Halloween decor – yes that’s right!

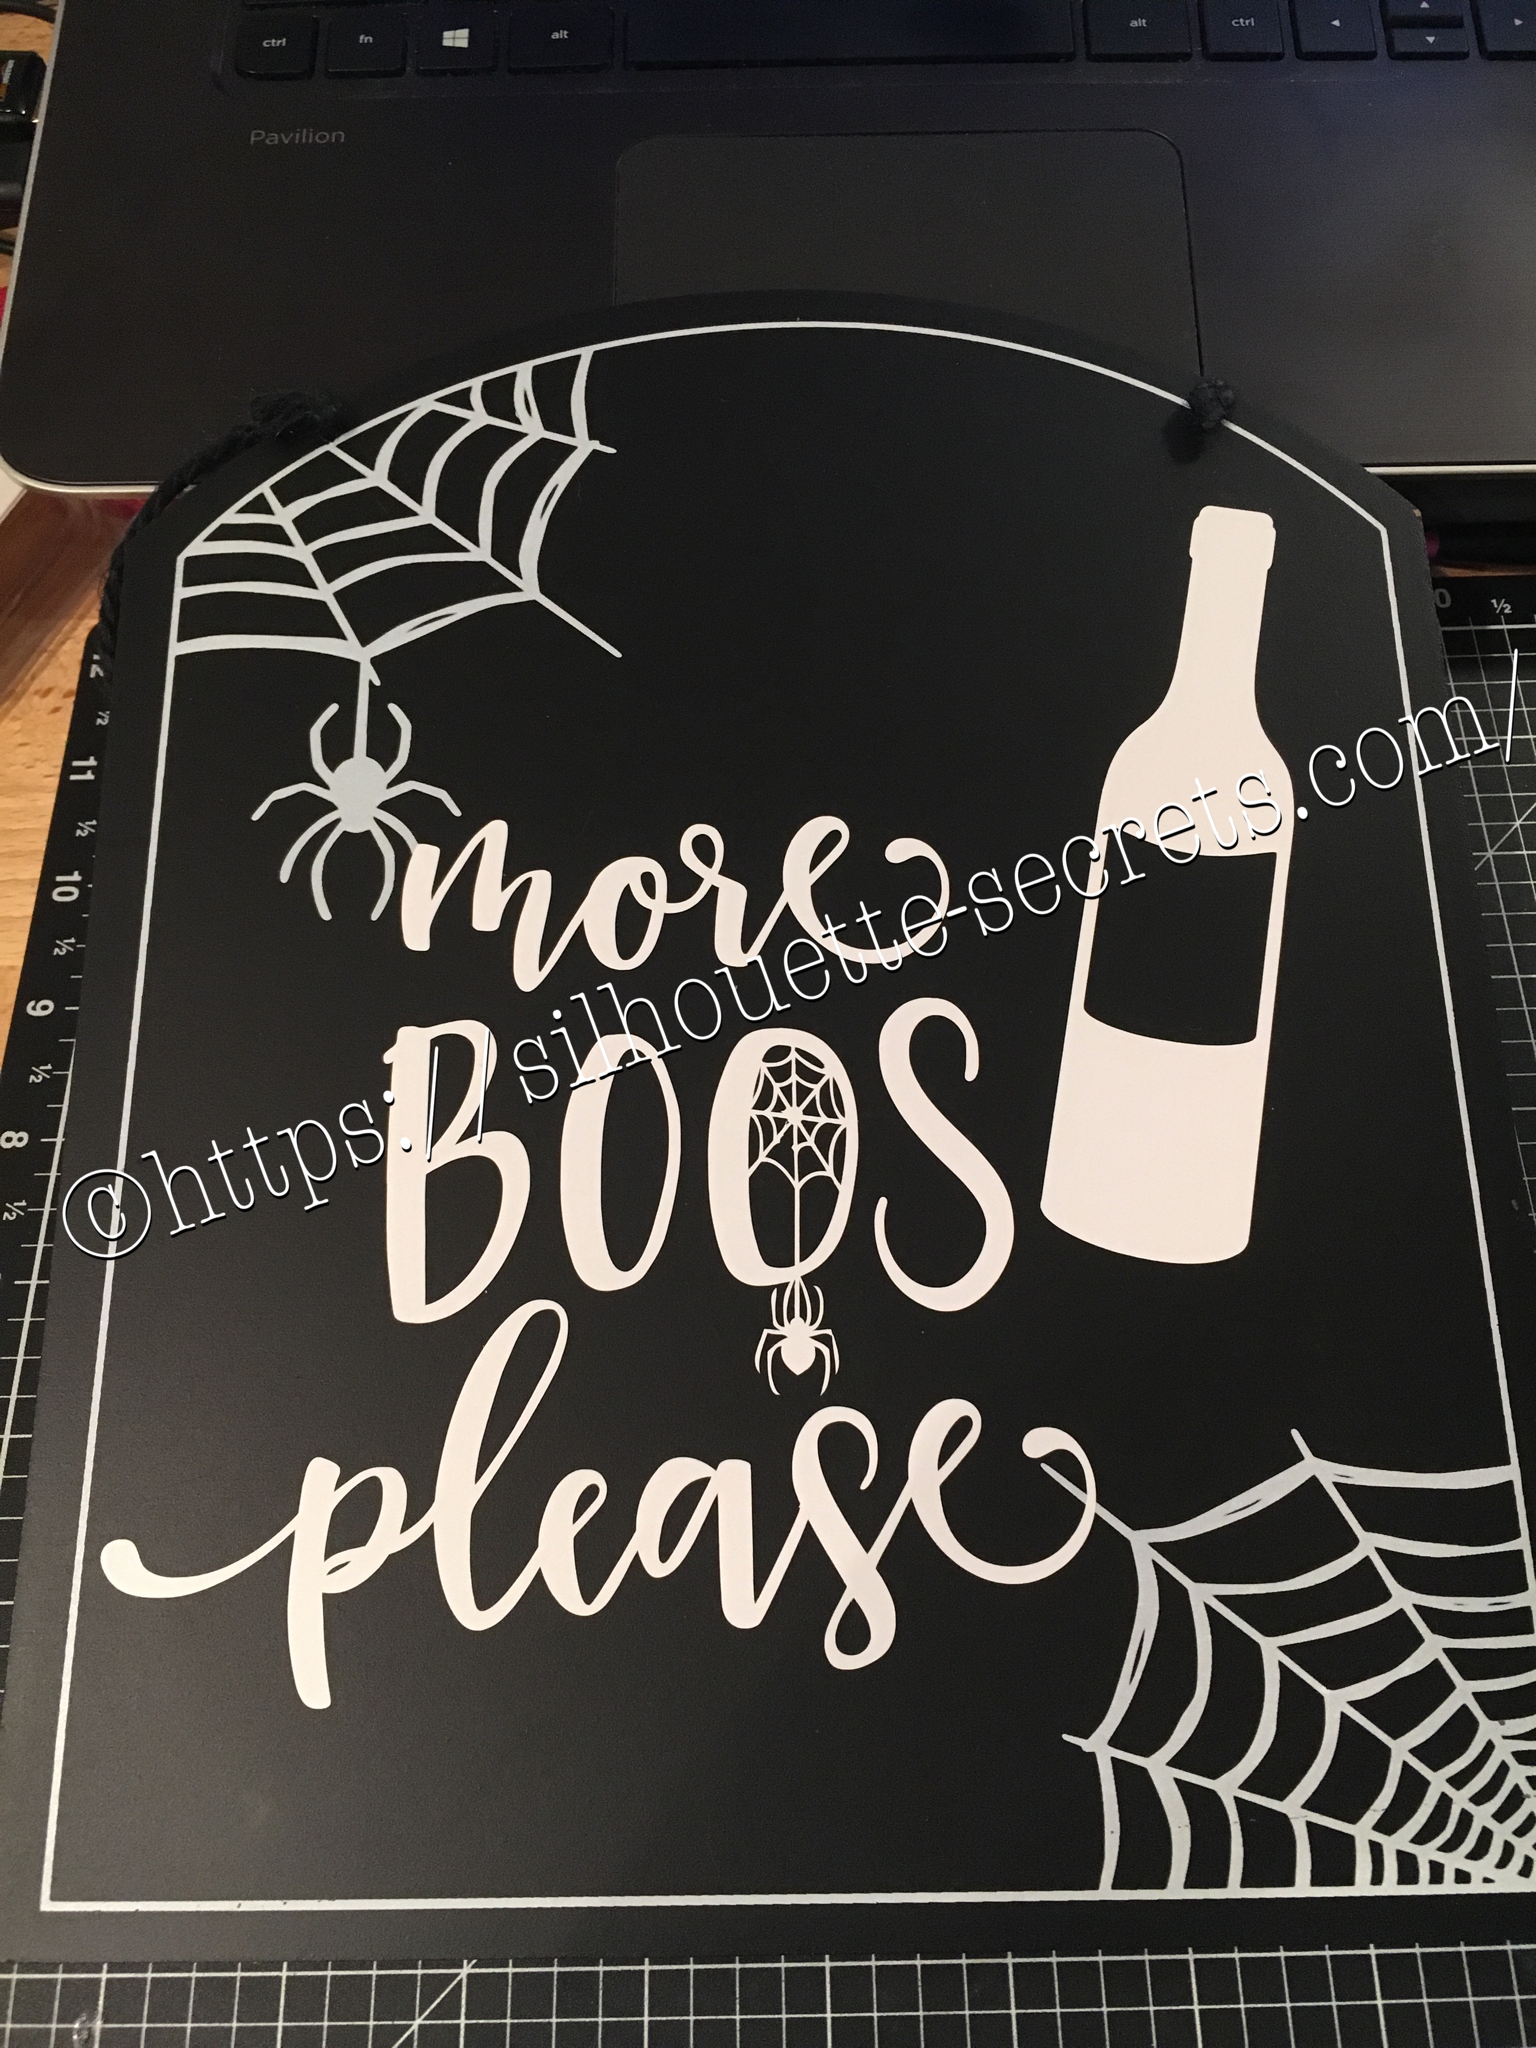
Photos shows a black sign that says more Boos please with a wine bottle, spiders, and webs.

Halloween is of course several months in the past, but when you can pick something up on clearance…. why wait until next year to finish it.
I found a couple signs at Target that were perfect to add vinyl to.

I had a couple files from the Silhouette store & they were perfect for these…..

img_6072-1

With my first design, I weeded the large area first & then I applied my transfer tape & uses a technique commonly called “reverse weeding” in the Vinyl crafting lingo.

How do you reverse weed?

Burnish your design well, so it all sticks to your transfer tape.
Then peel the backing off of your vinyl design & very carefully weed out the bits of vinyl from the delicate parts of your image.
This works especially well if you have small eye pieces or small dots for letters, etc. It does take some practice to get the hang of it.
The first time I did it, I hated it because my transfer tape kept sticking to me.
But, the more you practice & get the hang of it, the more you fall in love with the technique & use it for those delicate designs that you don’t want your pieces moving on.
In my design, I used this for the spider web that was in the center of my “O”.

After weeding my design, I then carefully placed my design on my sign & burnished it down really well. Then I carefully peeled the transfer tape off, watching for any vinyl that did not come off the transfer tape and I would put it back down & burnish it some more to get it to stick.

img_6074-1

And my second design, also from the Silhouette Design Store.


img_6075-1

Now these are ready to pull out for next year and will go perfectly in my dining room that has a wine theme.

Whenever you get the chance to grab some decor items at a discount, grab them, but don’t let them sit around too long without adding all the finishing touches.

Enjoy !

THANK YOU for your support! How can you help? Click HERE & buy a coffee. Every little bit helps with the cost of running the site.

Looking for more in-depth, step-by-step classes, check out all of my online Silhouette classes on my Teachable site HERE.

SS Logo snip it
**This post may contain affiliate links. What that means is that I may receive compensation if you purchase through the links I have provided. The price you pay for the product or service is not higher but I may get compensated for sharing.
Posted on — Leave a comment

Quick gift – I love Rhinestones 

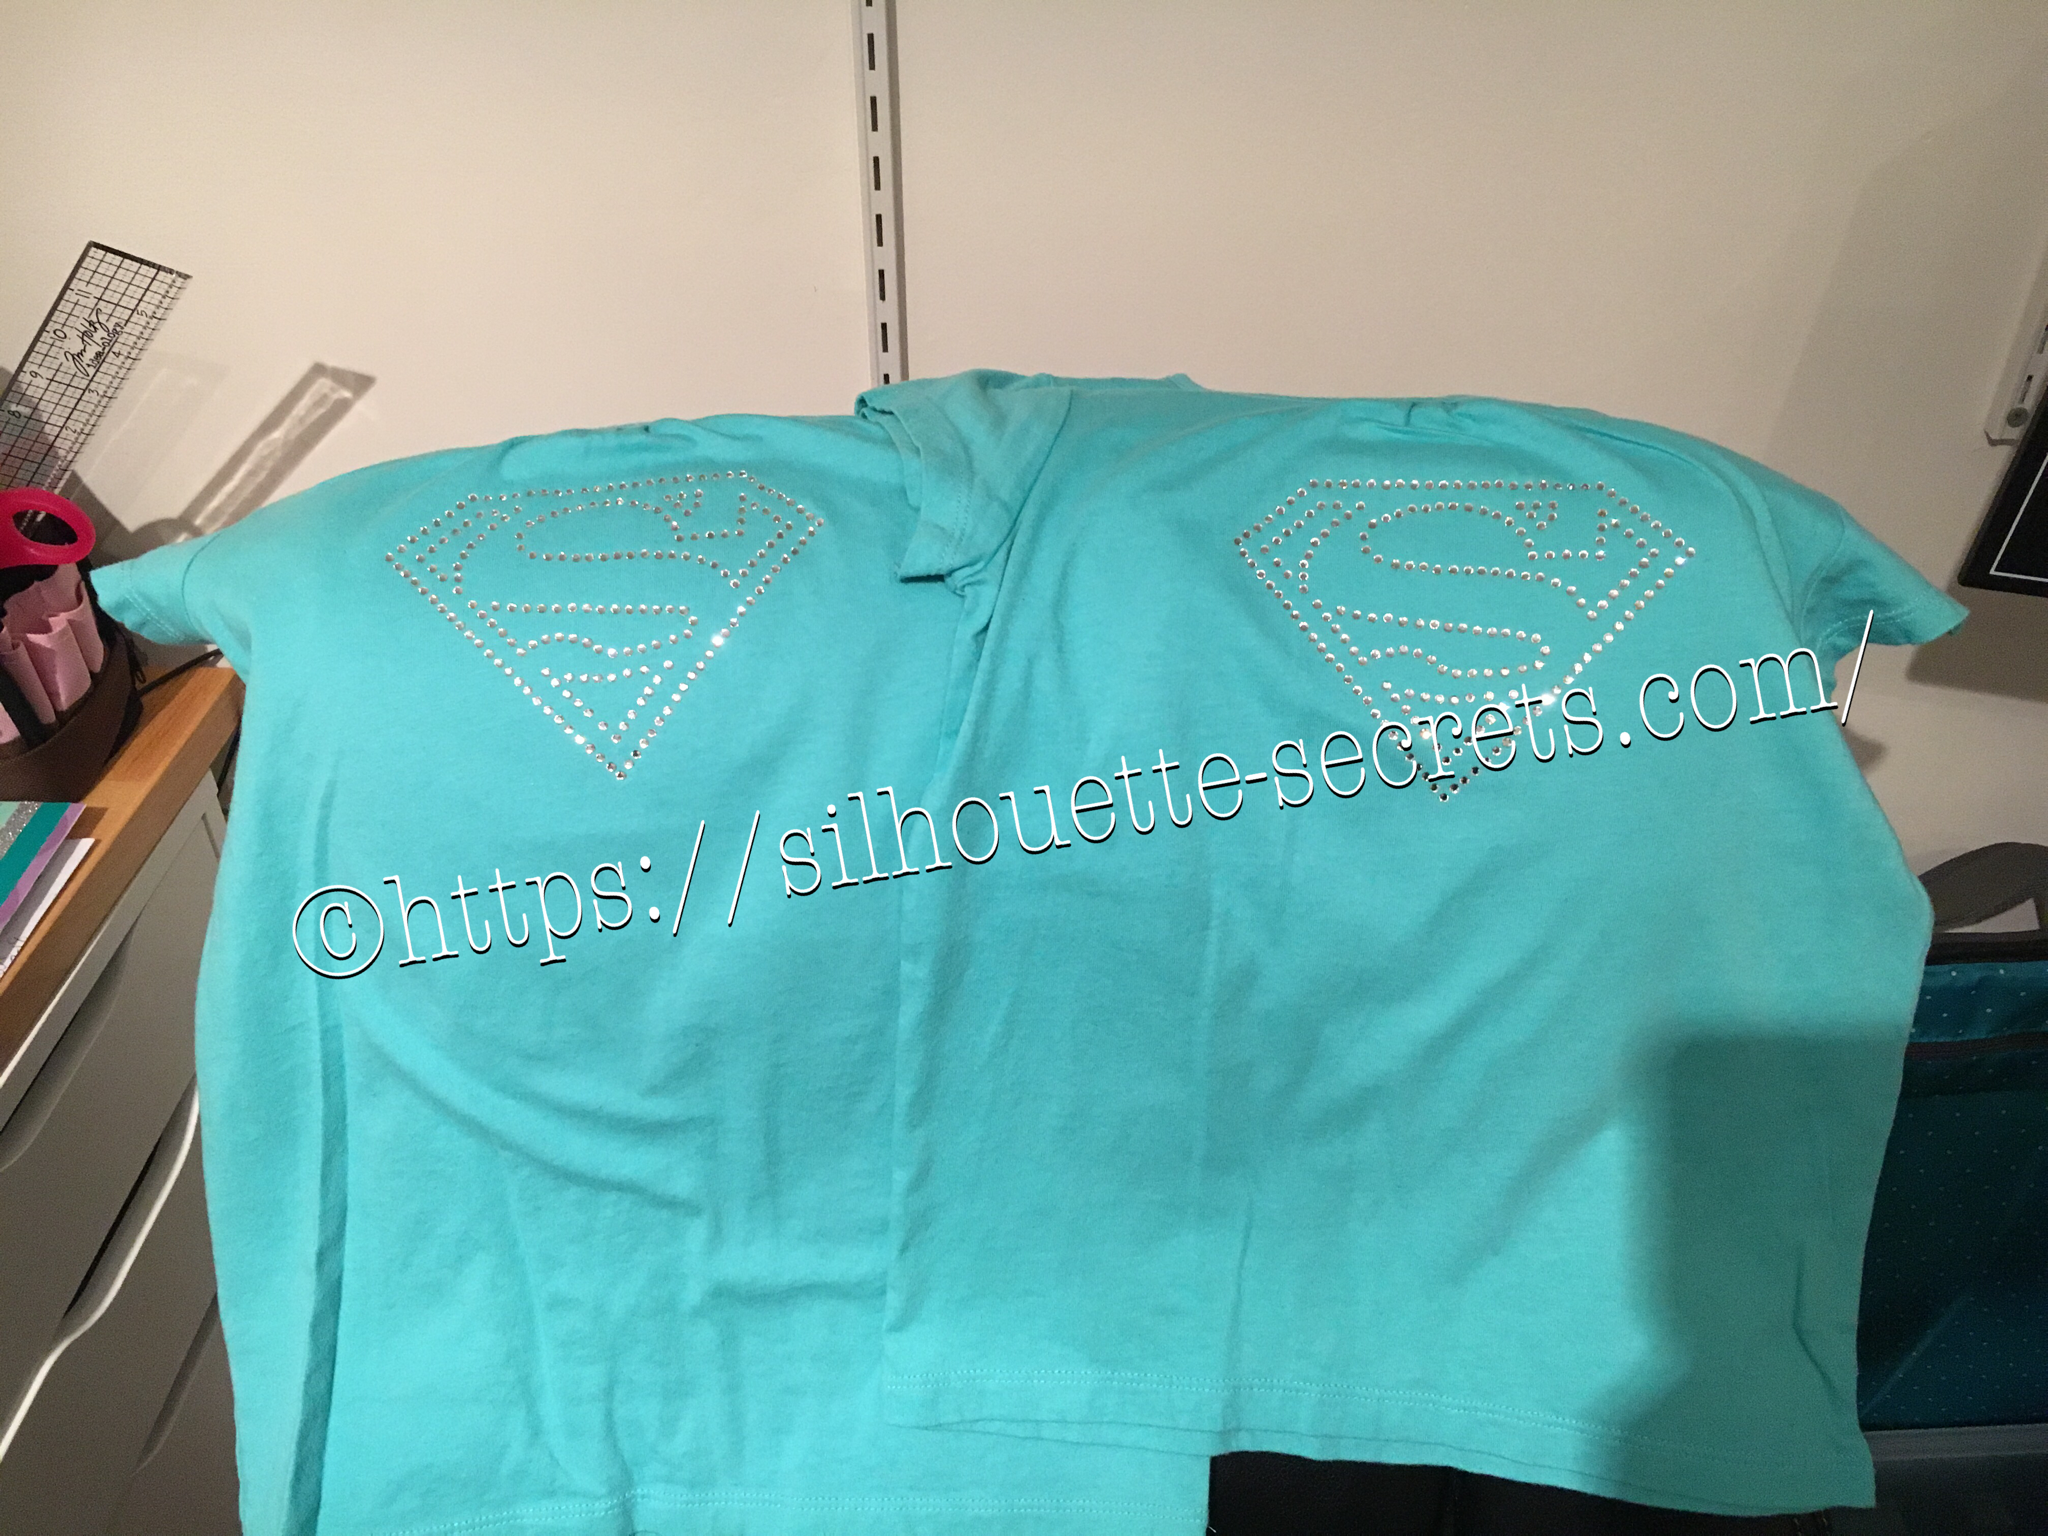
Photo shows 2 shirts with rhinestone designs

Rhinestones – once you start, it’s addictive and you just want to make more. I held off as long as I could, until I took Terri Johnson Creates hands on retreat last July. In her class, we designed our own rhinestone design and cut it out. After that one design, I was hooked and started shopping in the Silhouette store for more. This one jumped out at me and I knew I’d be making some for my nieces in the future.

I had just ordered some supplies from The Rhinestone World and had the opportunity to make these as quick gifts to send with my husband on a trip.

img_6136

So with this magic flock you cut the design with your machine and then peel it off the backing – rip it like a band aid gets the best results. If it has cut well, the little holes will stay on the backing and you can just scrape them off…..

img_6137

You can then lay the sticky design down on a safe surface, press it and peel it back again to get more of the circles to stick out.

img_6138

I then look for any that didn’t come out, remove those and put it back on the backing paper.

img_6139

Now, sprinkle your rhinestones on top of your template and rub them around until all the holes are full. Once all the stones are in place, using heat transfer tape, lay it over top of your design and burnish. Carefully life it up and make sure the rhinestones are stuck to the heat transfer tape.

img_6144

img_6145 Place your heat transfer on the shirt where you want it and I used an iron with a board under it and lots of pressure on high heat with a teflon sheet to set the stones on the shirt.

img_6147 I love the ability to make a gift up really quickly and hope you enjoy making rhinestone designs as much as I do.

I would highly recommend attending a retreat by Terri Johnson Creates, you will learn so much and be able to try all kinds of new projects. The possibilities are endless with the Silhouette Cameo!!!

Enjoy !

THANK YOU for your support! How can you help? Click HERE & buy a coffee. Every little bit helps with the cost of running the site.

Looking for more in-depth, step-by-step classes, check out all of my online Silhouette classes on my Teachable site HERE.

SS Logo snip it
**This post may contain affiliate links. What that means is that I may receive compensation if you purchase through the links I have provided. The price you pay for the product or service is not higher but I may get compensated for sharing.
Posted on — 2 Comments

Customized cards with my Silhouette Cameo

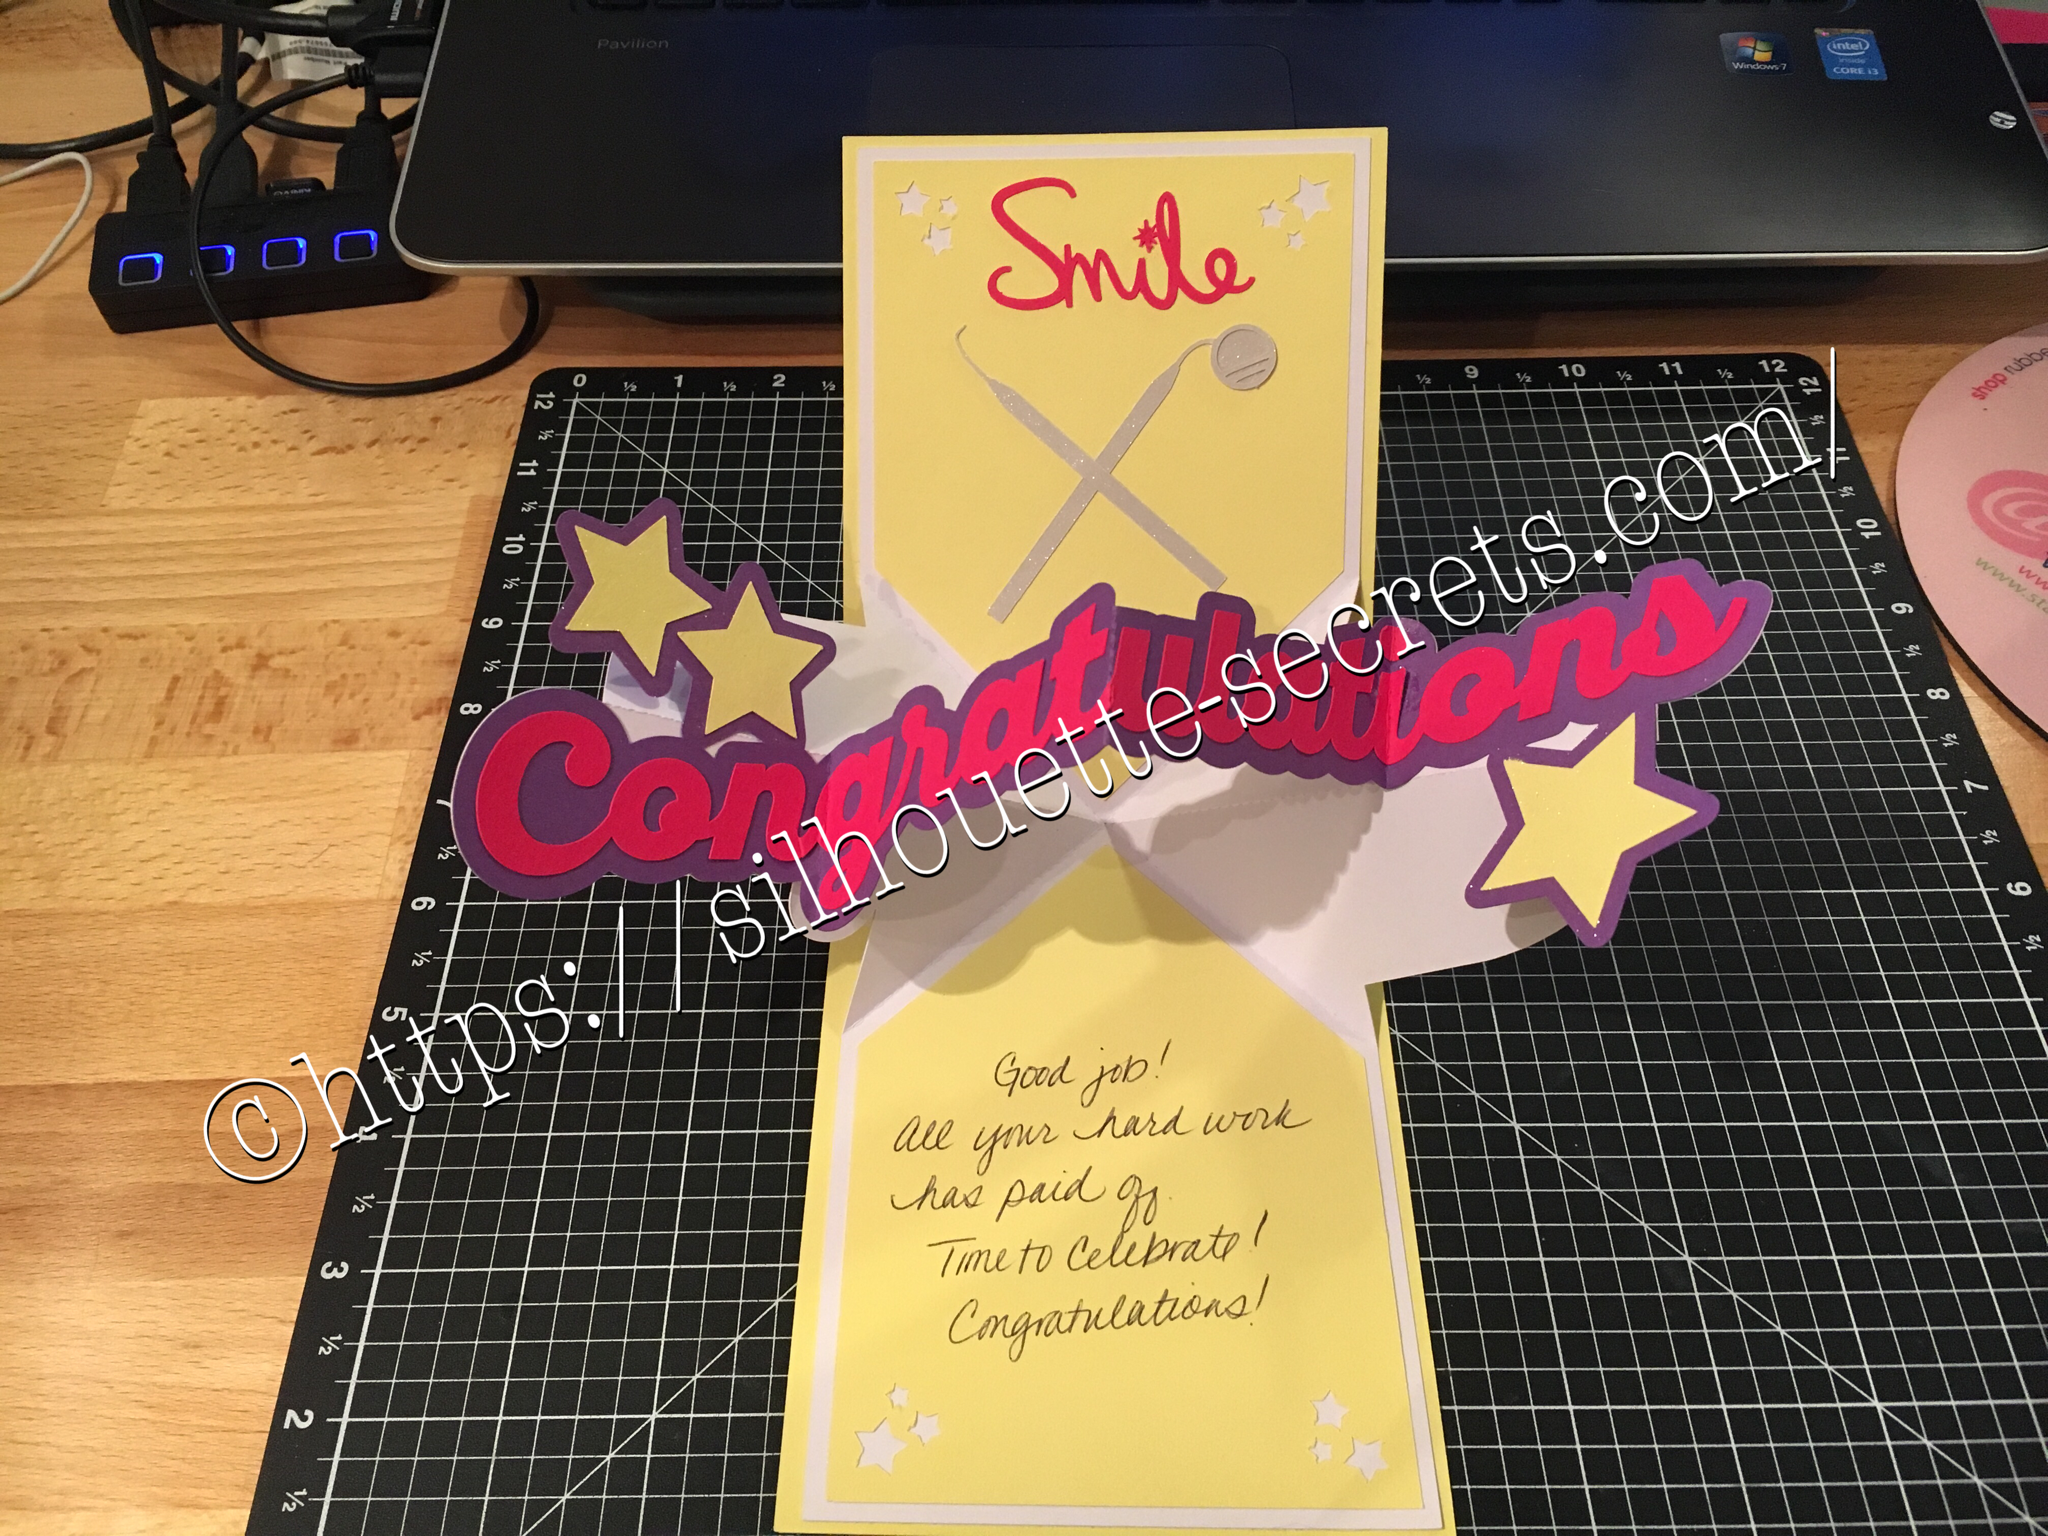
Photo shows a Congratulations pop up card.

I love being able to create these customized cards for friends, especially for special occasions… A friend of mine just received the results of her dental hygiene exam and I thought I would create a unique card for her. I found all the designs in the Silhouette Store and loved that I could just click buy and then get to cutting. You can find the Congratulations Pop & Twist card file HERE. Find the Tooth file HERE. Find the Dentist tools HERE.

img_6006 img_6180

You can see a short video of how this card works HERE.

img_6005

I took the tooth cut file and resized it down to make a bunch of teeth confetti to include inside the pop & twist card. And then I stuffed it into the envelope. Just a tip… I even measured this card and it was under the weight limit but U.S.P.S still returned it for more postage. You just never know. Sometimes with these fancy fold cards they can get to be a bit thick and you need to allow for extra postage. I thought I was good this time, but guess not!

Now while you can find instructions on how to create these fancy cards such as Twist & Pop or Cards in a Box, I still prefer to use my Cameo machine and let it do the work for me.

What kind of fancy cards will you try with your Cameo?

Enjoy !

THANK YOU for your support! How can you help? Click HERE & buy a coffee. Every little bit helps with the cost of running the site.

Looking for more in-depth, step-by-step classes, check out all of my online Silhouette classes on my Teachable site HERE.

SS Logo snip it
**This post may contain affiliate links. What that means is that I may receive compensation if you purchase through the links I have provided. The price you pay for the product or service is not higher but I may get compensated for sharing.
Posted on — Leave a comment

Happy Valentine’s Day!

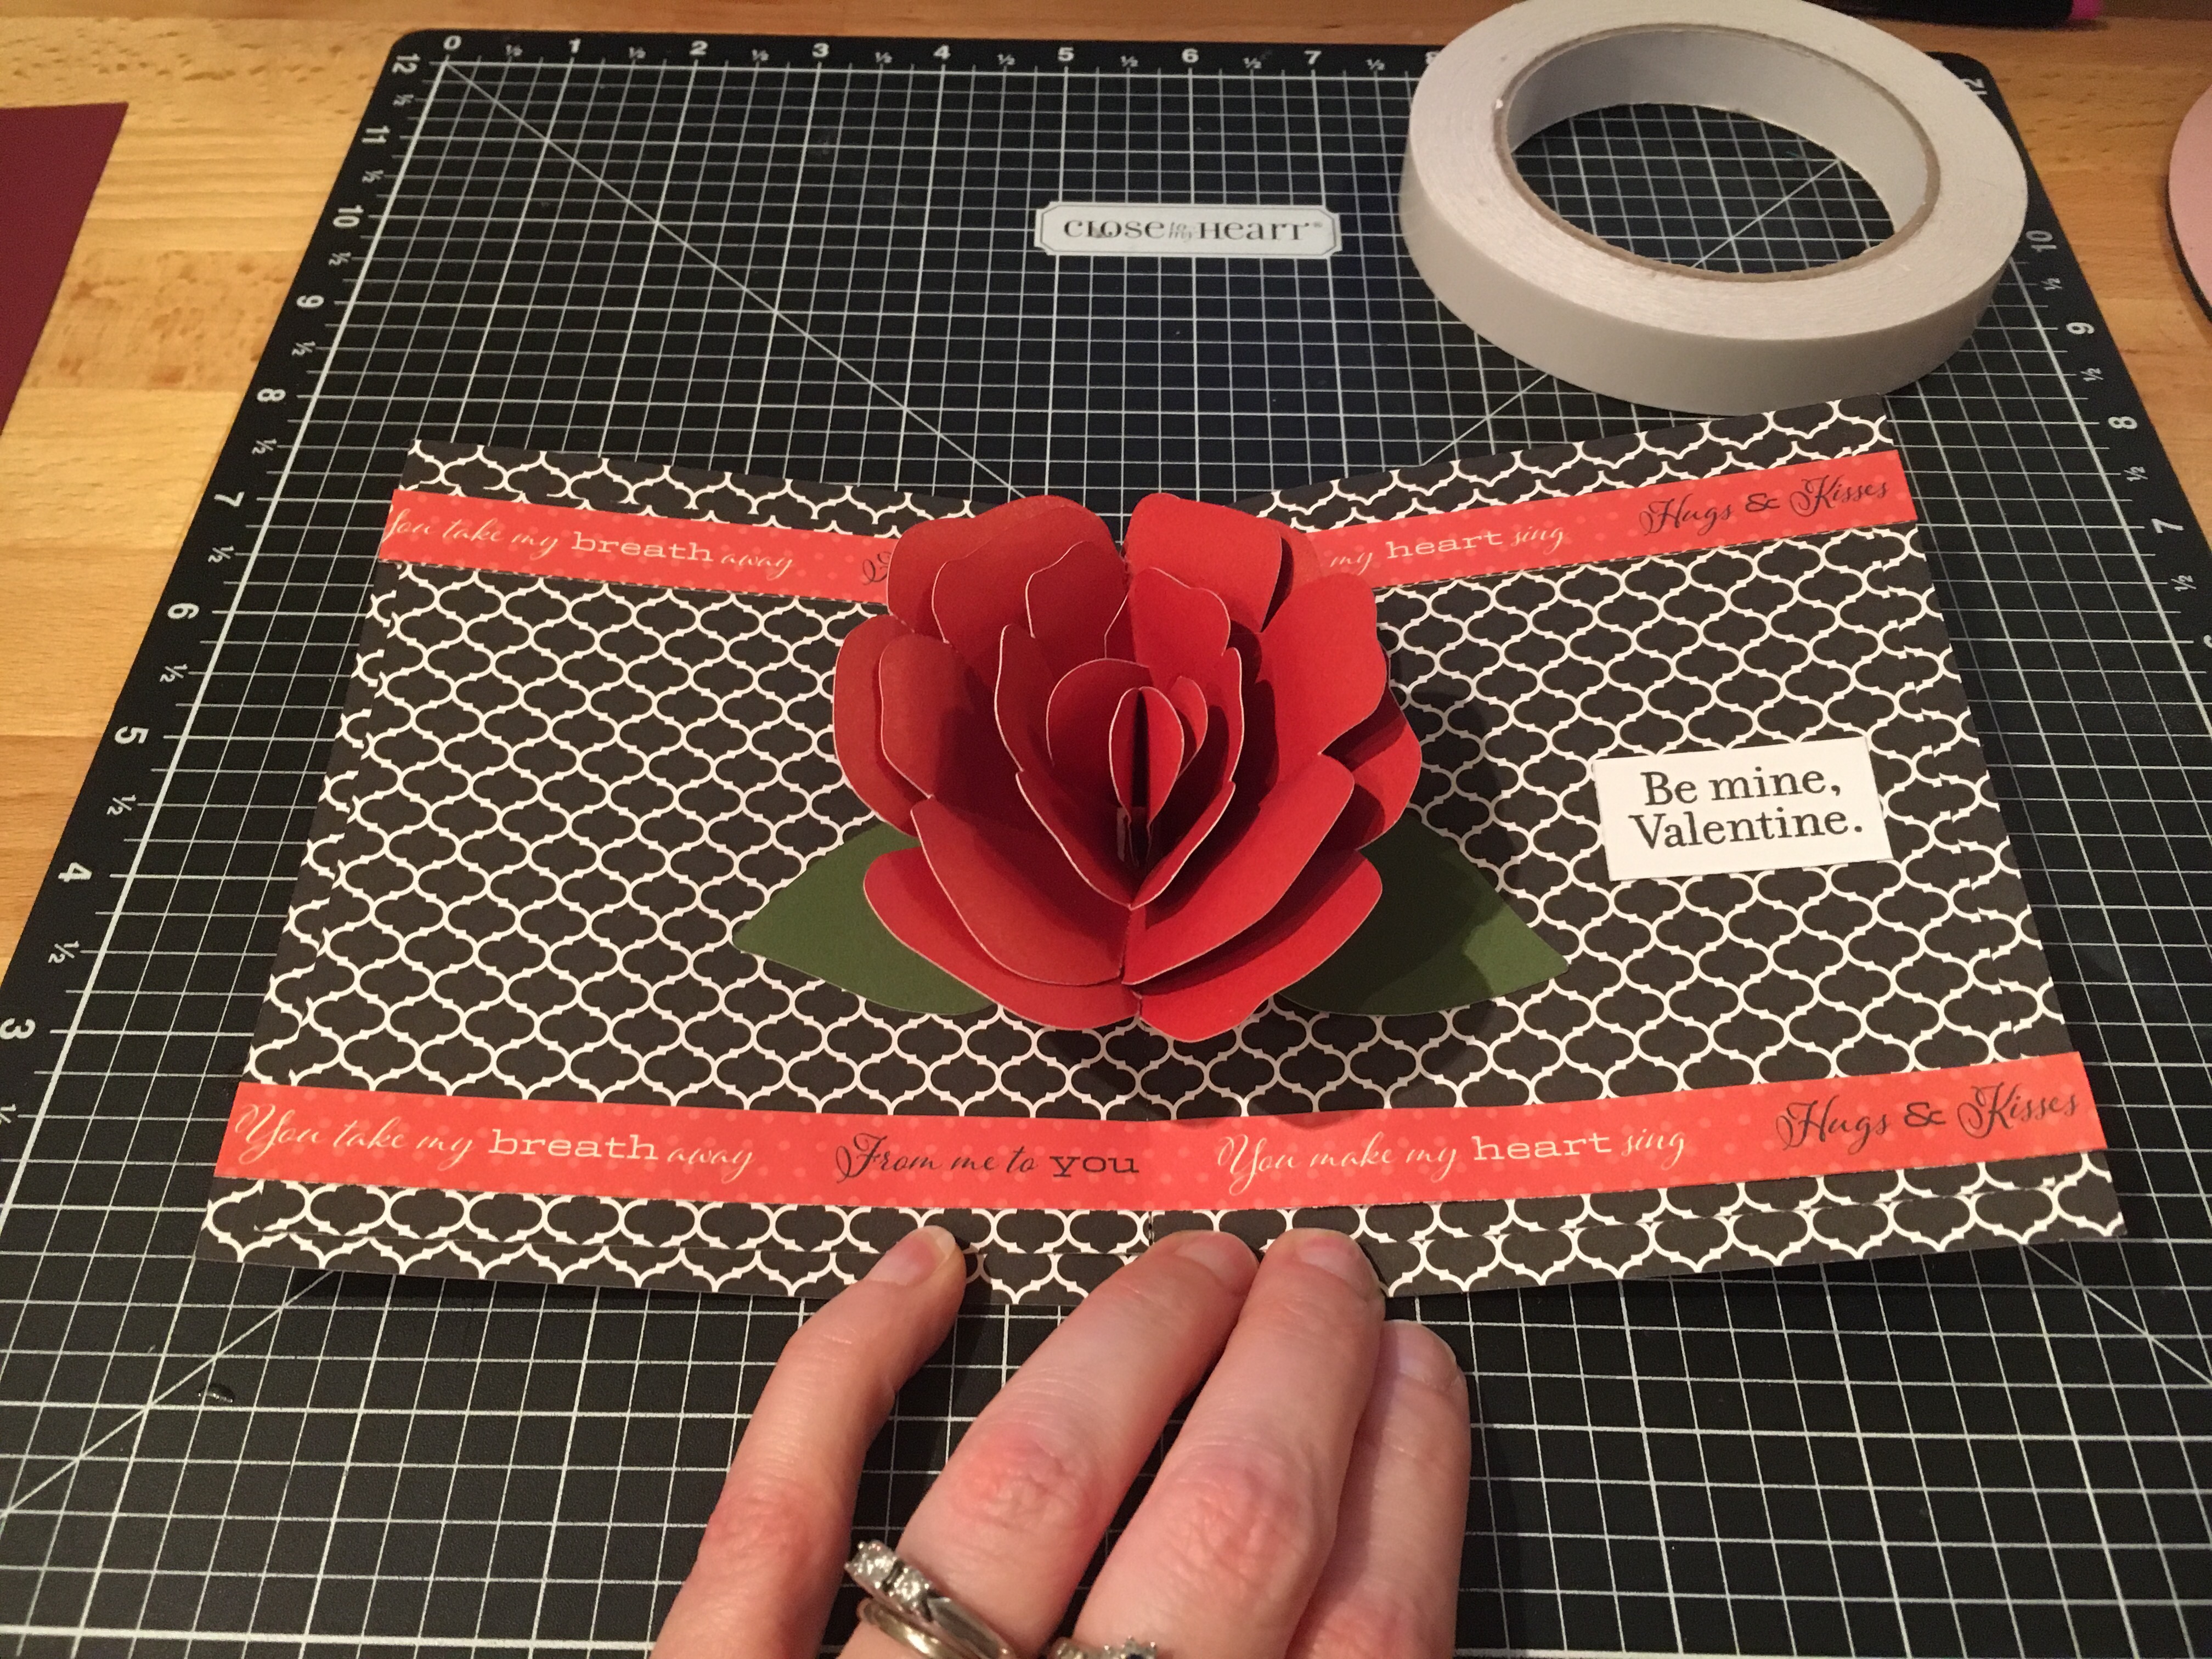
Photos shows the inside of a card that has a pop up rose design with Be mine, Valentine inside.

Where ever you are, I hope that you have a wonderful Valentine’s Day!

After hubby asked me if I could make a pop up flower card, I just had to try out several that I found…. In my last blog post, I showed you a card in a box bouquet that I found in the Silhouette store – you can see that HERE. But I found several others….. how do you ask? Well, Pinterest of course!!! That is my go to source for ideas… I’ll either browse the front page or if I’m looking for something specific, I will use the search function and see what cool things it will bring in to my life that I must make. You can find my Silhouette Pinterest page HERE for all thins I’ve pinned Silhouette related, but I also try to keep things organized in folders so I can find things easily when I get the time to make them.

img_5848

I used the cut file I found at Paper Pulse for the Rose pop up card and cut the pieces out of card stock. And then I referenced her instructions on how to piece it together and assemble the card.

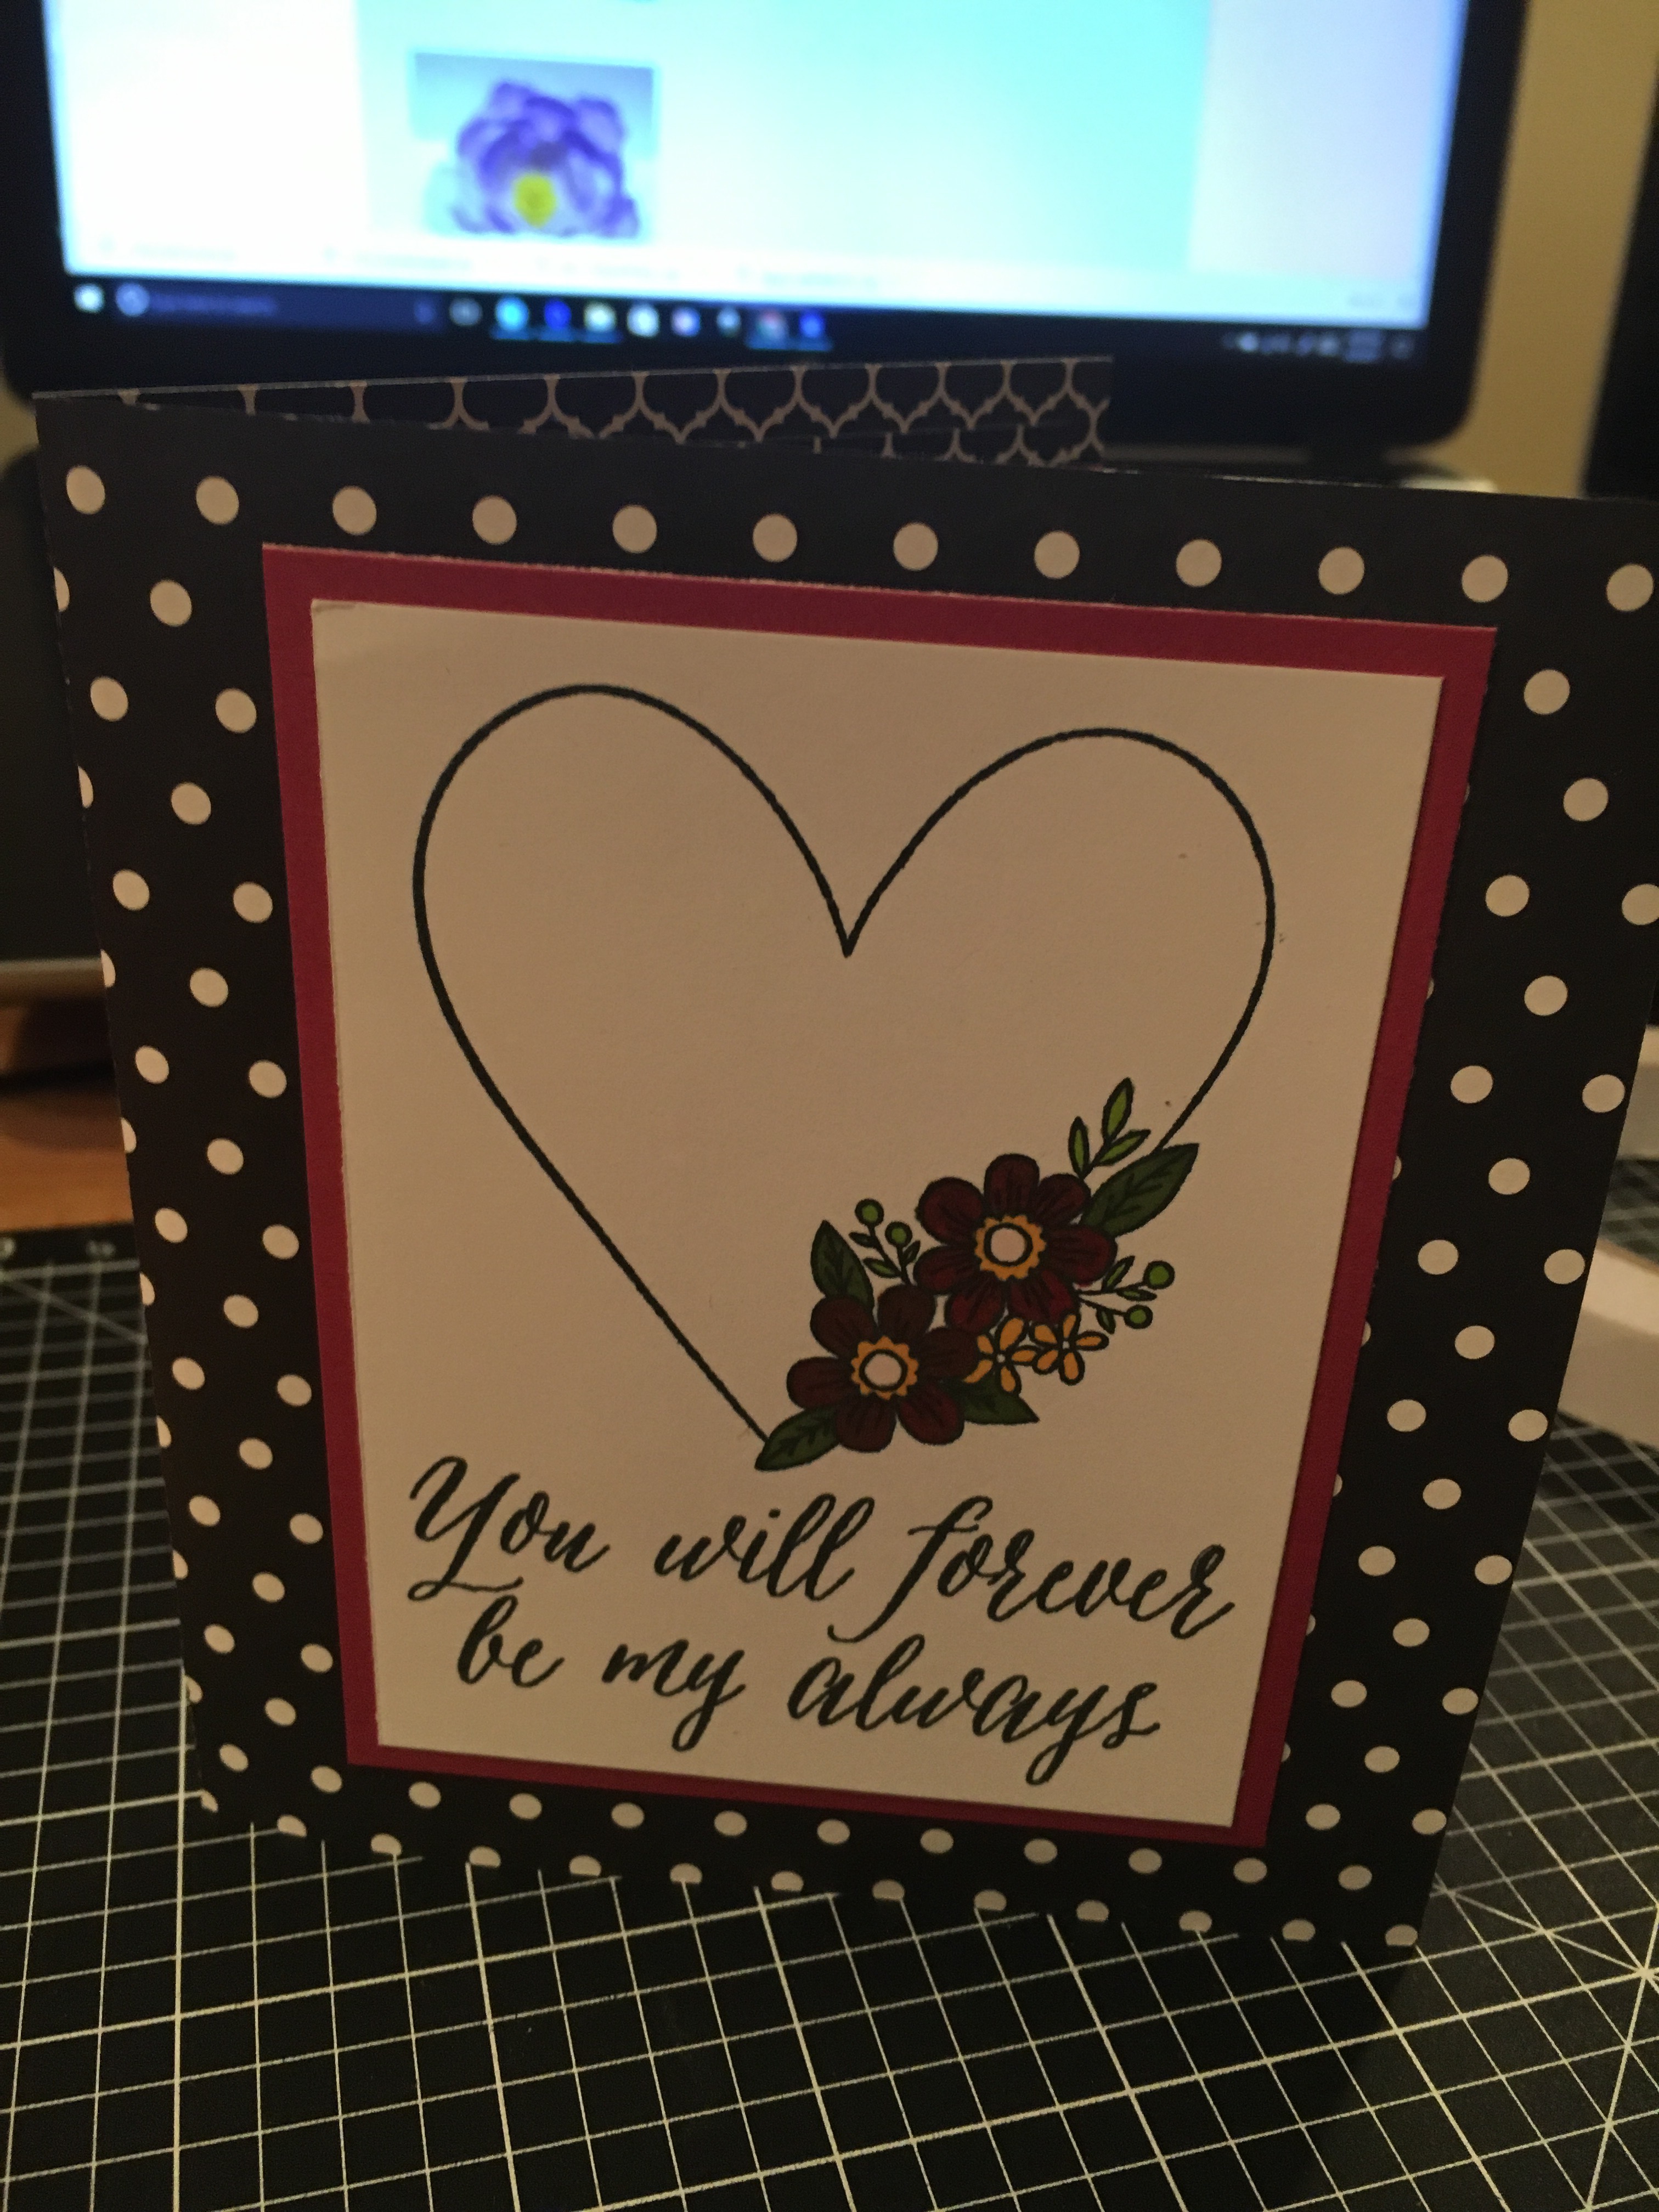
img_5849 I used the CTMH Stamp of the Month from January and colored it in with the Shin Han markers. img_5850 I cut the card base and inside from a retired CTMH paper pack called La Vie En Rose.

img_5851 And then I used my Envelope Punch and created an envelope for my pop up card.

I hope you have a wonderful day!

Enjoy !

THANK YOU for your support! How can you help? Click HERE & buy a coffee. Every little bit helps with the cost of running the site.

Looking for more in-depth, step-by-step classes, check out all of my online Silhouette classes on my Teachable site HERE.

SS Logo snip it

**This post may contain affiliate links. What that means is that I may receive compensation if you purchase through the links I have provided. The price you pay for the product or service is not higher but I may get compensated for sharing.
Posted on — 1 Comment

Bouquet of roses

The other night my husband shows me a photo on his phone and asks me, “Can you make this?” It was a pop up card with flowers in the middle…. so of course….. challenge accepted!!!

I start looking for cut files that I can make something similar and found several. This one I found in the Silhouette Design store and it was so easy to click buy and cut.

You can find the design HERE.

On this particular design there was also information in the product description that leads you to the designer’s blog for instructions on how to assemble and I referenced this several times to know the order that each was glued into the card. You can find the instructions for this card HERE as well.

This card in a box was easy to assemble since everything was included in the one cut file and all you had to do was un-group and arrange the cuts according to the color you wanted to cut. However, do keep in mind that if you want to mail this card, it does need to be resized smaller to fit in a regular size envelope.

img_5854

I cut all my pieces and set them aside to assemble everything at once. I used several adhesive types: Liquid Glass when gluing the card box, roses & stems together, foam tape to attach the greenery inside the card and then a Xyron sticker maker for the word valentine.

img_5855

Liquid glass is my go to adhesive for a quick secure hold on these card in a boxes or on rolled flowers…. I use a small amount and hold the paper in place for 10 seconds, sometimes maybe a bit longer, and then give it a few to dry and it holds so well.

img_5856

Above is my card once all the roses are attached inside the box.

img_5900

And above is my finished card. I did resize the card, so I would be able to put this in a 5 x 7 envelope and mail it.

img_5930

After making this smaller version, I decided that I wanted to make some for the teacher’s. Because really, who doesn’t want to receive a dozen roses? And ones you don’t have to water or take care of in any way – bonus!

img_5929

I hope you take some time to “Do something Creative today.”

Enjoy !

THANK YOU for your support! How can you help? Click HERE & buy a coffee. Every little bit helps with the cost of running the site.

Looking for more in-depth, step-by-step classes, check out all of my online Silhouette classes on my Teachable site HERE.

SS Logo snip it

**This post may contain affiliate links. What that means is that I may receive compensation if you purchase through the links I have provided. The price you pay for the product or service is not higher but I may get compensated for sharing.