Posted on — 7 Comments

Let’s Explore v4 – Transform = Move

Did you know that you can Move objects on your Silhouette Design mat specifically into place?

Pretty neat when you start to look at it.

Under the Transform Panel on the right side, then the 4th tab at the top of the Panel is the “Move By” tab.

4-25 Transform -Move copy

This allows you to move an object to an exact location on the Design mat.

4-25 Transform -Move detail copy

  1. Directional arrows – Move left, move right, move up, move down – choose which direction you want to move your design.
  2. Distance – Set the exact distance you want your design to move.
    Here is the original design placed on my design mat:
    Distance before
    *Running Out Wine Cardio design #222003 by Megan Hardy Design

    Now see how it moved exactly 3.25″ when I select the design and click on the Move right directional arrow.

    Distance after

  3. X and Y coordinates – Set the exact X and Y location of your design on your mat.
    If you look in my above photo, when I moved it 3.25″ to the right, it also added in the X and Y coordinates. This means that I can also move something by changing those numbers. Here I entered my X as 5, so it moved it 5″ from the left side and my Y as 3″, so it moved it 3″ down from the top.X and Y

    You can also choose how it applies the X and Y coordinates by selecting the position on the square that you want it to apply from.
    My photo above has it applied in the top left corner.X Y position copy
    But you can choose what position works best for you, whether it’s the Center of the design or another location as well.

  4. Apply – Click here to apply the Move or hit Enter.

And that is how you can move things on your design screen to the exact location you want.
Can you move it manually? Yes, you sure can!
Drag and move it where you want.
Or you can use the Move tools and place it exactly.
Just like so many other functions in the Silhouette software – there are multiple ways to do things!

Enjoy !

THANK YOU for your support! How can you help? Click HERE & buy a coffee. Every little bit helps with the cost of running the site.

Looking for more in-depth, step-by-step classes, check out all of my online Silhouette classes on my Teachable site HERE.

SS Logo snip it
**This post may contain affiliate links. What that means is that I may receive compensation if you purchase through the links I have provided. The price you pay for the product or service is not higher but I may get compensated for sharing.

Posted on — 4 Comments

Bus Driver Appreciation gift

Over on the Silhouette School blog today I showed how to use the Cut by Fill Color option to create a layered vinyl decal for perfect placement.

 IMG_2823

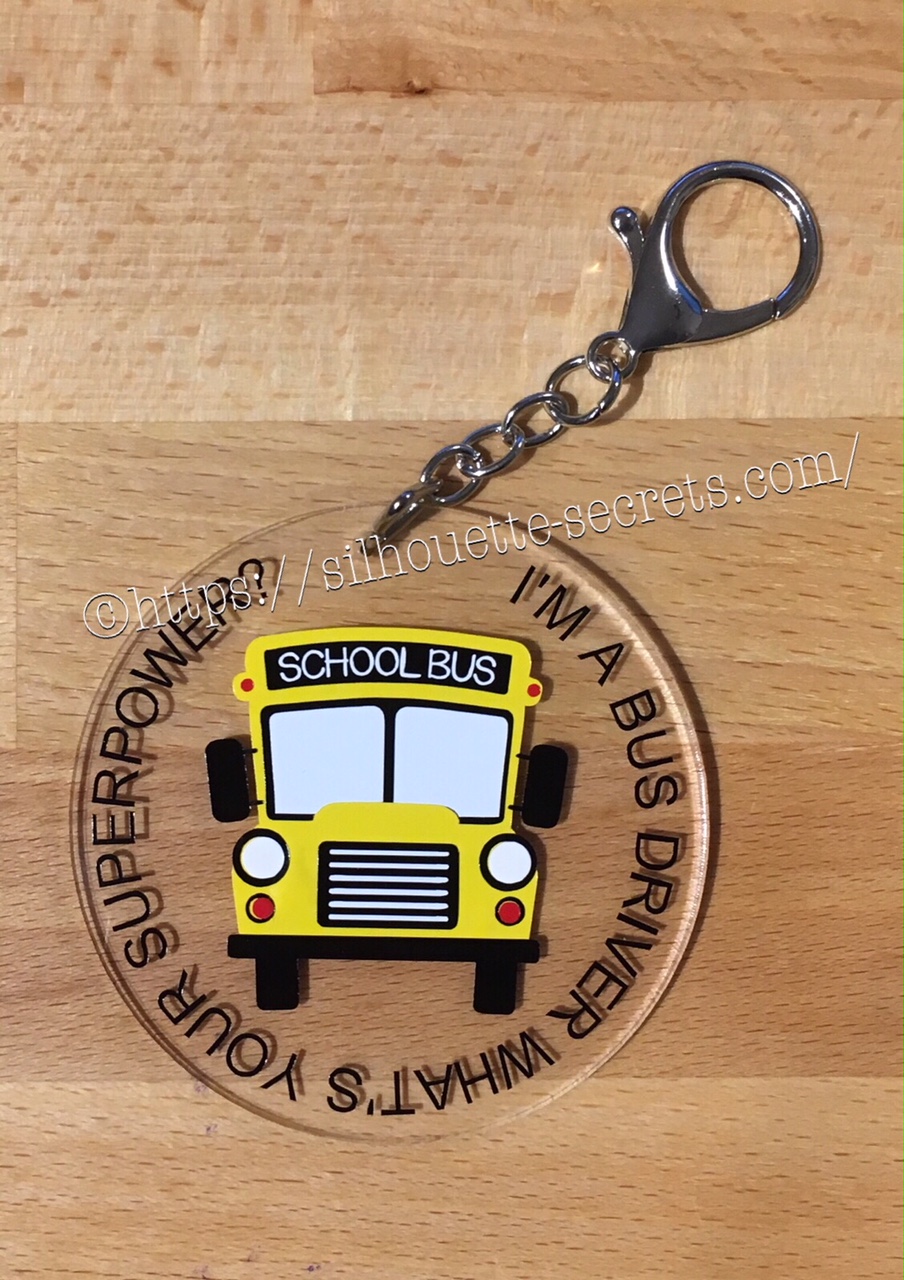
Now I’m going to show you how I took that design, shrunk it down and used the same technique to create a bag tag for our Bus Driver.

I started with a 3″ clear acrylic circle blank from Craft Chameleon.

IMG_2824

I love that Craft Chameleon acrylics come with a cut file included. I opened up the template for this shape and copied and pasted it to a new design mat to use as my base. Or you could draw a perfect circle by holding down the Shift key and then resizing the circle to the exact dimensions under the Transform Panel – Scale tab.

Base Template

Now, I can use this to create my design in.

I took the School bus design by Kelly Lollar Designs that I used as an example in my guest post, and shrunk it down with the registration (layering) marks. I wanted to make sure that the bus fit in the center of the acrylic shape with space around the edges for text.

 Bus centered

Now, I duplicated my circle and made it a little bit smaller. This is so the text will fit down inside of the acrylic shape better. Move the original 3″ circle off the mat as it’s not needed any longer or you can delete it.

Then select just the bus and the circle and use the Align Tab in the Transform Panel to Align Center or from the QAT (Quick Access Toolbar). Do not include the registration (layering) marks in this, as it is just the bus and circle we want to center together.

Align center copy

Now, type out the text, select the font style and size. Double click back on the text to get the circle in the bottom left corner. Grab that circle and drag it to your circle shape.

Typing text copy

As you drag it to the circle you will notice it attaches to the circle. Play around with the alignment of the text to your liking and then use the slider bar to increase the distance from the circle either inside or outside of the circle.

Text to shape copy

Now, I decided to increase the Character Spacing under the Text Style Panel, just a bit on my letters to spread it out a bit. And then readjust your words around the circle. Each Font style that you choose will give you different looks, so you will need to adjust for whatever you choose.

Character spacing copy

Now, once the text is modified, it will no longer be editable text. This is a good time to make a copy of the text & circle and pull it off the mat, just in case you want to edit it later. If you select only the text to pull it off, it will release from the shape, so you want to select both the text and the shape and make a copy.

In order to separate the text from the circle, right click on the text and choose Convert to Path.

Convert to Path copy

And now, move the circle off the mat as we do not want it to cut.

Circle released

Now, we are ready to cut out decal just as I detailed in the Silhouette School guest post.

Once we have our decal cut out and layered together, we are ready to apply to the acrylic shape.

I went ahead and placed the shape on my Silhouette cutting mat on the sticky side, so it wouldn’t move while I applied the decal. The acrylic blanks come with a protective covering on them to prevent scratching before use, so make sure to peel that off before you add your decal.

IMG_2814

And then I lined the decal up and placed it down, burnishing it well and took the transfer tape off.

IMG_2815_edited

And with any project there’s always 1 piece that may not work just right. As you can see I’m missing the School bus title on it. This did not weed well when I was layering the decal and after messing with it, I decided I’d just re-cut it and apply.

I duplicated the design and then un-grouped everything and deleted all but the School Bus. Then I duplicated the School bus 3 times just in case…. if I had only cut it once you know it wouldn’t have weeded correctly, but since I cut it 3 times….. all 3 weeded beautifully with reverse weeding.

IMG_2817_edited2

Then I gathered the rest of the tools to attach the pieces of the bag tag.

IMG_2819

I just received these bent nose pliers from Craft Chameleon and using them 1 time, I’m in love with them. They are one of those tools like my Close to My Heart nonstick scissors that will be my go to tools. Now, I could have just gone to the garage and “borrowed” a couple pairs of pliers from there, but these were the perfect size for my hands and worked wonderfully. I am so glad I ordered them after watching Craft Chameleon’s live FB video a few weeks ago.

And now I have a little gift to give to the bus driver.

temp

Can you think of things you might layer with adhesive vinyl? Those first few times you attempt it can seem daunting, but it is another project that takes practice and the layering (registration) marks make it much more manageable to layer a design. What will you design and cut?

Enjoy !

THANK YOU for your support! How can you help? Click HERE & buy a coffee. Every little bit helps with the cost of running the site.

Looking for more in-depth, step-by-step classes, check out all of my online Silhouette classes on my Teachable site HERE.

SS Logo snip it

**This post may contain affiliate links. What that means is that I may receive compensation if you purchase through the links I have provided. The price you pay for the product or service is not higher but I may get compensated for sharing.

Posted on — 13 Comments

Let’s Explore v4 – Rotate

Hi everyone! This week we are continuing on our journey to explore more of Silhouette Studio v4.

We are looking today at the Transform Panel – Rotate tab. You will find this on the right side of the Silhouette Studio v4 as shown below.

Rotate main copy

If  you want to manually rotate an object, you can do that on the design screen by grabbing the green circle at the top of the design when it’s selected and hold down the mouse button and drag it left or right.

Manual rotate copySoftball Mom by SM Designs

But if you want something more precise, then you want to use the Rotate tab on the Transform Panel.

Let’s take a look at how this can help.

Rotate detail copy

  1. Rotate to 0, 90, 180 or 270 degrees – Choosing one of these options will rotate your object to the exact degree you choose.Rotate 90 degrees copy
  2. Custom – Change the numbers in the box to a specific degree you would like it to rotate to.Custom rotation copy
  3. Rotate by 45 or 90 degrees, 180 degrees, -90 or -45 degrees – Using this option will move the design exactly the distance you select. For example, in my photo above, I have it selected at 30 degrees. If I now choose -45, it will rotate it to the left exactly -45 degrees from where it started at 30 degrees, placing it at 345 degrees.Rotate by -45 copy
  4. Custom – Type in a custom amount if you want something in between the standard options.
  5. Apply – You can click this after changing the custom amount or just hit the Enter key.

There are many reasons that you would use these rotate tools.

For instance, let’s draw a heart. Now, you’ll notice that the Drawing tools on the left side does not have a heart shape. So let’s make one. Select the Draw and Ellipse tool and then hold down the Shift key and drag your mouse on the design mat. This will draw a perfect circle. Now, let’s fill it with color so it’s easier to work with. (Check out the Let’s Explore Fill Panel here)

Draw heart

Next, make a copy of your circle. There are several ways to do this – Ctrl+c and Ctrl+v, right click & choose copy and then again for paste or hold down the Alt key and drag a copy off, or use the toolbar (QAT) at the top.

And then draw a perfect square by choosing the Draw a Rectangle tool and holding the Shift key down. Fill your square with color as well.

Draw heart2

Now let’s use the Rotate tab to turn our square to a 45 degree angle.

Draw heart3

Next move the square up to meet the circles and align them how you like it. You may need to enlarge your circles (select them both and resize) to get the dimensions of the heart to align.

Draw heart final

And there you have drawn a heart shape using just the basic shapes in the Silhouette software and the Transform panel – Rotate tab. Make sure to select all your shapes and choose weld or it will cut out the individual shapes.

Heart no weld.JPG

After you weld the shapes together you will have your heart design.

Heart weld

And there is one way you would use the Rotate tab and as a bonus you learned how to draw a heart from basic shapes.

Hope you’ve enjoyed the Let’s Explore v4 session today! Check out all the previous panels we’ve explored HERE.

Enjoy !

THANK YOU for your support! How can you help? Click HERE & buy a coffee. Every little bit helps with the cost of running the site.

Looking for more in-depth, step-by-step classes, check out all of my online Silhouette classes on my Teachable site HERE.

SS Logo snip it

**This post may contain affiliate links. What that means is that I may receive compensation if you purchase through the links I have provided. The price you pay for the product or service is not higher but I may get compensated for sharing.

Posted on — 39 Comments

Let’s Explore v4 – Scale tab

Welcome back to Let’s Explore v4!

Today we are on to Tab 2 of the Transform Panel – the Scale tab. This is another tool I use almost every time I open my Silhouette program.

Just like almost all the other tools, there are many ways to do things in the software. While you can grab the corners of the Selection box and drag your design to the correct size, sometimes you need a more accurate measurement of your design.

Selection box copy
*I Craft Therefore I Hoard Phrase by Kolette Hall Design #152410

For instance, I am making these stencils for my husband to use in a woodworking project and he wants a maximum of 6.5 inches for the design, so it fits on the board he has. With the Transform Panel, it is possible to achieve this easily.

Stencil demo copy

Let’s take a look at the Scale Tab.

Scale tab details copy
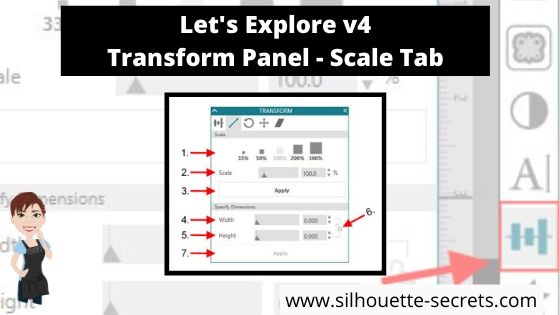
  1. Scale by percent – There are a couple of preset percentages that you can choose for quick resizing of an object. Anything below 100% will decrease the size and higher than 100% increases the size.
    Scale percent
  2. Adjustable Scale – Highlight the number in the box and choose your custom percentage to resize the design.Resize custom percentage copy
  3. Apply – After changing the customized Scale option, click Apply (or hit Enter).
  4. Width – Highlight the numbers and replace or use the increase/decrease arrows  to a specific dimension.
  5. Height – This works the same as the width, highlight the numbers and replace or use the increase/decrease arrows Arrow up down copy to a specific dimension.
  6. Lock Aspect – This is a very important icon! The default is set to the unlock position. If you want to keep the proportions of a design the same when you resize it, click this icon to change it from unlocked Unlock copy to locked Locked copy.
    Specific dimensions copy

    What does that mean? If I change the Width of my design while it is unlocked, then it will adjust only the width of the design and I end up with some distorted shape the design. You can see here that now my state of Montana design, does not look how it should.Lock AspectVersus if I click on the Lock Aspect and lock it in, then it will adjust both the width and the height, keeping the proportions the same.

    Locked Aspect
    That makes quite a difference in the design.
  7. Apply – After making changes to the Width and Height you can click on Apply or hit Enter for the software to make the changes.

And now you have a better understanding the Scale Tab found under the Transform Panel in Silhouette Studio v4.

You can also find some of these tools in the QAT (Quick Access Toolbar) at the top of you program when your design is selected. How it appears on your screen, will be dependent on your screen size and you will notice that each person’s varies for that reason.
Some of the tools will have a fly out box and others will be fully visible as my width & height are.

QAT copy

I hope you take a few minutes to check out this Scale panel and see what it’s all about!

Check out the other posts in the Let’s Explore v4 Series HERE.

Save this for future reference by pinning the image below.

I would love to see what you are creating with your Silhouette! Feel free to join my Facebook group – Silhouette Secrets+ with EllyMae and share!

Enjoy !

THANK YOU for your support! How can you help? Click HERE & buy a coffee.
Every little bit helps with the cost of running the site.

Looking for more in-depth, step-by-step classes, check out all of my online Silhouette classes on my Teachable site HERE.

SS Logo snip it
**This post may contain affiliate links. What that means is that I may receive compensation if you purchase through the links I have provided. The price you pay for the product or service is not higher but I may get compensated for sharing.

Posted on — 38 Comments

Let’s Explore v4 – Transform Panel – Align

Today we are exploring the Transform Panel – Align Tab.

This is a very important and useful panel when you are creating designs & one I use almost every time I open the Silhouette software.

Transform Panel copy

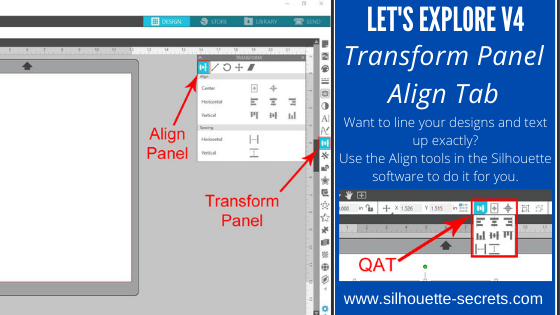
The Transform Panel is on the right side of Silhouette Studio v4 and the first tab on this panel is the Align Tab.

Let’s take a look at the entire Align tab.

Transform Panel details copy

  1. Center – This icon  Center to Page icon copy is the Center to Page and it will center the design in relation to the Page Size you have set under the Page Setup Panel – Page Size. Here I have resized my design (Softball Mom by SM Designs) and then hit the Center to Page icon and it centered that to my 12″ x 12″ page size.Center to Page demoThen you have the Center multiple objects copyCenter multiple objects icon. When multiple objects are selected, this will center those objects to each other. If I draw a circle and select both objects, click on the center multiple objects, it will center those designsCenter multiple objects demo
  2. Horizontal – There are 3 options here: (A) left edge, (B) center, (C) right edge.Horizontal Alignments copy (Dots Nice – A Dotty Handwritten font by One Oak Designs)
  3. Vertical – There are 3 align options here: (A) top, (B) center, (C) bottom edge.Vertical Alignment copy (SG Beach Vacay Dingbats Font by Sophie Gallo – Design #240727)
  4. Horizontal Spacing – With multiple objects selected (more than 3), this will space those objects equal distance apart horizontally.Horizontal spacing copy
  5. Vertical Spacing – With multiple objects selected (more than 3), this will space those objects equal distances apart vertically.Vertical spacing copy

And there you have the details of the Align tab in the Transform Panel of Silhouette Studio v4. Now, there is no need to eye-ball the spacing or alignment, let the software do the work for you.

You can also find the same icon in the Quick Access Toolbar (QAT) at the top when more than one object is selected.

QAT Align2

Check out the other posts in the Let’s Explore v4 Series HERE.

Save this for future reference by pinning the image below.

Transform Panel - Align Tab Pin

I would love to see what you are creating with your Silhouette machine. Feel free to post on my Facebook group Silhouette Secrets with EllyMae. If you have questions feel free to post below or on the Facebook group too!

Enjoy !

THANK YOU for your support! How can you help? Click HERE & buy a coffee. Every little bit helps with the cost of running the site.

Looking for more in-depth, step-by-step classes, check out all of my online Silhouette classes on my Teachable site HERE.

SS Logo snip it

**This post may contain affiliate links. What that means is that I may receive compensation if you purchase through the links I have provided. The price you pay for the product or service is not higher but I may get compensated for sharing.

Posted on — 1 Comment

Hot Mess with your Silhouette Cameo

While the title could mean many things, this week it’s in reference to Spring Break at my house. I thought it would be a fun idea to try out this “Hot Mess” technique with the kids for a crafting project on Spring Break….

Now, I don’t know if it was a good idea to do this on Day 1 of Spring Break or not – would it have been better on Day 5? Who knows…. but I’m going to show you our results.

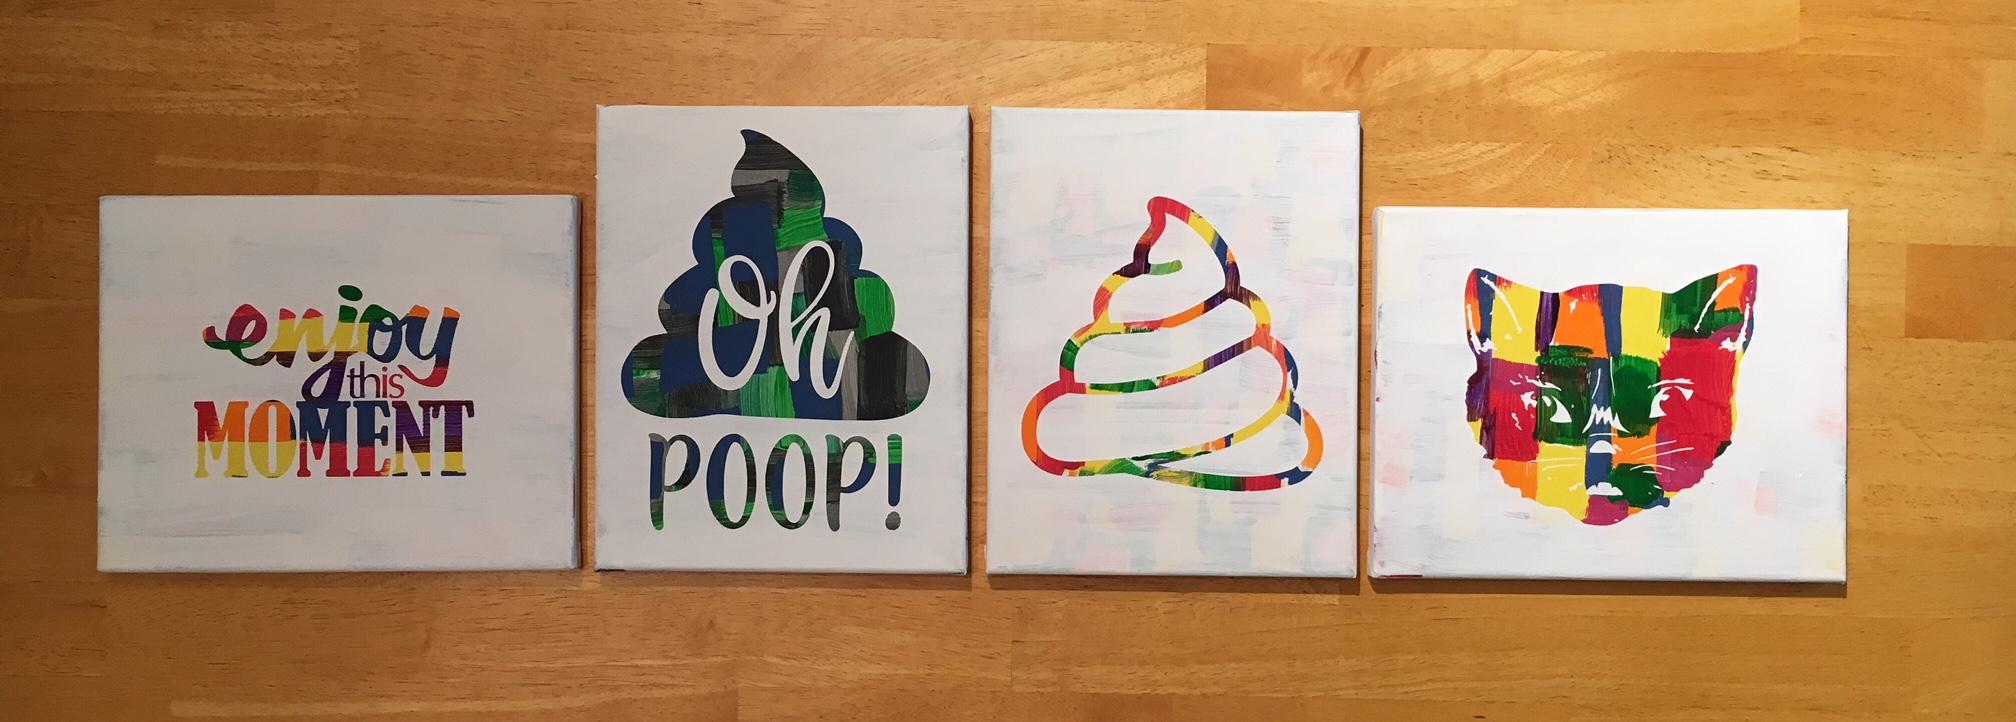
First, what is a Hot Mess? On some days, that could be my title but today I’m talking about a new crafting project that has everyone rushing out to pick up canvas from the craft store.

IMG_2483

How do you create these pieces of art?

  1. Grab a canvas and the paints you want to use. IMG_2446
  2. Paint any sort of pattern you so desire onto your canvas. Let it dry thoroughly.
  3. Cut a stencil using your Silhouette machine and some vinyl – I used Oracal 631 and 651. As you can see, this is what you get when you let an 8, 6 and almost 5 year old pick out their own stencil. IMG_2452
  4. Apply the stencil using transfer tape – I recommend Oracal transfer tape. You may need to help the vinyl stick to the canvas at first. Just be patient and go slow. IMG_2453
  5. And now paint your top layer of paint. You can choose any color you’d like, but we stuck with white on top. IMG_2456_edited
  6. Let that dry for a bit and then carefully peel off the vinyl stencil. You don’t want it to be too wet when you peel it and you don’t want the vinyl to sit on the canvas too long either as it may start to cure to the canvas.
  7. Let your works of art dry completely.

And there you have the “Hot Mess” technique.

I am so glad I did not start with the 12″ x 24″ canvas that jumped into my cart at Michael’s, as the kids were done after the first 30-40 minutes. And I can say it is a one and done crafting project for Spring Break 2018.

If you have any desire to use these same designs in your works of art, here is where I found them: – Enjoy this Moment by Kolette Hall Design #36196 from the Silhouette Design Store – Oh Poop! Quote by Sarah Hurley Design #209510 from the Silhouette Design Store – Cat by Basic Grey Design #65180 from the Silhouette Design Store – Other poo design created using tracing and point editing.

Next week we will be back to our “Let’s Explore v4” series, continuing through the different tools available to you in the Silhouette Studio v4 software.

In the meantime, check out the other posts in the Let’s Explore v4 Series HERE.

I would love to see what projects you create! Feel free to post on my Facebook group at Silhouette Secrets with EllyMae.

Enjoy !

THANK YOU for your support! How can you help? Click HERE & buy a coffee. Every little bit helps with the cost of running the site.

Looking for more in-depth, step-by-step classes, check out all of my online Silhouette classes on my Teachable site HERE.

SS Logo snip it

**This post may contain affiliate links. What that means is that I may receive compensation if you purchase through the links I have provided. The price you pay for the product or service is not higher but I may get compensated for sharing.

Posted on — 3 Comments

Let’s Explore v4 – Pixscan Panel

Now you may have noticed I skipped an icon as we were going down the right side of the Silhouette software. I wanted to get through the Tracing panel before we explored the Pixscan, since we will be using that feature here.

The Pixscan Panel can be very useful if you are scanning an object such as a stamped image or design off of a piece of scrapbook paper.

Here is how the Pixscan works:

  1. Gather your images you want to scan and place them on your Pixscan mat inside of the rectangle border.
  2. Take a photo of your Pixscan mat or use your Scanner to gather your image.IMG_1837
  3. Click on the Pixscan icon in the top right corner of the software.Pixscan copy
  4. Then you will choose Import PixScan Image from File and select your photo from where you have saved it. Pixscan no calibration copyMy software gave me the notice that “No Calibration Profile could be found….” and I tried to create a calibration file, but was unable to. I have an iphone 6s and it was not recognizing that, but I’ve still been able to get successful cuts even with this notice. This may not work for everyone.
  5. Click on Continue without Calibration and then be patient as it loads up the image onto your software mat.Continue with Calibration
  6. Next, trace or draw shapes around the images on the design mat.Pixscan demo
  7. Once there are cut lines, either by tracing or drawing shapes, click on the Send tab  and set the cut settings by choosing your material. You will notice above, there is one image on my mat that has no cut lines. When I did the trace on the monkey, while he is cute, he was not a very good image to trace around as he had edges that were not closed. He could still be used, however, would require a bit of extra manipulation of edit points in order to do so.
  8. Now, load the mat. Make sure that your rollers are on the edges of the mat and you have lined up the left edge with the blue line on the left.IMG_1838
  9. Now, cross your fingers and Click on the Send button. The Cameo will begin by reading the registration marks on the mat with the Optical eye, this is how it can line up the design and cut lines. And….. Success!!!IMG_1839 I see a few things are a bit off such as the Toscana Vigneto circle is not quite centered and the coffee stamps are a tad off….. but, all the others cut exactly how they showed on my screen.

Now, what I would suggest is practice. Is every one going to turn out perfect? No, probably not. But, with practice you will get the hang of what works and what does not.

Check out the “Let’s Explore v4” series HERE or at the top of the blog.

Check out my Silhouette Instructions and Events tab for more information on Personalized Silhouette Instruction.

Enjoy !

THANK YOU for your support! How can you help? Click HERE & buy a coffee. Every little bit helps with the cost of running the site.

Looking for more in-depth, step-by-step classes, check out all of my online Silhouette classes on my Teachable site HERE.

SS Logo snip it

**This post may contain affiliate links. What that means is that I may receive compensation if you purchase through the links I have provided. The price you pay for the product or service is not higher but I may get compensated for sharing.

Posted on — 14 Comments

Let’s Explore v4 – Trace by Color

Last week, we started with the Trace Panel – Tab 1 which covers the Basic Tracing options. Now, we are moving on to Trace Panel – Tab 2: Trace by Color. This option is available if you have the Designer Edition upgrade (DE+ or BE).

Trace Panel copy

While the Silhouette Studio Basic software is available for free, I do feel the Designer Edition upgrade is a great investment and will save you so much time in the long run. Silhouette America has provided a chart that lists out what features are unlocked with each upgrade and you can find it HERE.

Some of the biggest features for me that Designer Edition unlocks are: opening svg & pdf files, rulers, trace by color, rhinestone conversion and glyph access.  Even if you do not know what all of those do at this time, you will learn more as you utilize the software.

Now, let’s explore the Trace by Color Panel.

First, open a design to be traced such as a png or jpeg file. For this example, I am using a png file from Scout and Rose Design Co called Too Cute to Pinch.

Demo design

Trace by Color Panel copy

  1. Trace by color – Click on Trace by color and then choose the color you want to trace. I clicked on the pink color and it highlighted all the pink of the design in yellow. This is what it will trace.Trace by Color 1
  2. Solid Fill vs Outline fill – Solid Fill is shown in the photo above. Outline fill is shown below. This is a matter of personal preference on how you want it to show.Outline Fill
  3. Single Area or All Areas – In my original photo in #1, All Areas was chosen and that highlights all of the pink areas of the design. Single Area will allow you to pick & choose a certain area, such as individual letters,  that you want to trace.Single Area
  4. Tolerance – This can be adjusted to increase or decrease the area that is picked up in a trace color. In my example, when I click on the light green, it picks up the dark green as well in my trace.Tolerance 50 percentHere you can see that the Trace picks up all shades of green with a 50% tolerance. Tolerance 6 percentAnd when the tolerance is lowered to 6% it deselects the dark green shamrock and only picks up the light green color in the trace. You would trace the shamrock and change the tolerance to get it to trace as well.
  5. Trace – After you have the design highlighted that you want to trace, click on trace and it will change to red cut lines around the object selected. You can then move the cut lines off the design and I fill with color to see the design better.Trace option
  6. Trace & Detach – This will trace & detach the image from the background. If you are using a jpeg, this is a great feature.

Now, I have my final pieces that I’ve filled with color and can move them around on my mat to cut them and then place them on to my project.

Final trace copy

And now you can go play with the Trace by Color Panel. This can be a great option if you only have the graphic file for a design.

Check out all the other posts in the Let’s Explore v4 series HERE.

Enjoy !

THANK YOU for your support! How can you help? Click HERE & buy a coffee. Every little bit helps with the cost of running the site.

Looking for more in-depth, step-by-step classes, check out all of my online Silhouette classes on my Teachable site HERE.

SS Logo snip it

**This post may contain affiliate links. What that means is that I may receive compensation if you purchase through the links I have provided. The price you pay for the product or service is not higher but I may get compensated for sharing.

Posted on — 6 Comments

Layering vinyl with Silhouette

Well, this week has been such a crazy week. Snow days, 2 hour delays and just life has gotten in the mix – I am sure I’m not the only one out there who has these weeks.

I will have the Let’s Explore v4 – Tracing Panel post out next week, make sure to check out the previous posts in the Let’s Explore series.

I thought I would pop in here today and show you the projects we used last night on a webinar that I co-hosted.

The first one we created was a 2 layer decal.

2-8 Layered vinyl decal copy

So how did I create this?

  1. Type out the text and weld. I used the Mystical Wood Smooth Script font found at SoFontsy – you get 4 fonts all in one file when you purchase this.
  2. Create an Offset. The size of the offset is a matter of personal preference – I used the default of 0.125.
  3. Create the registration marks. Draw a rectangle, make a copy & move it to the right. Align the marks and group together.
  4. Click on the Send tab in top right corner, choose Cut by Fill Color, checking the boxes next to each color to select it to cut & uncheck the colors you do not want to cut. Cut by fill color -create
  5. Line up the registration marks to layer the decal. Always start with the top layer of a decal.

Here is my finished decal & I loved where Barbara placed her’s so I copied her and placed it on my Iris tote that holds my Oracal 651 sheets.

IMG_1896

Next, we created a 3 color vinyl decal.

3 layer decal

To create this design:

  1. Start by drawing a large circle using the Circle tool from the left side of v4.
  2. Download the circle heart frame HERE.
  3. Open the heart circle frame and resize to fit inside the circle you drew.
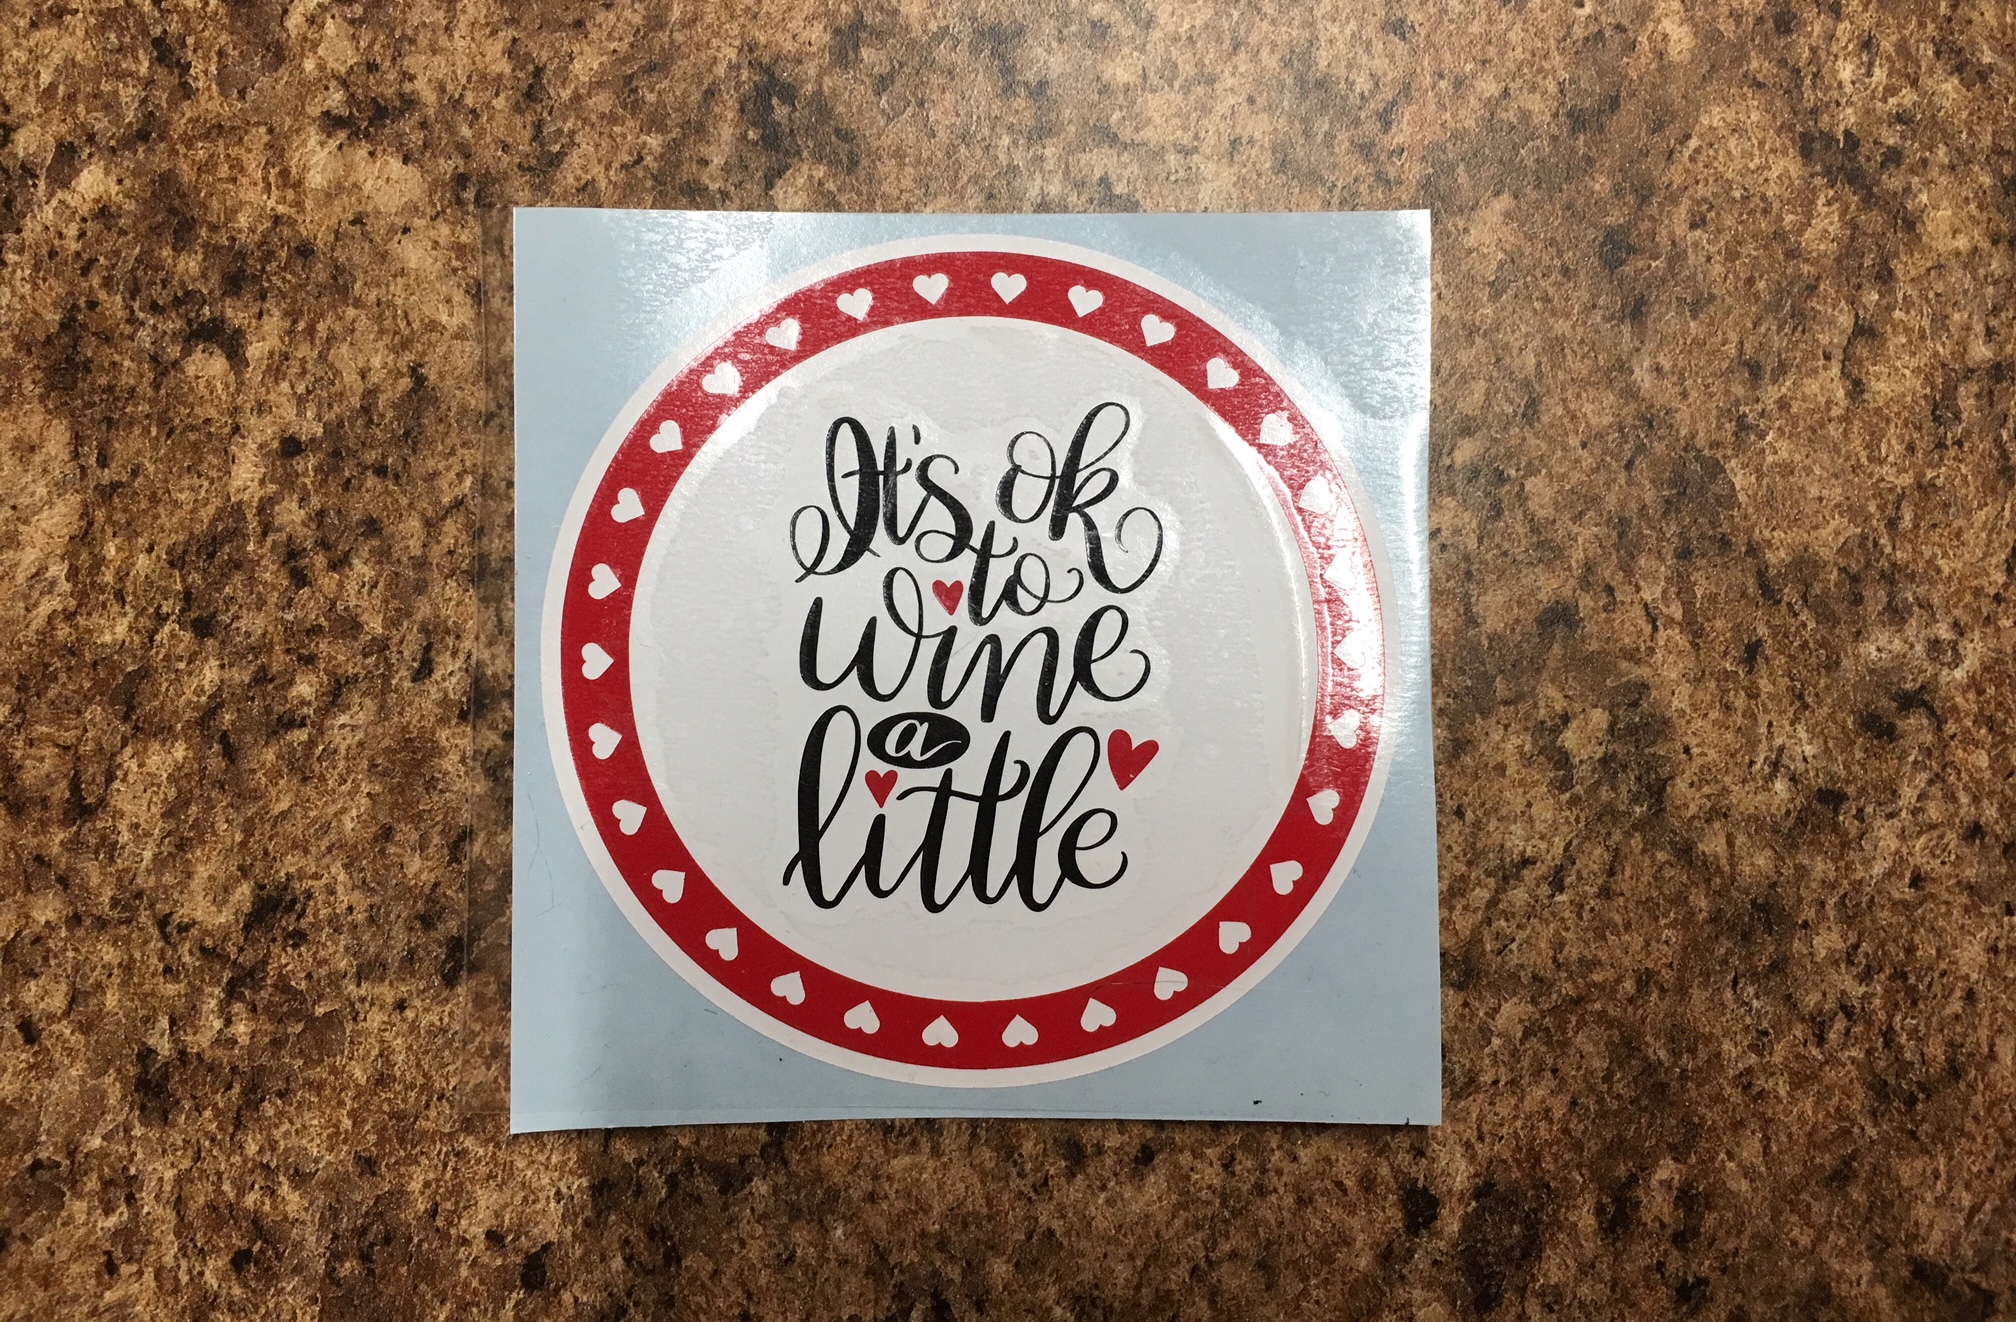
  4. Purchase the It’s Ok to Wine a Little by Dawn Nicole Designs – Design #227534 from the Silhouette Store. Open the design from your Silhouette library by double clicking the design.
  5. Choose the Fill Color Panel and fill the design with black.
  6. Resize the Wine a Little design to fit in the center of the white circle.
  7. Right click on the Wine a Little design and choose Ungroup. While holding down the Shift key, click on the 3 hearts – this will deselect them. Then right click and choose Group. Now your text is all Grouped back together.
  8. Hold the Shift key down and click on the 3 hearts. When they are all selected, right click and Group.
  9. Choose the Fill Color Panel on the right and fill the hearts with the same red that the heart circle frame is.
  10. Select all the layers and choose the center Align tool. Right click and Group those layers together.
  11. Create the registration marks. Draw a rectangle, make a copy & move it to the right. Align the marks and group together.
  12. Click on the Send tab in the top right corner, then Cut by Fill Color, checking the boxes next to each color to select it to cut & uncheck the colors you do not want to cut. Cut by fill color -3 layer
  13. Line up the registration marks to layer the decal. Always start with the top layer of a decal.

And there you go, a 3 color vinyl decal that is aligned perfectly.

IMG_1901

And all those little hearts will work perfect as nail decals, just in time for Valentine’s Day!

I also wanted to note that I used an Autoblade on my Cameo 3 to cut this out and as you can see, it has some pretty thin details. It cut beautifully!

IMG_1898

I hope you enjoyed seeing how I create a layered vinyl decal.

I would love to see what projects you create! Feel free to post on my Facebook group at Silhouette Secrets with EllyMae.

Enjoy !

THANK YOU for your support! How can you help? Click HERE & buy a coffee. Every little bit helps with the cost of running the site.

Looking for more in-depth, step-by-step classes, check out all of my online Silhouette classes on my Teachable site HERE.

SS Logo snip it
**This post may contain affiliate links. What that means is that I may receive compensation if you purchase through the links I have provided. The price you pay for the product or service is not higher but I may get compensated for sharing.

Posted on — 39 Comments

Let’s Explore v4 – Line Style Panel

Did you know you can change the line style of your designs in the Silhouette Studio? Today we are going to Explore the Line Style Panel which you can find on the right side of your v4 Silhouette Software program.

Line Style Panel copy

First, I want to mention that you can change the default that your software Outlines in under the Preferences Panel. Preferences can be found by clicking on the gear icon in the bottom right corner of the Design Tab or in the top left corner under the Edit tab.

Preferences Edit tab copy

Open the Preferences Panel and Click on the Default tab at the top. You can then change whether the Default Fill Style is ‘Solid Fill’ or ‘Outline only’ and whether the line color is Black or Red.

Preferences copy

My program is set for outline only and red meaning that when I draw a shape it will show a red outline of my shape. This is a personal preference and you can change it at any time.

Now, let’s take a look at the Line Style Panel. Tutorial written in version 4.1.206

Line Style Panel diagram copy

  1. Style – Choose from a variety of dashed lines.Style drop down copyKeep in mind that changing the line style also changes how it will cut. If you have a dashed line, that is exactly what it will cut. This works good if you are trying to make a score line for a card or template, but it doesn’t work well to cut a design out.
  2. Thickness – Line thickness is defaulted to 0. That means if you were to print this design on your printer right now, it would not actually print anything because there is no line thickness. If you want to print the outline of a design, then you need to increase the line thickness.Thickness
  3. Corner – When using the line thickness, this determines if the corners of the design are round, flat or sharp. Corner copy
  4. End caps – This option has flat, adds a square on the ends or rounds off the ends of your line. End Caps copy
  5. Position – When using thick lines, you can choose to have the outline in front of the design or behind the design.Shape Outline in frontThe photo above has the Line Style Position in front of the design.Shape Outline in back And this photo shows the Line Style Position behind the design.
  6. Line Options – Print Lines of Selected Shapes – When your design is selected and you check this box, your Line will print with a line weight. Keep in mind,  it will print in whatever color you have set up on the design screen. I changed mine to black for this example. Here is my design: Print Lines of Selected Shapes And here is my printed page: IMG_1792 This is an awesome feature as you don’t have to change the line thickness to get a design to print unless that is the look you want.
  7. Line Style Panel – Tab 2: Line Color – change the line color to any of those in the Color Palette, change the transparency of the line color or click on the Advanced Options and open up a lot more color options.

    Line Color

    And that is the Line Style Panel! This can be very useful when you are printing designs, sending images to people, saving your designs as .jpegs (Business Edition feature) and so many more reasons. Take some time and play around with the Line Style options, you never know what you will learn!

    For this tutorial I used a file from the Silhouette Design store called Mom’s Fidget Spinner by Sweet Afron #202772 – find it HERE.

    Check out the entire “Let’s Explore v4” series HERE.

    Check out my Silhouette Instructions and Events tab for more information on Personalized Silhouette Instruction.

    Enjoy !

    THANK YOU for your support! How can you help? Click HERE & buy a coffee. Every little bit helps with the cost of running the site.

    Looking for more in-depth, step-by-step classes, check out all of my online Silhouette classes on my Teachable site HERE.

    SS Logo snip it

    **This post may contain affiliate links. What that means is that I may receive compensation if you purchase through the links I have provided. The price you pay for the product