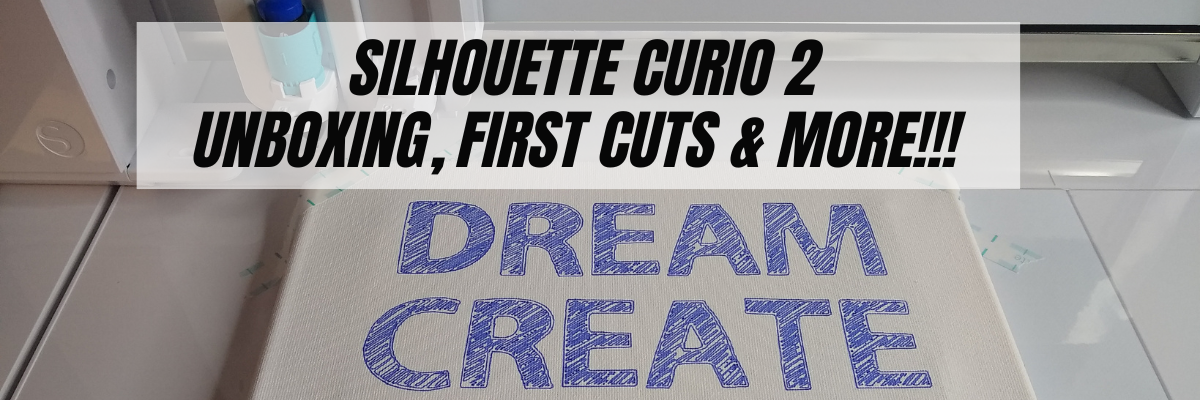
Posted on 2 Comments

Sublimation Markers & Silhouette

Have you seen or used Sublimation markers?

The great part is that you can use your Silhouette to help draw with these markers.

Today I wanted to share some awesome ornaments my friend Sarah with Silhouette Made has created with the Artesprix blank of the month & Artesprix sublimation markers.
I love these ornaments!

Check out the full blog post tutorial HERE

Affiliate links may be present in the following blog post and as an Amazon Associate I earn from qualifying purchases.

There are just not enough hours in the day to do it all!
Want to use these same designs?
Merry & Bright by Diva Watts Designs – Design #388075
Let It Snow by Diva Watts Designs – Design #382434

If you have never sketched with your Silhouette machine, it can be a lot of fun. I have sketched on cardstock, faux leather paper, wood (with a Curio). Basically anything that a pen will write on, you can use if it fits in the Silhouette machine.

Grab the pen holder and some pens and just start to play. Then take it to the next level with the Artesprix sublimation markers.

In May I released a step-by-step sketch pen class and shared on the blog all of the supplies to get started with sketching.

Check out the post HERE to see what supplies you will need for your specific Silhouette model.

This class covers all about sketch pens & creating sketch designs. We discuss different pen styles, adapters, sketch designs, fonts, filling designs, and trouble-shooting too.
We do some testing, demos, and finished projects.
At the end of the class, you will have a better understanding of what works and doesn’t work for sketching with your Silhouette machine.
This class can be completed with a Portrait, Cameo, or Curio machine.

Whether you take the class to get started or not, just start!
Play with the sketch features and you will be able to create fabulous things like Sarah at Silhouette Made has done.

And the best part is, anyone can do this! It just takes a bit of practice.
Grab some paper, a Silhouette pen holder, pens, and get to sketching today.

Check out more of the awesome creations on the Artesprix blog HERE.

I’d love seeing what you are creating with your Silhouette machines or software.
Feel free to post photos or questions on my Facebook group at 
Silhouette Secrets with EllyMae.

Save this for future reference by pinning the image below.

Enjoy!

This image has an empty alt attribute; its file name is logo.jpg

THANK YOU for your support! How can you help? Click HERE & buy a coffee.
Every little bit helps with the cost of running the site.

Or if you are looking for more in-depth, step-by-step classes, check out all of my online Silhouette classes on my Teachable site HERE.

SS Logo snip it
**This post may contain affiliate links. What that means is that I may receive compensation if you purchase through the links I have provided. The price you pay for the product or service is not higher but I may get compensated for sharing.
Posted on 6 Comments

New Silhouette class released – Sketching

Silhouette Sketch pens & Sketch Pen Design Class

Just released!
New online video class with tips, tricks, and troubleshooting for sketching with your Silhouette.

I had no idea how popular this class would be when I submitted it for the May All Things Silhouette Conference. I had a limited window of opportunity right after conference to get this recorded and edited, but I’m happy to announce that after 18 hours of video production – IT’S HERE!!!

Click HERE to go to the class on my Teachable.

This is a total video time of around 2 hours, however, the class will take approximately 3 hours to complete with all the sketching and design time.

In this class you will learn all about sketch pens & creating sketch designs. We discuss different pen styles, adapters, sketch designs, fonts, filling designs, and trouble-shooting too.
We will be doing some testing, demos, and finished projects.
At the end of the class, you will have a better understanding of what works and doesn’t work for sketching with your Silhouette machine.
This class can be completed with a Portrait, Cameo, or Curio machine.

Check out the class HERE

Affiliate links may be present in the following blog post and as an Amazon Associate I earn from qualifying purchases.

There are some differences between the different Silhouette model machines on the supplies you might need for this class, so I am including the class supply information below.

Sketching Supplies:

Cameo 4, Cameo Plus, Cameo Pro, and Portrait 3 owners

Either:

a Silhouette blue sketch pen adapter (Silhouette America, The Vinyl Spectrum)
with Silhouette black bodied pens (Silhouette America)

Or

a Silhouette Type B pen holder (Silhouette America, The Vinyl Spectrum) and pens that fit
Pens I’ve tested: Sharpie Pen S-Gel, Sharpie Pen Style, Pilot G2 Gel Fine 0.7 mm, Gelly Roll Classic 06 Black, Gelly Roll white, Gelly Roll Moonlight 10 Ice Cream Smooth

Cameo 3, Cameo 2, Cameo 1, Curio, Portrait 1 or 2 owners

Either:

Silhouette black bodied pens or white bodied pens (Silhouette America)

Or

A Silhouette Type A pen holder (Silhouette America, The Vinyl Spectrum) and pens that fit
*pens listed above with links

Other supplies:

Designer Edition upgrade (or higher) in the software to unlock Line Effects
retailers: The Vinyl Spectrum, Swing Design
Design #65898 Mushroom Sketch by Tanya Batrak
Design #271670 Hello Friend Brush Script by Gina Marshall (optional)
Design #79759 Cancun Sketch font by Dresden Carrie (optional)
– 5+ sheets of white cardstock
– Silhouette cutting mat
– Silhouette blade
– 5” x 7” black frame (optional)

Full Sketching class HERE on my Teachable site.

We would love to see what you are working on!
Feel free post on the
Silhouette Secrets+ Facebook Group.

Save this for future reference by pinning the image below.

Enjoy!

This image has an empty alt attribute; its file name is logo.jpg

THANK YOU for your support! How can you help? Click HERE & buy a coffee.
Every little bit helps with the cost of running the site.

Or if you are looking for more in-depth, step-by-step classes, check out all of my online Silhouette classes on my Teachable site HERE.

SS Logo snip it
**This post may contain affiliate links. What that means is that I may receive compensation if you purchase through the links I have provided. The price you pay for the product or service is not higher but I may get compensated for sharing.
Posted on 15 Comments

Let’s Explore v4 – Line Effects

If you have been around the Silhouette software for awhile, you may or may not have noticed that there was a change in the software. This change seemed to happen overnight and it’s not one that would severely impact a user, but you may see the differences in tutorials.
With the release of v4.2.479, the Sketch Panel changed to the Line Effects Panel.
With this new change came a few more options.

Let’s take a look at the Line Effects Panel and what it looks like in versions v4.2.479 and higher.

Tutorial is written in Silhouette Studio v4.3.372

If a user only has the Basic (free) Silhouette software, then they will have less options in their Line Effects Panel. This is also a change from before. In versions prior to v4.2.479, you didn’t have the option to select anything under the Sketch Panel in the basic version.

If a user has the Designer Edition, Designer Edition Plus, or Business Edition upgrades they will see several more options in the Line Effects Panel.

Line Effects Settings

Let’s take a look at the sections on the Line Effects Panel.

1 – Fill Effects
Add a sketch fill to any design.
The options include: grid, stripe, concentric, spiral, zig-zag, curly, cross-hatched, scribble, and charcoal.

Each of these fills will act differently depending on the design being applied to. Change the Spacing and Angle to see what will look best for the design.

2 – Edge Effects
Add a sketch line to the outside edge of a design.
The options include: plain, scribble, double effect, curly, rough, and charcoal.

3 – Release Effects
Releasing the sketch when it’s finished takes it out of editable sketch mode and then makes it a vector design.

This opens up a whole new world of possibilities in editing your sketch design. Once the sketch is released, then you can access individual point editing on the sketched design and can manipulate it how you like.

Each of the gray points is an edit point that can be manipulated in this design.
Now, not only do you have the gray edit points, but the sketch fill lines have been released so you can move those as well. Keep in mind that a red dot means that it is an open point and not a closed object, so you will not be able to fill this with color. You can move the red dots towards each other and connect the dots to change the sketch fill.
For more information on Edit Points check out this post HERE.

Each of the red lines you see on the screen is a sketch line.
When a design is filled with line style fills, each line is more data. Be patient with your computer in processing all of this data.

On the 2nd tab of the Line Effects Panel, there are even more options that you can adjust the sketch fills with.

Each has multiple options and varies according to what fill and edge effects you have chosen to start with.

Each design you choose is going to vary in what sketch fill looks good, what spacing might work, what angle might work, etc.

The best way to see what is going to work is to just start playing around with your design.

Affiliate links may be present in the following blog post and as an Amazon Associate I earn from qualifying purchases.

I am going to use 3 Fall Leaves by Lori Whitlock – Design #33053 as an example.

Here is the Scribble fill with the spacing adjusted up and the Scribble edge effects.

Here is the cross-hatched fill with the double edge effect.

Here is the curly fill effect with the rough edge effect.

And here is the zig-zap fill effect with the charcoal edge effect.

As you can see, each line effects fill & edge effect will give you a different look.

Now, something to keep in mind is that when you fill the object with sketch fills, you are adding more data with each red line that you add in. This demo page took over 75 minutes to sketch out. There is one drag mark on the page and that is from when it rolled back through to the starting point. I could adjust it a little bit and try to prevent that for future projects. The more you do it, the more comfortable you will feel with it.

You can also add in a cut line, change the color of the cut line, and then use the Cut/Sketch by Line Color to cut out around the sketch designs as desired.
Since I am using a Cameo 4, I do need to swap out the tools, but that just takes a second.
By using the Sketch/Cut by Line Color, I can turn on and off the line color I want to work with so it allows me time to swap out the tools. Just make sure you do not unload the cutting mat after it’s done sketching.

For more information on the Cut/Sketch by Line Color, check out this post HERE.

Sketching can be a lot of fun and give your projects a unique look. Whether you are using a design that you have filled with a Line Style effect or are using the sketch pens with a sketch design as shown below, they are a lot of fun to play with.

I would love to see what you are creating with your Silhouette machines!
Feel free to share on my Facebook group at 
Silhouette Secrets with EllyMae.

Save this for future reference by pinning the image below.

Enjoy!

This image has an empty alt attribute; its file name is logo.jpg

THANK YOU for your support! How can you help? Click HERE & buy a coffee.
Every little bit helps with the cost of running the site.

Or if you are looking for more in-depth, step-by-step classes, check out all of my online Silhouette classes on my Teachable site HERE.

SS Logo snip it
**This post may contain affiliate links. What that means is that I may receive compensation if you purchase through the links I have provided. The price you pay for the product or service is not higher but I may get compensated for sharing.
Posted on 9 Comments

Leatherette Earrings & Earring Card Projects

Affiliate links may be present in the following blog post and as an Amazon Associate, I earn from qualifying purchases.

Who doesn’t love a surprise? And that is just what I received when Silhouette America asked if I wanted to check out their new Mystery box.

When I opened the box, look what I saw:

IMG_5534

Plus a pack of the Kraft Adhesive paper that arrived on my doorstep, it must have forgotten to jump in the box and was just another bonus to the mystery box.

Kraft Paper

And now the fun part of playing with these materials.

I grabbed some designs from the Silhouette Design Store and tackled something I’ve had on my project list.

IMG_5560_edited

I used the Leatherette package and the sketch pens to create these earrings and earring cards.

First, I started off making the earring holders.
I cut several different styles but I ended up really liking Design #14057 by Loni Stevens.

Earring holder file

But, I knew I could add to the earring holder, so I decided to dress them up a bit with the Silhouette sketch pens. I received the Metallic set in my mystery box and after testing several, the silver was my favorite.
I could have told you that before I tested, but I still gave all the colors a chance.

Zoom on stitches and name

To make the dashed sketch line:
– Make a copy of the outer edge of the earring holder design
Resize the copy a little smaller – either by the Scale panel or by dragging the corner bounding box
– Use the Line Style Panel and change the style of the line to a dashed line
– Also under the Line Style Panel change the color of the line to black.
– Select the dashed line, click on the Send Tab and then click on the
Action by: Line at the top –
this means the Cameo will perform the actions we tell it to by the Line Color
Cut by Line color

– Grab the black color option and move it to the top spot –
this action will be performed first
– Change the Tool No. to the blue circle (blue circle = Tool 2)
– Select your Material – Cardstock
– Change the Action to Sketch
– Check & set up the Cut settings for the red line

Now when the design is Sent, it will first sketch the design that has been changed to a black Line color – the dashed line and then after will cut the lines that are red.

Next, I used the Nouradilla Script Font and added my name and Silhouette Secrets to the earring holder as well. Change the line color to black under the Line Style Panel and it will sketch at the same time as the dashed line.

Once I started cutting, it was hard to stop. I do love how this Leatherette cut so smoothly. I started with brand new blade and mat and I believe it made a big difference in how cleanly it cut. In fact, the more I cut and the less sticky my mat became, the cuts weren’t as crisp. A sticky mat makes a big difference.

IMG_5566

This was the first set I cut and might be my favorite. It is Leaf Earring design by Lilium Pixel SVG – Design #266977. The only thing I changed on this file was I released the Compound Path and deleted the top circle for the hardware. After I deleted the circle in each, I selected the entire design and then chose Make a Compound Path again.

I then made a copy of the earring design and right clicked and Flipped horizontally. This made a 2nd copy that I could glue together and make the back have a finished look. I used a Xyron Sticker Maker permanent adhesive to do this.

IMG_5568_resized

Lined Leaf Earrings by Amanda McGee – Design #275057
Leaves Earrings by Amanda McGee – Design #275058
This design was modified to take out the top circles like the first file and then cut & glued together with the Xyron Permanent Adhesive.

IMG_5561_resized

Tear Drop Earrings by Sweet Elsie – Design #273510
– Ungroup the design
– Release the Compound Path and deleted the hardware circle at the top.
– Make a copy and Scale the copy down a little
– Make another copy and Scale it down a little more
– Cut each out of a different color and layer on the earring hardware

You could also use glue and adhere the layers down to each other but I chose to let them hang loose.

Rather than try to get each design to match, I deleted one of the original designs, made my copies and resized how I liked and then make a copy of the entire design before I cut. Then both earrings matched exactly.

IMG_5562

Leaf Earrings by Lori Whitlock – Design #268363
I once again ungrouped the design, released the compound path and then deleted the top circle. You might see a pattern here.
It is nothing to do with the Designer’s file, but for the Double J Earwire hardware I had from Craft Chameleon, it was easier to make my own hardware hole.

IMG_5567_resized

Drop Earrings by Sweet Elsie – Design #273506
I did the same technique with making copies and resizing as I did with the Tear Drop earrings above.

IMG_5565_resized

Layered Feather Earrings by Amanda McGee – Design #275059
This file was cut exactly as it opened.
Again, you could glue the layers down if that is your desired look.

IMG_5563_resized

For this set, I took the Tear Drop Earrings by Sweet Elsie – Design #273510 and then added a dingbat from the Valentine Dingbats Font by Lori Whitlock – Design #243211.
– Make a copy of the Tear Drop design
– Add the dingbat shape from the font to one of the designs
– Select both the earring shape and the dingbat shape, then make a compound path
– Cut each shape out of the colors
– Glue the layers together

All of the earrings above were cut from the Silhouette Leatherette using the Leatherette cut settings in the program and it worked beautifully.
Leatherette cut settings

Again, I did start with a brand new blade and mat, which I believe was very helpful.

The Silhouette cutting mat is very important and the material sticking to the mat for the entire cut is key to getting crisp, clean cuts for all materials.
If the material moves as the blade is going around, it cannot connect exactly and you end up with crunched corners, cuts not connected, frustration and possibly a mess.

I’d suggest always having an extra Silhouette mat & blade on hand for any projects you are doing.

Save this for future reference by pinning the image below.

Leatherette (Pinterest Pin)

Enjoy !

THANK YOU for your support! How can you help? Click HERE & buy a coffee. Every little bit helps with the cost of running the site.

Silhouette Classes

Never stop learning! Let me help you take the anxiety out of learning with Silhouette and get to creating faster! My Silhouette classes are heavily focused on software, so you can take the skills & techniques taught and apply them to many future projects!

Silhouette step-by-step Classes by Silhouette Secrets+

**This post may contain affiliate links. What that means is that I may receive compensation if you purchase through the links I have provided. The price you pay for the product or service is not higher but I may get compensated for sharing.

Posted on 8 Comments

Let’s Explore v4 – Sketch Panel

One of the options with the Silhouette machine is using pens in the tool holder and then the Silhouette will draw the design you choose. There are sketch designs that you can find in the Silhouette Design store and are all ready to use with your sketch pens. This is one of my favorites I did while preparing for a class.

IMG_2944

But, did you know that you can turn images into sketched designs? If you have the Designer Edition upgrade to the Silhouette software, you have the Sketch Panel available to you.

Sketch Panel copy

This is so fun to play around with and you never know what you may like until you try it.

Sketch Settings

Sketch Panel detail copy

  1. Edge Sketch – 7 different edge style sketchesEdge SketchAs you can see, each one gives it a little different look. Keep in mind that the more lines you see or the darker the sketch is, the longer it will take to sketch out that design.
  2. Fill Sketch –  8 different fill option for the sketch design.Fill SketchIn the above example, an outer edge sketch line was chosen to help show the design better and then each one is a Fill option.
  3. Release Sketch – This opens up a whole new world of possibilities in editing your sketch design. Once the sketch is released, then you can access individual point editing on the sketched design and can manipulate it how you like. On the left is before the sketch is released. Each of the gray points is an edit point that can be manipulated in this design. On the right is after the sketch has been released. Now, not only do you have the gray edit points, but the sketch fill lines have been released so you can move those as well. Keep in mind that a red dot means that it is an open point and not a closed object, so you will not be able to fill this with color. You can move the red dots towards each other and connect the dots to change the sketch fill.

And there are even more options

Advanced Sketch Settings

Advanced Sketch copy

  1. Edge Effect – 4 options for Edge Effect. These look the same when you first click on them, but with each one there may be more options for you to adjust the design.Plain – there are no further options given. AS Plain Continuous – Option for width, density & waver. AS Continuous I have made a few adjustments from the photo above to show you the difference. AS Continuous2 Rough – Option for stroke length, width, density, splay, curvature. AS Rough 1 And this photo below shows a few adjustments and how it can change the look of the sketched design. AS Rough 2 Scribble – Options for loop separation, loop size, randomness, and density. AS Scribble 1 And here is an example of adjustments made to the Scribble options. AS Scribble 2
  2. Fill Type – 3 additional options for Fill type – none, zigzag, and hatchZigzag – Options for spacing, angle, offset FT Zigzag And here is adjusting those options. FT Zigzag2 Hatch – Options for spacing, angle, sweep, offset. FT Hatch1 And more adjustments made to the Hatch fill. FT Hatch2
  3. Options – As shown in the examples above, these options change for each type of sketch fill you choose.
  4. Fill Effect – 2 advanced OptionsRough – options for stroke length, width, density, splay, curvature. FE Rough1 And changing the options up a bit, yields a different sketched look. FE Rough2 Scribble – Options are loop separation, loop size, randomness, and density FE Scribble 1.JPG And more adjustments to the options. FE Scribble 2

Now, did you know there were so many options? You could play with this feature for a long time and make many different designs with it, just by changing a few things.

Sketch pens are so fun to play with and can make very unique designs.

Keep in mind that that the Sketch Panel is available for those that have the Designer Edition upgrade to the Silhouette software.

Check out this video showing how to turn a design into a sketched design using this Sketch Panel.

Enjoy !

THANK YOU for your support! How can you help? Click HERE & buy a coffee. Every little bit helps with the cost of running the site.

Looking for more in-depth, step-by-step classes, check out all of my online Silhouette classes on my Teachable site HERE.

SS Logo snip it

**This post may contain affiliate links. What that means is that I may receive compensation if you purchase through the links I have provided. The price you pay for the product or service is not higher but I may get compensated for sharing.