Posted on 2 Comments

Brilliant Living Digital Kit by Nitwit Collections – Crafting Creativity

Silhouette Secrets+ with EllyMae

A digital design preview featuring a card cluster with floral elements, butterflies, and a colorful plaid pattern, promoting 'Brilliant Living' by Nitwit Collections.

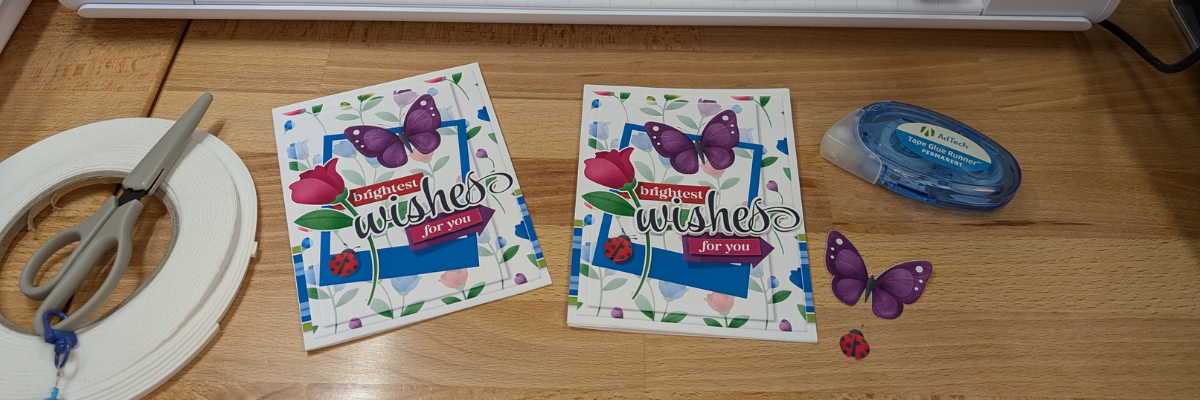
A handcrafted greeting card featuring colorful floral designs, a purple butterfly, and the text 'brightest wishes for you' from the Brilliant Living digital kit. The card is placed on a wooden surface in front of a cutting machine.

Here is a look at the print and cut page printed out ready to cut around each of the layers.

Crafting project featuring a colorful card design with floral elements, a butterfly, and text that reads 'brightest wishes'. The card design is on a mint green cutting mat placed on a wooden surface.

There are so many options with a digital kit and you can mix and match, add more layers, decrease the layers, or only print one layer for a project as well.

If you are mailing the card, you may need to keep the thickness of the layers in mind when creating it.

So for the next cards, I stacked elements together and then was able to print 2 card fronts on one sheet of paper. Each of these designs have different elements that can be layered together.

A printed design featuring two cards with the message 'brightest wishes,' surrounded by colorful flowers, butterflies, and ladybugs, set against a white background.

Here is a look at the final results from this printed page.

Two greeting cards featuring colorful butterflies and flowers from the Brilliant Living Digital Kit, with the text 'brightest wishes for you' prominently displayed.

The card on the left side only has the “for you” and the “ladybug layered”, while the card on the right has the “wishes, for you, and the ladybug layered”.

Two colorful ladybug cutouts with red bodies and black spots, placed on a grid background.

There were a couple intricate areas that may not cut well for all users. I was able to get these ladybugs with their antennae’s to cut, but had to be extremely careful removing them off the cutting mat.
However the butterfly antennae’s were just too delicate, which is another reason you may want to add that layer directly to the card background instead of trying to add it as a 3-D layer.
But you never know until you try. The Silhouette machine might amaze you in the cut it can get.

Three greeting cards featuring colorful floral designs, butterflies, and the text 'brightest wishes for you' on a wooden surface. 
Created with the Brilliant Living Digital Kit

Watch how I created these layered card designs with Silhouette in this video on the Silhouette Secrets+ YouTube channel – Layered Card Design with Brilliant Living Digital Kit – Step-by-step Silhouette tutorial

Video tutorial HERE

Being able to create your own designs means that you can make them any size you want and create as many as you need in the moment. I started with the idea to create only 2 tags, but it ended up being 4 complete designs.

A crafting workspace featuring a cutting machine, several colorful tags with floral designs and text, a roll of tape, scissors, and decorative embellishments on a wooden surface.
Tags created with the Brilliant Living Digital Kit

I used 2 sheets of paper to print and created 1 layered tag and one simple print and cut tag on each sheet.

A colorful greeting card design featuring floral elements and the text 'wishes' displayed on a crafting machine workspace.

Here is a look at one of the layered tags using the foam tape to pop up the dimension.

The great part about creating your own tags is there are no rules. Flower hangs off the edge, no problem! Want the design to be flush on the edges – no problem! Or mix and match. And using a digital kit allows you to mock it up first in the Silhouette software before you even cut the elements out.

Four decorative tags with floral designs and the word 'wishes' displayed on a wooden surface, alongside a cutting machine, promoting a step-by-step tutorial in Silhouette Studio.

Video tutorial HERE

I used the same techniques I shared in the step-by-step video tutorial – Layered Card Design on the Silhouette Secrets+ YouTube channel and created a little bit different layout for two 5″ x 7″ cards.

Two greeting cards displayed on a wooden surface, featuring floral designs, butterflies, and the word 'wishes'. The left card has a striped border while the right card showcases a different layout with a colorful pattern.
Created with the Brilliant Living Digital Kit

Here is a look at the card designs in Silhouette Studio.

A digital design featuring two greeting card layouts with floral patterns, featuring butterflies, ladybugs, and the word 'wishes'. The left card has a white background with pink and red flowers, while the right card displays a blue background with a plaid pattern.

And then I simply chose letter size paper and rotated the designs 90 degrees so I could print 2 on a page.

A screenshot of Silhouette Studio software displaying the design for a card featuring floral motifs, butterflies, and the word 'wishes'. The design area shows two card layouts and various setup options on the right.

A few slices with my paper trimmer and my card front were ready to attach to a base.

Quick and easy cards in minutes with the Brilliant Living Knick Knack kit by Nitwit Collections.

Digital designs worked perfectly for sublimation projects! I created 4 sublimation project designs on 1 sheet of sublimation paper.

A collection of crafting materials including a decorative metal panel, multiple colorful greeting cards featuring flowers and butterflies, and bookmarks, arranged on a wooden table next to a cutting machine.
Created with the Brilliant Living Digital Kit

I made a decorative panel, cover for a compact mirror case, a bookmark, and a coaster.

The colors are so bright and brilliant with these projects, except the center of the coaster turned out a bit washed out. This can happen with hardboard at times and moisture affecting the outcome.

A colorful decorative panel featuring floral patterns, a purple butterfly, and bold text that reads 'brightest wishes' alongside an arrow and additional decorative elements.
Created with the Brilliant Living Digital Kit

Watch how I created these sublimation projects with Silhouette and sublimation blanks on the Silhouette Secrets+ YouTube channel HERE.

An image showcasing a decorative card with floral and butterfly designs, featuring the text 'brightest wishes' and other colorful embellishments, alongside crafting materials on a wooden table.

Video tutorial HERE

Supplies Used:

Make sure to follow Nitwit Collections for more amazing designs:

Sign up for the Silhouette Secrets+ newsletter HERE so you don’t miss out on future collaborations.

A flat lay of various sublimation projects including a decorative coaster, a compact mirror, tags, and a greeting card featuring colorful floral designs and the text 'brightest wishes'.

Silhouette step-by-step Classes by Silhouette Secrets+

Silhouette Secrets+ with EllyMae
**This post may contain affiliate links. What that means is that I may receive compensation if you purchase through the links I have provided. The price you pay for the product or service is not higher but I may get compensated for sharing.

Posted on Leave a comment

Crafting Creativity: 1 Bunny File, 5 Creative Projects with Studio Ilustrado

Silhouette Secrets+ with EllyMae

A cute paper craft scene featuring a gray bunny in a hot air balloon shaped like a carrot, surrounded by colorful flowers and pastel eggs on a checkered tablecloth.

Collage of spring-themed crafts featuring bunny and carrot designs, including greeting cards, decorative items, and crafting tools.

A colorful paper craft depicting a bunny in a hot air balloon shaped like a carrot, with a basket and flowers in a grassy landscape.

I had the Silhouette Curio 2 out from testing with the Silhouette Leather Carving Knife, so it was the machine I used to cut this card. Almost all the pieces were cut out using scraps from my stash. I love being able to use my scraps!

Look at these tiny details!

A hand holding a gray paper cutout of a smiling bunny with long ears.

To be honest, I wasn’t sure if it would cut well with the electrostatic mat on the Curio 2, but it did! Especially using a scrap piece of cardstock with the Silhouette Electrostatic Mat.

Sometimes we all just need a little bit of help and taping down the cardstock scraps on the Electrostatic Mat can be that help. It just added a little bit more security to hold my scraps in place and get a successful cut with the Electrostatic Mat. I love this new technology that Silhouette has. While it does not work with all materials, it has saved me hours of time cutting cardstock.

Close-up of a cutting machine with two tool holders, one equipped with a blade and the other empty, and a piece of gray material on the cutting mat.

While I used the Silhouette Curio 2 to cut the projects, any Silhouette machine could be used to create these projects.

Watch a bit of the behind-the-scenes on creating this project in this video – Creative Projects with Studio Ilustrado Designs – Bunny Carrot Balloon Card HERE

A colorful, three-dimensional craft display featuring a bunny in a basket, surrounded by green grass and flowers, with a large carrot above.

A yellow gift box shaped like a carton with a bunny illustration on the front, placed on a crafting table alongside a roll of adhesive tape, a tape dispenser, and a crafting tool.

The bunny made the perfect peeking addition to this gable box card. Don’t let the name of a design fool you either. The title of the box is called Christmas Gable Box by Studio Ilustrado, but it can be used for so much more!

Now here is one of my “secrets” – while the Silhouette machines can cut acetate for the window of this box card, I can cut it faster and with less headache.

Digital design software interface showing a cut template with instructions to cut a shape from cardstock.

I cut the window shape from a piece of cardstock using the Silhouette machine and then used it as a template to make a few quick snips with scissors and I was on my way to assembly. It doesn’t have to be perfect since it will be hidden inside the box. And I saved myself time, headache, and didn’t dull my blade.

Crafting workspace with a yellow paper cutout featuring bunny designs, scissors, and various crafting supplies including glue and other tools.

I used my laser to cut this out of wood, but you could also use other materials such as cardstock too! Even though I have a laser machine, I started with a 12 inch wood round blank, which you could use as your backing board too.

A decorative wall hanging featuring a cartoon bunny in a hot air balloon shaped like a carrot, with the words 'Hoppy Spring' at the bottom, set against a blue background.

I used the SVG file, opened it in Silhouette and made a few modifications to the file to be able to create the layers for cutting on wood. Since the wood has more thickness to it than a material such as cardstock, I had to add a layer behind the bunny and cut multiples to make it sit flush with the sign and balloon basket. The knife tool in Silhouette helped me to cut the bunny’s little feet off so it would sit flush on the balloon for this design. That sounds so bad when I type it out, but if you have designed in Silhouette, you’ll know exactly what I mean.

A workspace with various craft supplies including a blue sign that says 'SPRING', a cute wooden bunny cutout, and several Uni Posca markers in different colors.

I used a combination of Posca Paint Markers and Deco Arts Paint for finishing out the sign.

A decorative wall hanger featuring a cute gray bunny with pink ears peeking over a white picture frame. The word 'SPRING' is spelled out in yellow letters beside the frame.

I drew out a skinny rectangle, made a copy and rotated it 90 degrees. Aligned the right edges and welded it together to make the corner. Then sized the bunny and welded the bunny background to the rectangles to sit on top. Next, I added letters down the right side. Before welding the letters, I made a copy so I could cut them out and layer on top for color and dimension.

Before you go to cut the design, make sure it’s all flush. I forgot to cut the bunny’s feet with the knife tool, but I didn’t realize it until after he was all cut out, so he sits a little bit higher on the top of the door. In this case, it wasn’t worth recutting the design simply because you can’t really tell on our door frame.

I love these little door corner designs, even if we only have a few door frames that I can add them to in our house because the previous owner used the wrong trim to frame out the doors or the frame is too close to the wall. It is a fun way to add a bit of decoration without putting another hole in the wall.

Supplies Used:

I used the knife tool again, but not to cut off any bunny feet. Instead I cut the carrot off the design and used it to create a couple corny cards.

Four handmade cards featuring carrot designs and playful phrases, displayed on a crafting mat with various crafting tools in the background.

I used a Silhouette Black Glitter sketch pen and a font called BFC Rustic Cherry Farmhouse to sketch out the sentiment. I love the look of this glitter black pen, but it’s very difficult to photograph and show how it really looks.

A craft workspace featuring a Silhouette cutting machine, with a blank page laid out displaying fun carrot-themed quotes and phrases, alongside two markers.

I used the Silhouette Curio 2 to sketch this design using the electrostatic mat because that was the machine on my desk this week, but sketching can be done with any Silhouette machine model.

Two handmade cards on a crafting desk. The left card features a carrot with the text 'I CARROT FOR YOU'. The right card depicts a potted plant with the text 'BLOOM WHERE YOU ARE PLANTED'.

The clay pot was drawn in Silhouette Studio using basic shapes and adjusting the bottom edit points on a rectangle too!

Unlock your creativity by learning more about Silhouette. You never know where it will take you! Even making cards with carrots.

Four greeting cards featuring playful carrot designs and puns. The cards read: 'YOU'RE ONE IN A BUNCH', 'BLOOM WHERE YOU ARE PLANTED', 'THANKS A BUNCH!', and 'I CARROT FOR YOU', showcasing colorful carrot illustrations.

Collage of five craft projects featuring bunnies, plants, and colorful decorations, with a central text overlay reading '5 projects 5 1 file'.

Silhouette step-by-step Classes by Silhouette Secrets+

Silhouette Secrets+ with EllyMae
**This post may contain affiliate links. What that means is that I may receive compensation if you purchase through the links I have provided. The price you pay for the product or service is not higher but I may get compensated for sharing.

Posted on Leave a comment

Silhouette Cameo5α (Alpha) Unboxing

Silhouette Secrets+ with EllyMae

The Silhouette Cameo5α (Alpha) model is the latest machine released by Silhouette America. It was announced at the Silhouette Summit 2025 in Japan in September 2025 and was released shortly after the Summit.

A boxed Silhouette Cameo 5 cutting machine, labeled with dimensions and brand, placed on a concrete surface.

Affiliate links may be present in the following blog post and as an Amazon Associate, I earn from qualifying purchases.

I was not able to attend the Silhouette Summit in Japan, but did order the Silhouette Cameo5α as soon as it was available on the Silhouette America website. At the time of the release, only the white Silhouette Cameo5α models were available and there was no timeline on the other colors being released, so I grabbed it. However, if I would have had choices, I would have selected the Bianco Carrara pattern. When this pattern was first released, I was not impressed, until I had one in my hands and it is my new favorite pattern.

I released 2 unboxing videos on the Silhouette Secrets+ YouTube channel sharing a quick setup as well as an in-depth look at the new machine model.

So far the in-depth unboxing and setup has been the most popular.

I did not get a blog post out at the time of releasing the unboxing, but sometimes a delay can also be a good thing as I’ve had some time to work with the Silhouette Cameo5α and really test it out. This means that I can add more information and real world experience to the blog post.

Here is one of the first projects I cut out after unboxing the Silhouette Cameo5α.

Crafting materials laid out on a wooden table, including cutouts of a skeleton, coffin, and various decorative pieces, with a Silhouette cutting machine in the background.

This project had many intricate cuts from the wood layers to the small skeleton hands. At this size, the cardstock makes a huge difference too! The first one I cut, the cardstock paper layers were separating and I had to switch to a higher quality smooth cardstock for these details.

Three white paper cutouts of hands placed on a brown surface, with a crafting tool nearby.

Here is a close up look at this finished project of the 3-D Skeleton Coffin with all of the details.

A decorative wooden chest with chains and a padlock, featuring skull and bony hands, set against the backdrop of a cutting machine.

This was just one piece to my Halloween busted canvas project, but it was a great test to really see what the Silhouette Cameo5α was capable of.

A decorative coffin with a skeleton figure inside, resting next to a white cutting machine on a wooden surface.

But, of course, I couldn’t stop there! The coffin was only the first piece of my Halloween busted canvas project.

A Halloween-themed decoration featuring a skeleton seated in a spooky graveyard setting, surrounded by a decorative wreath made of black netting, yellow and black patterned ribbons, and faux bones, with a miniature coffin and tombstone that reads 'R.I.P.'

I continued to cut out pieces for the 3-D Tombstone and put the Silhouette Cameo5α to the test. Within a short amount of time from unboxing the machine, I had a lot of cut hours into testing it out.

Watch the video – 3D Tombstone & Skeleton Halloween Art | Creative Process with Silhouette HERE.

A 3D Halloween-themed display featuring a skull behind wooden planks with chains and a padlock on one side, and a gravestone marked 'R.I.P.' on the other side, surrounded by paint supplies.

How Is This Model Different?

The Silhouette Cameo5α is an updated model of the original Cameo 5. The original Silhouette Cameo 5 model is no longer manufactured.

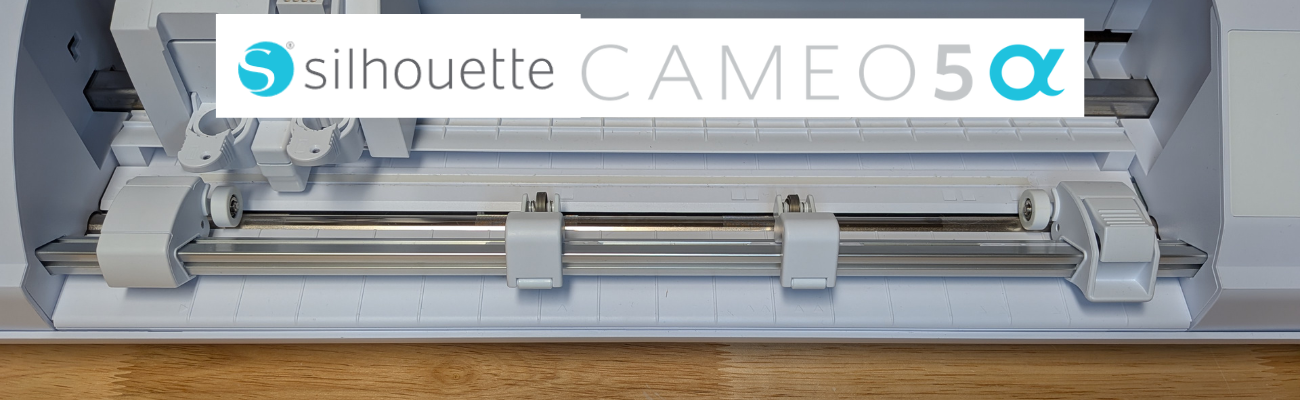
The Silhouette Cameo5α features a new roller design and I do like how it is much more visible to see the rollers and if ever there is a need, easier to clean them as well. It also has a pinch pressure button locking mechanism on the right roller that is so much nicer than the original model design.

Close-up view of the interior of a Silhouette cutting machine, showcasing the rollers and blade holders on a wooden surface.

It also has an additional 0.3 mm clearance on the roller bar for the Silhouette Cameo5α. At the Silhouette Summit, they mentioned this in reference to use with the Silhouette Electrostatic Mat. With the Silhouette Electrostatic Mat, there is a protective sheet that goes on top of the mat before you place your materials on it to be cut. This protective sheet adds height to what is rolling through the machine. I have not had any issues with this, however, they must have received some feedback from users who were using multiple layers of materials, such as stickers with a laminate on top of it which is thicker than your average cardstock. So the clearance was increased a tad bit.

Keep in mind that when you are talking about clearance, the material also has to “clear” the bottom of the tool that is being used. So even if it clears the bottom of the roller bar, thicker materials also have to allow the blade or tool to clear it as well. And even if a material can clear both the roller bar and tool tip, that does not guarantee that it is a cuttable material with the Silhouette. There are many factors that go into whether a material is going to cut well with a Silhouette.

Close-up image of a cutting machine with a white exterior, displaying the interior components and cutting blade holder system.

With the Silhouette Cameo5α, you do have to use a Silhouette software version of 5.0.402 in order for the machine to be recognized. As I type this up, there are still many bugs and issues with version 5 and I am not recommending version 5 for all users. But, if you are a Silhouette Cameo5α owner, you do have to use version 5 and there is no way around that. I recommend using version 5.0.402 at this time and not the current version (5.0.414) as we have seen some issues with the current version. We have seen some issues of machines being bricked or recognized as a regular Cameo 5 and not a Silhouette Cameo5α. If you encounter any of those issues, please contact Silhouette Support and be as detailed as possible in your request for assistance. Including photos and video can help them help you faster as well.

The Silhouette Cameo5α also uses the 4 point registration marks for print and cut projects. This was first released with the Silhouette Cameo Pro MK II model and now is available with the Silhouette Cameo5α model. Silhouette states that this is supposed to improve accuracy of the print and cut results. However, I have not seen any significant improvements in my testing. The biggest issues we see with print and cut are still due to setup and user errors.

Screenshot of a design project in Silhouette Studio, featuring two card designs with floral and butterfly elements, along with text 'wishes' and 'for you'. The page setup settings are displayed on the right.

I shared a little more on using the 4 point registration marks and testing it with the same design on both the older style marks and the newer style marks in this video – Layered Card Design with Brilliant Living Digital Kit – a Step-by-Step Silhouette Tutorial.

Image shows two layered greeting cards featuring floral designs and butterflies, with crafting materials like tape and scissors in the background. The text above indicates a step-by-step tutorial using a digital kit.

This 4 point registration mark system is only available if the Silhouette software has recognized a Silhouette Cameo5α or a Silhouette Cameo Pro MK II has been connected.

What Do I Use?

I use both the Silhouette Cameo 5 original model and the Silhouette Cameo5α. It really just depends on what I am doing and what the project might be.

Anytime I get a new machine, I like to put it through the paces to see what works and what doesn’t. This means testing both the machine and the Silhouette Studio software.

Here are some print and cut projects I did while testing it.

A crafting workspace featuring a cutting machine, colorful papers, printed floral designs, and various crafting tools arranged on a wooden table.

I do love that I can create meaningful cards and gifts for friends and family, no matter what the circumstances are.

A greeting card featuring a floral design with the text: 'May you find comfort in sweet memories, strength in those you love & hope in each new day,' placed next to a crafting machine on a wooden table.

Check out more projects I cut using the Silhouette Cameo5α in this blog post – 5 Card Designs from One Template with Quietfire Designs.

A collage featuring five unique card designs made with one template, showcasing themes like winter, birthdays, flowers, Halloween, and a friendly ghost.

I really do wish cutting machines came with a cut hours timer. Within the first few weeks of owning the machine, I racked up a lot of cut hours.

Save this for future reference by pinning the image below.

A woman wearing a black shirt with the word 'create' is standing at a table, pointing towards a Silhouette Cameo 5 cutting machine. The background features various craft supplies and organizational tools.

Enjoy !

THANK YOU for your support! How can you help? Click HERE & buy a coffee.
Every little bit helps with the cost of running the site.

Silhouette Classes

Never stop learning! Let me help you take the anxiety out of learning with Silhouette and get to creating faster! My Silhouette classes are heavily focused on software, so you can take the skills & techniques taught and apply them to many future projects!

Silhouette step-by-step Classes by Silhouette Secrets+

Silhouette Secrets+ with EllyMae
**This post may contain affiliate links. What that means is that I may receive compensation if you purchase through the links I have provided. The price you pay for the product or service is not higher, but I may get compensated for sharing.

Posted on 3 Comments

Custom Etching Martini Glasses with Silhouette

Silhouette Secrets+ with EllyMae

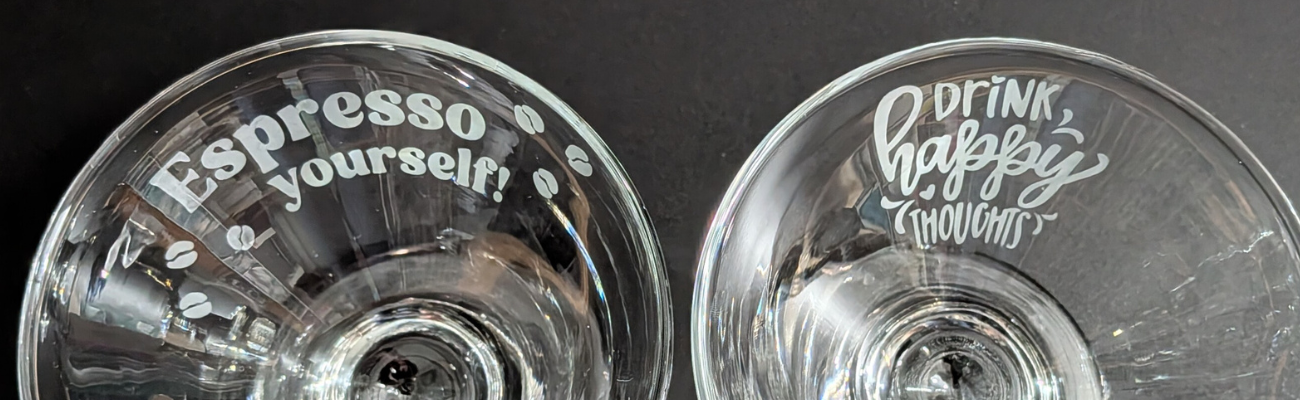
Glass etching is a great way to make unique projects and combine that with a Silhouette cutting machine and you have endless possibilities of customization. In this blog post I’m sharing a look at custom etched martini glasses I made while creating the March 2026 exclusive video tutorial for the Creative Community.

Two etched glass cups on a dark surface. The left cup reads 'Espresso yourself!' and features coffee bean illustrations. The right cup says 'Drink happy thoughts!' in a playful font.

Affiliate links may be present in the following blog post and as an Amazon Associate, I earn from qualifying purchases.

Steps to Etched Glass Projects

  1. Create a stencil for etching.
  2. Clean glass blank with alcohol and allow to dry.
  3. Apply stencil.
  4. Mask off edge of stencil to prevent bleeding
  5. Apply Etchall Etching Creme and allow to sit for 20 minutes.
  6. Remove any excess Etching Creme and place back in the bottle.
  7. Wipe off remaining excess with a paper towel and safely discard paper towel.
  8. Run water in the sink and rinse off decal thoroughly.
  9. Remove masking tape and adhesive vinyl under running water.
  10. Rinse blank thoroughly.
  11. Dry and Enjoy!

Glass Etching Supplies

Custom Glass Etched Martini Glasses

I started with created the stencil design in the Silhouette software using the Conical Warp Panel.

I shared an in-depth look at the Conical Warp Panel and step-by-step instructions for several projects, including these stencils in the March 2026 Creative Community exclusive video tutorial. For more details on the Creative Community, check it out HERE.

Design software interface displaying a black etched design that reads 'Drink Happy Thoughts' for a stubby martini glass.

I wanted the design visible when drinking from the glass, so I flipped the design in the software prior to cutting the stencil.

A digital design software interface displaying a black and white graphic that reads 'Drink Coffee, Stay Thoughtful.' The design is upside down on the screen, with additional tools and options visible in the software.

Then sent the design to cut from Oracal 651 adhesive vinyl. Scraps are great for making stencils and I have a whole drawer full of adhesive vinyl scraps.

A black Silhouette cutting machine positioned on a wooden surface, with a light blue cutting mat partially inserted into the machine.

After weeding the design, I applied transfer tape and applied the adhesive vinyl as smooth as possible to the cleaned martini glass.

A clear glass with a black label featuring the phrase 'Drink Responsibly' displayed on a wooden surface, alongside a vinyl sheet and cutting machine in the background.

Here is a look at the stencil and how it will read after the design is etched.

A person holding a glass with the phrase 'Drink happy thoughts' in front of a silhouette cutting machine on a wooden surface.

Then, I created and cut a few more designs.

A silhouette cutting machine is in the background, with two freshly cut vinyl designs placed on a blue cutting mat. One design reads 'sip sip hooray' and the other 'don't ask just pour'.

If I am etching one glass, might as well etch a few more at the same time.

Four uniquely designed glassware pieces with black bases featuring decorative text, placed on a wooden surface next to a cutting machine.

Adding painters’ tape to the edges of the stencil can prevent any bleeding. Etching is permanent and it never fails that if the etching creme touches a spot you don’t want etched for even just a second, it will etch it. One of those craft project oopsies.

Four etched wine glasses with names and designs covered in blue painter's tape, a bottle of etching cream, and a cutting machine in the background.

Apply the Etchall etching creme and let it sit for 20 minutes.

A workspace featuring four glass containers with etching cream applied and blue tape around their rims, a jar of etching cream, and a pair of white gloves on a table.

Carefully scrape off any excess Etchall etching creme and put it back in the bottle. It can be reused over and over again. Make sure not to scrape too hard to dislodge any small bits of the stencil or etching creme can get in areas that you don’t want to be etched.

A setup for glass etching featuring three glassware pieces taped with blue painter's tape and etched designs. A bottle of etching cream is displayed alongside the glasses, with a small cap and a wooden stick for application on a dark surface.

I also like to take a paper towel and carefully remove any other excess etching creme and then discard the paper towel. Then I run water in the sink and begin rinsing and removing the painter’s tape and adhesive vinyl.
Rinse the glass thoroughly and dry.

Enjoy your custom etched martini glasses.

A bottle of etchall etching cream next to a clear glass bowl etched with the phrase 'Drink happy thoughts'.
Drink Happy Thoughts Etched Martini Glass

A bottle of Etchall etching creme next to a clear glass bowl etched with the phrase 'Espresso yourself!' and coffee bean illustrations.
Espresso Yourself Etched Martini Glass

Two etched glassware pieces on a dark background. One glass features the phrase 'DON'T ASK just pour,' and the other displays 'sip sip HOORAY.'
Don’t Ask Just Pour & Sip Sip Hooray! Etched Martini Glass

Save this for future reference by pinning the image below.

A bottle of etching cream next to a custom etched martini glass with the phrase 'Drink Happy Thoughts' on it.

Enjoy !

THANK YOU for your support! How can you help? Click HERE & buy a coffee.
Every little bit helps with the cost of running the site.

Silhouette Classes

Never stop learning! Let me help you take the anxiety out of learning with Silhouette and get to creating faster! My Silhouette classes are heavily focused on software, so you can take the skills & techniques taught and apply them to many future projects!

Silhouette step-by-step Classes by Silhouette Secrets+

Silhouette Secrets+ with EllyMae
**This post may contain affiliate links. What that means is that I may receive compensation if you purchase through the links I have provided. The price you pay for the product or service is not higher, but I may get compensated for sharing.

Posted on Leave a comment

Silhouette Tutorial: Layered Card Design with Brilliant Digital Kit

Silhouette Secrets+ with EllyMae

New video out on the Silhouette Secrets+ YouTube channel!!
In this video I share step-by-step how I created a layered card design in the Silhouette Studio software using a digital kit by Nitwit Collections.

A colorful greeting card featuring a purple butterfly, a red tulip, and the text 'brightest wishes for you' on a floral background, positioned in front of a cutting machine.

Affiliate links may be present in the following blog post and as an Amazon Associate, I earn from qualifying purchases.

This is the first Crafting Creativity project for the month of March that I shared with newsletter subscribers.

Watch this below.

I love the bright colors Knick Knack kit by Nitwit Collections. This kit is exclusive to newsletter subscribers for the month of March and then will be available in their shop for purchase later.

Image showcasing a collection of card designs featuring floral elements, butterflies, and decorative layers. The layout includes a bright and colorful card cluster with the text 'brightest wishes for you', accompanied by matching envelopes and various themed graphics.

Subscribe to the weekly newsletter HERE. It comes straight to your inbox each Friday.

Two decorative greeting cards featuring the text 'brightest wishes for you,' adorned with purple butterflies, red roses, and colorful floral patterns.

This Brilliant Living Knick Knack kit coordinates with the Brilliant Living Collection that can be found on the Nitwit Collections shop.

A colorful collage featuring various decorative elements and phrases related to celebration, joy, and friendship from the NitWit Collections' Brilliant Living Collection.

View this tutorial on creating a layered card in Silhouette Studio on the Silhouette Secrets+ YouTube channel HERE.

Save this for future reference by pinning the image below.

Two layered greeting cards featuring floral designs and butterflies, with the text 'brightest wishes for you.' A Silhouette cutting machine is visible in the background.

Enjoy !

THANK YOU for your support! How can you help? Click HERE & buy a coffee.
Every little bit helps with the cost of running the site.

Silhouette Classes

Never stop learning! Let me help you take the anxiety out of learning with Silhouette and get to creating faster! My Silhouette classes are heavily focused on software, so you can take the skills & techniques taught and apply them to many future projects!

Silhouette step-by-step Classes by Silhouette Secrets+

Silhouette Secrets+ with EllyMae
**This post may contain affiliate links. What that means is that I may receive compensation if you purchase through the links I have provided. The price you pay for the product or service is not higher, but I may get compensated for sharing.

Posted on Leave a comment

Silhouette IPT (Intelligent Path Technology) – What Is It?

Silhouette Secrets+ with EllyMae

Silhouette IPT is short for Intelligent Path Technology and was first announced to us at the 2023 Silhouette Summit when the Silhouette Cameo 5, Curio 2, and Portrait 4 models were announced.

Affiliate links may be present in the following blog post and as an Amazon Associate, I earn from qualifying purchases.

In this blog post, I am sharing some of the details of the IPT setup and how it works. Read more details below and then watch the video tutorial with even more tips on the Silhouette Secrets+ YouTube channel HERE.

The Silhouette IPT is a patented cutting technology that changes the cut order of a design to “help” it stay in position and complete the cut. Depending on the design you have on the file, when it’s turned on, it will complete the cut of the design in segments versus a continuous cut around the entire design. The photo below shows the standard method of cutting on the left side, that would be from 1 starting point and cut around in one continuous cut back to the starting point on a heart. On the right side, the white dots are points of reference in how the design would be cut in segments, starting on the top right, then moving to the top left and then moving to complete the bottom on each side. This method is designed to “hold” the design in place and not have shifting as it’s being cut.

A graphic showing two versions of a heart shape: on the left, a hand is guiding a dotted outline of a heart, while the right shows a clearer representation with marked points.

This new technology was created to help delicate materials such as vellum be more successful when cutting out designs and to cut through multiple layers of materials at once, such as several sheets of vellum stacked on top of the Silhouette Electrostatic Mat.

Here is the video we were shown at Silhouette Summit 2023 to explain the process.

This is a setting you have to set up and turn on in order for it to use the IPT cutting method and is not an automatic setting. It is compatible with the Silhouette Cameo 5, Curio 2, and Portrait 4 models.

Silhouette IPT settings can be found under the advanced settings on a preset setting, or you can turn it on for a custom cut setting. On the Send tab in Silhouette Studio, select the MORE button and you will see a box next to “Intelligent Path Technology”.

Here is a look at Silhouette Studio version 5

Screenshot of Silhouette Studio Business Edition interface showing material settings and tool holder options with a red arrow pointing towards checkboxes for line segment overcut, track enhancing, and intelligent path technology.
Screenshot Silhouette Studio v5.0.402

And a look at the Advanced Settings in Silhouette Studio version 4

Screenshot of Silhouette Studio software displaying a design workspace with heart and flower shapes, along with material settings on the right panel.
Screenshot Silhouette Studio v4.5.815

If IPT is selected on a preset material setting, you will need to Save As to create a new material in order for it to be activated on the cut setting. If you simply check the box and X out of the preset material, it will not activate the IPT setting.

Screenshot of Silhouette Studio software showing design interface with heart and flower shapes, and material settings for various types of vinyl and vellum.
Screenshot Silhouette Studio v4.5.815

How Silhouette IPT (Intelligent Path Technology) Works

Let’s take a real world look at the IPT cut setting and the order that it takes. Keep in mind that the Silhouette software will change this order for every design, and you do not know what the order will be unless you watch and record the machine behavior.

I’ll be using the Silhouette Curio 2 for this demonstration, but it works the same for the Silhouette Portrait 4 and the Silhouette Curio 2. I am using Silhouette Vellum sheets for this test along with a brand new Silhouette Autoblade.

I used the same shape from the video by Silhouette from 2023. I drew the heart using the Flexishapes tool on the left side in Silhouette.

An interface of Silhouette Studio software displaying two heart shapes on the design canvas, alongside cutting settings for Carriage 1 and Carriage 2.

This was completed as a continuous cut, the blade never lifted.

Then I turned the cut lines off for the first heart and turned the cut lines on for the 2nd heart, which is an exact copy of the first one.

My first attempt at this IPT cut, I used the Vellum preset, checked the box, but then X’d out and found out that it did not activate the IPT setting. A new custom setting is required by clicking on Save As after checking the box.

So I made a 3rd copy of the heart and I clicked on the MORE button and checked the box next to Intelligent Path Technology and chose Save As. Then clicked the X in the top right and chose the new material of Vellum (1) as my setting. I then clicked on the MORE button to double check that IPT setting did save with the new material.

Screenshot of Silhouette Studio software displaying a design workspace with three heart shapes outlined in red. The software tool settings on the right show options for cutting vellum.

The IPT function did work and it cut the heart in 10 different line segments. However, the cut order was a bit different than the video by Silhouette from 2023 and I noticed it started the first cut in the bottom left area of the design. I am using Silhouette Studio version 4.5.815 for this demonstration. The order in which it cuts may vary by software version, which may be why the order is different than what the video shows from 2023.

Here is a diagram of the cut order using IPT with this heart shape

A heart shape template outlined on a piece of paper, with numbered markers around the edge for reference.

This heart with this specific material cut fine both ways. But, that won’t always be the case.

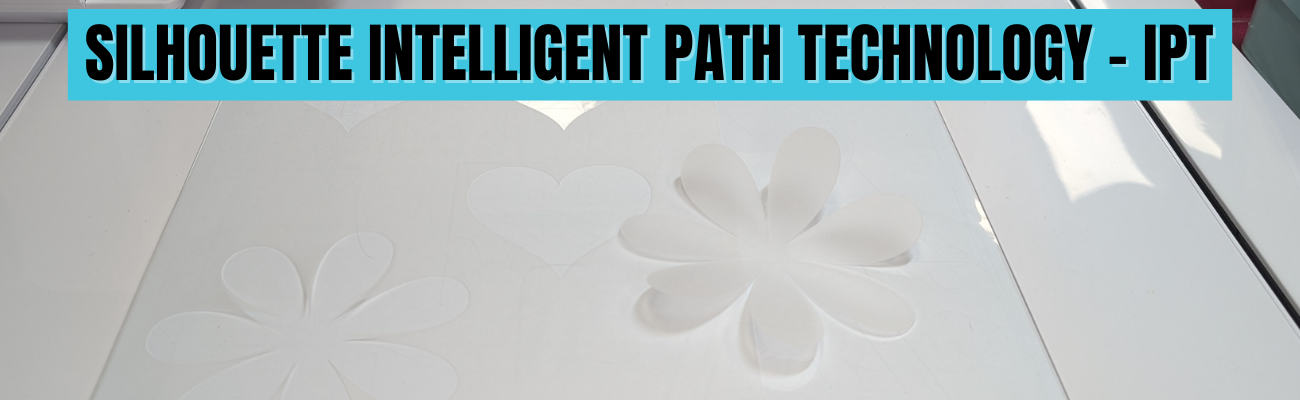
On a more complex design, such as this flower shape drawn with the Flexishapes and the control point adjusted to make a sharper petal, IPT did make a difference in the cut. Instead of tearing, smooshing, or ruining the corners on the interior of the petals, it was a clean sharp point and the design cut well.

Screenshot of Silhouette Studio software showing design tool interface with three heart shapes and a flower shape, and cutting settings for vellum material.

For this flower shape that is approximately 4.3″ tall and 4.2″ wide, it did 51 segmented cuts. I am not going to study the video to diagram all that out, however, it was pretty neat to watch. And it was a success, with no smooshed corners or tears. I did have to “pop” out the flower carefully, but for some designs that extra little bit of care is worth it!

Close-up of a cutting machine mat featuring various cut shapes, including hearts and a flower, with the cutting machine in the background.

Here is a close up look at the interior cuts on the flower shape. Look at those crisp, cut edges! No tearing or smooshing using the IPT feature in Silhouette.

Close-up view of a flower design cut from vellum using Silhouette IPT - Intelligent Path Technology.

Vellum is a very delicate material and can be difficult to cut, especially on an intricate cut. Vellum will also curl as you can see in this photo, the flower immediately started to curl. Humidity can also affect the success of cutting vellum, well, really any paper is affected by humidity. For best results, store vellum in a sealed envelope and completely flat. The Silhouette Electrostatic Mat is awesome for cutting vellum designs and I share even more in the Silhouette Curio 2 – Out of the Box class found HERE.

Here are a few more vellum products I’ve tested with:

Things to Know About the Silhouette IPT Method

  • It is not automatic.
  • It is a setting you can turn on for a preset material, then Save As a new material.
  • It is a setting you can turn on for a custom setting.
  • It does take longer to cut a design because the blade will lift, move, and cut in a different order.
  • It will take longer on the Silhouette Curio 2 versus a Silhouette Portrait 4 or Silhouette Cameo 5 model due to the slower movement of the arm on the Silhouette Curio 2. It may only be a few seconds longer, but it will.
  • IPT is compatible with the Silhouette Curio 2, Portrait 4, and Silhouette Cameo 5 models.
  • IPT setting can be used with both the Silhouette adhesive cutting mat and the Silhouette Electrostatic Mat.
  • Testing is the only way you will know if it will work for a design and material.
  • The Silhouette software decides the order of IPT based on the shape, size, and design. The user does not see the order or know how many segments a design will be cut out in.
  • Don’t believe AI answers on what IPT does or in general how to use a Silhouette. AI has no experience using Silhouette machine and will come back with some very bad advice. Experience using a cutting machine will beat AI hands down – literally.
  • This is NOT the same as Cut Order Sorting options found under the Settings (gear icon) on the Send Tab in Silhouette Studio.
Screenshot of Silhouette Studio Business Edition displaying cut settings on the right side, with options for layer sorting, feed options, and weeding settings. The cutting area is highlighted in red.
Screenshot from version 5 Silhouette Studio

Here is a look at where to find the Cut Order Sorting options in Silhouette Studio version 4

Screenshot of Silhouette Studio software showing design elements including hearts and a flower, with the advanced settings panel open for cut order sorting options.

I have included more details and real time demonstrations in the video below or on the Silhouette Secrets+ YouTube channel too.

It did take more time to cut, but I was able to successfully cut out a rolled flower design using the Silhouette Electrostatic Mat and IPT setting. This has been something I have troubleshot with users several times and the intricate design just couldn’t be held in place to complete the cut using the standard cutting methods with the electrostatic mat.

A crafting workspace featuring a black hole puncher, a yellow paper flower, and various crafting tools on a yellow patterned background.

I am thrilled with how this worked out!

Does Silhouette IPT Work?

Yes – but not for every design, material, or project. I thought it worked great with the flower design above as that is one of those highly likely designs to smoosh and tear on the sharp corners.

Personally, I do not typically like the little tabs it left, similar to pop out cutting. However, it might be beneficial for those materials or designs that just will not cut the standard way. The only way to know is to test it and see what happens. If you do use it, I would recommend a sharp pair of detail scissors to snip the little connections and care when separating it from the full sheet.

The second part of IPT method for cutting through multiple layers of materials, proved to be much more finicky with mixed results. I spent hours and hours testing and was never really impressed with the results. The more layers of material, the less desirable the cut results were. It is not something I’ve spent more time testing. Maybe someday I’ll try again.

I hope those tips give you a better idea of how this new cut path technology works. You never know until you try and hopefully that will help your trials go a bit easier.

Next time you have a design that is just giving you fits with a standard, continuous cut setup – you might try out the IPT setting and see if it makes a difference in the success with your material.

Good luck!

Save this for future reference by pinning the image below.

Screenshot showing the Silhouette software interface with options for Intelligent Path Technology highlighted.

Enjoy !

THANK YOU for your support! How can you help? Click HERE & buy a coffee.
Every little bit helps with the cost of running the site.

Silhouette Classes

Never stop learning! Let me help you take the anxiety out of learning with Silhouette and get to creating faster! My Silhouette classes are heavily focused on software, so you can take the skills & techniques taught and apply them to many future projects!

Silhouette step-by-step Classes by Silhouette Secrets+

Silhouette Secrets+ with EllyMae
**This post may contain affiliate links. What that means is that I may receive compensation if you purchase through the links I have provided. The price you pay for the product or service is not higher but I may get compensated for sharing.

Posted on Leave a comment

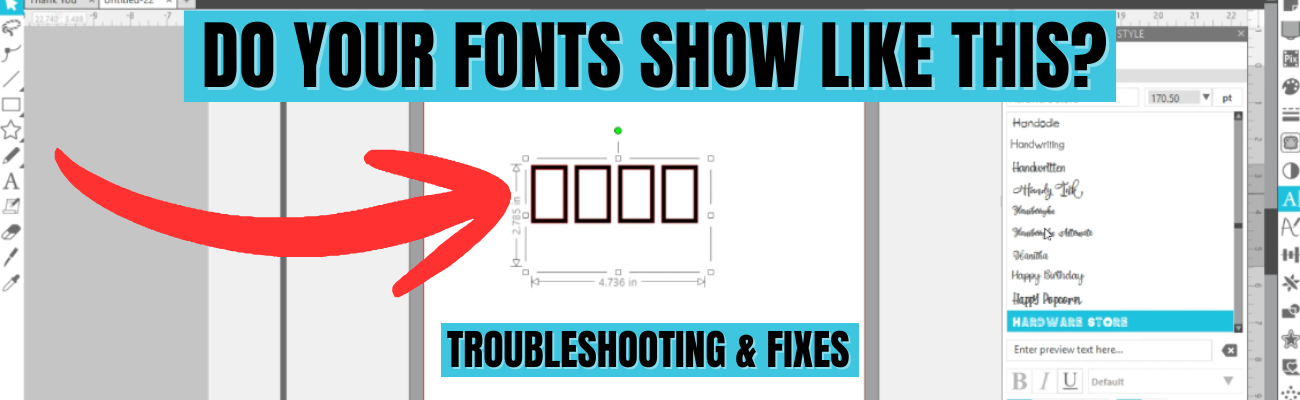
Troubleshooting Fonts in Silhouette Studio: Fix Font Issues

Silhouette Secrets+ with EllyMae

Affiliate links may be present in the following blog post and as an Amazon Associate, I earn from qualifying purchases.

A black sign and a light purple mug, both featuring the word 'Create' in a stylish font. The sign is positioned on a cutting mat next to a craft machine.

A black t-shirt featuring the word 'Create' in a vibrant pink script font.

Graphic showing the phrase 'WTH WHY does this happen in Silhouette?' with an illustration of a design window displaying shapes, and arrows pointing towards the shapes with the text 'TROUBLESHOOT & FIX IT'.

Enjoy !

Silhouette step-by-step Classes by Silhouette Secrets+

Silhouette Secrets+ with EllyMae
**This post may contain affiliate links. What that means is that I may receive compensation if you purchase through the links I have provided. The price you pay for the product or service is not higher but I may get compensated for sharing.

Posted on Leave a comment

Crafting Creativity: 1 Design, 5 Stunning Projects with Flavir Design

Silhouette Secrets+ with EllyMae

A decorative floral crown made of paper flowers in warm colors and green leaves, arranged on a simple gold circular base.

A flat lay image featuring two large, colorful paper flowers - one yellow and one orange - with green leaves on a crafting mat. Surrounding the flowers are a hot glue gun, a sponge, a pen, and small squares of paper. Silhouette flower projects

Screenshot of Silhouette Studio software showing a design featuring leaf shapes outlined in orange, with settings for cutting cardstock on the right side of the screen.

A close-up view of two artificial flowers, one yellow and the other orange, adorned with green leaves, placed on a wooden background. Silhouette flower projects
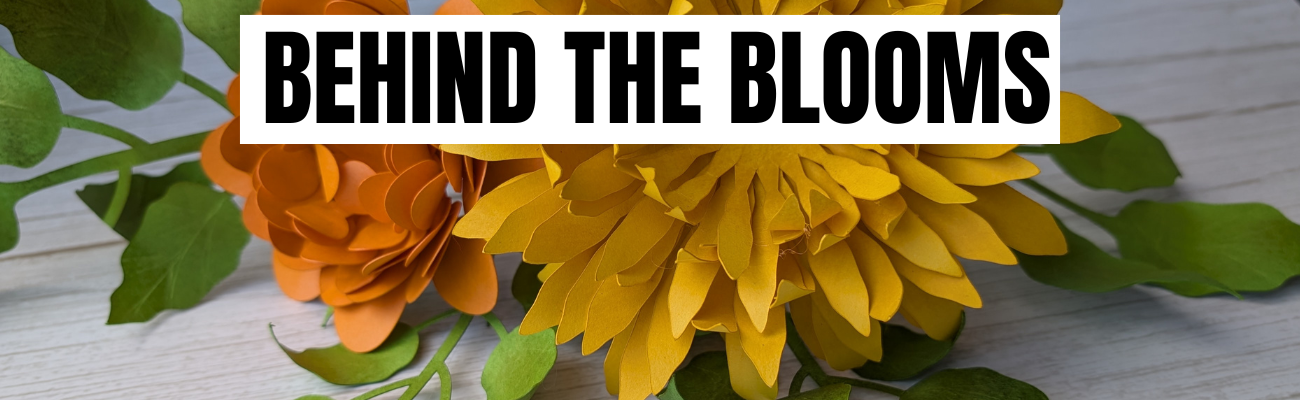
A close-up of vibrant paper flowers in shades of yellow and orange, accompanied by green leaves, with the text 'Behind the Blooms' prominently displayed.

A handmade birthday card featuring a large pink flower, green leaves, and a glittery gold accent band. The card has a watercolor-like pink background and includes the text 'HAPPY BIRTHDAY' on a white banner. Silhouette flower projects

A handmade birthday card featuring a large pink flower, a gold glitter strip, and the text 'HAPPY BIRTHDAY' on a white banner. The background is a vibrant pink splatter design with green leaves. A crafting workspace with various tools and supplies is visible in the background. Silhouette flower projects

A vibrant pink paper flower with intricate petals sits on a textured card background, accompanied by green leaves and a glittery gold strip. The card features a banner reading 'HAPPY'. Silhouette flower projects

Two decorative paper flowers in teal and pink placed on geometric boxes, with a background featuring pink spray and floral shapes. Silhouette flower projects

A pink cherry flower box design displayed alongside details of its purchase options and features.

Screenshot of Silhouette Studio software displaying a digital pattern design for a box with a grid background.

A hand holding a sheet of paper with a grid pattern and an abstract shape on it, placed on a cutting mat in front of a cutting machine.

Close-up of a hand holding a piece of paper with a grid pattern, showcasing a cut-out shape on the paper.

Five decorative paper boxes with colorful paper flowers on top, displayed on a wooden surface. Silhouette flower projects

A digital design workspace displayed on a computer screen, featuring various bookmark designs with floral elements and motivational text phrases like 'Just one more page' and 'Your only limit is your mind.' The design software's page setup and customization options are visible on the right side of the screen.

Print preview of bookmark designs featuring motivational quotes and leaf patterns.

Close-up of a crafting machine applying gold foil to a textured surface with a red light indicator and patterned tape.

A close-up of foil packaging with an irregular cutout, revealing a textured silver surface underneath. The surrounding area features pastel colors and decorative elements.

Close-up of a textured background with blue floral designs and the phrase 'Just One More Page' in gold lettering.

A close-up of a decorative fabric featuring blue leaf patterns and the inspirational phrase 'Live Your Dream' in gold lettering.

A collection of five decorative bookmarks with motivational quotes on a wooden surface, accompanied by a craft machine and a pink scraping tool. Silhouette flower projects

Supplies Used:

A close-up view of a textured surface covered in green moss and adorned with pink fabric flowers, featuring a wooden structure in the backdrop. Silhouette flower projects

Screenshot of Silhouette Studio software showing two floral background designs, one with a pink and yellow gradient and the other with a pink bokeh effect.

A digital design workspace showing a pink and yellow flower background with yellow flowers and red heart shapes in the design software Silhouette Studio.

A crafting workspace featuring a cutting machine, pink paper flowers, and heart shapes on a wooden table. Scissors and a crafting tool are also visible.

A collection of small pink flower-shaped embellishments scattered on a black surface, with scissors and other crafting materials in the background. Silhouette flower projects

A vibrant handmade birthday card featuring a large pink flower and the text 'Happy Birthday', surrounded by colorful paper crafts.

Silhouette step-by-step Classes by Silhouette Secrets+

Silhouette Secrets+ with EllyMae
**This post may contain affiliate links. What that means is that I may receive compensation if you purchase through the links I have provided. The price you pay for the product or service is not higher but I may get compensated for sharing.

Posted on Leave a comment

Creating Layered Paper Flowers with a Silhouette Cameo: A Behind-the-Scenes Crafting Process

Silhouette Secrets+ with EllyMae

Creating shaped & layered paper flowers is all about the details. In Creating Layered Paper Flowers with a Silhouette Cameo: A Behind-the-Scenes Crafting Process, I’m sharing a closer look at the full creative journey behind my layered paper flower bouquet. This blog post goes hand in hand with the new YouTube video, where I walk through the behind-the-scenes process, helpful cutting tips, shaping techniques, and see the complete supply list below too. You’ll see how flat paper designs can be transformed by adding dimension, shaping each layer, and assembling them together to create full, eye-catching paper flowers using the Silhouette Cameo.

Affiliate links may be present in the following blog post and as an Amazon Associate, I earn from qualifying purchases.

Watch the Video & See the Details!

Head over to the Silhouette Secrets+ YouTube channel to catch the full behind-the-scenes video, then scroll down to explore the finished flower photos and the complete supply list for creating your own layered paper flower bouquet.

A close-up view of two vibrant paper flowers, one orange and one yellow, surrounded by green leaves, with the text 'Behind the Blooms' prominently displayed.

Supplies Used for Layered Paper Flowers:

Additional Resources:

Finished Layered Paper Flower Bouquet

A top-down view of two large paper flowers, one yellow and one orange, surrounded by green leaves and crafting tools, including a hot glue gun and a pen, on a cutting mat.

A close-up image of two vibrant paper flowers, one bright yellow and one orange, accompanied by green leaves, resting on a wooden surface.

A vibrant arrangement of paper flowers featuring a large yellow flower and a smaller orange flower, accompanied by green leaves, set against a light wooden background.

I had so much fun creating these layered paper flowers and greenery. Time is the key factor to completing projects like this. Enjoy the creative process!

Find this design in the Silhouette Design Store by Flavir Design.

A decorative floral wreath featuring paper flowers in orange, yellow, and pink hues with green leaves, set on a circular gold frame.

Save this for future reference by pinning the image below.

Close-up of a decorative yellow paper flower with layered petals and green leaves on a wooden surface.

Enjoy !

THANK YOU for your support! How can you help? Click HERE & buy a coffee.
Every little bit helps with the cost of running the site.

Silhouette Classes

Never stop learning! Let me help you take the anxiety out of learning with Silhouette and get to creating faster! My Silhouette classes are heavily focused on software, so you can take the skills & techniques taught and apply them to many future projects!

Silhouette step-by-step Classes by Silhouette Secrets+

Silhouette Secrets+ with EllyMae
**This post may contain affiliate links. What that means is that I may receive compensation if you purchase through the links I have provided. The price you pay for the product or service is not higher but I may get compensated for sharing.

Posted on Leave a comment

New Silhouette Curio 2 Leather Carving Knife: First Tests, Settings & Tips

Silhouette Secrets+ with EllyMae

The Silhouette Curio 2 Leather Carving Knife opens the door to a whole new level of creative possibilities for leather projects—and getting great results starts with knowing how to use it correctly. In this post, I’m sharing my brand new video tutorial that walks through using the Silhouette Leather Carving Knife with the Curio 2, including setting up custom cut settings, what to watch for during carving, and real Day 1 testing results. If you’re curious about carving leather with the Silhouette Curio 2 or want practical tips to avoid common mistakes, this guide will help you get started with confidence.

A close-up of a cutting machine engraving patterns onto a piece of textured material, with visible designs on the surface.

Affiliate links may be present in the following blog post and as an Amazon Associate, I earn from qualifying purchases.

Ready to see the Silhouette Curio 2 Leather Carving Knife in action?
Watch the full video tutorial below or on the Silhouette Secrets+ YouTube channel to see my real Day 1 results, custom settings, and tips for success—then try it out on your own leather projects!

These were the results after 5-6 hours of testing on a full sheet of tooling leather. I cannot wait to share more!

A light brown leather sheet with various circle and tag designs embossed on it, placed on a cutting mat with grid lines, next to a Silhouette cutting machine in a crafting workspace.

Below are the supplies I used for those interested in testing and seeing what the Silhouette Leather Carving Knife can do.

Supplies Used:

Leather Carving Supplies:

Options for double sided adhesive:

Leather Finishing Supplies:

Silhouette Studio Software Recommendations:

*my recommendations as of 1/31/26

  • V4.5.812 for Curio 2 owners that do NOT own a Cameo 5 alpha
  • V5.0.402 for Curio 2 owners who DO own a Cameo 5 alpha
  • NOT recommending v5.0.414 for users as it has been reported that the firmware update can brick the Cameo 5 alpha machine

Silhouette Studio Legacy Versions – found at Silhouetteamerica.com under Software > Silhouette Studio > Legacy –

Video tutorial – How to Install a Legacy Version of Silhouette Studio

I have lots of ideas floating around in my head after this full day of testing with the new Silhouette Leather Carving Knife. Stay tuned for more details on the blog, YouTube channel, and step-by-step classes of leather carved projects too!

Save this for future reference by pinning the image below.

Close-up of a Silhouette leather carving knife in use on beige leather, with intricate designs visible on the surface.

Enjoy !

THANK YOU for your support! How can you help? Click HERE & buy a coffee.
Every little bit helps with the cost of running the site.

Silhouette Classes

Never stop learning! Let me help you take the anxiety out of learning with Silhouette and get to creating faster! My Silhouette classes are heavily focused on software, so you can take the skills & techniques taught and apply them to many future projects!
Silhouette step-by-step Classes by Silhouette Secrets+

Silhouette Secrets+ with EllyMae
**This post may contain affiliate links. What that means is that I may receive compensation if you purchase through the links I have provided. The price you pay for the product or service is not higher but I may get compensated for sharing.