Posted on 1 Comment

How to Apply Vinyl Straight on Acrylic Panels

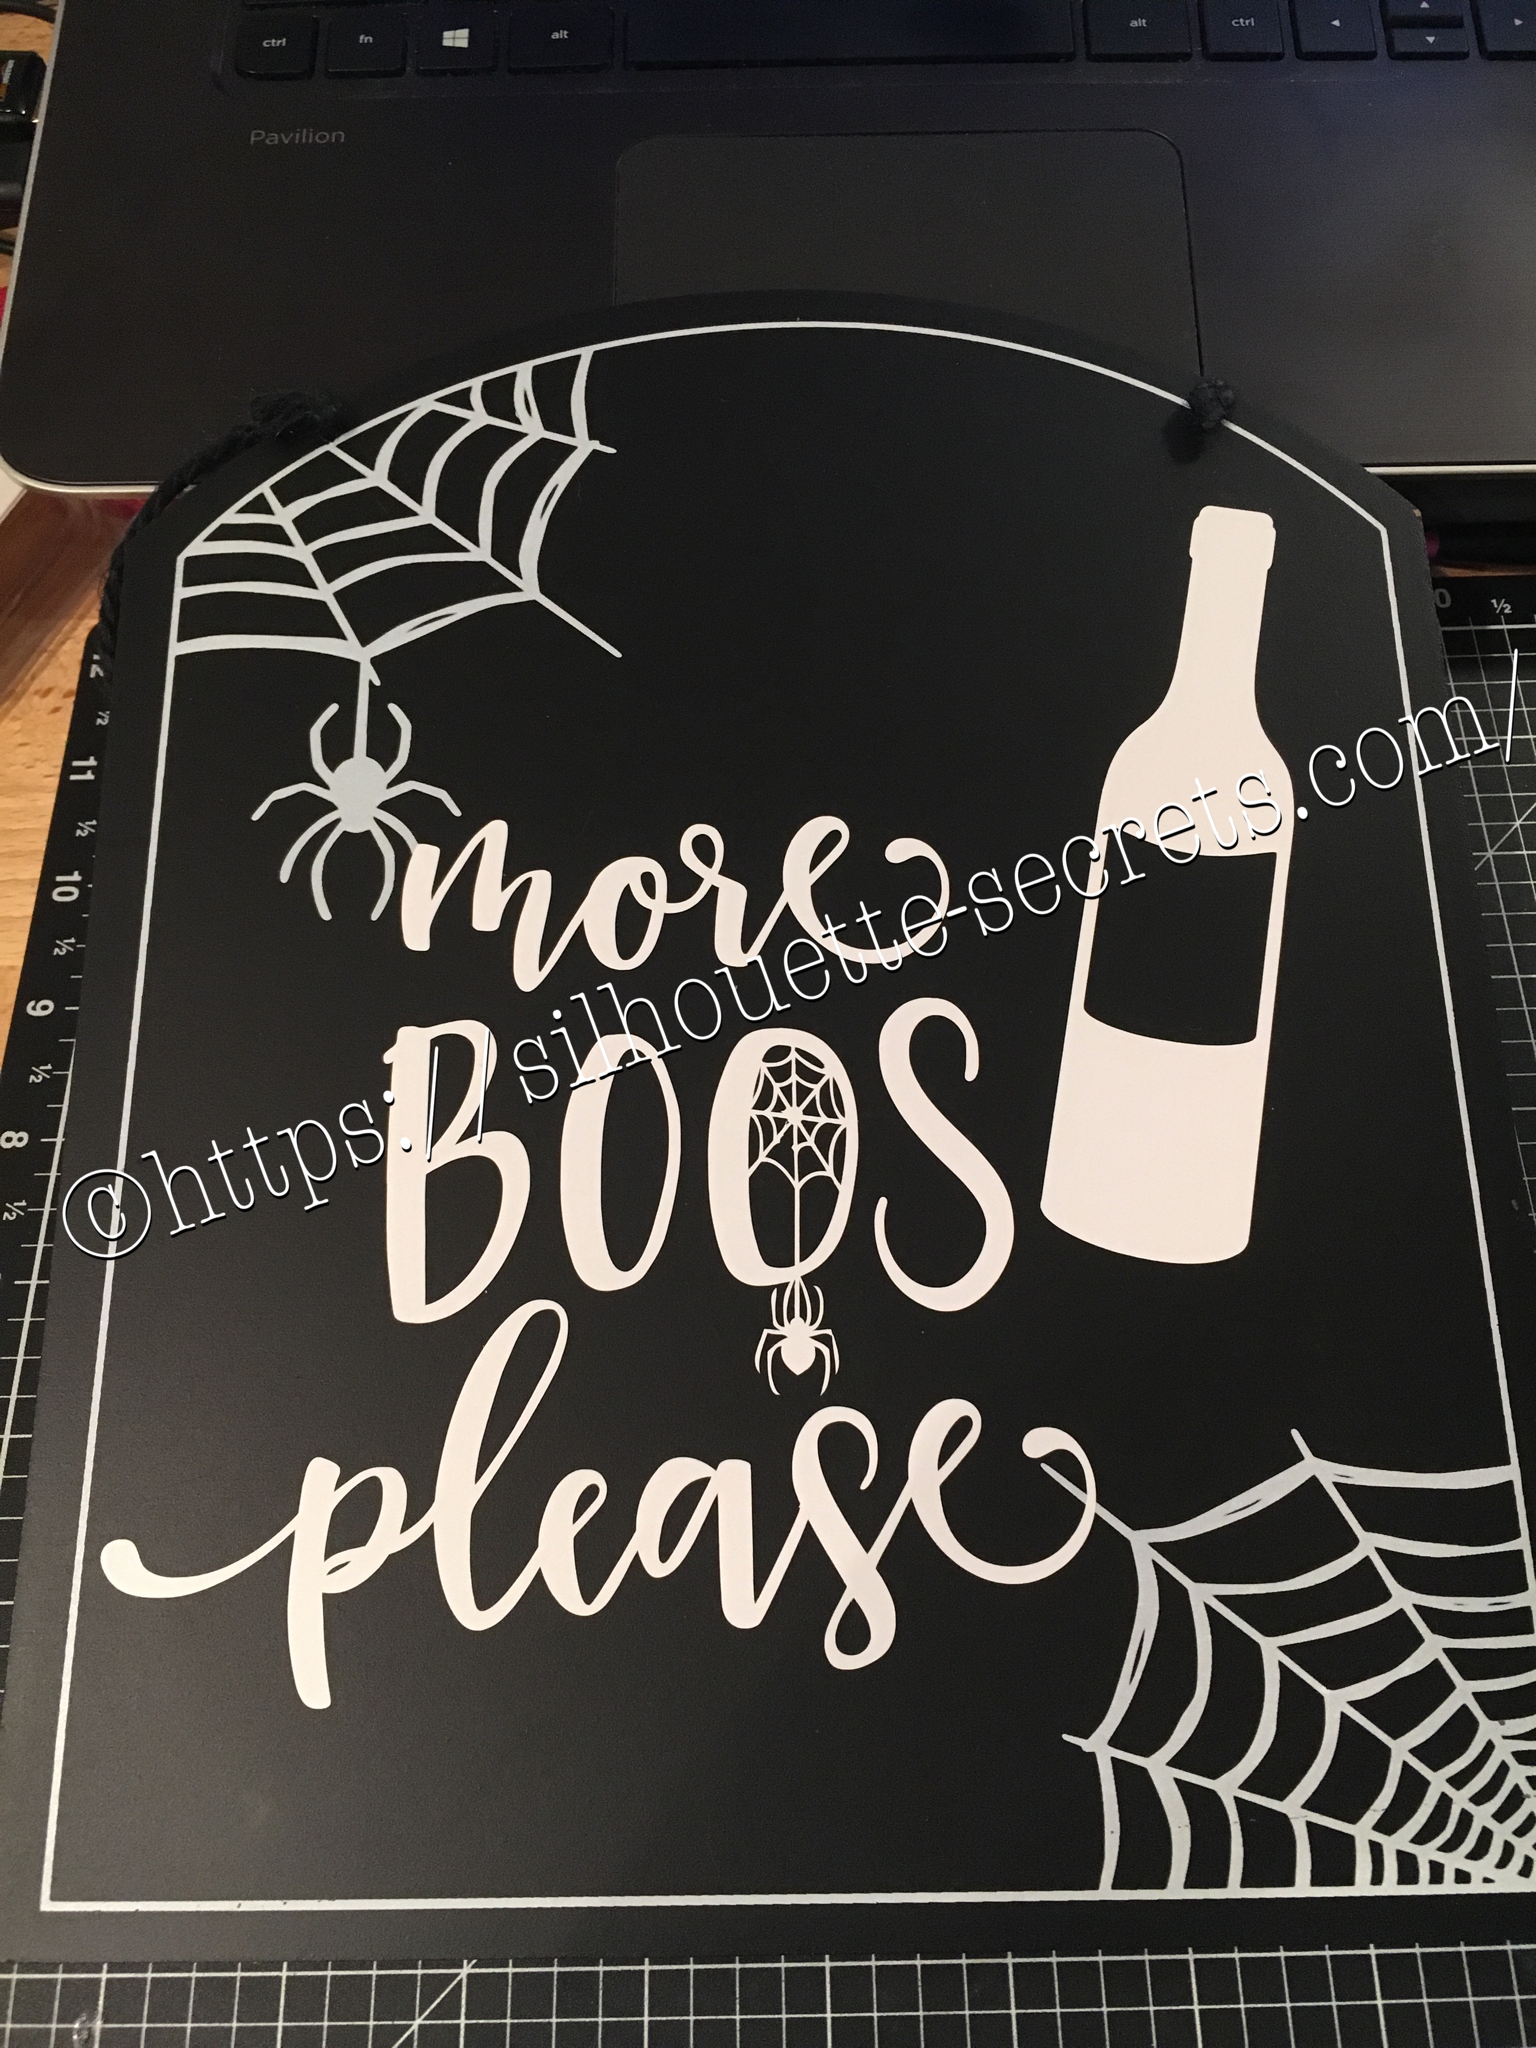
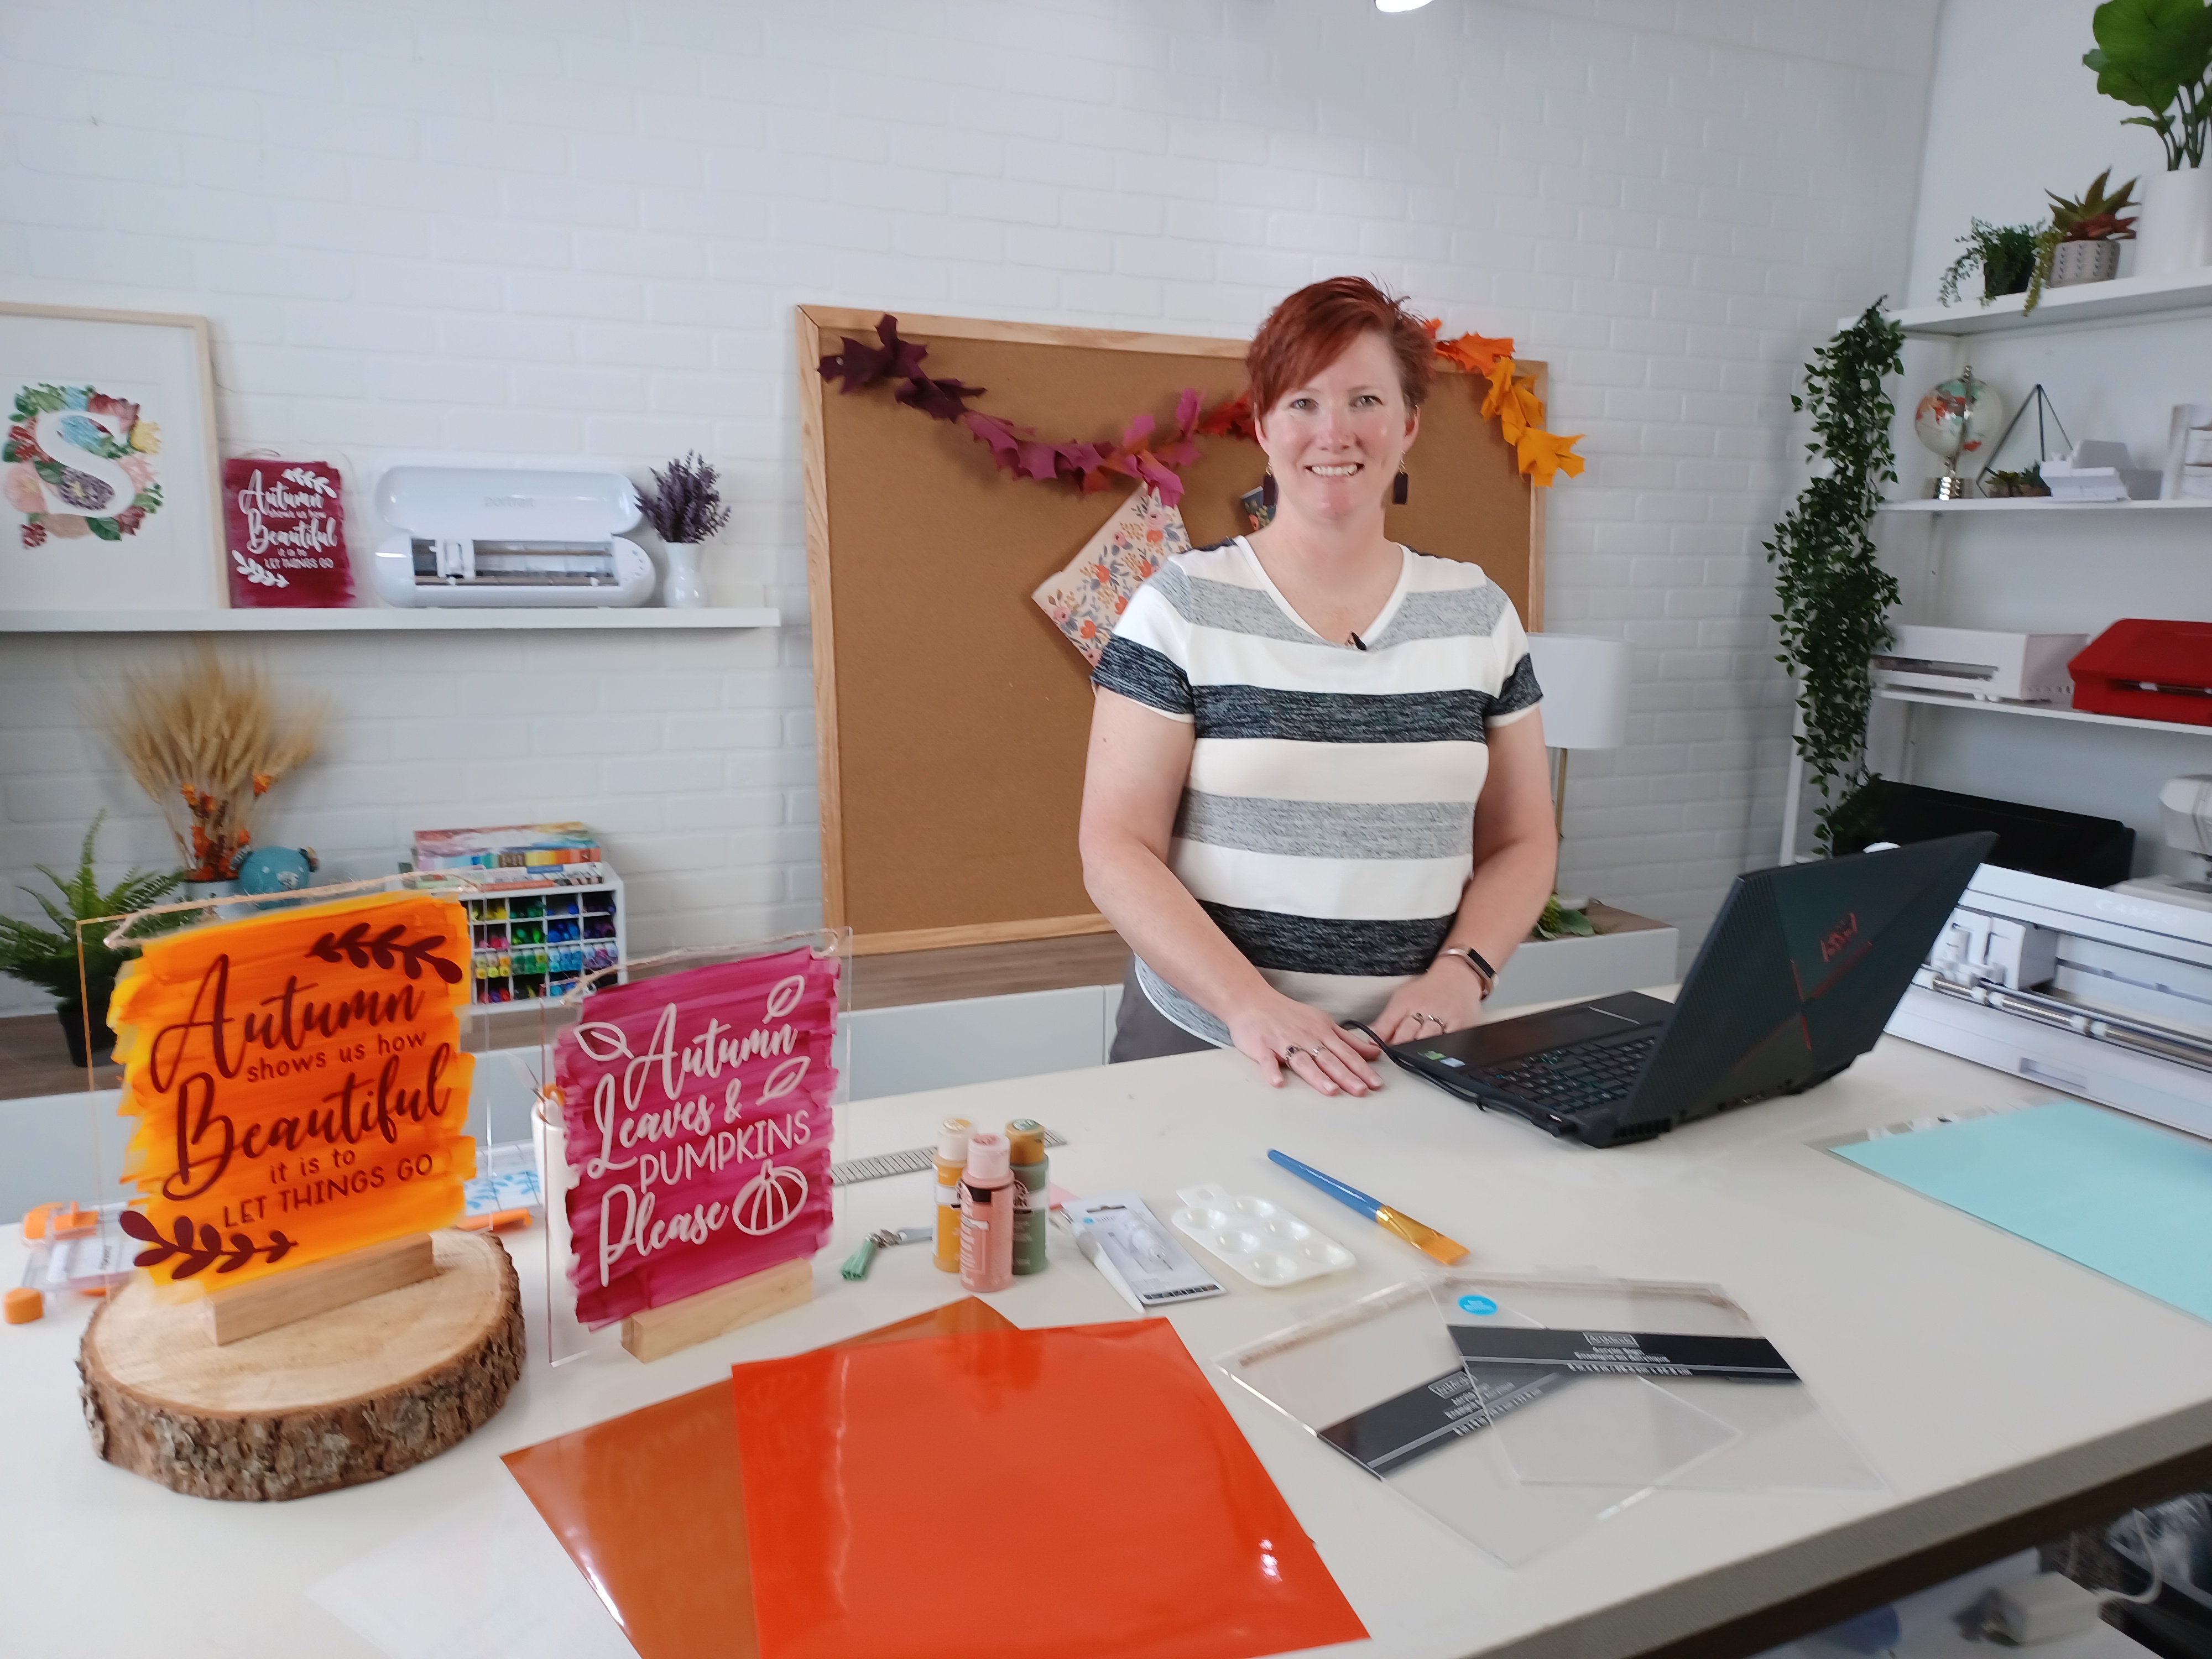
Today I’m sharing another acrylic sign décor project and how I made it.

Affiliate links may be present in the below and as an Amazon Associate I earn from qualifying purchases. What that means is that I may receive compensation if you purchase through the links I have provided. The price you pay for the product or service is not higher but I may get compensated for sharing.

Start by gathering your supplies.

Here is a list of the supplies used to create this project:
– Oracal 651 adhesive vinyl in the following colors:
Black, yellow, green, blue, light blue, red

– Oratape MT80P application tape
– Acrylic Panel or sign
– Wood stand (optional for panel)
– Acrylic Paint in your color choice
– Paint brush with bristles
– Paint palette (optional)
– alcohol wipe
– weeding tool
*Note: the acrylic sign I used in this project was from Michaels but is no longer available
These techniques can be applied to any acrylic sign blanks you might find.

Designs & Fonts used:
Christmas Lights svg by Art Boutique Butterfly
BFC Magic Marker Print Font by Blush Fonts – Design #396584

Next, measure the size of the blanks and write down measurements.

Paint backside of acrylics if desired to make it pop.

Using drawing tools to create a shape to use as a template with the measurements taken.

Add your design within the template and adjust as you see fit.

Using shapes as your template helps to visualize the available space you have for the design on your blank and see how might look. I use shapes as templates often in my designing and they also make a great weeding box too!
Check out these other tutorials HERE to see how I use shapes all the time as templates.

I don’t know about you, but most times, the most time consuming part of creating a project for me is choosing a design. I ended up creating a design with a combination of things I had seen.
I used both a design and a font style to create this sign.
Christmas Lights svg by Art Boutique Butterfly
BFC Magic Marker Print Font by Blush Fonts – Design #396584

Draw rectangles and align with the edges of the template to use as alignment tools for aligning on the acrylic blank.

Thanks to Barbara Foster with Let’s Go Silhouetting for this tip!
I used alignment boxes for layering vinyl and lining things up before, but taking a class with Barbara at the All Things Silhouette virtual conference in 2022 was a light bulb moment (no pun intended) to use this when lining it up to make sure it was absolutely straight on acrylic blanks.

Arrange the design to be cut.

I arranged it so that I could cut all of the pieces of the design in all colors on 1 Silhouette mat and 1 time sending it through the machine. I use this technique for all materials I cut.

Look for a step-by-step video tutorial on this coming soon to the Silhouette Secrets+ YouTube Channel!
I’ll update this post with a link once it’s ready.

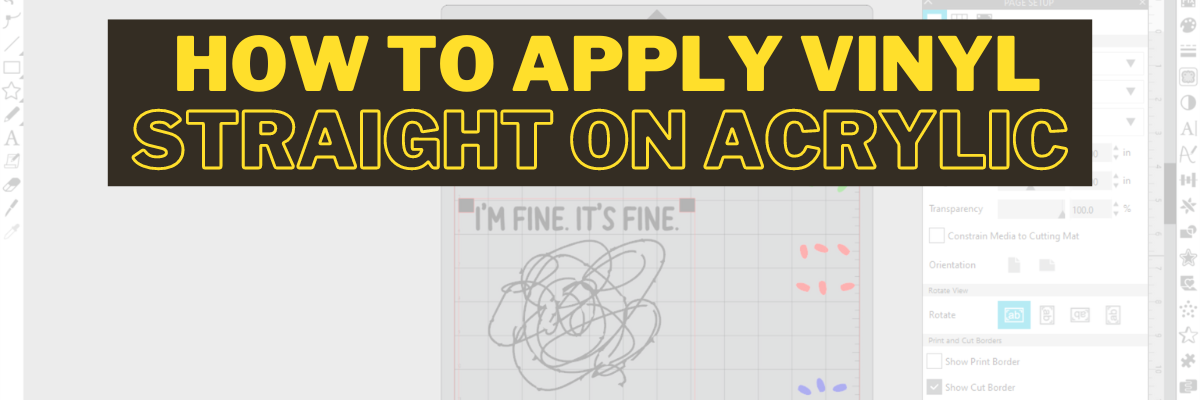
Weed your vinyl design and then apply to the acrylic blank. I used the rectangles drawn for the layering marks to line it up with the straight edge of the acrylic sign.

Check out the new video on my Silhouette Secrets+ YouTube channel on the application of this design HERE.

And check out this recent post on Creating Fall Decor with Oracal 651 HERE.

Acrylic signs are something that have been very popular the last few years and can be used for all seasons and occasions.

Check out this post HERE for 10 more ideas of what you can create.

I would love to see what you are creating with your Silhouette software or machines!
Feel free to post on my Facebook group at 
Silhouette Secrets with EllyMae.

Save this for future reference by pinning the image below.

Enjoy !

This image has an empty alt attribute; its file name is logo.jpg

THANK YOU for your support! How can you help? Click HERE & buy a coffee.
Every little bit helps with the cost of running the site.

Or if you are looking for more in-depth, step-by-step classes, check out all of my online Silhouette classes on my Teachable site HERE.

SS Logo snip it
**This post may contain affiliate links. What that means is that I may receive compensation if you purchase through the links I have provided. The price you pay for the product or service is not higher but I may get compensated for sharing.
Posted on 1 Comment

Fall Decor with Oracal 651

Affiliate links may be present in the below and as an Amazon Associate I earn from qualifying purchases. What that means is that I may receive compensation if you purchase through the links I have provided. The price you pay for the product or service is not higher but I may get compensated for sharing.

First, a great big THANK YOU is in order!

There are many aspects of teaching classes or hosting events that many followers do not realize or think about. Costs is one of those. It is a wide range from venue rental fees, food, taxes, resort fees, transportation, shipping, class supplies… and the list could go on and on!

In September I taught at an in-person workshop organized by Marjorie with Atlanta Stylish Point in Atlanta. This was the first in-person workshop we have been able to organize since 2020 and just like everything else worldwide, costs have gone up.

Sponsors are a big part of teaching classes and hosting events. A BIG PART!
I want to give a great BIG SHOUT OUT to my class sponsor for that event!!!
Thank you H & H Sign Supply!

They sponsored my Acrylic Decor class and sent extra goodies for the students too!

Without sponsors like H & H Sign Supply, I could not do classes and events.
I greatly appreciate the support and the students loved all the goodies!

Here is a photo of the class project I taught at the event.

This was a project that the attendees designed completely from scratch using several fonts styles.

Here is a list of the supplies used to create this project:
Oracal 651 adhesive vinyl in the following colors:
Brown, Golden Yello, Purple Red, Dark Red, Light Orange

Oratape MT80P application tape
Acrylic Panel or sign
Wood stand (optional for panel)
Spiced Pumpkin DecoArt Americana Acrylic Paint
Saffron Yellow DecoArt Americana Acrylic Paint
Paint brush with bristles
Paint palette (optional)
alcohol wipe
weeding tool

Fonts used in design creation:
Maxwell font by Silhouette – Design #259151
BFC Magical Writing Handwriting Font by Blush Fonts – Design #387314
Fall Leaf Dingbats by Lori Whitlock – Design #222723

Need help installing fonts? Check out this tutorial HERELet’s Explore v4 – Installing Fonts

In this class, I taught attendees how to create their own design using shapes as templates and designing within that to create a project. They were in charge of the design from start to finish.

Here are few of the students creations


Some created the exact same design I developed the class with and others took off on their own, using different fonts and phrases!

It was so neat to see what everyone at the event did!

The best part of creating your own designs is that they can turn out a bit different each time!

Thank you to H & H Sign Supply for being a sponsor for our Silhouette events!

Stay tuned as I have another acrylic sign project coming your way soon sharing some of the techniques we used in class!

For a few more ideas of how you can create different seasonal décor projects with acrylic signs and adhesive vinyl, check out these 10 other examples in this Acrylic Sign Decor post from last year found HERE.

Save this for future reference by pinning the image below.

Enjoy !

This image has an empty alt attribute; its file name is logo.jpg

THANK YOU for your support! How can you help? Click HERE & buy a coffee.
Every little bit helps with the cost of running the site.

Or if you are looking for more in-depth, step-by-step classes, check out all of my online Silhouette classes on my Teachable site HERE.

SS Logo snip it
**This post may contain affiliate links. What that means is that I may receive compensation if you purchase through the links I have provided. The price you pay for the product or service is not higher but I may get compensated for sharing.
Posted on Leave a comment

Silhouette & Michaels Class

Yesterday I was able to teach a class from the Silhouette Headquarters in Utah.

It was a beautiful fall day.

Here is a peek at the look at the Silhouette video and photography studio before we started the Zoom class.

The video recording is now available for viewing on the Michaels YouTube channel.

Check it out HERE

For more ideas of what you can do with the acrylic sign decor that I demoed in the Silhouette & Michaels Zoom class, check out this post HERE.

After the Silhouette and Michaels Zoom class, we did a quick Facebook Live on the Silhouette America Facebook page.

Check that out HERE

I hope I will see what you are creating with your Silhouette software & machines soon!
Feel free to post photos or questions on my Facebook group at 
Silhouette Secrets with EllyMae.

Save this for future reference by pinning the image below.

Enjoy!

This image has an empty alt attribute; its file name is logo.jpg

THANK YOU for your support! How can you help? Click HERE & buy a coffee.
Every little bit helps with the cost of running the site.

Or if you are looking for more in-depth, step-by-step classes, check out all of my online Silhouette classes on my Teachable site HERE.

SS Logo snip it
**This post may contain affiliate links. What that means is that I may receive compensation if you purchase through the links I have provided. The price you pay for the product or service is not higher but I may get compensated for sharing.


Posted on 7 Comments

10 Creative Acrylic Sign Decor Ideas for Every Season and Style

Silhouette Secrets+ with EllyMae

Acrylic sign decor is a versatile and stylish way to enhance any space, whether you’re sprucing up your home for the holidays or adding a personal touch to your everyday surroundings. With endless design possibilities, acrylic signs offer the perfect blend of elegance and creativity for seasonal and year-round decor. In this post, we’ll showcase 10 creative acrylic sign decor ideas that are easy to make and guaranteed to inspire, whether you’re a seasoned crafter or just starting with your Silhouette cutting machine. Get ready to elevate your decor game with these stunning designs!

10 examples of acrylic sign décor for seasonal or everyday décor

Affiliate links may be present in the following blog post and as an Amazon Associate I earn from qualifying purchases.

Acrylic Sign Decor Autumn theme with Silhouette

Autumn Shows Us How Beautiful design by Silhouette – Design #383335

Basic supplies for all sign decor

How to Create Acrylic Sign Decor:

Gather the supplies for your sign.

Paint the backside of the design with acrylic paint in the color(s) of your choice.
Let this completely dry before moving on to the next step.

Measure the size of your acrylic sign. Draw a rectangle the same size as the sign. If using an odd shape, make sure to measure inside of the narrowest part of the sign.

Acrylic Sign Template for Sizing
Red rectangle shows narrow part of an odd shaped sign. Draw your design template that size to make sure your design fits within the sign space.

Select your design and size it inside of your drawn rectangle to best fit the shape you are working with.
Some designs will work better within a certain shape or portrait vs landscape orientation.

Cut adhesive vinyl in the color(s) of your choice.
Weed away the excess vinyl around the cut design.
Apply to the front side of the acrylic sign using transfer tape.

Hang your sign by the twine attached (if applicable) or use a wood stand.
Note: test your acrylic thickness with your wood stands – this may vary depending on the acrylic purchased and stands used.

Create signs to change out seasonally with your decor or just for general home decor purposes to enjoy all year long!

Store acrylic signs in page protectors when not in use to minimize any scratching on the acrylic sign or acrylic paints used. I will also wrap them in bubble wrap when storing as well.

I’ve created a few more signs to share with you and hopefully spark your creative thought process in how you can use this technique to fit your style.

Thankful Grateful Blessed Acrylic Sign Decor

Design used: Thankful Grateful Blessed design by Silhouette – Design #388089

Believe in the Magic of Christmas Acrylic Sign Decor

Designss used:

I don't have ducks in a row. I have squirrels and they are at a rave acrylic sign decor.

Designs used:

This house runs on love laughter and inappropriate humor acrylic sign decor.

Designs used:

Crafting Forever - Housework Whenever acrylic home decor

Design used: Crafting Forever Housework Whenever by Jillibean Soup – Design #295547

Laundry Acrylic Sign Decor

Design used: Laundry Schedule by Lori Whitlock – Design #93059

Everyone wants to change the world acrylic sign decor

Design used: Change the Toilet Paper Roll by Jillibean Soup – Design #285168

Bee Yourself Acrylic Sign Decor

Designs used:

Happy Fall Acrylic Sign Decor

Design used: Happy Fall Autumn Phrase by Angele Kamp – Design #227654

Hopefully those have given you some ideas to start creating your own acrylic decor!

I had the incredible opportunity to teach this class at Silhouette HQ for a Michaels Live YouTube tutorial, where I shared tips, techniques, and inspiration for creating stunning acrylic sign decor using a Silhouette cutting machine. You can catch the full tutorial and learn along with me by watching it HERE.

Find more Silhouette tutorials on the website HERE.

Save this for future reference by pinning the image below.

Acrylic Sign Decor Pinterest

Enjoy !

THANK YOU for your support! How can you help? Click HERE & buy a coffee.
Every little bit helps with the cost of running the site.

Silhouette Classes

Never stop learning! Let me help you take the anxiety out of learning with Silhouette and get to creating faster! My Silhouette classes are heavily focused on software, so you can take the skills & techniques taught and apply them to many future projects!

Silhouette step-by-step Classes by Silhouette Secrets+

Silhouette Secrets+ with EllyMae
**This post may contain affiliate links. What that means is that I may receive compensation if you purchase through the links I have provided. The price you pay for the product or service is not higher but I may get compensated for sharing.
Posted on 1 Comment

Home Decor with Silhouette

Using the Silhouette Software to Help Design Home Décor

I always have my eye out for things that I can use in creating with my Silhouette machine. Target had these little wooden houses available in their Dollar section.

After debating with my inner self, I finally picked up a set.
I always have this inner dialog on – can I make that? Will I make that?
Yes, I can cut the wood, but when will I get it done?
Right now, in the process of moving, our wood shop is not set up, so I did it.
I bought wood shapes.

If you have access to a saw, you could create your own shapes. This tutorial is not limited to these little house shapes, but think about the supplies you have on hand and you can use this same technique for any blanks you use.

Affiliate links may be present in the following blog post and as an Amazon Associate I earn from qualifying purchases.

Next, gather the rest of the supplies.
– Paint
– Foam brush
– Paint palette or small dish
– Sponge
– Painters Tape
– Adhesive Vinyl
– Transfer Tape
– Squeegee
– Weeding tool

Tape off any sections needed with the painters tape. In this case, each house has a metal chimney.

Paint the houses any color you want.
I chose to paint a solid color of gray, light blue, or dark gray as the first coat and then used the white chalk paint with the sponge on top of that to give it a distressed look.

Let the wood blanks dry completely.

Next, measure the space of each blank and write that down.

This is just a rough draft and does not have to be perfect or to scale.

Using the information from your measurements and drawing, draw shapes in the Silhouette software to design use as “design templates”.

For these houses I started by using a rectangle under the Drawing Tool on the left side and then used the Edit Points to pull up a point in the roof.

Check out this video tutorial showing the full process of drawing the shapes in Silhouette Studio.

Find this video on YouTube HERE

Once you have the template shapes, then you can decide on the designs to fill those shapes. Some designs will work better in the shapes than others.

I used the following designs on my double sided houses:
Home Sweet Home by Angele Camp – Design #233239
Hello Fall by Lilium Pixel SVG – Design #300125
Home Sweet Home by Diva Watts Designs – Design #346001
Home Sweet Home by Diva Watts Designs – Design #347923
Home Sweet Home by Design Hooked – Design #354446
Fall Bouquet by Tanya Batrak – Design #159397

Once all the designs are sized how you want them to cut, move the designs around on the virtual mat to cut out each color vinyl you want them in.

Then send to the Silhouette machine to cut all the adhesive vinyl pieces. I cut everything from Oracal 651 adhesive vinyl.
I have been having an issue with the vinyl cutting too deep into the backing using the preset settings, so I am using the settings of:
Blade depth – 2
Force – 5
Speed – 5
With a Silhouette Autoblade and it is cutting, weeding, and transferring beautifully.

Cut settings depend on many variables and test cuts will be the way to find out what is going to work best with your material and blade. For more tips on cut settings check out this post – Perfect Cut Setting in Silhouette.

Carefully weed the excess vinyl from around the designs.

This takes practice and the cut settings can make a big difference in the ease of weeding.
Do not rip it off like a bandaid.

After all the weeding is done, apply vinyl to blanks

Here is a quick real time video of the application process on one of the wood blanks.

In the above video, I reference a recent tutorial on the Smart Snapping lines. This can be a very helpful tool as shown in the video.
Check out the Let’s Explore v4 – Smart Snapping post HERE

And now you have some seasonal or year round décor.

Double sided means that they can pull double duty in your seasonal decorations.

And if I were to ever want to change the designs out, I would just carefully remove the vinyl. Sand it if needed and repaint, then cut and place new vinyl designs on them.

Keep in mind that you can use these tips & techniques for any blanks you might have!

I’d love see what you create & how you use the tools in Silhouette Studio
Feel free to post on the
Silhouette Secrets+ Facebook Group.

Save this for future reference by pinning the image below.

Enjoy!

This image has an empty alt attribute; its file name is logo.jpg

THANK YOU for your support! How can you help? Click HERE & buy a coffee.
Every little bit helps with the cost of running the site.

Or if you are looking for more in-depth, step-by-step classes, check out all of my online Silhouette classes on my Teachable site HERE.

SS Logo snip it
**This post may contain affiliate links. What that means is that I may receive compensation if you purchase through the links I have provided. The price you pay for the product or service is not higher but I may get compensated for sharing.
Posted on Leave a comment

Quick gifts

I love being able to whip up a quick gift to send to a friend.

I had a towel in my stash & it seemed to be whispering my name. So I went shopping in the Silhouette Design store to find a cut file I liked.

After a measurement error & my 2nd scrap of black HTV, I ended up with a nice, simple gift I could throw in my care package.

Yes, even seasoned Silhouette users make mistakes. And do you know, often times you learn more from making a mistake than not. At least in my experience, I remember things better the next time when I’ve made a mistake or had to research how to do something. Does that mean I won’t make the same mistake again? No! But I may laugh at myself more the next time!

How do you learn to use the machine? You play, you practice, you research, you create!

I love learning what new technique or new project I can do with my Silhouette Cameo.

Enjoy !

THANK YOU for your support! How can you help? Click HERE & buy a coffee. Every little bit helps with the cost of running the site.

Looking for more in-depth, step-by-step classes, check out all of my online Silhouette classes on my Teachable site HERE.

SS Logo snip it

**This post may contain affiliate links. What that means is that I may receive compensation if you purchase through the links I have provided. The price you pay for the product or service is not higher but I may get compensated for sharing.

Posted on Leave a comment

Beach Home decor

Sometimes you just can’t pass by something in the craft store. I really don’t need any more paper in my craft stash but beach themed was calling my name…… and it jumped in my cart.

img_6106 These images were all part of 12 x 12 sheet of paper and I cut it apart to make 4 – 6 x 6 squares. I found canvas blanks that were the same size and used Mod Podge to add the paper onto the canvas. Once the Mod Podge was dry, I sponged some ink on the edges of each one to match the background colors.

These canvas squares do not have backing on them so I will just add a 3M hanger to the back to hang on our walls. img_6107Now that these are dry, it’s time to find a place for them in our house.

I only used one sheet of paper and now have the entire pack to use for other projects. A very low cost home decor item that I can change out at any time that came together very quickly. img_6130

Enjoy !

THANK YOU for your support! How can you help? Click HERE & buy a coffee. Every little bit helps with the cost of running the site.

Looking for more in-depth, step-by-step classes, check out all of my online Silhouette classes on my Teachable site HERE.

SS Logo snip it

**This post may contain affiliate links. What that means is that I may receive compensation if you purchase through the links I have provided. The price you pay for the product or service is not higher but I may get compensated for sharing.

Posted on Leave a comment

Halloween decor – yes that’s right!

Halloween is of course several months in the past, but when you can pick something up on clearance…. why wait until next year to finish it.
I found a couple signs at Target that were perfect to add vinyl to.

I had a couple files from the Silhouette store & they were perfect for these…..

img_6072-1

With my first design, I weeded the large area first & then I applied my transfer tape & uses a technique commonly called “reverse weeding” in the Vinyl crafting lingo.

How do you reverse weed?

Burnish your design well, so it all sticks to your transfer tape.
Then peel the backing off of your vinyl design & very carefully weed out the bits of vinyl from the delicate parts of your image.
This works especially well if you have small eye pieces or small dots for letters, etc. It does take some practice to get the hang of it.
The first time I did it, I hated it because my transfer tape kept sticking to me.
But, the more you practice & get the hang of it, the more you fall in love with the technique & use it for those delicate designs that you don’t want your pieces moving on.
In my design, I used this for the spider web that was in the center of my “O”.

After weeding my design, I then carefully placed my design on my sign & burnished it down really well. Then I carefully peeled the transfer tape off, watching for any vinyl that did not come off the transfer tape and I would put it back down & burnish it some more to get it to stick.

img_6074-1

And my second design, also from the Silhouette Design Store.


img_6075-1

Now these are ready to pull out for next year and will go perfectly in my dining room that has a wine theme.

Whenever you get the chance to grab some decor items at a discount, grab them, but don’t let them sit around too long without adding all the finishing touches.

Enjoy !

THANK YOU for your support! How can you help? Click HERE & buy a coffee. Every little bit helps with the cost of running the site.

Looking for more in-depth, step-by-step classes, check out all of my online Silhouette classes on my Teachable site HERE.

SS Logo snip it
**This post may contain affiliate links. What that means is that I may receive compensation if you purchase through the links I have provided. The price you pay for the product or service is not higher but I may get compensated for sharing.
Posted on Leave a comment

‘Twas the Night before Christmas

I’ve seen variations of this all over and I just had to try it.

This was a bit difficult to weed the vinyl but I was determined. I wanted this image on my charger plate. I ended up cutting it twice and then coaxing it along while weeding & applying it, but I love the end result.

img_5308 I decided I needed to cut up the words a bit & applied in pieces. It seemed to lay on the charger & go on better with less bubbles.

img_5312 And done….. another Christmas decoration off my to- do list.

I hope you enjoy your Christmas Eve!

Enjoy !

THANK YOU for your support! How can you help? Click HERE & buy a coffee. Every little bit helps with the cost of running the site.

Looking for more in-depth, step-by-step classes, check out all of my online Silhouette classes on my Teachable site HERE.

SS Logo snip it

**This post may contain affiliate links. What that means is that I may receive compensation if you purchase through the links I have provided. The price you pay for the product or service is not higher but I may get compensated for sharing.