Posted on 3 Comments

10 Sublimation Tips For You!

This past weekend I participated in the Sublimation Camp that was hosted by Cori George from Hey Let’s Make Stuff and Angie Holden from the Country Chic Cottage and I just have to say WOW!
It was an amazing event that was jam packed with information for all levels of those in the sublimation process.

It was an event for Crafters by Crafters and I really found that the information provided answered the questions that I see posted every single day by beginners or those wanting to learn more about sublimation.
You can still gain access HERE at the time this post is published.

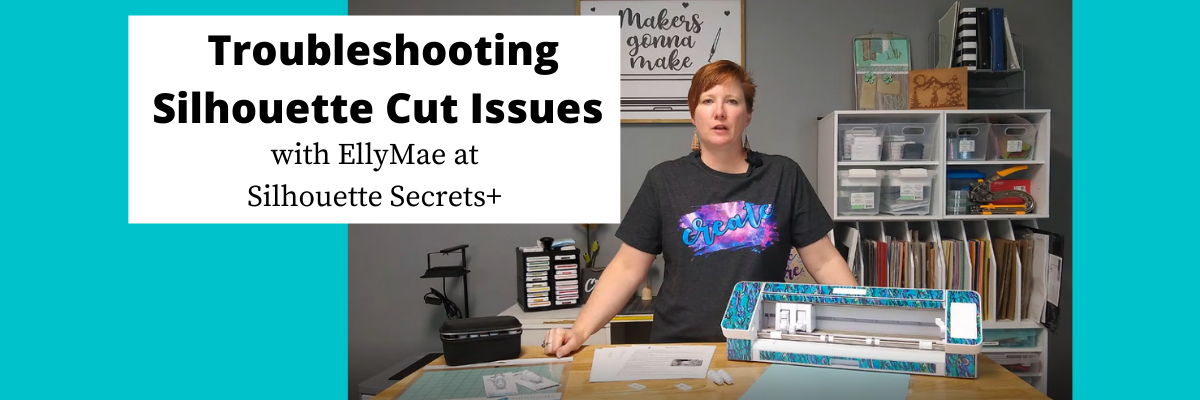
Sublimation is a hot topic currently and more and more we are getting questions on the Silhouette Secrets with EllyMae Facebook Group. I signed up so I could pick up tips and tricks to help out more Silhouette users.

The biggest thing I learned right away is that – I CANNOT do it all!
There is just too many projects and not enough time to do it all.
I also realized that there are just things that I do not experience that others have happen to them, such as printers not printing colors correctly.
And over the years of troubleshooting, I have found that it is very difficult to reproduce an issue on purpose. So it can be difficult to cover it ALL!

And that is what I am hear to say today – my tagline on the blog has been
“Because some things are too good not to share!”

So today, I’m here to share with you 10 things that I learned or re-learned during this event and the resources where you can find more information.
I do feel that we all can learn from others in the industry and can gain inspiration from so many amazing instructors out there!

Affiliate links may be present in the below and as an Amazon Associate I earn from qualifying purchases.

10 Things I Picked Up at Sublimation Camp

#1 – Testing Materials

Get some 100% polyester fabric from the craft store to test your prints on. I picked this tip up from Angie Holden at the Country Chic Cottage.
I thought this was a fabulous idea – I mean really, how easy is that?
I’d rather use up a sheet of printed ink on some cheaper fabric than waste one of my blanks and it not look good!
I couldn’t wait to hop in the car and head to JoAnn Crafts to pick up some testing fabric.
I bought 2 yards of White 100% Polyester Fabric and it cost me $13.98.
Now I am set to test my prints.

Another option that was mentioned in the camp by Courtney Brickner with The Crafty Brick was getting a 100% polyester shower curtain off Amazon and use that as your test surface.

#2 – Print a Test Page

A test color page can save you time, money, and materials.
And I am saying this from experience because it was the first thing I did when I started watching the Sublimation Camp and I found that my Epson F170 was not printing properly and I needed to do a cleaning on it. I had not printed in several weeks and it did affect it.
Jennifer Maker had an amazing download (#385) when you sign up on her site that worked great for colors and being able to see what prints out.

I knew immediately when it printed out that it was not correct.

Then I was able to do a print head test and see where the problem was.
I was on my way quickly after finding that and doing a cleaning.
Even though I have an Epson F170 sublimation printer, I had not used it for a couple weeks and it definitely made a difference.

#3 – Blanks

Sublimation does require special blanks. They need to be treated specifically for sublimation or the ink will not bond to the blank.
Sublimation ink binds with polyester and that is why you need a high polyester count or sublimation blanks. It will just wash out of other materials or non-treated items.
Not all blanks are created equal! Quality matters too!
If you have a design that hasn’t turned out, it may not be the ink, print, heat source, or sublimation paper that is the problem. It may be the actual blank.
Testing is the only way to know!

Sublimation also needs to be done on light colored objects if you are just printing and pressing. Sublimation ink does not print white and it is a translucent ink, so background colors will show through.
This can work for some designs like the below photo but not for all. The color of the blank will affect the ink colors of the print on the final object.

Sublimation on a 95% polyester light colored shirt from a local vendor.

#4 – Clean the blanks

I’ll admit this was one of the first things I did not know about when I started pressing sublimation prints. I had pressed hundreds of tote bag prints before I even heard this tip.
Use a lint roller to get any debris, fuzz, etc. off the blank you are using.
I found out the hard way when blue flecks showed up on the shirt I was pressing.

For hard surface blanks, an alcohol swab to get rid of debris and oils as well.

#5 – Color Profiles

I hear often that colors are not printing at the colors that users think they should. I learned many things at Camp about this. It can be for several reasons.
One of the biggest that I heard instructors say over and over was that converted printers do not print correctly because they are calibrated for inkjet ink. So you may need to use a ICC color profile. Cori George with Let’s Make Stuff had great tips to finding and testing ICC color profiles.

It can also vary, even with using the same ICC profile between the software programs you are printing from.

This is one of those things that I cannot recreate with my own equipment because I don’t see to have the same issues with my colors from printing through Silhouette to my inkjet or my sublimation printers.

If you are having issues with colors, I would recommend checking out Cori’s blog for more tips on ICC profiles and sublimation in general.
She has a ton of information on sublimation there.

#6 – Off Colors

I heard several times through the entire event from Angie Holden at the Country Chic Cottage that colors can be off if the blank was undercooked or overcooked. One easy indicator that she mentioned was undercooked the color would look too green and overcooked the color would look brown.

#7 – Air Purifier

Sublimation stinks!
I mean even the sublimation blanks just smell bad when they are heat pressed. Then you add in the actual pressing of the sublimation print when it’s pressed. It is always a good idea to make sure your space is well ventilated!
I was having some allergy and asthma attacks during the event weekend, so I already didn’t feel great and when this air purifier was mentioned, I ordered one.
I’ve only used it a couple times, but I already noticed a big difference!

I was surprised that it was a bit bigger than what I expected, which is awesome!
Now I plan to run it anytime my heat press or my GlowForge is running.

#8 – Don’t forget to mirror the design

This happens to us all, whether it’s for cutting HTV or sublimation. You are not alone!
I try to always make mirroring the design the final step. If you have a sublimation printer, it will do it automatically for you unless you tell it not to, but if you have a converted printer, you will need to manually do this step.

#9 – Some things are going to FAIL!

You are learning a new skill! In the beginning, you will go through more supplies as you are learning. In my experience this holds true for all things! We see it all the time with beginning Silhouette users. You will go through blades and mats faster in the beginning because you are learning what works and what doesn’t. The more you do it, you pick up tips & tricks that extend the life of your supplies.

And then you will still have failures because you forgot to mirror, applied it upside down, or some other random reason. Most times I make mistakes because I’m trying to rush or multi-task.

#10 – Sublimation is Print and Press

Basically, any program you can print from, you can use for sublimation.
The basics are printing and pressing.
There are many users getting into sublimation and a wide variety of software programs they are using. I saw Canva, Photoshop, Illustrator, Design Space, Word, Silhouette Studio, ProCreate, and more during the event.
As you get into it, you can get into more complex things which may require certain software, ICC profiles, cutting with the machines, etc.

But the basics are printing and pressing in the technique.

I’ve been having so much fun creating different things!


Like I said at the beginning, I CANNOT do it all. This past weekend at Sublimation Camp has reconfirmed that for me.
There are just too many cool projects and not enough time in the day.

My expertise is in the Silhouette software, Silhouette machines, and in troubleshooting Silhouette. There are just some areas that I am not an expert in. I love taking classes and learning new things. Sometimes that means knowing who to refer users to when they have a specific situation. We can all gain inspiration and creative ideas from others in the crafting community.
Follow these great resources above for tips & tricks to get creative ideas that you can adapt to your projects.

After attending the Sublimation Camp I bit the bullet and order a convection oven and finished my first sublimation tumbler. Of course, I’m hooked!
This design was part of the class by Charynn Olesheski with Pineapple Paper Co showing how to create it in ProCreate. I loved this class! I am no where near her skill level in ProCreate, but I did try. I used her design template and a font in this tumbler below.

For more sublimation tips with Silhouette check out these tutorials below:
Basic Sublimation Print from Silhouette
Printing Sublimation Designs from Silhouette Studio – Basics
Sublimation Markers and Silhouette

I would love to see what you are creating with your Silhouette software or machines!
Feel free to post on my Facebook group at 
Silhouette Secrets with EllyMae.

Save this for future reference by pinning the image below.

Enjoy !

This image has an empty alt attribute; its file name is logo.jpg

THANK YOU for your support! How can you help? Click HERE & buy a coffee.
Every little bit helps with the cost of running the site.

Or if you are looking for more in-depth, step-by-step classes, check out all of my online Silhouette classes on my Teachable site HERE.

SS Logo snip it
**This post may contain affiliate links. What that means is that I may receive compensation if you purchase through the links I have provided. The price you pay for the product or service is not higher but I may get compensated for sharing.
Posted on 1 Comment

5 “Secrets” to Cutting Crepe Paper with the Cameo 4

Originally published February 2020 – republished May 2022
I have jumped into cutting crepe paper on the Cameo 4 since the November 2019 All Things Silhouette Conference and the release of the new Cameo 4 machine.
And I have to say it’s addicting.

Crepe Paper Supplies copy
Affiliate links may be present in the following blog post and as an Amazon Associate I earn from qualifying purchases.

Today, I want to share my top 5 “secrets” to cutting crepe paper flowers on the new Cameo 4 with the rotary blade.

5 “Secrets” to cutting crepe paper on the Cameo 4

Secret #1 – Use a good sticky cutting mat!

Because of the stretch in crepe paper you want to make sure it is good & secure on the cutting mat. I use a new cutting mat that I designate for crepe paper, smooth it on straight with my hand, and then use a brayer to roll across it to make sure it is good and secure to the cutting mat. You want to try to get it as smooth as possible without stretching the crepe paper. Any bumps or folds in the crepe paper will cause uneven cuts. If the paper moves while cutting it will either not connect the cuts or it will bunch the crepe paper up.

IMG_20200202_135920371 copy

Won’t it stick too much to the cutting mat and tear?
No, so far I have not had this issue. If you are careful when removing the crepe paper after the cut, I have had no issues with it being too sticky. I do de-stick my mat after I first open it by applying it to my clean t-shirt or a clean cotton towel.

Secret #2 – Pick designs that will work well. 

The rotary blade is just like a hand-held rotary blade. It is not designed for intricate cuts. Think about if you enlarged the design, could you cut it with a hand-held rotary blade?

Single petal designs or broad petal & leaf designs are what I find that works well. Designs with lots of inner curves may not cut as well.

Single vs complex copy

Here are 10 flower designs I found in the Silhouette Design Store that would work with the Cameo 4 and rotary blade:

3D Flower (6) by Amy Robinson – Design #75970
3D Large Flower with Petals (2) by Alaa’ K – Design #196852
Anenome 3D – by The Bleu Dahlia – Design #271113
Giant Sunflower by Amanda McGee –Design #300726
Icelandic Poppy 3D by The Bleu Dahlia – Design #216825
Hellebore Double Petal by The Bleu Dahlia – Design #216816 
Oriental Lily 3D by The Bleu Dahlia – Design #217974
Starburst Flower – Big by Echo Park – Design #193696
Peony Flower – Small by Echo Park – Design #193711
Water Lily 3D – by The Bleu Dahlia – Design #271114
(See the bottom of this post for project photos of some of these designs)

Now, these files are originally designed for cutting paper flowers, so here is how I modified it for crepe paper. Each of these petals has a cut up the center to make it easier for paper assembly, however, with crepe paper that is not necessary. First, I scaled the design down to the size I wanted. Then, I right clicked and chose ungroup. Each design will vary in how it was created, so you may need to ungroup again to get the individual cut lines, or right click and release compound path.  Once they are all separate pieces, I deleted the middle cut line in the petals.

Anemone file copy

So it is one outer cut line to make the petal design. Then follow the instructions for the number of each petal that needs cut. Move the text instructions off the mat prior to cutting.

Anemone file petals copy

Note that a few of these designs mentioned are for giant flowers. You can still use them by scaling them down to what you need for the project you are completing. Now, you can cut out of cardstock, frosted paper, or crepe paper.
One design and so many options – from small projects to large projects.

IMG_20200203_135741479 copy

On these flower designs you will notice the parts for the stamen have lots of cut lines. One of the tips I picked up from watching the videos on the Lia Griffith site is to just cut a strip of crepe paper the same size that it shows in the software (or close) and then use your scissors really quick to make those fringed edges. Crepe paper is more fragile than cardstock & the Cameo 4 rotary blade is not designed for intricate cuts, so it would just shred trying to cut out the fringe.

Stamin bits copy

But, I think this brings up a few good points! First, flowers are all unique and it doesn’t have to be a perfectly cut edge because not every single petal on a flower is exactly the same in nature. And next, sometimes we may over-complicate things by wanting the machine to cut a rectangle shape out vs just grabbing a paper trimmer and cutting a section of crepe paper to 1″ x 4″.

IMG_20200203_153143178_MP copy

Although if I was cutting a bunch of them I would set up the Cameo to cut the rectangles out, but since it was just a couple flowers, the paper trimmer worked great.

And what about the leaves?

I found several petal sets in the Silhouette Design Store that can either be used for flower petals or leaves. There are so many possibilities when you mix and match these together.

Flower Petals Set by Alaa’ K – Design #186166
Flower Petals by Alaa’ K – Design #15463
Flower Petals by Alaa’ K – Design #15464
Flower Petals by Alaa’ K – Design #16305 

Secret #3 – Watch where the hooks and loops are. 

When you go to the Send tab and turn on the Tool 2 – Rotary blade, you will see “hooks” and “loops” appear on the screen around the design.

hooks and loops copy

These are part of the Smart Cut technology in the Silhouette software that determines how the blade will have to turn to rotate the rotary blade. The Smart Cut technology places hooks and loops where it determines is best to complete the cut of the design on the screen. These hooks and loops only show on the Send tab and are not parts that can be moved. However, you will notice that the hooks and loops will change depending on where the design is on the cutting mat, what the design shape is, and how many pieces are set to cut on the cutting mat.

Makes sure that there are no hooks and loops inside the design that is being cut and that each piece of the design has adequate space between the next piece.

Why the hooks & loops?

Think of using a hand-held rotary blade. It does not make sharp corners. You have to lift it and either turn the material or the direction that you are cutting to start a new direction.

Rotary blade example copy

If you wanted to cut this design in the photo above with a hand held rotary blade, you would not cut it all in one pass without lifting the blade up. You would have to make multiple cuts to change direction. The blue lines show an example of the motion you might use with a hand held rotary blade in order to cut this shape.

It is the same with the Cameo 4 Rotary blade. It has to lift, touch down to rotate the blade to the new direction & then start the next cut line.

You may have never noticed this before, but the regular Silhouette blades do the exact same thing at the beginning of the cut. Watch your Silhouette machine the next time you are cutting a material. The first move the housing does is move to the left side of the cutting mat and tap down once to get the swivel blade in the correct position.

Did you see the tape right at the beginning of the cut on the left edge of the mat? This orientates the blade tip to the correct location to begin the cut.

The big difference here is that the regular Silhouette cutting blades are a smaller, sharper angle, so it only has to do this at the beginning of the cut versus the Rotary blade that is a broader blade that can’t turn as sharp.

Secret #4 – Don’t fill the page with the design.

As tempting as it might be to go “all in”. Start with cutting 1 petal. Don’t fill the page with the entire file to be cut on the first try.

If that cuts well, then duplicate the image, move it next to the first piece, turn the cut lines off on the 1st design, and then send it to cut. This way you still know where the first design cut on your material.

Cut line off and on copy

2 tips here:
1 – Make sure that the design is selected to turn the cut lines on or off. Select the design by clicking on it and you will see a gray selection box around it. If there is nothing selected on the design mat, there is nothing to tell it to No Cut or Cut.
2 – Make sure that once the design is selected that you turn the cut lines Off under Tool 1 before turning the cut lines On on Tool 2.
Otherwise, you are telling the machine to complete the Action with both tools.

Secrets #5 – Just do it!

In my recent interview with Lia Griffith (found HERE) she said,
“When you are making a crepe paper flower, it is really hard to make an ugly crepe paper flower. It’s really hard…. I mean you can…. but, it’s really hard.
Every crepe paper flower is a beautiful crepe paper flower. “

Just like any other project – Just get started!

Just a warning though – It’s addictive! Lia said the same in her interview and I have been saying it since I started really working with it in December. The more I play with the it, the more ideas I have, and the greater the urge to just start cutting.

And….. as Terri’s grandson says, “But wait, there’s more……

Bonus “Secrets”

Watch this video on Lia Griffith’s YouTube channel

and next….

Grab Lia’s Crepe Paper Flowers book!

It is a great place to start for beginners as it is packed with information on crepe paper, tips on cutting, how to assemble the flowers, and how to arrange your creations. It has 21 different flower files and instructions that are perfect for a beginner to get started.

Do you have to buy the book to cut crepe paper?

No, but I’d highly recommend it!

Crepe paper is all new to me and I am soaking up as many tips as I can. I think anyone can do this with the right tools and resources. I found that in Lia Griffith Crepe Paper book and on her website at LiaGriffith.com.

Find my full tutorial on cutting crepe paper with your Cameo 4 and rotary blade here
Cutting Crepe Paper on the Cameo 4.

Crepe Paper Header

While I can share my “secrets” for cutting crepe paper on the Cameo 4 with the rotary blade, I am not an expert on what to do after it’s cut. I just followed the tips & directions I found on the Lia Griffith website and in her book.

To learn more about Lia Griffith find my full interview with HERE.
Lia is an energizing person and I hope that you feel that as you read through her answers about her journey, tips for beginners, flower favorites, and experiences in the interview.

Here are a few of the crepe paper flowers I have had fun creating.

Photo collage copy
Top left – Design #759703D Flower, top middle – Design #27113Anenome, top right – Design #271114 – Water Lily
Bottom left – Satsuma branch on LiaGriffith.com, bottom middle – Design #217974Oriental Lily, bottom right – Design #216816Hellebore

Rose bouquet copy
Lia Griffith Crepe Paper Rose Flower Kit all cut on the Cameo 4 with the rotary blade

Can you cut the crepe paper on older Silhouette models?

No, not easily because of how the crepe paper is made. The regular Silhouette blades just drag and tear across the crepe paper. But, the rotary blade made for the Cameo 4 machine, rolls across the material when it cuts and works beautifully for this.

If you are looking to add a Cameo 4 and rotary blade to your tools here are a few places to find it:
Amazon
Heat Press Nation
Silhouette America
Swing Design

I hope that you will get started cutting this new material with your Cameo 4!

Pin the image below to save it for future reference.

Pinterest photo

Enjoy!

SS_Signature copySS Logo snip it

**This post may contain affiliate links. What that means is that I may receive compensation if you purchase through the links I have provided. The price you pay for the product or service is not higher but I may get compensated for sharing.
Posted on Leave a comment

New! Troubleshooting Cut Issues with Silhouette Video

We troubleshoot hundreds maybe even thousands of Silhouette issues on the Silhouette Secrets with EllyMae Facebook group each week. Over the years of troubleshooting and teaching, we have found that most cut issues can be corrected by following a few simple steps.
However, the biggest factor here is you have to start at Step 1.
If you do not, you may only be applying a band-aid to the issue and not resolving the actual issue. You may have inconsistent cut results which can lead to more frustration if the source of the issue is not solved.

In December 2021 I published a troubleshooting tutorial on the blog and it has been extremely popular. Because this is such a big topic for Silhouette users, I’ve now released it in video format and in a free PDF printable format as well.

Check out the new YouTube Video on my channel HERE or clicking the photo below.

The free PDF Guide is available as a download exclusively for confirmed newsletter subscribers.
Download the PDF and click on the blue links in the document to get more information and print it out for a handy reference.

Join the Newsletter

Subscribe to get our latest content by email.
    We respect your privacy. Unsubscribe at any time.

    I hope this helps you with any of your cutting issues you might have and save you some frustration!

    Watching your machine and learning how it works can help you in pinpointing cut issues that you may encounter. This will save you time, frustration, and materials in the future.

    Please let me know if you have any questions.
    Happy Cutting!

    Save this for future reference by pinning the image below.

    Enjoy !

    THANK YOU for your support! How can you help? Click HERE & buy a coffee.
    Every little bit helps with the cost of running the site.

    Silhouette Classes

    Never stop learning! Let me help you take the anxiety out of learning with Silhouette and get to creating faster! My Silhouette classes are heavily focused on software, so you can take the skills & techniques taught and apply them to many future projects!

    Silhouette step-by-step Classes by Silhouette Secrets+

    **This post may contain affiliate links. What that means is that I may receive compensation if you purchase through the links I have provided. The price you pay for the product or service is not higher but I may get compensated for sharing.

    Posted on Leave a comment

    Chalkboard Décor with the Curio

    Just a quick post today to share my newest Silhouette class. It is a Silhouette Curio class that I was in the process of creating for an in-person event before everything was shut down a couple years ago. I finally picked it back up where I left off and it is now available for all to view anytime after you’ve registered on my Teachable site.

    New! Chalkboard Decor with the Silhouette Curio class is now available.

    This is a step-by-step class on using a chalk marker in the Silhouette Curio to sketch directly on a chalkboard.
    Find the class and full details on my Teachable site HERE

    Check out the demo video on my YouTube channel HERE.

    I had so much fun playing with the chalk marker and these chalkboard signs.
    Here are a few more that I created

    Affiliate links may be present in the below and as an Amazon Associate I earn from qualifying purchases. What that means is that I may receive compensation if you purchase through the links I have provided. The price you pay for the product or service is not higher but I may get compensated for sharing.

    These are the supplies I used in this class to create these chalkboards:
    – Silhouette Curio machine, Silhouette small base cutting mat, Curio platforms and base
    – Chalkboard sign – Michaels – 6.6” square, arrow shape, rectangle shape
    Michaels bulk chalkboard options – rectangle 8 pk, arrow 8 pk, Square 8 pk
    or Amazon
    NOTE: chalkboards can vary in thickness – it needs to be under 5 mm thick & fit on the Curio base
    No frames or borders. Remove any twine attached.

    Create by Cali Arroyo – Design #215617
    Bistro Chalk Marker by Marvy Uchida White
    – Optional: Bistro Markers Colors – Fluorescent, Primary
    – Silhouette Pen Holder Type A – Silhouette America, Amazon
    Digital Calipers – highly recommend for Curio projects
    – Ruler with mm
    White Chalk
    – Clean Towel
    – Notepad & pen
    – Optional designs also featured: Design #317171, Design #404761, Design #304784,
    Design #400058, Design #229894, Design #154513
    Optional: extra twine, scissors

    I have so many more ideas I want to try and test!

    I hope you will join me in this Silhouette class!
    Check out the full details on my Teachable site HERE

    Whether you join or not, I’d love to see what you are creating with your Silhouette software & machines!
    Feel free to post on my Facebook group at 
    Silhouette Secrets with EllyMae.

    Save this for future reference by pinning the image below.

    Enjoy !

    This image has an empty alt attribute; its file name is logo.jpg

    THANK YOU for your support! How can you help? Click HERE & buy a coffee.
    Every little bit helps with the cost of running the site.

    Or if you are looking for more in-depth, step-by-step classes, check out all of my online Silhouette classes on my Teachable site HERE.

    SS Logo snip it
    **This post may contain affiliate links. What that means is that I may receive compensation if you purchase through the links I have provided. The price you pay for the product or service is not higher but I may get compensated for sharing.
    Posted on Leave a comment

    Cameo Pro Project Video Timelapse

    This week I cut the pieces to make up 40 card kits for an event I’m teaching at. I set the video camera up to record a time lapse of the entire cutting process.

    This was 3 hours of real time cutting.
    23 – 12″ x 12″ sheets of cardstock cut on a 24″ x 24″ cutting mat with the Cameo Pro
    40 card bases
    80 daisy pieces
    320 flower center pieces
    80 leaves

    I have added the video to my YouTube channel HERE.
    It is condensed down to 7 minutes for the 3 hours in real time it took.

    I’m sharing more tips below too!

    Tips for cutting 4 sheets of cardstock on the
    Cameo Pro at one time.

    Guides

    Use Guides in the Silhouette Studio software placed at the 12″ marks to show where your pages will meet. Keep the design away from the edges of the cardstock.

    Guides are a Designer Edition upgrade or higher feature. For more on guides check out the Let’s Explore v4 – Page Setup Panel Tab 2 tutorial HERE.

    Cameo Pro Workspace

    One of the biggest issues I see when troubleshooting issues on the Cameo Pro is not having an adequate workspace setup for it to function properly.

    This machine is big and it needs a large workspace to function and feed properly. It cannot work against gravity or the cuts will not line up consistently.

    If you are using the 24″ cutting mat, it should have a workspace of 38″- 40″ in width for the machine to be securely and stable on and 52″ of length that is absolutely flat. This allows for 22″ in front and 22″ behind the machine for it to feed the cutting mat as flat as possible in and out of the machine as it cuts.

    Check out this post HERE on the Cameo Pro Table Options for more tips & workspace suggestions.

    Make sure the right roller is locked in position properly

    The right roller should be rolling on the edge of the cutting mat and not across the adhesive on the cutting mat. The middle indent of the right roller should be lined up with the gray arrow on the machine at the 24″ mat mark.

    The right roller can only be locked in place where the gray arrows point to on the machine roller bar. For the 24″ cutting mat, that is the far right gray arrow.

    If you look at your machine closely, you will see that the right roller is directly under the indent on the white pinch bar. That is the only place that the roller makes contact with the surface underneath, so placement is very important for feeding properly.

    If the right roller is not placed properly you may experience future cut issues which can include:
    – gumming up the roller and there is no easy way to clean this roller on the Pro
    – wearing a groove in the cutting mat which causes an uneven surface for cutting
    – mat can get stuck inside the machine
    – feed issues as the rollers do not roll at the same rate of speed because the right roller is either getting stuck or the roller is slipping on the material
    – affect print and cut accuracy if the rollers are rolling at different rates
    – cuts not connecting
    – mat can skew
    Note: the rollers rolling at different rates is not something you can usually see with the naked eye, even when studied closely. However, you can see it when the cuts do not connect completely.

    Cutting Mat is loaded properly

    The Cameo Pro is different than other machine models. It has 2 load lines. The line on the left side of the arrows is ONLY for the 24″ cutting mat.

    The line on the right side of the arrows is for ALL other sizes of materials and cutting mats.

    If the cutting mat is not loaded properly it can cause feed issues or it to skew in the machine as it’s cutting.

    Above I shared a photo of the right roller, but where is the left one exactly?
    If you look closely at the left roller, it is directly below the dot on the roller bar. This is where the roller grips the mat or material.

    The 24″ x 24″ mat is a monster of a cutting mat and it has heft to it. The load line and the right roller placement is very specifically designed to gripe each side of the mat so it can feed it in properly.

    If the mat catches on something or does not load completely straight, unload it and load it again – as many times as needed. If it does not start off straight, it’s not going to cut in the properly locations and the cuts may be off.
    On my 1st set of daisies being cut, I did not notice that the mat was slightly off and it did affect a few of the flowers getting cut off a bit.
    It happens – plan for it!
    If in doubt, always reload the cutting mat.

    Use the Autoload feature whenever possible

    This will help to ensure that you are able to support the mat and hold it up to the rollers as even as possible. The monster mat can be difficult to get the hang of, but keep on practicing and you will get it. It is much easier to load if you have the proper clearance in front of the machine to help keep the mat flat and not hanging down over the edge.

    Check out this video on how the Autoload feature works on my YouTube channel HERE.

    Clean Debris off the Cutting Mat

    Any debris on the cutting mat can interfere with the cut being clean as it creates an uneven cutting surface. Clean off any previous bits of debris left behind by the materials.

    In the video I shared above, when I load the 2nd set of white cardstock, you can see me smoothing it down to secure it to the mat. When I did, I noticed uneven areas under the cardstock and I lifted it to clean it and placed it back down. Any debris can affect your cuts.

    Weed carefully.

    Sure you see videos of people all the time that seem to just rip off the excess of the material whether it’s for cardstock or vinyl. But, it is not always the case.

    Go slow when weeding and you will find you can save your design most times. My Autoblade is very well used and it’s still cutting well, but the design I was using had interior corners and cuts. It cut, but by carefully removing the excess cardstock, I didn’t rip off any petals from the flowers or pieces of the centers.

    I hope these tips have helped to show you a few things about the Cameo Pro!
    For more tips and troubleshooting on the Cameo Pro –
    check out the header on the blog HERE.

    Check out how I created this Pop Out Topper card in the Silhouette Studio software in this video tutorial on my YouTube channel HERE.

    I would love to see what you are creating with your Silhouette software or machines!
    Feel free to post on my Facebook group at 
    Silhouette Secrets with EllyMae.

    Save this for future reference by pinning the image below.

    Enjoy !

    This image has an empty alt attribute; its file name is logo.jpg

    THANK YOU for your support! How can you help? Click HERE & buy a coffee.
    Every little bit helps with the cost of running the site.

    SS Logo snip it
    **This post may contain affiliate links. What that means is that I may receive compensation if you purchase through the links I have provided. The price you pay for the product or service is not higher but I may get compensated for sharing.
    Posted on 1 Comment

    DIY Pop Out Top Place Card: Versatile as a Treat Topper or Card for Any Celebration

    Silhouette Secrets+ with EllyMae

    How to Create a Pop Out Top Place Card

    This pop out top place card technique could be used to create many different projects including a treat topper, a place card for an event, a card for a friend, and more!

    Pop Out Place Card created with Silhouette

    Affiliate links may be present in the below and as an Amazon Associate I earn from qualifying purchases.

    I used the daisy from the Envelope with 3D Daisy Flowers by Lucilla Paper – Design #350668 to create this pop out top place card example.

    Daisy Pop Top Place Card

    Here’s a fun twist on the Pop Out Top Place Card! For this project, I added an adorable Bunny Butt design to transform it into a cute treat topper! This is just one of the many ways you can customize the place card for different occasions and projects. The possibilities are endless! Whether you’re prepping for a party or just want to make something fun and unique, this bunny-inspired treat topper is sure to bring smiles.

    Pop Top Treat Bag Toppers with Silhouette

    For this treat topper, I used the Jumping Easter Bunny Butt Outline by Wispy Willow Designs – Design #404567 and LD Pirate Pegleg font by Illustration Ink – Design #381497.

    What kind of project would you use the pop out top place card technique for?

    Check out the video tutorial on the Silhouette Secrets+ YouTube channel HERE to see how this pop out top place card was created in the Silhouette Studio software.

    Pop Top Place Card with Silhouette

    Be sure to watch this video on Shaping a Paper Daisy Flower for creative tips to make your paper projects even more unique!

    Shaping a Paper Daisy

    Save this for future reference by pinning the image below.

    Pop Top Place Card with Silhouette Pin

    Find more tutorials in the A to Z to Silhouette on the website HERE.

    Enjoy !

    THANK YOU for your support! How can you help? Click HERE & buy a coffee. Every little bit helps with the cost of running the site.

    Silhouette Classes

    Never stop learning! Let me help you take the anxiety out of learning with Silhouette and get to creating faster! My Silhouette classes are heavily focused on software, so you can take the skills & techniques taught and apply them to many future projects!

    Silhouette step-by-step Classes by Silhouette Secrets+

    Silhouette Secrets+ with EllyMae
    **This post may contain affiliate links. What that means is that I may receive compensation if you purchase through the links I have provided. The price you pay for the product or service is not higher but I may get compensated for sharing.** The pop out top place card technique discussed here can be adapted based on project needs.
    Posted on 4 Comments

    Let’s Explore v4 – Text to Path

    How do you place text around a circle? This is the question I see most often. It’s a very neat feature called Text to Path and it’s pretty simple to use.

    I have updated this tutorial to include a video that is available on my
    YouTube channel HERE.

    Check out the full written tutorial below showing all the different aspects of Text to Path.

    Text to path

    *original post written 3/2019 created in version 4.2 of the Silhouette software – all features are still current and up to day for 3/2022 v4.4

    Let’s explore how to take ordinary text and make it more interesting by adding it onto a path. The most common way I see this used is when you want the text to form to a circle or oval shape.
    But why stop there? You can add text onto so many other paths.

    Text to Path photo copy

    Let’s take a look at how to do this.

    Click on the Text tool on the left side, then click on the mat to get a text cursor and type out the text.

    Text to Path 1 copy

    Next, I fill my text with color using the Fill Color Panel on the right side. This helps to see the text better and select the object easier.

    Then, click on the Text Style Panel on the right side and change the text style.

    Now, draw the shape that you want the text to snap to. Let’s start with an oval, since this is the most common shape I see users try to use.
    Note: I have increased the Line thickness so that you can see my shape easier.

    Text to Path on circle copy

    Double click on the text and a control point will appear in the bottom left corner.
    Note: if the text has been changed in any way, such as welding or converting to path, it is no longer editable text and this will not appear.

    Text to Path Circle2 copy

    Grab the control point and drag it to the object you want it to conform to.

    When the text snaps to the shape, a slider bar will appear on the left side and the text can be adjusted.

    Text slider out copy

    Moving the slider up on the bar, moves the text out away from the shape.

    Text Slider in copy

    Moving the slider down on the bar, moves the text inside of the line of the shape.

    Make any additional changes to the text, such as increasing the character spacing, etc.

    If you have a script text, right click and choose Weld.

    Weld copy

    This will weld any overlapping letters and then release the font from the shape.
    Now, keep in mind that the text is no longer editable once it is welded. Make a copy and pull it to the side if you want to keep the original text to go back to.

    Each font style is going to look different and you may need to adjust the character spacing on the Text Style Panel to make it overlap so it welds.

    If the text is not overlapping, right click on the text and choose Convert to Path.

    Convert to path copy

    This will release the font from the shape.
    Now, the text is a design and no longer editable text.

    This is an important step, especially if you are cutting the design from HTV and need to flip the image before you cut. If the text is not converted to a path, it will not flip correctly.

    Flip Horizontally copy

    Now, if that ever happens, you know why and how to fix it.
    Make sure to convert to path or weld before you flip the design.

    Now, let’s play with some shapes.

    Flexi-Shapes are a great option to play with. This is a Designer Edition Plus or Business Edition upgrade feature only. Flexi-shapes are found on the left side.
    More details on Flexi-Shapes can be found HERE.
    I chose the star and then changed the points to 5.

    Flexi Shapes copy

    I have increased the Line thickness again, so it can be seen better.

    Now, type out the text.

    If the text does not fit on one line, grab the teal slider bar on the right side and move it farther right, until all the text is on one line.

    Now, grab the control point that appears in the bottom left corner of the text box and drag it to the shape. Move it around the shape until you have it how you like.

    Twinkle star control point copy

    Each font and shape will vary in what looks better or if it splits words, etc. Play with the character spacing, the text size, and more until the desired look is achieved.

    Want the text on a wave?

    Use the Draw Curve Shape found under the Line tools on the left side and draw your wave.

    Text to wave copy

    Type out the text, grab the control point in the bottom left, and drag to the wavy line.

    Text to wave2 copy

    When it’s positioned how you like, right click and choose Convert to Path. Now, the line can moved away.

    Wave finished copy

    Now, what can you think of to create with the Text to Path feature?

    What about adding to a pre-made design to personalize it?

    Granny design copy
    Up Up Away copy

    Or inside a banner?

    Happy Birthday Banners copy

    A design for a card or a sign on a wall?

    Welcome Little One copy

    Each one of these shapes works a bit differently and you will need to play with it to see how the Text to Path snaps to the image.

    Don’t forget to make a copy of the design before right clicking on the image and choosing Convert to Path.

    I would love to see what you create with this feature!

    Affiliate links may be present in the following blog post and as an Amazon Associate I earn from qualifying purchases.

    Here are some of the designs used in the examples above:
    Heart Arrow by Sophie Gallo – Design #177769
    Hot Air Balloon by Rhonna Farrer – Design #182992
    Banner by American Crafts – Design #19529
    Banner by Skyla Design – Design #267349
    Basic Banner by Silhouette – Design #141887
    Baby Footprint Heart by Studio Illustrado – Design #198883

    I would love to see what you are creating with your Silhouette software or machines!
    Or if you have any questions, feel free to post photos or questions on my Facebook group at 
    Silhouette Secrets with EllyMae.

    Save this for future reference by pinning the image below.

    Enjoy !

    THANK YOU for your support! How can you help? Click HERE & buy a coffee.
    Every little bit helps with the cost of running the site.

    Silhouette Classes

    Never stop learning! Let me help you take the anxiety out of learning with Silhouette and get to creating faster! My Silhouette classes are heavily focused on software, so you can take the skills & techniques taught and apply them to many future projects!

    Silhouette step-by-step Classes by Silhouette Secrets+

    SS Logo snip it
    **This post may contain affiliate links. What that means is that I may receive compensation if you purchase through the links I have provided. The price you pay for the product or service is not higher but I may get compensated for sharing.
    Posted on 2 Comments

    Behind the Scenes Look

    This past week I released a behind the scenes look at a project I was creating to my YouTube channel.

    I woke up with an idea and just had to get it out of my head.

    Affiliate links may be present in the following blog post and as an Amazon Associate I earn from qualifying purchases.

    I don’t know why, but the Magnolia designs in the Silhouette Design Store have been calling my name for awhile now.

    The designs I used are:
    Magnolia by Sophie Gallo – Design #345231
    Magnolia Flowers by Sophie Gallo – Design #341162

    This design was not too hard to create.
    I used the Drawing Tools to create a few rectangle for the backing board and the frame.
    The frame is 2 rectangles of different sizes and then I selected both the rectangles at the same time, right clicked and chose Make Compound Path. This turns it from 2 rectangles stacked on top of each other, into a frame.

    Compound Paths are often the most difficult concept for a Silhouette user to understand, but when that light bulb moment comes on, it’s like a whole new world opens up. Even after a user gets how compound paths work, sometimes it’s still a matter of just “let’s see what happens” with a design to see what it will do or how it’s made up.
    Don’t be afraid to make a copy of a design and just “see what happens”

    Check out more on Compound Paths HERE.
    I also used them in this tutorial on Creating a Layered Cut File from an Outline HERE.

    Then I added the designs to the frames and sized them as needed to fit.

    This project took 2 days to completely finish and I tried to record each step of the way. I was able to condense all the time lapse down into about 38 minutes and still be able to show a lot of the process and steps taken.

    The finished designs were cut on my Glowforge and then I painted and glued the pieces together.

    Check out the Behind the Scenes video HERE on my YouTube channel.

    Do you ever have those ideas that you just want to get created?
    I hope you find time to just get started!

    I would love to see what you are creating with your Silhouette software or machines!
    Or if you have any questions, feel free to post photos or questions on my Facebook group at 
    Silhouette Secrets with EllyMae.

    Save this for future reference by pinning the image below.

    Enjoy !

    This image has an empty alt attribute; its file name is logo.jpg

    THANK YOU for your support! How can you help? Click HERE & buy a coffee.
    Every little bit helps with the cost of running the site.

    Or if you are looking for more in-depth, step-by-step classes, check out all of my online Silhouette classes on my Teachable site HERE.

    SS Logo snip it
    **This post may contain affiliate links. What that means is that I may receive compensation if you purchase through the links I have provided. The price you pay for the product or service is not higher but I may get compensated for sharing.
    Posted on Leave a comment

    New Silhouette Curio class released!

    I have so much fun playing with my Silhouette Curio and all the things it can do!
    I want to share that with you!
    Join me in this Silhouette Curio class to create an acrylic etched panel!
    Check out the class HERE.

    This is an Advanced Beginner Curio class that will cover the setup step-by-step to getting the Curio ready to etch, creating a template in Silhouette Studio for the etching, and then creating the design to be etched. You will create your own word art design using tools in the Silhouette Studio software! Tips are shared throughout the video class for getting successful etches with your Silhouette Curio machine.

    Check out the class

    HERE

    Here is a sneak peek at the class content and the videos included:

    Supplies & Setup Video – 17:55 minutes

    Creating the Etched Acrylic Panel Template in Silhouette Studio – 31:30 minutes
    – Using the drawing tools to create a template
    – Creating template with nail holes to avoid
    – Alignment Tools
    – Move By Tool

    Designing & Etching the Acrylic Panel in Silhouette Studio – 1 hour 3 minutes
    – Opening Starfish border Design #3653
    – Compound paths
    – Text Tool
    – Creating the design with multiple lines of text
    – Creating “word art” with text
    – Adding an etch fill
    – “Secret” to getting a tighter etch fill
    – Setting up the Curio to etch
    – Etching
    – Finish and assembly

    Class Supplies:

    Affiliate links are present in the following supply list and as an Amazon Associate, I earn from qualifying purchases. The cost to you is no different, but I may earn a commission by you using the links provided.

    -Silhouette Curio machine
    Silhouette Etching Tool
    – New Silhouette Curio Cutting mat – highly recommend a sticky mat
    Starfish border Design by Calli Arroyo – Design #3653
    Fish Grill font by 7nTypes – Design #292330
    4” x 6” Acrylic Panel with 4 holes from Craft Chameleon
    Double sided sticky tape from Craft Chameleon
    – 6” x 8” Basswood board by Walnut Hollow – Amazon or Walnut Hollow
    #4 x ½” Sheet Metal Screws
    – Dark colored paint or stain
    – Paint brush
    – Screwdriver
    Hand drill
    – Weeding tool
    – Optional: baby wipes, Teflon sheet, apron

    Optional:
    LW Wide Marker Font by Lori Whitlock – Design #82132
    Acrylic Panel no holes from Craft Chameleon
    Wood stand

    Additional Resources

    No matter how many times I etch a project, even the same design, I still do a little happy dance when it’s finished!

    Find this class on my Teachable site HERE

    I love being able to customize my gifts & projects with the Silhouette Curio!

    Want more ideas of what you can create with your Curio?
    Check this out – Gift Ideas with your Silhouette Curio

    Just getting started with your Curio?
    The possibilities are endless in what you can create!
    Check out the other Silhouette Curio class on my Teachable site HERE.

    I would love to see what you are creating with your Silhouette software or machines!
    Feel free to post on my Facebook group at 
    Silhouette Secrets with EllyMae.

    Save this for future reference by pinning the image below.

    Enjoy !

    This image has an empty alt attribute; its file name is logo.jpg

    THANK YOU for your support! How can you help? Click HERE & buy a coffee.
    Every little bit helps with the cost of running the site.

    SS Logo snip it
    **This post may contain affiliate links. What that means is that I may receive compensation if you purchase through the links I have provided. The price you pay for the product or service is not higher but I may get compensated for sharing.
    Posted on 5 Comments

    Silhouette Print and Cut with Foil Embellishments

    Silhouette Secrets+ with EllyMae

    Want to take your Silhouette projects to the next level? Print and cut designs with foil embellishments might be the next project for you!

    Combining techniques such as adding Foil Quill accents to a print and cut project can give it a little pop.

    This technique takes two amazing features and combines them together. It can be as simple or complex as you want to make it and the end result can be amazing and unique.

    This post is inspired by my friend Teresa P. who does some amazing Foil Quill work and combines it with print and cut. The credit goes to her for this post as she is a big inspiration!

    To get started with this combination, I would recommend being familiar with both the print and cut process and using the Foil Quill. Here are 2 basic tutorials:
    Let’s Explore v4 – Print and Cut Basics
    Silhouette Cameo 4 – Beginner Foil Quill

    A few other tools to be familiar with in the Silhouette software for this technique are:
    Let’s Explore v4 – Basic Trace
    Let’s Explore v4 – Trace by Color
    Let’s Explore v4 – Freehand Drawing Tools
    Let’s Explore v4 – Drawing Tools

    You won’t use all of these tools at the same time, but each tool serves a purpose and one may work better for you on a certain graphic versus another. You may find that you know more than you realize in the software.

    What does it mean to combine a print and cut project with Foil Quill?
    Basically, you are telling the software that you want to foil certain areas on top of a print and cut. Since a print and cut has registration marks, it can read where the design is on the page to know where you are telling it to foil.

    However, each design may vary in what you need to do to tell it where to foil. You may have to create a “cut” line by tracing, drawing, etc. in order for it to know where you want to foil on top of the print and cut.

    Tutorial written in Silhouette Studio v4.4.552
    Affiliate links may be present in the following blog post and as an Amazon Associate, I earn from qualifying purchases.

    How to Add Foil Accents to Print and Cut Projects

    Set up print and cut page with the design to be used.

    I am using Watercolor Almond Flowers Greeting Card by Graphic House Design – Design #398797.

    On the Page Setup Panel – Tab 1, choose the machine, cutting mat, and media size.
    Check the boxes next to Show Print Border and Show Cut Border.

    Silhouette Studio Software showing design on the screen set up for print and cut.

    Tip – It helps to place the design towards the bottom of the page if possible. You do not want to unload the mat after it’s foiled, so you can send the design to be cut after it’s foiled.

    On the Page Setup Panel – Tab 3, turn the Registration Marks on and click the Restore Defaults button.

    Tip: using the system defaults will give you the most accurate print and cut. I recommend using the defaults especially if you are just getting started with print and cut.

    Use File > Print > Print to print the page.

    Silhouette Studio Software showing a print window.

    Tips:
    – Once the page is printed, do not move the design on the page. If you accidentally move the design use the Undo button.
    – This is a great time to use the Layers Panel and lock the layer with the graphic image
    on it so it does not move. Create a new “working layer” to complete the following steps.

    Place the printed page on the cutting mat in the exact location (top left corner) on the cutting mat as it shows on the design screen.

    Silhouette Studio software showing where to place the printed page on the Silhouette cutting mat.

    Using drawing tools or the trace panel, create cut lines where you want to add foil quill.

    In this example, I used the Freehand Drawing Tools to trace around the areas of the design that I wanted to fill with the Foil Quill.

    Silhouette Studio software showing drawing around elements on the page to create lines.

    Add a fill to the shape using the Line Effects/Sketch fill panel.

    Silhouette Studio software page showing how to fill in designs with sketch filles.

    I used a crosshatched fill with 0.010″ spacing and an edge effect in the Line Style/Sketch Panel.

    Set the sketch lines to a different color than the cut line color using the Line Style Panel – Tab 2.

    I use red for my cut lines and blue for sketch lines.

    Secure foil on top of the area to be foiled.

    Shows the placement of foil on top of printed design for foil setup.

    Tips:
    – Use washi tape or a low tack tape to secure the foil onto the page. Be careful when removing so as not to tear the paper or remove the ink.
    – Keep the foil & tape away from the registration marks area so it does not interfere with the reading of the print and cut.
    – Make sure the foil is secure and will not catch as the mat moves back and forth in the machine.

    Click on the Send tab. Choose the cut by Line Color.

    Silhouette Studio software showing how to set up a project by Line Color.

    Choose the Material settings on the Send tab for each color.

    Uncheck the line color(s) for the cut lines and only have the Foil Quill lines checked.

    Send it to foil.

    Shows a glance at the foiling completed on the print and cut job.

    DO NOT unload the cutting mat when finished.

    Carefully check the foil and remove carefully.

    Uncheck the foil color lines and check the cut lines.

    Silhouette Studio software showing how to switch to the next step in the process on the Line Color tab.

    Switch the tools from the Foil Quill to a blade if needed and send it to cut.

    Finished photo of foil and print and cut project cut out.

    Enjoy your foil accented print and cut design.

    Finished photo of the foiling section on the print and cut project.

    Now it’s time to practice!

    Choose designs and then decide what will work best for creating the cut lines to fill with a line effect/sketch fill to foil accents with.

    This could be a great addition to cards, stickers, scrapbook pages, or many more projects.

    Here are a few examples I created using the same techniques.

    Another project photo showing a foiled finished card with Happy Anniversary on it.
    Anniversary card with sentiment & accents in gold foil.
    Happy Anniversary created with Samantha Craft font found HERE.
    Finished project foiled card with Happy Birthday to You on it.
    Trace tool used for the geometric shapes and added sentiment in gold foil.
    Geometric Floral Frame by Rhonna Farrer – Design #293654

    Check out a quick demo video of the foiling process for the Happy Birthday card above on my YouTube channel HERE.

    Photo of a floral Christmas wreath that has foiled elements added to it.
    Christmas wreath accented with green & pink foils.
    Christmas Wreath by Echo Park – Design #162745

    Looking to add a Foil Quill to your tools?
    Find it at Joanns, Amazon, Swing Design, Scrapbook Pal
    Check out the supply list I used in the Foil Quill Beginner’s Tutorial HERE

    I would love to see what you are creating with your Silhouette software or machines!
    Or if you have any questions, feel free to post photos or questions on my Facebook group at 
    Silhouette Secrets with EllyMae.
    Check out the Foil Quill Album on the Facebook group HERE.

    Save this for future reference by pinning the image below.

    Enjoy!

    THANK YOU for your support! How can you help? Click HERE & buy a coffee.
    Every little bit helps with the cost of running the site.

    Silhouette Classes

    Never stop learning! Let me help you take the anxiety out of learning with Silhouette and get to creating faster! My Silhouette classes are heavily focused on software, so you can take the skills & techniques taught and apply them to many future projects!

    Silhouette step-by-step Classes by Silhouette Secrets+

    Silhouette Secrets+ with EllyMae

    **This post may contain affiliate links. What that means is that I may receive compensation if you purchase through the links I have provided. The price you pay for the product or service is not higher but I may get compensated for sharing.