Affiliate links may be present in the below and as an Amazon Associate I earn from qualifying purchases.What that means is that I may receive compensation if you purchase through the links I have provided. The price you pay for the product or service is not higher but I may get compensated for sharing.
Last week Siser announced a new product called Siser EasyColor DTV. This new product is an actual Heat Transfer Vinyl that can be printed with a home, inkjet printer.
Up until now there has been a product on the market called Heat Transfer Paper, which many users get confused by and call printable HTV. But, it’s really not. It is paper, not actual vinyl. I’ve used several brands and had success with it and have even taught classes using it. Each brand may have different results.
Now, there is a new option out there. Siser EasyColor DTV and I’ve been testing it this past week. So far, I am loving it!
I wanted to share a bit about that process so I made up a “quick” video. I say “quick” because it is longer than I intended as I give a lot of tips about print and cut in the video. We troubleshoot thousands of Silhouette issues each week on social media and most times it is something that can easily be fixed to get successful print and cuts. So I shared several of those tips in the video. I want YOU to be successful and it’s always best to practice the print and cut technique on copy paper or cardstock before using your more expensive materials such as EasyColor DTV.
I have so many ideas to use this material with and cannot wait to share more!
I would love to see what you are creating with your Silhouette software or machines! Feel free to post on my Facebook group at Silhouette Secrets with EllyMae.
Save this for future reference by pinning the image below.
Enjoy !
THANK YOU for your support! How can you help? Click HERE & buy a coffee. Every little bit helps with the cost of running the site.
Or if you are looking for more in-depth, step-by-step classes, check out all of my online Silhouette classes on my Teachable site HERE.
**This post may contain affiliate links. What that means is that I may receive compensation if you purchase through the links I have provided. The price you pay for the product or service is not higher but I may get compensated for sharing.
There are several things you can do for your Silhouette machine maintenance. In 2021, I published a tutorial on several things you can do to keep your machines in good condition. Check out the Silhouette Machine Maintenance tutorial HERE.
One of those things I touched on was the cutting strip on the Silhouette machines. I changed mine this year after 2 years of owning the Cameo 4 and I was surprised by what I found. Read below to see what I found on my machine. This is a very important piece. Let’s explore more about that in detail.
Cutting Strip
The cutting strip is the rubber strip that runs below the housing of all Silhouette model machines except the Curio, Alta, and Mint.
If it’s damaged, it will cause inconsistent cutting issues that have a wide range of results. This could be missed areas cut, cutting too deep, not cutting at all, blade getting stuck, etc. For each user it can be different because each situation is different.
When we troubleshoot, the cutting strip is the last thing we look at if nothing else has fixed it. But we first go through everything else that could be affecting the cut. The cutting strip is what provides the even surface underneath where the blade cuts. If that is uneven from damage, that can affect the cut.
The cutting strip is an important component of how the machine can complete the cuts whether you are using a mat or cutting matless. It provides the “solid” bottom to where the blade cuts in order to complete that cut. If it is uneven or missing, the blade just pushes down and meets no resistance, which means the material gets pushed into a “hole”. The cut will be incomplete, missing areas, etc.
Damage to the cutting strip may be visible or able to be felt by running your hand along the strip. But, often times we may not even be able to see the damage that there is to the cutting strip because it’s translucent and only seen when it’s removed. That was the case for my Cameo 4. The damage was not visible to me. We won’t even talk about my Cameo 1, my cutting strip looks like a complete wreck, but it still cuts perfectly fine, so I do not mess with it.
Here is mine after replacing it on my Cameo 4. Keep in mind that this is after 2 years of thousands and thousands of cuts, class development, and testing on the Cameo 4.
Lines cut through and a chunk missing on the edge of the cutting strip.
More cuts and damage to the cutting strip.
Completely cut through on the end.
Damage to the cutting strip can happen for several reasons. Here are a few, however, this is not an extensive list. – cut settings too deep – blade depth too deep – blade getting stuck in the material or mat – sending to cut without material loaded – using the Kraft or Rotary blade with too deep of settings – cutting completely through materials with no mat
For those who replaced and it didn’t fix the issue, it’s generally for 2 reasons. 1. It was not the issue to begin with. 2. They didn’t install it completely flat. I’ve seen users rush and not remove the old adhesive completely or install it with an edge lifted. Both will affect the cuts. If the instructions are followed carefully, it is pretty easy to do.
Affiliate links may be present in the below and as an Amazon Associate I earn from qualifying purchases.What that means is that I may receive compensation if you purchase through the links I have provided. The price you pay for the product or service is not higher but I may get compensated for sharing.
How to Replace the Cutting Strip
The cutting strip can be replaced easily if the directions are followed carefully. The hardest part of the task is removing the adhesive completely from beneath the cutting strip. But, it is the most important part! If the cutting strip is not completely flat, it can cause future cutting issues.
I found that using the Silhouette Pick Me Up Tool and a little bit of elbow grease mixed in with some patience, that it was not difficult at all.
An alcohol swab will help remove some of the sticky residue and make the surface clean for the application.
Next, make sure you buy the correct cutting strip for your machine model.
Then follow the instructions step-by-step from Silhouette America found HERE. I printed them off and found it very easy to follow.
Ta-da! Nice new cutting strip ready for many Silhouette projects.
Enjoy !
THANK YOU for your support! How can you help? Click HERE & buy a coffee. Every little bit helps with the cost of running the site.
Or if you are looking for more in-depth, step-by-step classes, check out all of my online Silhouette classes on my Teachable site HERE.
**This post may contain affiliate links. What that means is that I may receive compensation if you purchase through the links I have provided. The price you pay for the product or service is not higher but I may get compensated for sharing.
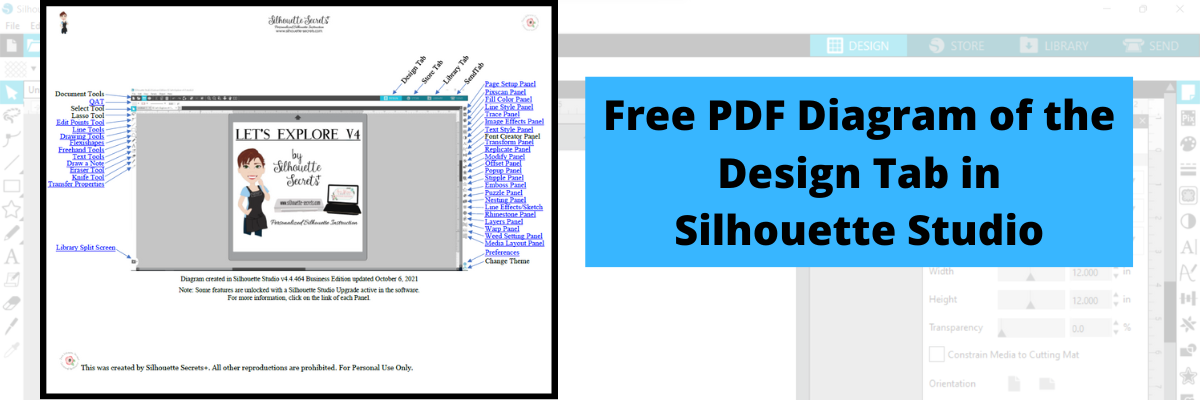
Download this to your computer and open it. Then click on the blue links to be taken to more in-depth information on each of the tools or features.
Print it for a visual reference while working in the software too!
Grab the free PDF file HERE or click the image below.
I have had many comment with feedback that this is very helpful to them when getting familiar with the Silhouette Studio v4 software. All of the information provided is part of the “Let’s Explore v4 series” on the blog HERE.
We love seeing what you are creating with your Silhouette machines or software. Feel free to post photos or questions on my Facebook group at Silhouette Secrets with EllyMae.
Save this for future reference by pinning the image below.
Enjoy!
THANK YOU for your support! How can you help? Click HERE & buy a coffee. Every little bit helps with the cost of running the site.
Or if you are looking for more in-depth, step-by-step classes, check out all of my online Silhouette classes on my Teachable site HERE.
**This post may contain affiliate links. What that means is that I may receive compensation if you purchase through the links I have provided. The price you pay for the product or service is not higher but I may get compensated for sharing.
Lots of things happening behind the scenes, which means that things are happening, but I can’t share until they are ready to publish.
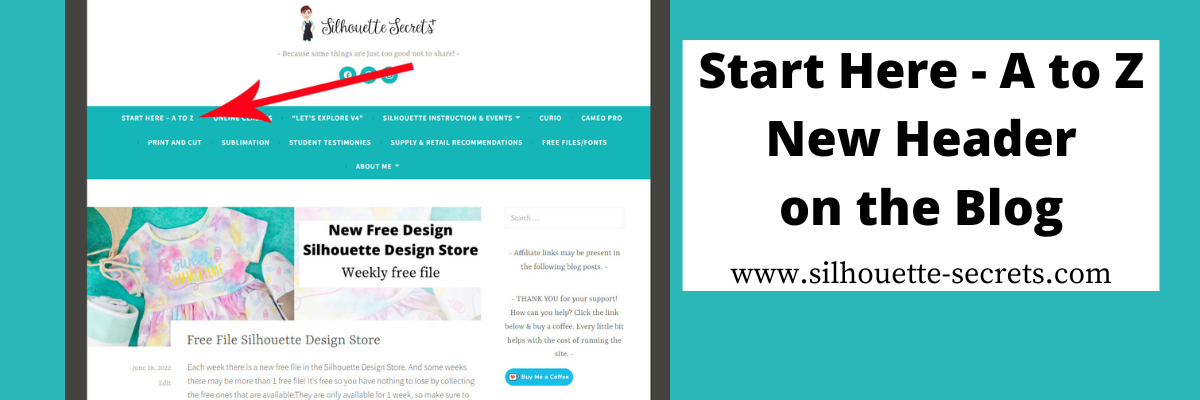
One of those things has been on my to-do list much longer than I want to admit. That is a site map for the Silhouette Secrets+ blog. I have been writing tutorials and creating classes since 2016, which means there is a lot of information on the website. Finding a way to organize that in an easy to view format can be difficult and I hope that I have found a way to make it easier with the A to Z Guide.
I have linked keywords, topics, classes, tutorials, and word combinations in alphabetical order in this A to Z guide that includes some of the most searched Silhouette topics.
Click on the keyword to open up a new web page with more information on that topic.
I hope this makes it easier to find information on the Silhouette Secrets+ blog. I was amazed as I went back post by post for the past years at some of the projects I’d forgotten about.
If I don’t have information specific to a topic on the blog, for instance, something like the Alta, I linked to where you could find more information such as the Silhouette America website.
Save this for future reference by pinning the image below.
Enjoy !
THANK YOU for your support! How can you help? Click HERE & buy a coffee. Every little bit helps with the cost of running the site.
Silhouette Classes
Never stop learning! Let me help you take the anxiety out of learning with Silhouette and get to creating faster! My Silhouette classes are heavily focused on software, so you can take the skills & techniques taught and apply them to many future projects!
**This post may contain affiliate links. What that means is that I may receive compensation if you purchase through the links I have provided. The price you pay for the product or service is not higher but I may get compensated for sharing.
Affiliate links may be present in the below and as an Amazon Associate I earn from qualifying purchases.What that means is that I may receive compensation if you purchase through the links I have provided. The price you pay for the product or service is not higher but I may get compensated for sharing.
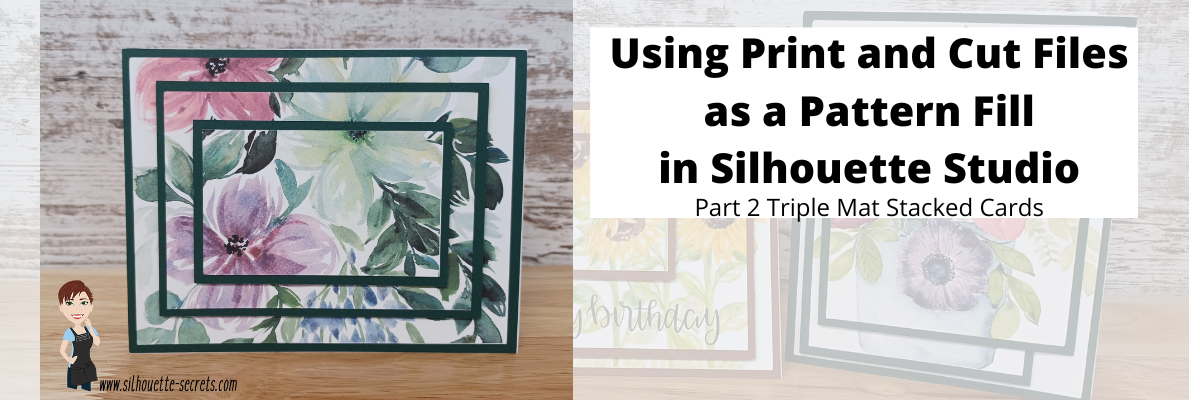
In Part 2, I am sharing how you can use a print and cut file and use it as a pattern fill.
I hope you get into the Silhouette software and play today!
I would love to see what you are creating with your Silhouette software or machines! Feel free to post on my Facebook group at Silhouette Secrets with EllyMae.
Save this for future reference by pinning the image below.
Enjoy !
THANK YOU for your support! How can you help? Click HERE & buy a coffee. Every little bit helps with the cost of running the site.
Or if you are looking for more in-depth, step-by-step classes, check out all of my online Silhouette classes on my Teachable site HERE.
**This post may contain affiliate links. What that means is that I may receive compensation if you purchase through the links I have provided. The price you pay for the product or service is not higher but I may get compensated for sharing.
Each week there is a new free file in the Silhouette Design Store.
And some weeks there may be more than 1 free file!
It’s free so you have nothing to lose by collecting the free ones that are available. They are only available for 1 week, so make sure to check back each week.
Affiliate links may be present in the below and as an Amazon Associate I earn from qualifying purchases.What that means is that I may receive compensation if you purchase through the links I have provided. The price you pay for the product or service is not higher but I may get compensated for sharing.
This week’s free file is a Sweet Summer Time design.
Grab this free cut file HERE and get to creating. Or save it for a later project. Once it’s in your library, it’s yours to use.
Silhouette Design Store files should download direct to your Silhouette library and they do not count against the cloud storage space. If you are experiencing issues with files not downloading direct to the library, check out these troubleshooting steps
We’d love to see what you are creating with your Silhouette software or machines! Feel free to post on my Facebook group at Silhouette Secrets with EllyMae.
Enjoy !
THANK YOU for your support! How can you help? Click HERE & buy a coffee. Every little bit helps with the cost of running the site.
Or if you are looking for more in-depth, step-by-step classes, check out all of my online Silhouette classes on my Teachable site HERE.
**This post may contain affiliate links. What that means is that I may receive compensation if you purchase through the links I have provided. The price you pay for the product or service is not higher but I may get compensated for sharing.
I love being able to recreate just about anything in the Silhouette Studio software!
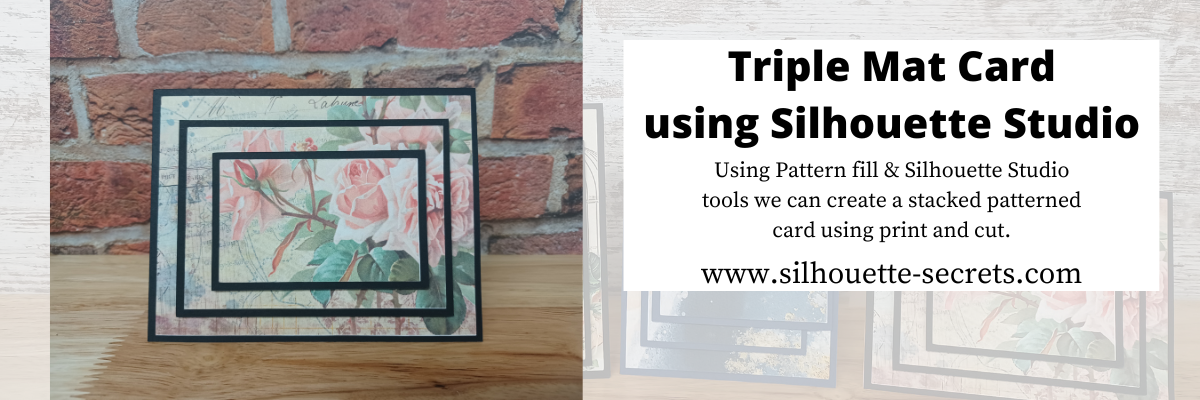
I’ve seen the triple mat technique in the stamping community for many, many years and even created cards with stamps using this same effect. Today we are going to take a look at how we can easily recreate this look with any pattern in the Silhouette Studio software.
First, a great big Thank You to Teresa P. for inspiring and helping with this tutorial.
I also have a video tutorial on my YouTube channel HERE.
Blue words in this tutorial are linked to more information on that particular topic. Click on the word and it will open a new window with a tutorial on that subject.
Creating a Triple Mat Card with Silhouette Studio
Open Silhouette Studio and set up the Page Setup Panel. Select Letter size media or the size page you will be printing on. Select Portrait Orientation. I have the best results with print and cut on Portrait orientation.
I will be using a standard U.S. card size in the tutorial, however, you can adjust this to your desired card size. Create along with me for the technique and then play around with the sizes you normally create a card in.
Using the Drawing Tools on the left side, draw a rectangle any size.
Make a copy of the rectangle. There are about 10 different ways (or more) to copy and paste in the Silhouette Studio software. A couple are Ctrl+C and Ctrl+V, right click choose copy & paste, or right click and choose duplicate. My favorite shortcut is to hold down the Alt key (Option on a MAC) then move the mouse over the red cut line and the cursor changes to a +. Left click on the mouse and drag a copy away.
Resize the 2nd rectangle to 5.25″ W x 4″ H.
Do this 4 more times and resize each rectangle as shown below.
Rectangle Copy 3 – 4.5″ W x 3.25″ H Rectangle Copy 4 – 4.25″ W x 3″ H Rectangle Copy 5 – 3.5″ W x 2.25″ H Rectangle Copy 6 – 3.25″ W x 2″ H
You should end up with 6 rectangles all at different sizes that will make up the stacked technique.
Select Rectangle #1, hold the Shift key down and click Rectangle #3 & #5 to select them all at once. Move those off the design mat area to the gray holding area. Next, with all 3 selected, fill those with black using the Fill Color in the QAT or the Fill Color Panel on the right side. These are the mats that will be cut out of black cardstock or any other color you desire.
With the 3 rectangles centered and selected, right click and choose Make Compound Path. Compound paths are one of the most difficult concepts for a Silhouette user to understand. However, in this case, we are using the Compound Path option in a little bit different way. Check it out below.
Next, click on the Show/Hide Library option in the bottom left corner.
This opens up a split screen of the Library and the Design tab.
Click on the Patterns folder in the library.
Affiliate links may be present in the below and as an Amazon Associate I earn from qualifying purchases.What that means is that I may receive compensation if you purchase through the links I have provided. The price you pay for the product or service is not higher but I may get compensated for sharing.
Now, it may look a bit odd right now, but hang tight and you’ll see the magic happen on the screen.
Click the Show/Hide library button to close the split screen library.
Now, we can adjust the pattern a bit before we move on. Open the Fill Color Panel and click on the 3rd tab at the top. Then click on the Advanced section to open up more options.
Under the Advanced section, you can Scale the pattern up and also Pan the pattern around. Just be careful to watch for white lines to appear as the pattern is “tiled”. The white lines indicate the edge of the pattern page. If you see those on the screen, it will print that way as well.
Adjust the settings to your liking.
Now, are you ready for the magic?
Right click on the rectangles and choose Release Compound Path.
Ta-da! Move the rectangles away and you can see that the pattern fill is now in all 3 rectangles in the exact location that it was when it was stacked together.
What a nifty little trick!
Now that we have our card design, it’s time to set up the print and cut.
Open the Page Setup Panel & make sure the page is setup properly if needed. Choose Letter size (or the size you are printing on). Choose Portrait Orientation.
Then click on the Tab 3 at the top of the Page Setup Panel for the Registration Marks. Choose On. Click the Restore Defaults button. *This is an important step if you have ever had issues with print and cut or are just getting started. The default registration marks are where the machine can read the most accurately.
Arrange the designs on the page within the red cut border and stay away from the cross-hatched area. If needed, use the Transform Panel – Rotate Tab to rotate the design to fit within the red cut border of the print and cut page.
The cross-hatched area is very, very important in the success of the accuracy in the print and cut! The optical eye is a laser eye that turns on when registration marks are on the project. This eye searches for those black registration marks and any part of the design that is in the cross-hatched area can interfere with an accurate reading. It may look like it read the marks, but if it picked up part of the design instead of the edge of the registration mark, it can affect where it cuts. Dark colors in, near, or between the cross-hatched areas can interfere with the reading. If you have every had an issue, look at where your design is placed and are you using the defaults to give the machine the best chance to read?
Some users can successfully adjust the print and cut boundaries, but NOT ALL! The most accurate results with print and cut are with the default registration marks. Once you have established a baseline with the defaults, then you can start changing things and see what works. It does NOT work for all users to adjust.
Print and Cut is an amazing feature on the Silhouette software! Here are some tips on how to set up a basic print and cut Let’s Explore v4 – Print and Cut Basics Starting with the basics will give you the most accurate print and cut results.
Once your page is ready, send it to print using File > Print.
Printed on a Canon TS9521C Craft Printer
I am often asked what printer to buy for print and cut. Any good quality printer will work. Start with the one you have and start with the Basics of Print and Cut, test it and see how it does.
Place the printed page on the cutting mat, exactly as it shows on the Silhouette Design screen in the top left corner and covering the grid lines on the mat.
Using a Silhouette cutting mat will also be the greatest chance of an accurate print and cut. Other 3rd party cutting mats are not the same dimensions and can affect the accuracy of a print and cut project.
Load the cutting mat in the Silhouette machine. On a Cameo, the left edge of the cutting mat should be next to the line on the left and not over top of it. Hold the cutting mat flat as it registers the marks for best results.
Click on the Send tab in the top right corner. Select the material type and adjust the cut settings as needed for your material. Click the Send button in the bottom right corner when ready to cut.
After it’s cut, unload the cutting mat, flip the mat over and carefully peel the mat away from the cardstock.
Add the black cardstock (or other color) to the cutting mat. Click on the Design tab again in Silhouette Studio. Select all 3 of the black rectangles, copy and paste to a new design mat and arrange to cut.
Send to cut.
After it’s cut, unload the cutting mat, flip the mat over and carefully peel the mat away from the cardstock.
Now that the pieces are cut, gather the supplies for assembly.
And since you are already setting up a print and cut, you can also add a sentiment that could either be added directly to the pattern area or create your own shape as well. Print it right along with your pattern pieces.
I would love to see what you are creating with your Silhouette software or machines! Feel free to post on my Facebook group at Silhouette Secrets with EllyMae.
Save this for future reference by pinning the image below.
Enjoy !
THANK YOU for your support! How can you help? Click HERE & buy a coffee. Every little bit helps with the cost of running the site.
Or if you are looking for more in-depth, step-by-step classes, check out all of my online Silhouette classes on my Teachable site HERE.
**This post may contain affiliate links. What that means is that I may receive compensation if you purchase through the links I have provided. The price you pay for the product or service is not higher but I may get compensated for sharing.
Check out the description on the video for links to the supplies used in the video and more information on each Silhouette Studio tool used to create this project.
Watch for the written tutorial coming on Sunday.
Hope you have a fabulous day!
Save this for future reference by pinning the image below.
Enjoy !
THANK YOU for your support! How can you help? Click HERE & buy a coffee. Every little bit helps with the cost of running the site.
Or if you are looking for more in-depth, step-by-step classes, check out all of my online Silhouette classes on my Teachable site HERE.
**This post may contain affiliate links. What that means is that I may receive compensation if you purchase through the links I have provided. The price you pay for the product or service is not higher but I may get compensated for sharing.
Have you ever wanted to soften the edges of a photo or distress the edges of a photo so it’s not such a sharp edge?
Blue words in this tutorial are linked to more information on that particular topic. Click on the word and it will open a new window with a tutorial on that subject.
Let’s look at 3 ways we can do this in the Silhouette Studio software.
#1 Softening edges with a svg file #2 Softening edges with a .studio file from the Design Store #3 Softening edges with a png file
There are 2 things I want to mention first
The first thing is that when you are working with photo files or distressed files as we will be, they can be large files and they can be data heavy. You may need to be patient with your computer as it processes the data and makes the changes. This will vary for each user and for some users it may cause your software to crash because it’s a lot of data that is being changed.
If you experience a crash on the software, close all other programs on the computer and close all tabs in the Silhouette Studio software and try again.
The second thing is if you are cutting the design out, keep in mind that it will cut around the distressed areas. Depending on what material you are cutting it from, you may have a bit of weeding to do.
Let’s get started!
I started in Photoshop Elements with digital scrapbooking before I was a Silhouette user and in the graphics programs we worked with “clipping masks”. Which basically means, a mask (design) that you are clipping (combining) to a photo or image. This means the photo takes on the shape of the “mask”.
A lot has changed in the past 9 years and a “clipping mask” can be called many different things today. It is still basically the same thing, just new words & new file formats to be recognized for the same technique. When working in the graphic programs such as Photoshop, we used png files mostly as the clipping mask, but other file types can be used as well.
Let’s take a look at how to do it in Silhouette Studio
Affiliate links may be present in the below and as an Amazon Associate I earn from qualifying purchases.What that means is that I may receive compensation if you purchase through the links I have provided. The price you pay for the product or service is not higher but I may get compensated for sharing.
#1 Softening edges with a svg file
A svg file is a ready to cut file, which means it already has a cut line around the design. For more information on svg files check out these posts: File Formats for Silhouette Studio
Open a photo image that you would like to work with. Resize the photo if needed using the Scale Tools and center it to the page using the Align Tools. These tools can be found in the Panels on the right side or in the QAT Toolbar at the top.
*Photo images can be large files and open large. Each photo will vary in size according to the original photo file. Keep in mind image quality if you are printing the photo. If a yellow triangle appears in the top left of Silhouette Studio, the image may be low resolution to print at the size you currently have on the design page.
Open the svg file that you want to use by File > Open in the Silhouette software. To open a svg file in Silhouette Studio, you do need the Designer Edition upgrade or higher. Find out more details on opening svg files HERE.
Bleach Effect Background SVG by Little Type Factory
This file is great because you have several file type options! A few keywords to search for are: bleach effect svg, clipping mask svg, or photo mask svg. For this technique, make sure of the file types you are receiving with the file and that svg is an option.
By opening using File > Open the svg file opens on a new design mat. Since this is a large file, I prefer it opens on a new design mat so I can make any changes needed on that design mat before the next step.
Copy and paste the svg file to the design mat with the photo and close the original svg.
Resize the svg file to the desired size for your photo. I use the corner bounding box unless I need a specific size. If I need a specific size, then I would use the Scale tools.
Select both the photo and the svg file at the same time. This can be done by left clicking and holding the left mouse button down and dragging across both objects or by holding the Shift key down on the keyboard and clicking on each object you would like to select.
Open the Modify Panel and with both objects selected, choose Crop. Be patient with your computer! This is where the data is changing.
Ta-da! The photo now has a distressed look around the edges that match the svg file chosen.
As I mentioned at the beginning, if you are cutting a distressed object, it will now cut that distressed shape.
Click the Send tab in the top right corner. Select the design by clicking on it (very important!) and choose Cut. Bold red cut lines will appear around the design.
The Silhouette machine will cut everywhere you see those bold red cut lines.
#2 Softening edges with a .studio file
Files you get from the Silhouette Design Store automatically download to your Silhouette library. These are .studio file types. A .studio is a proprietary file to Silhouette and is a ready to go cut file.
*If files from the Silhouette Design Store are not downloading directly to your library, follow the tutorial HERE step-by-step to correct that.
*If a .studio file from the Silhouette Design Store does not have bold red cut lines around it when you go to the Send tab when cutting, check out the tutorial on how to fix it HERE. Hint: it is NOT by tracing it
In the Silhouette Design Store you can search for design such as:
Other search options are: paint, splatter, distressed, or inkpen
If you want to narrow the search down even more try using quotation marks around the specific terms. For instance, type “grunge” in the search bar. Another way to narrow the search is in the filters on the left side, uncheck the printable patterns, print and cut, 3D crafts, sketch, and rhinestone. This means the search will bring up regular cut files and fonts.
Any cut file or dingbat font would work for this technique. We will be using a cut file as an example.
Since a .studio file is a cut file, the steps are pretty much the same as the svg file.
Open a photo image that you would like to work with. Resize the photo if needed using the Scale Tools and center it to the page using the Align Tools.
Open the file you want to crop the image to. If the file contains multiple objects, I open it on a new design mat as it can be easier to work with.
Copy and paste the design to the photo design mat. You may need to ungroup the design to only copy 1 part of it. All designs will vary and it is dependent on how the Designer saved the file.
Adjust the design to your liking. In this case, I scaled the design up and rotated it.
Select the photo and the design at the same time.
Open the Modify Paneland with both objects selected, choose Crop.
Pay close attention to the file after you crop. On distressed images, you can end up with smaller bits and “artifacts” that you don’t necessarily need or want. However, each design is going to vary. You will be able to see these if you look close at your design and watch for the selection boxes around small areas. In this case, these are “artifacts” and are not needed for the image.
I can move the original main image off, draw a wide selection box around the design mat area where the original was and you will see those “artifacts” show up with the selection boxes indicating where they are. Press delete on the keyboard to remove them.
Move the original design back on the mat, click the Send tab in the top, select the design by clicking on it (very important!), and then choose Cut. Bold red cut lines should turn on around your image.
Ta da! You did it!
#3 Softening the edges with a png file
The 3rd way in this tutorial is to use a png file. A png file is not typically a cut file, which means it will require additional steps to turn it into a cut file. A png is a flattened photo file and does not contain pieces or cut lines (typically).
I will also state right off the top that this method is going to take longer, because of the data processing time and your computer. But, if your only option is a png image, grab a cup of coffee and check your email while the computer is processing the data. You will see what I mean in a few minutes.
There are 2 ways you can turn a png into a cut file. 1. In versions of the Silhouette Studio software of v4.4 software there is now a feature called Autotrace. Autotrace is defaulted ON and when a transparent png file is opened, it should automatically trace around the outer edge of the transparent png file. However, there are still bugs in the Autotrace feature and it can vary by software version. The only way to know if you are affected or if a particular design is affected will be to test it.
Keep in mind that when you trace a png file, that is adding more data to your file exponentially. That means A LOT of data! This can be a lot for your computer to handle and each user may experience something different.
If you experience crashing following along with this same file I use, try a simpler file and see if your computer can handle that. This file used even taxed my computer and I had to be patient.
A few of the things that you might experience with Autotrace are: – png files opening very large – opening a png file takes longer (sometimes a lot longer) – the software crashes – working with the png to resize after it opens is jumpy or takes a lot longer
If you experience any of that, I would recommend turning the Autotrace off and go to the 2nd way to work with png files.
Check out the tutorial on Autotrace for more details HERE.
2. Trace a png file to get cut lines. Check out the tutorial on the Basic Trace Panel HERE. The basic trace is all you should need for #3, so let’s take a look at how to do that.
Open a photo image that you would like to work with. Resize the photo if needed using the Scale Tools and center it to the page using the Align Tools.
Open the png file. This should open onto a new design mat. A png file can be opened in all versions of the Silhouette Studio software.
If the png file opens large, scale it down as desired. If the png file opens small, do not resize it. This will affect how it traces. A png file is an image file, which means it’s made up of pixels. If you increase the size of a photo file, this can pixelate the image. This means that a trace will trace all of those pixels.
I opened DD2024 Clipping Mask 4 and it opened large than my mat, so I scaled it down a bit.
Open the Trace Panel. Click Select Trace Area. Draw a box around the area to be traced.
Tracing an object will vary by the object. This is something that is affected by color, gradients, design, etc. Black always traces the best! White does not trace without “tricking” the software in some way.
The Trace Panel can have different adjustment options depending on what software version is being used.
If needed, I adjust the Threshold up or down to get the yellow as solid around the area I want to be traced.
In this case, we are wanting the distressed look. So I am tracing it exactly as it is showing on the screen.
After all adjustments are made that you want, then click the Trace button at the bottom of the Trace Panel.
Be patient with your computer! Remember when I said above that tracing adds more data exponentially to the file. Using the Trace Panel does not seem to require as much processing time as the Autotrace option, but this will vary by user’s computer.
Just look at all those red cut lines around the design now.
Move the png file off the design mat.
Look at all those red lines. Those are cut lines. This is a distressed image. Keep that in mind if you are cutting the image. It will cut all of those.
For this tutorial, that is the effect we are going for.
If you want to eliminate some of those areas, I won’t go step-by-step with photos now, but here is how to do it. Right click on the trace and choose Release Compound Path. Be PATIENT – like really patient – this will depend on the design completely but it can take awhile – do NOT continue clicking or the software may crash. It could crash the software still if it’s too complex. When the compound path is released, all the little pieces will show with individual selection boxes. Click off and click back on each piece to select it and delete. When finished editing, select the entire image, right click and choose Make Compound Path.
Fill the design with color to see how it looks using the Fill Color Tools. It should look like the png file that was traced.
Now, that we have the cut lines we can follow the same steps as we did for the first 2 methods.
If you want to keep this file after you’ve traced it, save it as your template file to use in the future.
——–
As a side note here – I accidentally double clicked on the traced image and the Edit Points popped up. Remember when I said a trace adds more data?
Wow! Check out those gray dots! Each one of those is a data point the Silhouette machine has to hit in order to complete a cut. If you are cutting this design or any design with a lot of edit points, you might want to try clicking the Simplify option in the Edit Points window that pops up. Just make sure you do not simplify too much and get red dots. Red dots mean open points and the cuts will not connect. Check out more on Edit Points HERE. It is a great tool to understand and play with!
This is why your computer may need time to process the steps you are doing. When you are making changes, the software has to recalculate all those edit points every single change. This is also why some designs do not cut well when they are scaled down because you are squishing those edit points into a smaller space.
——–
Copy and paste the traced design to the original photo design mat.
If it helps to change the Fill Color to Transparent so you can see where to place the image, use the Fill Color Panels and choose the cross-hatched (transparent) option.
Adjust the mask design as desired on top of the photo.
Select the photo & design together. Open the Modify Panel, choose Crop with both objects selected.
Be patient with your computer! I know I keep saying that, but even for my computer this is a lot of data to process and change! The more distressed the image is, the more edit points it has, the quality of the trace are all factors in the data of the file.
After the computer processes and crops, you may notice that it has a lot of gray boxes and in my example, it is so many that it looks black around it. These are those distressed bits. Immediately after the crop is finished, while all these parts are selected, Group the design together. Either press Ctrl+G (Command+G on Mac) or right click and choose Group.
Now, I will say, for this example that I choose, I probably will not cut it as it’s too complex and will probably just tear up the material. But, I can print it and use it for sublimation or other projects.
I grabbed a towel blank and just did a test print with my Epson F-170 printer. Then heat pressed it onto the towel.
Guess what? If you are printing, be patient with your computer and printer as this is a large file and data to send from one device to another. Did you think you’d already heard it enough? I know you may not want to hear it again, but I see it mentioned often on groups when we are troubleshooting. It can take some time to process and I want to prepare you for that.
This is a blank I received in my Vapor Apparel Foam Decoration Kit, so I thought why not do another test? When pressing sublimation onto colored blanks, the color of the blank will affect the final outcome of the pressed colors. In this design, it turned out pretty well.
And I’ll share one more, even though it didn’t turn out perfect – although in the photo you cannot tell. But, in real life this looks a bit green, which means it’s undercooked. I followed the instructions I found online for pressing for 30 seconds and I do not think it was long enough.
For more tips on Sublimation with Silhouette, check out the Sublimation section on the blog HERE.
——
If you find your computer is running slow after working with all this data or with larger files, make sure you are closing everything and doing a full system shut down and/or a restart on the computer. Both never hurts to clear out things in the computer and should be done on a regular basis.
Even just closing the Silhouette software can help to reset things. I would also recommend that if you have any Recovered Documents showing up, clear those out. The Recovered Documents section is not designed as a file storage and it has to remember all the data for every single file when you open the software. Check out more on Recovered Documents HERE.
I hope you learned something new in this post! It is packed with a lot of information. Make sure to save it to come back to later!
I would love to see what you are creating with your Silhouette software or machines! Feel free to post on my Facebook group at Silhouette Secrets with EllyMae.
Save this for future reference by pinning the image below.
Enjoy !
THANK YOU for your support! How can you help? Click HERE & buy a coffee. Every little bit helps with the cost of running the site.
Or if you are looking for more in-depth, step-by-step classes, check out all of my online Silhouette classes on my Teachable site HERE.
**This post may contain affiliate links. What that means is that I may receive compensation if you purchase through the links I have provided. The price you pay for the product or service is not higher but I may get compensated for sharing.
Creating a Custom Knockout Design in Silhouette Studio
New Silhouette class available on my Teachable site HERE.
This class is one I created for the May 2022 All Things Silhouette Conference and it was a hit! The attendees took the class ideas and ran with it. I loved seeing all of their creations and it really inspired me to want to create even more.
I’ll be honest and typically after all the time that goes into the testing, recording, and editing to create a new class – I usually am “over” the class topic and it might be awhile for me to do it again. For instance, my Foil Quill didn’t get unpacked for a year after teaching at an ATS conference a few years back. But, this class has been different as I see all the creations coming in. I am sharing a few of those below the class information so make sure to keep scrolling below.
This is a step-by-step class that explores the complete process of creating your own unique design. We start with downloading an image, tracing, discuss compound paths, text, offset, and the modify-subtract tools. This class is jam-packed with information that will help you in many future projects!
I am including the list of supplies I used in the class below. Affiliate links may be present in the below and as an Amazon Associate I earn from qualifying purchases.What that means is that I may receive compensation if you purchase through the links I have provided. The price you pay for the product or service is not higher but I may get compensated for sharing.
I have also included a list of the class content in the description on Teachable. There is a lot of information packed into this class. The best part is once you are registered, you can watch at your convenience and as many times as needed to really soak in the information. Check out all the details HERE.
During the All Things Silhouette Conference attendees will post their completed project photos in our private Facebook group and WOW! I was blown away with their creations and the variety of different patterns, shapes, and text used in this class.
It truly shows that the techniques learned in the class can be used in many different ways for all users.
Custom Knockout Show & Tell
Here are a few that I received permission from the creators to share with you all.
There were so many fabulous creations! It is a good thing it was not a contest as I could not have picked just one!
When creating a class, I always have several demos that I’ve created in the testing and recording times of the course. Here are a few more I created using this same technique.
I do not necessarily like the feel of glitter HTV on a shirt that I wear, but I still love the look of glitter. This is Siser Glitter HTV applied to a piece of fabric and then I glued the fabric to the photo backing.
Here is the same design with a different pattern on a tote bag.
And once you start, sometimes it’s hard to stop, especially when you have a stash of patterned HTV.
And one more!
I have had this patterned HTV for several years and never found a design that I wanted to use it for. This pattern reminds me of a Lisa Franks design and it was perfect for this Inspire and Create design by Donna Downey – Design #32502.
And now after seeing all the creations from those who’ve already done the class, I have so many more ideas. I’ll have new shirts for the rest of the year!
And I would love to see what you create with it! I’d love to see what you are creating with your Silhouette software & machines! Feel free to post on my Facebook group at Silhouette Secrets with EllyMae.
Save this for future reference by pinning the image below.
Enjoy !
THANK YOU for your support! How can you help? Click HERE & buy a coffee. Every little bit helps with the cost of running the site.
Or if you are looking for more in-depth, step-by-step classes, check out all of my online Silhouette classes on my Teachable site HERE.
**This post may contain affiliate links. What that means is that I may receive compensation if you purchase through the links I have provided. The price you pay for the product or service is not higher but I may get compensated for sharing.
THANK YOU for your support! How can you help? Click the link to buy a coffee. Every little bit helps in the cost of running the site.