Posted on — Leave a comment

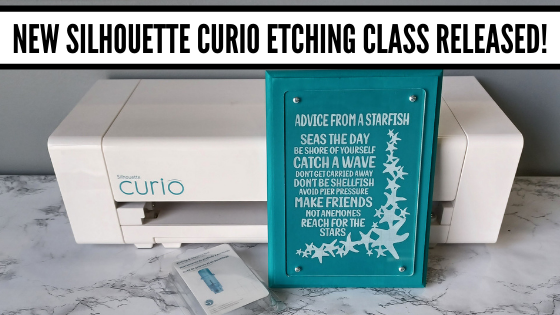
Etched Acrylic Décor Class Released

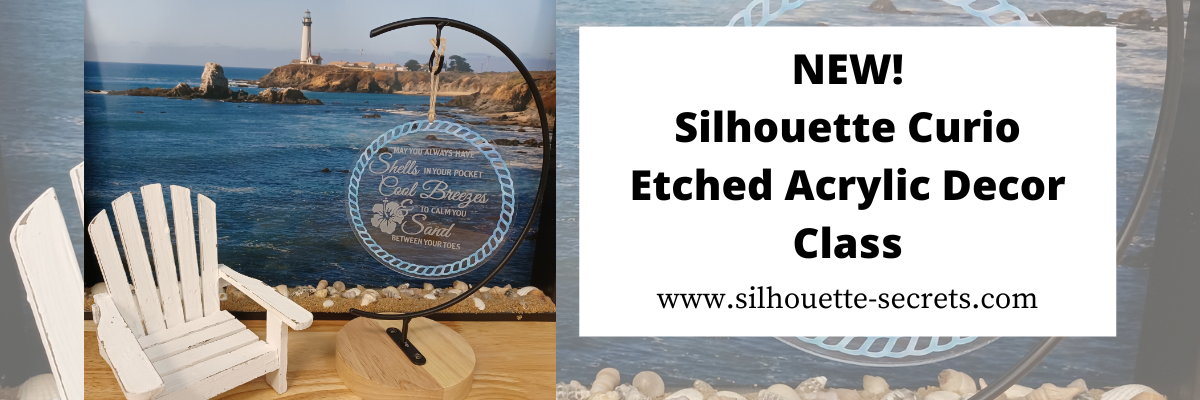
New! I’ve just released the a new Silhouette Curio class on my Teachable site!

Etched Acrylic Decor with the Silhouette Curio

Not only do we set up to etch on acrylic, but I also share how to cut adhesive vinyl on the Curio and why I added it onto this project.

Check it out

HERE

and join me in this class to create a unique décor item and learn more about the Silhouette Curio!

I am also including the list of supplies that I used in the class if you’d like to create along with me.

Affiliate links may be present in the below and as an Amazon Associate I earn from qualifying purchases. What that means is that I may receive compensation if you purchase through the links I have provided. The price you pay for the product or service is not higher but I may get compensated for sharing.

Class Supplies:
– Silhouette Curio machine
– Silhouette Etching tool – use code 10OFF to save 10% at Silhouette America
– Silhouette black blade (ratchet) or premium blade – if cutting vinyl with the Curio
– (2) Silhouette Curio cutting mats – Very important! – 1 mat for cutting & 1 mat for etching
**Cutting adhesive vinyl can also be done on a Cameo or Portrait, but the class will show cutting with the Curio
– Double sided tape from Craft Chameleon
– Beach Blessing design by Deborah Stine – Design #62386
– Rope Frames Circle by Snapdragon Snippets – Design #30736
– Curio Etching Kit by Craft Chameleon
Kit includes: (3) 5” Round Acrylic discs, (1) Curio Etching 5” round template, (1) Diamond Tip Reamer, (1) twine, (3) 6”x 6” adhesive vinyl – random colors/patterns
– Transfer Tape
Optional: Adhesive vinyl of color choice
– Digital Calipers – highly recommend

Check out all 11 Curio classes on my Teachable site HERE.

As well as all available Silhouette classes HERE.
And…. for those who’ve read this far I’ll give a little hint – I have 1 more Silhouette class releasing very soon too!

I’d love to see what you are creating with your Silhouette software & machines!
Feel free to post on my Facebook group at 
Silhouette Secrets with EllyMae.

Save this for future reference by pinning the image below.

Enjoy !

This image has an empty alt attribute; its file name is logo.jpg

THANK YOU for your support! How can you help? Click HERE & buy a coffee.
Every little bit helps with the cost of running the site.

Or if you are looking for more in-depth, step-by-step classes, check out all of my online Silhouette classes on my Teachable site HERE.

SS Logo snip it
**This post may contain affiliate links. What that means is that I may receive compensation if you purchase through the links I have provided. The price you pay for the product or service is not higher but I may get compensated for sharing.
Posted on — Leave a comment

Chalkboard Décor with the Curio

Just a quick post today to share my newest Silhouette class. It is a Silhouette Curio class that I was in the process of creating for an in-person event before everything was shut down a couple years ago. I finally picked it back up where I left off and it is now available for all to view anytime after you’ve registered on my Teachable site.

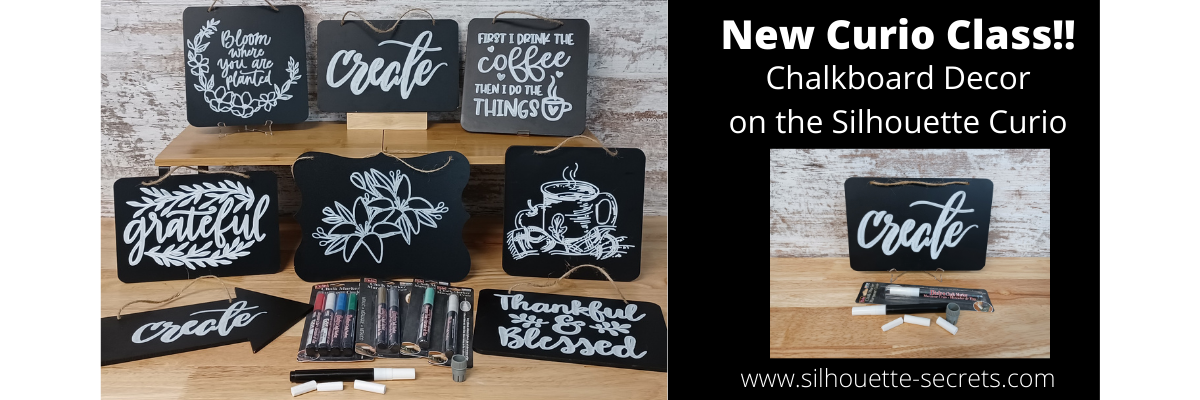
New! Chalkboard Decor with the Silhouette Curio class is now available.

This is a step-by-step class on using a chalk marker in the Silhouette Curio to sketch directly on a chalkboard.
Find the class and full details on my Teachable site HERE

Check out the demo video on my YouTube channel HERE.

I had so much fun playing with the chalk marker and these chalkboard signs.
Here are a few more that I created

Affiliate links may be present in the below and as an Amazon Associate I earn from qualifying purchases. What that means is that I may receive compensation if you purchase through the links I have provided. The price you pay for the product or service is not higher but I may get compensated for sharing.

These are the supplies I used in this class to create these chalkboards:
– Silhouette Curio machine, Silhouette small base cutting mat, Curio platforms and base
– Chalkboard sign – Michaels – 6.6” square, arrow shape, rectangle shape
Michaels bulk chalkboard options – rectangle 8 pk, arrow 8 pk, Square 8 pk
or Amazon
NOTE: chalkboards can vary in thickness – it needs to be under 5 mm thick & fit on the Curio base
No frames or borders. Remove any twine attached.

– Create by Cali Arroyo – Design #215617
– Bistro Chalk Marker by Marvy Uchida White
– Optional: Bistro Markers Colors – Fluorescent, Primary
– Silhouette Pen Holder Type A – Silhouette America, Amazon
– Digital Calipers – highly recommend for Curio projects
– Ruler with mm
– White Chalk
– Clean Towel
– Notepad & pen
– Optional designs also featured: Design #317171, Design #404761, Design #304784,
Design #400058, Design #229894, Design #154513
– Optional: extra twine, scissors

I have so many more ideas I want to try and test!

I hope you will join me in this Silhouette class!
Check out the full details on my Teachable site HERE

Whether you join or not, I’d love to see what you are creating with your Silhouette software & machines!
Feel free to post on my Facebook group at 
Silhouette Secrets with EllyMae.

Save this for future reference by pinning the image below.

Enjoy !

This image has an empty alt attribute; its file name is logo.jpg

THANK YOU for your support! How can you help? Click HERE & buy a coffee.
Every little bit helps with the cost of running the site.

Or if you are looking for more in-depth, step-by-step classes, check out all of my online Silhouette classes on my Teachable site HERE.

SS Logo snip it
**This post may contain affiliate links. What that means is that I may receive compensation if you purchase through the links I have provided. The price you pay for the product or service is not higher but I may get compensated for sharing.
Posted on — Leave a comment

New Silhouette Curio class released!

I have so much fun playing with my Silhouette Curio and all the things it can do!
I want to share that with you!
Join me in this Silhouette Curio class to create an acrylic etched panel!
Check out the class HERE.

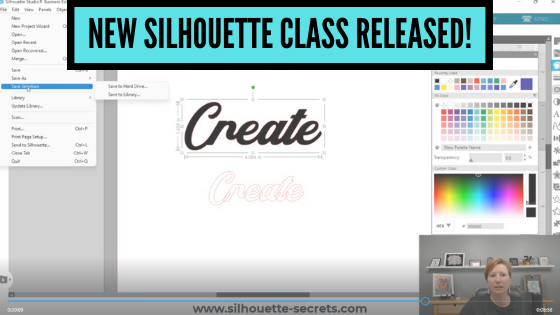
This is an Advanced Beginner Curio class that will cover the setup step-by-step to getting the Curio ready to etch, creating a template in Silhouette Studio for the etching, and then creating the design to be etched. You will create your own word art design using tools in the Silhouette Studio software! Tips are shared throughout the video class for getting successful etches with your Silhouette Curio machine.

Check out the class

HERE

Here is a sneak peek at the class content and the videos included:

Supplies & Setup Video – 17:55 minutes

Creating the Etched Acrylic Panel Template in Silhouette Studio – 31:30 minutes
– Using the drawing tools to create a template
– Creating template with nail holes to avoid
– Alignment Tools
– Move By Tool

Designing & Etching the Acrylic Panel in Silhouette Studio – 1 hour 3 minutes
– Opening Starfish border Design #3653
– Compound paths
– Text Tool
– Creating the design with multiple lines of text
– Creating “word art” with text
– Adding an etch fill
– “Secret” to getting a tighter etch fill
– Setting up the Curio to etch
– Etching
– Finish and assembly

Class Supplies:

Affiliate links are present in the following supply list and as an Amazon Associate, I earn from qualifying purchases. The cost to you is no different, but I may earn a commission by you using the links provided.

-Silhouette Curio machine
– Silhouette Etching Tool
– New Silhouette Curio Cutting mat – highly recommend a sticky mat
– Starfish border Design by Calli Arroyo – Design #3653
– Fish Grill font by 7nTypes – Design #292330
– 4” x 6” Acrylic Panel with 4 holes from Craft Chameleon
– Double sided sticky tape from Craft Chameleon
– 6” x 8” Basswood board by Walnut Hollow – Amazon or Walnut Hollow
– #4 x ½” Sheet Metal Screws
– Dark colored paint or stain
– Paint brush
– Screwdriver
– Hand drill
– Weeding tool
– Optional: baby wipes, Teflon sheet, apron

Optional:
– LW Wide Marker Font by Lori Whitlock – Design #82132
– Acrylic Panel no holes from Craft Chameleon
– Wood stand

Additional Resources

No matter how many times I etch a project, even the same design, I still do a little happy dance when it’s finished!

Find this class on my Teachable site HERE

I love being able to customize my gifts & projects with the Silhouette Curio!

Want more ideas of what you can create with your Curio?
Check this out – Gift Ideas with your Silhouette Curio

Just getting started with your Curio?
The possibilities are endless in what you can create!
Check out the other Silhouette Curio class on my Teachable site HERE.

I would love to see what you are creating with your Silhouette software or machines!
Feel free to post on my Facebook group at 
Silhouette Secrets with EllyMae.

Save this for future reference by pinning the image below.

Enjoy !

This image has an empty alt attribute; its file name is logo.jpg

THANK YOU for your support! How can you help? Click HERE & buy a coffee.
Every little bit helps with the cost of running the site.

SS Logo snip it
**This post may contain affiliate links. What that means is that I may receive compensation if you purchase through the links I have provided. The price you pay for the product or service is not higher but I may get compensated for sharing.
Posted on — Leave a comment

New Silhouette Class Released!

This class has been in creation for a long while and I first want to send a great big THANK YOU to Marjorie DiFiore with Atlanta Stylish Point!

Marjorie contacted me last year about a need she was seeing in brand new Silhouette Studio software users who did not necessarily own a Silhouette cutting machine, but were using the Silhouette Studio Business Edition to create for use in other programs or machines. We have worked together and she has answered my numerous questions regarding svg files, specifically in use with a GlowForge laser machine.
THANK YOU Marjorie!

Due to our big move, the class creation was delayed a bit, but I am excited to announce it is now available on my Teachable site!
With more to come in the future!

Check out the new class HERE

Silhouette Studio Software Basics to Create SVG Files

In this Silhouette Studio software class we use basic tools to create and export a svg file. We will discuss the important factors to know before creating svg files, how to install fonts, use basic tools to create a svg file, demonstrating using the exported file in the Glowforge App, and a bonus video on 3 additional tools in Silhouette Studio that can help in your design creations.

Who is this class for?
This class is for
– those who are laser machine owners and want to get started learning to use the Silhouette Studio software to design and export files in svg format to use with the laser machine
– if you are a beginner Silhouette user who wants to learn how to create svg files, this class is going to cover the basics of getting started with Silhouette and creating a simple svg file
– beginners to Silhouette Studio in general – the class covers several of the basic tools to get started creating your own designs using fonts. The class also discusses more advanced features of exporting as a svg file.

What if you do not own a laser machine can you still take the class?
Of course! The information will be relevant to anyone who wants to get started creating in the Silhouette software with the option to export as a svg file using the Silhouette Studio Business Edition upgrade.

Affiliate links are present in the following supply list and as an Amazon Associate, I earn from qualifying purchases
The cost to you is no different, but I may earn a commission by you using the links provided.

Class Supplies:

– Silhouette Studio Software
– Silhouette Studio Business Edition Upgrade
*this is discussed in class why it’s needed and how to get it
Optional fonts used in class:
– Radicals Font by Plusstore – main class demo
– Bohemian Script font – Silhouette Design Store or Creative Fabrica – Bonus class demo photo

Class Content

Section 1 – Important Factors Supporting PDF download
Section 2 – Important Factors to Create a SVG File – 20 minutes
Section 3 – Installing Fonts – 6 minutes
Section 4 – Creating a SVG Design in Silhouette Studio – 39 minutes
Section 5 – Demonstration of Exported Design in the Glowforge App – 16 minutes
Section 6 – Bonus: Additional Tools in Silhouette Studio – 16 minutes
Additional Resources
Class Conclusion

This class is available on my Teachable site

HERE

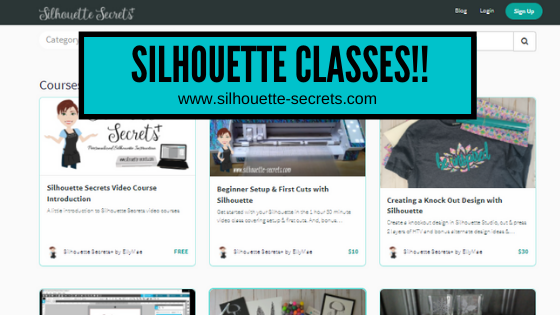
I currently have 22 different Silhouette classes available on Teachable.
These are all step-by-step video classes that are taught just like an in-person class.
The best part about being available online is that you can view the class anytime and as many times as needed to practice the technique.
Check out all the available classes

HERE

I would love to see what you are creating with your Silhouette software or machines!
Feel free to post on my Facebook group at 
Silhouette Secrets with EllyMae.

Save this for future reference by pinning the image below.

Enjoy !

This image has an empty alt attribute; its file name is logo.jpg

THANK YOU for your support! How can you help? Click HERE & buy a coffee.
Every little bit helps with the cost of running the site.

SS Logo snip it
**This post may contain affiliate links. What that means is that I may receive compensation if you purchase through the links I have provided. The price you pay for the product or service is not higher but I may get compensated for sharing.
Posted on — Leave a comment

Silhouette Classes

I have been teaching Silhouette classes since September 2016. I originally had not planned to teach when I signed up for the instructor course. I just wanted to learn more and boy did I!

I have been teaching ever since through the Silhouette Secrets+ blog, in-person classes, at Silhouette events, Zoom lessons, online classes, and even from Silhouette headquarters in November 2021. Taking the Instructor Licensing was definitely a life changing event for me and now I can share that with many more Silhouette users.

I’ll share a little secret too! The best part about teaching Silhouette is all the people I have connected from all over the world! Whether it is in person at an event or only online! I’ve met some amazing people!

Why take a Silhouette class?

The most common reason to take a Silhouette class is to get started faster. Rather than you spending hours testing and searching for an accurate video on YouTube on how to do it, skip the testing and get set up and cutting.

I have 21 Silhouette classes available on my Teachable website.
The classes are all step-by-step classes that are the same as I teach in person.
The best part is that after you register for a class, it is available to you at any time that is convenient to you. And you can watch them over and over if needed.
I find this is even better for Curio users as there is no need for me to watch your machine etch if we were doing a live Zoom call.

Find all the classes HERE

Developing classes takes time and testing. Let me do that for you!
These classes can help take the anxiety out of working with your Silhouette machine and the Silhouette software.

Still on the fence? I understand completely.
Check out the testimonies from past students who have taken classes HERE.

Here are a few of the classes available

Curio Classes

Other Classes Include:
Creating a Vinyl Decal and Layering Vinyl using the Silhouette Studio Software
Cutting & Layering HTV in Silhouette Studio
Glass Etching with Silhouette
Heat Transfer Paper Print & Cut Lesson with Silhouette
Creating a Knockout Design with HTV & Bonus HTV & Subtract
Creating a Rhinestone Design in Silhouette Studio

As well as: 
Cameo Pro DIY Stand/Table instructions & tips
Cutting Like a Pro with the Cameo Pro Tips & Troubleshooting printable

As a Terri Johnson Creates Licensed Silhouette Instructor, it is my goal to help others learn the Silhouette Studio software & how to use their Silhouette machines to get the most out of it.

Find all of my online Silhouette classes on my Teachable site HERE.

I would love to see what you are creating with your Silhouette software or machines!
Or if you have any questions, feel free to post photos or questions on my Facebook group at 
Silhouette Secrets with EllyMae.

Save this for future reference by pinning the image below.

Enjoy !

This image has an empty alt attribute; its file name is logo.jpg

THANK YOU for your support! How can you help? Click HERE & buy a coffee.
Every little bit helps with the cost of running the site & developing more classes.

Or if you are looking for more in-depth, step-by-step classes, check out all of my online Silhouette classes on my Teachable site HERE.
SS Logo snip it
**This post may contain affiliate links. What that means is that I may receive compensation if you purchase through the links I have provided. The price you pay for the product or service is not higher but I may get compensated for sharing.
Posted on — Leave a comment

New Silhouette Class Released

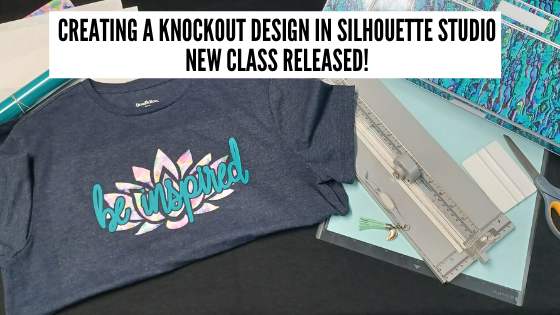
Come join me in learning about your Silhouette software and cutting HTV to create a knock out design. We will use several tools in the Silhouette Studio software to create this design.

Check out the full class HERE.

This is a step-by-step class from creating the knockout design, cutting patterned & solid HTV, pressing 2 layers of HTV, and bonus design tips for alternate designs ideas.

Class Supplies list

Affiliate links are present in the following supply list and as an Amazon Associate, I earn from qualifying purchases
 The cost to you is no different, but I may earn a commission by you using the links provided.

– Silhouette machine – any model will work
– Silhouette blade
– Silhouette cutting mat
– Sparkleberry patterned HTV or pattern/color of your choice
Use code SILSECRETS to save 10% at Sparkleberry Ink
– Heat Transfer Mask for patterned HTV (required if using Sparkleberry patterns or other types of patterned HTV without a carrier sheet)
*Note: patterned HTV and glitter HTV require 2 different masks – glitter requires a High Tack mask in case you decide to go with that
– Siser Easyweed HTV solid
– Blank to put the design on – I am using a T-shirt
– Weeding tool – EK Tools Reverse Tweezers are my tool
– Vinyl Squeegee
– Scissors
– Heat Press – I am using a Craft Pro 15″ x 15″ heat press from Heat Press Nation
– Teflon Sheet or Parchment Paper
– Paper trimmer (optional – but handy)
– T-shirt Ruler Placement Guide – (optional)
Heat Press Pads or Pillows – (optional) this helps with the seams on a blank if it cannot be placed off the press area

Find all the class details HERE on my Teachable site.

Find all of my Silhouette classes on the Teachable site HERE.

I would love to see what you are creating with your Silhouette software or machines!
Or if you have any questions, feel free to post photos or questions on my Facebook group at 
Silhouette Secrets with EllyMae.

Save this for future reference by pinning the image below.

Enjoy !

This image has an empty alt attribute; its file name is logo.jpg

THANK YOU for your support! How can you help? Click HERE & buy a coffee.
Every little bit helps with the cost of running the site.

Or if you are looking for more in-depth, step-by-step classes, check out all of my online Silhouette classes on my Teachable site HERE.

SS Logo snip it
**This post may contain affiliate links. What that means is that I may receive compensation if you purchase through the links I have provided. The price you pay for the product or service is not higher but I may get compensated for sharing.
Posted on — 1 Comment

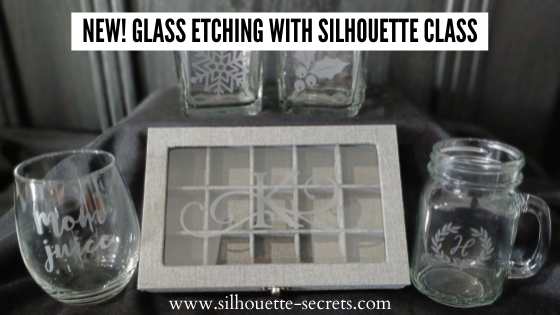
New Silhouette class – Glass Etching

Let me tell you, this class was challenging. Teaching how to use Silhouette is the easy part that I can do with my eyes closed (maybe most of the time). However, the tech issues, it was non-stop for me this round. And not Silhouette tech issues, but everything else, from recording software to the editing process.
It was driving me batty!
But 2 days and many hours later, I got it finished, with a few cuss words at the editing/recording software.

Glass etching is not difficult to do and I share my tips & tricks in this 1 hour 42 minute video class. In the class, I share cutting tips for measuring, sizing, and cutting 4 different stencils on 2 different materials. I cut from Oracal 651 and Oramask 813. Then I also demonstrated and provided tips to applying the stencils to 4 different shaped objects.
For the class, you do not have to use the same glass objects or do all of the projects, but it will give you ideas so you could use a wide variety of blanks.

The most difficult part of glass etching is getting a good photo of it due to the glass and glare.

Find all the details on the class

HERE

Affiliate links may be present in the following blog post and as an Amazon Associate I earn from qualifying purchases.

I’ve included the class supply list below to help prepare for what I used in the class.

Supplies needed:

– Silhouette machine
– Etchall Etching Cream – Amazon or – Etchall.com use code silhouettesecretsplus and save 10%
*This class uses Etchall cream. Using other brands of etching cream may not yield the same results. Etchall can be reused so is a great investment.
– Oracal 651 or 631
– Oramask 813
– Transfer tape
– Alcohol swabs
– Silhouette spatula or popsicle stick
– Painters Tape
– Rubber gloves
– Access to a sink & paper towels

Glass products demonstrated:
– Stemless wine glass
– Mason jar drinking glass
– Jewelry box: Gray, White, or Burlap
– Glass Candle holders from Dollar Tree

*Not all glass items can be etched. Tempered glass cannot, cookware from Ikea cannot, etc. The only way to know is to test it out for sure.

**You do not have to have the same items that I am using for class, but I will share some tips for these different shaped objects using the items in the photo above.

Designs used in class demonstration:
– Holly from Christmas design by Sarah Hurley – Design #334881
– Snowflakes by Erica Digital Designs – Design #379892
– Monogram Wreath Font by Kristen Magee – Design #260225
– Split & Full Flourish Monogram E (class demo) or Split & Full Flourish Monogram K (class photos) – by artist Kolette Hall
– Mom Juice created with a bold font
* These are just design examples and do not have to be exact. We will discuss design tips in the class and what can be easier to get a good etch with.

It is so fun to be able to customize glass items for gifts and Silhouette makes that easy.

Here are a few more things that I have etched with the same techniques as we cover in the class.

Glass coffee mug from Target
You Can Do This – Coffee design by Jillibean Soup – Design #218802

Glass Cookie Jar from Michaels etched for K pod storage
Coffee Canister Label by Chameleon Cuttable – Design #349557

More etched jewelry boxes I made for Christmas gifts
Split & Full Flourish Monogram – G by Kolette Hall – Design #128840
Split & Full Flourish Monogram – A by Kolette Hall – Design #128858

Glass etching is a great way you can personalize a gift too!

Like 25 glass mason jars from Michaels to be filled with candy as Thank You gifts.
Add a Print and Cut thank you note and ta-da!

Yes! Etchall etching cream works on glass and slate!

Slate serving trays from Johnson Plastics
Eat Drink and Be Thankful by Jillibean Soup – Design #280222
Monogram Family by Lori Whitlock – Design #271080

So many options! I hope that has given you some ideas.
Check out the Glass Etching with Silhouette class HERE and start perfecting your technique today!

Or check out the 19 other Silhouette classes available on my Teachable site HERE.

I’d love seeing what you are creating with your Silhouette machines or software.
Feel free to post photos or questions on my Facebook group at 
Silhouette Secrets with EllyMae.

Save this for future reference by pinning the image below.

Enjoy!

This image has an empty alt attribute; its file name is logo.jpg

THANK YOU for your support! How can you help? Click HERE & buy a coffee.
Every little bit helps with the cost of running the site.

Or if you are looking for more in-depth, step-by-step classes, check out all of my online Silhouette classes on my Teachable site HERE.

SS Logo snip it
**This post may contain affiliate links. What that means is that I may receive compensation if you purchase through the links I have provided. The price you pay for the product or service is not higher but I may get compensated for sharing.
Posted on — 1 Comment

HTV Sizing for T-shirts

Getting started with HTV can be overwhelming, but it doesn’t have to be.

One of the questions I see asked most often is,
“What size should I cut the design for my shirt?”

Affiliate links may be present in the following blog post and as an Amazon Associate I earn from qualifying purchases.

Basically, you can do any size you want since you can cut it on the Silhouette machine and adjust it as needed.

But there are a few things to keep in mind when you are doing it.
For instance, the design itself. Each design can vary in what might look good.
Another is, the size of the shirt you are adding the design too.
Larger is not always better.

Today I wanted to share a chart from Expressions Vinyl that can help in giving you an idea of what might look good.

Expressions Vinyl is an awesome company that offers a great selection of adhesive and HTV products.
I’ve worked with them in the past at the All Things Silhouette Conference and have had great success with my orders through them.

Today, I thought I’d share the HTV sizing chart that I am often referring to my students when they ask.
This will give you an idea of what to start with.

Now, a few things to keep in mind. This is a general idea to start with. The design itself can make a difference in what might look good or not. Every design can vary because it is made up of different aspects.

You may also notice that this sizing chart only goes up to a Large. What about bigger than that?

For shirts size of XL and up, I really do not go much larger.
The largest design I tend to use is just under 12″ x 12″, if it looks ok.
Why?
I was regularly making 3XL to 5XL shirts for my husband and most times I would ask him what he thought before I cut it. In our discussion he mentioned that for those larger size shirts, think of the person who is wearing it. He said he wanted the design to be front and center. He didn’t want people to have to walk around him to see the full design. When explained like this, it made complete sense.
The design should be completely visible when looking straight at the person who is wearing it.

Just something to keep in mind when making your own personal shirts.

Another thing to keep in mind when placing designs is busty women or in general a women’s bust area.
I’ve seen some designs popping up in the past year or two that are very specific to a bust area such as this
Hey Check Out My Pumpkins by Petra Studio Art – Design #384455.

In this design, the placement is very specific and on purpose.
However, what if that is not what you are going for.

I made this shirt with design Wine Tasting Team Captain by Megan Hardy Designs – Design #322093 but I was not thinking about the placement of the design aspects when I made it.

Now I just laugh about it when I wear it.

One other thing that I just purchased to hopefully help me get better placement of HTV is this T-shirt Ruler Placement guide.

Note: you do not press this in the heat press, it is only used for lining things up.

I was in the Craft Chameleon store for an event and thought it might be worth giving a try to see if it helps me get the design on straighter. It is a hard acrylic ruler and I’m hoping it helps me.
It never fails that I eyeball it and my design is just a little bit crooked, even if I press the center of the shirt. The ruler will hopefully give me that straight edge to line up the design with.
Or I’ll just continue standing a little bit off center so no one notices.
Things happen to us all!
Practice, practice, practice!
And have fun!

I hope those tips have helped in getting started with HTV cutting and your Silhouette!
Here are a few more posts with information and tips on cutting HTV:

Silhouette “Secrets” for HTV – Beginner Tips & Tricks

Cutting HTV on the Cameo 4, Plus, or Pro – Troubleshooting

Note: these tips will also work for all machine models, but the photos are very specific to the Cameo 4 model

Let’s Explore v4 – Mirrored HTV not Cutting Right

Want to get a little fancier in the design process?

Check out these 2 posts that feature layered HTV designs

Designing in Silhouette Studio

Subtracting Text for HTV in Silhouette v4

I’d love seeing what you are creating with your Silhouette machines or software.
Feel free to post photos or questions on my Facebook group at 
Silhouette Secrets with EllyMae.

Save this for future reference by pinning the image below.

Enjoy!

This image has an empty alt attribute; its file name is logo.jpg

THANK YOU for your support! How can you help? Click HERE & buy a coffee.
Every little bit helps with the cost of running the site.

Or if you are looking for more in-depth, step-by-step classes, check out all of my online Silhouette classes on my Teachable site HERE.

SS Logo snip it
**This post may contain affiliate links. What that means is that I may receive compensation if you purchase through the links I have provided. The price you pay for the product or service is not higher but I may get compensated for sharing.
Posted on — Leave a comment

Silhouette & Michaels Class

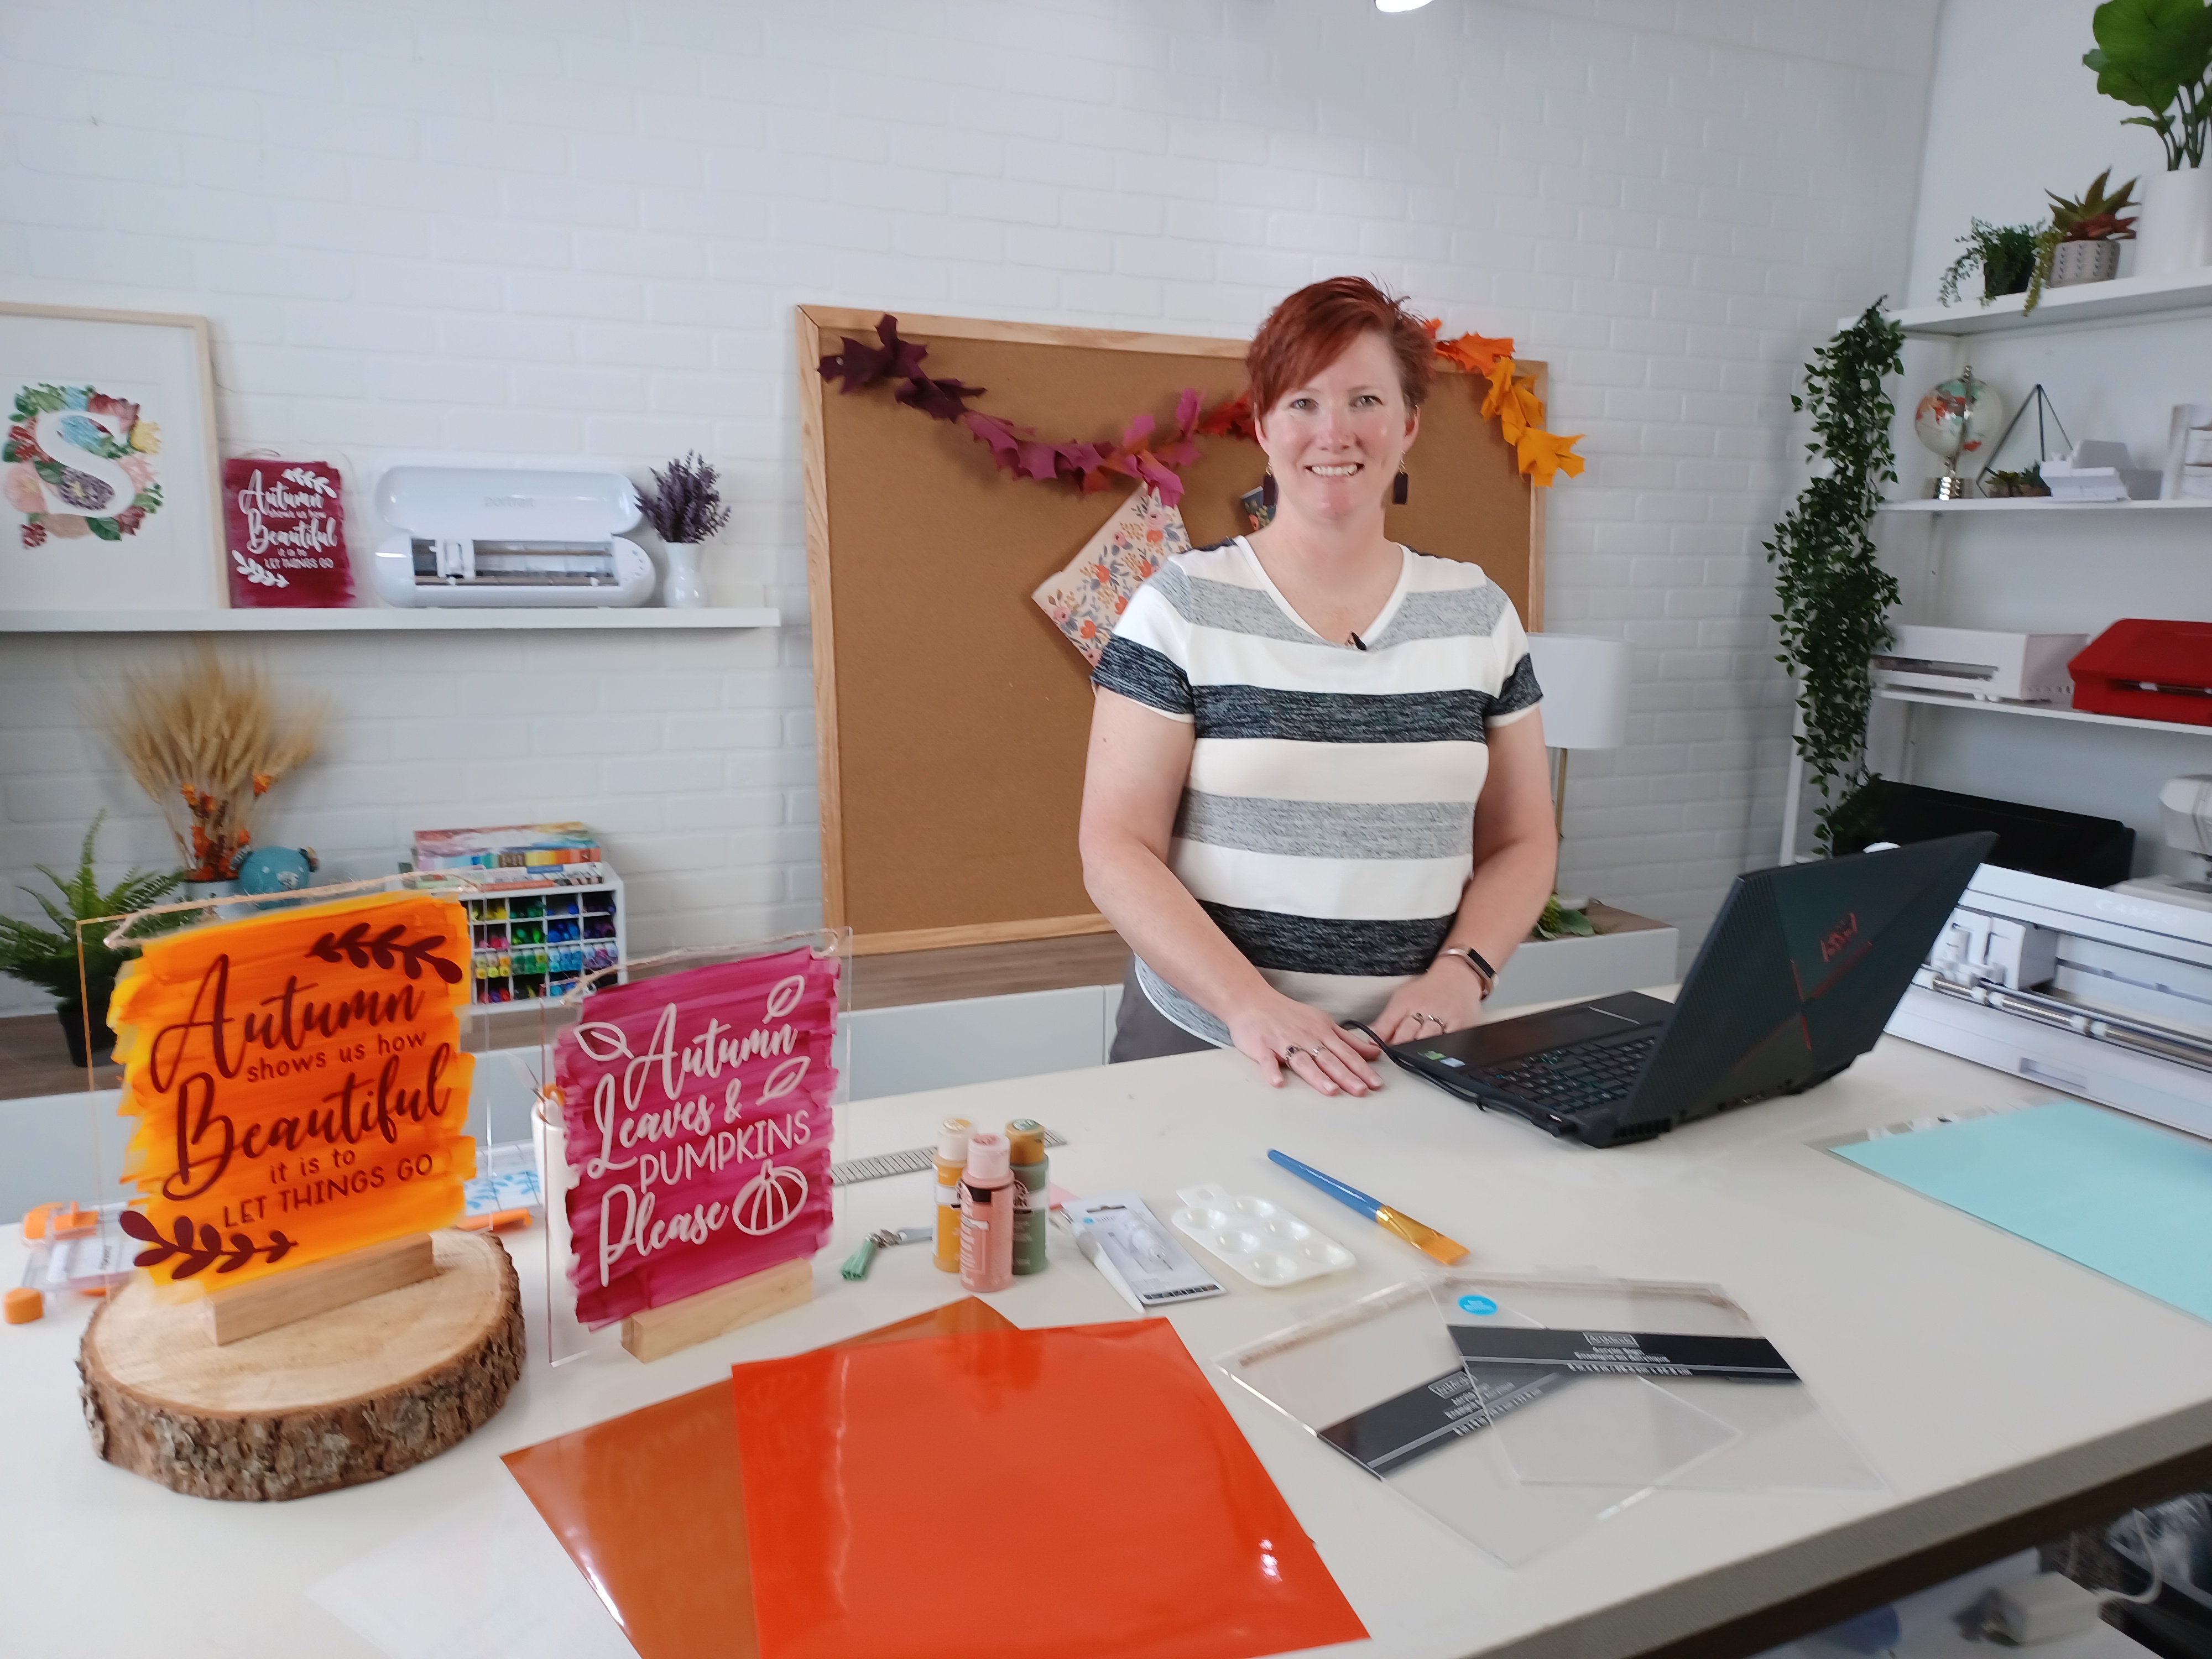
Yesterday I was able to teach a class from the Silhouette Headquarters in Utah.

It was a beautiful fall day.

Here is a peek at the look at the Silhouette video and photography studio before we started the Zoom class.

The video recording is now available for viewing on the Michaels YouTube channel.

Check it out HERE

For more ideas of what you can do with the acrylic sign decor that I demoed in the Silhouette & Michaels Zoom class, check out this post HERE.

After the Silhouette and Michaels Zoom class, we did a quick Facebook Live on the Silhouette America Facebook page.

Check that out HERE

I hope I will see what you are creating with your Silhouette software & machines soon!
Feel free to post photos or questions on my Facebook group at 
Silhouette Secrets with EllyMae.

Save this for future reference by pinning the image below.

Enjoy!

This image has an empty alt attribute; its file name is logo.jpg

THANK YOU for your support! How can you help? Click HERE & buy a coffee.
Every little bit helps with the cost of running the site.

Or if you are looking for more in-depth, step-by-step classes, check out all of my online Silhouette classes on my Teachable site HERE.

SS Logo snip it
**This post may contain affiliate links. What that means is that I may receive compensation if you purchase through the links I have provided. The price you pay for the product or service is not higher but I may get compensated for sharing.


Posted on — 7 Comments

10 Creative Acrylic Sign Decor Ideas for Every Season and Style

Silhouette Secrets+ with EllyMae

Acrylic sign decor is a versatile and stylish way to enhance any space, whether you’re sprucing up your home for the holidays or adding a personal touch to your everyday surroundings. With endless design possibilities, acrylic signs offer the perfect blend of elegance and creativity for seasonal and year-round decor. In this post, we’ll showcase 10 creative acrylic sign decor ideas that are easy to make and guaranteed to inspire, whether you’re a seasoned crafter or just starting with your Silhouette cutting machine. Get ready to elevate your decor game with these stunning designs!

10 examples of acrylic sign décor for seasonal or everyday décor

Affiliate links may be present in the following blog post and as an Amazon Associate I earn from qualifying purchases.

Acrylic Sign Decor Autumn theme with Silhouette

Autumn Shows Us How Beautiful design by Silhouette – Design #383335

Basic supplies for all sign decor

How to Create Acrylic Sign Decor:

Gather the supplies for your sign.

Paint the backside of the design with acrylic paint in the color(s) of your choice.
Let this completely dry before moving on to the next step.

Measure the size of your acrylic sign. Draw a rectangle the same size as the sign. If using an odd shape, make sure to measure inside of the narrowest part of the sign.

Acrylic Sign Template for Sizing
Red rectangle shows narrow part of an odd shaped sign. Draw your design template that size to make sure your design fits within the sign space.

Select your design and size it inside of your drawn rectangle to best fit the shape you are working with.
Some designs will work better within a certain shape or portrait vs landscape orientation.

Cut adhesive vinyl in the color(s) of your choice.
Weed away the excess vinyl around the cut design.
Apply to the front side of the acrylic sign using transfer tape.

Hang your sign by the twine attached (if applicable) or use a wood stand.
Note: test your acrylic thickness with your wood stands – this may vary depending on the acrylic purchased and stands used.

Create signs to change out seasonally with your decor or just for general home decor purposes to enjoy all year long!

Store acrylic signs in page protectors when not in use to minimize any scratching on the acrylic sign or acrylic paints used. I will also wrap them in bubble wrap when storing as well.

I’ve created a few more signs to share with you and hopefully spark your creative thought process in how you can use this technique to fit your style.

Thankful Grateful Blessed Acrylic Sign Decor

Design used: Thankful Grateful Blessed design by Silhouette – Design #388089

Believe in the Magic of Christmas Acrylic Sign Decor

Designss used:

I don't have ducks in a row. I have squirrels and they are at a rave acrylic sign decor.

Designs used:

This house runs on love laughter and inappropriate humor acrylic sign decor.

Designs used:

Crafting Forever - Housework Whenever acrylic home decor

Design used: Crafting Forever Housework Whenever by Jillibean Soup – Design #295547

Laundry Acrylic Sign Decor

Design used: Laundry Schedule by Lori Whitlock – Design #93059

Everyone wants to change the world acrylic sign decor

Design used: Change the Toilet Paper Roll by Jillibean Soup – Design #285168

Bee Yourself Acrylic Sign Decor

Designs used:

Happy Fall Acrylic Sign Decor

Design used: Happy Fall Autumn Phrase by Angele Kamp – Design #227654

Hopefully those have given you some ideas to start creating your own acrylic decor!

I had the incredible opportunity to teach this class at Silhouette HQ for a Michaels Live YouTube tutorial, where I shared tips, techniques, and inspiration for creating stunning acrylic sign decor using a Silhouette cutting machine. You can catch the full tutorial and learn along with me by watching it HERE.

Find more Silhouette tutorials on the website HERE.

Save this for future reference by pinning the image below.

Acrylic Sign Decor Pinterest

Enjoy !

THANK YOU for your support! How can you help? Click HERE & buy a coffee.
Every little bit helps with the cost of running the site.

Silhouette Classes

Never stop learning! Let me help you take the anxiety out of learning with Silhouette and get to creating faster! My Silhouette classes are heavily focused on software, so you can take the skills & techniques taught and apply them to many future projects!

Silhouette step-by-step Classes by Silhouette Secrets+

Silhouette Secrets+ with EllyMae
**This post may contain affiliate links. What that means is that I may receive compensation if you purchase through the links I have provided. The price you pay for the product or service is not higher but I may get compensated for sharing.