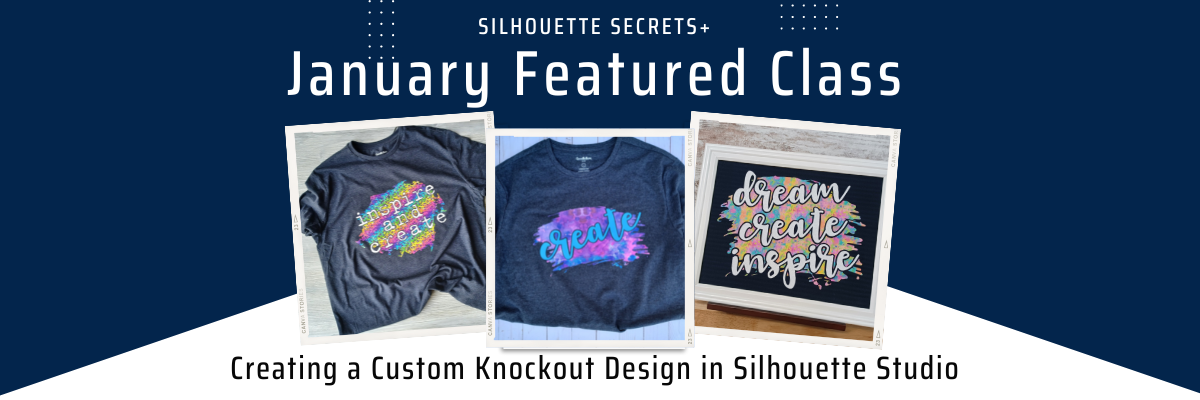
In this class, you will create your design! I show you how to download an image, trace, work with compound paths, text, offset, and the modify-subtract tools. Through this step-by-step class I explain what we are doing with each tool used. The techniques learned in class can be apply to many future projects. I cannot wait to see what you create!
Check out the full class description, supply list, and class content HERE.
And use coupon code KNOCKOUT2023 to save $5 off this class. Good through 1/31/23. There are now 2 purchase options. A 60-day access and a lifetime access. This is also NEW for 2023!
I am also sending out a newsletter on the 5th of each month from my Teachable site. Anyone who is registered on the Silhouette Secrets+ Teachable site and has not opted out of the notifications will receive the newsletter and information early in the month.
Silhouette “Secrets” – Because some things are just too good not to share! –
One other thing I am starting for 2023 is sending out some of the “secrets” I have taught either through written tutorials or videos throughout the past years. I have 6+ years of blog tutorials that are available to access any time. This will help to highlight some tools that you may not even know you want to learn about.
Silhouette “Secret” #1
As we begin this new year, let’s talk organization! First, I am not a great example of keeping things organized. If you get a glimpse of my files, I am more of a “hot mess express” as I’ve collected things over the years. However, if I could go back and start over, I would. I do have a system and it works for me, it just may be a little crazy at times.
Last year I published a series of specific tutorials regarding organization that pertain to your Silhouette files.
How about tools? I love tools but what I love more is having tools handy and ready for me to grab easily for my project. I recently received a new tool kit and fell in love with 2 tools in particular – the weeding pen and the scraper.
The pink weeding tool turned out to be my favorite in this design that took 2 hours and 20 minutes to weed completely. It was the most comfortable to use and the sharp point stabbed those small pieces well.
Silhouette “Secret” #3
As I look through tutorials, I can’t share just one as the 3rd secret. I’ll try to be more precise in the future, but I’ll keep it short by just providing a list of a few that might be helpful and maybe one will jump out at you.
I wish you a great start to 2023 and I hope I can help you learn more about your Silhouette!
THANK YOU for your support! How can you help? Click HERE & buy a coffee. Every little bit helps with the cost of running the site.
**This post may contain affiliate links. What that means is that I may receive compensation if you purchase through the links I have provided. The price you pay for the product or service is not higher but I may get compensated for sharing.
I am in LOVE! I know I get excited about the little things but I do!
And maybe only another paper crafter will understand my excitement but this tool kit is great no matter what kind of crafter you are!
Here is a close up clip of the pieces flying off my cutting mat
Affiliate links may be present and as an Amazon Associate I earn from qualifying purchases.
This CrafterCuts 7 piece Vinyl Tool Kit can be found HERE. Use code SECRETS to save 10% too! And free shipping on orders over $35. Don’t forget to stock up on Silhouette cutting mats and blades if you need them!
I can’t wait to see what you create this year! I know with this tool I won’t be shying away from some intricate paper cuts.
Save this for future reference by pinning the image below.
Enjoy !
THANK YOU for your support! How can you help? Click HERE & buy a coffee. Every little bit helps with the cost of running the site.
Or if you are looking for more in-depth, step-by-step classes, check out all of my online Silhouette classes on my Teachable site HERE.
**This post may contain affiliate links. What that means is that I may receive compensation if you purchase through the links I have provided. The price you pay for the product or service is not higher but I may get compensated for sharing.
Are you a Silhouette owner and just got a new computer? Not sure where to go from there?
It is pretty easy to get setup and running with a new computer and I’m going to share a few tips.
First when you get a new computer, be prepared that it will take a little bit for it to be ready for you to start using. There will be some computer setup instructions for you to follow. And if you are a Windows owner, you may find that you have a lot of Windows updates that need to install in order to get it ready for use. Be patient and let it setup correctly. I know you are excited, believe me, I always am too! But, there really is no rushing it. The updates will finish when they finish.
Steps to Setting Up a New Computer with Silhouette Studio
Below I’m going to list the steps to start with when setting up a new computer with Silhouette Studio. Each step in this process has some tips that can help you get set up faster and I’ve included important information in detail below. I would highly recommend reading the entire post before you get started.
1 – Download Silhouette Studio from the Silhouette America website 2 – Activate Software Upgrades 3 – Log in to the Silhouette Library 4 – Install Fonts 5 – Export User Designs
IMPORTANT TIPS!
1. Silhouette Studio Software Installation
When you get a new computer, you will first need to download the software on to the new computer. This can be found on the Silhouette America website. Click on Software & then Get Software
For the Silhouette cutting machines, you will select the Silhouette Studio option.
For the current version of the software, you simply click Download and it will download the current version to your computer. It is the Basic software program. We will talk about upgrade activation further down.
Note: As of the publication date of this post, I DO NOT recommend the current version unless you have a Silhouette Auto Sheet Feeder to use. I would highly recommend v4.4.554 for most users.
Legacy Versions
To find Legacy versions click on Learn More
Click on Download Legacy Versions
Choose which Legacy version you want to install
This will download the installer to your computer and you will open that to start the installation.
Click HERE to go directly to the Software download page.
There may be some pop ups that come up that need approval in order to proceed. Watch the bottom task bar for any flashing shields if the pop up doesn’t actually pop up.
If a flashing shield appears, click on it and then approve ALL the pop ups. If you do not click on the shields to approve, it will look like it stalled, but it is waiting on you!
Once the installation is complete, you can open the Silhouette Software.
If by chance you have a new Windows Computer and it is running in S mode, it will not let any program that is outside of the Microsoft Store install on the computer. You will need to take it out of S mode in order to install any programs, including the Silhouette software. For more information on how to take it out of Windows S mode click HERE.
2. Activate Silhouette Studio Upgrade
Affiliate links may be present in the following blog post and as an Amazon Associate I earn from qualifying purchases.
Silhouette software upgrades include Designer Edition, Designer Edition Plus, and Business Edition. These upgrades unlock features that are in the software. To see what each upgrade unlocks, click the Feature Comparisons to find out more information. Find this HERE
This will bring up a chart you can scroll down through to see what features are with each upgrade.
If you are using a software version of v4.4.554 or higher, you do not need to enter your upgrade codes in the software. Click on Help – Apply Upgrade Edition and enter your log in information. Do NOT enter your upgrade codes. Once you log in with your Silhouette account info, your upgrade should be active on any computer you log in to.
This is a new feature and is only available in software versions of v4.4.554 or higher. The upgrade can only be active on 3 computers at a time. If you log into a 4th computer, it will deactivate on the oldest computer that has not been active.
For older software, software upgrades do not automatically activate when you download the Silhouette software to a new computer. If you have ever entered an upgrade code, you will need enter the upgrade codes in the order that you purchased them for it to activate on the new computer. So if you purchased the Designer Edition and then the Business Edition later, you would need to enter the code for Designer first and then Business next. If you try to enter Business Edition first, you will get an error and it will not activate.
If you are a brand new user, there is a new system that is in process and you can activate the upgrade on the Silhouette America website to be used on any computer you log into. This is still very new and only available for those that are brand new and have never entered an upgrade code as of 10/15/21.
If you do not remember what the codes were, you can easily access them under your Silhouette account information in the Silhouette Design Store. Open the Silhouette Design Store, make sure you are signed in, move the mouse over the person icon in the top right corner, and then choose Account Settings.
Then click on the License Keys section.
3. Log in to the Silhouette Library
Once the software is open, click in the top right corner on the Library tab.
Enter your Silhouette Account information and all of the files that are in the Silhouette Cloud should Sync up. It will depend on how many files you have in your Silhouette library on how long it will take to fully sync. Another hurry up and wait moment.
As a point of reference, I have high speed internet and 12,000+ files. This took approximately 3 hours to sync my library completely. Keep in mind that each of those files has to sync fully to the new computer. That is a LOT of data, but just depends on how many files you have in the library.
Plug in Silhouette machines to computer & turn on
If you have an older model Silhouette machine of a Cameo 3 or older, the free files download to the library once the machine is recognized. Plug in the Silhouette machine, turn it on, and click on the Send tab. Once it has recognized the machine, then the files will download to the library. You will need to do this for ALL machines that you have had plugged into your software to get those free files to download.
If you have multiple machines, click on the little machine icon in the bottom right corner of the Send tab to choose the machine you want active.
This will also unlock any panels that are associated with a particular machine such as the Emboss Panel for the Curio or the Stipple Panel for the Cameo 4, Cameo 3, Portrait 2, and Curio machines.
Exporting files on old computer
Note: this is only needed if files cannot be recovered in another way
If there are files that did not show up when you logged in and the library synced, the first reason would be they are the free with machine and I would suggest looking at the above information again. If you have done that, then it could be because those files were only stored on the Local User section of the old computer. This will be dependent on the Silhouette software version you were using before. If you were using a version prior to v4.1, you will find more tips on exporting the library in this post – Library Tips (v4.1).
If you have a library backup file, it can then be imported into the Silhouette library by clicking on your name in the top left of the Library and choose Library Import, then select the location of the file backup.
Screenshot from v4.4.892
But this only needs to be done if files are missing and you cannot get them to sync up any other way. If you do it and it’s not needed, you can end up with many duplicate files, which you’ll need to remove manually.
4.Install fonts on the new computer
Keep in mind that when you set up a new computer, you are starting from scratch. That means you will need to install any program or file that you were using on the old computer, if you want it on the new computer. This includes fonts. The new computer comes loaded with the default fonts only and these can vary by computer.
While I have heard of others being able to copy and paste the entire font file from their computer programs folders on the old computer and then pasting it into the new computer fonts folder, I have had mixed results with this. I had to right click on the font and choose “Install for All Users”.
Luckily, I had saved all my font files that I’ve collected onto a folder in my external hard drive, so I could access them direct from the external drive. While I still had to install over 500 fonts, I did get to also pick and choose which ones I really “needed” on the new computer.
I have had several new computers in the last few years and on one I had to install each font and on the other, some worked by copy and paste.
BIG TIP TO NOTE: If you created designs using certain fonts, when you open the design file, if that font is not installed on the computer you are using to open the file, the font will revert to the default font style on that computer.
5. Export User Designs from Silhouette Library
If you have downloaded the current version or a version higher than v4.4.552, there is also a new feature that allows you to export all User Designs from the library as individual files.
Click on your name in the top left corner of the library tab and choose Export User Created Designs.
For more details on this specific features, check out this post HERE
While I do NOT recommend storing your personal files in the Silhouette library, there are times that it is handy when you are accessing files on multiple computers or using Pattern Fills in the Silhouette software.
One big thing to note
when exporting these User Designs is that it will export the entire library folder structure. However, any designs from the Silhouette Design Store, the folders will be empty. Only the user created designs will be exported. This is due to the proprietary nature of the .studio files and to protect the designers of those files from theft.
I would HIGHLY recommend using this export feature when you update to the software of v4.4.552 or higher because it is a really nice feature. However, as a general note, I do not recommend that all users update to this version or higher. There are many factors that I consider before advising a user on whether they should update. It really comes down to the user’s choice, however, before I make a recommendation I do ask for more information. If you would like to know what I’d recommend for your situation, feel free to post on the Silhouette Secrets+ with EllyMae Facebook group and we can take a look at the factors.
Keep in mind that the Silhouette library is not designed as an all inclusive storage area but as a syncing device. This is one reason the Silhouette cloud storage is limited in size. All users get 1 GB of storage space, but if you are a Silhouette Club Member or a Silhouette Design Store Subscriber, you get 5 GB of storage.
————
I hope this helps you start enjoying that new computer and your Silhouette software a little bit quicker! The biggest tip I can say is to be patient! I am not the most patient person when it comes to setting up a new computer, but if I tell myself that in the beginning sometimes it helps.
We love seeing what you are creating with your Silhouette machines or software. Feel free to post photos or questions on my Facebook group at Silhouette Secrets with EllyMae.
Save this for future reference by pinning the image below.
Enjoy !
THANK YOU for your support! How can you help? Click HERE & buy a coffee. Every little bit helps with the cost of running the site.
Or if you are looking for more in-depth, step-by-step classes, check out all of my online Silhouette classes on my Teachable site HERE.
**This post may contain affiliate links. What that means is that I may receive compensation if you purchase through the links I have provided. The price you pay for the product or service is not higher but I may get compensated for sharing.
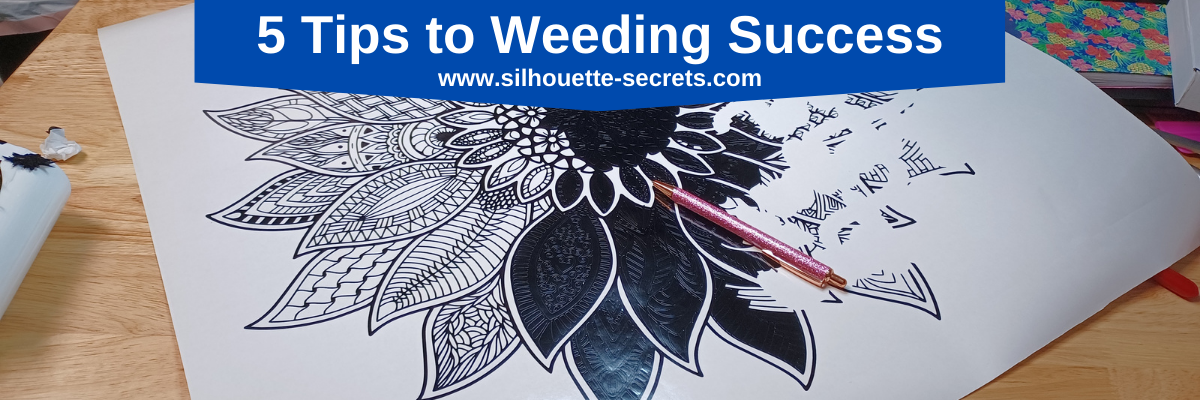
This past week I was working on a very large, intricate adhesive vinyl decal and thought I’d share some of the tips I use for weeding projects.
What is weeding?
The word “weeding” can bring to mind different things to each person. In this case, I am referencing the process of removing the excess material around a design you have cut with a cutting machine.
Affiliate links may be present in the below and as an Amazon Associate I earn from qualifying purchases.What that means is that I may receive compensation if you purchase through the links I have provided. The price you pay for the product or service is not higher but I may get compensated for sharing.
I am cutting Oracal 651 adhesive vinyl and this decal is 21.5″ x 21.5″. It is a very detailed design and I am not sure how it would cut at a smaller size. Some areas even at this size have very small dots, but you never know until you give it a try.
Tips for Weeding Success
1 – Good Cut Settings!
Test cut, test cut, test cut or be prepared to either sacrifice some materials if the cut doesn’t come out or spend a lot more time than needed on weeding.
Check out this tutorial HERE for 2 ways you can set up to do test cuts.
2 – PRACTICE!
It’s a new skill for most and practice is the only way you get better at anything! And you will still make mistakes, like weeding the wrong piece or going to fast. Practice helps!
3 – Weeding Tools
Find a good weeding tool that you are comfortable using.
I tried new tools and always went back to these EK Tools Reverse Tweezers. I even bought several pairs to have in different locations or if one happened to be in a “safe” place and I couldn’t find it when I needed it. But, for a larger project or one where I weeding multiples of a design, I found my hand would start to cramp up after awhile holding these. I still really love them because it has a sharp point and also tweezers to grab pieces with quickly, but I forced myself to again try some new ones.
When I first tried it, the heavier handle was hard to get used to but, over time, I got used to that and found that I really liked this one, especially for HTV and larger sections. You can find this Siser Easyweeder Tool at The Vinyl Spectrum or Michaels.
In the video link I share below, you’ll see me use this several times.
This one is nice because it is designed with the pen body and has a silicone grip that can be more comfortable for some users. The Pin Pen also comes in several colors in case you are one to match your tools.
I don’t think the sparkle pink has anything to do with it, but I loved the sharp pin point on it for this particular decal I was weeding. You will see that I used it quite a bit in the weeding video below.
Why did I list several different ones? Because I see the question of what weeding tool is the best asked all the time. And the answer is – whatever tools works best for you!
I have seen some amazing work done with just a thumbtack as the weeding tool or a sewing pin. It’s not something I feel comfortable doing, but you need to decide what works for you and develop a method for that.
A good pair of Tweezers can be helpful when weeding to pick up small bits. The first tool I shared, the EK Reverse Tweezers, has the tweezers built in, but some have a hard time getting used to the reverse part.
I am a big fan of having multiples of tools in my studio. Mostly because my tools seem to find “safe” places that I can’t even find because they are so safe.
I used 2 different pairs when weeding this decal depending on what was closest to me.
Scissors are another great tool to have handy when weeding! Some designs you can create weeding lines and have the machine cut the design into smaller sections to weed, however, this particular design was all one piece and there wasn’t any way to add weeding lines to it.
For more on creating your own weeding lines, check out these tutorials on the blog HERE.
I recommend having a pair of detail scissors for smaller areas. I just added these Fiskars 5″ Soft Grip Detail Scissors to my studio shop a few months ago. I actually ordered 3 pair so I could have them available in different areas of my studio.
Upon delivery, I highjacked it and had it set up and put it to work. It made weeding this very small, detailed cut do-able.
Decal cut with Siser Juliet machine
You can see how thin these cut lines are and weeding was interesting, but the magnifying light helped out so much!!!
Here it is in action as I was getting ready to weed this rose decal.
Now something to note here, I cut this decal as a test. When cutting small decals such as this, keep in mind that the thinner the design is, the less surface area there is with adhesive on it, so it may not be ideal for a lot of projects.
I have one similar to this one above that had good reviews, but I don’t use it often. But, it is probably more a matter that I need to take time to practice like when using new weeding tools. I know many others who use it for weeding all the time.
5 – The Design
The design you are using can make a difference too! Some designs are just a bugger to weed no matter what you do.
The size of the design can make a difference too! Some designs do not cut well at smaller sizes.
As I mentioned at the beginning, this design is Take What You Have by TrueNorthImagesCA had some really tiny small circles within the mandala sections even at the 21.5″ size. This is not a design I would attempt to cut super small. In my experience, it’s just not going to cut properly.
One thing you can look at in a design is the Edit Points and see if you can simplify things a bit to help it cut better. It won’t always work but it’s worth a shot.
A design that has been traced will most often have more Edit Points than a svg file of the design. The svg file should be the cleanest cut that you can get. However, this is also designer dependent as well. A bad file is just a bad file and most likely not worth your time or headache.
I hope those tips will help you in your future weeding projects!
I see videos of projects online all the time and I did a timelapse of this project to share. I am creating both the long and short versions of this project.
When I did the calculation, the entire project took me 2 hours and 20 minutes to weed completely.
Check out the videos by clicking the links below. I used almost all of the tips I shared above in the full video, except weeding lines and the light box.
5 Tips to Weeding Success – Long Version – found HERE I encourage you to watch the first few minutes of this video as I am sharing some tips, the feel free to fast forward as desired.
Save this for future reference by pinning the image below.
Enjoy !
THANK YOU for your support! How can you help? Click HERE & buy a coffee. Every little bit helps with the cost of running the site.
Or if you are looking for more in-depth, step-by-step classes, check out all of my online Silhouette classes on my Teachable site HERE.
**This post may contain affiliate links. What that means is that I may receive compensation if you purchase through the links I have provided. The price you pay for the product or service is not higher but I may get compensated for sharing.
Changes – no one really likes them, but they are part of life!
I was chatting with a colleague the other day and told them that my motto for 2023 was going to have to be “Evolve or Dissolve”. I was trying to make light of it, but the reality of it is very true! I either have to make changes or just give it up altogether.
And so I am writing this post to let you know that I have to make some changes for 2023. These are not things I really want to do, but “evolve” it is and I must do so.
Changes for 2023
I am sure that you all know that the cost of things has increased and this industry is no different. The first major change of 2023 will come to my online Silhouette classes at Teachable.
UPDATES – December 15, 2022
This week I received an offer from CrafterCuts to sponsor Silhouette classes on my Teachable site. This means it will be possible for me to continue releasing new classes as I have been.
There will be updates to the site coming in January 2023.
CrafterCuts is an authorized Silhouette retailer and I was referred to them direct from Silhouette.
A great big Thank You to CrafterCuts for coming on as a sponsor and making it possible for me to continue to develop current Silhouette classes.
And for my followers use code SECRETS to save 10% on your order from CrafterCuts.
Here is looking forward to 2023 and what is to come. Check out the current classes listed below and remember if you register before December 31, 2022, you will have lifetime access to those classes.
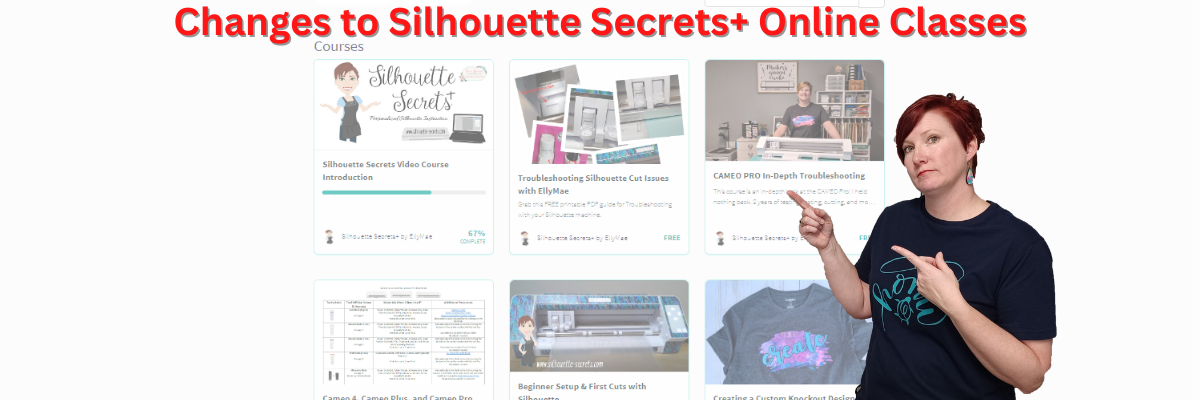
As of January 2023, I will only be able to have 5 active classes available on my Teachable platform at a time.
What does this mean?
First, it means that effective December 31, 2022, all of the current classes will no longer be available for purchase as they currently are. I can only have 5 active classes published at a time.
I am in the process of deciding which if any of the current classes should go back up. I will be making this decision as I work through the process on the back end of things on the site.
But, once I start making changes to my Teachable site, I am limited to 5 active classes only, at one time.
So effective December 31, 2022, all the current classes will no longer be available.
What about a class you already purchased?
If you have already purchased a class on my Teachable site, you will have access to that class even after it is no longer available for purchase. This class should show up under your Teachable account when you log in.
Starting in 2023, there may be a time limit for viewing any new courses that are offered. I am still working on all the details and what I need to adjust. However, anything you purchase prior to December 31, 2022 you would have access to it for a lifetime according to Teachable.
Have I looked at other options?
The answer is yes, I have. I’ve researched many other options out there and they all come down to the same thing – cost!
It costs money to have the blog website. It costs money to have an online hosting platform for the classes. It all has a cost and I have to weigh those costs and decide what is feasible for me to invest in. And I have to do that to pay in advance for the next year. Bottom line is, costs have increased and Teachable notified me that if I wanted to continue as I had with unlimited classes it was going to cost a whole lot more.
So for 2023, I am going to try this out with the 5 available courses and see what happens. This means some classes released will have a limited time frame they are available in order to offer new ones. At the end of 2023, I will once again have to look at whether I “Evolve or Dissolve”…. lol – most likely after I get an email that my costs are increasing yet again. It’s just part of the business.
I enjoy teaching Silhouette classes, but there is a cost to it all, both in monetary value and time.
What about the free content on my Teachable site?
This change includes the free content that I have available currently on my Teachable site. As of December 31, 2022, all content will no longer be available to register for, including the free classes. Any class I publish counts towards that limit of 5, this includes “free” items as well.
I am in the process of reorganizing how I will offer things like the free content currently on the site in the future. I cannot continue to offer that on the Teachable site with the rise in costs to host on the site.
What current classes are offered?
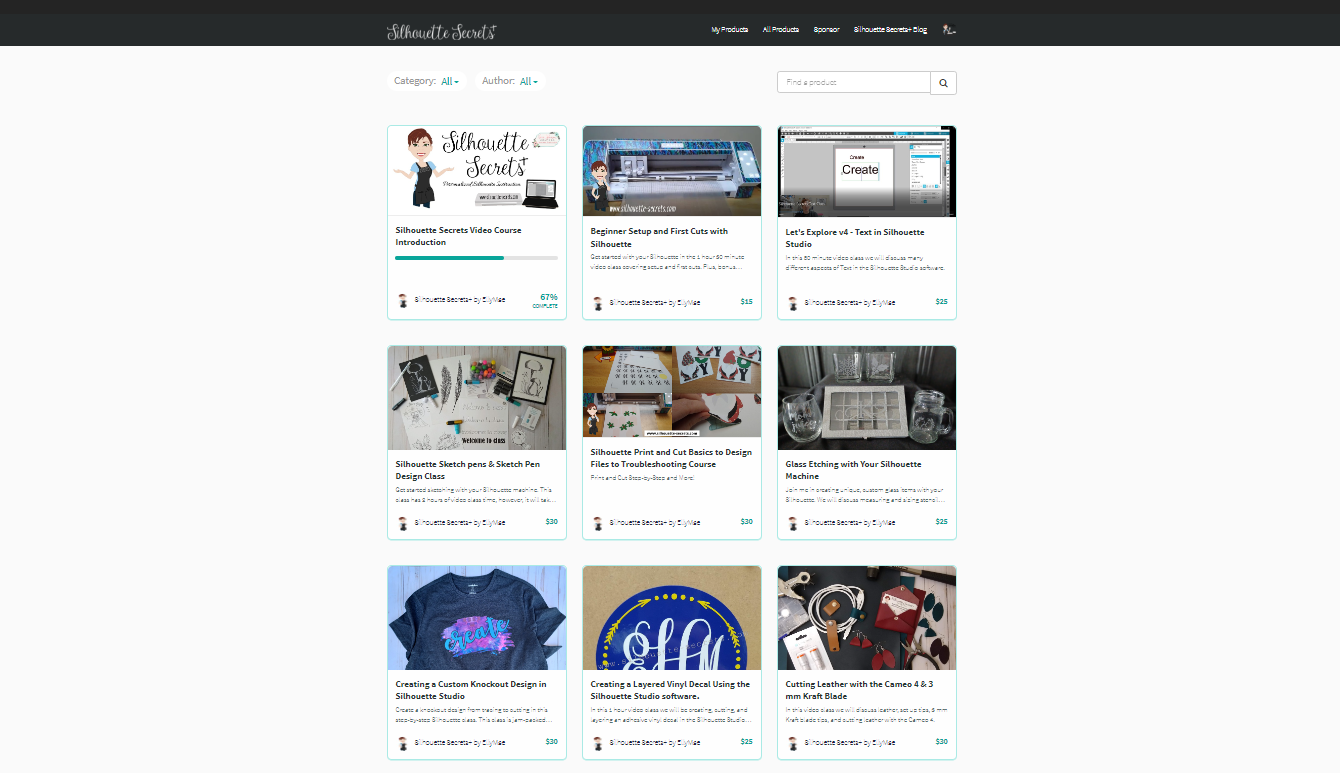
You can click HERE to be taken to my Teachable site to preview all the classes available or below on each individual class for more details.
– Post videos on the Swift Creek Customs YouTube channel where we hope to inspire other Makers Follow us that channel HERE to be notified of new content when it’s released.
– Merging it all together? Still an unknown, but many know that I launched a new site called Swift Creek Customs where I share content that is not specifically Silhouette related. My husband and I are both involved in many hobbies and hope to inspire others as well, but it’s not always strictly Silhouette based, so the new channel was created.
– Sending out a newsletter? This one is a ? still as I don’t know if people would read it. If you are interested in a newsletter, please comment below and sign up on my Teachable site.
– And many other things that I write in and then cross out. It is an evolving process and who knows what can happen in 2023!
So for now, I’m still here and will have some Silhouette online course offered in 2023.
This year I also added the “Start Here – A to Z” menu on the blog. If you are looking for a topic, I have those organized in A to Z format with all the information I’ve published in the past 6+ years.
I want to thank you all for your support through the years. Without your support, I would not be able to even consider making changes and continuing what I’ve been doing to bring more information to you.
I want to wish you all a very happy holiday season and I hope that the New Year brings you lots of blessings! Let’s see what we can create in 2023
Enjoy !
THANK YOU for your support! How can you help? Click HERE & buy a coffee. Every little bit helps with the cost of running the site.
Or if you are looking for more in-depth, step-by-step classes, check out all of my online Silhouette classes on my Teachable site HERE.
**This post may contain affiliate links. What that means is that I may receive compensation if you purchase through the links I have provided. The price you pay for the product or service is not higher but I may get compensated for sharing.
I know, most won’t be as excited about it as I am, but keep reading and maybe I can explain why I am excited about this!
Why am I so excited?
Because I use the search on the SilhouetteAmerica.com website hundreds of times every single day to find answers for users. AND now, you can easily do that too!
I am asked often how I know what I do and can solve the issues I do.
Research and experience!
Now, you can learn more about your Silhouette, find solutions to Silhouette issues you are having, and become an expert with your Silhouette machines easier.
I have previewed this Silhouette Knowledge Base for a few weeks now and am finding great resources and instruction on it!
So first, I want to share a few of the topics I found when I was just scrolling through that can be helpful to all Silhouette users and we often see asked on social media groups.
The more you know and can understand about how the machines work, the easier it will be to troubleshoot issues when they arise for you.
Materials Silhouette Can Cut The information provided under this topic explains several characteristics of materials that may determine if it can be cut with a Silhouette machine.
Silhouette Software crashing During Start Up Follow this step-by-step if crashing is occurring immediately on opening the software.
Silhouette Software crashing After Start Up Follow this step-by-step if crashing is occurring while working in the program.
Those are just a few of the ones I found in a brief search. There is so much information right at your fingertips on the new Silhouette America Support Fresh Desk.
I hope you take the time to learn something new today! It really is the way that I have learned and troubleshoot user issues every day.
Enjoy !
THANK YOU for your support! How can you help? Click HERE & buy a coffee. Every little bit helps with the cost of running the site.
Or if you are looking for more in-depth, step-by-step classes, check out all of my online Silhouette classes on my Teachable site HERE.
**This post may contain affiliate links. What that means is that I may receive compensation if you purchase through the links I have provided. The price you pay for the product or service is not higher but I may get compensated for sharing.
Affiliate links may be present in the below and as an Amazon Associate I earn from qualifying purchases.What that means is that I may receive compensation if you purchase through the links I have provided. The price you pay for the product or service is not higher but I may get compensated for sharing.
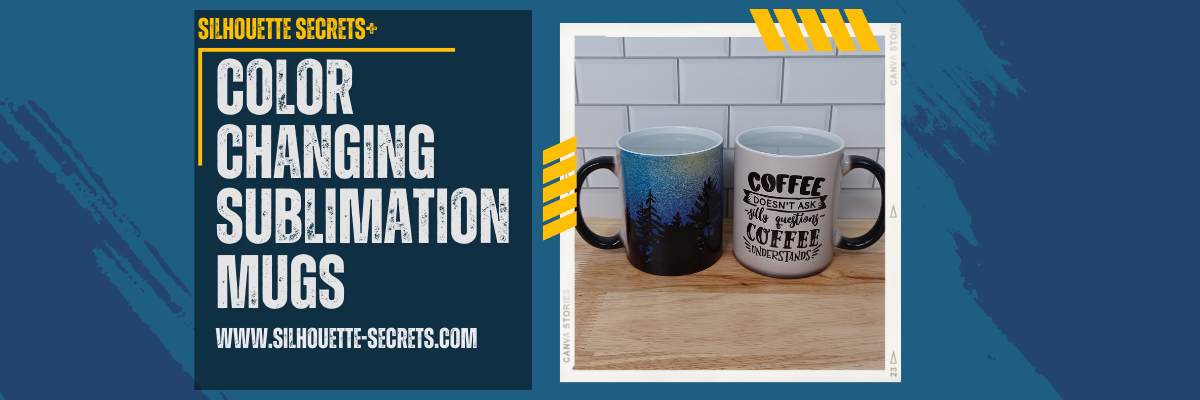
I am so excited to share this project! Well frankly, I’m excited to make myself some new coffee mugs. I saw these color changing mugs at 143 Vinyl and knew I had to try it out. I’ve been so excited to use my new mug press on the StarCraft 8-in-1 heat press that I’ve got all kinds of ideas! Check out the post I did on the heat press HERE with my first project.
Trim design as needed. This can make it easier to handle and line up the design.
A paper trimmer is a handy tool to have in the craft room.
Clean mugs with alcohol wipe and a lint roller to remove any debris and oils. The alcohol removes oils & dirt while the lint roller picks up fibers and debris unseen to the eye. Fibers can cause colored specks to appear on the sublimated blank as the ink binds to those areas and is permanent on your blank.
Check the pressure on the mug press by placing the mug in it and closing before you heat the press up. This will help ensure that the pressure is right before you have the design in place. Make any adjustments needed before it’s hot.
Securely tape the sublimation prints onto the mug.
Set the mug press time and temperature according to the recommended directions. These called for 370 degrees for 250 seconds found in the description on the 143 Vinyl website.
Wrap parchment paper (blow out) paper around the mug and carefully slide into the mug press. This will protect your mug press adapter from any sublimation ink that might “blow out” around the print.
Press for the time and temperature recommended.
Using heat safe gloves carefully remove the mug and place on a safe surface. This silicone high temperature protective mat from Artesprix is great for sublimation and keeping my workspace safe from burns.
Let the mugs cool completely on this safe surface.
Since the mug is hot, you can see that the color changed from black to white.
As the mug cools, the black color comes back. This is perfect to know when the mug is cool enough to handle and remove the sublimation print.
Waiting for it to cool can be the longest part of the process.
But the reveal is worth it…. well…. maybe.
It does say on the product description that it is a black color-changing coating (image slightly visible under coating).
I also want to add that the product description does state they are not microwave or dishwasher safe.
Loving my 2 new coffee mugs for my Studio area!
What new things have you tried lately? Let us know below.
I would love to see what you are creating with your Silhouette software or machines! Feel free to post on my Facebook group at Silhouette Secrets with EllyMae.
Save this for future reference by pinning the image below.
Enjoy !
THANK YOU for your support! How can you help? Click HERE & buy a coffee. Every little bit helps with the cost of running the site.
Or if you are looking for more in-depth, step-by-step classes, check out all of my online Silhouette classes on my Teachable site HERE.
**This post may contain affiliate links. What that means is that I may receive compensation if you purchase through the links I have provided. The price you pay for the product or service is not higher but I may get compensated for sharing.
This is a technique that I use with every single project I have that requires multiple colors to be cut with my Silhouette. I find it saves me time, materials, and adhesive on my cutting mat since I’m only using smaller sections at a time and not ripping full sheets off the mat each time.
Check out this video tutorial below
How to Cut Multiple Colors at Once with Silhouette video on YouTube HERE.
Affiliate links may be present in the below and as an Amazon Associate I earn from qualifying purchases.What that means is that I may receive compensation if you purchase through the links I have provided. The price you pay for the product or service is not higher but I may get compensated for sharing.
I find that a good paper trimmer is one of my most essential tools in my crafting area.
But you can use any paper trimmer that cuts a straight line for doing this technique.
Hope those tips help to make your Silhouette projects go smoother!
Save this for future reference by pinning the image below.
Enjoy !
THANK YOU for your support! How can you help? Click HERE & buy a coffee. Every little bit helps with the cost of running the site.
Silhouette Classes
Never stop learning! Let me help you take the anxiety out of learning with Silhouette and get to creating faster! My Silhouette classes are heavily focused on software, so you can take the skills & techniques taught and apply them to many future projects!
**This post may contain affiliate links. What that means is that I may receive compensation if you purchase through the links I have provided. The price you pay for the product or service is not higher, but I may get compensated for sharing.
Today I’m sharing another acrylic sign décor project and how I made it.
Affiliate links may be present in the below and as an Amazon Associate I earn from qualifying purchases.What that means is that I may receive compensation if you purchase through the links I have provided. The price you pay for the product or service is not higher but I may get compensated for sharing.
Next, measure the size of the blanks and write down measurements.
Paint backside of acrylics if desired to make it pop.
Using drawing tools to create a shape to use as a template with the measurements taken.
Add your design within the template and adjust as you see fit.
Using shapes as your template helps to visualize the available space you have for the design on your blank and see how might look. I use shapes as templates often in my designing and they also make a great weeding box too! Check out these other tutorials HERE to see how I use shapes all the time as templates.
I don’t know about you, but most times, the most time consuming part of creating a project for me is choosing a design. I ended up creating a design with a combination of things I had seen. I used both a design and a font style to create this sign. – Christmas Lights svg by Art Boutique Butterfly – BFC Magic Marker Print Font by Blush Fonts – Design #396584
Draw rectangles and align with the edges of the template to use as alignment tools for aligning on the acrylic blank.
Thanks to Barbara Foster with Let’s Go Silhouetting for this tip! I used alignment boxes for layering vinyl and lining things up before, but taking a class with Barbara at the All Things Silhouette virtual conference in 2022 was a light bulb moment (no pun intended) to use this when lining it up to make sure it was absolutely straight on acrylic blanks.
Arrange the design to be cut.
I arranged it so that I could cut all of the pieces of the design in all colors on 1 Silhouette mat and 1 time sending it through the machine. I use this technique for all materials I cut.
Look for a step-by-step video tutorial on this coming soon to the Silhouette Secrets+ YouTube Channel! I’ll update this post with a link once it’s ready.
Weed your vinyl design and then apply to the acrylic blank. I used the rectangles drawn for the layering marks to line it up with the straight edge of the acrylic sign.
Acrylic signs are something that have been very popular the last few years and can be used for all seasons and occasions.
Check out this post HERE for 10 more ideas of what you can create.
I would love to see what you are creating with your Silhouette software or machines! Feel free to post on my Facebook group at Silhouette Secrets with EllyMae.
Save this for future reference by pinning the image below.
Enjoy !
THANK YOU for your support! How can you help? Click HERE & buy a coffee. Every little bit helps with the cost of running the site.
Or if you are looking for more in-depth, step-by-step classes, check out all of my online Silhouette classes on my Teachable site HERE.
**This post may contain affiliate links. What that means is that I may receive compensation if you purchase through the links I have provided. The price you pay for the product or service is not higher but I may get compensated for sharing.
Just popping in really quick to share a new video I released on YouTube sharing some new tools from Crafter Cuts that would be a perfect gift idea for a crafter friend or even yourself! Who doesn’t need more tools handy when creating?
Affiliate links may be present in the below and as an Amazon Associate I earn from qualifying purchases.What that means is that I may receive compensation if you purchase through the links I have provided. The price you pay for the product or service is not higher but I may get compensated for sharing.
Here is a close up of each of the tool kits I received from Crafter Cuts and what each includes.
Includes: Scraper, 3″ x 4″ Vinyl Squeegee with felt, 3″ x 2″ Small Vinyl Squeegee, Angled Anti Static Weeding Tweezers, Hook Tool, Pin Tipped Pen with replacement pin, precision knife with 5 replacement blades
Includes: All Felt 3M Squeegee, Blue Vinyl Squeegee with Felt edge, White Squeegee, Lil’ Chizler Precision Tweezer, Precision knife with 5 replacements, and Crafter Cuts Pick Tools
I’ll have more gift ideas soon! Now I’m off to play with my new tools and give them a talk about not hiding in “safe” places.
Save this for future reference by pinning the image below.
Enjoy !
THANK YOU for your support! How can you help? Click HERE & buy a coffee. Every little bit helps with the cost of running the site.
Or if you are looking for more in-depth, step-by-step classes, check out all of my online Silhouette classes on my Teachable site HERE.
**This post may contain affiliate links. What that means is that I may receive compensation if you purchase through the links I have provided. The price you pay for the product or service is not higher but I may get compensated for sharing.
THANK YOU for your support! How can you help? Click the link to buy a coffee. Every little bit helps in the cost of running the site.