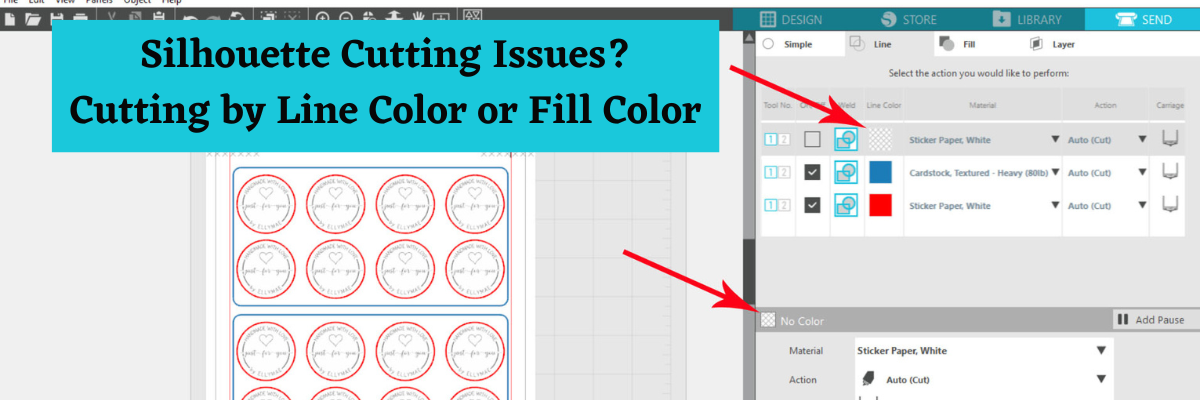
I have noticed an increase in posts regarding cut issues when using the Cut by Line or Cut by Fill color option in Silhouette Studio.
Usually it’s along the lines of “My machine isn’t working and is not adjusting to the correct settings I set.”
We can usually easily identify this issue by looking at a photo of the cut settings the user is using on the Send tab. If they show the Cut by Line Color or Cut by Fill option, I’m finding that the correct color was not selected when changing the settings. The user has not specifically selected the color that they want to make changes to. Just clicking on the box to check it to cut does NOT always select the color.
In the photo above, the “no color” option is the line color selected. This is shown by a gray selection indicator across the setting in the top panel on the right. On a MAC or on a dark background screen, this may be difficult to see the gray selection indicator. Even though the “no color” is not checked to cut at the top, it is the material selected and shows in the bottom half of the Cut Settings panel on the right.
If you adjust the settings for this, it will be adjusting the color that isn’t even going to cut.
Make sure when you are setting up the cut settings, that you are paying close attention to which color is selected and showing in the bottom of the Send tab. Click on the color box specifically and watch for the gray selection to indicate it’s selected.
I hope this little tid-bit of information helps to save some frustration in your Silhouette journey!
Save this for future reference by pinning the image below.
Enjoy !
THANK YOU for your support! How can you help? Click HERE & buy a coffee. Every little bit helps with the cost of running the site.
Looking for more in-depth, step-by-step classes, check out all of my online Silhouette classes on my Teachable site HERE.
**This post may contain affiliate links. What that means is that I may receive compensation if you purchase through the links I have provided. The price you pay for the product or service is not higher but I may get compensated for sharing.
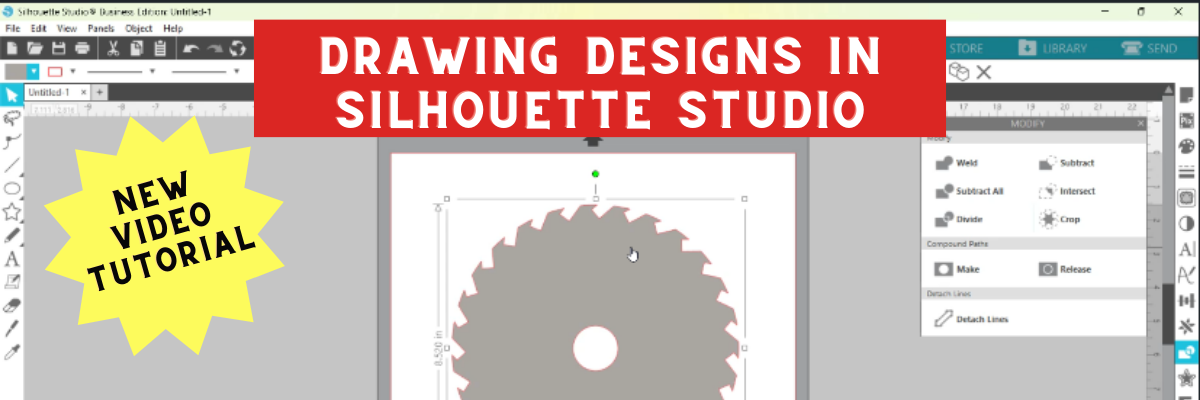
This past week there was a question on my Silhouette Secrets+ Facebook Group and I was working on my computer so did a quick video tutorial on how they could accomplish the design they wanted. Several asked if there was a way to save that video so I re-recorded it and put it up on the Silhouette Secrets+ YouTube Channel.
While the video shows how to create a saw blade because that was what the user was asking, the techniques could be used to create all kinds of designs from wreaths, frames, and so much more!
And check out the A to Z Silhouette Resource tab at the top of the website as well. You can search for any tool or keyword for Silhouette in alphabetical order.
If you are looking for step-by-step classes for Silhouette, check out all my Silhouette classes on Teachable HERE.
Save this for future reference by pinning the image below.
Enjoy !
THANK YOU for your support! How can you help? Click HERE & buy a coffee. Every little bit helps with the cost of running the site.
**This post may contain affiliate links. What that means is that I may receive compensation if you purchase through the links I have provided. The price you pay for the product or service is not higher but I may get compensated for sharing.
This is a great technique to use for personalized gifts!
In this class, we use the Silhouette software to create stencils for glass etched projects.
I chose to use several different shaped objects in the class to show tips for them all. You do not have to etch the same objects, but it’s good to know tips for multiple shapes. Not all glass objects can be etched. Tempered glass and some types of cookware cannot be etched due to the composition of it. The only real way to know is to test it or learn from others.
We will use the Silhouette Studio software to size the stencils, cut stencils with the Silhouette machine from both Oracal 651 & Oramask 813, transfer the stencils to get a good seal, and then etch with etching cream.
Glass etching is a great way to create unique projects that can be used for home décor, gifts, and more!
Check out the full class description, supply list, and class content HERE.
And use coupon code GLASS2023 to save $5 off this class. Good through 2/28/23. There are now 2 purchase options. A 60-day access and a lifetime access. This is also NEW for 2023!
New Silhouette Curio Class Released
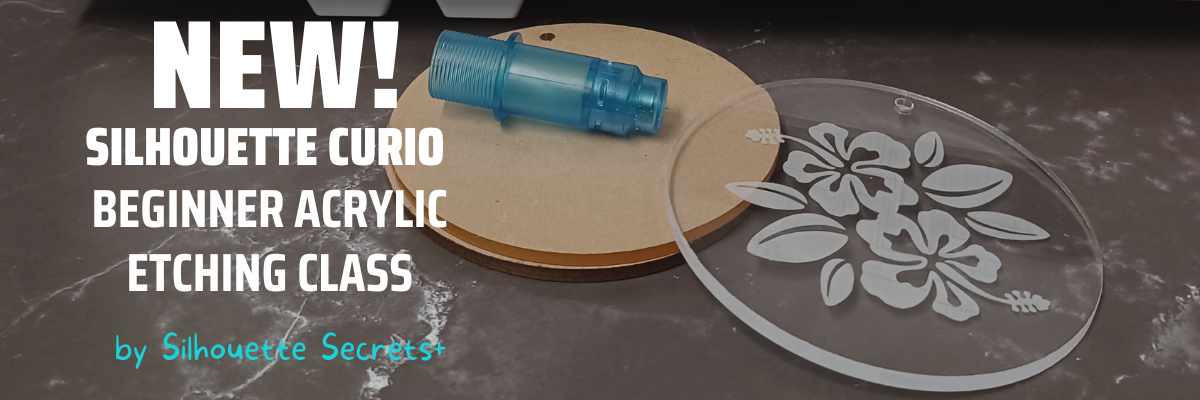
I have updated and released a new Beginner Acrylic Etching Curio Class. This new class is updated to include information on the Silhouette Studio v4.5+ changes, tips on working with acrylics.
In this step-by-step class we will discuss the supplies for etching acrylics with the Silhouette Curio and the entire process to get set up etching acrylics. I will share all of my tips & tricks for getting a good etch on acrylics. This class is designed to give you the tools and resources so you can test and etch on any acrylics that you might be able to source.
Check out the full class description and supply list HERE.
Silhouette “Secrets” – Because some things are just too good not to share! –
Silhouette “Secret” #1
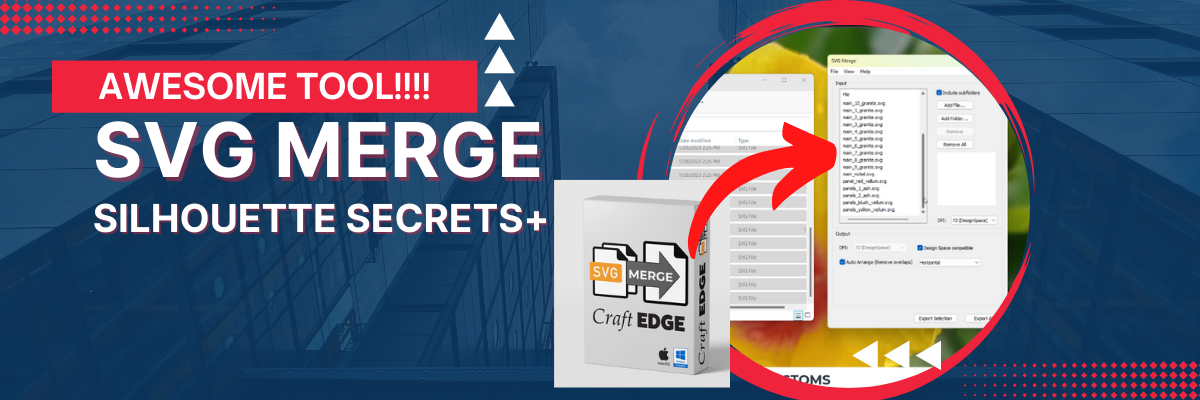
If you are a paper crafter, you may have heard of the Dreaming Tree website. They have some awesome files! This past month I shared a way that can save you time when working with their files, especially if they have many pieces to the file. That is the SVG Merge program.
Troubleshooting cut issues is one of the top searches on both my website and the Silhouette Secrets+ YouTube channel. This month I wanted to share the Troubleshooting Silhouette Cut Issues with EllyMae video. These steps can solve 98%+ of any cutting issues that we see posted.
Whether you are experiencing cutting issues currently or just want to tuck this away for future reference, it has already helped many users get back to cutting faster!
Make sure to Like and Subscribe if you want to be notified of future content released on YouTube!
Silhouette “Secret” #3
I just released a new blog post on Silhouette Library Issues & Troubleshooting Tips. I have been seeing more posts on social media of the library not syncing or missing files, which means some of you may also be experiencing the same thing.
Check out this new post HERE I am sharing quite a bit of information in it. Once I started to write it all out more and more just kept flowing and like my tagline says – Because some things are just too good not to share! – I have a hard time not sharing it all for you!
I hope this month’s “secrets” help you to be more successful with your Silhouette!
Silhouette Secrets+ Sponsor
CrafterCuts, a Silhouette Authorized reseller is a sponsor for my Silhouette Secrets+ Teachable site.
And I have a coupon code to save 10% on your order Use code SECRETS at CrafterCuts Get free shipping with a $35 order I always recommend having extra blades and mats on hand for your projects this year! You will also find this information under the NEW “Sponsor” tab at the top of the Silhouette Secrets+ Teachable site HERE.
Also check out the latest blog post on all of the Recommended Retailers and Font sites HERE. Thank you for your support! Each time you use an affiliate link to make a purchase, it supports me and what I do. You do not pay any more for that product, but I may get credit for the referral.
I also have a “Buy Me a Coffee” option as well on Ko-Fi because I know not everyone buys new supplies each month, but many still asked for a way to support Silhouette Secrets+. Thank you all for your continued support of my small business!
**This post may contain affiliate links. What that means is that I may receive compensation if you purchase through the links I have provided. The price you pay for the product or service is not higher but I may get compensated for sharing.
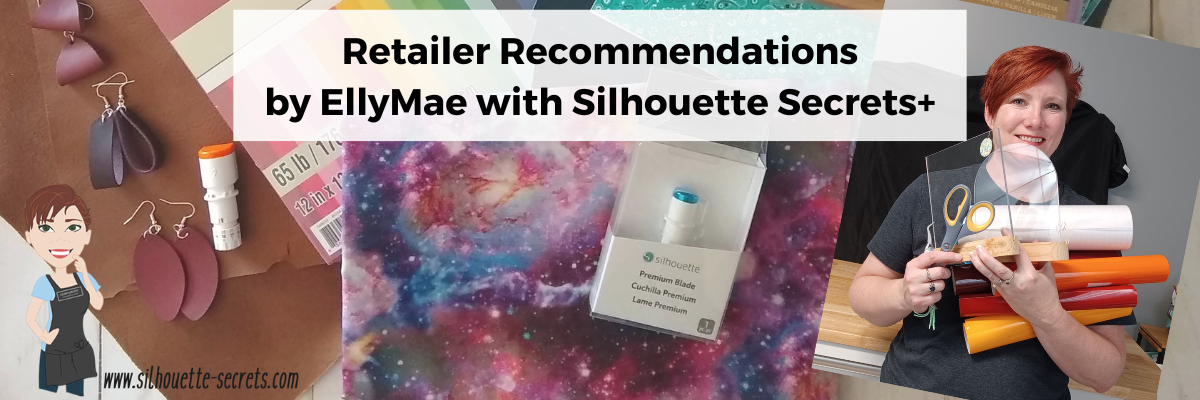
One of the things I have enjoyed the most in this Craft Industry is meeting the people! I have developed relationships with many cutting machine users, retailers, sponsors, companies, and industry influencers world wide in the past couple years since starting Silhouette Secrets+. As you’ll see below, I work with many great retailers.
Today I am writing this as a blog post, but I do have a header on the blog for recommended retailers as well as design and font sites as well. The blog header is updated on a regular basis.
**Please note that these may be affiliate links which means that by using these links and/or codes, I may received a small compensation for sharing the links with you. The price you pay for the product or service is not higher. Thank you for using affiliate links as it provides a way for me to continue doing what I do as an Instructor, blogger, and event organizer.
I know there are many, many retailers and suppliers worldwide. My job is not to try to convince you that one is better than another. I know that many users have a preferred vendor and that is great! This is one reason I work with retailers from all across the country. Another reason is that each one of the vendors I’ve worked with carries something a bit different and I order different supplies from each. I have listed the supplies below next to each retailer of things they carry or that I’ve used and ordered. The rest is up to you! I want thank you for using the affiliate links below as every little bit helps to buy supplies to create content, classes, and tutorials. A great big THANK YOU to you for your support!
I also want to give a great big shout out to each of these businesses for their support as well – THANK YOU!
Watch for more new projects, tutorials, and classes coming this year too!
Expressions Vinyl(located in Idaho) CLICK HERE New sales often on adhesive vinyl and htv Viny, HTV, Patterned vinyl, Mystery Boxes, Vinyl Club Membership, and more
H & H Sign Supply – vinyl supplies Carries 24″ rolls of vinyl CLICK HERE Vinyl, Equipment, HTV, Blanks, Tools, and more
Now, I do have a few contacts internationally, but I only add international retailers after I have a trusted referral source, since it’s not typically somewhere I can easily purchase from. And my experience as an international customer may be different than someone much closer.
Save this for future reference by pinning the image below.
Enjoy !
THANK YOU for your support! How can you help? Click HERE & buy a coffee. Every little bit helps with the cost of running the site.
Looking for more in-depth, step-by-step classes, check out all of my online Silhouette classes on my Teachable site HERE.
**This post may contain affiliate links. What that means is that I may receive compensation if you purchase through the links I have provided. The price you pay for the product or service is not higher but I may get compensated for sharing.
Creating unique designs in the Silhouette Studio software does not have to be hard. The more that you do it, the more comfortable you will get in the Silhouette software and before long you will be using the tools without a second thought. Find out how easy it is to create a shaped edge card. I have created both a video tutorial and below is the written tutorial.
Create the card base. I used the the Project Wizard in this tutorial, which is found under File > Open in the top left corner.
Check out how to create a card base in 2 different ways in this post – Create A Card Base Tutorial HERE This will allow you to create any size card that you would like to create in the future.
The Project Wizard – Card is a 5″ x 7″ card base.
Right click on the card base and choose Ungroup, this will ungroup the middle score line from the card base.
I change the score line to a wider perforated line so it doesn’t tear the card when folded in half. Open the Line Style Panel on the right side, select the score line, and change the Style to a wider dashed line.
The score line needs to be ungrouped from the card base in this tutorial, so it doesn’t disappear as we build the shaped edge card.
Right click on the heart and choose Convert to Path.
Position the heart on the right side of the card base. Resize the heart as desired by grabbing the corner bounding box and moving it in.
Make copies of the heart, resize as desired, rotate, and position on the right side of the card base the full length of the card base. Make sure to position the hearts on the right side, but not over the right edge of the card base.
Select all the hearts, then use the Align Tools to center align and space horizontal as desired.
The card base is a very specific side to fit in an envelope. Make sure not to move the score line or have the hearts extend past the right side to keep the card base dimensions.
With all of the hearts selected, open the Offset Panel on the right side. Select a distance of the Offset that does not extend past the card base, but that does overlap each heart, so the offset is welded together when Apply is selected.
Select the right edge of the card base and move it in about half way across the hearts. We are creating the shaped edge of the card.
Select the card edge, hold the Shift key down, click on the Offset to select it. Right click and choose Weld. This creates the shaped edge of the card base.
If you end up with an interior bits from the offset. Right click on the card edge, select Release Compound Path, click off to deselect and then back on the little bit and press Delete.
Select the card base and all of the hearts, right click and choose Make Compound Path. Do not select the score line. Then fill it with a light color to see the Shaped Edge card that you’ve created.
Right click on the card base and choose Send to Back. This puts the score line back on top. Select everything, right click and choose Group.
You’ve now created a shaped edge card design! You can do this technique with all kinds of shapes. Cut from cardstock and send to friends and family.
I also have another tutorial on creating a little bit different shaped edge – check that out HERE.
Save this for future reference by pinning the image below.
Enjoy !
THANK YOU for your support! How can you help? Click HERE & buy a coffee. Every little bit helps with the cost of running the site.
Silhouette Classes
Never stop learning! Let me help you take the anxiety out of learning with Silhouette and get to creating faster! My Silhouette classes are heavily focused on software, so you can take the skills & techniques taught and apply them to many future projects!
**This post may contain affiliate links. What that means is that I may receive compensation if you purchase through the links I have provided. The price you pay for the product or service is not higher but I may get compensated for sharing.
We troubleshoot thousands of issues each week on social media and one of the questions we see often is about Library issues.
Most times it is a simple fix if the steps are followed properly.
One of the common ones we see is when a user’s library is showing as “Working Offline” in the bottom left corner. I find this happens if my internet connection changes such as when I’m traveling or the internet connection is dropped.
Check out that tutorial HERE. It still solves 98%+ of the library issues.
However, there are times that the above does not work, so I thought I’d share where you can find more information about specific library issues.
Silhouette America has recently updated their Support FAQ area and it is a bit more search friendly to find information you might need. Check out this post HERE on the Updates to the Silhouette America website.
Backup User Designs!!!!
As a note, it is ALWAYS recommended that you have any of your user designs backed up to an outside source. I do not recommend using the Silhouette library as your file storage as it is not designed as an all inclusive storage area but as a syncing device. This is one reason that the library is limited on storage space.
If you are using a Silhouette Studio version of v4.4.552 or higher, you can easily export individual user created designs as individual files and I HIGHLY recommend that you do this – right now if you have not already done it!
I want to share more information that can easily be found on the new Silhouette Support site. If you are experiencing any of these issues below, click on the title to be taken to step-by-step tips to help get you back on track.
Design Thumbnail Partially Missing Note: at the time of this publication, I am not recommending v4.5.152 – if you choose to update to fix this issue, I would recommend updating to Beta v4.5.171 – however, please note that Beta versions can have unknown bugs. But, I still would recommend it over the bugs that are in v4.5.152.
Silhouette Support has changed over the years since I started as an TJC Licensed Silhouette Instructor. At the time of this publication, they have not had phone support in 4-5 years. I can agree with this 100% as troubleshooting by telephone is very, very difficult – if not impossible in most situations. You cannot provide photos or videos of the issue you are having and the Support staff cannot provide a list of instructions that will help to solve the problem.
Currently, the only way to get in touch with Silhouette Support is through the online Support request found HERE or in the bottom right corner of the Silhouette America website.
Most issues that a user has could be solved by a quick search of the Silhouette America Support Solutions center and following the instructions exactly like they are written.
However, there are some cases where a Support tech is needed to address an issue. In that case, you will need to fill out all of the questions regarding the support request. And then make sure you complete it & that it gets fully submitted to them.
When you submit a request to Support, the best thing you can do is provide as detailed of a description as possible, photos of the issues, and/or video of the issue if necessary. This can help you get a diagnosis faster in most cases.
A support ticket that states “My machine won’t cut, fix it!”, really does not help you get an answer faster or help the Support Staff diagnose what issue you are having. It’s like throwing mud against the wall to see what sticks.
After you have submitted the issue to them, you will need to be patient and wait. The emails are answered in the order they are received in and you are in a line. There are other users with an issue that are ahead of you in that line and you don’t get to skip to the front because you feel your issue is more important.
Again, the more details you can provide when you submit your issue, the better chance you have of getting a diagnosis faster.
On that note, if you are having cut issues, follow this Troubleshooting Video HERE step-by-step and it fixes 98%+ of the cutting issues that we see.
We troubleshoot thousands of issues weekly across social media platforms and in most cases ask for photos and/or videos in order to diagnose the issue. You would probably be amazed at how many times we spot something in the photo or video that we weren’t even looking for that is culprit of a cut or software issue. Without seeing the photo or video, we would have never diagnosed it and the user would have continued to be frustrated.
When we ask for a photo of the blade installed in the machine with the mat loaded, it is NOT just to look at the blade installation. There are MANY things we can tell from this photo that can help in identifying the problem. Most times it’s a quick fix. Otherwise it can be like throwing mud against a wall to see what sticks….. And sometimes it’s not specifically what we are looking for but what doesn’t look right – for instance, an adjustment hole blocked or vinyl stuck to the bottom of the blade.
A photo is really worth a thousand words.
Here are just a few things I can identify from a photo: – blade housing alignment – is the cutting mat covering adjustment holes – adjustment holes have debris – adhesive build up on rollers – debris stuck in the machine – what machine model it is – what blade is being used – is the cutting mat loaded sideways And yes, if the blade is installed and locked in.
Those are just a few…. it would amaze you the little things we have picked up on that are the cause of a cut issue just from a photo. And until the underlying issue is identified and resolved, a user will continue to experience cut issues.
Silhouette “Secrets”
This blog post originally started as just troubleshooting for the Silhouette library and issues you may have. However, I couldn’t just stop there.
What is my “secret” to troubleshooting?
1 – Experience! On my recent trip to Italy with Siser, our tour guide in Venice said she would get so many people questioning how she knew something. She said it took her awhile but she finally came up with an answer. EXPERIENCE!
The more you do this, the more you watch your machine, the more familiar you become with the Silhouette software and the Silhouette machines, you will start to see how things work. Or be able to spot when something is “off” and then upon closer examination can figure out what is the cause.
I have been teaching Silhouette users since 2016 and I troubleshoot daily. I see a lot! I also watch my machines work and I listen to them! Yes, they will talk to you or at least you can hear when they yell at you when something might be wrong.
2 – I have no “secret”. I treat each case I troubleshoot as a new issue because there is no one button fix for all issues. No matter the experience level of the user, I follow the same steps in troubleshooting. To be honest, for experienced users it’s often harder to troubleshooting with them because they are not always as willing to following instructions or provide us the information needed to help them.
Tip: When asked to provide information, photos, or video – the faster you do it, the faster you are going to get help and fix any issue you are having. Help us, help you!
I hope these tips help you on your Silhouette journey!
And I have a coupon code to save 10% on your order Use code SECRETS at CrafterCuts Get free shipping with a $35 order I always recommend having extra blades and mats on hand for your projects!
We love seeing what you are creating with your Silhouette machines or software. Feel free to post photos or questions on my Facebook group at Silhouette Secrets with EllyMae.
Save this for future reference by pinning the image below.
Enjoy !
THANK YOU for your support! How can you help? Click HERE & buy a coffee. Every little bit helps with the cost of running the site.
Or if you are looking for more in-depth, step-by-step classes, check out all of my online Silhouette classes on my Teachable site HERE.
**This post may contain affiliate links. What that means is that I may receive compensation if you purchase through the links I have provided. The price you pay for the product or service is not higher but I may get compensated for sharing.
Just a quick post to share a very neat tool that I find is going to save me a lot of time in the future!
Affiliate links may be present in the below and as an Amazon Associate I earn from qualifying purchases.What that means is that I may receive compensation if you purchase through the links I have provided. The price you pay for the product or service is not higher but I may get compensated for sharing.
If you have not heard about this awesome company called Dreaming Tree, they are a company that has files for paper crafters of all kinds. A lot of 3-D paper crafting projects, but also flat ones as well!
They have lots of FREE files too in case you just want to play and test whether you will like the files or not.
Make sure to scroll down on each file to see the assembly video that they record for every single svg file they create!
Now, the Dreaming Tree website is not the main news I wanted to share, but it is an awesome site and brings me to the neat tool!
When you download Dreaming Tree files, you will notice that the pieces to each file are saved individually and not all in one svg file. This may seem odd at first, but here is why. This makes the files compatible with many different cutting machines. In the past, some programs changed the way they opened svg files and when the pieces were saved all as one file, it caused issues. This meant that Dreaming Tree had to redesign every single file to be compatible with those changes for certain programs. So instead, they now offer each piece as an individual file. Dreaming Tree has a vast collection of files and some of those can have a lot of pieces. They are so neat when they are constructed!
This also means that you have to open each piece and then merge them onto one file if you so choose.
I have seen so many cool ideas done with this crate on the Dreaming Tree Facebook Group HERE. There are often times that I may not be jumping to grab the design right away when it’s released, like this Father’s Day Crate, but then I see all the amazing pieces of artwork that other users are creating with it in the group and I HAVE to get it!
I also have all the pieces cut to build myself a snowman, but just need to take the time to do that. Hopefully soon!
I hope you have a great day and get to be creative!
Save this for future reference by pinning the image below.
Enjoy !
THANK YOU for your support! How can you help? Click HERE & buy a coffee. Every little bit helps with the cost of running the site.
Looking for more in-depth, step-by-step classes, check out all of my online Silhouette classes on my Teachable site HERE.
**This post may contain affiliate links. What that means is that I may receive compensation if you purchase through the links I have provided. The price you pay for the product or service is not higher but I may get compensated for sharing.
Changes. No one really likes them, but they are a fact of life!
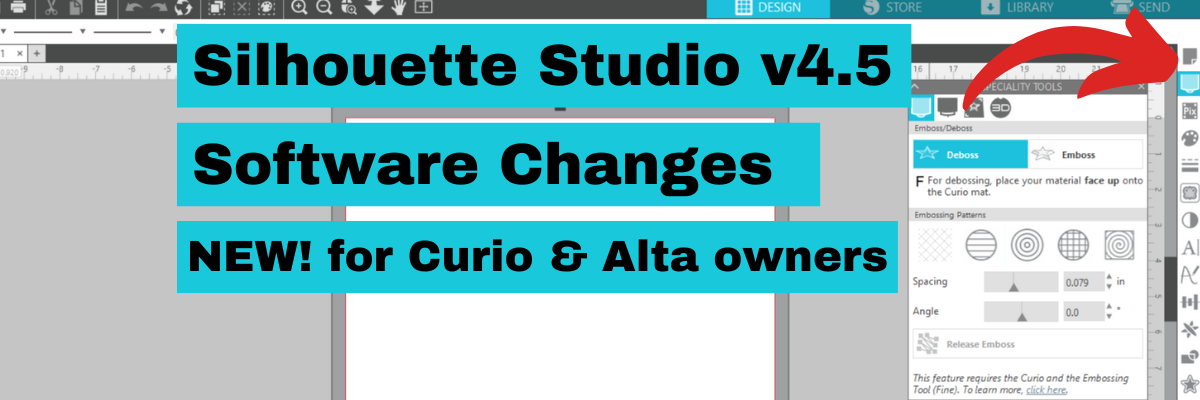
That is no different in the Silhouette Studio software. Today I am sharing a new change in the Silhouette Studio software in versions of v4.5 and higher.
This change affects Curio & Alta owners most, but all users will notice a new icon appear on the right side of the Silhouette Studio software after updating to version 4.5+.
While I am NOT recommending to update to v4.5 versions at this moment unless you absolutely have to, I do want to make you aware of the change so you don’t panic when you see it.
In the top right corner of the Silhouette Studio software on versions of v4.5 and higher, you will now see a new icon that is called Machines Featured Panel. This is where the Curio Panels and the Alta Panel is now located.
Here is a little bit closer look.
Nothing has disappeared, it is just in a new location.
Hope this information helps when you see that odd new icon show up on your software.
Again, at the time I’m writing this, I am still not recommending v4.5.152 which is the current version. There are some not so nice bugs in it.
Let me know in the comments below if you have questions.
Save this for future reference by pinning the image below.
Enjoy !
THANK YOU for your support! How can you help? Click HERE & buy a coffee. Every little bit helps with the cost of running the site.
Looking for more in-depth, step-by-step classes, check out all of my online Silhouette classes on my Teachable site HERE.
**This post may contain affiliate links. What that means is that I may receive compensation if you purchase through the links I have provided. The price you pay for the product or service is not higher but I may get compensated for sharing.
I am so excited to share this post today! I have a hard time keeping things under wraps, especially when I had so much fun creating a project! But due dates do that to us – they make us exercise patience!
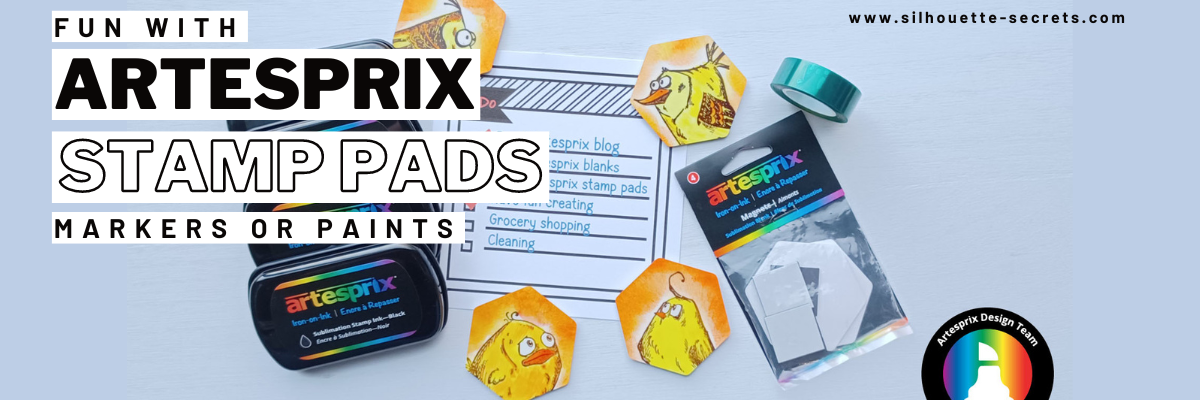
I was asked to be a guest designer on the Artesprix blog for January 2023 and in the beginning of December 2022 I started playing with my supplies. Well, it snowballed and the project was done before I knew it and then I had to wait a whole month to share! But it’s here – check out these funny birds!
I have a full step-by-step tutorial on the Artesprix blog showing you how easy it is to make something like this! All of the supplies are linked on the step-by-step tutorial so you can create too!
There are so many mix and match possibilities with the Artesprix supplies. Whether it is stamps, markers, paints, with a cutting machine or without – so many projects, so little time! Can’t wait to create more things and share!
Save this for future reference by pinning the image below.
Enjoy !
THANK YOU for your support! How can you help? Click HERE & buy a coffee. Every little bit helps with the cost of running the site.
Looking for more in-depth, step-by-step classes, check out all of my online Silhouette classes on my Teachable site HERE.
**This post may contain affiliate links. What that means is that I may receive compensation if you purchase through the links I have provided. The price you pay for the product or service is not higher but I may get compensated for sharing.
This new Curio etching class has been designed to show how the Silhouette Studio software has changed in v4.5 software (don’t worry, you do NOT need to update), but I show you how it has changed. And I designed this class with tips for all acrylics in general, not just from one source.
In this step-by-step class we will discuss the supplies for etching acrylics with the Silhouette Curio and the entire process to get set up etching acrylics. I will share all of my tips & tricks for getting a good etch on acrylics. This class is designed to give you the tools and resources so you can test and etch on any acrylics that you might be able to source. Plus bonus information on etching on other size blanks too!
I am also including the class supply list and the supplies I shared in the bonus examples too! This information is also in the class description on the Silhouette Secrets+ Teachable site and again in the class as a downloadable PDF document too!
Affiliate links may be present in the below and as an Amazon Associate I earn from qualifying purchases.What that means is that I may receive compensation if you purchase through the links I have provided. The price you pay for the product or service is not higher but I may get compensated for sharing.
Supply list
– Silhouette Curio Machine with all platforms & cutting mat – Silhouette Etching Tool – Acrylic Blanks 143Vinyl Acrylic Blanks can be found HERE *I will update and add more as I test with new vendors – Double sided tape – Hibiscus Flower Bunch by Samantha Walker – Design #10873 – Digital Calipers or a ruler with mm – Sharp point weeding tool
I designed the class so you can start with the small design and then apply the same exact techniques to larger projects such as these below. In the bonus information I share tips on how to work with these different size acrylic blanks.
The biggest thing is TO JUST GET STARTED!
The Silhouette Curio is an awesome machine and I share why in this new class. Get it out and start creating fabulous projects with it!
I have several more Silhouette Curio Classes available on my Teachable site HERE as well as other Silhouette Classes too!
Save this for future reference by pinning the image below.
Enjoy!
THANK YOU for your support! How can you help? Click HERE & buy a coffee. Every little bit helps with the cost of running the site.
**This post may contain affiliate links. What that means is that I may receive compensation if you purchase through the links I have provided. The price you pay for the product or service is not higher but I may get compensated for sharing.
THANK YOU for your support! How can you help? Click the link to buy a coffee. Every little bit helps in the cost of running the site.