Posted on 4 Comments

Silhouette Specialty Tools Panel – Emboss Panel

Silhouette Embossing Panel
Silhouette Secrets+ with EllyMae

New for the Silhouette Studio version 4.5+ software is the Specialty Tools Panel on the right side of the Silhouette Studio software. It originally started with only a few options showing available, such as the Silhouette Emboss Panel and Alta options. When Silhouette released the Cameo 5 and Curio 2 along side software version 4.5.735+, they introduced more options.

If you are using older software prior to v4.5, check out this post on the Emboss Panel HERE.

Affiliate links may be present in the following blog post and as an Amazon Associate, I earn from qualifying purchases.

The Specialty Tools Panel resides on the right side, just below the Page Setup Panel. Upon its addition, all other icons shifted downward, and the Silhouette Emboss Panel became nested under the Specialty Tools.

Silhouette Specialty Tools Panel

The Emboss Panel is available to Silhouette Curio 1, Silhouette Curio 2, and Silhouette Cameo 5 model owners. If one of these machines is not plugged in and recognized, the panel will appear grayed out, and you may not be able to select the options.

Specialty Tools Panel – Emboss Tab – Tab 1

Silhouette Emboss Panel

1 – Deboss – the design will be created as seen on the screen & will press the design down into the material exactly as seen on screen.
For example, if using cardstock, it will create a valley where the design is.
Emboss – the design is flipped horizontally so it is mirrored BUT it does not show this on the screen. You will place your material face down on the embossing mat and the design will be pressed mirrored. When it’s finished, you will flip it over and the design should be raised on the side that was face down on the mat.

2 – F – This tells you which way to put the material on the mat.

For deboss, put the material face up.

For emboss, put the material face down.

3 – Embossing Patterns – Choose between 5 options: none, lined, concentric, cross hatched, or spiral.

Silhouette Emboss Patterns

Each design will vary in which pattern may look better for the emboss. Again it is a matter of personal preference. I prefer the look of the cross hatched pattern for most projects. However, the only way to know what might look best on any material is to test it.

5 – Spacing – Increase or decrease the grid spacing between the lines of the pattern. The dark blue heart shows a 0.004″ spacing – a really tight Deboss

Silhouette Emboss Spacing

If we zoom in on the design, you will see the pattern.

Silhouette Emboss Tight Fill Crosshatched Pattern

This is another area where you are changing a lot of data at one time, so be patient with your computer if it is thinking.

If you ever encounter a blue square/rectangle with an X in it, it may be smaller than what the Silhouette can process. Use the up arrow and increase the spacing just a bit or delete and type in a number just a bit higher than the current spacing, until the box disappears. Remember, be patient and go slow, it is processing a lot of data.

Here is an example of what it might look like.

Silhouette Emboss Error

5 – Angle – Change the angle of the deboss or emboss pattern.

6 – Release Emboss – Releases the lines of the emboss pattern. When you are satisfied with the pattern, click the Release Emboss button. You will not really see it do anything, but it is no longer an editable fill pattern.
Once you release the emboss/deboss, you can add another pattern on top if you choose to.

Embossing is available on the following Silhouette model machines: Curio 1, Curio 2, Cameo 5.

Here is a look at embossing cardstock with the Silhouette Curio 2.

Silhouette Curio 2 Embossing Cardstock

The Silhouette Embossing tools (fine & wide tip) are designed to work in conjunction with the Silhouette 12″ x 12″ Embossing mat.

At the time of publishing this post, a bug persists in the Silhouette software for the Silhouette Cameo 5 causing it not to emboss where it shows on the screen. I will release a tutorial until this bug is fixed, as I don’t want users to ruin their $30 embossing mat, as I did on the first try.

Silhouette Embossing Mat Cameo 5

If you do attempt to do this with the Silhouette Cameo 5, I would highly recommend that you use a full 12″ x 12″ sheet of cardstock to protect the entire emboss mat surface.

Cutting completely through a material on top of the Silhouette Embossing mat is not recommended as it can damage the embossing pad and tear it up.

On the Send tab, select Score & Emboss paper to have the settings for embossing. If you want the emboss settings with any other material, you would need to create your own custom setting.

Silhouette Emboss Setting - Score & Emboss Paper

And then test, test, test! Remember that the preset settings in the Silhouette Studio software are just a starting point to test!!! All cardstock and materials will vary and there is no perfect setting for all materials worldwide.
More information on Perfect Cut Settings found HERE.

Additional resources

I will add additional resources for embossing as new information is released and the bugs are fixed.

Silhouette Cameo 5 additional resources found HERE
Silhouette Curio 2 additional resources found HERE

Silhouette Studio Specialty Panel Tabs 2-6 Info (coming soon)

  • Specialty Tools Panel – Tab 1 – Emboss Panel details above
  • Specialty Tools Panel – Tab 2 – Score & Emboss – details HERE
  • Specialty Tools Panel – Tab 3 – Power Engraver – details HERE

Save this for future reference by pinning the image below.

Silhouette Emboss Panel Pinterest

Enjoy !

THANK YOU for your support! How can you help? Click HERE & buy a coffee.
Every little bit helps with the cost of running the site.

Silhouette Classes

Never stop learning! Let me help you take the anxiety out of learning with Silhouette and get to creating faster! My Silhouette classes are heavily focused on software, so you can take the skills & techniques taught and apply them to many future projects!

Silhouette step-by-step Classes by Silhouette Secrets+

Silhouette Secrets+ with EllyMae
**This post may contain affiliate links. What that means is that I may receive compensation if you purchase through the links I have provided. The price you pay for the product or service is not higher but I may get compensated for sharing.
Posted on 2 Comments

Sketching with Silhouette

Silhouette Secrets+ with EllyMae

Have you ever sketched designs or fonts with your Silhouette machine? It can give your projects a unique look or just be fun to play around with.

I’m fascinated by the countless creative applications Silhouette users create with sketching options, from addressing envelopes to crafting signs and beyond!

Today I wanted to share some tips and resources that can help when you are sketching with your Silhouette machines. Sketching can be done with all Silhouette machine models, with the right tools.

This week I released a new video on the Silhouette Secrets+ YouTube channel sharing information on sketching with the Silhouette Cameo 5 and the new Type C pen holder. Even if you do not have a Cameo 5, the information in the video can be helpful and I’ve had several comments from users who learned new things.

Silhouette Cameo 5 Sketch

Check out the new video HERE.

Affiliate links may be present in the following blog post and as an Amazon Associate, I earn from qualifying purchases.

Sketching Supplies for Silhouette

As I mentioned above, sketching can be done with any Silhouette model machines. However, the tools for each machine may vary just a bit.

That’s why I wrote up the Sketching Supplies blog post and have broken it down into a list by machine model.

Sketching Supplies for Silhouette

Find out which Silhouette pens fit in each machine model, what adapters you might need, and which pen holder is compatible with your Silhouette machine HERE.

How to Fill in a Sketch with Silhouette

One of the most common things we see asked is how to fill in a font or design.

The Silhouette machines do what the user tells them to do. They are designed as cutting machines, so the red cut lines that you see on the screen around a design is the exact path that any tool placed in the Silhouette machine would follow.

Silhouette Sketching Example

In the photo above, the design is showing exactly what a pen would sketch out using a font called Willow Bloom Modern Calligraphy Font by Angele Kamp. The red lines that you see are the exact path the pen would follow.

Since all text that is typed in Silhouette Studio now defaults to Cut Edge, you don’t need to weld it prior to sending, however, you still want to look closely to make sure that the letters are overlapping. If a letter does not overlap another letter, then it will be sketched as an individual letter. Personally, I always weld my text, just because it’s a routine step in my process and I know I’ve looked closely at the font to make sure it’s going to do what I want before I send it.

Remember that once you change a font in any way, such as welding, it is no longer editable text and is now a vector design. I recommend making a copy of the text so you always have an original before you make changes.

Another big thing to note here is that since text now defaults to Cut Edge, that also affects some sketch fonts and how they behave. In the example below, I used BFC Fantasy Sketch by Blush Fonts. Notice how there are sections that are missing or are not highlighted bold red? It is going to sketch exactly as you see on the screen.

Silhouette Sketch Font Line Missing

This is easily fixed by selecting the entire design and choose Sketch instead of the Sketch Edge. The most important factor here is that the design has to be selected first before you can change the action.

Now that we’ve covered the normal behavior of a font, can you fill in a font or design? Yes!

The best method to use is the Line Effects or Sketch Fill Panel. This is the same exact panel, however, the name has changed depending on the software version you are using.

The Sketch Panel gives you the most fill options and can be used for a wide variety of things.

Silhouette Sketch Fills

Keep in mind when filling in a design or font, that the pen follows every single red line in the design. If you use a tight fill pattern, the pen will completely fill in the object, however, it can also be more difficult to remove from the cutting mat as the pen has gone over and over that design many times.

Check out the full tutorial on the Silhouette Sketch Panel HERE.

Tips for a Successful Sketch

  • Scribble with the pens prior to installing in the machine to get the ink flowing. The machine writing with a pen is just like writing with a pen by hand. If the pen won’t write smoothly by hand, you can’t expect the machine to magically make it happen either.
  • Use a clean cutting mat free of debris.
    Any bits of paper or debris that are stuck to the cutting mat will affect how that pen reacts on the paper and you could have skipping in the sketch.
  • Keep the Silhouette cutting mat completely level and flat the entire time it is sketching. If the mat is hanging down in front or behind, it can bubble up in the middle and the pen can hit it and cause marks as it travels to complete the sketch.
  • Keep the material completely flat and secure on the cutting mat.
    Any variance in the thickness of material can affect how it sketches. For example the flap on the envelope will create a bump that can affect how the pen writes over that area. Keep that in mind when you are sketching.
  • When using the Silhouette pen holders, use the pen holder cap to set the pen depth. Not sure what I mean, check out the YouTube video and I show a demo of how this is done.
    Or another method is to place a popsicle stick (craft stick) underneath the tool housing. Then place the pen in the housing. When the tip touches the popsicle stick, lock the pen holder in place.
Silhouette Sketch Popsicle Stick Trick
Silhouette Cameo 3 with Type A Pen Holder

This is easier to do on the older Silhouette machine models. The newer machine models have different housings and not as easy to maneuver.

And DON’T FORGET to take the popsicle stick out after you are done setting the blade depth.

  • Test, test, test!!! Have fun with it!
Silhouette Sketch Fonts Examples

Want to see how a font will sketch out? Type out the name of the font style and select that font and then sketch it out. The photo above is an example how I did just that. All of these are fonts I have from the Silhouette Design Store and that is exactly what I did.

This is a tip I shared last year in the Silhouette Secrets+ weekly newsletter. If you’d like tips, information, news, sales, and more “secrets” delivered to your inbox on a regular basis, make sure to subscribe and confirm your subscription.

Silhouette Secrets+ Newsletter

Never miss out on the news, tips, “secrets”, deals, classes, and more that I share on Silhouette Secrets+.
Sign up for the newsletter and get information delivered to your inbox every Friday.

Silhouette Secrets+ Newsletter

Want to learn even more?
Check out the Silhouette Sketch Pen & Sketch Pen Design Class on the Silhouette Secrets+ Teachable site HERE!

Silhouette Sketch Class by EllyMae at Silhouette Secrets+

The Sketching with Your Silhouette class has been one of my most popular classes released. I have been blown away at the feedback from this class by those who’ve enrolled.

And just have FUN!!!!

Oh and if you have a Silhouette Curio 2, there are even more possibilities for sketching on thicker materials too! The Silhouette Curio 2 has a clearance of 20 mm, which is the highest clearance of any cutting machine out there!!! So exciting and fun to play with!

Silhouette Curio 2 Sketching on Thicker Materials

Find more details on sketching with the Silhouette Curio 2 HERE.

And …. there’s more!!! The sketch abilities can also be used for foiling projects too! Check out more information on foiling with the Silhouette Heat Pen HERE or with the We R Memory Keepers Foil Quill HERE.

Save this for future reference by pinning the image below.

How to Sketch with Silhouette

Enjoy !

THANK YOU for your support! How can you help? Click HERE & buy a coffee.
Every little bit helps with the cost of running the site.

Silhouette Classes

Never stop learning! Let me help you take the anxiety out of learning with Silhouette and get to creating faster! My Silhouette classes are heavily focused on software, so you can take the skills & techniques taught and apply them to many future projects!

Silhouette step-by-step Classes by Silhouette Secrets+

Silhouette Secrets+ with EllyMae
**This post may contain affiliate links. What that means is that I may receive compensation if you purchase through the links I have provided. The price you pay for the product or service is not higher but I may get compensated for sharing.
Posted on Leave a comment

Silhouette Curio 2 Guide to Blades and Tools + Free PDF Chart

The Silhouette Curio 2: Blade & Tools Chart

Have you ever wondered what tools are compatible with the Silhouette Curio 2? The Silhouette Curio 2 flatbed cutting machine can use a few additional tools that are not designed for the Silhouette Cameo 5 models. Let’s take a look at those today!

Affiliate links may be present in the following blog post and as an Amazon Associate, I earn from qualifying purchases.

I have created a free PDF chart of all the tools that can be used in the Silhouette Curio 2 . This chart is available as a free download exclusively for confirmed newsletter subscribers.

Join the Newsletter

Subscribe to get our latest content by email.
    We respect your privacy. Unsubscribe at any time.

    I always recommend stocking up on extra blades and cutting mats to have on hand. It can be very frustrating to be in the middle of a project with a dull blade or and adhesive mat that is no longer sticky. It is also one of the fastest ways to rule out a cutting issue you might have.

    You can find blades & tools at Silhouette America, Crafter Cuts, or check out the other retailers in the Silhouette Secrets+ Recommended Retailers list HERE.
    *use code SECRETS at CrafterCuts to save 10% off supplies and free shipping on orders over $35

    For some of the specialty tools listed below I’ve also included links for tutorials and more information on their usage as well.

    Silhouette Blades

    Silhouette Autoblade Type B

    Silhouette Autoblade – Type B
    Carriage 1
    Used for paper, cardstock, sticker sheets, adhesive vinyl, HTV, Chipboard, Acetate, and select specialty materials.
    Materials under 1 mm thick
    Available at Silhouette America or Crafter Cuts
    *This is the blade I use most often. Most cut issues occurring with this blade can be fixed by following the steps in this video HERE – Troubleshooting Cut Issues


    Silhouette 1 mm Manual Blade
    Carriage 1
    Used for paper, cardstock, sticker sheets, adhesive vinyl, HTV, Chipboard, Acetate, and select specialty materials.
    Materials under 1 mm thick

    Silhouette 1 mm Manual Blade

    Silhouette 2 mm Manual Blade

    Silhouette 2 mm Manual Blade
    Carriage 1
    Used for paper, cardstock, sticker sheets, adhesive vinyl, HTV, Chipboard, Acetate, Craft Foam, and select specialty materials.
    Materials under 2 mm thick


    Silhouette 2 mm Kraft Blade – Type B
    Carriage 1
    Used for chipboard, acetate, craft Foam, leather, and select specialty materials
    Materials up to 2 mm thick
    *15+ Tips for using the Kraft blade found HERE

    Silhouette Kraft blade 2 mm - Type B

    Silhouette Adapter Set

    Silhouette Tool Adapter Set
    Carriage 1
    Adapters are color coded for specific blades/tools
    Black adapter = Silhouette blade (ratchet) & Premium blade
    White adapter = 2 mm Kraft blade
    Gray adapter = Deep Cut blade
    Blue adapter = Silhouette Sketch pens


    Silhouette Blade – often referred to as a “ratchet” blade but the official name is Silhouette blade
    Carriage 1 with black adapter
    Used for paper, cardstock, sticker sheets, adhesive vinyl, HTV, Chipboard, Acetate, and select specialty materials.
    Materials under 1 mm thick

    Silhouette ratchet blade

    Silhouette Premium blade

    Silhouette Premium Blade
    Carriage 1 with black adapter
    Used for paper, cardstock, sticker sheets, adhesive vinyl, HTV, Chipboard, Acetate, and select specialty materials.
    Materials under 1 mm thick


    Silhouette Deep Cut Blade
    Carriage 1 with gray adapter
    Used for paper, cardstock, sticker sheets, adhesive vinyl, HTV, Chipboard, Acetate, Craft Foam, and select specialty materials.
    Materials under 2 mm thick

    Silhouette Deep Cut blade

    Silhouette Kraft Blade 2 mm

    Silhouette 2 mm Kraft Blade
    Carriage 1 with white adapter
    Used for chipboard, acetate, craft Foam, leather, and select specialty materials
    Materials up to 2 mm thick
    *15+ Tips for using the Kraft blade found HERE


    Silhouette 3 mm Kraft Blade
    Carriage 2
    Used for chipboard, acetate, craft Foam, leather, and select specialty materials
    Materials up to 3 mm thick
    *15+ Tips for using the Kraft blade found HERE

    Silhouette 3 mm Kraft blade

    Silhouette Rotary Blade

    Silhouette Rotary blade
    Carriage 2
    Used for fabrics, crepe paper, felt, wool, and select specialty materials
    *Rotary Blade Tutorial HERE

    Additional Silhouette Tools

    Silhouette Pen Holder Type B
    Carriage 1
    Use with a variety of pen styles to sketch onto materials such as cardstock, paper, faux leather paper, etc.
    *Step-by-step Sketching Class HERE
    **More tutorials on sketching HERE

    Silhouette Pen Holder - Type B

    Silhouette Punch Tool

    Silhouette Punch Tool
    Carriage 2
    Used with adhesive vinyl or HTV to punch a hole to designate where to weed the material out.
    Also used with the Cameo 5 for etching on Silhouette metal sheets.
    *12+ Tips for Etching with the Silhouette Cameo 5 HERE


    Silhouette black bodied sketch pens
    Carriage 1 with blue adapter
    Used to sketch onto materials such as cardstock, paper, faux leather paper, etc.
    *Step-by-step Sketching Class HERE
    **More tutorials on sketching HERE

    Silhouette Sketch Pens

    Silhouette Pen Holder Type C

    Silhouette Pen Holder – Type C
    Carriage 2
    Use with a variety of pen styles to sketch onto materials such as cardstock, paper, faux leather paper, etc.
    Type C Pen Holder has a broader barrel on the end so you can use wider bodied pens and markers


    Silhouette Embossing Tool Set – Type C
    Carriage 2
    Embosses onto materials such as cardstock, embossable foil, etc.
    Set includes a fine and wide tip.

    Silhouette Embossing Tools

    Silhouette Heat Pen Set

    Silhouette Heat Pen Set – Powered Tool
    Carriage 2
    Applies foil transfer material to surfaces of many materials such as cardstock, faux leather, etc.
    Cordless design and powered by the Cameo 5 Tool 2 housing
    *Heat Pen Setup & Foiling tutorials HERE


    Silhouette Heat Pen Super-Fine
    Carriage 2
    Applies foil transfer material to surfaces of many materials such as cardstock, faux leather, etc.
    Cordless design and powered by the Cameo 5 Tool 2 housing
    0.5 mm Super Fine Tip


    Silhouette Power Engraver

    Silhouette Power Engraver
    Carriage 2
    Surface engraves on materials such as metal sheets, acrylic, etc.
    To be used with the Silhouette Curio Debris Tray
    *Beginner Acrylic Etching Class with Power Engraver HERE
    **Additional Silhouette Curio 2 Information HERE


    Silhouette Leather Punch Tool
    Carriage 2
    Powered tool to punch holes in compatible materials such as cardstock and leatherette.
    Not for use with real leather.
    To be used with the Silhouette Curio Debris Tray
    1 mm, 3 mm, and 5 mm Tip included
    Replacement tips are available for purchase.

    Silhouette Leather Punch Tool

    Additional Supplies

    There are a few additional supplies for use with some of the specialty tools listed above.

    Silhouette 12″ x 12″ Embossing Mat
    For use with the Silhouette Embossing Tools

    Silhouette Embossing Mat

    Silhouette Heat Transfer Foil

    Silhouette Heat Transfer FoilGold & Silver
    For use with the Silhouette Heat Pen Set
    2 heat foil rolls (3 in x 33 feet)
    *Heat Pen Setup & Foiling tutorials HERE


    Silhouette Curio 2 Debris Tray
    For use with the Silhouette Power Engraver


    Silhouette Electrostatic Protector Sheet

    Silhouette Electrostatic Protection Sheet
    12″ x 12″ – 2 per pack
    Protects the Electrostatic Bed from damage.

    Grab the free PDF chart of all the Silhouette Curio 2 tools for future reference when you subscribe to the Silhouette Secrets+ newsletter.
    *chart is the current tools available for the Silhouette Curio 2January 2024

    Join the Newsletter

    Subscribe to get our latest content by email.
      We respect your privacy. Unsubscribe at any time.

      Find even more information on the Silhouette Curio 2 HERE including an unboxing, setup, first cuts, and the Electrostatic Bed.

      Please let me know if you have any questions in the comments below.

      Save this for future reference by pinning the image below.

      Silhouette Curio 2 Blade and Tool Chart

      Enjoy !

      THANK YOU for your support! How can you help? Click HERE & buy a coffee.
      Every little bit helps with the cost of running the site.

      Silhouette Classes

      Never stop learning! Let me help you take the anxiety out of learning with Silhouette and get to creating faster! My Silhouette classes are heavily focused on software, so you can take the skills & techniques taught and apply them to many future projects!

      Silhouette step-by-step Classes by Silhouette Secrets+

      **This post may contain affiliate links. What that means is that I may receive compensation if you purchase through the links I have provided. The price you pay for the product or service is not higher but I may get compensated for sharing.
      Posted on 2 Comments

      Silhouette Electrostatic (ES) Bed Tips

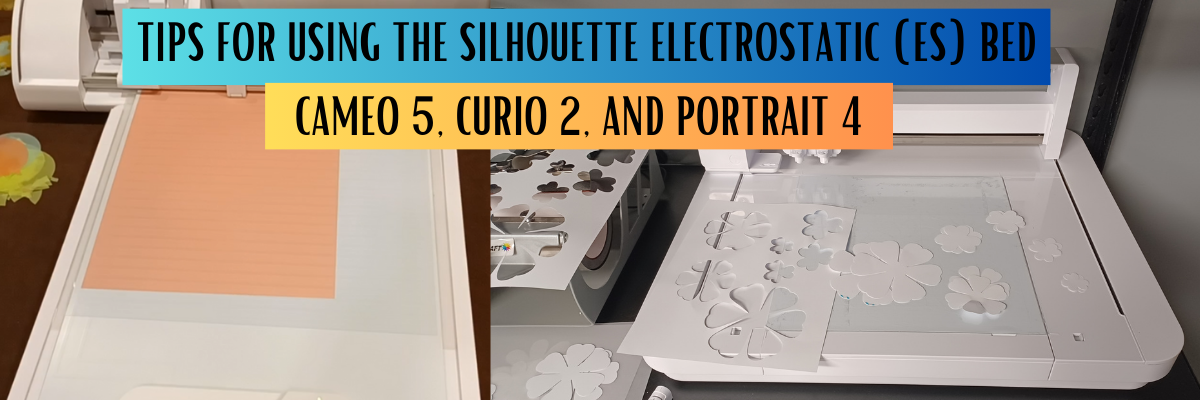
      The new Silhouette Electrostatic (ES) Bed for the Silhouette Cameo 5, Curio 2, and Portrait 4 model machines was announced and demonstrated at the Silhouette Summit in September 2023. It was pretty cool to see this new technology in action.

      Silhouette Cameo 5 Electrostatic Bed Tips

      Affiliate links may be present in the following blog post and as an Amazon Associate, I earn from qualifying purchases.

      I recorded the Electrostatic Bed demo from Silhouette Summit and shared it on the Silhouette Secrets+ YouTube channel HERE. I loved seeing everything first hand and in action at the Silhouette Summit!

      But, until you get the equipment in hand and start to use it, you never really know how it’s going to go. This is new technology and it does have to be set up properly. It is designed to work with thin, smooth materials that can maintain a charge between the ES bed and the material while it’s being cut.

      This was the first time in Silhouette’s history that they released the new machines and features at Silhouette Summit. Usually, in the past, there has been a 4-6 month gap between the announcement and when the new items are released.

      The Silhouette Curio 2 was available first and it comes with the Electrostatic (ES) Bed in the box. For the Silhouette Cameo 5 and Portrait 4 models, the Electrostatic (ES) Bed is an additional accessory that can be purchased separately.

      I received my Silhouette Curio 2 and immediately started testing and seeing what it could do. I have cut vellum, 65 lb. cardstock, 110 lb. cardstock, sticker paper, adhesive vinyl, and copy paper with the Electrostatic (ES) bed so far.

      Check out the video – Tips for Success with the New Silhouette Electrostatic (ES) Bed – Cameo 5, Curio 2, and Portrait 4 HERE.

      I share how you can be successful with the Electrostatic (ES) Bed. These tips will work for the Electrostatic (ES) Bed no matter which Silhouette machine model you are using it with. I’ve also included a few more tips down below this video in this post as well.

      Electrostatic (ES) Bed Tips

      1. The Electrostatic (ES) Bed is powered by the Silhouette machine.
        This is one reason that the Electrostatic (ES) bed is not compatible with older model Silhouette machines. The older machines do not have the technology in them to send power to the ES bed.
      2. The electrostatic charge has to be built up.
        The ES bed needs to be turned on to start building up the charge. It takes time, usually less than a minute for the electrostatic charge to build. It is not a slap it and go. You have to set it up properly for success!
        Place Electrostatic (ES) Protective Sheet on the Bed and smooth out any air bubbles. Make sure that the Electrostatic (ES) Bed has not turned off.
        In early versions of the software with the Silhouette Curio 2, the ES Bed automatically turns off after the cut and the user will need to turn it back on each time.
      3. Not all materials work with the Electrostatic Bed.
        Materials need to be completely flat and smooth to be able to hold and maintain the electrostatic charge. Textured materials will not work or maintain that charge to hold it in place while it’s being cut.
        Smooth materials down on top of the ES Protective Sheet and allow time to build the charge.
      4. Test the materials with your fingertips to see if the materials move. If it moves, it’s not ready. Start again & take the time to build the charge.
        If the charge is broken at any time while it’s being cut, it will be a lost cut.
      5. Keep the design away from the edges of the materials.
        If the cut goes over the edge of the material, it can break the electrostatic charge and the material may move.
      6. Not all designs will work well with this new technology.
        Keep in mind that the smaller the cut pieces are, the less surface area there is for the material to maintain the electrostatic charge. Pieces that are completely cut may move out of place. This may or may not affect the entire cut. If a loose piece of material gets stuck on the blade as it’s cutting, it may hinder the cutting of the blade.
      7. Get extra materials! It is going to take time and practice to learn a new skill and new equipment.

      Supplies used or mentioned in the video:

      And I have more tips!!!!

      Check out this video HERE to see how to install the Silhouette Electrostatic (ES) Bed on the Silhouette Cameo 5. The installation for the Silhouette Portrait 4 will be the same once the electrostatic bed is available.

      I will admit, this is pretty cool technology and not having to remove delicate materials from the adhesive cutting mat is pretty darn awesome!

      Will it work for every project? No!

      But it is definitely fun to play around with and see what can be done with it!

      Here are a few examples of projects I’ve done with the Silhouette Electrostatic (ES) Bed.

      Silhouette Curio 2 Electrostatic Bed Tips

      Koala sticker paper cut using the Silhouette Electrostatic bed. You can find the Silhouette Curio 2 Print and Cut with the ES (electrostatic) Bed HERE on the Silhouette Secrets+ YouTube channel.

      Silhouette Curio 2 Electrostatic Bed Cutting Cardstock

      Recollections 65 lb. cardstock 12″ x 12″ print and cut using the Electrostatic (ES) Bed. See this in action on this video Silhouette Curio 2 Print and Cut 12″ x 12″ with the ES Bed HERE.

      Vellum Flowers cut with the Silhouette Curio 2 Electrostatic Bed

      I cut & created these vellum paper flowers for the Silhouette Curio 2 – Out of the Box class where I share 3+ projects you can complete with the Curio 2 right out of the box. Find more details on that HERE.

      Silhouette Tips for Cutting Small Fonts & Designs

      This is an example of adhesive vinyl from a class I released called Easily Create Custom Gift Tags & Keepsake Ornaments in Silhouette found HERE. In the class I share a demonstration of cutting adhesive vinyl with the Curio 2 on the Electrostatic Bed.

      I also released a tutorial on Silhouette Tips to Cutting Small Fonts and Designs found HERE that can be applied to any Silhouette model machine you are using.

      Silhouette Curio 2 Electrostatic Bed cutting copy paper

      And here is one that I just completed this week cutting copy paper using the new IPT technology to cut 2 sheets that are stacked on top of each other. Yes, you read that right! Stacked materials cut at the same time with the Electrostatic Bed.
      I’ll be sharing more on that soon!

      I’ll be adding more information to the blog and Silhouette Secrets+ YouTube channel as I create projects and play with this new technology. Stay tuned for more!

      I hope those tips help you get started and creating with your new Silhouette model machines and the Electrostatic (ES) Bed.

      Save this for future reference by pinning the image below.

      Silhouette Electrostatic Bed Tips

      Enjoy !

      THANK YOU for your support! How can you help? Click HERE & buy a coffee.
      Every little bit helps with the cost of running the site.

      Silhouette Classes

      Never stop learning! Let me help you take the anxiety out of learning with Silhouette and get to creating faster! My Silhouette classes are heavily focused on software, so you can take the skills & techniques taught and apply them to many future projects!

      Silhouette step-by-step Classes by Silhouette Secrets+

      Silhouette Secrets+ with EllyMae
      Silhouette Secrets+ with EllyMae
      **This post may contain affiliate links. What that means is that I may receive compensation if you purchase through the links I have provided. The price you pay for the product or service is not higher but I may get compensated for sharing.
      Posted on 4 Comments

      Silhouette Cameo 5, Curio 2 & Portrait 4 – Care, Maintenance, and Storage Tips

      Affiliate links may be present in the following blog post and as an Amazon Associate, I earn from qualifying purchases.

      With the release of these new models of Silhouette machines – the Silhouette Cameo 5, Curio 2, and Portrait 4 – along with the new Electrostatic (ES) Beds – care and maintenance is going to be very important in the success and lifespan on your machines!

      We troubleshoot with thousands of users each week and we have seen some very dirty machines. This will affect the lifespan and usage of your Silhouette machines! There is no way to sugar coat that! Especially now with the new technology released.

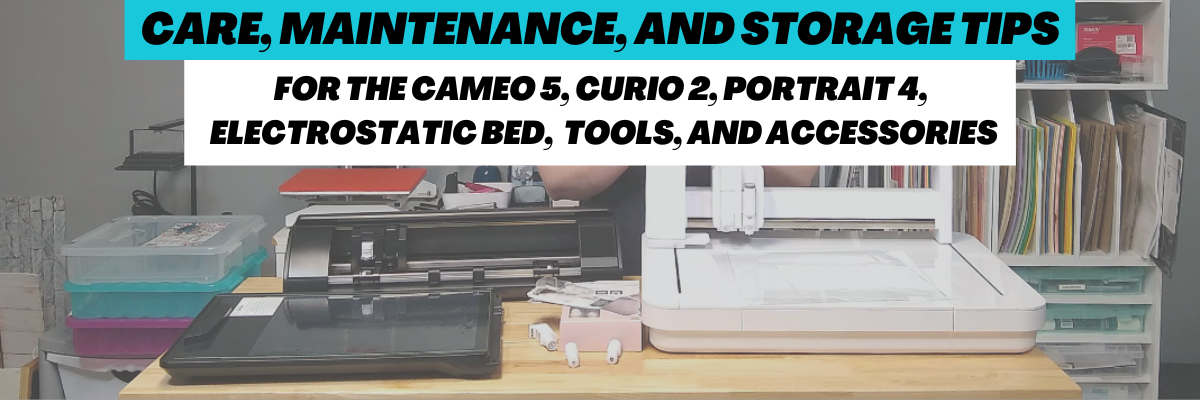
      I’m sharing tips to the care, maintenance, and storage for the new Silhouette machines and accessories in this video – Silhouette Cameo 5, Curio 2, Portrait 4 – Care, Maintenance, and Storage Tips video on the Silhouette Secrets+ YouTube channel found HERE.

      Care, Maintenance, and Storage Tips

      The #1 biggest thing is to keep your machines clean and free of debris. Especially with the new powered tool housing and power plug on the Cameo 5, Curio 2, and Portrait 4. Any dirt or debris in that power housing plug and it can affect your results and success!

      I recommend keeping the lid on your machine for the Silhouette Cameo 5 and Portrait 4 closed when it’s not in use.

      A Silhouette machine dust cover is a great idea too, especially if you have a workspace that has a lot of particles in the air. The Cameo 4 dust covers fit nicely over the Cameo 5 machines. They are pretty similar in size, just a few differences in the design.

      With the Silhouette Curio 2, keep it free and clear of debris and materials in the way of the housing and channels on the machine. Any dirt, debris, or materials in the channels can interfere with the Curio 2 function and housing moving freely during use.

      I do not recommend storing anything on top of the Silhouette Curio 2 or it could affect the machine function.

      A can of compressed air or a keyboard air duster may be handy to have around to help keep debris off the machine as well.

      For my Curio 2 with acrylic etching/engraving, I’ve been using a handheld vacuum to help with the clean up after the etch.

      Silhouette Electrostatic (ES) Bed

      The Silhouette Electrostatic (ES) Bed is new! It’s awesome! Keep the boxes if you have not already thrown those away. The Electrostatic Bed should be stored completely flat and I do not recommend storing things on top of it.

      The Silhouette Electrostatic (ES) Bed is very specific in that it needs to be completely flat in order to function properly and maintain the charge. Any warping of the bed due to improper storage or materials placed on it over time, can affect the success of using it.

      Keep the boxes and packing materials for storage on the Silhouette Electrostatic (ES) Bed. This will be the best protection that you can use and you know it is stored safely when it’s placed back in the box with the packaging foam.

      Any damage to the Silhouette Electrostatic (ES) Bed and you will need to replace it. Improper storage of the bed is not a machine fault, but is the responsibility of the user.

      For information on how to install the Silhouette Electrostatic (ES) Bed with a Silhouette Cameo 5 click HERE.

      Silhouette Electrostatic (ES) Protective Sheets

      The Electrostatic (ES) Protective Sheets are a very important part of the ES bed as well! The Electrostatic (ES) Protective Sheets need to be store completely flat and kept flat for proper usage on the Electrostatic (ES) Bed. If they are not completely flat, the charge may not be able to build up properly and be maintained during the cut.

      I found 2 options for storing the Electrostatic (ES) Protective Sheets. Both are 12″ x 12″ scrapbook cases and fit the 12″ x 12″ Protective Sheets very well.

      Silhouette Power Tool Storage

      The new Silhouette Power Tools are a bigger tool housing than previous Silhouette tools. This means that they may not fit in the previous tool storage that a user had.

      The storage of these new power tools will be very important because you not only have to protect the Auto Tool Detection metal plate on the backside of the tool, but you also have a Power Plug on the backside of the tool that needs to be protected as well.

      I found a couple options for storage for the tools and they are customizable for what each user might need.

      The Options Grab-n-Go Storage worked great for the Silhouette 3″ foil rolls, the print and emboss squares & fasteners for the Silhouette embossing mat, and holding multiple tools. This is an “Option” that can grow with you.

      Look around your house and see if there is something you can repurpose for tool storage. You may already have an option that works for the tools you have!

      Non-power Silhouette Tool Storage Options

      This is the tool holder that I’ve been using for several years with the non-power Silhouette tools such as the Autoblade, Rotary blade, and Kraft blades. As you can see, I have gathered a selection of tools over the years as I’m writing tutorials and teaching classes.

      This tool holder has worked for me so far with the smaller blade housings.

      Additional Care Tips

      Keep the rollers clean of adhesive. The rollers of the Cameo 5 and Portrait 4 should not be rolling on the adhesive of the cutting mat or it can pick up adhesive residue and affect your future cut projects.

      All of these tips are 100% the user’s responsibility. You have invested in these machines and with proper care, use, and storage the Silhouette machines, tools, and accessories should work well for you.

      Find the new Silhouette model machines and accessories at CrafterCuts or SilhouetteAmerica.

      Save this for future reference by pinning the image below.

      Enjoy !

      THANK YOU for your support! How can you help? Click HERE & buy a coffee.
      Every little bit helps with the cost of running the site.

      Silhouette Classes

      Never stop learning! Let me help you take the anxiety out of learning with Silhouette and get to creating faster! My Silhouette classes are heavily focused on software, so you can take the skills & techniques taught and apply them to many future projects!

      Silhouette step-by-step Classes by Silhouette Secrets+

      **This post may contain affiliate links. What that means is that I may receive compensation if you purchase through the links I have provided. The price you pay for the product or service is not higher but I may get compensated for sharing.
      Posted on 4 Comments

      Silhouette Electrostatic Bed Installation & Tips – Cameo 5

      Affiliate links may be present in the following blog post and as an Amazon Associate, I earn from qualifying purchases.

      Silhouette Electrostatic Bed Installation & Tips

      New equipment is always fun to get to know and play around with. I will admit that when I opened the box for the Silhouette Electrostatic Bed, I had a bit of a questionable moment as I saw something in the box I didn’t know about.

      I had no idea what the “guard tape” was. There is an instruction sheet in the box. Make sure to keep the instructions, your box, and this guard tape for future use.

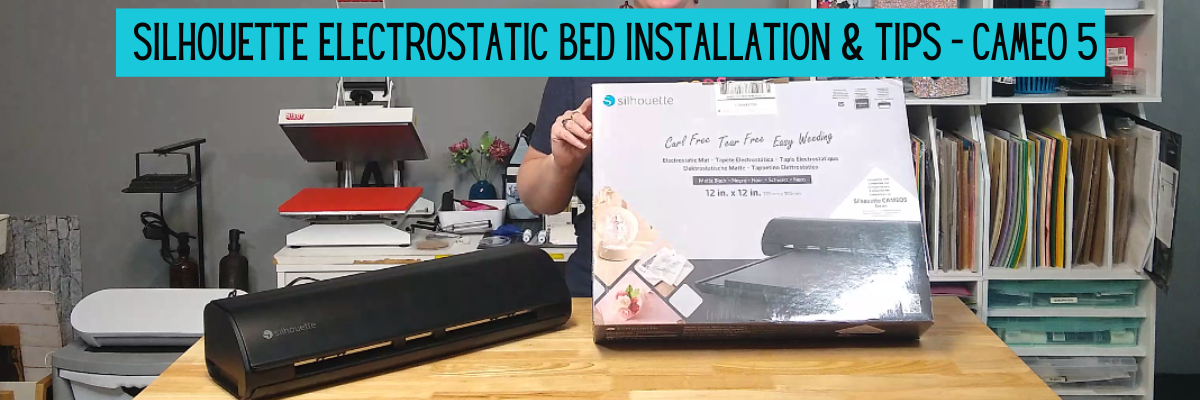
      I shared more information in the Silhouette Electrostatic Bed Installation & Tips – Cameo 5 video on the Silhouette Secrets+ YouTube channel found HERE.

      In this video I am using the following supplies:

      Find additional tips on using the Silhouette Electrostatic Bed HERE in the Tips for Success with the New Electrostatic (ES) Bed – Cameo 5, Curio 2, and Portrait 4 video on the YouTube channel.

      The Electrostatic Bed is awesome! I have loved creating with some delicate materials using it and can’t wait to share more!

      If you are a Silhouette Curio 2 owner, the Electrostatic Bed comes with the machine. Check out additional information on the Silhouette Curio 2 HERE.

      Save this for future reference by pinning the image below.

      Enjoy !

      THANK YOU for your support! How can you help? Click HERE & buy a coffee.
      Every little bit helps with the cost of running the site.

      Silhouette Classes

      Never stop learning! Let me help you take the anxiety out of learning with Silhouette and get to creating faster! My Silhouette classes are heavily focused on software, so you can take the skills & techniques taught and apply them to many future projects!

      Silhouette step-by-step Classes by Silhouette Secrets+

      **This post may contain affiliate links. What that means is that I may receive compensation if you purchase through the links I have provided. The price you pay for the product or service is not higher but I may get compensated for sharing.
      Posted on Leave a comment

      Beginner Acrylic Engrave/Etch with the Silhouette Curio 2

      Affiliate links may be present in the following blog post and as an Amazon Associate I earn from qualifying purchases.

      The Silhouette Curio 2 is a unique machine that I am enjoying so much! Just like it’s predecessor, it functions a bit differently than the Silhouette Cameo and Portrait model machines. I am not sure it really should have been called a curio, but it is what it is and I don’t control that. What I can control is me and what I’m creating.

      I am having a blast learning it and I do think that anyone can use it and learn it if they are willing to take the time to! That is why I’ve created classes to help Silhouette Curio 2 users get started faster and take the guess work out of it. Less anxiety in learning a new machine! I’ve made the mistakes and I am showing step-by-step how you can be successful with your Curio 2 in my classes.

      I am so excited to announce this class – Curio 2 – Beginner Engraving/Etching on Acrylic class using the Silhouette Power Engrave Tool!!

      Here is a look at a few of the designs that I have been creating on acrylic rounds.

      In this class you will learn how to:

      • setup a template for exact placement for projects
      • recognize “no compatible cut setting” errors and why you see it
      • set up the Silhouette Curio 2 Debris tray for cutting & engraving/etching
      • set up to cut with the Silhouette Curio 2 to create the template
      • use the Auto height detection & how it works
      • use the Layers Panel in Silhouette Studio
      • set up an engrave/etch for the Silhouette Power Engrave Tool
      • create a custom setting for acrylic etching/engrave
      • do a manual height detection and why I love it!
      • and more! Bonus tips & demos included as well!

      Silhouette Curio 2 –
      Beginner Acrylic Engrave Class

      Step-by-step class for setting up the Curio 2 for exact placement on blanks, creating a template, creating a custom setting for the Acrylic Engrave, auto & manual height detection and why you would use either, engrave tips, and more!

      Supplies Used for Beginner Curio 2 Engrave Class:

      Design used in class:

      Additional bonus designs shown in testing:

      Optional:

      • Handheld vacuum or wet wipes – do not inhale or get the acrylic dust in your eyes
      • Small paint brush to clean off engraving tool

      Save this for future reference by pinning the image below.

      Silhouette Curio 2 Engrave Etch

      Enjoy !

      THANK YOU for your support! How can you help? Click HERE & buy a coffee.
      Every little bit helps with the cost of running the site.

      Silhouette Classes

      Never stop learning! Let me help you take the anxiety out of learning with Silhouette and get to creating faster! My Silhouette classes are heavily focused on software, so you can take the skills & techniques taught and apply them to many future projects!

      Silhouette step-by-step Classes by Silhouette Secrets+

      **This post may contain affiliate links. What that means is that I may receive compensation if you purchase through the links I have provided. The price you pay for the product or service is not higher but I may get compensated for sharing.
      Posted on 5 Comments

      New! Silhouette Heat Pen Setup & Foiling

      The Silhouette Heat Pen is compatible with the new Cameo 5, Curio 2, and Portrait 4 (with adapter included with machine).

      Affiliate links may be present in the following blog post and as an Amazon Associate, I earn from qualifying purchases.

      I’ve been testing out the new heat pen and wanted to share how to set it up in the Silhouette software. I will be demonstrating on the Curio 2, but the setup process is the same in the Silhouette software no matter which machine you are using that is compatible.

      This written tutorial will be photo heavy.
      I also have a video tutorial on the Silhouette Secrets+ YouTube channel HERE
      and a printable PDF available as a free download exclusively for confirmed newsletter subscribers.

      Join the Newsletter

      Subscribe to get our latest content by email.
        We respect your privacy. Unsubscribe at any time.

        Supplies Used in This Tutorial

        Optional supplies:

        How to Set Up the Silhouette Heat Pen for Foiling

        Step 1 – Set up cutting mat by placing cardstock on the cutting mat.

        For Curio 2 users only – tape Silhouette cutting mat to debris tray securely.
        It is NOT recommended to use the heat pen on top of the electrostatic bed. You do not want to damage the electrostatic bed or it will not function properly and will need to be replaced.

        Silhouette Heat Pen Setup Curio 2

        Step 2 – Unpack the Silhouette Heat Pen set and select the items you want to use.

        Silhouette Heat Pen Unpacking

        The Silhouette Heat Pen set includes a 1 mm heat pen, 2.5 mm heat pen, roll of Silhouette masking tape, roll of gold foil, and roll of silver foil. 0.5 mm, 1 mm, and 2.5 mm heat pen, roll of Silhouette masking tape, roll of gold foil, and a roll of silver foil.

        I used the 2.5 mm heat pen and the gold foil for this tutorial.

        Step 3 – Install the Silhouette heat pen in the Tool 2 carriage and a Silhouette blade in the Tool 1 carriage of the machine.

        Silhouette Heat Pen Installation

        The Portrait 4 only has 1 tool housing and will need the power adapter installed prior to installing the Silhouette heat pen (power adapter is included with the Portrait 4 – do not throw it away or lose it). Check out the Portrait 4 unboxing HERE for more information.

        Do not worry if the light does not turn on immediately on the front of the Heat Pen. It will come on as the project is set up.

        Step 4 – Set up design in the Silhouette software to foil & then cut.
        You do not want to cut the foil. Silhouette makes it easy for us to set it up for one action and then the other.

        First, set up the Page Setup Panel for the machine you are using, the cardstock size and orientation.

        Silhouette Studio Heat Pen Setup

        I selected the design I wanted – Hi by Diva Watts DesignDesign #399489 and drew a rounded rectangle around the design with the Drawing Tools on the left side.
        Then with both the design and the rectangle selected, I used the Center Align tool in the top Quick Access Toolbar (QAT).

        Placing the design at the bottom of the sheet of material can make it easier to set up the foiling process and you don’t have to work around the housing. With the Cameo and Portrait machines, it will also make it easier to remove the foil as you do not want to unload the mat between the foiling and cut process.

        Silhouette Studio Hot Foil Design Setup

        Select the design and open the Specialty Tools Panel in the top right corner, directly below the Page Setup Panel. Choose the Heat Pen Panel and choose your fill pattern and spacing. I used the cross-hatched pattern and the default fill which showed as 0.016″.

        Then I changed the line color of my foiling design to blue using the QAT Line Color option in the top left corner. This is going to allow us to use the Send by Line Color option and set up the design for foiling first and the cut second.

        Click the Send button in the top right corner.

        Silhouette Send by Line Color

        Choose the Line option at the top right of the Send tab. Uncheck the red color. Keep the blue color checked and select the “2” option for Tool 2.

        *Tip – I do not use the pause option between foiling and cutting as pause does not always work properly.

        When the Silhouette Heat Pen is recognized in the software, a pop up will come up and ask if you want to start heating the Heat Pen.

        Silhouette Heat Pen Message

        There is no default material setting for the Silhouette Heat Pen currently in the software, but that is no problem. We can create one simply by clicking on the More button in the bottom right of the Send tab. This opens up the Advanced Material Settings and we can set up a material for our foiling.

        Silhouette Custom Setting Setup

        Click the plus sign on the right side to create a new material. Name the new material to designate what you want. Choose the machine model when asked and then select Carriage 2.

        Silhouette Custom Setting Setup Foil Action

        Next, select the larger + sign and select Add Foil Action.

        Silhouette Foil Action Setup

        With Carriage 2 still selected, click on the Sketch Action and choose Remove Action.

        Silhouette Custom Setting Save

        Adjust the settings for the foil, choose Save, and click the X in the top right corner.

        I started with a Force of 10. The only way to know what will work for your material, foil, design, and heat pen is to test it. Start with a small design and test, test, test!

        Silhouette Heat Pen Test

        Next, select the new material you created. The setting will be at the bottom of the materials list as a user defined setting.

        Verify that the correct color is the one you are changing and that the blue is the color that will be sent to foil.

        Step 5 – While the pen is heating, add foil on top of the cardstock in the exact location of the design.

        Start by taping the diagonal corners and pulling it as smooth as possible.

        Silhouette Foil Setup

        Then tape the other 2 corners. Adjust as needed until it is securely held and as smooth as possible. Any movement in the foil can cause the heat pen to catch and the project to be lost.

        Silhouette Foil Setup Cardstock

        Step 6 – When the Silhouette Heat Pen shows as Ready, click the Send button to send the job to foil.

        If using the Silhouette Curio 2, you will need to do the manual height detection. The height detection does not work accurately on clear or shiny surfaces, so you want to follow the directions to manually detect the height in the software. Check out the video tutorial for a visual on how I do this HERE.

        With the Heat Pen set up properly, the auto height detection is automatically disabled to allow for you to set the height manually. This is important to get an accurate reading of the thickness of the material with the Curio 2.

        Silhouette Foil Check

        Peek at foiling job when complete. Sometimes if it didn’t foil properly, you could send again if you don’t move the foil too much.

        Silhouette Heat pen Foil

        If it’s successful, remove the tape, save and reuse it.

        If using a Silhouette Cameo 5 or Portrait 4 , do NOT unload the cutting mat.

        Step 7 – Send the job to cut.

        Silhouette Heat Pen Cut

        Uncheck the blue cut line and check the red cut line. The blue lines will turn off and the bold red cut line should turn on. Select the appropriate cut setting for your material. Then click Send.

        Step 8 – Carefully remove the cut piece.

        Silhouette Heat Pen Project

        Keep in mind that if you have the force too high, it can cement the cardstock down to the cutting mat. Be careful removing it and a Silhouette spatula works nicely to help lift it without damaging it.

        Silhouette Heat Pen Project Removal with Spatula

        I also tested with Spellbinders hot foil and We R Makers Foil Quill Foil and both worked well.

        Silhouette Hot Foil Testing

        If cardstock does stick to the cutting mat, carefully remove it with a scraper, but don’t press too hard and remove the adhesive on the mat.

        Silhouette cleaning mat with scraper

        Just be careful and do not dig into the cutting mat with it.

        Silhouette clean mat

        Ta-da! Clean mat!

        This little scraper tool is also amazing at removing little bits of a cut design quickly and easily. Check out this video where I show that HERE.

        Silhouette Heat Pen Projects and Testing

        Have fun and just play!!!

        Check out the video tutorial on the Silhouette Secrets+ YouTube channel HERE
        and grab the printable PDF available when you confirm the newsletter subscription HERE.

        Save this for future reference by pinning the image below.

        Silhouette Heat Pen Pinterest

        Enjoy !

        THANK YOU for your support! How can you help? Click HERE & buy a coffee.
        Every little bit helps with the cost of running the site.

        Silhouette Classes

        Never stop learning! Let me help you take the anxiety out of learning with Silhouette and get to creating faster! My Silhouette classes are heavily focused on software, so you can take the skills & techniques taught and apply them to many future projects!

        Silhouette step-by-step Classes by Silhouette Secrets+

        **This post may contain affiliate links. What that means is that I may receive compensation if you purchase through the links I have provided. The price you pay for the product or service is not higher but I may get compensated for sharing.
        Posted on Leave a comment

        Silhouette Curio 2 – Resources

        Affiliate links may be present in the following blog post and as an Amazon Associate I earn from qualifying purchases.

        Silhouette Curio 2 – Resources

        The Silhouette Curio 2 is new but I have resources that can help! I have been having a lot of fun getting to know this new machine and want to share some things that can help you!

        If you have happened on this page before getting a Silhouette Curio 2, you’ll be off to a great start with this information for when you receive it. You can find the Curio 2 at CrafterCuts HERE.

        Silhouette Curio 2 Manual

        The new Silhouette machines now have a QR code on the side of the box and that should be your first step when you open the box. It will help in getting setup with the new machine and your Silhouette account.

        Or you can go to www.silhouetteamerica.com/setup

        It also has a link to the Silhouette Curio Manual, but I find that users often skip over that section and then later on are asking where to find it.

        Find the Silhouette Curio 2 User Manual HERE on the Silhouette America website.

        Additional Silhouette Curio 2 Information

        The Silhouette America website also has additional information about the Curio 2 in the Support area. These topics are usually frequently asked questions that Silhouette Support gets asked over and over, so it’s a great resource to check out and see if your answer is there before you contact Silhouette Support.

        There is no need to Log in, simply type “Curio 2” into the search box and all the articles about the Curio 2 will pop up.

        The information provided here can be very helpful and save you from doing things with your machine that it was not designed or tested for. Such as etching with the Tool 1 housing on the Curio 2.

        My goal as an instructor is to help users have the best experience they can. I don’t want to be responsible for any issues you encounter with your machine, so you will not see me instruct or recommend techniques with your machine that could have an effect on the warranty or the lifespan of your machine. Others don’t always consider this when they advise a user to do it. As a Silhouette instructor, I feel I just can’t do that. Your experience and being able to get help when you have a problem matter to me.

        I hope you will check out the Silhouette Support Freshdesk for more information!
        It is an important resource that I use ALL THE TIME!

        I have more tips for this resource in this post HERE.

        Silhouette Secrets+ YouTube Channel – Curio 2

        Check out the Silhouette Curio 2 playlist on the Silhouette Secrets+ YouTube channel HERE.

        As I add videos specific to the Curio 2, they will show up in the playlist.

        Or you can see all the videos I have on the Silhouette Secrets+ YouTube channel HERE.

        Make sure to Like, Subscribe, and click the bell for notifications so you don’t miss anything. It is also a big help to me as a creator as well. The more people watch, interact, like, and comment on a video helps the algorithms show others more.

        So a great big thank you to those who interact on the Silhouette Secrets+ YouTube channel. I appreciate it!

        Silhouette Curio 2 Classes

        If you are looking to get started faster and avoid the guessing game, I have also released step-by-step Silhouette Curio 2 classes.

        Silhouette Curio 2
        First Cuts Step-by-Step

        Step-by-step video class to getting started with the Silhouette Curio 2. Learn about proper setup for the Electrostatic Bed, about IPT, and complete the first cuts with the Curio 2. Click below for the full class description.

        Silhouette Curio 2 –
        Out-of-the-box Class

        Step-by-step class to complete 3 projects with the Curio 2 right out of the box.
        Cutting vellum with the electrostatic bed, perfect print and cut, sketching on thicker materials, and creating templates for exact placement. Click below for the full class description.

        Silhouette Curio 2 –
        Beginner Acrylic Engrave Class

        Step-by-step class for setting up the Curio 2 for exact placement on blanks, creating a template, creating a custom setting for the Acrylic Engrave, auto & manual height detection and why you would use either, engrave tips, and more!

        Find all of the Silhouette classes available on the Silhouette Secrets+ Teachable site HERE.

        Silhouette Classes

        Never stop learning! Let me help you take the anxiety out of learning with Silhouette and get to creating faster! My Silhouette classes are heavily focused on software, so you can take the skills & techniques taught and apply them to many future projects!

        Silhouette step-by-step Classes by Silhouette Secrets+

        I hope you have as much fun with your Silhouette Curio 2 as I have been! I’ll be adding additional resources and classes soon – Stay tuned!

        Save this for future reference by pinning the image below.

        Enjoy !

        THANK YOU for your support! How can you help? Click HERE & buy a coffee.
        Every little bit helps with the cost of running the site.

        **This post may contain affiliate links. What that means is that I may receive compensation if you purchase through the links I have provided. The price you pay for the product or service is not higher but I may get compensated for sharing.
        Posted on Leave a comment

        Silhouette Curio 2 – Out-of-the-box Class

        What can you do with the Silhouette Curio 2 right out of the box? LOTS!

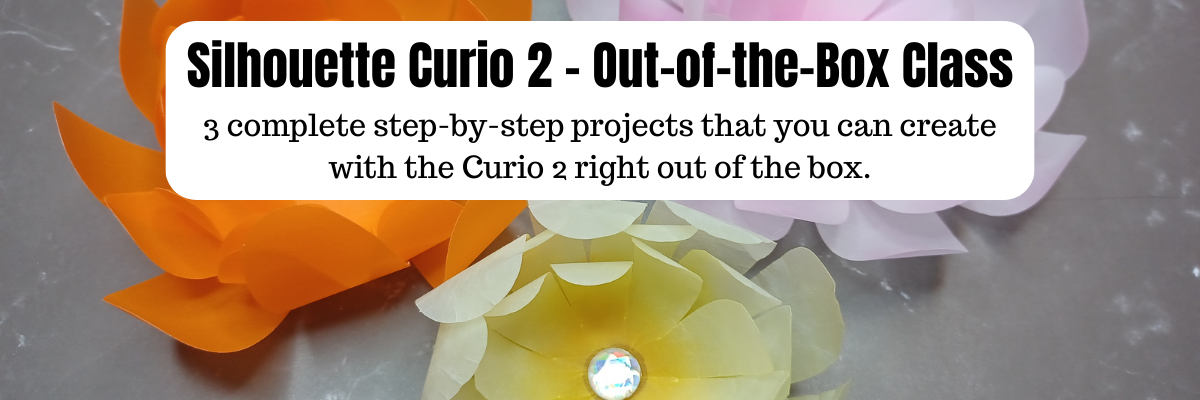
        I have just released the new Silhouette Curio 2 – Out-of-the-box class where you will complete 3 projects step-by-step and learn all about your Curio 2 and setting yourself up for success! No power tools needed!

        Silhouette Curio 2 – Out-of-the-Box Class

        The first project is creating vellum flowers using the new electrostatic bed on the Silhouette Curio 2. In the class, I’ll share 2 ways you can cut thin, delicate materials on the ES bed. We will look at the differences in a regular cut and the new IPT (Intellectual Path Technology) method. You might find that this new method is successful for more materials that previously did not have a high success rate.

        The second project is setting up a print and cut file for a successful cut with sticker paper. While it may seem very basic in written word, I’m sharing my tips for success and the more you can practice with the Silhouette Curio 2 and the electrostatic bed, the more successful you will be in your future projects.

        We will use an amazing design by Diva Watts Designs that is provided in the class.
        Thank you Diva Watts Designs! Check out all her fabulous designs HERE.

        The third project is utilizing the new 20 mm clearance on the Silhouette Curio 2 by sketching on thicker materials. I will share tips for the new height detection, how to perform a manual height detection exactly on your project, and how to create a template so you can get exact placement for your designs on your material. I’ll be showing several different thicknesses in materials and you will have options for this class depending on what you want to sketch on and try first.

        And I couldn’t stop sharing, so there are some additional bonus sections in this Curio 2 – Out-of-the-box class where I’m sharing even more tips too!

        What you’ll also learn in the class is exactly how I troubleshoot issues when they do come up. You will encounter issues or have times that a project just doesn’t turn out. I did and show how I worked through those and explain why they might happen as well.

        I hope you’ll join me in this class to get started making fabulous projects with your Silhouette Curio 2.

        Silhouette Curio 2 –
        Out-of-the-box Class

        Step-by-step class to complete 3 projects with the Curio 2 right out of the box.
        Cutting vellum with the electrostatic bed, perfect print and cut, sketching on thicker materials, and creating templates for exact placement. Click below for the full class description.

        I’ve had a blast creating with the Silhouette Curio 2 and I can’t wait to see what you create with it!

        Affiliate links may be present in the following blog post and as an Amazon Associate I earn from qualifying purchases.

        If you want to add the new Silhouette Curio 2 to your toolbox right now, you can find it HERE.

        Save this for future reference by pinning the image below.

        Enjoy !

        THANK YOU for your support! How can you help? Click HERE & buy a coffee.
        Every little bit helps with the cost of running the site.

        Silhouette Classes

        Never stop learning! Let me help you take the anxiety out of learning with Silhouette and get to creating faster! My Silhouette classes are heavily focused on software, so you can take the skills & techniques taught and apply them to many future projects!

        Silhouette step-by-step Classes by Silhouette Secrets+

        **This post may contain affiliate links. What that means is that I may receive compensation if you purchase through the links I have provided. The price you pay for the product or service is not higher but I may get compensated for sharing.