Posted on Leave a comment

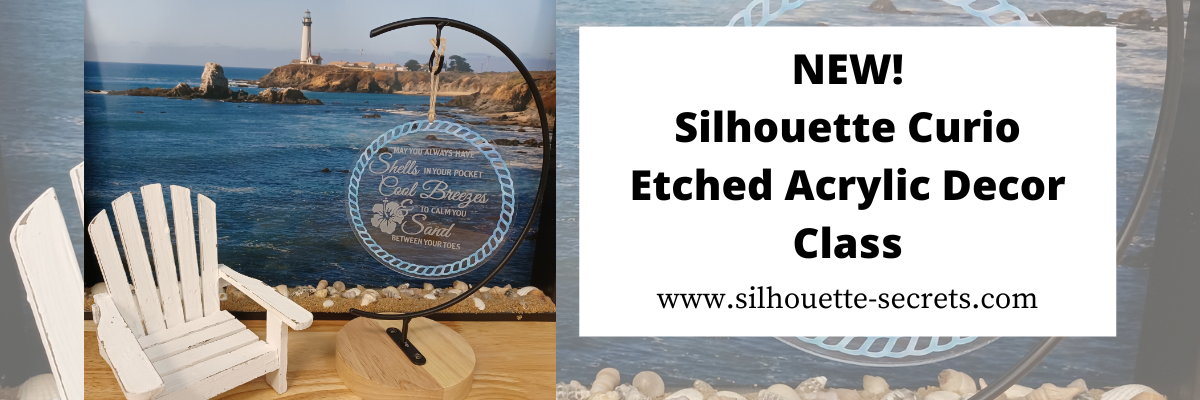
Etched Acrylic Décor Class Released

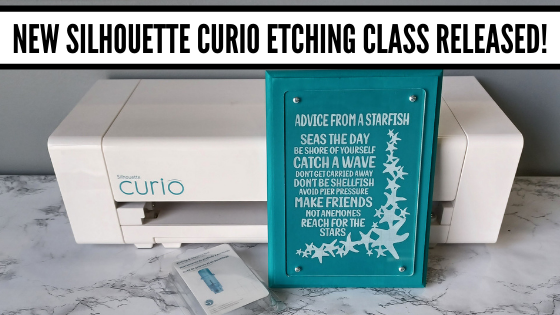
New! I’ve just released the a new Silhouette Curio class on my Teachable site!

Etched Acrylic Decor with the Silhouette Curio

Not only do we set up to etch on acrylic, but I also share how to cut adhesive vinyl on the Curio and why I added it onto this project.

Check it out

HERE

and join me in this class to create a unique décor item and learn more about the Silhouette Curio!

I am also including the list of supplies that I used in the class if you’d like to create along with me.

Affiliate links may be present in the below and as an Amazon Associate I earn from qualifying purchases. What that means is that I may receive compensation if you purchase through the links I have provided. The price you pay for the product or service is not higher but I may get compensated for sharing.

Class Supplies:
– Silhouette Curio machine
Silhouette Etching tool – use code 10OFF to save 10% at Silhouette America
– Silhouette black blade (ratchet) or premium blade – if cutting vinyl with the Curio
– (2) Silhouette Curio cutting mats – Very important! – 1 mat for cutting & 1 mat for etching
**Cutting adhesive vinyl can also be done on a Cameo or Portrait, but the class will show cutting with the Curio
Double sided tape from Craft Chameleon
Beach Blessing design by Deborah Stine – Design #62386
Rope Frames Circle by Snapdragon Snippets – Design #30736
Curio Etching Kit by Craft Chameleon
Kit includes: (3) 5” Round Acrylic discs, (1) Curio Etching 5” round template, (1) Diamond Tip Reamer, (1) twine, (3) 6”x 6” adhesive vinyl – random colors/patterns
– Transfer Tape
Optional: Adhesive vinyl of color choice
Digital Calipers – highly recommend

Check out all 11 Curio classes on my Teachable site HERE.

As well as all available Silhouette classes HERE.
And…. for those who’ve read this far I’ll give a little hint – I have 1 more Silhouette class releasing very soon too!

I’d love to see what you are creating with your Silhouette software & machines!
Feel free to post on my Facebook group at 
Silhouette Secrets with EllyMae.

Save this for future reference by pinning the image below.

Enjoy !

This image has an empty alt attribute; its file name is logo.jpg

THANK YOU for your support! How can you help? Click HERE & buy a coffee.
Every little bit helps with the cost of running the site.

Or if you are looking for more in-depth, step-by-step classes, check out all of my online Silhouette classes on my Teachable site HERE.

SS Logo snip it
**This post may contain affiliate links. What that means is that I may receive compensation if you purchase through the links I have provided. The price you pay for the product or service is not higher but I may get compensated for sharing.
Posted on Leave a comment

Chalkboard Décor with the Curio

Just a quick post today to share my newest Silhouette class. It is a Silhouette Curio class that I was in the process of creating for an in-person event before everything was shut down a couple years ago. I finally picked it back up where I left off and it is now available for all to view anytime after you’ve registered on my Teachable site.

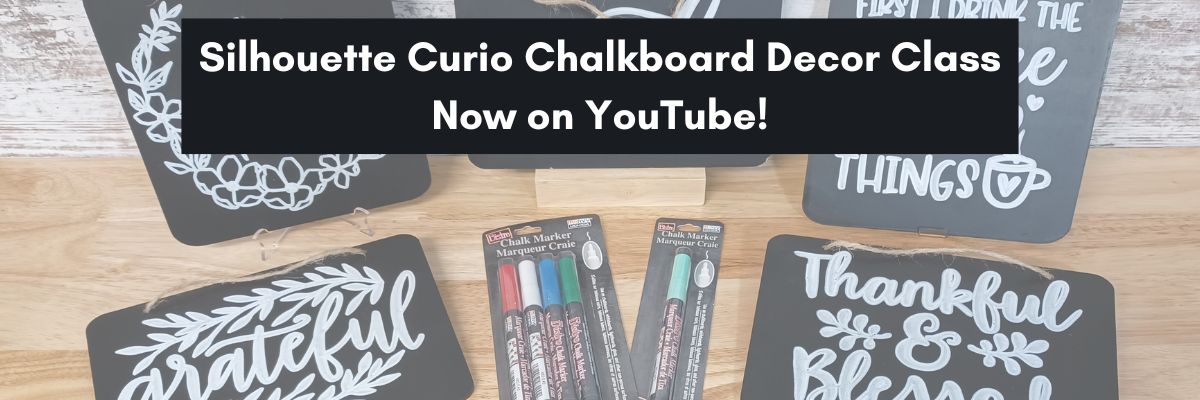
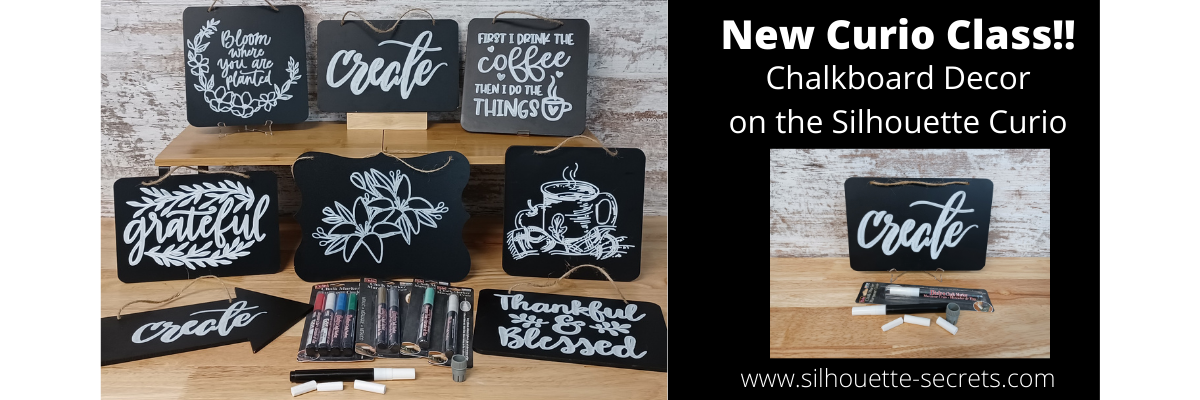
New! Chalkboard Decor with the Silhouette Curio class is now available.

This is a step-by-step class on using a chalk marker in the Silhouette Curio to sketch directly on a chalkboard.
Find the class and full details on my Teachable site HERE

Check out the demo video on my YouTube channel HERE.

I had so much fun playing with the chalk marker and these chalkboard signs.
Here are a few more that I created

Affiliate links may be present in the below and as an Amazon Associate I earn from qualifying purchases. What that means is that I may receive compensation if you purchase through the links I have provided. The price you pay for the product or service is not higher but I may get compensated for sharing.

These are the supplies I used in this class to create these chalkboards:
– Silhouette Curio machine, Silhouette small base cutting mat, Curio platforms and base
– Chalkboard sign – Michaels – 6.6” square, arrow shape, rectangle shape
Michaels bulk chalkboard options – rectangle 8 pk, arrow 8 pk, Square 8 pk
or Amazon
NOTE: chalkboards can vary in thickness – it needs to be under 5 mm thick & fit on the Curio base
No frames or borders. Remove any twine attached.

Create by Cali Arroyo – Design #215617
Bistro Chalk Marker by Marvy Uchida White
– Optional: Bistro Markers Colors – Fluorescent, Primary
– Silhouette Pen Holder Type A – Silhouette America, Amazon
Digital Calipers – highly recommend for Curio projects
– Ruler with mm
White Chalk
– Clean Towel
– Notepad & pen
– Optional designs also featured: Design #317171, Design #404761, Design #304784,
Design #400058, Design #229894, Design #154513
Optional: extra twine, scissors

I have so many more ideas I want to try and test!

I hope you will join me in this Silhouette class!
Check out the full details on my Teachable site HERE

Whether you join or not, I’d love to see what you are creating with your Silhouette software & machines!
Feel free to post on my Facebook group at 
Silhouette Secrets with EllyMae.

Save this for future reference by pinning the image below.

Enjoy !

This image has an empty alt attribute; its file name is logo.jpg

THANK YOU for your support! How can you help? Click HERE & buy a coffee.
Every little bit helps with the cost of running the site.

Or if you are looking for more in-depth, step-by-step classes, check out all of my online Silhouette classes on my Teachable site HERE.

SS Logo snip it
**This post may contain affiliate links. What that means is that I may receive compensation if you purchase through the links I have provided. The price you pay for the product or service is not higher but I may get compensated for sharing.
Posted on Leave a comment

New Silhouette Curio class released!

I have so much fun playing with my Silhouette Curio and all the things it can do!
I want to share that with you!
Join me in this Silhouette Curio class to create an acrylic etched panel!
Check out the class HERE.

This is an Advanced Beginner Curio class that will cover the setup step-by-step to getting the Curio ready to etch, creating a template in Silhouette Studio for the etching, and then creating the design to be etched. You will create your own word art design using tools in the Silhouette Studio software! Tips are shared throughout the video class for getting successful etches with your Silhouette Curio machine.

Check out the class

HERE

Here is a sneak peek at the class content and the videos included:

Supplies & Setup Video – 17:55 minutes

Creating the Etched Acrylic Panel Template in Silhouette Studio – 31:30 minutes
– Using the drawing tools to create a template
– Creating template with nail holes to avoid
– Alignment Tools
– Move By Tool

Designing & Etching the Acrylic Panel in Silhouette Studio – 1 hour 3 minutes
– Opening Starfish border Design #3653
– Compound paths
– Text Tool
– Creating the design with multiple lines of text
– Creating “word art” with text
– Adding an etch fill
– “Secret” to getting a tighter etch fill
– Setting up the Curio to etch
– Etching
– Finish and assembly

Class Supplies:

Affiliate links are present in the following supply list and as an Amazon Associate, I earn from qualifying purchases. The cost to you is no different, but I may earn a commission by you using the links provided.

-Silhouette Curio machine
Silhouette Etching Tool
– New Silhouette Curio Cutting mat – highly recommend a sticky mat
Starfish border Design by Calli Arroyo – Design #3653
Fish Grill font by 7nTypes – Design #292330
4” x 6” Acrylic Panel with 4 holes from Craft Chameleon
Double sided sticky tape from Craft Chameleon
– 6” x 8” Basswood board by Walnut Hollow – Amazon or Walnut Hollow
#4 x ½” Sheet Metal Screws
– Dark colored paint or stain
– Paint brush
– Screwdriver
Hand drill
– Weeding tool
– Optional: baby wipes, Teflon sheet, apron

Optional:
LW Wide Marker Font by Lori Whitlock – Design #82132
Acrylic Panel no holes from Craft Chameleon
Wood stand

Additional Resources

No matter how many times I etch a project, even the same design, I still do a little happy dance when it’s finished!

Find this class on my Teachable site HERE

I love being able to customize my gifts & projects with the Silhouette Curio!

Want more ideas of what you can create with your Curio?
Check this out – Gift Ideas with your Silhouette Curio

Just getting started with your Curio?
The possibilities are endless in what you can create!
Check out the other Silhouette Curio class on my Teachable site HERE.

I would love to see what you are creating with your Silhouette software or machines!
Feel free to post on my Facebook group at 
Silhouette Secrets with EllyMae.

Save this for future reference by pinning the image below.

Enjoy !

This image has an empty alt attribute; its file name is logo.jpg

THANK YOU for your support! How can you help? Click HERE & buy a coffee.
Every little bit helps with the cost of running the site.

SS Logo snip it
**This post may contain affiliate links. What that means is that I may receive compensation if you purchase through the links I have provided. The price you pay for the product or service is not higher but I may get compensated for sharing.
Posted on Leave a comment

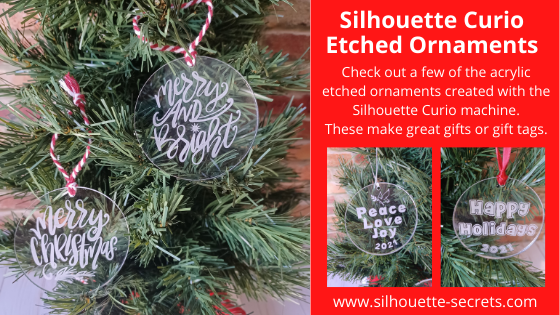
Silhouette Curio Etched Ornaments

Looking for a unique décor or gift idea?
Acrylic etched items can be just the thing.

Etched Acrylic Ornaments with the Silhouette Curio

Affiliate links may be present in the following blog post and as an Amazon Associate I earn from qualifying purchases.

Take a 3″ acrylic circle and customize it however you like.
Add a simple saying with the date or jazz it up even more.
These acrylic circles could be used for tree ornaments, gift tags, bag tags, and more!

Here are a couple that I created for a Curio demonstration at the Craft Chameleon Fall Open House.
Check out the replay of this demo HERE.

The supplies for this project include:
– a Silhouette Curio machine
Silhouette Etching tool
3″ acrylic round from Craft Chameleon
Curio template for 3″ round from Craft Chameleon
– Double sided tape from Craft Chameleon
– designs of your choosing

The above designs are ones that I created myself and made using fonts and designs.
Grab those designs for free
HERE

If you’d like to create your own here are the fonts I used:
Happy Holidays – CC Too Much Fun Bold Font
Peace, Love & Joy – CC Gobsmacked Solid Font
Merry Christmas – CC Elegande Font

But, you can also take a design and size it down to fit in the 3″ circle to etch with as well. My only caution is to give yourself clearance around the edges of the acrylic and the hole at the top. If the tool catches on the edge or the hole, it will throw the etch off and you have a dud.

Here are a few examples of ornaments I’ve created and I’ll share the links to the designs I used.

Merry Christmas Ornament by Sweet Afton – Design #333980
Merry & Bright Ornament by Sweet Afton – Design #333981

Merry Ornament by Sweet Afton – Design #337453
Snowflake design created with the Drawing Tools in Silhouette Studio – more details found HERE

I love doing a combination of etching and adding vinyl to give it colors, dimension, and make it “pop”.
Dear Santa Design by Craft Chameleon
Noel Ornament design by Sweet Afton – Design #334450

This design is one I created for a Silhouette Curio etching class that is available on my Teachable site.
Keep in mind that designs you have can be used on many different blanks from ornaments to coasters, etc.

There are so many gift ideas that you can create with your Silhouette machine and even more options when you have a Silhouette Curio.

Check out more gift ideas created with the Curio machine HERE.

At the time of writing this, Swing Design still has Curio machines available.
Find those HERE.

You will also need a Silhouette Etching Tool for etching projects.
These are a little difficult to come by right now because of manufacturing and shipping delays worldwide, but keep on checking. Once you have the machine, you have the biggest part.
Find Silhouette etching tools here:
Silhouette America
Amazon

I do not recommend 3rd party etching tools as they can void the machine warranty and I had more blank spots in the etch when I used them. The Silhouette etching tool has given me the best results and I etch a lot when I’m developing classes.

The worldwide shortage on supplies, manufacturing, and shipping delays affect so many things including but not limited to Silhouette products. They are coming, but there is nothing that can be done but wait as we all work through these times we are in.

This little machine is a fantastic machine and will make fabulous projects for years to come.
Check out more Curio projects in my virtual demo table on YouTube HERE

I currently have 8 Curio classes on my Teachable site that will take you from Beginner to more advanced projects.
Find those HERE

I would love to see what you are creating with your Silhouette machines or software.
Feel free to post photos or questions on my Facebook group at 
Silhouette Secrets with EllyMae.

Save this for future reference by pinning the image below.

Enjoy!

This image has an empty alt attribute; its file name is logo.jpg

THANK YOU for your support! How can you help? Click HERE & buy a coffee.
Every little bit helps with the cost of running the site.
If you are looking for more in-depth, step-by-step classes, check out all of my online Silhouette classes on my Teachable site HERE.

SS Logo snip it
**This post may contain affiliate links. What that means is that I may receive compensation if you purchase through the links I have provided. The price you pay for the product or service is not higher but I may get compensated for sharing.
Posted on Leave a comment

New Curio Class Released!

Just a quick post to give a heads up that I’ve released a new Curio etching class on my Teachable site.

Etched Metal Cake Server Class with the Curio

This is a step-by-step class showing how to etch an odd shaped object on the Curio machine. I share how I secure the cake server on the Curio cutting mat and use shape templates to place the design and size it for the etching. Plus a trick to getting a tighter etch fill for harder surfaces like these stainless steel servers.

Supplies used in this class are:
– Silhouette Curio small cutting mat
– Silhouette Curio Etching/Stippling Tool – Click here to find at Silhouette or Amazon
*Watch for these to come in stock soon 😉
– Silhouette Curio small base with ALL platforms – please double check that you have all the platforms – a 2+1+cutting mat
– Metal Cake Server from Amazon
Monogram Wreath Font by Kristen Magee – Design #260225

Check out all of the Curio classes available on my Teachable site HERE

Create unique and custom gifts and projects with the Curio.
Check out this post HERE on more gift ideas of what you can do with the Silhouette Curio.

The Curio is a fantastic little machine that can do so much!

Want to see more Curio projects? Check out the virtual demo table video that I created for our past Curio virtual retreats on my YouTube Channel HERE.

I’d love see what you create!
Feel free to post on the
Silhouette Secrets+ Facebook Group.

Save this for future reference by pinning the image below.

Enjoy!

This image has an empty alt attribute; its file name is logo.jpg

THANK YOU for your support! How can you help? Click HERE & buy a coffee.
Every little bit helps with the cost of running the site.

Or if you are looking for more in-depth, step-by-step classes, check out all of my online Silhouette classes on my Teachable site HERE.

SS Logo snip it
**This post may contain affiliate links. What that means is that I may receive compensation if you purchase through the links I have provided. The price you pay for the product or service is not higher but I may get compensated for sharing.
Posted on Leave a comment

Etched Acrylic Coasters with the Curio

What happens when you move into a furnished apartment with wood furniture? My husband says to me, “We should have brought coasters.”

No problem! Pull out the Curio, pick out a couple of designs and the Curio is etching away.

I may be working on the dining room table, but I am happy to have the Curio out and running.

Affiliate links may be present in the following blog post and as an Amazon Associate I earn from qualifying purchases.

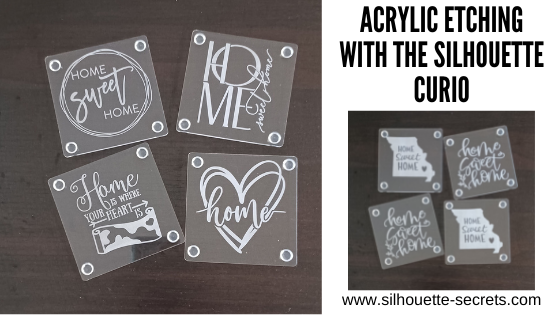
I picked up a few designs from the Silhouette Design Store, grabbed some acrylic coasters from my stash, my Curio coaster template, and the Curio machine did all the work.

Home Sweet Home by Diva Watts Designs – Design #346725 (top left)
Home Sweet Home by Diva Watts Designs – Design #346001 (top right)
Home is Where the Heart Is by Graphic House Design – Design #333473 (bottom left)
Home Hearts by Sophie Gallo – Design #318625 (bottom right)

Home Sweet Home Missouri by Jennifer Wambach – Design #148499
Home Sweet Home by Diva Watts Designs – Design #347923

And now the furniture will be protected….
well, if we can get the kids to use them.

Do you have a Curio and it’s just sitting there?
Get it out and play!

I’ve been teaching Curio classes for a couple of years now and have several available on my Teachable site HERE.

If you are interested in Acrylic Etching with the Curio, I would suggest the Basic Acrylic Etching with the Silhouette Curio class or the Acrylic Etching & Design with the Curio class.

If you are not a Curio owner, here is more information on etching with the Silhouette machines and why I highly recommend getting a Curio –
Etching with Your Silhouette Machine.

I would love to see and hear about what you are creating on my Facebook group at 
Silhouette Secrets with EllyMae. If you have questions feel free to post below or on the Facebook group too!

Save this for future reference by pinning the image below.

Enjoy!

This image has an empty alt attribute; its file name is logo.jpg

THANK YOU for your support! How can you help? Click HERE & buy a coffee.
Every little bit helps with the cost of running the site.

Or if you are looking for more in-depth, step-by-step classes, check out all of my online Silhouette classes on my Teachable site HERE.

SS Logo snip it
**This post may contain affiliate links. What that means is that I may receive compensation if you purchase through the links I have provided. The price you pay for the product or service is not higher but I may get compensated for sharing.
Posted on 6 Comments

Customize your Silhouette with this cover file

In October 2019 I released a cover cut file for the Silhouette Cameo 4. This is a cut file that can be used to cut out of adhesive vinyl and then applied to the Silhouette machine cover to customize it how you like.

I’ve updated the cover cut files and created a couple others that you will find below.

If you would like to see how I created these cut files, check out the original post HERE
Cameo 4 Cover & More

Find the Silhouette machine cover files by clicking on the links below:

Silhouette Cameo 4 – 12″ model

Silhouette Cameo 4 Plus – 15″ model – in progress

Silhouette Cameo 4 Pro – 24″ model

Note: this file is for models that say “Cameo Pro” at the top.
For international machines that say “Silhouette Cameo Pro” the cutout for the top middle panel will need to be extended. I will update the file when I get measurements.

Note: You will notice that I have not fully committed here to adding vinyl to my Pro machine. I am just not sure what I want to add to it. I did cut and test the file for all the pieces and then used Scotch tape to add it to the front of the machine to verify and test. This is also a great way to help in placing it on the machine and getting it exactly where you want it before you commit permanently to peeling that backing off the adhesive vinyl. When you are ready, lift one side, peel the backing off and cut about halfway down. Smooth the vinyl down on one side and then lift the next side and peel the backing. This hinge method can save you some headache of getting it on straight the first time. I did cut with scissors around the edges of the decal pieces to line it up better.

Silhouette Cameo 3 model

Silhouette Curio

Note for International users outside of the U.S. & Canada: due to regulations in your countries, the Silhouette logo on the front of the Cameo 4 model machines may be different. Regulations require it to say Silhouette Cameo, Silhouette Cameo Plus, or Silhouette Cameo Pro versus just Cameo, Cameo Plus, or Cameo Pro. This does change the measurement of the inside rectangle of the top panel where it is backlit on the machine. The Cameo 4 – 12″ model file does contain the alternate panel and I am working on getting measurements and creating the alternates for the Cameo Plus and Pro models.

Silhouette Portrait – I do not have a cut file for this as the Portrait has quite a curve to the front of it and it is more difficult to get a vinyl to wrap with no wrinkles on this surface area.
Personally, unless you are very experienced with curved vinyl wraps, I would cut a design decal and apply it to your Portrait. But, the only way to know is to practice it.
To see how I created the original cut file check out this post HERE.

Cameo 2 and Cameo 1 owners

Grab this Silhouette Cameo Cover Template from the Silhouette Design Store,
*Note this file contains cuts for the Cameo 1 panels, Cameo 2 panels, and Cameo 3 lid.

Silhouette cover

If you do create a cover for your Silhouette machine, please share on a photo of the finished project on my Facebook group.
Silhouette Secrets+ Facebook Group
We love seeing the different selections of vinyl used to customize the cover.

As always, please understand that I have measured and created these files for personal use only. If you do share, please direct Silhouette user’s to this blog post to download the file direct.
And thank you for sharing!

Save this for future reference by pinning the image below.

Enjoy!

This image has an empty alt attribute; its file name is logo.jpg

THANK YOU for your support! How can you help? Click HERE & buy a coffee.
Every little bit helps with the cost of running the site.

Or if you are looking for more in-depth, step-by-step classes, check out all of my online Silhouette classes on my Teachable site HERE.

SS Logo snip it
**This post may contain affiliate links. What that means is that I may receive compensation if you purchase through the links I have provided. The price you pay for the product or service is not higher but I may get compensated for sharing.
Posted on 6 Comments

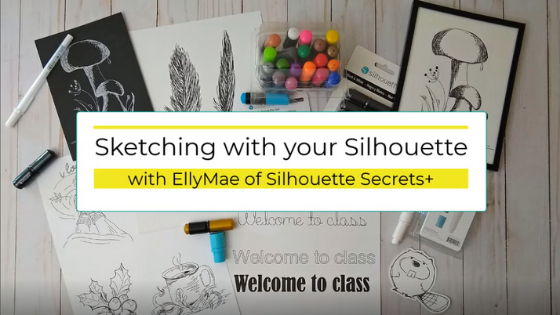
Silhouette Sketching Class – Step-by-step

Silhouette Secrets+ with EllyMae

Silhouette Sketch pens & Sketch Pen Design Class

Just released!
New online video class with tips, tricks, and troubleshooting for sketching with your Silhouette.

I had no idea how popular this class would be when I submitted it for the May All Things Silhouette Conference. I had a limited window of opportunity right after conference to get this recorded and edited, but I’m happy to announce that after 18 hours of video production – IT’S HERE!!!

Silhouette Sketch Class HERE

This is a total video time of around 2 hours, however, the class will take approximately 3 hours to complete with all the sketching and design time.

In this class you will learn all about sketch pens & creating sketch designs. We discuss different pen styles, adapters, sketch designs, fonts, filling designs, and trouble-shooting too.
We will be doing some testing, demos, and finished projects.
At the end of the class, you will have a better understanding of what works and doesn’t work for sketching with your Silhouette machine.
This class can be completed with a Portrait, Cameo, or Curio machine.

Check out the class HERE

Affiliate links may be present in the following blog post and as an Amazon Associate, I earn from qualifying purchases.

There are some differences between the different Silhouette model machines on the supplies you might need for this class, so I am including the class supply information below.

Sketching Supplies:

Cameo 4, Cameo Plus, Cameo Pro, and Portrait 3 owners

Either:

a Silhouette blue sketch pen adapter
with Silhouette black bodied pens

Or

a Silhouette Type B pen holder and pens that fit
Pens I’ve tested: Sharpie Pen S-Gel, Sharpie Pen Style, Pilot G2 Gel Fine 0.7 mm, Gelly Roll Classic 06 Black, Gelly Roll white, Gelly Roll Moonlight 10 Ice Cream Smooth

Cameo 3, Cameo 2, Cameo 1, Curio, Portrait 1 or 2 owners

Either:

Silhouette black bodied pens or white bodied pens

Or

A Silhouette Type A pen holder and pens that fit
*pens listed above with links

Other supplies:

Designer Edition upgrade (or higher) in the software to unlock Line Effects
Design #65898 Mushroom Sketch by Tanya Batrak
Design #271670 Hello Friend Brush Script by Gina Marshall (optional)
Design #79759 Cancun Sketch font by Dresden Carrie (optional)
– 5+ sheets of white cardstock
– Silhouette cutting mat
– Silhouette blade
– 5” x 7” black frame (optional)

Full Sketching class HERE

Save this for future reference by pinning the image below.

Enjoy !

THANK YOU for your support! How can you help? Click HERE & buy a coffee.
Every little bit helps with the cost of running the site.

Silhouette Classes

Never stop learning! Let me help you take the anxiety out of learning with Silhouette and get to creating faster! My Silhouette classes are heavily focused on software, so you can take the skills & techniques taught and apply them to many future projects!

Silhouette step-by-step Classes by Silhouette Secrets+

Silhouette Secrets+ with EllyMae
**This post may contain affiliate links. What that means is that I may receive compensation if you purchase through the links I have provided. The price you pay for the product or service is not higher, but I may get compensated for sharing.
Posted on 7 Comments

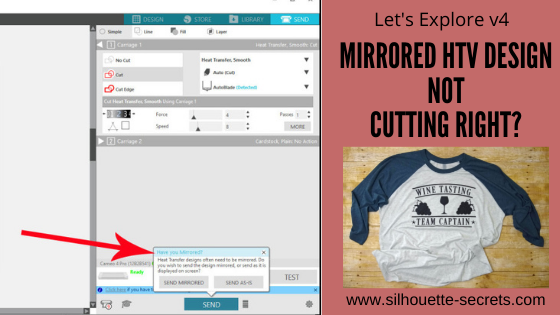
Let’s Explore v4 – Mirrored HTV not cutting right?

Having issues with mirroring HTV and it not cutting right?
Did you let the software mirror it for you and it still didn’t cut right?
Did it cut what was off the cutting mat in the holding area and not your design?

I’ve been seeing this pop up a lot and I originally posted this information at the bottom of an HTV troubleshooting post called
Cutting HTV with the Cameo 4, Plus, or Pro – Troubleshooting
However, it is at the end of the post and I am seeing many user’s post with questions on why it’s not mirroring it correctly.
Hopefully these details below will explain why and how to fix it for your project so you can get back to creating.

Affiliate links may be present in the following blog post and as an Amazon Associate I earn from qualifying purchases.

I would suggest reading through this next section entirely so you understand how this one works and also how to “fix” it.

In 2016, there was a new “pop-up” message that was released into the software for Heat Transfer materials called the Mirror pop up.

For heat transfer materials you are generally placing the material face down on the cutting mat and then cutting through the backside of the material. This means that you have to “mirror” the design so it will cut properly.
How many times have you cut heat transfer material only to have that “head smack” moment after when you realized you forgot to mirror the image?
So the idea behind the “pop-up” message is great!

If you have never cut HTV before or are just getting started, then I would suggest this
Silhouette “Secrets” for HTV – Beginner Tips & Tricks
blog post to get started.

However, this “new” Mirror pop-up released in 2016, did not just mirror the design in the exact place that it was on the design mat. It flipped the entire mat when it mirrored the image, but it does not show that on the screen. So the design that shows on the screen on the left side of the mat/material, is really going to cut on the right side if you choose
Send Mirrored” and let the software mirror it for you.

If you choose “Send As Is” it will send it to cut in the exact location and exactly as you see it on the screen.

Now, I know that may seem like “old news” since this “bug” has been in the software since 2016. Some users got used to it this way while other users would learn to flip the design themselves and just choose “send as is”.

Now, let’s move to the present.
A few months back, I started to notice users commenting that their HTV was not cutting as it should. They would tell the software to mirror it and it wasn’t cutting in the right spot. I reported the issue and found out that the old mirror “bug” was changed in February 2020 the software release.
Now, it would flip the design in the exact location you have it placed on the mat, but still does not show you that on the screen.
However, if you have anything else on the design file, it will mirror all of the objects. Whether they are in the “holding area” off the cutting mat or not.

If you choose “Send Mirrored“, it could mirror all of the designs on the file.
So when it flips it, this is how it would cut.

Now that would come as a complete surprise when you cut and it’s not what you thought it would be.
Note: the above screen shot is a representation of how it may cut, you do not see this change on the software screen at all.

This is present in the software versions from v4.4.247 until v4.4.438.

From v4.4.438 and higher, the software now is back to mirroring the design on the opposite side of the design mat than what shows on the screen.

How to work with this?

In the grand scheme of things, this is not a big deal, if you know about it and know how to work with it.

My suggestion to you is to mirror the design yourself.

The fastest way to do that is to right click on the design on the Design tab before you go to cut and choose Flip > Horizontal.

This will flip the image on the screen, in front of your eyes.

And it will then cut in that exact spot if you choose “Send As Is” on the Send tab.

If you do not have right click menus enabled on your computer, you can also find this in the top menus under Object > Mirror > Flip Horizontally too.

I use the Mirror Pop up as my final reminder and it has caught me several times when I forgot to mirror the design. Then I go back and mirror it myself before I’ve sent the design to cut.

Hopefully with those tips above, you will be well on your way to cutting HTV smoothly and being able to troubleshoot when you do have an issue.

Wine Tasting Team Captain by Megan Hardy Designs – Design# 322093

We would love to see what you are working on!
Feel free post on the
Silhouette Secrets+ Facebook Group.

Save this for future reference by pinning the image below.

Enjoy!

This image has an empty alt attribute; its file name is logo.jpg

THANK YOU for your support! How can you help? Click HERE & buy a coffee.
Every little bit helps with the cost of running the site.

Or if you are looking for more in-depth, step-by-step classes, check out all of my online Silhouette classes on my Teachable site HERE.

SS Logo snip it
**This post may contain affiliate links. What that means is that I may receive compensation if you purchase through the links I have provided. The price you pay for the product or service is not higher but I may get compensated for sharing.
Posted on 26 Comments

Perfect Cut Settings for Silhouette

Silhouette Secrets+ with EllyMae

I know everyone is always looking for the “perfect cut settings” with Silhouette.
Well, let’s just start with

That is a myth!

What you will see is many “suggested settings”.
Even in the Silhouette software, there are “preset settings“.
These are just a starting point.

Why?

Well, the first reason is
Not all materials are created the same.
You may have variances in products even within the same brand, colors, style, etc. There is no magic one size fits all cut setting.
This is why you will see so many “suggestions” from user’s when someone asks on a Facebook post. It is also why you will see each different retailer have their own “suggested settings.”

Materials pictured: Leather, Cardstock, Felt, Faux Leather, Crepe Paper, Fabric, Vinyl

The next reason is
There are many other factors that play into it.
The settings that might work for one user may not work for another because the factors may not all be the same.

The biggest of these factors is whether the blade is installed properly and adjusting correctly.
This is still the #1 cutting error issue and it affects ALL Silhouette machines.

Cameo 3 Autoblade and Silhouette black “ratchet” blade installation

This is one of the best things you can learn to do for yourself & to save yourself headache in the future. It doesn’t matter if you are an experienced user or a beginner. If the blade is not installed properly with no gap and adjusting properly, you WILL have cut issues.
This is an important step no matter what blade type you are using. If you have a gap between the lip of the blade and the housing, you will most likely experience inconsistent cut results.

This is how the blade should be installed on a Cameo 4, Cameo Plus, Cameo Pro, or Portrait 3.

There should be absolutely no gap between the lip of the blade and the housing.
AND the lock on the front of the blade needs to be pushed in completely.

For those using the Autoblade watch as the machine does it’s “tap dance” at the beginning of the cut, does the red line inside the blade adjust properly and to the correct number?

If it does not, we can start troubleshooting it with a photo of the blade installed with the cutting mat or vinyl loaded if you post on the Silhouette Secrets+ Facebook group or check out this video by Silhouette America on Cutting Machine Maintenance and how to Reset the Motor at 4:38 in the video. This should reset the housing so that it is properly aligned to hit the adjustment holes correctly.

After the blade installation other factors that play into a cut are:

Blade life? How old is the blade? Or more importantly, how much as it been used.

What else has the blade cut? I would recommend keeping dedicated blades for each material you do cut. This can increase the lifespan of the blades and get you better cuts. For instance, glitter eats a blade and can sometimes even take chunks out of it. If you’ve cut glitter and then go back to cutting vinyl, it may not cut well again. Or another examples is cutting cardstock. Paper dulls a blade at a different rate than vinyl.
This is one reason that fabric people & people who sew have separate scissors for cutting fabric vs paper scissors.
Also keep in mind that thicker, denser materials are going to dull a blade faster than thin materials.

Cutting with a 3rd party mat? Third party mats can be different sizes and thicknesses. This can affect the cut quality. It is not recommended to use 3rd party mats for many reasons. It can affect not only the cut quality but also the lifespan of the machine’s rollers as well.

Is the cutting strip damaged? This is a rubber strip under the blade housing that provides the pressure from the bottom of the mat/material. Any nicks, dings, holes, slices in it can affect the cut.
Find more details on the cutting strip HERE.

Are you re-sticking your mats? Re-sticking mat can cause all kinds of cutting issues. It can gum up the machine or blades. It can cause the rollers to not function properly. It is not advised.

Cheap materials? Sometimes it’s a get what you pay for situation. Cheap vinyl/htv, etc. can be a headache and it may not be that you are doing anything wrong, it’s just difficult to work with.

Silhouette machine model? Yes, each machine can vary because they are different.

All of these are factors that can affect the cut quality.

Affiliate links may be present in the following blog post and as an Amazon Associate I earn from qualifying purchases.

So what do you do?

TEST CUT

Test cuts are going to be your BEST FRIEND!

I start with the preset in the software that is the closest material to what I’m using.

For instance, if I’m cutting a solid color Heat Transfer, I select Heat Transfer Smooth and do a test cut with the recommended settings. If I’m cutting Oracal 651, I start with the Vinyl – Glossy setting. If it doesn’t cut, adjust the cut settings and do another test cut. I recommend only changing 1 thing at a time and doing a new test cut. If you change too many things at once, you don’t really know what worked.

As you do this more and more, you will start to see patterns. For instance, on the Cameo 4 models I find I have to increase the blade depth up 1 on almost all materials.

There are 2 ways you can do a test cut.

1 – Use the Test Cut feature in the Silhouette software on the Send tab.

The default test cut option is in the upper left corner of either the mat or the material loaded.

If you need to move the test cut to do it again, you can do so in 2 ways. You will need to move the test cut to the exact location you want it to cut on your material.

To do this, use the arrows keys next to the test cut button on the Send tab in the software or the arrows on the Cameo touch panel on the right side.

To move the housing, you will need to move it both over to the right and down. The housing will perform the test cut in the exact location it is placed. If it is only moved over to the right, it will cut the top of the cutting mat.

Or the second way to do a test cut is use a shape or object.

I use a capital B that I type out and then I will place it on my virtual mat where my design is not located at. I love this way because it is faster than adjusting the housing and a bit more accurate since you place it where you want.

Click on the Send tab, click exactly on the design to select it and choose No Cut to turn the cut lines off on the design and only cut the capital B.

Select the material you are cutting and click the Send button at the bottom of the Send tab to cut the B. Did it cut? If not, adjust the settings, move the B and send it to cut again.

It is much better to use a small section of material to make sure the settings will work versus sending a full 20″ design and it didn’t cut well. This will save you both time and headache.

Note: if doing a print and cut project, you do not want the test cut to cut from the top left of the printed page or it can interfere with the reading of the registration marks.

You can also either change the Line Color or the Fill Color of the B and then use the Cut by Line or Cut by Fill color options to turn the cut lines on or off.

This was one of the habits that I found the hardest to get into. I was a Silhouette user for many years before I knew about the test cut feature. But, if you think about it, it makes complete sense and it will save you time, materials, and headache in the long run!

While there are NO one size fits all “cut settings”, the more you cut, you will get familiar with what you are working with.

Once you have found those “perfect” cut settings for your material, you can create a custom setting in Silhouette for your materials. Find out more on Custom Cut Settings HERE.
And if you do use custom cut settings, make sure you are backing those up or writing them down somewhere too!

Now the next question I see all the time is “How long should a blade last?

Again, there is no “perfect” answer to this!

As a beginner I do feel you will go through blades and cutting mats faster than an experienced user.
Why?

Because you are learning!
Learning how this work, learning how things cut, learning what works and what doesn’t.
As you continue to cut things, you will find tips and tricks that work for you!

Many of the same factors go into the blade life as the cut settings, such as materials you are cutting or settings you are using.

While I know that may not be the news you want to hear – that there is no “magic” button to cut all materials, I hope that it will help save you some frustration and headache in the long run.
Test cut, test cut, test cut. Now repeat it to yourself!

Whether you are a new user or an experienced user, I would love to see what you create with your Silhouette machines & software.
Feel free to post photos or questions on my Facebook group at 
Silhouette Secrets with EllyMae.

Save this for future reference by pinning the image below.

Enjoy !

THANK YOU for your support! How can you help? Click HERE & buy a coffee.
Every little bit helps with the cost of running the site.
Silhouette Classes

Never stop learning! Let me help you take the anxiety out of learning with Silhouette and get to creating faster! My Silhouette classes are heavily focused on software, so you can take the skills & techniques taught and apply them to many future projects!

Silhouette step-by-step Classes by Silhouette Secrets+

Silhouette Secrets+ with EllyMae
**This post may contain affiliate links. What that means is that I may receive compensation if you purchase through the links I have provided. The price you pay for the product or service is not higher but I may get compensated for sharing.