Posted on 7 Comments

Let’s Explore v4 – Puzzle Panel

This week we are going to explore one of the newly released features of the v4.2 software.
The Puzzle Panel is available in the Silhouette software with the Designer Edition Plus or Business Edition upgrade.
(Use my code SECRETS10 to save an additional 10% off the great prices on upgrades at Swing Design)

The Puzzle Panel is located on the right side under the Emboss Panel in the v4.2 software.

Puzzle Panel copy

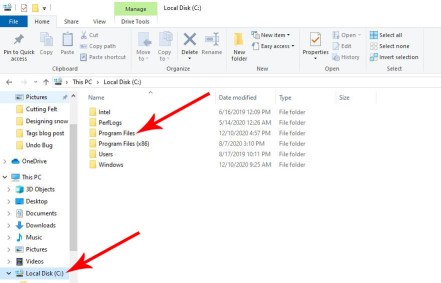
If you do not see this icon and you have the Designer Edition Plus or Business Edition upgrade, check under Help > About Silhouette to see what version you are currently using. You do need v4.2 (released February 11, 2019) in order to have this feature available to you. I recommend downloading updates directly from the Silhouette America website – HERE.

Let’s Explore v4 – Puzzle Panel

Now, let’s take a look at all the details of the Puzzle Panel.

Puzzle Detail copy

  1. Puzzle Selected Shape – Select the object by clicking on it, then click on this button to create a puzzle out of that shape.
    Select Puzzle copy

    *Note – I have decreased the transparency of my photo so the puzzle lines can be seen.

    If no object is selected, then it will show “Select Puzzle Shape”.

    Select Puzzle Shape copy

    Click Select Puzzle Shape and then draw a box around the object.

    Puzzle drawing copy.jpg

    With this method, the puzzle layer is separate from the object and can be moved independently. This would work great if you want a border around a photo.

  2. Rows – Choose the number of rows in the puzzle layout. Rows run up and down.Rows copy
  3. Columns – Choose the number of columns in the puzzle layout. Columns run side to side.
    Columns copy
  4. Curvature – Check the box or un-check the box, the will determine if the puzzle pieces have straight edges or curved edges.
    In the photo below the Curvature box is not checked. This means that the puzzle pieces will have straight edges.

    No Curvature copy
    Notice that when Curvature is not checked, the Curve and Ripple options are grayed out below.In the photo below the Curvature box is checked. This means that the puzzle pieces will have curves.

    Curvature copy

  5. Curve – Change the percentage of the curve on the puzzle pieces.Below the curve is at 100%.
    Curve 100 percent copy

    In the photo below the curve is at 25%.

    Curve 25 percent copy

  6. Ripple – Changes how the ripple of the puzzle pieces looks.
    In the photo below, the ripple at 100%.

    Ripple 100 percent copyIn the photo below the ripple at 0%.

    Ripple 0 percent copy
    It is harder to see, but you can notice a shape change where the pieces connect, at the ripples.

  7. Wobble – Choose how off-center the parts of the puzzle pieces are.
    In the photo below the wobble at 100%.Wobble 100 percent copy

    In the photo below the wobble at 0%.

    Wobble 0 percent copy

  8. Randomize Selected Puzzle – Select this to move the puzzle pieces around in a random order. Select it as many times as you want to get a different look to the puzzle.

    Randomized #1

    Randomize 1 copy

    Randomized #2

    Randomize 2 copy

    Randomized #3

    Randomize 3 copy

    Each push of the button will change the shape of the puzzle. There are so many combinations that you could create and variations based on the selections you make.
    So much fun!

Now, that we have explored the Puzzle Panel. Let’s create a project.

First, set up the page for a Print and Cut project.
For more details on print and cut – check out Part 1, Part 2 and Part 3 of the Print and Cut series. Print and Cut Part 1 also includes troubleshooting tips.

On the Page Setup Panel, choose Current Printer for Page Size and 12 x 12 in for the Cutting mat.
Check the Show Print Border and Show Cut Border.

Project Page Setup copy

Click on the Registration Marks tab and Choose Type 1 Registration marks. Click on the Restore Defaults button to reset the default registration marks
(for best results – see more tips in Print and Cut – Part 1).

Project Registration marks copy.jpg

Add the photo or design that you are using to create a puzzle.

Scale (resize) the photo or design to the size you want.

I am using 2 photos and have sized them down using the Transform – Scale Panel to 4 x 6 inches.

Project Photos copy
Note: If you rotate the photo before you create the puzzle, the photo will revert back to the 0 degree setting. Create the puzzle first before rotating the photo to fit on the Print and Cut page.

Click on the Puzzle Panel. Select the shape by clicking on it and then choose Puzzle Selected Shape.

Project Photo 2 copy

For the photo on the left, I selected the photo and then chose the puzzle selected shape option.

For the photo on the right, the object was not selected and I chose the Select Puzzle Area option and drew a box around the photo. This will create a puzzle with a border around my entire photo. Make sure if you choose this method, keep in mind that the puzzle shape and the object are separate, so they would both need to be selected to Align or move the objects.

Now, play with the Puzzle settings and decide what you like.

Project Photo 3 copy

The top photo I used the Transform – Rotate Panel to rotate it so it would fit within the borders of the print and cut.

Before I print, I will decrease the transparency of the photo back to 0% on the Fill Color Panel. Remember this was just for a visual to be able to see the red lines of the puzzle clearer.

Project Photo 4 copy

Now, it is ready to print.

Click on the Printer icon in the top right corner or File > Print.

print icon copy

Once it is printed, place it on the Silhouette cutting mat, exactly as it shows on the software screen, in the top left corner of the mat.

Then load the mat into the machine.

IMG_8602 copy

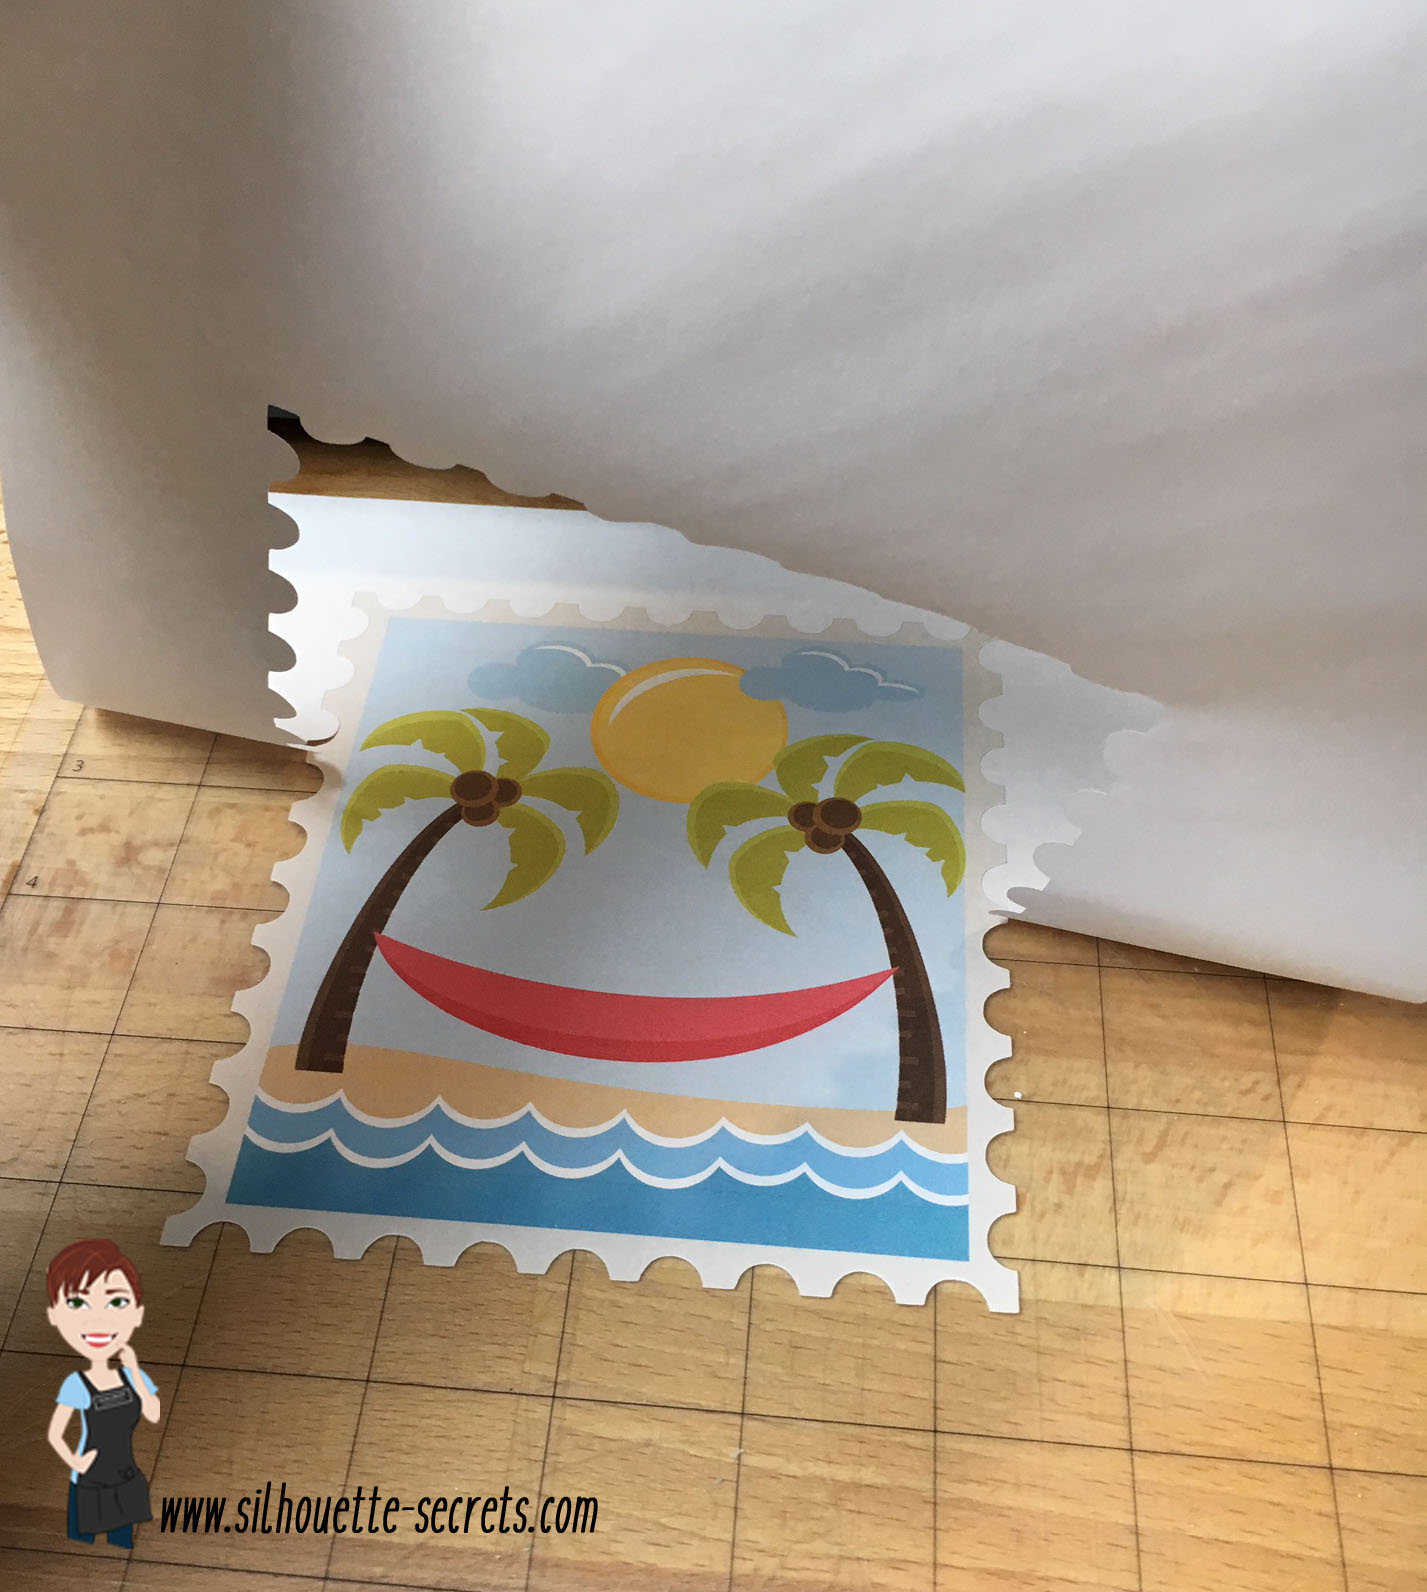
Click on the Send tab in the top right corner of the software. Then choose the Material type. I am using the Silhouette printable magnet paper.

Send tab copy

Do a test cut if needed and then send the project to cut.

Don’t forget this tip: Check the cut before you hit the Unload button, if it did not cut cleanly through, you can resend the cut job and it should be lined up perfectly.
While you do have registration marks on the page, it should read it accurately to start but never hurts to check first.
I did end up sending my project through to cut again because of a blade issue. But, once I figured that out, it cut smoothly.

Luckily, I was able to hang them for a few minutes before the kids got home from school. Now, the puzzle may never be complete again.

Hope you enjoyed exploring the Puzzle Panel in the newly released Silhouette Studio v4.2!

What will you create with this?

Puzzle Panel 2.jpg

I would love to see what you create – feel free to post on my Facebook group at
Silhouette Secrets+ with EllyMae.

Enjoy!

SS_Signature copySS Logo snip it

**This post may contain affiliate links. What that means is that I may receive compensation if you purchase through the links I have provided. The price you pay for the product or service is not higher but I may get compensated for sharing.

Posted on 23 Comments

How to Make Your Silhouette Cutting Mat Last Longer and Perform Better

Silhouette Secrets+ with EllyMae

Ensuring your Silhouette cutting mat lasts longer and performs at its best can significantly enhance your crafting experience. By following a few simple tips, you can maintain its adhesiveness, accuracy, and overall longevity. In this guide, we’ll share practical advice on how to properly care for your cutting mat, including cleaning techniques, storage recommendations, and best practices for using it with your Silhouette machine. Whether you’re a beginner or an experienced crafter, these tips will help you get the most out of your cutting mat, resulting in cleaner cuts and more professional-looking projects.

Today, I am stepping away from the “Let’s Explore v4” series about software for another topic I am asked about all the time.
I want to share some tips I’ve discovered about getting the most use out of the Silhouette cutting mats.

Affiliate links may be present in the following blog post and as an Amazon Associate, I earn from qualifying purchases.

As a beginning Silhouette user, I do feel you go through mats and blades quicker because you are learning. As you practice, you will find out tricks and techniques that help you get more life out of the blades and mats.

So let’s get right to the tips I’ve found:

Tips to get the most out of your Silhouette cutting mat

Cover the mat with the blue protective sheet after each use. 

Even if you will be using it again soon, place the shiny side of the blue protective cover back on the mat to keep it free from any debris.

Silhouette Cutting Mat Blue Cover

You never know when you could accidentally knock it on the floor or your wonderful, helpful cat will walk across the work space.
Covering it each time can help keep it clean.

Place the shiny side of the blue protective cover down on the adhesive side of the mat. 

There are 2 sides to the blue protective cover – a shiny side, which is non-stick and a matte side. The matte side will stick to the adhesive more and can cause it to be less sticky.

Silhouette mat protective cover blue

If you have a hard time remembering, take a Sharpie marker and write TOP on the matte side of the protective cover to help remind you.

De-stick a brand new, super sticky mat. 

When you first open a new mat, you will notice that it is super sticky.
After peeling the protective cover off, apply the adhesive side of the mat to a clean cotton t-shirt or a cotton towel. This helps “season” the mat a little bit and makes it easier to get materials to release from the adhesive on the mat.
I generally just stick it on my t-shirt a couple times before placing my materials down on it.

Cut the materials down to the size needed and then place it on the mat.

This can save the life of the adhesive vs sticking a full sheet of material on the mat and then peeling it off the adhesive every time.

Silhouette Cut Materials Down

I use the Transparency feature on the Page Setup Panel to reveal the grid spacing on my virtual cutting mat and then line up the materials with where I have placed them on my screen.

Silhouette Studio Transparency Mat

In older version of the software prior to v4.3, it is called the Reveal feature. Same tool, just a new name.

Reveal copy

I have found that this saves the adhesive and if I find one section isn’t as sticky any longer, I can move the material to another section.

Flip the mat over after the cut & peel the mat away from the materials.

I roll the Silhouette mat away from the material as I hold the material down on my work surface.

Silhouette flip mat over

If you roll the Silhouette mat at a sharp angle, it helps the adhesive release from the material. By rolling the mat away at a sharper angle, you are applying less force to the adhesive, then lifting the material off the mat.
This will help the adhesive stay on the mat versus transferring to the material.

Clean any debris from materials off the mat. 

Debris on the mat of any kind, means that the material cannot adhere to the adhesive in that location. This can cause mis-cuts or movement in the materials when cutting.

Silhouette Mat Debris Removal

After I’ve taken off the larger pieces of my project, I will roll the mat to release other debris on the mat. Any smaller pieces, I use a Silhouette spatula to carefully help remove debris off the mat.

Check out this video HERE on another tool that I have found that I LOVE!

Clean the mat if needed. 

A good quality lint roller brush can be used to help lift debris off the mat.
Don’t use a cheap one – I tried with an Ikea roller and the paper just stuck to the mat.

Do NOT wash the mats with liquid. Updated 2024 – the Silhouette cutting mats are a water soluble adhesive. This means that water will dissolve the adhesive on the cutting mat and remove it.

Buy Silhouette cutting mats from an authorized Silhouette retailer. 

Flip the mat around.

The mat can go in the machine 2 ways, arrow in or arrow out. On the newer Silhouette cutting mat, there is an arrow on both ends.

Arrow in or out copy

If one side of the mat is well used, flip the mat around and use it the other direction.
The mat does have a specific dimension and is not uniform on all sides, so it can only be loaded into the machine 2 ways and still have the grid spacing line up correctly.

Be gentle and have patience.

I know this is not what you want to hear, but if you are rushed then you are more likely to tear the project or pull the adhesive off the mat.
A new mat can gripe the material very well, this can mean it is harder to remove.
Yes, it can be frustrating but you will get it.
The more you practice, the more you will find the ways that work well.
But, even as an experienced user, if I rush, I end up with bigger issues.

Keep an extra mat on hand.

When all else fails. Get a new Silhouette cutting mat and try it.

Silhouette Cutting Mats New

There are many times that I have felt my mat was still sticky enough but after so much frustration, I tried a new mat and magically, it cut beautifully.
Especially when cutting cardstock, a good sticky mat is needed to hold all the pieces of the cardstock in place when it is cutting, or it may not connect the cut cleanly.

Cut without a mat

Any lined material such as adhesive vinyl or HTV can be cut without a mat because you are not cutting completely through the material.
This can take some practice and does require adjusting a few things to get a good cut.
Check out this post on Cutting without a Mat.

Silhouette Cutting Without a Mat

These cutting without a mat tips will apply to all Silhouette cutting machines except the Curio. The Silhouette Curio is a little different in that it needs a base loaded in the machine & is limited in the cutting space it has because of the platform system.

I hope these tips help you get the most out of your Silhouette cutting mat!
Save this post for future reference by pinning the image below.

SilSecrets_Cutting Mat

Enjoy !

THANK YOU for your support! How can you help? Click HERE & buy a coffee.
Every little bit helps with the cost of running the site.

Silhouette Classes

Never stop learning! Let me help you take the anxiety out of learning with Silhouette and get to creating faster! My Silhouette classes are heavily focused on software, so you can take the skills & techniques taught and apply them to many future projects!

Silhouette step-by-step Classes by Silhouette Secrets+

Silhouette Secrets+ with EllyMae
**This post may contain affiliate links. What that means is that I may receive compensation if you purchase through the links I have provided. The price you pay for the product or service is not higher but I may get compensated for sharing.
Posted on 12 Comments

Print and Cut – Part 3 – Images

Print and cut with the Silhouette software has so many options available. The past 2 weeks we have explored using a print and cut file (Part 1) and creating text (Part 2) to use in print and cut. This week we will explore creating a print and cut file from a jpeg or png image.

Print and Cut with Images

Open the jpeg or png file.

A jpeg may have a white background around the image and a png file can have a transparent background. These file types are both flattened graphic images, so they are no cut files.

For more information on file types, check out this post –
Understanding File Type Extensions in Silhouette Studio
by Lycia Evanoff with Caught by Design.

jpeg vs png copy

Here I have opened both files to show the difference, but the same steps would be used for either file type.

Open the Trace Panel.

Step 1 – Click on Select Trace Area and draw a rectangle around the entire design.

Trace Panel copy

Step 2 – Increase the Threshold up until the entire design has turned yellow.

Step 3 – Click on Trace and Detach. The image will be detached from the background and there will now be cut lines around the image and you have . As long as you make sure your design is as yellow as possible, it will trace around the edge.

jpeg pieces copy

Keep in mind that each design will vary in how it reacts.

Step 4 – Delete the extra portion of design background, as it’s no longer needed.

Set up the file as a Print and Cut

Step 1 – Move the file onto the Silhouette virtual mat. I used

Step 2 – Open the Page Setup Panel.

Step 3 – Choose:
Page Size – Current Printer
Orientation – Portrait
Check the Show Print Border box
Check the Show Cut Border box

Page Setup Panel copy

Step 4 – Click on the Page Setup Panel – Registration Marks tab.

Step 5 – Choose Type 1 Registration Marks for the Cameo, Portrait or Curio machine.

Registration Marks copy

Step 6 – Click on the Restore Defaults button.
This will reset the registration marks and I would suggest using this as the starting point to get an accurate cut.

Step 7 – Move the design on the mat so it is not in the cross-hatched areas of the page. The optical eye on the Silhouette machine needs the cross-hatched area to read the registration marks accurately.
While the registration marks can be moved, I suggest for a new user to keep them on the defaults before it is sent to print. If the marks are moved, then I would suggest doing some test print and cuts on copy paper to make sure the cut is still accurate.
Check out more troubleshooting tips HERE on Part 1 of Print and Cut.
For more information on the Registration marks panel, check out the “Let’s Explore v4 – Registration marks” post HERE.

Step 8 – Next, click on the printer icon in the top left corner.
print icon copy
or
File > Print from the Menu
File Print
For more information on the Print Preview – check out Print and Cut – Part 1.

Step 9 – Double check that the page looks correct and that all 3 of the registration marks have printed.

IMG_8374 copy

Step 10 – Place the printed page on the cutting mat exactly as it shows on the screen, in the top left corner.

IMG_8376 copy

Step 11 – Click on the Send tab in the top right corner.

Send tab copy

Step 12 – Click on the image to select it and choose Cut. The bold red cut lines should appear around the design.

Step 13 – Load the Silhouette mat in the machine and choose Send.

Perfect print and cut!

IMG_8377 copy

For more information on print and cut, check out these posts:
Print and Cut – Part 1 – pre-designed Print and cut files
Troubleshooting Tips
Print and Cut – Part 2 – Text

I would love to see what you create – feel free to post on my Facebook group at
Silhouette Secrets+ with EllyMae.

Enjoy!

SS_Signature copySS Logo snip it

**This post may contain affiliate links. What that means is that I may receive compensation if you purchase through the links I have provided. The price you pay for the product or service is not higher but I may get compensated for sharing.

Posted on 7 Comments

Print and Cut – Part 2 – Text

Let’s Explore v4 – Print & Cut – Part 2

In Print and Cut – Part 1, I showed how to create a print and cut project from an already existing file that was set up for print and cut. In today’s post, we will create our own text and turn it into a print and cut file.

Print and Cut with Text

First, let’s go through how to set up a Print and Cut Project with text.

  1. Set up the Page Size on the Page Setup Panel to “Current Printer”.
  2. Choose Portrait Orientation.
  3. Check Show Print Border – a gray box turns on around the maximum print edge. This is set by the current printer that your computer recognizes.
  4. Show Cut Border – a red line turns on around the maximum cut edge of the page size. Anything outside this border will not cut.page size copy* Note: I choose the Portrait Orientation for Print and Cut projects because I  troubleshoot many users with the issue of the registration marks not reading accurately when printed in Landscape Orientation. I believe this varies by the printer it is printed with and how the paper is pulled in to the printer. I suggest printing in the Portrait Orientation for best results.
  5. Click the Page Setup Panel – Tab 3 – Registration Marks.
  6. Choose Type 1 Registration marks if you have a Cameo, Portrait or Curio machine.
  7. Click Restore Defaults. This will reset the registration marks to the default location.
    I recommend starting your print and cut projects here, especially for a beginner or if you have a new printer.registration marks copy*While the registration marks can be moved out (Registration Marks – Advanced Options), you will need to test how far you can move those and still get an accurate cut. I know may want to increase the area and squeeze as many designs into the print and cut area that they can, but it can come with some frustration. Do some test printing and then cut to see if the accuracy is affected on copy paper before using the more expensive materials. You will find out what the limits of your printer and Silhouette are.
  8. Type out the text using the Text tool on the left side. Weld the text if necessary. *Make a copy of the original text if you do and move it to the side, just in case you need to make changes to the design later.
    For more information on text and how it works, check out the Let’s Explore v4 – Text Style Panel post here.
  9. Fill the text with color using the Fill Color Panel.
  10. Choose the font type from the Text Style Panel on the right side of Silhouette Studio.type text copy
  11. Change the Line Style color of the text using the Line Style – Tab 2 – Line Color, so it is the same color as the filled text.
    The default line color is red. Since, this text will be printed the line color may show in the printed page. In the photo above, there is a faint red line around the black text, this can show if printed like this.
  12. Choose how you want the text to cut. Do you want just the text cut out or do you want it to have an outline?
    To create an outline around the text, use the Offset Panel and adjust the spacing to get the desired effect, then Click Apply.offset copyAfter the Apply button is selected, any overlapping pieces of the offset created, will weld together.
  13. Click on the Send tab to see how this will cut.send tab copyThe bold red lines indicate cut lines.
    If this was sent to cut, the top text would cut out around the text and the bottom text would cut both around the text and the Offset.
    For the example today, I only want the Offset to cut.

    On the Send tab, Select the text cut line and then choose “No cut”, this will turn the bold red cut lines off.

    send no cut copy

    *The key here is that the object you are turning the cut lines on or off for has to be selected. That means you have to click on it and a gray selection box will appear around it. If there is no object selected, the software has nothing to turn on or off.

  14. Click back on the Design tab. Select the entire design and move it to the location on the page you want it to print. The design cannot be in the cross- hatched area of the page. The Cameo optical eye needs the cross-hatched area of the page to read the registration marks accurately. If the design is in the cross-hatched area, you may get a registration error or an inaccurate cut.chemo day send copy
  15. Do any final adjustments to the text before you send it to print. Once the page is printed, you cannot move anything on the page or you will have either registration errors or get an inaccurate cut.On the Design tab, I selected the Offset, right clicked and chose Release Compound Path.release cp copyThen deleted the small inside pieces of the Offset that I didn’t need to cut.release cp delete copy
  16. Once the file is ready to go. Click on the Printer icon in the top left or File > Print.
    For tips on Print Preview – check out the Print and Cut – Part 1 post here.
    *Remember – do not move anything on the design mat after the page is printed.print icon copyimg_8224 copy
  17. Click on the Send tab. Select the Material.send tab cut settings copy
  18. Load the printed page on the Silhouette cutting mat exactly as it shows on the virtual design mat – in the top left corner.
    img_8227 copyYou will notice that I added several other items to my page. These are other print and cut images that I know will be used, so I added them to fill up the sticker paper area.
  19. Load the cutting mat next to the blue arrow on the left side of the Cameo machine.img_8228 copy
  20. Click on the Send button at the bottom of the Send tab.send button copy

Perfect print and cut!


I hope that helps get you started on your Print and Cut projects that use text.
Because there are so many details and ways you can use the print and cut feature, I am breaking it up in to several posts.

Print & Cut – Part 1 – Print and Cut with a pre-designed Print and Cut image
Includes Troubleshooting steps
Print & Cut – Part 2 – Print and Cut with Text
Print & Cut – Part 3 – Images

header photo copy

Troubles with print and cut?
Check out my tips for Troubleshooting in Print and Cut – Part 1 here.

I would love to see what you create – feel free to post on my Facebook group at
Silhouette Secrets+ with EllyMae.

Have a suggestion on possible Silhouette topic you would like covered? Add it to this Facebook post on my Silhouette Secrets by EllyMae group HERE or email it to me at silhouettesecretsplus@gmail.com

Enjoy!

SS_Signature copySS Logo snip it

**This post may contain affiliate links. What that means is that I may receive compensation if you purchase through the links I have provided. The price you pay for the product or service is not higher but I may get compensated for sharing.

Posted on 21 Comments

Print and Cut – Part 1

Let’s Explore v4 – Print & Cut – Part 1

I love the print and cut option on the Silhouette software!

I’ve used it for many years and in this 2 part series I will share some tips with you for getting a successful print and cut.

A few weeks back I made up special Chemo day gift bags for a friend of mine who is a Planner gal. I found a few print and cut files that I knew she would like on the Silhouette Design Store and then set up to print them all out in the Silhouette software, then I let the Cameo machine do it’s work and cut out around them. I will say that every single one turned out perfectly!

silhouettesecrets_pnc copy

I was asked so many questions, I thought I’d show you how I did it. I am going to break this up into 3 parts so you get the most out of it.
Part 1 – Setting up a pre-designed Print and Cut project
Part 2 – Print and Cut – Text
Part 3 – Print and Cut – Images

Pre-Designed Print and Cut Project

First, find a Print and Cut design that you like. I am using the ML Panda Love Stickers from the Silhouette Design Store (this file is no longer available in the store).
This can be used for any print and cut file available – click HERE to see more Print & Cut designs.
Search by file type and narrow the search down in the Filter on the left side.
For instance, in the photo below, I searched Print & Cut Design Type & Planner for the keyword.

Planner Sticker image

Open it in the Silhouette software.
Every file you open will be different in what it looks like when you open it and is based off how the Designer saved it.

open file

Next, on the Page Setup Panel, adjust the Page Size to Current Printer. Also, check the boxes next to the Show Print Border and Show Cut Border. These are guides that will help in lining things up so they print on the page and are not outside of the cut area.
With the Reveal set at 0% you will see a white page that is the size of the Page Size you have chosen.

page size copy

Now, in order for the Cameo to read where the design is on the printed page, we need to add Registration marks. Click on the Page Setup Panel – 3rd tab – Registration Marks.

registration marks panel copy

Then choose Type 1 Registration marks if you have a Cameo, Portrait or Curio.
If you have an older model machine before the Cameo 1, then you would use the Type 2 marks.

You will notice 3 marks appear on the Page. A square in the top left corner, a corner bracket in the top right corner and bottom left corner (this is with the Portrait Orientation – Page Setup chosen – this is the Orientation I recommend).

registration marks copy

Tip for a beginner or for print and cut issues.

  • Click on the Restore Defaults button. This will reset the Registration marks to the default and this is where I suggest you start from.
    While the registration marks can be moved, each printer will vary in how far they can be moved and still get an accurate cut. I suggest starting with the default registration marks and then you can test from there once you are familiar with the print and cut process.

Next, make sure that your Print and Cut design is inside of the Cut border. Notice that the Cut border has now moved in line with the 3 registration marks. Anything outside of that border will not cut and may interfere with the reading of the registration marks.

cut border copy

In the photo above, I need to move the design to the left because it is too close to the right cut line.

And the design cannot be in the cross hatched area of the print and cut. The optical eye of the Cameo needs this area to read those registration marks correctly. If the design is in the cross hatched areas, it can interfere with the optical eye reading and either give you an error or an inaccurate cut.

The cross hatched areas are across the top and the bottom left corner.

print and cut parts

As I mentioned above, each file you open will be different. With this file, there are 2 parts to the print and cut design. One part is the graphic of the pandas and the second is the cut lines. If the design needs to be moved, make sure to select & move both parts together.

print and cut to send

Once my design is moved away from the cut border and the cross hatched areas, it is ready to send to the printer.

There are 2 ways to do this.

Click on the Printer icon in the top left corner. This will send the print job directly to the printer that is set as the default printer connected to your computer.

Printer icon copy

In the top left corner, choose File > Print and you will get a pop up of Printer options. (Ctrl + P)

file print
The options vary by the printer you have connected to your computer.

Tip: If you have a Preferences button, click on that and look for a “Preview before Printing” option. This is a great feature to see if it is going to print how you want it to before actually committing to the print job.

print preferences copy

Check the Preview before Printing box.

preview before printing copy

Then click OK.

print copy

And choose Print.

A Printer menu will pop up and the design can be previewed before committing to printing.

print preview
Again, this will be dependent on the printer and what the printer setup settings are. Not every user will have this and it can vary, but never hurts to look for it.

Tip: Check to make sure that the bottom left registration mark will print completely. I see a lot of print and cut issues and one is the registration marks were outside the users printer margins and did not print. This means you will either get a registration error or it will cut inaccurately because it doesn’t have all the information to read it correctly.

Once you’ve verified the settings are correct, click on Print and it will send it to the current default printer.

silhouettesecrets_pnc_printer

Grab it off the printer.

Place it on the Silhouette cutting mat exactly as it shows on the virtual design screen, in the top left corner of the cutting mat.

silhouettesecrets_printed

Then load the cutting mat next to the line on the left that the arrows point to.

silhouettesecrets_arrow copy

Click on the Send tab in the top right corner of the Silhouette software.

send tab top right copy

Choose the Material type.
I am using the Staples brand Sticker Paper and the preset for Sticker Paper – White works well for me.

send tab copy

Tip: If cutting a new material, use the test cut feature to test that material before you send the entire project. This can save you lots of headache on mis-cuts.

Once you click on the Send button on the bottom of the screen, the Cameo will then read the registration marks and begin the cut.

silhouettesecrets_sticker2

Perfect print and cut!

Save this to Pinterest for future reference

Print & Cut 1

Troubleshooting Print and Cut

Did it not cut accurately or did you get a registration error? Here are a few things to check when you do run into an issue.

  1. Do you have the correct registration marks chosen? Type 1 should be used for the Cameo, Portrait or Curio machines.
  2. Did the registration marks print on the page? Make sure on the Page Setup Panel – 3rd tab – Registration marks that they are turned on.
  3. Did the registration marks print completely? I often see the bottom left registration mark did not print completely because it was outside of the printer margins. Check to make sure it printed completely and if not, then either move the registration mark slightly up or increase the Printer margins under the Printer Setup.
  4. Is the design in the cross-hatched areas of the print and cut? This will interfere with the optical eye and can either result in a registration error or inaccurate cut around the design. Move the design away from the cross hatched area and reprint on copy paper until you get an accurate cut.
  5. Did the registration marks get moved? Each printer will vary in how far out the registration marks can be moved and still read accurately. Click the Restore to Defaults and use those as a test to get an accurate cut. As you become more familiar with the process and your printer capabilities, you can move them out and test how far the limit is.
  6. Were changes made to the file after the design was printed? This will result in inaccurate cuts because the design is no longer in the same place it was when it was printed. Re-print and do not move the design after printing.
  7. Did the printer feed multiple pages through at a time? Or did you print more than one copy at a time? For best results, I suggest feeding one sheet of material in the printer at a time. Multiple copies printed can result in the paper being pulled in too quickly and then the print is off on the page and not accurate.
  8. Is the printer low on ink? Ink quality can interfere with the optical eye reading the registration marks accurately.
  9. Was it printed at high quality? Printing at a low quality can also affect how the optical eye reads the registration marks.
  10. Still getting a registration error? Start over on a new design mat and go through each step again. Then print a test print on copy paper.

I hope these tips help you have a successful print and cut experience.

Pin this image to Pinterest to save for future reference

Troubleshooting PNC

Want to know more on Print and Cut?
Check out Part 2 – Print and Cut – Text & Part 3 – Print and Cut – Images

I would love to see what you create – feel free to post on my Facebook group at
Silhouette Secrets+ with EllyMae.

Enjoy!

SS_Signature copySS Logo snip it

**This post may contain affiliate links. What that means is that I may receive compensation if you purchase through the links I have provided. The price you pay for the product or service is not higher but I may get compensated for sharing.

Posted on 3 Comments

Cards with your Silhouette

Did you ever need a quick card?

Grab that cardstock and an easy cut file from the Silhouette Design Store.

img_7960 copy

I used Lori Whitlock’s Sympathy Card Thinking of YouDesign #258278. While the card says Sympathy, it could be used for a lot more than that. This was a pretty easy card to cut.

Open the Design and right click to ungroup the pieces.

ungroup

Next, move the pieces around on the mat and place the cardstock in the same location of the mat.
To see how I did this with Oracal vinyl as well, check out this post on the Acrylic ornaments HERE.

moving pieces copy

Tips

 – I use the Reveal Mat and increase it to 100% to see the grid lines of my cutting mat, so I can line up the material in the exact location and cut it down to the size needed with my paper trimmer.

– A sticky mat is important to hold down the entire piece of cardstock so it does not move while it’s being cut. A mat that is too sticky will hold the paper too tight and make it harder to get it off after it’s cut. De-stick your mat a few times on a clean cotton t-shirt or towel. I usually use my t-shirt I have one, as that is the quickest.
A mat that is not sticky enough and the paper is not held down for a crisp cut.

– I use the textured cardstock setting for almost all cardstock and it works well. It will lightly score the mat, but that is normal as you are cutting completely through a material.

– I like the cardstock packs from Michael’s to test and play with cutting cardstock. It cuts well and is inexpensive to play around with. I do prefer to cut smooth cardstock versus textured. I just found that there was more chance for a cut to not connect with the textured – again a really sticky mat will help with this and holding that textured cardstock in place.

– Play, play, play and you will pick up tricks and tips. Even experienced users still have issues, so if you do, it is all part of the process.
Keep on trying!

img_7962 copy

And use a bit of adhesive and you are finished.

You can get as detailed in card making as you want or as simple.

I would love to see what you create – feel free to post on my Facebook group at
Silhouette Secrets+ with EllyMae.

Enjoy!

SS_Signature copySS Logo snip it

**This post may contain affiliate links. What that means is that I may receive compensation if you purchase through the links I have provided. The price you pay for the product or service is not higher but I may get compensated for sharing.

Posted on 16 Comments

Let’s Explore v4 – How to open an svg file

I see many questions regarding .svg files come up across the Silhouette world, so let’s take a look at it.

What is a svg file?

A .svg is a Scalable Vector Graphic.
But what does that mean to a Silhouette user?
It is a cut file that you can resize without losing image quality.

How is it different than a file from the Silhouette Design Store?

Silhouette design store files (.studio or .studio3) files are a proprietary file that can be found in the Design store and downloaded direct to your Silhouette library. These files should be ready to cut when you open them.
These are the easiest files to open and cut as a new beginner with the Silhouette and what I would recommend a new user starts with.
As with any file, it is dependent on how the designer saved the file.
The Silhouette Design store does have an option to purchase the .svg file in addition to the .studio file, however, it is not needed unless you are using it outside of the Silhouette software.

An .svg file is a common cut file and can be opened in many programs.

How to Open a .svg file in Silhouette Studio

In order to open a .svg file in the Silhouette Studio software it requires a Silhouette software upgrade of Designer Edition or higher. I highly suggest at least the Designer Edition upgrade, it is a great investment and will save you time & headache in workarounds.

With a software upgrade to Designer Edition or higher, it unlocks additional features in the software.
For a list of those features unlocked with each upgrade check out this chart from Silhouette America HERE.
Click on the video camera icon for a brief demo of each feature.

Where do you find the software upgrades?

The software upgrades can be found at an authorized Silhouette retailer. I suggest Swing Design or Silhouette America.

After you purchase the upgrade and receive the code, enter it under Help > Upgrade in the software and it will be active.
As you can see in this photo, my Upgrade option is grayed out because I have the highest level of Business Edition. This will show at the top of the software or under Help > About Silhouette (PC) or About Silhouette (MAC).

upgrade

Extracting a downloaded folder

The first step to opening a .svg is to download the file from the source. Most files will come in a zipped (compressed) folder and this will need to be unzipped/extracted first. This will depend on your computer system but for me on a Windows PC, I right click on the folder and choose Extract All. Or select the file by clicking on it once and choose the Extract button at the top of the folder.

Extract file copy.jpg

You can tell this is a compressed folder because it says at the top of the window and has a zipper on the file icon.

compressed folder icon copy

You will not be able to access the full design files unless the folder is unzipped/extracted.

Once you click the Extract All button, it will give you the options to choose where to save the Extracted file to. Select where and then click Extract.

extracting file copy

Now, the folder can be fully accessed.

Opening a .svg file in Silhouette Studio

Now that the downloaded file is fully accessible, it can be opened in Silhouette Studio. Again keep in mind, that you must have the Designer Edition upgrade or higher in order to open a .svg file in the Silhouette software.

As with a lot of the tools and features, there are several ways you can open files in the Silhouette software.

1. Using the menu options. 

In the top left corner, choose File and then Open.

file open

Then choose where the file is located and click OK. Or double click on the file and it should open in the Silhouette software.

file open location copy

2. Drag and drop the file from the Computer folder. 

With the Silhouette software open on the Design tab, open the My Computer folder where the file is saved.

drag and drop copy

Now grab the .svg file by left clicking the mouse and holding the mouse button down, then drag the file on to the design mat of the Silhouette software.

Drag and drop1.JPG

The design will show up on the Silhouette work space where you drag it to.

3. Double click the .svg file to open directly in the Silhouette software.

The computer will use the default program to open any file type when you double click it.
What does this mean?
You will most likely have to change the default program that the computer uses to open .svg files with a double click.

When an .svg file is downloaded, the icon shown next to the file name will most likely be a web browser icon such as Internet Explorer or other. This means that the computer is set to open a .svg file with a web browser. But, you can change that.

Changing the default program for .svg files on Windows

Right click on the .svg file name and choose Properties.

default program svg

Under the General Properties tab, next to the “Opens with” section, click on Change.

properties copy

Now, find the Silhouette program and choose it as the default. Scroll down to the bottom and choose More Apps if you do not see it in the list.

file type svg default

You may need to keep clicking to look further on the computer programs.

file type svg default2

Once you find the Silhouette Program keep on clicking into the folder, then choose Silhouette Studio for the default to open .svg files.

file type svg default3 copy

The Silhouette software will be found under the C: Program Data (x86) if you are using a software version older than v4.3.
For all v4.3 and higher versions, the software is found under C: Program Data.

Once you have set the default to use the Silhouette software to open a .svg file, then you will see the icon next to the file name change to the Silhouette icon.

silhouette default program copy

And when you double click on that file, it will then open up in the Silhouette software.

Silhouette default program1.JPG

Another tip here is that you can change how a .svg file opens in the Silhouette software. The choices are As Is, Centered, or Fit to Page. You will find these options under the Import tab in the Preferences.
I have mine set to open Centered, meaning that the .svg image will be centered on the design mat.

preferences copy

MAC users: On a Mac – right click on any SVG file, then click on Get Info. In the popup window, near the bottom, you’ll see where it says “Open With”. Click on that and you’ll see a list of programs. Click on “Other” to open the Applications folder, where you’ll be able to select your Silhouette program. If Silhouette Studio is greyed out, make sure you have “All Applications” enabled. There is also an option in the Get Info window to make the selected application (in this case, Silhouette Studio) open all file types with the same extension as the one selected (which would mean all SVGs in this example).
Thanks to my colleague Lycia Evanoff with Caught By Design for this MAC information.

Now, once the .svg file is open in the software there is one more thing you will need to do before it will cut.

Turn on the cut lines.

The .svg files open in the software with the cut lines defaulted to off.

How to turn the cut lines on. 

1 – Select the image by clicking on it.
You will know that it is selected by the gray box showing around the object.

Selection box copy.jpg

2 – In the top right corner of the Silhouette software, choose the Send tab.
You will notice that the design is selected and “No Cut” is highlighted on the right. This is because the default for a .svg file is the cut lines are off.

send tab copy

3 – Choose Cut and the bold red cut lines should turn on.

send tab cut lines copy

Two key things to note here are:

  1. The Design must be selected in order to turn the cut lines on. If nothing is selected, choosing the Cut option will not turn anything on.
  2. It must be the .svg file that you opened. Other file types such as .jpeg or .png files are not cut files and will not have cut lines around the object. Most often you will only see the outer edge of a jpeg or png file turn on and show a rectangle.jpeg or png copy

There are so many great cut files out there and from many locations. The file that I used as an example today is from SoFontsy that has 100% Commercial Use friendly designs.

Keep in mind that with any file you acquire, it is dependent on how the designer designed and saved it.

Hope that helps explain a very common question I see all the time.

Save this for future reference by pinning the image below.

Feel free to post your comments and questions below or on my Facebook group at Silhouette Secrets with EllyMae.

Enjoy!

SS Logo snip it

**This post may contain affiliate links. What that means is that I may receive compensation if you purchase through the links I have provided. The price you pay for the product or service is not higher but I may get compensated for sharing.

Posted on 22 Comments

Let’s Explore v4 – Silhouette Library tips

Silhouette Library Tips

*Blog post written with v4.1.206 of the Silhouette Studio Software

Happy New Year!
And what a better way to start the New Year off then getting our Silhouette libraries in shape.

In the Silhouette software, you will find the Library tab in the top right corner.

Library tab copy

Once you click on the Library tab, you will see the Library tree on the left side and the Design Preview Area on the right.

Silhouette Library copy

Silhouette Studio Library

As of this post (January 2, 2019), there are 2 main sections of the Silhouette library.
(This will be changing when v4.2 is released, so the information will be relevant for any user prior to v4.2.)

  1. Local User section – this is the top section of the library and is computer specific. This means that personal files stored in this location do not automatically transfer to another computer, sync up to cloud, or are stored in another location.Local User copy
    Under the Local User section, there are several default folders.- Recent Downloads – this is where the Free files that come with a Silhouette machine will download to after the machine is connected, the Send tab in the software is selected, and the Silhouette machine is recognized.- User Designs – this folder is where you can save your personal designs. Keep in mind that this section is computer specific.

    Under each folder, right click on it and a menu will pop up. This is how you can create new folders to organize the library tree.

    New Folder copy

  2. Cloud library – this is anything under the email address in the Silhouette library tree.Cloud library copy
    Under the Cloud library, there are also several default folders.- Fonts – fonts files from the Silhouette Design Store will show under this folder. You cannot access the font files from this but it does show you which ones you have from the Design Store.
    For information on how to install fonts from the Silhouette Design Store, check out this post by Julie Huggins at Sew Craft N’SpiredInstalling Fonts for Use in the Silhouette Software.- Library – this folder contains several more default folders and more folders can be added to organize the library.

    Recent Downloads – this appears under the Library folder. If you do not see it, click on the (+) sign to expand the folder out.

    Library recent downloads copy.jpg
    This is where the files from the Silhouette Design Store will sync up to after the checkout process is complete. All files from the Silhouette Design store will download to here and you can move them to organize once they are synced up.

    NEW!!! Silhouette America recently added the feature to be able to also download the Silhouette files directly to your computer.

    Store download
    This is a great feature for those who do not like using the Silhouette library.

    On any new purchases, you can choose the Download button at the end of the Checkout process as shown above.

    For older purchases, this can be accessed under the Silhouette Design Store > Account Settings.

    Account Settings copy

    Then you will either choose My Designs (single file download) or My Download History (download by Order #).

    Account Settings1 copy

    Note: if accessing the Silhouette Design Store through the Silhouette software, it does give you a warning that it will work better through a web browser directly.
    This message says
    “Direct downloads work better in a Web browser (i.e. Chrome, Internet Explorer, Safari) than the software’s browser. 
    You can download this order a the following address after signing into the store in your browser: ….”
    This is the method I prefer to browse the store in most often.

    Download designs.JPG

    My Designs

    Click on the individual design file and then you will see a Download button available.

    My Designs copy

    My Download History

    Click on the Order number and then you will see Download buttons.

    My Download History1 copy.jpg

    Here you can choose to Download all or select which files that you want to be included in the downloaded folder.

    My Download History2 copy.jpg
    Then click on the Download now button.

    My Download History3

    User Design – this is found under the Library folder as well. Save your personal files to this folder.

    Cloud library copy2

    Patterns – Pattern files from the Silhouette Design Store will download here or add your own.

    Recycle – delete and clear files from the Silhouette library.

    Now, while the Silhouette Cloud library does sync to multiple devices there are some things to be aware of.
    This is direct from the Silhouette website regarding the Silhouette Cloud library.
    “Silhouette America’s Cloud Storage is a syncing service rather than a backup service. Files deleted locally will be deleted on the cloud. We strongly recommend users save important and/or valuable files to another location outside of the cloud or local library, or to a third-party backup service.”

    Show All Designs
    At the top of the Library tree, you will see a folder that will give you the option to see all the designs in the entire library.

    All files copy

Whew! That is a lot of information on the Silhouette Cloud library.

But that’s not all.

Tips on the Silhouette Library

Shape up your Silhouette Library copy

Organize designs into folders.

Create a new folder by right clicking on a folder in the library and choosing “New Folder”. This will add a new folder under the current folder that was selected.
New Folder copy
Here is an example from my Library tree.
Library folders.JPG

To move designs from the Recent Downloads folder, click and drag the design icon from the Design Preview area and drag it into the folder where you want it.
Check out this video on how to move designs in the Silhouette Library.

Each user’s organization is going to vary depending on what files they have. My 2 largest folders are Christmas and Wine, at the moment I’m not sure which one is winning.

Use the Search option

At the top of the library, type in a keyword you would like to pull up. This can narrow down the designs you have to scroll through in the library.
Search copy

Back Up! Back Up! Back Up!

It is always a good time to make a backup and I recommend getting in the habit of doing so on a regular basis.
Here is how to make a backup of the library. Note, this will be 2 separate files.

Local User Section

Right click on the Local User section and choose Export. Save this file to a safe location. I like to save mine with the date included.

Export Library1 copy

Cloud (email address and below) Section

Right click on the email address, choose Export and save this to a safe location. I add the date and ‘Cloud’ to the name of this file, so I can tell the difference in the files.

Export Library copy

Store personal files outside the Silhouette library

I would highly suggest keeping at least a back up copy of the library on an outside source.
Personally, I keep a hard copy of all other files not from the Silhouette Design Store, on an external hard drive.
Each user will have a storage system that they most feel comfortable with.
For me, I have my main external hard drive and then I have a larger one that I backup to as well. Not as often as I should, but I’m working on that.
You could also use an online storage such as google drive, drop box, etc.
However, keep in mind that nothing is 100% safe and you never know when something can happen such as a computer crash.
Having multiple copies of your files backed up is always a good idea!

I hope this has helped you learn a little about the Silhouette library and give you some ideas for getting your library in shape.

Now, if you caught a glimpse of my library tree in the photos above, it’s time for me to do some organizing as well. With the recent Silhouette Design Store sale, I have some files to put into folders.

Library organization copy

Hope that helps you start the year off right by getting the Silhouette library into shape & making a backup!!

Feel free to post your comments and questions below or on my Facebook group at Silhouette Secrets with EllyMae.

Enjoy!

SS_Signature copySS Logo snip it

**This post may contain affiliate links. What that means is that I may receive compensation if you purchase through the links I have provided. The price you pay for the product or service is not higher but I may get compensated for sharing.


Posted on 2 Comments

Let’s Explore Silhouette v4 in 2018 & 2019

Wow! 2018 has sure gone by fast!

There has been so much that has happened – what a year!

I started the year with the goal to have a blog post every week and I only missed 1-2 weeks, so I’m counting that as a success! On to next year!

I started the year out with a series called Let’s Explore v4 and have learned so much going through the software in detail. There are some features that I had never used and I learned so much as I researched and played with it. This program is so powerful and it continues to amaze me all the time.

SS cover photo copy

This Let’s Explore v4 series has been so popular that I will continue it into 2019 and I’ve created a special section on the blog for it all. Find it HERE.

There is still so much more to explore and more new features coming with the v4.2 release.

In addition to the series, I added some projects in here and there that I used the tools in the Silhouette v4 software to complete.

Collage Projects 2019

Layered vinyl acrylic ornaments

Cutting cards with the Silhouette

Back to School bag tags

“Tank” top

SilhouetteShowcase

Vinyl, Glass etching, acrylic etching – oh my!

WM

Faux leather earrings with Silhouette Leatherette

Header photo

Custom Shadow box with the Silhouette

Copy of Collage projects 2018-2

Subtracting text to create word art

Using Multiple files to create a design

Pop up cards

Creating rhinestone designs

Cutting without a mat

Cutting without a mat

Copy of Copy of Collage projects 2018-3

Hot Mess with the Silhouette

Layering vinyl

Bus Driver Appreciation

Teacher gifts

What a year! My absolute favorite thing about the Silhouette is creating projects and being able to show others how to do it too!

Make sure to join my Facebook group – Silhouette Secrets+ with EllyMae and share your projects there – I love seeing what you are doing.

If you are looking for personal instruction – check out the Silhouette Instruction & Events tab at the top of the blog.

What coming in 2019?

Classes, workshops, TJC Hands on Silhouette Spring Retreat, Intermediate Curio Workshop at Craft Chameleon in St. Louis, All Things Silhouette Conferences in June & November, more Let’s Explore v4 and who knows what else will be added to the calendar.

Classes

Here are just a few that I held in 2018


Keep checking on the Silhouette Instruction & Events tab for future classes.

TJC Silhouette Spring Hands On Retreat

March 1-3, 2019
Woodbridge, VA
Staff & Instructor
Silhouette-Spring-Retreat
Find out more information and register HERE!

Intermediate Curio 1 day Workshop at Craft Chameleon

March 2019
St. Louis, MO
More details coming soon!

All Things Silhouette Conference 2019

June 8-9, 2019
Peachtree City, GA
Staff & Instructor

ATS-logo.slider.2019-1024x419

Find out more details & register HERE for the June All Things Silhouette Conference.
New this ATS – Pre-day hands on classes! The Ultimate ATS package!

Silhouette-Getaway_02-1024x597

Silhouette Getaway
September 6-8, 2019
Peachtree City, GA

ATS-logo-slider-11-2019-1024x419

All Things Silhouette Conference
November 9-10, 2019
Peachtree City, GA

I want to thank everyone for following Silhouette Secrets+ in 2018 and want to wish everyone a Happy New Year!

Looking forward to what 2019 brings!

Enjoy!

SS_Signature copySS Logo snip it

**This post may contain affiliate links. What that means is that I may receive compensation if you purchase through the links I have provided. The price you pay for the product or service is not higher but I may get compensated for sharing.

Posted on 3 Comments

Let’s Explore v4 – Tiling

The Tiling feature is a Business Edition upgrade feature that is found under the Media Setup Panel – Tab 4.

The Media Setup Panel is found on the right side of the Silhouette software at the bottom of the icon toolbar. Depending on the size of your computer monitor you may see all the icons or you may have an arrow for a fly out menu.

Tiling Panel double copy

Since the Cameo can only cut 12″ wide, the tiling feature can be used to break up a big design into smaller pieces to be placed together after the cut. While the knife feature could also be used, why not let the software work for you and break it up. This feature is available if you have the Business Edition upgrade of the software and is only accessible under the Media Layout Setup Panel and with the Media Layout View active.

In the Media Layout View, the original design stays intact and all changes take place on the side of the Media Layout View. Check out the post from last week on the Media Layout View here.

I am going to use this Scandinavian Snow Princesses by Erin Doran – Design #68466 from the Silhouette Design Store for my example.

Snow Princess design

First, I’m going to resize this so the silhouette is 5 feet tall. To do that, open the Transform Panel – Scale tab, lock the aspect ratio and change the Height to 60″.
For more information on the Transform Panel – Scale tab click HERE.

Resize copy

Now, I am only going to work with 1 of the princess designs at a time, so I’m going to right click and choose Ungroup and delete the princess on the right side.
In the case of this file, I ended up choosing Release Compound Path to separate the princesses. Then, I selected all the parts of each Princess, right clicked and chose Make Compound Path for each again.
Find out more about Compound Paths HERE.

If you plan to cut both, you can leave it as is or copy and paste the right side to a new design mat to use later.

Now, let’s look at the Tiling feature.

Tiling Panel detail copy

  1. Tiling Active – Check this box to activate the Tiling feature. The Media Layout View will adjust to show you the number of tiles (according to the Page Size set) that it will take to cut the design.Tiling ActiveYou will also see on the left side in the Design View, that it adds a grid over the design with dimensions of each tile, and numbers of tiles. It does not alter the design on the left side, but adds this visual as an overlay of how it would divide the design up.

    On the right side, in the Media Layout View, it shows each of the tiles in the order of the numbers shown on the left side.

    For this design to cut on a 12″ x 12″ mat, it would take 14 – 12″ x 12″ tiles.

  2. Configure Position and Size – Choose Relative to Job, Relative to Media or User Defined. Each of these options allows you to adjust the design even more.Relative to Job – This option is shown in the photo above and includes the entire design.Relative to Media – This option uses the current Media mat chosen. In this case, a 12″ x 12″ cutting mat is selected, so it uses that Media in how it changes the Tiling.

    Relative to Media copy
    You can see above, that it only includes the Media mat portion of the design in the Tiling.

    User Defined – Choose between the Origin X, Origin Y, Width, Height and Maintain Aspect. Each will change how the design is Tiled.

    User Defined Configure copy

  3. Panel Margin – Allows you to change the size of the Panel.Panel Margin copy.jpg
    I increased the Panel Margin to 1″ and the Panel dimensions on the Design View adjusted.
  4. Configure Regular Grid – Choose between Automatic, Custom or Regular Grid. These options allow you to make changes to the Tile spacing.
  5. Overlap – This feature gives the ability to add a bit of overlap to the cut image and is a great feature for giving yourself some extra space in lining the image up after the cut.Overlap copy
  6. Other Options – Show Dimensions – Allows the dimensions to be toggled off on the Design View.Show Dimensions
  7. Tiling – Choose which Tiles you would like to cut – All or selected ones only and choose the separation details between the tiles.Tiles copy
    Notice that since Selected Tiles Only is checked and I typed in 1-2, it highlights only 1 and 2 numbered Tiles and then places only the 1 and 2 numbered Tiles on the Media Layout View to cut.

The Tiling option is a great feature if you are cutting large decals and want the software to do the work for you in breaking up the design to cut.
Each design that you are cutting is going to vary in how it looks and how much material it will take to cut the design out to the size you want.

For instance, if I want to cut this Witch Silhouette by Sarah Bailey – Design #153652, you can see that the top of the broom covers the edges of the 12″ x 12″ mat.

Witch

That leaves a lot of unused space and each Silhouette user would need to decide if it’s worth cutting a full 12″ x 12″ piece of material for this design.

Witch demo

Here is another example:

Beach demo.JPG

If I want to cut a decal of this Beach Bum phrase by Silhouette 48″ long, it breaks it up into 8 panels that fit onto 6 tiles.

Beach demo1

I encourage you to just pick a design and play around with the Tiling feature. Every design you choose will react a bit differently in how it looks in the Tiling feature.

Hopefully this explains some of the features of the Tiling feature.
I would love to see what you create on my Facebook group if you do.
Find me here at Silhouette Secrets+ with EllyMae.

Enjoy!

SS_Signature copySS Logo snip it

**This post may contain affiliate links. What that means is that I may receive compensation if you purchase through the links I have provided. The price you pay for the product or service is not higher but I may get compensated for sharing.