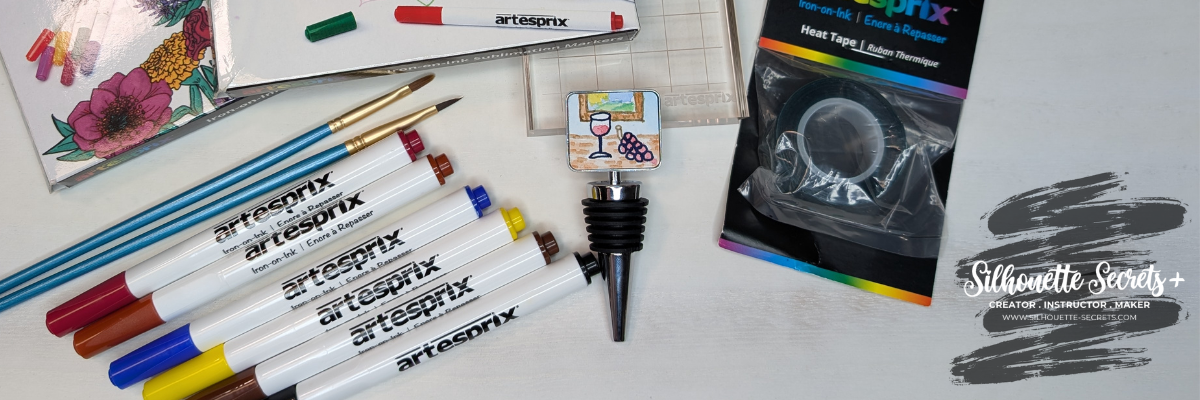
Looking for a fun and easy way to create a custom DIY wine stopper? 🍷✨ In this project, I’m using Artesprix Sublimation Markers to design a one-of-a-kind personalized wine stopper with the Artesprix Sublimation Wine Stopper Blank! Whether you’re making a unique gift or adding a personal touch to your kitchen accessories, this shows you how easy it can be to create your own design.
Affiliate links may be present in the following blog post and as an Amazon Associate I earn from qualifying purchases.
I recently took a 5 day challenge for a watercolor class held by Tracey Weinzapfel and it was so inspiring. Each night we had a 1 hour live class and she would show us some techniques to just play with. I loved it and sometimes my brain just would not stop thinking of new ideas. This one hit me in the middle of the night and I knew I wanted to try it out.
I can say that there is not another one like this in the world as it was custom drawn by me. But, you do not have to hand draw a design like I did. You can also use small stamps, add textures, paint a design, and more!
I absolutely love crafting with Artesprix products—they never fail to ignite my creativity and inspire new project ideas! Check out more of my Artesprix sublimation creations HERE.
THANK YOU for your support! How can you help? Click HERE & buy a coffee. Every little bit helps with the cost of running the site.
Silhouette Classes
Never stop learning! Let me help you take the anxiety out of learning with Silhouette and get to creating faster! My Silhouette classes are heavily focused on software, so you can take the skills & techniques taught and apply them to many future projects!
**This post may contain affiliate links. What that means is that I may receive compensation if you purchase through the links I have provided. The price you pay for the product or service is not higher but I may get compensated for sharing.
Looking to add a creative touch to your journal covers or other projects? In my latest video tutorial, I’ll show you step-by-step how to design a stunning mixed media journal cover using Silhouette Studio and bring it to life with physical mixed media elements. From printable vinyl to layered textures, this project blends digital design with hands-on creativity for a truly unique result! Watch the full tutorial now and get inspired to craft along with me!
Affiliate links may be present in the following blog post and as an Amazon Associate, I earn from qualifying purchases.
I had so much fun creating this project and can’t wait to create more with the digital elements and mixing physical mixed media to add a unique touch.
I am including the supply list for what I used, but you can use what you have and just start playing around.
And find the original blog post and short form video that is on the Grafix YouTube channel HERE.
Save this for future reference by pinning the image below.
Enjoy !
THANK YOU for your support! How can you help? Click HERE & buy a coffee. Every little bit helps with the cost of running the site.
Silhouette Classes
Never stop learning! Let me help you take the anxiety out of learning with Silhouette and get to creating faster! My Silhouette classes are heavily focused on software, so you can take the skills & techniques taught and apply them to many future projects!
**This post may contain affiliate links. What that means is that I may receive compensation if you purchase through the links I have provided. The price you pay for the product or service is not higher but I may get compensated for sharing.
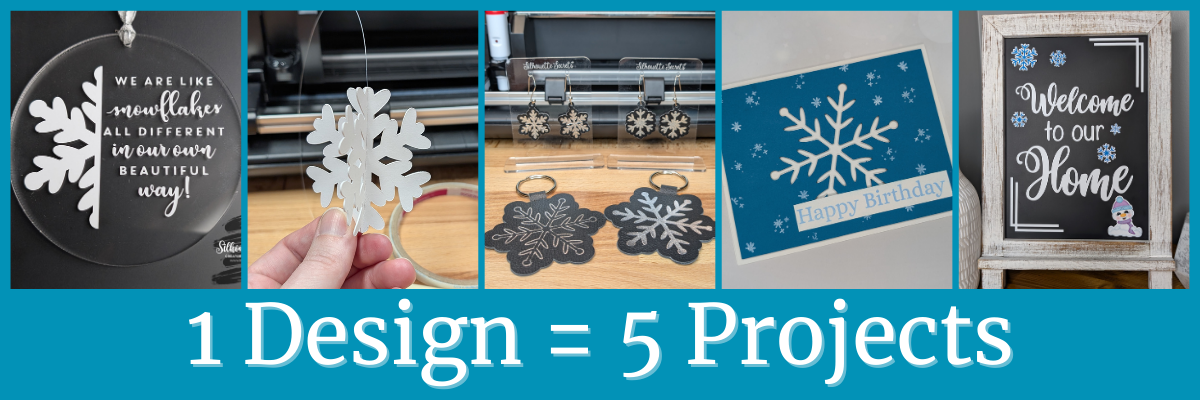
Each month in the Silhouette Secrets+ newsletters, there is a free file offer. I then use that file to create multiple projects, showcasing the endless possibilities you can achieve with just one design. In this blog post I am sharing a variety of creative projects made using snowflakes designs that I created in the Silhouette Studio software. There are so many possibilities when working with just one design and I hope it sparks your creativity to look at your designs differently and think about the possibilities for multiple projects with one file.
Affiliate links may be present in the following blog post and as an Amazon Associate, I earn from qualifying purchases.
The January newsletter files were several snowflake designs that I created in the Silhouette Studio software. This is a great way to learn more about using the tools in the Silhouette Studio software and every single user could create these themselves. Check out the tutorial on the tools I used HERE.
I drew a 3″ circle in the Silhouette Studio software as my template to create within for placement and getting an idea of what the design would look like. Using one of the snowflake designs, I added an offset and then used the Knife tool in Silhouette to cut the snowflake design in half. Next, I opened a snowflake saying, adjusted it at bit, and added that to the design. Then cut everything from Oracal 651 and applied it to the front of a 3″ acrylic circle.
I used the Silhouette Autoblade for these cuts and it did beautifully.
Using the Line Drawing Tools to add weeding lines can help so much when you have intricate designs to weed. This allows you to weed smaller sections of the design and not have the material stick back to itself.
Using one of the snowflake designs, I added a score line down the center and cut 3 for each 3-D snowflake out of cardstock. Then assembled them together to make the 3-D ornaments. The score line helped to fold each of the snowflake sides directly in half for assembly.
Project #3 – Keychains/Bag Tags and Earrings with Heat Foil on Silhouette Leatherette
This silver foil looks amazing on the Silhouette black leatherette. I highly recommend the Silhouette leatherette for anyone who wants to get started with cutting faux leathers. Create many different projects with the Silhouette heat pen and Silhouette leatherette.
I cut the snowflake design out of a blue sheet of cardstock and then had to walk away for a bit because I wasn’t sure how to finish this out.
I ended up pulling out supplies and stamps just to see what might be good to add on to finish this card out. I stamped some embellishments from a birthday stamp set as snowflakes in white ink and then stamping the sentiment in a light blue and adding it to the card with foam tape for dimension.
Print and cut is so awesome and there are many different material types you can use, such as printable magnet sheets. I filled the snowflake designs with color, added an offset and then a few more shapes to fill the page. These could be used to decorate any magnetic surface.
I used them to give additional ideas for a recent class I taught on creating a custom chalkboard for home decor. This chalkboard is magnetic and has so many options you can play around with.
I love discovering how a single design can spark endless creative possibilities! The Crafting Creativity blog series is your ultimate source of inspiration, filled with innovative ideas, practical tips, and expert techniques to take your crafting to the next level. Whether you’re transforming a favorite design, exploring new materials, or refining your skills, these posts are here to fuel your creativity and bring your ideas to life. Check out more in the Crafting Creativity series HERE and see where your imagination leads you! ✨
Save this for future reference by pinning the image below.
Enjoy !
THANK YOU for your support! How can you help? Click HERE & buy a coffee. Every little bit helps with the cost of running the site.
Silhouette Classes
Never stop learning! Let me help you take the anxiety out of learning with Silhouette and get to creating faster! My Silhouette classes are heavily focused on software, so you can take the skills & techniques taught and apply them to many future projects!
**This post may contain affiliate links. What that means is that I may receive compensation if you purchase through the links I have provided. The price you pay for the product or service is not higher but I may get compensated for sharing.
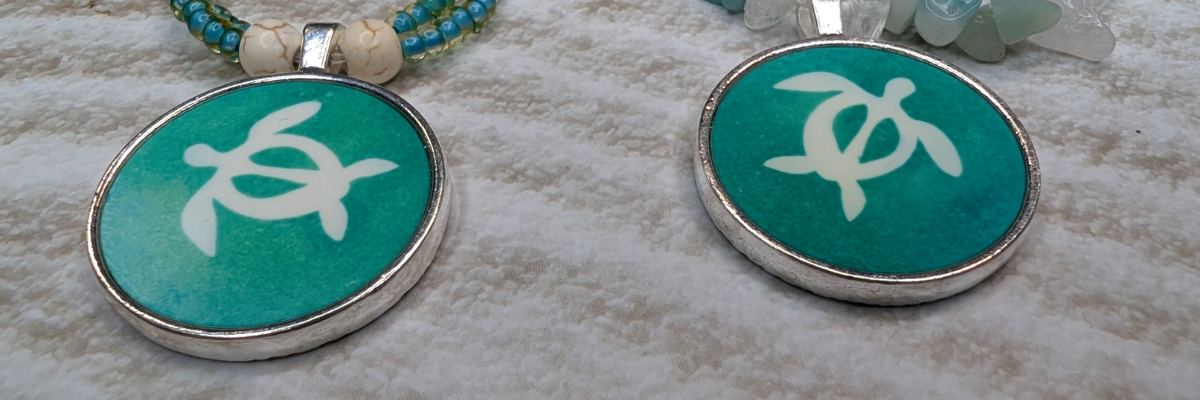
Have you ever wanted to create your own custom jewelry with vibrant, professional-looking designs? With Artesprix Sublimation Inks, you can turn your creative ideas into stunning custom jewelry pendant that is truly a one-of-a-kind piece. In this blog post, I’m sharing the simple process of designing and sublimating your own jewelry pieces, perfect for gifts, personal accessories, or even to sell. No matter your experience level, this fun and easy project is sure to inspire your creativity!
Affiliate links may be present in the following blog post and as an Amazon Associate I earn from qualifying purchases.
The white part of the design is the white of the sublimation blank and is created by using the Artesprix Heat Transfer Resist Mask. Basically it’s a stencil in reverse. The Heat Transfer Mask blocks any of the ink from binding to the sublimation blank and leaves it a bright white.
I cut the Heat Transfer Resist Mask with the Silhouette Cameo 5 using a Blade depth – 2, Force – 14, and speed 5 cut this design beautifully. I would highly recommend test cutting to get the best cut settings for use with your machine and blade. My blade is older and well used, so it did use more force than a brand new blade would.
Here is a close up look at the finished custom jewelry pendant.
I LOVE them! Love the colors that turned out and I also combined my new hobby of beading to complete these projects.
I absolutely love working with Artesprix products—they always spark my creativity and inspire endless ideas for future projects. You can explore more of the projects I’ve created with Artesprix sublimation products HERE.
THANK YOU for your support! How can you help? Click HERE & buy a coffee. Every little bit helps with the cost of running the site.
Silhouette Classes
Never stop learning! Let me help you take the anxiety out of learning with Silhouette and get to creating faster! My Silhouette classes are heavily focused on software, so you can take the skills & techniques taught and apply them to many future projects!
**This post may contain affiliate links. What that means is that I may receive compensation if you purchase through the links I have provided. The price you pay for the product or service is not higher but I may get compensated for sharing.
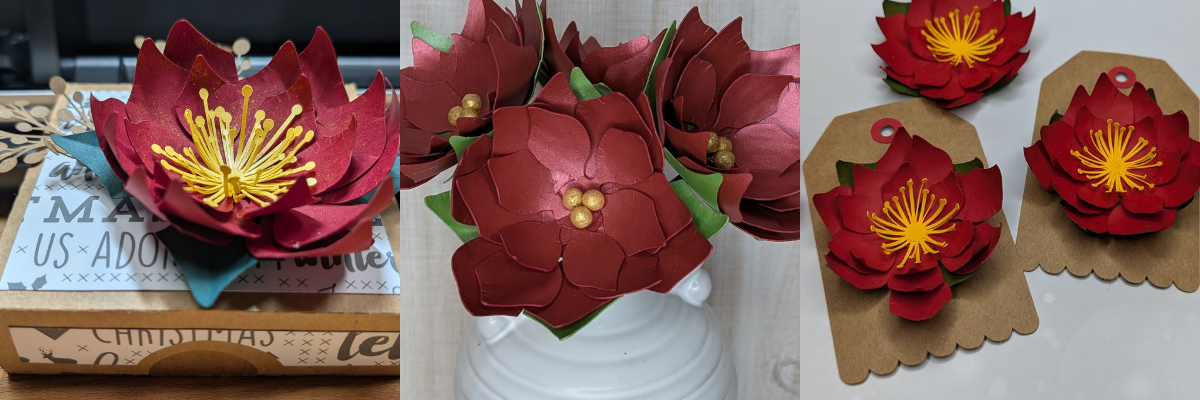
Each month in the Silhouette Secrets+ newsletters, I team up with a talented designer to offer a free file. I then use that file to create multiple projects, showcasing the endless possibilities you can achieve with just one design. In this blog post I am sharing a variety of creative projects made using the Poinsettia Gift Tag file by Jamie Lane Designs.
Affiliate links may be present in the following blog post and as an Amazon Associate, I earn from qualifying purchases.
To start the month off, I cut the design and assembled it for gift tags using kraft cardstock and colored cardstock. I then inked the edges of the cut pieces and used some paper shaping tools to add dimension to the flowers before gluing it all together.
I scaled the flower design down just a bit and used it as an embellishment on our Christmas card.
This one shown isn’t quite mail friendly, so I kept it for myself and used it as decoration for this year.
I added an easel to the back of all the Christmas cards I sent out and the one shown above that I have on display in my home.
The Silhouette LIVE tutorial on the Silhouette Secrets+ YouTube channel from November is what started the entire idea of using this with my Christmas card design. In the live I followed a suggestion from a viewer which began the creation of this years Christmas cards. I also shared sketching tips and a demo using the Silhouette Electrostatic Mat.
I scaled the poinsettia design up a little bit, cut a few more center pieces for the flower and added it on top of a hinged gift box. Added a little bit of gold sparkle spread on the poinsettia and now have a custom made gift box ready to go.
Want to know the perfect cut settings for all cardstock? There isn’t one. There are many factors that affect cut results such as: brand, color, weight, paper finish, blade life, cutting mat adhesion, humidity, the design, and more! Test cuts are the best way to know what will work for your particular cardstock or any material in fact. This will save you time, frustration, money, and supplies.
Over a year ago, I started working on a poinsettia project and crafted these gold-painted wool ball centers for the flowers. While that project was never finished, I kept all the pieces neatly tucked away in a basket, waiting for the right moment to complete it. As I revisited the project, I realized I had used this exact poinsettia flower file from Jamie Lane Designs. Inspired, I decided to pair it with beautiful pearlescent papers from 12 x 12 Cardstock Shop to create a stunning bouquet.
I ordered the cardstock and when I went to use it I was surprised at how thick it was. I wasn’t sure if I would be able to successfully cut it with the Silhouette Electrostatic Mat. After feeling it, I went looking for the weight and found it was 105 cover that’s 285 gsm. Even though I thought it might be too thick, the only way you really know if something will work is to test it! So I did just that. I did have to adjust my cut settings a bit at the beginning and then it cut beautifully!
As I mentioned above, there are no perfect cut settings that work for all cardstock. The faster you can learn to accept that, the less frustrating it will be. You will quickly learn that test cuts will save you time and if you are like me, kick yourself when you don’t do them.
Check out the new video on the Silhouette Secrets+ YouTube channel where I shared how I created this paper flower bouquet with tips to using the Electrostatic Mat too!
I miss counted when I was cutting the flowers out and I had more flower pieces cut than I had wool ball centers, but I wasn’t going to let this one sit unfinished. I had extra center pieces leftover from the previous projects and still finished these out to use for a future project or gift.
What are some ideas you have for projects this year?
I love exploring how one design can inspire multiple creative projects! The Crafting Creativity blog series is your go-to source for endless inspiration, packed with innovative ideas, practical tips, and expert techniques to elevate your crafting. Whether you’re reimagining a favorite design, experimenting with new materials, or mastering advanced skills, these posts are here to ignite your imagination and help you bring your creative visions to life. Head over to the Crafting Creativity series HERE and discover where your creativity can take you!
Save this for future reference by pinning the image below.
Enjoy !
THANK YOU for your support! How can you help? Click HERE & buy a coffee. Every little bit helps with the cost of running the site.
Silhouette Classes
Never stop learning! Let me help you take the anxiety out of learning with Silhouette and get to creating faster! My Silhouette classes are heavily focused on software, so you can take the skills & techniques taught and apply them to many future projects!
**This post may contain affiliate links. What that means is that I may receive compensation if you purchase through the links I have provided. The price you pay for the product or service is not higher but I may get compensated for sharing.
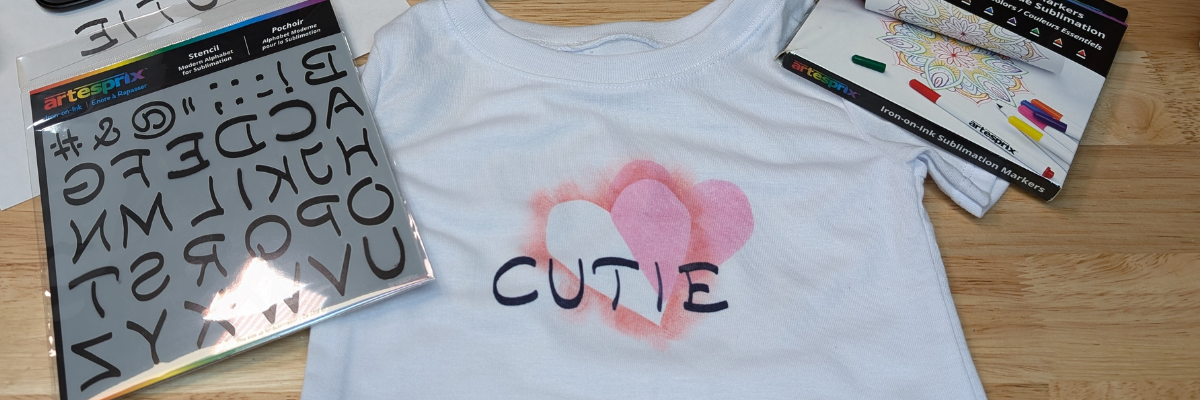
Looking for a fun and creative way to make a personalized baby bodysuit with sublimation? In the latest project video on the Artesprix channel, I’m showing you step-by-step how to sublimate an adorable baby bodysuit using Artesprix Sublimation Markers, Stencils, and Inks. Whether you’re crafting a unique gift for a baby shower, making something special for your little one, or just exploring sublimation techniques, this project is easy, beginner-friendly, and oh-so-cute! I’ll also share all the supplies you need to create your own, so you can get started right away.
Affiliate links may be present in the following blog post and as an Amazon Associate I earn from qualifying purchases.
I absolutely love working with Artesprix products—they never fail to ignite my creativity and inspire countless ideas for future projects. Find more projects I’ve created using the Artesprix sublimation products HERE.
THANK YOU for your support! How can you help? Click HERE & buy a coffee. Every little bit helps with the cost of running the site.
Silhouette Classes
Never stop learning! Let me help you take the anxiety out of learning with Silhouette and get to creating faster! My Silhouette classes are heavily focused on software, so you can take the skills & techniques taught and apply them to many future projects!
**This post may contain affiliate links. What that means is that I may receive compensation if you purchase through the links I have provided. The price you pay for the product or service is not higher but I may get compensated for sharing.
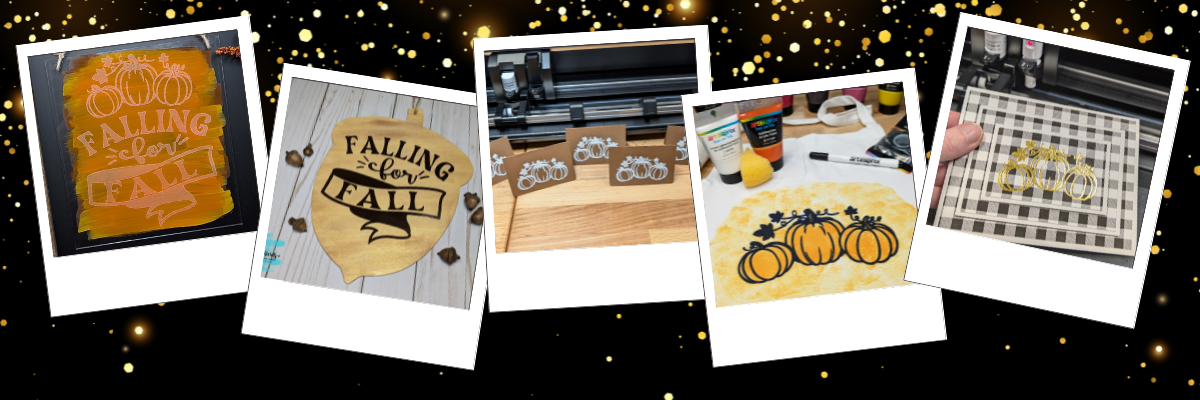
Discover the magic of versatility with Megan Hardy’s creative designs! In this post, we’ll show you how you can transform a single design into five unique projects that are perfect for any occasion. From an etched acrylic sign with the Silhouette Curio 2 to a wood sign using adhesive vinyl, a personalized apron using Artesprix sublimation markers and paints, a sketched place card for stylish gatherings, and a dazzling foiled card featuring the triple mat stacked technique—this post is packed with inspiration and tips to make the most of your crafting tools. Do more with your designs and bring your creativity to life!
Affiliate links may be present in the following blog post and as an Amazon Associate, I earn from qualifying purchases.
Each month in the Silhouette Secrets+ newsletters, I collaborate with an amazing designer to bring you a free file. Throughout the month, I work with the newsletter file to create and share a variety of projects, showcasing the many ways it can be used.
Project #1 – Etched Acrylic Sign with the Silhouette Curio 2
I used the Silhouette Curio 2 with the Power Engraver to etch on a clear acrylic sign.
In most cases, I prefer to etch on the backside of acrylic, however, I knew I want to paint on the back, so I etched the front for this design. The Silhouette Power Engraver leaves a pretty smooth finish, but that will also vary based on the actual acrylic being used and the fill options chosen. The only way to know how it will turn out is to test.
I use shapes in the Silhouette Studio software to create a “template” in order to align the design where I want on the blank I’m using. Just make sure to turn the “cut” line off for the template before you send it to etch or it will also etch the outer edge of your blank as well.
Also make sure to keep the design away from the taped edges or it could affect the etch results. I got lucky in this etching and it still etched through the painters tape, however, that can also gum up the Power Engraver tool too with the tape particles and adhesive.
I grabbed a plain wood sign from my stash that I had picked up years ago in a Target dollar spot. Added a couple layers of paint to the sign and let it dry. Then measured the inside of the blank and used a rectangle as a template to size the design. Once I had the design sized, I moved my rectangle off to the left side and drew in some weeding lines with the line tools so it was easier to weed in pieces.
I also cut my material down to the size I need so I can save the adhesive on my cutting mat and don’t have to peel a full sheet of material off the mat each time. To do this I decrease the Transparency on the Page Setup Panel so I can reveal the cutting grid and know what size to cut my material down to.
Now I am not using the adhesive on the rest of the mat and it will increase the lifespan on the cutting mat.
Adding weeding lines in the Silhouette software may take a couple extra seconds before you send the design to cut, but can save you frustration when weeding adhesive vinyl.
I love how these turned out! This place card was designed in the Silhouette software, using a rectangle, dashed line for scoring, and the pumpkin design from the Falling for Fall design.
Let’s not talk about the fact that I created these for Thanksgiving dinner and then totally forgot to use them. There is always next year!
But, they turned out looking awesome! I love the painted liked texture that the sketch fill with the white pen gave it. Each one turned out just a bit different in the way the ink laid down and moved.
After creating these, I did a LIVE tutorial on the Silhouette Secrets+ YouTube channel sharing more on sketching tips and a demo using the Silhouette Electrostatic Mat as well.
Project #4 – Custom Apron with Artesprix Sublimation Markers and Paints
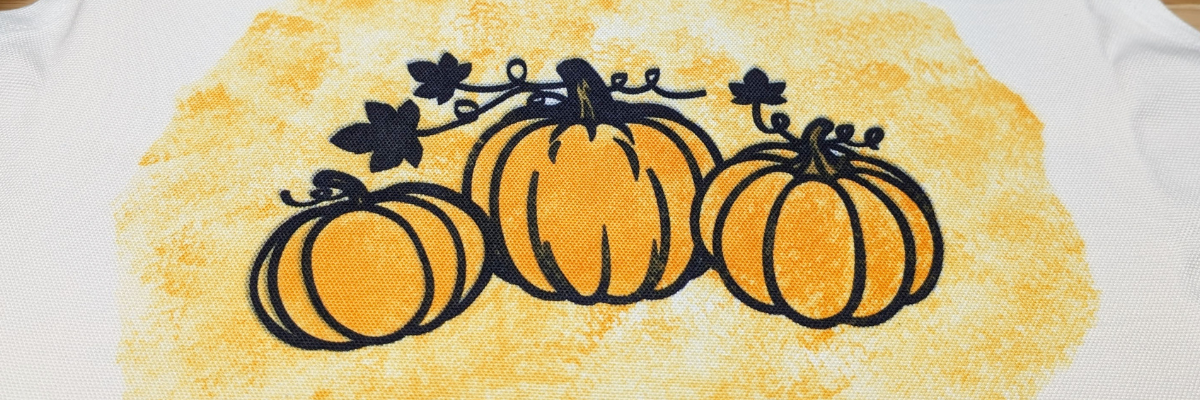
Artesprix sublimation products are a great way to test and investigate if you want to go deeper into the sublimation side of things. I used the Artesprix black sublimation marker to sketch out the design with my Silhouette.
With Artesprix sublimation products, you don’t need any special paper! Plain ordinary copy paper is all that’s needed and if you don’t like what you’ve made, you aren’t out much. I love playing with the Artesprix products and seeing what can happen.
Once the main design was sketched, then I sponged on some paint in 2 shades of orange around the design to complete the custom apron.
Other supplies: pencil, scissors, paper towels, copy paper, ruler, sponges or paint brush, paint palette
Project #5 – Foiled Card Design with the Triple Mat Stacked Technique
Make your cards pop with the Triple Mat Stacked technique and add heat foil to that for even more wow factor. I love combining things to make unique projects!
This was completed using a digital pattern in Silhouette Studio, setting it up for a print and cut, then using the setup for foiling the design before cutting.
Foiling can really add a unique touch to your projects! It does take extra time in creating, but can definitely be worth it.
I love exploring how one design can inspire multiple creative projects! The Crafting Creativity blog series is your go-to source for endless inspiration, packed with innovative ideas, practical tips, and expert techniques to elevate your crafting. Whether you’re reimagining a favorite design, experimenting with new materials, or mastering advanced skills, these posts are here to ignite your imagination and help you bring your creative visions to life. Head over to the Crafting Creativity series HERE and discover where your creativity can take you!
Save this for future reference by pinning the image below.
Enjoy !
THANK YOU for your support! How can you help? Click HERE & buy a coffee. Every little bit helps with the cost of running the site.
Silhouette Classes
Never stop learning! Let me help you take the anxiety out of learning with Silhouette and get to creating faster! My Silhouette classes are heavily focused on software, so you can take the skills & techniques taught and apply them to many future projects!
**This post may contain affiliate links. What that means is that I may receive compensation if you purchase through the links I have provided. The price you pay for the product or service is not higher but I may get compensated for sharing.
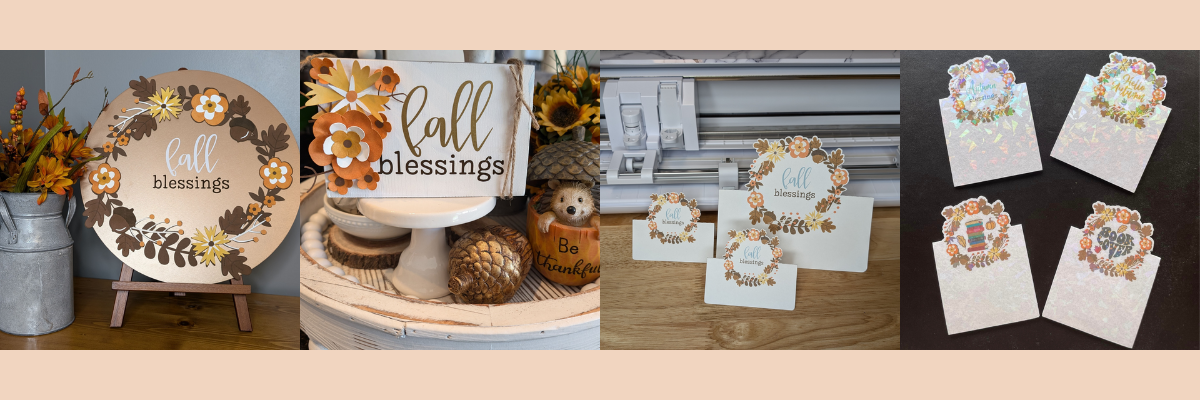
Lori Whitlock’s designs are a treasure trove of inspiration for crafters of all skill levels. Whether you’re a seasoned maker or just starting out, her versatile and beautifully crafted files can transform any project into something truly special. In this blog post, we’ll explore four unique ways to bring Lori Whitlock’s designs to life, showcasing a mix of techniques and ideas that highlight their creative potential. From cards to home décor, these projects will not only spark your imagination but also help you get the most out of your crafting tools.
Affiliate links may be present in the following blog post and as an Amazon Associate, I earn from qualifying purchases.
Crafting Creativity with Lori Whitlock
Project #1 – Fall Blessing WreathSign
I cut all of the cardstock pieces for the wreath using the Silhouette Electrostatic Bed along with my Cameo 5 . Once everything was cut, I started gluing the pieces of the wreath together and then added it onto a wood round that I’ve had in my stash for awhile.
I am loving the Silhouette Electrostatic Bed and not having to peel the cardstock off the adhesive sticky mat. I’ve cut lots of cardstock in the last year and it has saved me time.
While I was cutting the cardstock for the wreath shown above, I cut extra flowers and branches. Then added some ink to the cardstock pieces and used shaping tools to give the flowers dimension before gluing them together. Once the flowers were assembled, I cut fall blessings from adhesive vinyl and added that to the wood block. Then arranged the flowers and glued them down on the left side. Added a bit of twine wrapped around the wood on the right and had a new sign for my tiered tray.
Project #3 – Pop Out Top Used for Place Cards, Cards, or Treat Toppers
This is such a fun design to create! For this pop out top card, I used the Fall Blessings design and print and cut. I shared the entire process to create this in a live YouTube tutorial on the Silhouette Secrets+ YouTube channel. In the video tutorial I not only shared how to create the design of the pop out top card, but also gave many tips for successful print and cut projects!
I love these so much! After the Silhouette Live tutorial where I shared how to create the pop out top, I woke up the next morning to see these beauties posted on my group. My friend Teresa creates amazing things and she combined several of my tutorials to make some new magnetic bookmarks.
She used print and cut and added a holographic overlay on top to make them sparkle. In her region, they don’t use the term “fall” so she swapped it out for a few other designs to make it a better fit.
I love taking one design and thinking of several ways to make projects with it!
The Crafting Creativity blog posts are your ultimate source of inspiration, designed to spark new ideas and help you explore the endless possibilities in crafting. Each post is packed with innovative project ideas, practical tips, and expert techniques to help you think outside the box and take your creativity to new heights. Whether you’re looking for fresh ways to use your favorite designs, exploring new materials, or learning advanced techniques, these posts aim to fuel your imagination and empower you to turn your crafting dreams into reality. Check out the Crafting Creativity series HERE and see where your creativity takes you!
Save this for future reference by pinning the image below.
Enjoy !
THANK YOU for your support! How can you help? Click HERE & buy a coffee. Every little bit helps with the cost of running the site.
Silhouette Classes
Never stop learning! Let me help you take the anxiety out of learning with Silhouette and get to creating faster! My Silhouette classes are heavily focused on software, so you can take the skills & techniques taught and apply them to many future projects!
**This post may contain affiliate links. What that means is that I may receive compensation if you purchase through the links I have provided. The price you pay for the product or service is not higher but I may get compensated for sharing.
If you’re looking to add a personal touch to your kitchen or craft space, creating a custom apron is a fun and creative way to do so! In this DIY project, I’m sharing how I designed and create a one-of-a-kind apron using Artesprix Sublimation Markers, Sublimation Paints, and a Silhouette Machine. Whether you want to add a quirky quote, a custom graphic, or a colorful design, this technique allows you to create vibrant, long-lasting prints on fabric. Follow along for a step-by-step guide on how to use these amazing tools to bring your unique design vision to life, all while learning some fun sublimation techniques along the way!
Affiliate links may be present in the following blog post and as an Amazon Associate I earn from qualifying purchases.
I absolutely love working with Artesprix products—they always spark my creativity and leave me inspired with even more ideas for future projects. Find more projects I’ve created using the Artesprix sublimation products HERE.
THANK YOU for your support! How can you help? Click HERE & buy a coffee. Every little bit helps with the cost of running the site.
Silhouette Classes
Never stop learning! Let me help you take the anxiety out of learning with Silhouette and get to creating faster! My Silhouette classes are heavily focused on software, so you can take the skills & techniques taught and apply them to many future projects!
**This post may contain affiliate links. What that means is that I may receive compensation if you purchase through the links I have provided. The price you pay for the product or service is not higher but I may get compensated for sharing.
New Silhouette tutorial step-by-step to creating a Pop Out Top Card & Mastering Print and Cut in Silhouette Studio on the Silhouette Secrets+ YouTube channel.
Just a quick note to share the link for the Live Silhouette tutorial that happened this month.
Save this for future reference by pinning the image below.
Enjoy !
THANK YOU for your support! How can you help? Click HERE & buy a coffee. Every little bit helps with the cost of running the site.
Silhouette Classes
Never stop learning! Let me help you take the anxiety out of learning with Silhouette and get to creating faster! My Silhouette classes are heavily focused on software, so you can take the skills & techniques taught and apply them to many future projects!
**This post may contain affiliate links. What that means is that I may receive compensation if you purchase through the links I have provided. The price you pay for the product or service is not higher but I may get compensated for sharing.
THANK YOU for your support! How can you help? Click the link to buy a coffee. Every little bit helps in the cost of running the site.