Posted on 2 Comments

Create Stunning Silhouette Projects with Sarah Hurley’s Designs: Cards, T-shirts & More

Crafting Creativity Sarah Hurley
Silhouette Secrets+ with EllyMae

In this edition of Crafting Creativity I’ll be sharing the projects I created through the month with an arrow background/stencil design. So many great options from one file! A great big thank you to Sarah Hurley for providing the free file for the Silhouette Secrets+ August newsletter!

Affiliate links may be present in the following blog post and as an Amazon Associate, I earn from qualifying purchases.

Sarah Hurley website

What is Crafting Creativity?

I started sharing a blog post each month where I’m sharing the projects I’ve created with 1 file from an artist I have collaborated with. This is a file that the designer has provided for the Silhouette Secrets+ Newsletter subscribers and each month is something new! My goal is to share how you can take 1 design and think about different projects use it in to make your designs go farther! In each blog post, I’m sharing the projects created, the supply list, and additional resources that can help you learn more and advance your skills!

Sarah Hurley Arrow Background Stencil Design Silhouette Design Store

Crafting Creativity with Sarah Hurley

Project #1 – Fun Card with Bosh Cat and Arrow Background

Card created with designs by Sarah Hurley

I knew the moment I saw the Bosh cat design that I wanted to use him on a project. In following Sarah Hurley on social media and saw that she had adopted him, so I watch for his appearances. I always wonder what he’s thinking and feel like many of her designs would fit right in with Bosh’s thoughts.

Additional Resources:

Supplies Used:

Project #2 – Fun Interchangeable Sign

Fun Interchangeable Sign with Silhouette with designs by Sarah Hurley

Projects seem to take on a life of their own and I am getting better about just going with the flow of things and the direction it takes me. I knew I wanted to start with something bigger with this project and it developed along the way.

This fun sign is magnetic and the saying can be swapped out depending on what mood strikes you. Feeling snarky? Add a snarky saying. Sarah Hurley has some good ones in the Silhouette Design Store and sometimes I just enjoy scrolling through them for a laugh.
Need a pick-me-up? Add an inspiration saying…. or – leave them guessing at what will be up next.

Watch the video on the Silhouette Secrets+ YouTube channel and learn how to create your own interchangeable sign. Find it out HERE or click the image below.

Video Tutorial link to Silhouette Secrets+ YouTube channel for Interchangeable Sign
Video tutorial on the Silhouette Secrets+ YouTube channel HERE

Additional Resources:

Supplies Used:

Project #3 – This Side Up T-Shirt Using Text to Path

Text To Path T-Shirt Design in Silhouette with designs by Sarah Hurley

This was a fun way to use up scraps and create a fun shirt for myself. Anyone who’s ever traveled with me knows that I can trip over thin air. It’s genetic or that’s what we joke about because I get it from my Mom. If you ever see me on the ground, you’ll know why.

Text to Path is an awesome feature in the Silhouette Studio software and is available for all users. Check out how easy it is in this new video – Silhouette Tutorial: Quick and Easy Text to Path Tutorial HERE.

Silhouette Tutorial Text to Path

Additional Resources:

Supplies Used:

Project #4 – Sublimation Journal Cover with a Stencil

Grafix Stencil Film with Silhouette

I love being able to create my own projects and modify them as needed. That is exactly what I did in creating this stencil with the Grafix Stencil Film. The arrow background/stencil design came in as a square, but I was able to modify it with a few simple steps to make it for what I needed.

Check out more details on how I created the stencil in this blog post:
Create Customs Stencils: Using Grafix Stencil Film with Your Silhouette HERE

Stencil Design in Silhouette Studio with Sarah Hurley design

This was a fun project I created in a collaboration with Grafix Arts. Find the new video tutorial on the Grafix YouTube channel HERE

Additional Resources:

Supplies Used:

Project #5 – Bookmarks with Print and Cut

Silhouette Print and Cut Bookmarks with a Holographic Overlay with Sarah Hurley design

I used the arrow background/stencil design to create these bookmarks and then added my own custom color to it with the help of the Color Cubes by Sarah Renae Clark to select a color palette for the 2 different designs.

I shared how I did that in this video – Silhouette Studio Custom Color Palette Add Colors found HERE on the Silhouette Secrets+ YouTube channel.

Custom Color Palette in Silhouette Studio

The holographic overlay adds a fun touch as well as protects the bookmark front too!

Additional Resources:

Supplies Used:

I hope this edition of Crafting Creativity with Sarah Hurley has sparked a few ideas about what you can create. Write those ideas down and see where they take you!!!

Find more amazing designs by Sarah Hurley at the Silhouette Design Store. Follow along with Sarah Hurley on their website, Facebook, and Instagram too!

A great big thank you to Sarah Hurley for contributing the free file for the Silhouette Secrets+ newsletter for the month of August! If you missed grabbing the free Arrow Background/Stencil, it is available in the Silhouette Design Store HERE.

Sign up for the weekly newsletter HERE to have information delivered direct to your inbox and grab the new freebie each month.

Silhouette Secrets+ Newsletter

Never miss out on the news, tips, “secrets”, deals, classes, and more that I share on Silhouette Secrets+. Sign up for the newsletter and get information delivered to your inbox every Friday.
Unsubscribe at anytime.

I hope this has given you some ideas on how one file can lead to many different projects!

Save this for future reference by pinning the image below.

Multiple Projects from 1 Design by Sarah Hurley

Enjoy !

THANK YOU for your support! How can you help? Click HERE & buy a coffee.
Every little bit helps with the cost of running the site.

Silhouette Classes

Never stop learning! Let me help you take the anxiety out of learning with Silhouette and get to creating faster! My Silhouette classes are heavily focused on software, so you can take the skills & techniques taught and apply them to many future projects!

Silhouette step-by-step Classes by Silhouette Secrets+

Silhouette Secrets+ with EllyMae
**This post may contain affiliate links. What that means is that I may receive compensation if you purchase through the links I have provided. The price you pay for the product or service is not higher but I may get compensated for sharing.
Posted on 3 Comments

Install Fonts for Silhouette Studio: Tutorial for Crafters

Install Fonts for Silhouette
Silhouette Secrets+ with EllyMae

Sharing a bit of information today on how to install fonts for use in the Silhouette Studio software. Well, any program really. Fonts are installed directly on the computer and then software programs pull from the Fonts folder on the computer hard drive to access.

Windows computer fonts folder

Affiliate links may be present in the following blog post and as an Amazon Associate, I earn from qualifying purchases.

Font files are typically OTF or TTF font files. OTF stands for Open Type Font and if you have the option to install this, that is the one you should install. The OTF file is the newer font format and is the one that has all the special characters, also called glyphs, that we have seen evolve over time. Over time we have seen a shift in font development and are now seeing hundreds of characters in one font file versus the original 26 characters of the alphabet + numbers.

TTF stands for True Type Font and these are the older style font files that do not have as many special characters. If TTF is the only option you have to install for a font, that will work just fine. All it means is that the font file does not contain as many special characters.

How to Install Fonts for Silhouette

Check out the new video tutorial on the Silhouette Secrets+ YouTube channel as I’m sharing step-by-step how to install fonts for use in Silhouette.

How to Install Fonts for Silhouette

As a Silhouette user we’ve been kind of spoiled in seeing font file thumbnails show up in the Fonts folder of the Silhouette library and with most of your basic fonts, the font will install on the computer when the font thumbnail syncs to the library. However, with the Silhouette website migration issues that started on 5/22/24, we have seen fluctuation in files actually syncing properly to the Silhouette library.

The fonts from the Silhouette Design Store, do NOT have to sync to the library for use. It’s just kind of a perk that we have gotten used to. Once things are back to working like they should with the Silhouette websites someday, we may see things return to normal.

The Silhouette Fonts folder only contains thumbnails for fonts that are purchased and synced to the library directly from the Silhouette library. Font files can be found in many online sites. Check out the Recommended Design & Retailers for the group for more options HERE.

The same steps apply for all fonts to be installed no matter what site you obtain them from.

I also have a written tutorial that I published a few year back called Let’s Explore v4 – Installing Fonts. In this tutorial I have provided additional details on things you might encounter such as extracting downloaded files and installation steps for a MAC.

Installing Fonts in Silhouette Studio

As technology changes and we see updates from both Microsoft and Apple in the computer operating systems, there can be new ways they “hide” things or change things that users have to figure out. For instance, with the release of Windows 11, Microsoft hid the “Install for all users”. It is an important step in the process or the font file might not show up in all programs. That is also another change by Microsoft that occurred with Windows 10 release.
If you encounter any issues with installing fonts or see something different than my video tutorial shows, please check out the written tutorial HERE for more details.

If you have any questions, please let me know in the comments below.

Save this for future reference by pinning the image below.

How to Install Fonts for Silhouette Pinterest

Enjoy !

THANK YOU for your support! How can you help? Click HERE & buy a coffee.
Every little bit helps with the cost of running the site.

Silhouette Classes

Never stop learning! Let me help you take the anxiety out of learning with Silhouette and get to creating faster! My Silhouette classes are heavily focused on software, so you can take the skills & techniques taught and apply them to many future projects!

Silhouette step-by-step Classes by Silhouette Secrets+

Silhouette Secrets+ with EllyMae
**This post may contain affiliate links. What that means is that I may receive compensation if you purchase through the links I have provided. The price you pay for the product or service is not higher but I may get compensated for sharing.
Posted on Leave a comment

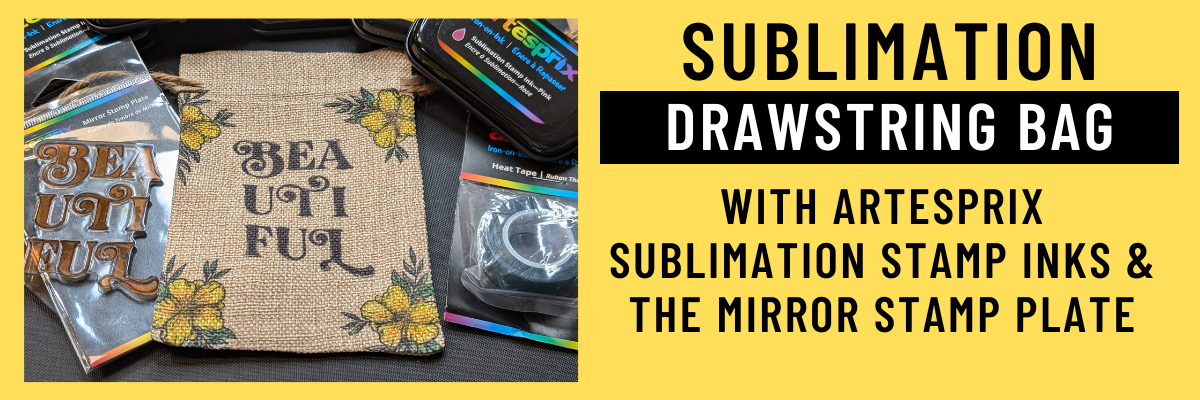
Sublimation Without a Printer: Easy DIY Drawstring Bag Tutorial Using Artesprix Inks

Artesprix Sublimation Inks to Create Custom Drawstring Bag
Silhouette Secrets+ with EllyMae

I love creating with the Artesprix Sublimation products! It has really helped me to just let go of my perfectionist tendencies and just create. These custom drawstring bags turned out FANTASTIC! I used the Artesprix mirror stamp plate for the text and then used it again as a color palette to pick up ink and paint the flowers. I wasn’t quite sure how the colors would show up on the background of the drawstring bag, but it was so bright and vibrant.

Custom Drawstring Bag: Sublimation Without a Printer Using Artesprix Sublimation Inks & Mirror Stamp Pad

Affiliate links may be present in the following blog post and as an Amazon Associate I earn from qualifying purchases.

Anyone can do this and you do NOT have to be an artist to create with the Artesprix Sublimation products. You also do NOT need a sublimation printer, so it is a great way to dip your toe in the water to test sublimation before investing in a bunch of equipment.

I am sharing the supplies I used to create the custom sublimation bag in the video that is linked below too!

Custom Drawstring Bag: Sublimation Without a Printer Using Artesprix Sublimation Inks & Mirror Stamp Pad

Supplies used to create custom sublimation bags:

Watch how I made these custom drawstring bags with the Artesprix Sublimation products in the new tutorial HERE on the Artesprix YouTube channel.

Find more ideas on creating with the Artesprix Drawstring Bag HERE.

You never know what you can create until you just do it and there are times I have to give myself a little pep talk and say “Just Do It!”… Just get started and see where it might take you!
Find more projects I’ve created using the Artesprix sublimation products HERE.

I’ll be sharing more so make sure to follow Artesprix on social media to see more projects!
YouTube channel
Blog
Facebook Page
Iron-on-Ink Inspirational Facebook Group

Save this for future reference by pinning the image below.

Artesprix Sublimation Ink Pads & Mirror Stamp Plate with Drawstring Bags


Want more creative ideas using the Artesprix sublimation products?
Check out all other projects HERE.

Grab some Artesprix sublimation products and get to creating today!

Enjoy !

THANK YOU for your support! How can you help? Click HERE & buy a coffee.
Every little bit helps with the cost of running the site.

Silhouette Classes

Never stop learning! Let me help you take the anxiety out of learning with Silhouette and get to creating faster! My Silhouette classes are heavily focused on software, so you can take the skills & techniques taught and apply them to many future projects!

Silhouette step-by-step Classes by Silhouette Secrets+

Silhouette Secrets+ with EllyMae
**This post may contain affiliate links. What that means is that I may receive compensation if you purchase through the links I have provided. The price you pay for the product or service is not higher but I may get compensated for sharing.
Posted on Leave a comment

Create Custom Stencils: Using Grafix Stencil Film with Your Silhouette Machine

Grafix Stencil Film with Silhouette and Artesprix
Silhouette Secrets+ with EllyMae

Have you ever made your own custom stencils? Combining Grafix Stencil Film with a Silhouette cutting machine opens up endless possibilities for creative projects and designs. You can easily create a wide variety of customized pieces! Using the Silhouette, a design by Sarah Hurley, and Grafix Stencil Film, I created a custom stencil that can be used over and over again.

Affiliate links may be present in the following blog post and as an Amazon Associate, I earn from qualifying purchases.

For this project I used Artesprix Sublimation inks with the custom cut Grafix Stencil Film and created a sublimation journal cover.

DIY Stencils with Grafix Stencil Film and Silhouette

I would recommend having a dedicated blade for cutting different materials. This will help to increase the lifespan on the blades, as well as help with future cut issues. Each material will dull the blade differently and stencil material is plastic, so that does affect it differently than say cutting a much thinner material such as adhesive vinyl.

The best thing you can do is test cut to determine what settings are going to work for your blade, machine model, and the materials being used.

Silhouette settings used:

After the cut is finished, check the cut to see if it cut completely through before unloading the mat from the machine. I have to tell myself this constantly because I’m so quick to press that unload button, but it can save you time and materials if you get in the habit of checking the cut first and if it did not cut through, then you can send it again and it should cut in the same exact location.

Additional Resources:

Custom Stencils with Grafix Stencil Film and Silhouette

Check out the new video on the Grafix Arts YouTube channel where I share how I did this HERE and I’ve included a supply list below too!

Supplies used for DIY Custom Stencils with Grafix Stencil Film:

Custom Sublimation Journal with Artesprix Sublimation Inks, Grafix Stencil Film, and Silhouette

What kind of projects would you create with your own custom stencils? Let us know in the comments below, we would love to hear from you!

Save this for future reference by pinning the image below.

Grafix Stencil Film for DIY Custom Stencils with Silhouette and Artesprix

Enjoy !

THANK YOU for your support! How can you help? Click HERE & buy a coffee.
Every little bit helps with the cost of running the site.

Silhouette Classes

Never stop learning! Let me help you take the anxiety out of learning with Silhouette and get to creating faster! My Silhouette classes are heavily focused on software, so you can take the skills & techniques taught and apply them to many future projects!

Silhouette step-by-step Classes by Silhouette Secrets+

Silhouette Secrets+ with EllyMae
**This post may contain affiliate links. What that means is that I may receive compensation if you purchase through the links I have provided. The price you pay for the product or service is not higher but I may get compensated for sharing.
Posted on 2 Comments

Understanding Compound Paths in Silhouette Studio: Beginner-Friendly Tips

Silhouette Studio: Compound Paths
Silhouette Secrets+ with EllyMae

Compound paths are one of the things in Silhouette Studio that can take the longest to grasp. We see compound paths every day but are not always really “seeing” them. Most often the initial experience with compound paths leaves you saying, “What the heck?” or something along those lines. Or “Why did it do that?

Affiliate links may be present in the following blog post and as an Amazon Associate, I earn from qualifying purchases.

Compound Paths in Silhouette Studio

In this month’s LIVE YouTube tutorial we covered compound paths and I walked through several different demonstrations starting with simple compound paths and working our way up to a little more complex designs with compound paths.

Those who attended live were able to ask questions and I answered those on the spot and showed additional demonstrations.

Check out this month’s YouTube LIVE on the Silhouette Secrets+ YouTube channel HERE.

Demystify Compound Paths in Silhouette Studio YouTube video tutorial

Additional Resources:

Make sure to check out the Events Tab HERE for upcoming LIVE tutorials and more events too!

Save this for future reference by pinning the image below.

Compound Paths in Silhouette Studio

Enjoy !

THANK YOU for your support! How can you help? Click HERE & buy a coffee.
Every little bit helps with the cost of running the site.

Silhouette Classes

Never stop learning! Let me help you take the anxiety out of learning with Silhouette and get to creating faster! My Silhouette classes are heavily focused on software, so you can take the skills & techniques taught and apply them to many future projects!

Silhouette step-by-step Classes by Silhouette Secrets+

Silhouette Secrets+ with EllyMae
**This post may contain affiliate links. What that means is that I may receive compensation if you purchase through the links I have provided. The price you pay for the product or service is not higher but I may get compensated for sharing.
Posted on 1 Comment

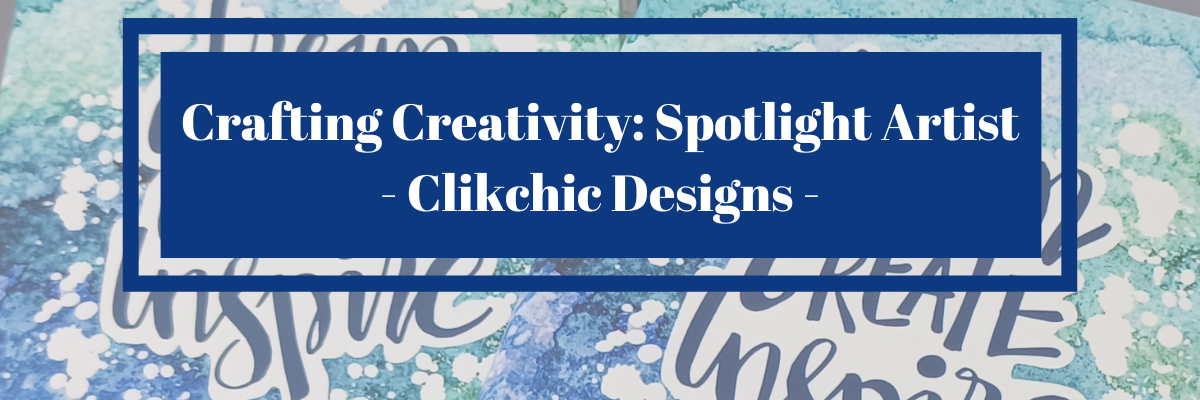
Creative Projects Using ClikChic Background Patterns in Silhouette: Cards, Coasters, and More

Crafting Creativity Spotlight Artist Clikchic Designs
Silhouette Secrets+ with EllyMae

In this edition of Crafting Creativity I’ll be sharing the projects I created through the month with a watercolor background pattern. Patterns can really make your project unique and be used in creative ways with Silhouette. A great big thank you to Clikchic Designs for providing the free file for the Silhouette Secrets+ July newsletter!

Clik Chick Designs Website

Affiliate links may be present in the following blog post and as an Amazon Associate, I earn from qualifying purchases.

Silhouette Background Patterns Projects

This past month I have had so much fun designing and creating with the Watercolor Background design by Clikchic Designs.

Blue Teal Green Watercolor Grunge Printable Background Pattern by Clik Chic Designs

I even went LIVE on YouTube – which for me is a big step, especially with all the issues Silhouette has been having. In the live video tutorial I shared all about pattern fill and how you can use it.

Check out the YouTube Live Tutorial – Design with Pattern Fill: Silhouette Studio Tips for Stunning Results HERE.

Silhouette Secrets YouTube Silhouette Tutorial Pattern Fill

I’ve been collaborating with designers this year and each week I am sharing new projects that can be created from 1 file. This is a file that the designer has provided for the Silhouette Secrets+ Newsletter subscribers. I want to share how you can take 1 design and think about different projects you can use it in to make your designs go farther!

Project #1 – Card Design with Watercolor Background

I used the Watercolor Grunge background and printed it on a 12″ x 12″ sheet of cardstock. Don’t worry if you don’t have the capability to print on 12″ x 12″ cardstock, the same technique can be done with letter size paper too!

Watercolor Background Cards Created with Background by Clik Chic Designs

I participated in a card swap and signed up to exchange 20 cards, so this was a perfect way to create 6 cards from one sheet of paper. And every one of these cards was different because of the unique watercolor grunge background.

Here is another set I made with a vertical layout.

Watercolor Background on Cards with Clik Chic Designs

Check out the written tutorial on how I made these cards in this post – Distressed or Grunge Background Designs in Silhouette Studio HERE

Additional Resources:

Supplies Used:

Project #2 – Sublimation Journal Cover

What started out as a sublimation tumbler idea, morphed into a sublimation journal cover project instead. I could not think of what I wanted to put as a saying onto a tumbler and while I was stumbling over that, I kept walking by these sublimation journals that I had ordered several weeks back.

Sublimation Journal Design with Clik Chic Designs Watercolor background pattern

Sometimes when the original project does not turn out, the next one is even better than you could imagine. I love these journal covers!

Additional Resources:

Supplies Used:

Project #3 – Eclipse Cards

Have you tried the eclipse card design? While it can be difficult to photograph, it can have a big WOW factor in person.

Eclipse Card with Watercolor Printable Background with Silhouette

When assembling the design you can use foam tape to either bump up the letters cut out or the background. Each can have a unique look to it.

Creating an eclipse Card with Silhouette

Play around with different design ideas and see what you like best.

Additional Resources:

Supplies Used:

Project #4 – T-shirt Design using Siser EasyColor DTV

Printable patterns can be used for all kinds of projects, including printable HTV. Siser EasyColor DTV is real HTV that can be used with an inkjet printer.

Printable Background Pattern using Siser EasyColor DTV with Clik Chic Design Background

I have had great success with the Siser EasyColor DTV and I would contribute that to following the printing and care instructions exactly. I have shirts that still look fantastic that I made when it was first released in August 2022.

In the video, Design with Pattern Fill: Silhouette Studio Tips for Stunning Results, I showed exactly how I created this design and you even get to see a little bit of troubleshooting LIVE while I tried to figure out what I was doing wrong and how I fixed it.

Additional Resources:

Supplies Used:

Project #5 & 6 – Sublimation Coaster, Earrings & Necklace

I had a misprint when I first did the sublimation print for the journal and I had a line of “tiling”, which is a sharp distinct line in the actual printout and would not look good on my finished project. I explained about this and showed exactly what it looks like in the YouTube video HERE.

But, I wasn’t just going to throw away the printed sublimation page. I can use it for other projects! So I started digging in my sublimation blanks to see what the design would fit completely on. The coaster was the perfect fit and now sits on my desk too!

Sublimation Coaster with Printable Background from Clik Chic Designs

For the photo, I paired it with a tumbler that I use all the time from a previous class on creating your own custom designs.

Sometimes mistakes can be a good thing!

Next, I took a few more sublimation blanks and made some earrings and a necklace pendant from the extra pieces of the mistake sublimation print.

Sublimation Earrings and Necklace with Background Pattern by Clik Chic Designs

I don’t even want to admit how many pieces of sublimation printed designs I have just hanging out waiting for the perfect blank. Shhhh…. we won’t talk about it.

Additional Resources:

Supplies Used:

I had so much fun crafting projects with the watercolor grunge background this month and still lots more ideas for future projects too!

Find more amazing designs by Clikchic Designs at:

Follow along with Clikchic Designs on their website, Facebook, and Instagram too!

A great big thank you to Clikchic Designs for contributing the free file for the Silhouette Secrets+ newsletter for the month of July! If you missed grabbing the free Watercolor Grunge Background, it is available in the Silhouette Design Store HERE.

This year I started offering a free file each month for Silhouette Secrets+ newsletter subscribers. I love designing in the Silhouette Studio software and have shared some of my creations as well as look forward to collaborating with more artists in the future too!

Silhouette Secrets+ Newsletter

Never miss out on the news, tips, “secrets”, deals, classes, and more that I share on Silhouette Secrets+. Sign up for the newsletter and get information delivered to your inbox every Friday.
Unsubscribe at anytime.

Sign up for the weekly newsletter HERE to have information delivered direct to your inbox and grab each month new freebie.

I hope this has given you some ideas on how one file can lead to many different projects!

Save this for future reference by pinning the image below.

Multiple projects created with a watercolor grunge background in Silhouette Studio

Enjoy !

THANK YOU for your support! How can you help? Click HERE & buy a coffee.
Every little bit helps with the cost of running the site.

Silhouette Classes

Never stop learning! Let me help you take the anxiety out of learning with Silhouette and get to creating faster! My Silhouette classes are heavily focused on software, so you can take the skills & techniques taught and apply them to many future projects!

Silhouette step-by-step Classes by Silhouette Secrets+

Silhouette Secrets+ with EllyMae
**This post may contain affiliate links. What that means is that I may receive compensation if you purchase through the links I have provided. The price you pay for the product or service is not higher but I may get compensated for sharing.
Posted on Leave a comment

Sparkle and Shine: Creating Personalized Sequin Pillowcases with Artesprix Paints

Artesprix Sublimation Sequin Pillow with Heat Resistant Transfer Mask
Silhouette Secrets+ with EllyMae

Join me in creating a custom pillowcase that sparkles and shines! With the Artesprix Sublimation Sequin Pillowcase and the Artesprix Heat Resistant Mask, this project is not only fun but also easy to personalize. Using the Silhouette Cameo 5, I cut out a design that bring a unique flair to the pillowcase.

Sublimation Sequin Pillow Case with Artesprix Sublimation Paints and Heat Transfer Resistance Mask

Affiliate links may be present in the following blog post and as an Amazon Associate I earn from qualifying purchases.

Watch how you can make your own custom creation with the Artesprix Sublimation products in the new tutorial HERE on the Artesprix YouTube channel.

Supplies used for Sequin Sublimation Pillow Case:

Here is a list of the supplies I mentioned and demonstrated in the new YouTube video:

Artesprix Sublimation Sequin Pillow Case with Heat Resistant Transfer Mask

Find more ideas on creating with the Artesprix Sublimation Sequin Pillow Case HERE.

Let your imagination go and see what you could create to add some sparkle to your space! Find more projects I’ve created using the Artesprix sublimation products HERE.

I’ll be sharing more so make sure to follow Artesprix on social media to see more projects!
YouTube channel
Blog
Facebook Page
Iron-on-Ink Inspirational Facebook Group

Save this for future reference by pinning the image below.

Sublimation Sequin Pillow Case Artesprix Heat Transfer Resist Mask


Want more creative ideas using the Artesprix sublimation products?
Check out all other projects HERE.

Grab some Artesprix sublimation products and get to creating today!

Enjoy !

THANK YOU for your support! How can you help? Click HERE & buy a coffee.
Every little bit helps with the cost of running the site.

Silhouette Classes

Never stop learning! Let me help you take the anxiety out of learning with Silhouette and get to creating faster! My Silhouette classes are heavily focused on software, so you can take the skills & techniques taught and apply them to many future projects!

Silhouette step-by-step Classes by Silhouette Secrets+

Silhouette Secrets+ with EllyMae
**This post may contain affiliate links. What that means is that I may receive compensation if you purchase through the links I have provided. The price you pay for the product or service is not higher but I may get compensated for sharing.
Posted on Leave a comment

Amazon Prime Day Deals 2024

Amazon Prime Day Deals
Silhouette Secrets+ with EllyMae

Affiliate links may be present in the following blog post and as an Amazon Associate, I earn from qualifying purchases.

The 2024 Amazon Prime Days are here!

I’ll be sharing more deals throughout the entire sale as I find them in my Amazon Storefront HERE.

I’ve found a few deals on Silhouette machines too!

Silhouette Cameo 5 Bundle

Silhouette Cameo 5 – Black Bundle – click HERE

Silhouette Cameo 5 - White bundle

Silhouette Cameo 5 – White Bundle – click HERE

Silhouette Cameo 5 - White

Silhouette Cameo 5 – White – machine only – click HERE

Silhouette Curio 2

Silhouette Curio 2 – click HERE

I’ll be adding more deals I find to the Silhouette Secrets+ Prime Day list in my Amazon storefront. Check it out HERE.
Deals change quickly during the Prime Days.

And one more deal I want to share. Siser has teamed up with Creative Fabrica for Christmas in July.

Creative Fabrica and Siser team up!!!

Christmas in July is back and Siser has teamed up with Creative Fabrica to offer a free gift along with the Creative Fabrica subscription.

Check it out HERE.

Creative Fabrica Christmas in July Siser

I am not normally a big subscription person, but I have to say that I have gotten a lot of use out of my Creative Fabrica subscription.

Grab this deal or extend your subscription during this promotion HERE. And then make sure to fill out the form to grab you free gift HERE – mine arrives quickly.

Enjoy !

THANK YOU for your support! How can you help? Click HERE & buy a coffee.
Every little bit helps with the cost of running the site.

Silhouette Classes

Never stop learning! Let me help you take the anxiety out of learning with Silhouette and get to creating faster! My Silhouette classes are heavily focused on software, so you can take the skills & techniques taught and apply them to many future projects!
Silhouette step-by-step Classes by Silhouette Secrets+

Silhouette Secrets+ with EllyMae
**This post may contain affiliate links. What that means is that I may receive compensation if you purchase through the links I have provided. The price you pay for the product or service is not higher but I may get compensated for sharing.
Posted on Leave a comment

Custom Water Bottle with Artesprix Sublimation Inks

Artesprix Sublimation Ink - Custom Water Bottle
Silhouette Secrets+ with EllyMae

Join me as I share how you can take a few stamps and create a custom water bottle using the Artesprix sublimation inks.

Custom Sublimation Water Bottle with Artesprix Sublimation Ink

Affiliate links may be present in the following blog post and as an Amazon Associate I earn from qualifying purchases.

Watch how you can make your own custom creation with the Artesprix Sublimation products in the new tutorial HERE on the Artesprix YouTube channel.

Supplies used for Custom Water Bottle:

Here is a list of the supplies I mentioned and demonstrated in the new YouTube video:

Artesprix Sublimation Water Bottle with Inks

Find more ideas on creating with the Artesprix Sublimation Water Bottle HERE.

So much fun to create this custom water bottle! And I have more to share too! Find more projects I’ve created using the Artesprix sublimation products HERE.

I’ll be sharing more so make sure to follow Artesprix on social media to see more projects!
YouTube channel
Blog
Facebook Page
Iron-on-Ink Inspirational Facebook Group

Save this for future reference by pinning the image below.

Sublimation Water Bottle with Artesprix Inks


Want more creative ideas using the Artesprix sublimation products?
Check out all other projects HERE.

Grab some Artesprix sublimation products and get to creating today!

Enjoy !

THANK YOU for your support! How can you help? Click HERE & buy a coffee.
Every little bit helps with the cost of running the site.

Silhouette Classes

Never stop learning! Let me help you take the anxiety out of learning with Silhouette and get to creating faster! My Silhouette classes are heavily focused on software, so you can take the skills & techniques taught and apply them to many future projects!

Silhouette step-by-step Classes by Silhouette Secrets+

Silhouette Secrets+ with EllyMae
**This post may contain affiliate links. What that means is that I may receive compensation if you purchase through the links I have provided. The price you pay for the product or service is not higher but I may get compensated for sharing.
Posted on 3 Comments

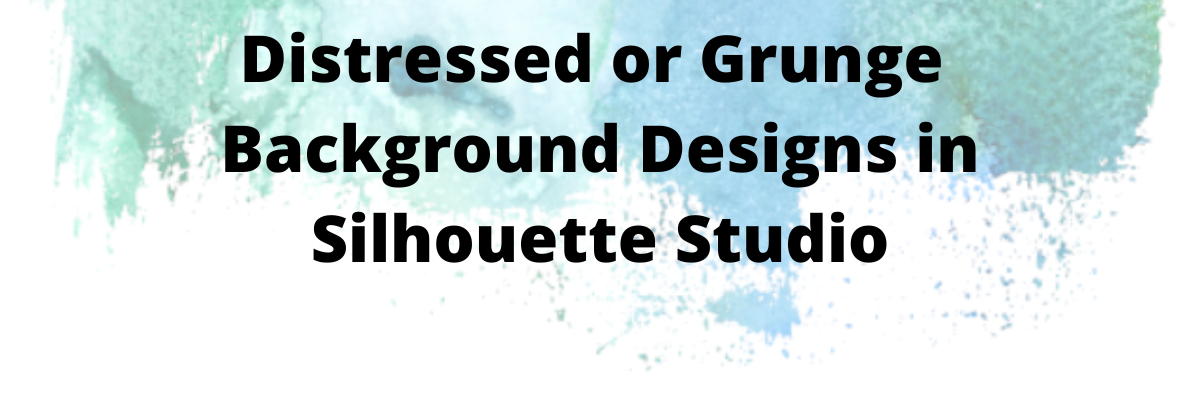
Distressed Background Designs in Silhouette Studio

Distressed Backgrounds in Silhouette Studio
Silhouette Secrets+ with EllyMae

Have you ever wanted to have distressed background or edges on a pattern or photo? While Silhouette Studio does not have the same tools as a graphics program like Photoshop does, there are still ways you can get distressed or grunge edges in the Silhouette Studio software.

Affiliate links may be present in the following blog post and as an Amazon Associate, I earn from qualifying purchases.

Recently I was creating a bundle of 20 cards for a card swap that I signed up for through Erin Reed Makes and saw an idea to create 6 card backgrounds from 1 sheet of 12″ x 12″ paper on Pinterest. It was a distressed background with white space left for additional elements to be added to the card front.

Silhouette Printed Pattern with Distressed Background Card Backgrounds

Now, these distressed designs are not ideal for cutting as they are quite detailed, but they are awesome for print projects, like creating card backgrounds, sublimation, or other printed projects.

I grabbed some clipping mask png files from ClikChic Designs on Etsy and created exactly what I wanted. But, I knew it could be easier or more available to Silhouette users, so I reached out to ClikChic Designs and we started working together testing some designs and I’m excited to say there are a few in the Silhouette Design Store! If this is a popular idea, you may see more too – so make sure to leave a comment below so we know if you like this style of designs.

Let’s take a look at how I created this distressed background pattern in Silhouette Studio.

Distressed Background Designs in Silhouette

Open Silhouette Studio and set up the page size for your printer.

If you don’t have the capability to print a 12″ x 12″ sheet of paper, don’t let that stop you. This could be done with whatever size you can print on to create projects with.

Open the distressed design and scale it to the size you want to fill as much of the page as you want.

This is called Grungy Ink Clipping Mask or Border by Clikchic Designs – Design #368071 or you can grab Dry Paint Grunge Clipping Mask Frame or Border by Clikchic Designs – Design #368127

Open Distressed Design in Silhouette Studio

A .studio file, which is what is in the Silhouette Design Store or a .svg file is a cut file. This means that you can add patterns to the design. If you open another file type such as a .png or .jpeg, you would need to do additional steps to work with that file. (See below for additional information)

**Currently as I type this, you will need to download these files direct to your computer to use as the library syncing is broken – click HERE for how to do that.

If the pattern is outside Silhouette, drag it from the My Computer folder location and hold it over top of the design. The design will fill with that pattern.

Drag Pattern to Design in Silhouette Studio

If you move too fast doing this step, it may not work or you may end up with a small square that won’t disappear without closing the software to reset it. Go slow and hold that pattern on top of the design in Silhouette Studio until it fills the shape.

Patterns from the Silhouette Library could also be used as well. For more on Patterns in Silhouette, check out these tutorials HERE.

Next, change the Line Color to Transparent to see how the pattern will look. This step also ensures that the red cut border will not print.

Silhouette Studio Change Line Color to Transparent

The next steps would depend on what project you are working on. I printed the design on a 12″ x 12″ sheet of Recollections cardstock.

Silhouette Printed Background Cardstock

Then I used my paper trimmer, cut the 12″ sheet at 6″ in the middle of the pattern and then again cut those sections down to 4″ widths. Once I had each section I could trim it down further to 4″ x 5.25″ for my card backgrounds.

Distressed background pattern cards with Silhouette

I added a stamped sentiment to the front and added some rhinestone gems to each card.

There are so many options! 6 card backgrounds from 1 sheet of 12″ x 12″ cardstock

Distressed Background Pattern Cards with Silhouette

Find more designs like this HERE.

A great big thank you to ClikChic Designs for working with me and the idea to make this style of designs easily available to Silhouette users. Check out their blog post for additional ideas on this technique HERE.

I have collected designs by ClikChic for awhile. And then I saw on their Instagram channel where they showed how they create their designs by hand painting them and then digitizing them. I was mesmerized. So make sure to check out their Instagram too!

For some additional ideas on working with distressed images, check out this blog post – 3 Ways to Distress Photo Edges in Silhouette Studio.

Save this for future reference by pinning the image below.

Distressed Backgrounds in Silhouette Pinterest

Enjoy !

THANK YOU for your support! How can you help? Click HERE & buy a coffee.
Every little bit helps with the cost of running the site.

Silhouette Classes

Never stop learning! Let me help you take the anxiety out of learning with Silhouette and get to creating faster! My Silhouette classes are heavily focused on software, so you can take the skills & techniques taught and apply them to many future projects!

Silhouette step-by-step Classes by Silhouette Secrets+

Silhouette Secrets+ with EllyMae
**This post may contain affiliate links. What that means is that I may receive compensation if you purchase through the links I have provided. The price you pay for the product or service is not higher but I may get compensated for sharing.