Posted on 3 Comments

Let’s Explore v4 – Designing with shapes Part 2

Last week, in Part 1 of Designing with shapes, we used the tools in the Silhouette software to draw an egg shape. Now, we will use those same tools to draw decorations for that egg.
Check out the previous post HERE to see 2 different ways to draw an egg shape.

Draw Oval copy

I had 3 eggs from the Easter Eggs by Echo Park – Design #187432, but I wanted another option. So I drew the zig-zag design inside the egg and created it to match the other eggs.

Easter Egg Design Store file copy

Just like in the last post, we will go through 2 ways to create this – with the Flexi-shapes  or by using the basic drawing tools.

First, let’s start by opening the egg file that we’ve created from Part 1.

In the original eggs, the design is offset internally from the outer edge of the egg.

Select the Egg design, click the Offset Panel, choose Internal Offset, and change the Distance to 0.80 inches.

Offset copy

The exact distance is a matter of personal preference, it will vary by the project you are creating.

We will be using the inner offset shape to create the design. Move the original egg shape off the design mat.

*Note: The line thickness of the designs has been increased to make it easier to see for the blog post.

Part 2 – Decorating the Egg 

Drawing with Flexi-shapes

Flexi-shapes are a newly released feature with the v4.2 software and are available if you have the Designer Edition Plus or Business Edition upgrade.
*check out the end of this post for a coupon code for the upgrades too!

The Flexi-shape option is in the toolbar on the left side of the v4.2 software.

Flexi shapes copy.jpg

Select the zig-zag option. Click on the design mat to start the shape and then move the mouse to where you want it to end and click again.

Adjust the Flexi-shape by using the slider bar in the middle to increase or decrease the number of  points in the zig-zag. Use the red dots to adjust the width of the the zig-zag.

Once you are happy with the design, right click and choose Convert to Path. This will change the design from an editable shape to a fixed shape.

Now, to fill the egg, either continue drawing more zig-zag patterns or copy and paste the zig-zag to fill the rest of the egg.

Zig Zag copied copy

My favorite way to copy and paste is to hold down the Alt button on the keyboard and click and drag a copy away.

To space the zig-zag pattern evenly, select all the zig-zags & use the Align option – vertical spacing that is found either in the QAT (Quick Access Toolbar) or under the Transform Panel – Tab 1.

Align option copy

Once the zig-zags are spaced how you like, right click and choose Group.

Now, make a copy of the entire design and move it off the design mat. This way there is an original to go back to if needed.

Select both the egg shape and the zig-zag shape, open the Modify Panel, choose Crop.

Modify Panel copy.jpg

Group all the pieces together before clicking off the design.

If there is a stray part of the design that you see, delete that before grouping.

Stray copy.jpg

Move the original egg shape back and then use the Center Align tool to center the zig-zag on top of the egg.

Center Egg copy

You have just created your own design to cut out of any colors you want using the Flexi-shape option.

Do you want to get the vinyl lined up exactly?
Check out this post – Layering Vinyl – to find out more on using layering marks.

Using the Drawing Tools to create the egg decoration

For those that do not have v4.2 or the Designer Edition Plus or Business Edition upgrade, let’s use the drawing tools and make the egg decoration.

Start with the inner offset egg shape.

On the Page Setup Panel – Tab 2, check the Show Grid & Snap to Grid options.

Choose the Draw Polygon tool on the left side. Click onto the design mat and start drawing the zig-zag shape. With the Snap to Grid option turned on, it will snap the points to each grid spacing as you move the Polygon tool.

Draw Polygon copy

Continue drawing the polygon until you get back to the starting point and then connect the dots.

Edit points copy

Once the polygon shape is closed, changes can be made by double clicking on the shape and bringing up the edit points. Each of these points can be selected and moved. To select multiple points at the same time, hold down the Shift key and click on the points or left click on the mouse and drag the cursor across the edit points to select any that are enclosed in the selection box.

Turn off the Snap to Grid & Show Grid options under the Page Setup Panel – Tab 2, if you choose to. I prefer to design without all the distraction of the lines, unless I need something to be exact and then I turn them on.

Make copies of the zig-zag pattern and fill the egg.

Draw - Align vertical copy

Select all of the zig-zag designs, then use the Vertical Spacing Alignment tool to space the design evenly vertically.

Group the zig-zag pattern together.
To group the design – select all the zig-zag designs, right click and choose Group or use Ctrl + G as the keyboard shortcut (Command+G = MAC).

Group copy

Now, make a copy of the entire design and move it off the design mat. It is always a good idea to have a copy of the original of any design or font to go back to, in case you have to start fresh.

Select both the egg shape and the zig-zag shape, open the Modify Panel, choose Crop.

Draw - Modify - crop copy

With all the pieces selected, right click and choose Group.

Move the Original egg shape back onto the Design mat and use the Align Center tool to line the egg with the pattern.

Draw - Align Center copy

And that is how I created my own chevron patterned egg for the door decor.

Eggs photo

While I could have just found another egg design to buy, drawing my own means it is my own creation. The Silhouette software is such a powerful graphics program, you are only limited by what you know how to do. The more you use these tools, the quicker it will become to create your own designs.

I would highly recommend upgrading the software to the full Business Edition upgrade to have the full power and all the features that the Silhouette software has to offer.
I think it is a great investment and I love not having to question if something is available to me.

Use my code SECRETS10 to save on the Software upgrades from Swing Design.

Software upgrades copy

*Prices in photo above are current as of 4-17-19

Want to know what features are unlocked with each upgrade?
Check out this comparison chart at Silhouette America HERE.

I love being able to customize and change things around. My kids love that I can create different scenes for them, birthday gifts, or almost any other thing they can imagine.
They are already thinking up ideas on how to decorate the skeleton after Easter.

Silhouette_Secrets_skeleton

What designs can you think to create today?

Feel free to post your comments and questions below or on my Facebook group at Silhouette Secrets with EllyMae.

Enjoy!

SS_Signature copySS Logo snip it

**This post may contain affiliate links. What that means is that I may receive compensation if you purchase through the links I have provided. The price you pay for the product or service is not higher but I may get compensated for sharing.

Posted on 3 Comments

Let’s Explore v4 – Designing with shapes

In October of 2018, I put up a vinyl skeleton on our front door. After Halloween, my kids & husband asked me to leave it up because they thought it would be fun to decorate all year long.
They tell me the ideas that they would like to accessorize the skeleton with and I cut and apply it from vinyl.

Silhouette_Secrets_skeleton

While I was cutting the eggs for the door, I had 3 shapes from the Silhouette Design Store but I wanted a fourth egg with a different design.

With the Silhouette software and the tools in it, you can create pretty much anything you can imagine.

Part 1 – Drawing the Egg

Let’s start with the egg shape.

Now, the easiest way would be to use the Flexi-shapes with the v4.2 software. But, we will discuss both ways.

Drawing with Flexi-shapes

Flexi-shapes are a newly released feature with the v4.2 software and are available if you have the Designer Edition Plus or Business Edition upgrade.

The Flexi-shape option is in the toolbar on the left side of the v4 software.

Flexi shapes copy

Check out all these shapes!

Flexi shapes 2 copy

Click on the oval shape and then click and drag the mouse on the design mat.

Egg flexishape copy

To adjust the shape after the original drawing, grab one of the white circles and move it. The shape will adjust as these points are moved.

Once the shape is to your liking, right click on it and choose Convert to Path.

Convert to Path copy

Now, that is one way to get an oval shape.

Using the Drawing Tools to create shapes

For those that do not have v4.2 or the Designer Edition Plus or Business Edition upgrade, let’s use the drawing tools and draw an egg shape.

Since the egg is wide at the bottom than at the top, I am going to use 2 shapes.
First, on the left toolbar, select the Draw Ellipse tool.

Draw Ellipse tool copy

Hold down the Shift key and drag the mouse to draw a perfect circle.

Choose the Draw Ellipse tool again and draw an oval.

Draw Oval copy

Select both the circle and the oval, using the Transform Panel – Align Tab to align the horizontal centers.

Align Oval copy

Then right click and choose Weld.

Weld copy

Next, double click on the welded shape and this will bring up the edit points. By deleting a few edit points we can change the shape of this design.

Delete Edit points copy

Alter the edit points to achieve the desired effect.

Delete Edit points2 copy.jpg

Still not the exact shape or as symmetrical as you’d like? Take it one step farther.

Alignment for knife copy

Open the Page Setup – Panel Grid Options.
Move the oval shape so that the top bounding box is centered on one of the grid lines.
Click on the Knife Tool on the left tool bar.
Make sure the Solid option is selected in the Quick Access Toolbar at the top left.

Knife tool copy

Hold down the Shift key and draw a line from the top to the bottom on the grid line with the bounding box.

Select the right side of the oval and delete it.

Open the Replicate Panel. Select the left side of the oval and choose Mirror Right.

Replicate Panel copy

Select the right side and press the left arrow key 1 time. This will move the design slightly so it is overlapping the left side of the oval.

Select both sides, right click and choose Weld.
The weld option can also be found under the Modify Panel on the right side too.

Weld2 copy

Now you have a symmetrical shape.

This can be done with all kinds of designs. You can create and draw anything in the software by breaking it down into basic shapes or using the Flexi-shapes.

How about a heart? Draw your own with 2 circles & a square and then edit using the same techniques listed above or use the Flexi-shape if available.

Heart shape copy

Or a flower?
Draw an oval and use the Advanced Replicate Panel to replicate and rotate the oval.
I chose 8 copies and 30 degrees for the rotation.

Flower copy

In the next blog post, we will take a look at how to create shapes to decorate the egg.
Part II – Decorating the Egg Shape

Eggs photo

What will you use the software to draw and experiment with today?

Feel free to post your comments and questions below or on my Facebook group at Silhouette Secrets with EllyMae.

Enjoy!

SS_Signature copySS Logo snip it

**This post may contain affiliate links. What that means is that I may receive compensation if you purchase through the links I have provided. The price you pay for the product or service is not higher but I may get compensated for sharing.
Posted on 9 Comments

Let’s Explore v4 – Warp Templates

The warp templates area new to the v4.2 software release. They are available with the Designer Edition upgrade or higher and a version higher than v4.2.279 of the Silhouette software.

To update the Silhouette software version, I would highly recommend going to the Silhouette website and downloading the update direct from there.

Before updating the software version, I would highly recommend making a backup of the library. You can find more details on the Silhouette library for versions before v4.2 in this post – Let’s Explore v4 – Silhouette Library Tips.

Warp Templates

The warp templates are found under the Warp Panel on the right side. Depending on your screen size, you may have a pop out menu or you may see the full list of panel icons on the right side.

Warp Panel copy

In the left photo, you will see the fly out menu for a smaller screen and on the right side, you will see the full panel list expanded. Again, this is dependent on screen size.

There are 6 different options for Warp Templates.

Here are the first 3 on the left side of the Warp Panel.

Warp first 3 shapes copy

And here are the 3 templates from the right side of the Panel.

Warp last 3 shapes copy

The templates can be used as is or you have even more options to customize the text.

Points copy

By grabbing and moving the points, you can edit the text even further.

Move points copy

Another tool that would come in handy here is the Snap to Grid feature. Most times when I use the software, I like the freedom to move my design freely and in small increments.
With the Snap to Grid option, it will move to the next grid space measurement that you have selected. This can help in aligning the points of a warped shape.
For instance, if you move the left bottom point and you want to make sure that you move the right bottom point so it’s perfectly aligned.

Snap to Grid option copy

Open the Page Setup Panel – top right icon. Click on the 2nd tab at the top to bring up the Grid Options.

Check the box next to Show Grid and Snap to Grid. Now, when the orange points are moved, they will snap to the grid spacing.

I love letting the software do the work for me!

At this point, the text can still be changed by double clicking in it to get the text cursor.

Change text copy

When you are satisfied with the changes to the text, then choose the Release Warp option and it will change it take it out of the Warp edit.

Release Warp copy

Notice that it separates each letter and you will need to group the design back together for it to move as one object.

If the changes are not what you had in mind, choose the Restore Original Shapes option and the text will revert back to the original design.

Restore original copy

And there is more!!!

Grab the slider on the right side of the panels and it reveals more Warp Template options.

Slider more options copy

So much fun to play with all the options available to you in the software.

Left side 2 copy

Right side 2 copy

Now, what are some ideas that you can think of to create Word Art with these Warp Templates?

Final copy

Feel free to post your comments and questions below or on my Facebook group at Silhouette Secrets with EllyMae.

Enjoy!

SS_Signature copySS Logo snip it

**This post may contain affiliate links. What that means is that I may receive compensation if you purchase through the links I have provided. The price you pay for the product or service is not higher but I may get compensated for sharing.

Posted on 7 Comments

Let’s Explore v4 – Text to path

Text to path

*created in version 4.2 of the Silhouette software

Let’s explore how to take ordinary text and make it more interesting by adding it onto a path. The most common way I see this used is when you want the text to form to a circle or oval shape.
But why stop there? You can add text onto so many other paths.

Text to Path photo copy

Let’s take a look at how to do this.

Click on the Text tool on the left side, then click on the mat to get a text cursor and type out the text.

Text to Path 1 copy

Next, I fill my text with color using the Fill Color Panel on the right side. This helps to see the text better and select the object easier.

Then, click on the Text Style Panel on the right side and change the text style.

Now, draw the shape that you want the text to snap to. Let’s start with an oval, since this is the most common shape I see users try to use.
Note: I have increased the Line thickness so that you can see my shape easier.

Text to Path on circle copy

Double click on the text and a control point will appear in the bottom left corner.
Note: if the text has been changed in any way, such as welding or converting to path, it is no longer editable text and this will not appear.

Text to Path Circle2 copy

Grab the control point and drag it to the object you want it to conform to.

When the text snaps to the shape, a slider bar will appear on the left side and the text can be adjusted.

Text slider out copy

Moving the slider up on the bar, moves the text out away from the shape.

Text Slider in copy

Moving the slider down on the bar, moves the text inside of the line of the shape.

Make any additional changes to the text, such as increasing the character spacing, etc.

If you have a script text, right click and choose Weld.

Weld copy

This will weld any overlapping letters and then release the font from the shape.
Now, keep in mind that the text is no longer editable once it is welded. Make a copy and pull it to the side if you want to keep the original text to go back to.

Each font style is going to look different and you may need to adjust the character spacing on the Text Style Panel to make it overlap so it welds.

If the text is not overlapping, right click on the text and choose Convert to Path.

Convert to path copy

This will release the font from the shape.
Now, the text is a design and no longer editable text.

This is an important step, especially if you are cutting the design from HTV and need to flip the image before you cut. If the text is not converted to a path, it will not flip correctly.

Flip Horizontally copy

Now, if that ever happens, you know why and how to fix it.
Make sure to convert to path or weld before you flip the design.

Now, let’s play with some shapes.

In the newly released v4.2 software, there are Flexi-Shapes on the left tool menu. I chose the star and then changed the points to 5.

Flexi Shapes copy

I have increased the Line thickness again, so it can be seen better.

Now, type out the text.

If the text does not fit on one line, grab the teal slider bar on the right side and move it farther right, until all the text is on one line.

Text expansion copy

Now, grab the control point that appears in the bottom left corner of the text box and drag it to the shape. Move it around the shape until you have it how you like.

Twinkle star control point copy

Each font and shape will vary in what looks better or if it splits words, etc. Play with the character spacing, the text size, and more until the desired look is achieved.

Want the text on a wave?

Use the Draw Curve Shape tool on the left side and draw your wave.

Text to wave copy

Type out the text, grab the control point in the bottom left, and drag to the wavy line.

Text to wave2 copy

When it’s positioned how you like, right click and choose Convert to Path. Now, the line can moved away.

Wave finished copy

Now, what can you think of to create with the Text to Path feature?

What about adding to a pre-made design to personalize it?

Granny design copy

Up Up Away copy

Or inside a banner?

Happy Birthday Banners copy

A design for a card or a sign on a wall?

Welcome Little One copy

Each one of these shapes works a bit differently and you will need to play with it to see how the Text to Path snaps to the image.

Don’t forget to make a copy of the design before right clicking on the image and choosing Convert to Path.

Text To Path

I would love to see what you create with this feature!

Designs used in the examples are from the Silhouette Design Store:
Heart Arrow by Sophie Gallo – Design #177769
Hot Air Balloon by Rhonna Farrer – Design #182992
Banner by American Crafts – Design #19529
Banner by Skyla Design – Design #267349
Basic Banner by Silhouette – Design #141887
Baby Footprint Heart by Studio Illustrado – Design #198883

Feel free to post your comments and questions below or on my Facebook group at Silhouette Secrets with EllyMae.

Enjoy!

SS_Signature copySS Logo snip it

**This post may contain affiliate links. What that means is that I may receive compensation if you purchase through the links I have provided. The price you pay for the product or service is not higher but I may get compensated for sharing.

Posted on 2 Comments

Let’s Explore v4 – Image Effects

Image Effects Panel in Silhouette Studio v4

Did you know there are a lot of options to change the Image Effects
in Silhouette Studio v4?

Under the Image Effects Panel on the right side, there are many options that include:
– Grey Shade
– Colorize
– Contrast, Brightness & Saturation
– Gamma
– Invert
– Sepia
– Tint
– Shadow

Panel copy

Let’s take a look at what each of those options means.

Grey Shade

Select the design by clicking on it and then move the slider to the right or increase the numbers to adjust the grey in the photo.

Here is the original graphic at 0% grey shade

Grey Shade copy

As the number is increased, the colors are muted and turn grey.
Here is at 50% grey shade

Grey Shade 50 copy

And here is 100% grey shade, which turns the entire image black and white.

Grey Shade 100 copy

Colorize

Increase the slider to change the colors in the design. There are so many options with this and you can alter the image to your liking.

Hue 50 copy

Look at the difference in this image with only changing the Hue to 50%.
Wow – I kind of like that!

How about Hue at 70%

Hue 70 copy

So many ideas! You could change your craft room colors anytime you want and have the same graphic for decor, just by changing the Image Effects.

Contrast, Brightness, & Saturation

Adjust each one of these from zero for many different effects.

Contrast copy

If you don’t like what the result is, click on cancel and it will revert back to the original design. If you love the look, click on apply to keep the changes.

Gamma

This slider starts at 50.

Decrease the gamma to get bolder colors.

Gamma 19 copy

Increase the gamma to get lighter colors. This reminds me of a watercolor effect.

Gamma 79 copy

Like what you see? Click the apply button to keep the changes or cancel if you want to revert back to the original colors.

Invert

This effect flips the colors. So if the design was a white background, increase the invert will change it to black.

Invert 100 copy

That is pretty neat!
Click the apply button if you like it or cancel if you want to start again.

Sepia

Adjust the strength to change add a brown look to the colors.

Sepia 50 copy

This reminds me of an antiqued look.

Tint

Change the red, green or blue colors to achieve different results.

Tint copy

Shadow

Add a shadow to the design. Below I added a shadow to the text in the middle.
The shadow feature is available in the Designer Edition upgrade or higher.

Shadow copy

There are so many option such as adding a shadow, changing the color of the shadow, pan the shadow, releasing the shadow, or choosing to cut around the shadow.

Adding a shadow is a great feature for Print and Cut projects!

If you release the shadow, it then becomes a stand alone design and can be cut.

Wow! This software is amazing! I learn new things every time I play with it!

So here is the original image.

Original image copy

And here is the final image. I changed several things in the Image Effects panel until I had the look I liked.

Final design copy

And then I printed on my new Canon TS9521C printer that I am in love with.

IMG_8885 copy

My original plan was to print it on cardstock and put it in a frame. But, then I saw the Silhouette Printable Cotton Canvas and thought I’d give it a go.
I love it!

IMG_8887 copy

There are just not enough hours in the day to play with all the cool features in the Silhouette software!

SilhouetteSecrets+CraftLife_

The designs I used in today’s post are Painted Floral Square by Loni Harris – Design #139088 and Craft the Life You Love Phrase by Kolette Hall – Design #262129.

Image Effects

Pin this image to save for later.
Find me on Pinterest HERE!

I would love to see what you create – feel free to post on my Facebook group at
Silhouette Secrets+ with EllyMae.

Enjoy!

SS_Signature copySS Logo snip it

**This post may contain affiliate links. What that means is that I may receive compensation if you purchase through the links I have provided. The price you pay for the product or service is not higher but I may get compensated for sharing.

Posted on 1 Comment

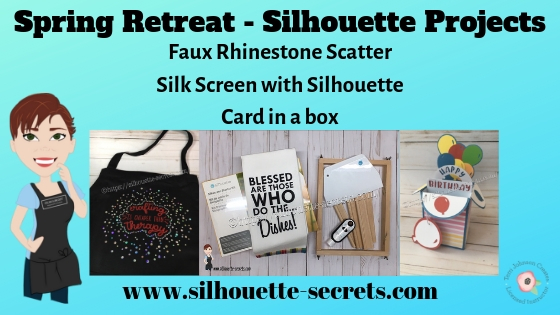
Silhouette Spring Retreat 2019

This past weekend I had the opportunity to teach at the Terri Johnson Creates Silhouette Spring Retreat. This was an intermediate level retreat and not only did the attendees learn lots of new things, but I learned from both the attendees and my colleagues as well.

But, do you know what the most important part about the entire weekend was?
The people!

We had a fabulous time learning, creating, and laughing through the entire weekend!

The time goes so fast and the hardest part for me is getting photos of things.
But, here are a few I managed to snap before it was over.

Every single time I tell myself that we need to take photos on the first day when we are all refreshed and every time it is always on that last day after we have been learning new things and staying up late chatting.
The first day there are many new faces, but by the 3rd day so many new friendships have been formed. I almost think, even if we look tired, those are still our best photos and there are finished projects to show as well.

The first class I taught was how to create a Faux Rhinestone scatter with Siser Holographic HTV & Siser Red Glitter HTV that was applied to a black apron.

Silhouette-secrets.com

For this design we started with a Silhouette Design Store file – Crafting is Cheaper than Therapy by Sweet Afton – Design #206867 and created several offsets using the Offset Panel. Then we used the Rhinestone Panel, which is available with the Designer Edition upgrade or higher to create our rhinestone pattern.

This project was very interesting to create and took quite a bit of testing to get the scatter to be random instead of a set pattern.

Thank you to our sponsors for this Faux Rhinestone scatter project!

The next project I taught was a card in a box project. Every user comes from a different background, so for many cutting paper was something new for them.
I started as a papercrafter with the Silhouette, so I always love to pass on my tips and tricks for working with paper to others.

Silhouette-secrets.com

For this project, I showed the attendees how to open and work with a paper piecing file from the Silhouette Design Store. We used the Happy Birthday Balloons Card in a Box by Suzanne Cannon – Design #256894.

They used the Fill Color Panel, Replicate Panel and the Reveal mat option on the Page Setup Panel to position this design and cut multiple colors out on one cutting mat at the same time.

I use this method for almost all projects whether it is cardstock or vinyl. I find that it saves time and also saves the adhesive on my mat. Since I am not putting down a full sheet of material on top of the mat and then peeling it off, the adhesive remains sticky longer in the areas not used as much.
For more tips on extending the life of your cutting mat, check out this blog post HERE.

This was the first pieces that we cut.

IMG_8322 copy

And this is how it was set up on the Silhouette virtual cutting mat in the software.

Matching colors copy

After cutting the white and blue pieces of the design, we moved those off the mat and positioned the other pieces onto the mat, using the grid revealed on the Page Setup Panel.

Cutting mat 2 copy

Then we placed the colored cardstock on the mat in the same locations as it shows on the software and sent a second mat through to cut.

IMG_8323 copy

Now, all the pieces are cut in only 2 times loading into the machine and this fabulous card is ready to assemble.

IMG_8324 copy

We used Close to My Heart cardstock and patterned papers to complete this project. When cutting cardstock, the quality of the cardstock makes a big difference. I love using the Close to My Heart brand or the Michael’s Recollection cardstock. They both cut very well.

A big thank you to Silhouette America, Inc., for providing the Happy Birthday Card in a Box file for the attendees.

And the third project I taught was the Silk Screen with the new
Silhouette Silk Screen Starter kit.

Silk Screen kit

We used a free cut file from Cutting for Business called Blessed Are Those Who Do the Dishes and applied it to a hand towel.

Silhouette-secrets.com

Thank you to Silhouette America, Inc. for the Silk Screen and Christine with Cutting for Business for allowing me to use her file to teach this class.

I started working with the Silhouette silk screen kit when it was first released in Fall of 2018 and just like anything else, it takes practice. I encourage you to try it out and keep on trying with it. I love that the screen is HTV and is reusable, just wash and let it dry. Then when needed, assemble it back in the frame and apply your paint.
I am making a list of ideas for Christmas gifts this year.

And finally, I do have to share with you the shirt I made to wear on the first day of the event. If you have followed me for any time or see me post on Facebook, I troubleshoot a lot when users post an issue and the first question I ask is
“Can I see a photo of your blade installed in the machine?”.
While that might be annoying to some, it is one of the most important things to start with any time there is a cutting issue. I was talking with Terri at Terri Johnson Creates one day and she said, “You need a shirt.”, so I create one and used the Silhouette Printable Heat Transfer for Dark Fabrics.
It turned out great! I’ve made several more shirts with this product and am loving it!
And this photo is taken after it was washed and dried, no special treatment.

Silhouette-secrets.com

And guess what, I fixed a few gaps in blades this weekend too!

So a tip for any user, always start with the blade. No matter which Silhouette blade you are using, if there is a gap in it, it can create cutting issues.
All blades need to sit with the lip of the blade flush with the housing.

Autoblade with arrow - wm copy copy

The weekend was fabulous and even though you may feel tired by the end of the weekend, it is a refreshing tired and I get a sense of renewed energy being around other Silhouette users.

To keep up with events by Terri Johnson Creates, make sure to follow her blog HERE. There are still spaces left at the moment (it has sold out every time – so don’t wait too long) for the All Things Silhouette Conference in June in Peachtree City, GA outside of Atlanta, GA. It is the largest Silhouette conference in the U.S. and a great opportunity to learn from so many in the Silhouette Industry!
Find out all the details here – June All Things Silhouette Conference.

And new this year, there is a Pre-Day event with more hands on classes!
Join us for the Ultimate ATS Package!

Here is a short video showing a glimpse of the ATS conference – I get excited every time I see it.

https://vimeo.com/312305252

You can also check to see if there is a Terri Johnson Creates Licensed Instructor in your area that may host retreats, workshops or even one on one classes.

I would love to see what you create – feel free to post on my Facebook group at
Silhouette Secrets+ with EllyMae.

Enjoy!

SS_Signature copySS Logo snip it

**This post may contain affiliate links. What that means is that I may receive compensation if you purchase through the links I have provided. The price you pay for the product or service is not higher but I may get compensated for sharing.

Posted on 1 Comment

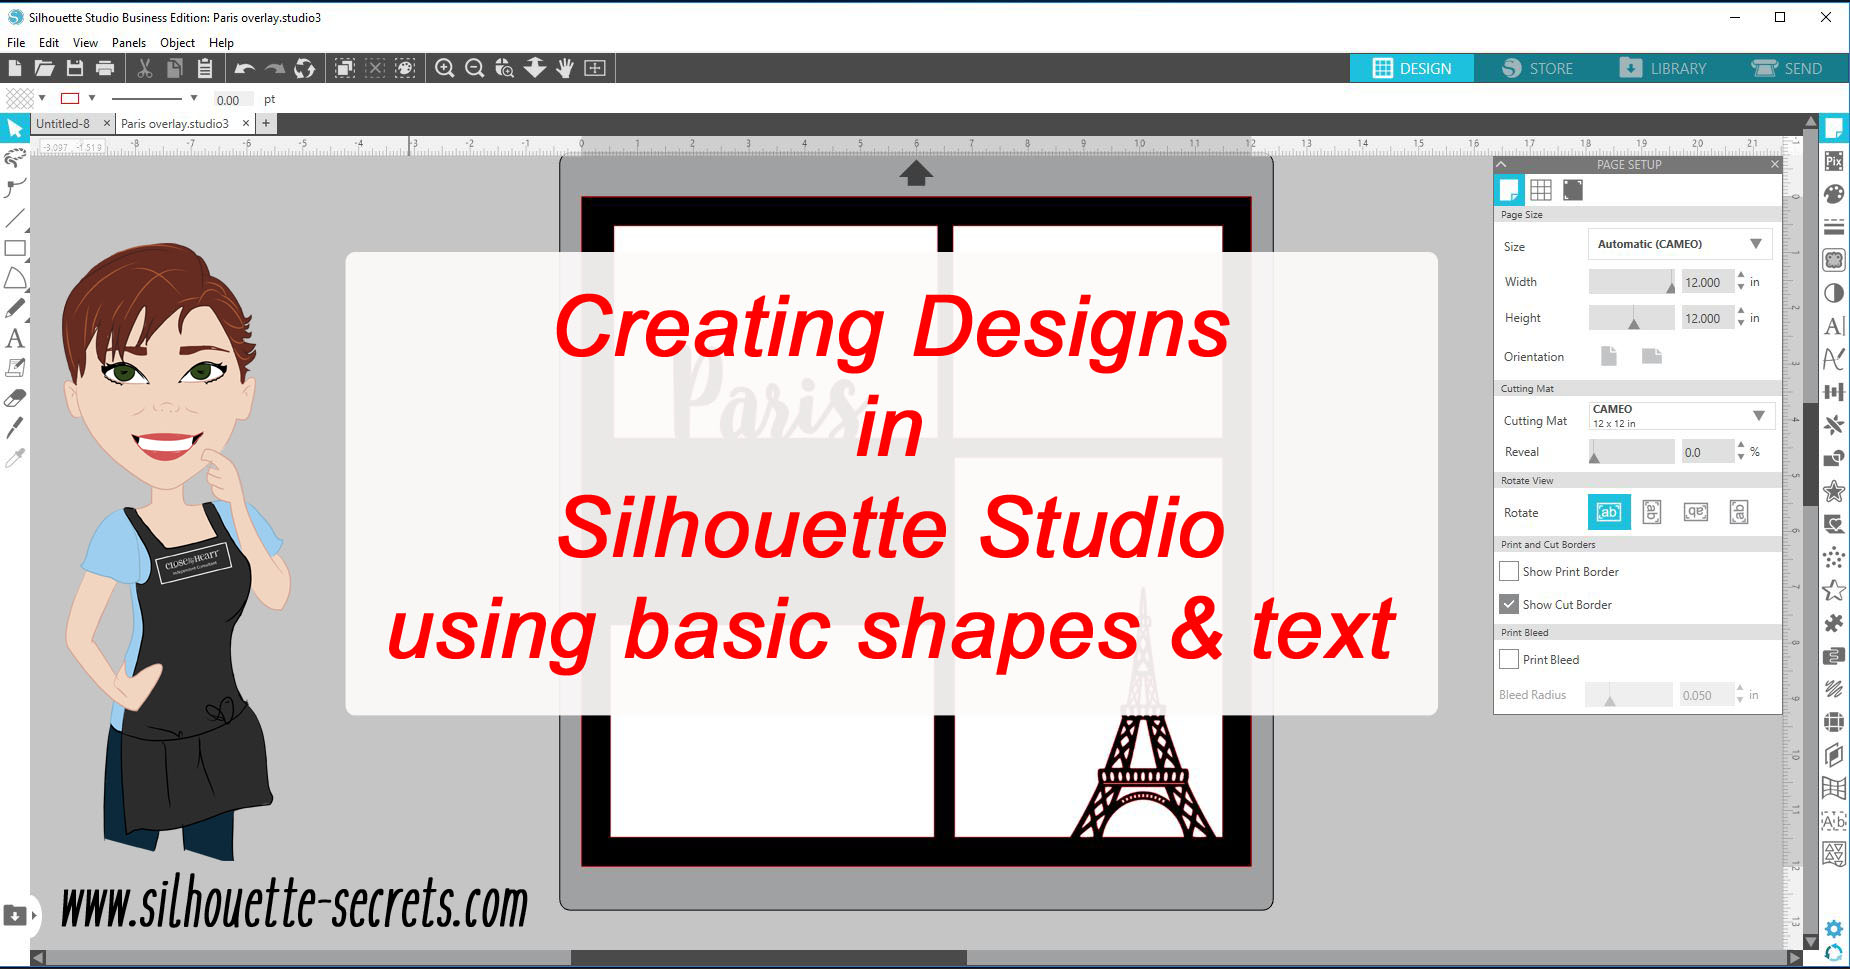
Creating designs in Silhouette Studio v4

This week let’s take a look at how to create your own design in the Silhouette Studio software using basic shapes and text.

We will create an overlay that could be cut out of cardstock or other materials. I most often see these at trade shows cut by big, fancy laser cutters.
But, why can’t you create your own?
You can!
With just a few basic shapes and tools, you can open up so many doors.

Paris Overlay demo copy

Let’s Explore how to create this overlay in the Silhouette Studio v4. 

Start by drawing a square using the Draw a Rectangle Tool on the left side.

Draw Rectangle copy

To draw a perfect rectangle, hold down the Shift key while drawing the shape.

Do not worry about drawing an exact rectangle dimension.
Use the Scale Tab (2nd tab) located under the Transform Panel on the right side, click on the lock to lock the Aspect so that the dimensions of the object change proportionally. Then type 12 inches in the width and hit enter.
Since the lock was closed, the height will automatically change keeping the proportion of the design.

Select the Square by clicking on it and then choose the Center to Page option. This is found in the QAT (Quick Access Toolbar) or under the Transform Panel – Align Tab.

Center to Page copy.jpg

Now, draw 2 more rectangles and resize them using the Transform Panel – Scale Tab to 3.8″ x 5.8″ and 4.8″ x 6.8″.
These are the sizes for a 4″ x 6″ and 5″ x 7″ photo, the overlay will overlap the photos by just a little bit when it sits on top of it.

Make a copy of the 3.8″ x 5.8″ rectangle and move it to the bottom left side.
My favorite way to make a copy is to hold down the Alt key and drag a copy off of the design.

Make another copy of the 3.8 x 5.8″ rectangle and move it to the top right corner. Resize this rectangle using the Scale Tab to 3.8″ x 5.8″.

Draw more rectangles copy

Next, use the Transform Panel – Align Tab to align the rectangles.

Align tool copy.jpg

Select the top right and bottom right rectangles, choose Align Right.
Select the top left and top right rectangles, choose Align Top.
Select the top left and bottom left rectangles, choose Align Left.
Select the bottom left and bottom right rectangles, choose Align Bottom.

Align options copy

For the next step, select all the rectangles including the 12″ x 12″ rectangle.
To select everything on the page, left click and drag the cursor across all the objects or on the keyboard hold down the Ctrl + A buttons.

 With all the rectangles selected, click on the Fill Color Panel and fill it with black.

Fill Color Panel copy

Now, what you have created is 4 rectangles on top of the 12″ x 12″ rectangle.

We are going to take those 5 separate objects and combine them into 1 object by making a compound path.

With all 5 rectangles selected, right click and choose Make Compound Path.

Make Compound Path copy

This combines those 5 objects into 1 layer.
Check out this post on Compound Paths for more information.

Make Compound path complete copy

With those basic shapes you have created the overlay base.
You can create any combination of layouts you want using any shapes you want for the overlay.

Now, let’s add a few more things to this.

Click on the Text Tool on the left side, then click on the design mat to get a text cursor and type “Paris”.
Click off of the text to deselect it and then back on it once to select it.
Open the Fill Color Panel and fill the text with black.
Then open the Text Style Panel on the right side and choose the Text Style you prefer.

Paris Text copy.jpg

Each text style you choose may be different. I chose LW Kaylee’s Script by Lori Whitlock. Resize the text to your liking.
Because of the slight angle of the text from left to right, I also rotated the text to sit straighter on the frame. This is a personal preference and each user may vary in what they like.

Move the Paris text so it overlaps the bottom section on the top left rectangle.

Paris text position copy

Next, let’s add one more element to this. I have an Eiffel tower image from the Silhouette Design Store by Samantha Walker – Design #41675.
From the Silhouette library, double click on the image and it will add to the design mat.
If it does not and opens onto another design mat, either copy and paste it to the previous work space or go back into the library and right click and choose Merge.

Click on the Eiffel tower to select it, then using the Fill Color Panel, fill it with black.
Then resize it to your liking and place it in the bottom left rectangle overlapping at the bottom.

Eiffel tower copy

And now the final step. Select the overlay background, the Paris text and the Eiffel tower design and right click and choose Weld.

Weld copy

Keep in mind that once you weld or change text in any way, it is no longer editable text, so you might want to make a copy or use the Sticky Note feature to make yourself a note on the Text Style used. For more information on Text tips, check out this post HERE.

And we have now used basic shapes, text and a design to create a overlay.
Click on the Send tab and it will show us how this will cut. It will all cut as 1 piece except the dot of the i, since it was not overlapping any other piece, it does not weld to the frame.

Send tab copy

What will you create today?

Check out the video of creating this overlay here:

I would love to see what you create – feel free to post on my Facebook group at
Silhouette Secrets+ with EllyMae.

Enjoy!

SS_Signature copySS Logo snip it

**This post may contain affiliate links. What that means is that I may receive compensation if you purchase through the links I have provided. The price you pay for the product or service is not higher but I may get compensated for sharing.

Posted on 3 Comments

Let’s Explore v4 – Tiling

The Tiling feature is a Business Edition upgrade feature that is found under the Media Setup Panel – Tab 4.

The Media Setup Panel is found on the right side of the Silhouette software at the bottom of the icon toolbar. Depending on the size of your computer monitor you may see all the icons or you may have an arrow for a fly out menu.

Tiling Panel double copy

Since the Cameo can only cut 12″ wide, the tiling feature can be used to break up a big design into smaller pieces to be placed together after the cut. While the knife feature could also be used, why not let the software work for you and break it up. This feature is available if you have the Business Edition upgrade of the software and is only accessible under the Media Layout Setup Panel and with the Media Layout View active.

In the Media Layout View, the original design stays intact and all changes take place on the side of the Media Layout View. Check out the post from last week on the Media Layout View here.

I am going to use this Scandinavian Snow Princesses by Erin Doran – Design #68466 from the Silhouette Design Store for my example.

Snow Princess design

First, I’m going to resize this so the silhouette is 5 feet tall. To do that, open the Transform Panel – Scale tab, lock the aspect ratio and change the Height to 60″.
For more information on the Transform Panel – Scale tab click HERE.

Resize copy

Now, I am only going to work with 1 of the princess designs at a time, so I’m going to right click and choose Ungroup and delete the princess on the right side.
In the case of this file, I ended up choosing Release Compound Path to separate the princesses. Then, I selected all the parts of each Princess, right clicked and chose Make Compound Path for each again.
Find out more about Compound Paths HERE.

If you plan to cut both, you can leave it as is or copy and paste the right side to a new design mat to use later.

Now, let’s look at the Tiling feature.

Tiling Panel detail copy

  1. Tiling Active – Check this box to activate the Tiling feature. The Media Layout View will adjust to show you the number of tiles (according to the Page Size set) that it will take to cut the design.Tiling ActiveYou will also see on the left side in the Design View, that it adds a grid over the design with dimensions of each tile, and numbers of tiles. It does not alter the design on the left side, but adds this visual as an overlay of how it would divide the design up.

    On the right side, in the Media Layout View, it shows each of the tiles in the order of the numbers shown on the left side.

    For this design to cut on a 12″ x 12″ mat, it would take 14 – 12″ x 12″ tiles.

  2. Configure Position and Size – Choose Relative to Job, Relative to Media or User Defined. Each of these options allows you to adjust the design even more.Relative to Job – This option is shown in the photo above and includes the entire design.Relative to Media – This option uses the current Media mat chosen. In this case, a 12″ x 12″ cutting mat is selected, so it uses that Media in how it changes the Tiling.

    Relative to Media copy
    You can see above, that it only includes the Media mat portion of the design in the Tiling.

    User Defined – Choose between the Origin X, Origin Y, Width, Height and Maintain Aspect. Each will change how the design is Tiled.

    User Defined Configure copy

  3. Panel Margin – Allows you to change the size of the Panel.Panel Margin copy.jpg
    I increased the Panel Margin to 1″ and the Panel dimensions on the Design View adjusted.
  4. Configure Regular Grid – Choose between Automatic, Custom or Regular Grid. These options allow you to make changes to the Tile spacing.
  5. Overlap – This feature gives the ability to add a bit of overlap to the cut image and is a great feature for giving yourself some extra space in lining the image up after the cut.Overlap copy
  6. Other Options – Show Dimensions – Allows the dimensions to be toggled off on the Design View.Show Dimensions
  7. Tiling – Choose which Tiles you would like to cut – All or selected ones only and choose the separation details between the tiles.Tiles copy
    Notice that since Selected Tiles Only is checked and I typed in 1-2, it highlights only 1 and 2 numbered Tiles and then places only the 1 and 2 numbered Tiles on the Media Layout View to cut.

The Tiling option is a great feature if you are cutting large decals and want the software to do the work for you in breaking up the design to cut.
Each design that you are cutting is going to vary in how it looks and how much material it will take to cut the design out to the size you want.

For instance, if I want to cut this Witch Silhouette by Sarah Bailey – Design #153652, you can see that the top of the broom covers the edges of the 12″ x 12″ mat.

Witch

That leaves a lot of unused space and each Silhouette user would need to decide if it’s worth cutting a full 12″ x 12″ piece of material for this design.

Witch demo

Here is another example:

Beach demo.JPG

If I want to cut a decal of this Beach Bum phrase by Silhouette 48″ long, it breaks it up into 8 panels that fit onto 6 tiles.

Beach demo1

I encourage you to just pick a design and play around with the Tiling feature. Every design you choose will react a bit differently in how it looks in the Tiling feature.

Hopefully this explains some of the features of the Tiling feature.
I would love to see what you create on my Facebook group if you do.
Find me here at Silhouette Secrets+ with EllyMae.

Enjoy!

SS_Signature copySS Logo snip it

**This post may contain affiliate links. What that means is that I may receive compensation if you purchase through the links I have provided. The price you pay for the product or service is not higher but I may get compensated for sharing.

Posted on 6 Comments

Let’s Explore v4 – Media Layout Setup Panel

Do you have the Business Edition upgrade? If not, there are so many neat features that are unlocked with it.
I have to admit that I have not used this much as all, but after today, that will be changing.

Media Layout Setup Panel

What is it? If you have the Business Edition upgrade this is an additional way to view your design to be cut and make some changes to it, without actually altering the design on the Design View.

So let’s explore the different views.

Design view is the normal view a user sees when the Silhouette software is opened.  The drawing tools are located on the left side, the panels are on the right side, and the document tools and Quick Access Tool bar are at the top.

Design view layout copy

Media view is an option if you have the Business Edition upgrade active on the software. This view shows how things are processed as they appear for a cut job. The Media view does not show color or patterns.

The Media Layout Setup Panel is found on the right side of the Silhouette Studio software, at the very bottom.

If you have a larger computer screen, you may see all the icons displayed on the right side like this.

Media view Panel copy

If you have a smaller computer screen, then you may have a fly out arrow to click on and then more icons will appear like this.

Media view small screen copy

The Media Layout view will open up with a split screen panel and you can choose between either side for which one is active and you are making changes in.

Media Layout View*Believe in the Magic of Christmas by Lori Whitlock – Design #162472

Now, let’s take a more detailed look at the Media Layout Setup Panel.

Media Layout Panel detail copy

  1. Show Media Layout Split – Screen – Check the box if you would like the Media layout to split screen with the Design View layout.
  2. Media Layout Setup Tabs – there are 4 tabs to chose from
    – Tab 1: Media Size, Cut Border & Orientation
    – Tab 2: Copy & Separation
    – Tab 3: Nesting
    – Tab 4: Tiling
  3. Media Size – Change the Page Size, Width & Height of the Media Layout ViewMedia Size
    You’ll notice that changes made on the Media Layout Screen do not change the Design View side on the left side. This is a way you can make changes to what will be cut without changing the actual Design mat itself.
  4. Cutting Mat – Change the Cutting mat size of the Media Layout View
  5. Reveal Mat – Slide the arrow over to reveal the cutting mat grid on the Media Layout ViewReveal mat copy
  6. Cut Border – Change the Cut border left, top, right, and bottom dimensions.Cut border copy.jpg

    As you can see above, on the right side the red cut border line changes as the measurements are changed under the Cut Border section.
    You could adjust these to where the material is placed on the mat or place it anywhere on the mat you like and it would only cut there.
    This might come in handy if the top left corner is no longer sticky but the middle of the cutting mat still has lots of stick left to it.

  7. Orientation – Rotate Cut Job – this will rotate the design on the cutting mat on the Media layout.Rotate cut
    Checking this box, will rotate the design 90 degrees on the cutting mat shown on the left side, but the original design stays in tact on the left side.While those features can be useful, I find the other tabs are even more interesting.

Media Layout Setup – Copy Tab

Next, is Tab 2 – the Copy Tab. Here is where you can tell the software to cut multiple copies of a design without actually adding images to the original Design mat.

Copies tab copy

  1. Copy rows – Add the number of rows you would like to cut and the Media Layout View will duplicate the design that many rows. It will show this on the right side in the Media Layout View only and leave the original design unchanged.Copy rows
  2. Copy columns – Add the number of columns you would like to cut and the Media Layout View will duplicate the design that many columns.Copy Columns
  3. Limit to Media – Click this button to limit the design to only the Media area selected, no matter how many columns or rows you enter, the software will change it to fit on only the Page Size and mat you have entered on the first tab.Limit Media
  4. Horizontal Separation – Increase or decrease the horizontal spacing between the designs on the selected media.Horizontal Separation copy
  5. Vertical Separation – Increase or decrease the Vertical spacing between the designs on the selected media.Vertical separation copy

This is another way you could tell the software to cut multiples of an image without actually having to Replicate the design on the Design view.

Either way will work, but it is another option and one I will be using in the future when cutting multiples of the same design.

Media Layout Setup – Nesting

And to add even more options to the Media Layout, the 3rd tab is the Nesting tab. This has several options in how it will nest the designs together before cutting.

Nesting tab copy

  1. Nesting Active – Check this box to turn the Nesting feature on.
  2. Interlock – The software looks for more paths to move shapes together. This works well for designs that are not square or hexagons.Here the Interlock is off:
    Interlocking off

    In this one, the Interlock has been turned on and you can see it Nests the design a little different.
    Interlocking on

  3. Maintain Grain – This option allows the design to rotate only 180 or not at all, in order to work with materials that may have a grain to them. So the design stays on the same grain of the material.
    For example, if you were cutting an object out of a wood grain paper and you wanted to make sure that the grain of the paper ran the length of a wood piece you were cutting instead of cross ways through it.
  4. Align – When align is on, the software will align the pieces of the design that are at an irregular angle.Here the Align is on:
    Interlocking on
    Notice the leaves are vertical.Here Align is off:
    Align option nesting
    Now the leaves are rotated to a different angle.
  5. Whole Words – Choose whether the software divides the text into a whole word or individual letters to place it for the cut.Here whole words is on:Whole words

    And here, whole words is off and it rearranges the individual letters:
    Whole words off

  6. Maintain Groups – When on, this maintains the items that are grouped together and treats it as one object. When off it will treat each piece as an individual object.Maintain Groups on:
    Maintain groups on

    Maintain groups off:
    Maintain groups off
    As you can see above, it treats it quite differently depending on what option you choose.

  7. Rotations Parameters – Tells the software how many rotations of an object is allowed when nesting it on the mat.This is 2 Rotations:
    Rotation parameters 2

    This is 4:
    Rotation parameters 4
    You can see above how it changes the spacing a bit when more rotations are allowed.

  8. Padding Parameters – This is the minimum distance between 2 shapes after it’s been nested.Here the padding is 1:Rotation parameters 4

    And here the padding is 3:

    Padding 3
    Once again, it changes how the nesting is done by the software.

This is just another way that shows the possibilities of the Silhouette software. I do learn new things everyday about what it is capable of.

So many projects to create, so little time to do it!

I hope you take advantage of the Media Layout Setup Panel in a future project.

I would love to see it on my Facebook group if you do.
Find me here at Silhouette Secrets+ with EllyMae.

Enjoy!

SS_Signature copySS Logo snip it

**This post may contain affiliate links. What that means is that I may receive compensation if you purchase through the links I have provided. The price you pay for the product or service is not higher but I may get compensated for sharing.

Posted on 6 Comments

Silhouette Studio – Adding cut settings & exporting

I just recently returned from the All Things Silhouette Conference and I always learn so many things. Even though I’ve been using the Silhouette software for over 6 years now, I learn all kinds of new things everyday. However, at ATS Conference, there is such a gathering of so many great instructors and students, that it just blows my mind how many things I pick up.

Even though I was on staff and an Instructor at this year’s ATS Conference, I learned things in all the classes whether I was a helper in or ones I taught.
That is what makes this so amazing!

IMG_6576

I attended Ben Wood’s – Tips Tricks and Troubleshooting class and even though I troubleshoot issues on many FB groups daily, I do not know it all and never will. I picked up so much from this class and many things I suggest when users have issues were reinforced in this class. Ben is the head of Silhouette support and we had a chance to ask him our questions.

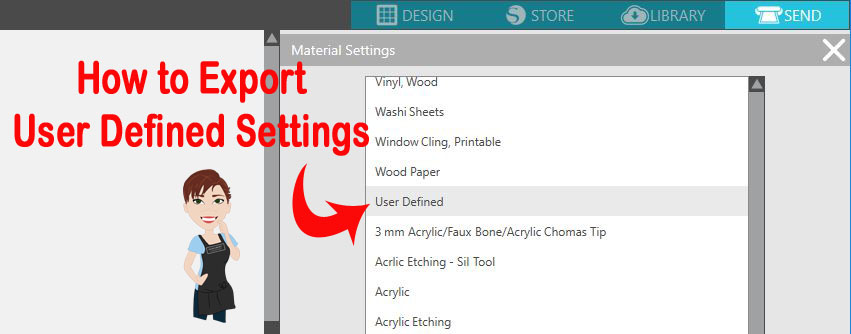
One thing (out of the many I learned) that stood out to me was how to Export User Defined Settings.

What are User Defined Settings?

This is when you create your own custom settings in the Silhouette software and save those settings. And now I know how to export those as well, just in case something happens either to the software or to load to a new computer.

First let’s look at the Material Settings under the Send tab in the Silhouette Studio version 4.
There are 2 sections to this area – Preset Settings and User Defined Settings.

Preset Settings

These are the settings that Silhouette has provided for us. The settings are what have been tested with Silhouette products. However, I find that the preset settings work for me about 98% of the time with other brands of materials. I always do a test cut first, just in case it does need to be tweaked.
But, you do pick up tips as you go, such as, I have always cut most cardstock with the Textured Cardstock setting and it works well for me.

These are found under the Send tab in the top right corner of Silhouette Studio & then under the Material drop down menu.

Material Settings copy copy

User Defined Settings

These are settings you can create and add to the Silhouette software for future use.

They are found at the bottom of the Materials drop down menu when you scroll down. When a new setting is added, it will appear at the very bottom of the list, but after the software is shut down and reopened, these settings will appear in alphabetical order under the User Defined section.

Material Settings - User Defined copy

Now, the next question is – how do you add a User Defined Setting and save it?

Adding User Defined Settings

  1. On the Send tab, click on the 3 dots for the Advanced Material Panel.Advanced cut setting copy
  2. Click on the + to Add New material
    Add New Material copy
  3. Type the name & hit Enter. Choose a name you will remember – include settings for quick reference.For example: Curio Platforms used – add that number at the end or if you are using multiple settings for a project with different Force settings, add the Force number at the end.New Material type copy
  4. Click on the Large + if you are adding a different action than Cut.
    The options are: Cut, Score, Emboss, Stipple and Etch. Each action tells the Silhouette machine to move the tools a bit differently.Actions added copy
  5. Click back on the Cut action and choose “Remove Action” – if it is not needed.
    It will depend on the project you are creating on what action you would use.
    For example: I taught the Acrylic Etching class at the November 2018 All Things Silhouette Conference, for class we added a specific setting to etch the acrylic with the Curio machine. When the Etch action is added, the Cut action is no longer needed because we are not using a cutting blade for the project. Since each action functions differently and tells the tools to work in a different pattern, the Cut action needs to be removed.
    Remove Cut Action copy
  6. Double check & verify the settings stay the same. Then click Save.
    If you type them sometimes they will revert or not hold vs using the arrows to adjust.
    Click Save copy
  7. Hit X to Exit Advanced Settings
    X out copy
  8. Then choose the new setting you have created in the Materials Drop down box and verify that the settings saved correctly.
    Verify settings saved

Now, what happens after you create these custom settings? What if your computer crashes, software has a glitch, you have to uninstall the software & reinstall, you get a new computer or you want to share these settings with students?

You can export these settings and save to safe location to be able to import them back in if needed.
Pretty amazing, right? I know!
This is only 1 thing I learned at the All Things Silhouette Conference that I didn’t know before.

Exporting User Defined Settings

  1. Click on the Advanced Materials Settings under the Send tab.Advanced cut setting copy
  2. Right click on the Material setting & choose Export.Export UDS copy copy
  3. If for some reason these settings disappear or you get a new computer, right click on the Advanced Materials Panel and choose Import.Import USD copy

How to Export Multiple User Defined Settings 

Export multiple settings copy copy

  1. Select the material setting.
  2. Hold down the Shift key and select additional material settings.
  3. Then right click and choose Export Selected Items.

This will come in handy on so many projects! Whether you have your own cut settings you like to use or have specialty products that are not in the presets.

Make sure that you go check out Terri Johnson Creates blog and sign up to get notified for new information released. The next All Things Silhouette Conference will be announced soon and I have it on my calendar for 2019.

Enjoy!

SS_Signature copySS Logo snip it

**This post may contain affiliate links. What that means is that I may receive compensation if you purchase through the links I have provided. The price you pay for the product or service is not higher but I may get compensated for sharing.