Posted on 2 Comments

Let’s Explore v4 – Freehand Drawing Tools

In the Let’s Explore v4 series we have covered Line Tools, Drawing tools, and Flexishape Tools available in the Silhouette software.
Today we are going to look at the Freehand drawing tools that are available.

Who can freehand draw? Well, typically not me, but it can come in handy for certain projects. My freehand drawing is something to laugh at these days.
I will say that it is something that takes practice.
I use a trackball mouse, so it can be a bit easier than a regular mouse, but you will still be able to use this tool no matter what tool you use.
If you have a touchscreen, you may be able to use a stylus or your finger to draw.

On the left hand side of the Silhouette Studio software you will find the Tools.
Under the Freehand tool here are 2 options:
Draw Freehand
and
Draw Smooth Freehand

Check out the video below to see the difference between the two tools

If viewing in email please click on the image above to view the video.

Notice that the Smooth Freehand Drawing tool will “smooth” out the design between the red dots that appear. This gives you less edit points on the line you are drawing but will affect the final shape. Each tool can have it’s useful purposes.

Here is a closer look at how the Smooth Freehand Drawing tool works in action around a design

If viewing in email please click on the image above to view the video.

And after the drawing is done, you can then make additional changes by adjusting the Edit Points as shown in the video above.

I love that there are so many options in the Silhouette software!
It can definitely be a handy tool to have.

So many options in the Silhouette software and there is just no way to remember them all!
Check out the full Let’s Explore v4 series on the blog HERE!

What are you creating with your Silhouette machine?

I would love to see and hear about it on my Facebook group at 
Silhouette Secrets with EllyMae. If you have questions feel free to post below or on the Facebook group too!

Save this for future reference by pinning the image below.

Enjoy!

This image has an empty alt attribute; its file name is logo.jpg

THANK YOU for your support! How can you help? Click HERE & buy a coffee.
Every little bit helps with the cost of running the site.

Or if you are looking for more in-depth, step-by-step classes, check out all of my online Silhouette classes on my Teachable site HERE.

SS Logo snip it
**This post may contain affiliate links. What that means is that I may receive compensation if you purchase through the links I have provided. The price you pay for the product or service is not higher but I may get compensated for sharing.
Posted on 3 Comments

Let’s Explore – 5 Silhouette Resources

Today I want to provide a few resources that can help you on your Silhouette journey. I call it a journey because there is so much to learn with the Silhouette software and projects, there is really no end. We are all on this journey together and we have all started at the same place – The Beginning – at one time or another.

5 Silhouette Resources

Tutorial written in Silhouette Studio v4.3.372
Affiliate links may be present in the following blog post and as an Amazon Associate I earn from qualifying purchases.

1 – Silhouette Studio User Manual in the software

Open the Silhouette software. Click on the Help menu in the top left corner.

A User Manual will open as a PDF document.

Use the Page numbers at the top to advance to a particular page or on the computer keyboard click Ctrl+F at the same time and a Find window will pop up and you can search by keywords.

2 – Shortcuts

Did you know that there are shortcuts in the Silhouette software? These are keystrokes that toggle tools and features on and off.

The shortcuts diagram can be found at the end of the User’s Manual in the software. Using the page numbers, type in 118, then hit enter and it will take you to the last page of the manual for the diagram. This can be printed out for reference.

My favorite shortcuts are Ctrl+Z for Undo and Ctrl+G for Group.

3 – Silhouette Handbook in the Silhouette Design Store

The Silhouette handbook is a free ebook in the Silhouette Design Store.
Grab it HERE.

This book has over 350 pages of Silhouette information packed into it.

Once you download the handbook it will show in the Silhouette library when it is synced and can be accessed under the Ebooks folder in the library tree.

Double click on it and it will open the PDF document. Ctrl+F will also bring up a Finder window that you can search by a keyword.

Or you can download it direct to your hard drive and open it from there. You can even print out pages from the book for hard copy reference.

4 – Silhouette 101 blog & tutorials

The Silhouette 101 website is packed full of information that can be helpful to new and seasoned users. It is not just for creative inspiration but you will find machine manuals, tutorials, free classes, and free e-books on there as well.

Click on the Getting Started section and see machine manuals.

Click on the Tutorials section and you will see free ebooks, software how tos, and projects as well.

Click on the Videos and you will see classes, software tutorials, and more.

So many great things can be found on the Silhouette 101 website in addition to the project blog posts.

5 – Silhouette Secrets+ website

The “Let’s Explore v4” series has been going strong for a couple of years now and is so much more than I imagined when I first started writing it.

The Silhouette software is so powerful that it is amazing how much I have learned in writing detailed posts on the different tools and features in the software.
There is always something new to learn.

Join me in this “Let’s Explore v4” journey as we learn all the details of the tools and features in the software.

Silhouette classes are another great way to dive into the software and really learn a particular task or project.

I’ve been teaching Silhouette classes for the past 4 years and this past year launched my online courses. I created these courses at the request of my students as they wanted to access them when they had time available and be able to re-watch them.

At the top of the blog is a Silhouette Instructions & Events tab.
Click on that and the first option is Online Video Classes.

From there click the link to my Teachable site to see all the courses available.

This will open up the Teachable site and you can see all the classes available.

The most popular class so far is the Beginner Setup & First Cuts with Silhouette.

The best way to learn the Silhouette is to play, play, play. It is just like learning anything else new, it will take time to learn and to perfect! The biggest thing I can encourage you to do is to be patient with yourself!
I hope this has helped to give you a few ideas of where to look for more information!

I would love to see your creations!
Feel free to post photos or questions on my Facebook group at 
Silhouette Secrets with EllyMae.

Save this for future reference by pinning the image below.

Enjoy!

SS Logo snip it
**This post may contain affiliate links. What that means is that I may receive compensation if you purchase through the links I have provided. The price you pay for the product or service is not higher but I may get compensated for sharing.
Posted on 11 Comments

Let’s Explore v4.4 – Autotrace png files

Tutorial written in Silhouette Studio v4.4.247

The new v4.4 software version was recently released and there are a couple of new features in it. One of those is the auto-tracing of .png files with transparent backgrounds when opened.
Now, this is still a new feature and there are still a few quirks with it.

Let’s look at how this works.

Open a .png with a transparent background in v4.4 software and notice that once it’s opened, red cut lines now appear around the design.

This may catch some users off guard when there are red cut lines around the .png file as soon as it opens.

Affiliate links may be present in the following blog post and as an Amazon Associate I earn from qualifying purchases.
Coffee Until Wine SVG by Endless Time Graphics

After you open the .png file, click on the Send tab and you can see it has bold red cut lines around the design.

This will be a great feature for using with print and cut images.
For example, these butterfly & flower images.

Open the .png file and the images are traced around each.

Keep in mind that .png files are flattened graphic images. If you increase the size of the image after it opens, the quality may not be as good. Decreasing the size, should not affect it as much, but they are not like .svg files that are scalable without losing the quality.

Since the .png files are already traced, you can combine images easily for a graphic design and then choose Cut Edge on the Send tab and it will only cut around the outside edge of all the objects overlapping and selected.

This is a great new option and just like any tool or feature in the software, I encourage you to play, play, play.

Turn the Auto-trace on or off

Not everyone will like this new feature and in some cases you may want to turn it off.

The great news is you can under the Preferences.

Click on the gear icon in the bottom right corner of the Design tab.

Or in the top left menu, under Edit > Preferences
or
the keyboard short cut is Ctrl+K

Choose the Import tab and then uncheck the Auto-trace for png files.

Click Apply and Ok.

Quality

Now, something to note is that a svg file will always be a higher quality cut file than a png file. A big factor is that a svg file can be scaled up or down and not lose image quality.

However, a png file is not the same way as it is a graphic file.
So you may experience different things with different designs.

As an example, in the Coffee until Wine design in our example, if we look at the edit points of the .png trace, there are more edit points on the circles.

Compared to the edit points on the svg file for this design.

This can make a big difference in the cut quality when you are working with files.

I would still highly recommend the Designer Edition upgrade to open svg files as they will always be a higher quality cut, especially when changing the size of designs from the original size.

Keep in mind, these edit points are the data points that the Cameo uses to make the cut connect. The png file in the first edit point example is 10.9 inches when it opens. If you scale that down, the number of edit points stays the same, but is in a smaller area. This can make some cuts difficult or impossible depending on the design.

Edit points are definitely a tool in the software that is good to know how to use.
Check out this post HERE for more information
Let’s Explore v4 – Edit Points

The only way to know for sure is to play, play, play.

How do you edit the cut lines that trace on a png file?

With the auto-trace turned on, a png file will create the cut lines automatically.
But, what if you do not want all the cut lines?

Right click on the cut lines and choose Release Compound path.

This will break up the cut lines into pieces and any piece that is not connected will now be an individual pieces.

Click off of the design and then click back on the individual piece and delete as needed.

For instance, in this design, if I do not want all the little pieces inside the letters to cut out. Once the compound path is released, I can remove those bits and delete them as needed. I have just moved them away from the design so you can see them.
This will be a great feature for print and cut designs, when you just want the outer edge to cut and not the inner bits that traced.

Here it is on the Send tab to show the cut lines better.

Notice how the little bits inside no longer have a cut line around them. I removed them and can delete those now, so they do not cut inside the letters.

That is it!
A neat new feature in the v4.4 software.

The v4.4.247 was recently released at the time this is written.
I always recommend waiting a bit to update unless you have specific reasons or issues that are fixed in a release.
But, if or when you do decide to update the software, this is a neat feature.

Software updates are always free and I recommend updating direct from the website here:
https://www.silhouetteamerica.com/software
anytime that you do decide to update.

I would love to see what you make!
Feel free to post photos or questions on my Facebook group at 
Silhouette Secrets with EllyMae.

Save this for future reference by pinning the image below.

Enjoy!

SS Logo snip it
**This post may contain affiliate links. What that means is that I may receive compensation if you purchase through the links I have provided. The price you pay for the product or service is not higher but I may get compensated for sharing.
Posted on 5 Comments

Let’s Explore v4 – Group vs Ungroup

Today, let’s explore what does Group and Ungroup mean.

Basically, if a design is grouped it means that you have separate pieces of a design that are acting together and move as one object. It can be resized or moved together and the changes apply to all the elements.

Ungrouped means that each piece can be selected separately and if only 1 piece is selected, that is the only one changes will apply to.

Affiliate links may be present in the following blog post and as an Amazon Associate I earn from qualifying purchases.

Let’s take a look at this Sloth Card by Daniela Moscone – Design #288765.

When you open the file, this is how it looks.

It opens with all the pieces since it is designed to be cut from cardstock and you will cut each piece separately. When open, the pieces are all grouped together and you can see the selection box around the entire design. This file can be scaled by grabbing the bounding box and moving it in or out to increase or decrease the size. All of the pieces act together.

To ungroup this design, right click on the photo and choose Ungroup.

Notice that all the pieces have their own selection box around each of them.

Now, click off the design to deselect it and then each piece can be selected and moved individually.

It will ultimately depend on the design in how they saved the file and if the file is grouped when it is opened or not.
Each file may vary.

Grouping and Ungrouping can also be found in the Quick Access Toolbar at the top of the Silhouette software. This Quick Access Toolbar is only active when objects are selected and it will vary what tools show up in the toolbar depending on what the objects are.

How is Grouping different than Making a Compound Path?

Grouping selects all the pieces together and they function as one object, but they are still separate pieces. Compound paths change the design and combine the 2 objects that are selected.

For more information on Compound Paths, check out this post on the Modify Panel – Part 2.

I would love to see what you create with your Silhouette machines & software.
Feel free to post photos or questions on my Facebook group at 
Silhouette Secrets with EllyMae.

Save this for future reference by pinning the image below.

Enjoy!

SS Logo snip it
**This post may contain affiliate links. What that means is that I may receive compensation if you purchase through the links I have provided. The price you pay for the product or service is not higher but I may get compensated for sharing.
Posted on 6 Comments

Let’s Explore v4 – Designing in Silhouette

Creating Designs in the Silhouette v4 Software

Affiliate links may be present in the following blog post and as an Amazon Associate I earn from qualifying purchases.

This project has been on my to-do list for a long while and now we are all home all day long together, I sat down to get it done.

Using some basic features in the Silhouette software – Drawing tools, Replicate Panel, Alignment tools – you can create your own custom projects.

Check out this video below on how I created a chore chart.

I added a couple Chore Chart Icons by Amy Robinson – Design #256141 to the chart to give it a little more color and character than just a boring lines chart.

Chore Chart image copy

Now, you may have been putting this off like I was or just haven’t had the time to make a chore chart. So I am also offering this as a free file you can download below.

Chore Chart free file copy

Click the photo above or download this free file HERE.

Save this for future reference by pinning the image below.

Pinterest Chore Chart

I would love to see what you create!
Feel free to post on my Facebook group at Silhouette Secrets with EllyMae.

Enjoy!

SS_Signature copySS Logo snip it

**This post may contain affiliate links. What that means is that I may receive compensation if you purchase through the links I have provided. The price you pay for the product or service is not higher but I may get compensated for sharing.

Posted on 14 Comments

Let’s Explore v4 – Knife Tool

The Silhouette Studio software is jam-packed with Tools and features that can be used to design with. One of those is the Knife Tool.

In the Silhouette software, Tools are located on the left side panel and Panels are located on the right side.

Tools vs Panels copy

The Knife Tool is located on the left side of the Silhouette v4 software.

Knife Tool copy

Keep in mind that the knife and eraser tool are changing a lot of data when they are in use. There are many factors that will affect what a user sees when using these tools. These could be the design being changed, the computer processing power, the version of software a user has, etc.

A user may need to be patient with their computer when they are using these tools as the computer processes the change in data. If a design is “complex”, then there may be other options to alter the design versus the knife or eraser tools, such as Releasing the Compound Path and deleting. Keep in mind, that each design might react differently.

Knife Tool

Tutorial written in v4.3.372

Let’s take a look at a circle shape and how the knife options work with it. I used the drawing tools on the left side to draw a circle and then replicated it on the right side and filled it with color using the Fill Color Panel.

Tip: holding down the Shift key on the keyboard will make the Knife (or line drawing tools) cut in a straight line either vertically, horizontally, or at a 45 degree angle.

Solid Option

Knife Solid copy

With the Solid option chosen, the shape will be cut and create 2 solid images.

Knife Solid2 copy

Each piece is now independent of the other and can be moved.

Outline Option

Knife Outline copy

With the Outline option selected notice that the unfilled shape reacts differently than the color filled shape.

A shape with no fill, will cut apart the design and leave the shape open. It is cutting a closed shape apart and making it 2 open paths.

Open Paths copy

Open paths react differently than a closed path. Open paths can be found by double clicking on the line of the design and bringing up the Edit Points.
If there are any red dots, that means it is an Open Path.

What you see above, is 2 semi-circle lines that have been cut from a circle. Open Paths cannot be filled with color and will only cut from 1 red dot to the next red dot.
It will not connect the cut.

Knife Outline closed path copy

If a shape is filled with color, then it reacts differently when the Knife – Outline option is used. It will result in 2 closed shapes.

Knife Set Tools

Each user with the basic (free) Silhouette software has access to the basic knife function as shown above.
If a user has a software upgrade such as Designer Edition, Designer Plus, or Business Edition there are more knife options available.

Knife Options copy

With the software upgrades, there are several more fun options for the knife tool.

Knife Options zoomed copy

Let’s take a look at a couple of these options.

Knife Options 2 copy

Notice that the unfilled shape behaves differently than the color filled shape. There are open paths on the unfilled shape and you do not see the knife design. But, the filled shape the knife tool creates the shape according to the design option you have chosen.

Auto Apply or Apply

Auto apply vs Apply copy

Next on the knife tool bar is the options to either Auto Apply the knife option when the mouse button is clicked or to manually choose Apply to have the knife finish. This gives the user the chance to decide whether they want the knife selection before it starts the process of changing the data.

This is all a matter of personal preference. However, if Auto Apply is chosen, then you do not get the chance to adjust the knife selection before it applies to the design.

Some of the knife tool options have an additional slider that appears when you draw with it that can adjust the shape of the chosen knife.

Preferences

Under the Preferences, there are options for how a user wants the Knife Tool to act. After Using the Knife can be set to “Continue Using Knife” or “Choose Select“.

Preferences copy

If it is set to “Continue Using Knife“, then you will need to click on the Select Arrow in the top left corner when done with the knife to turn it off.

Select Arrow copy

Check out more Preference options in this post
Let’s Explore v4 – Preferences – Tools

Do you use the knife tool?

Save this for future reference by pinning the image below.

Pinterest

I would love to see what you create!
Feel free to post on my Facebook group at Silhouette Secrets with EllyMae.

Enjoy!

Signature

SS Logo snip it

**This post may contain affiliate links. What that means is that I may receive compensation if you purchase through the links I have provided. The price you pay for the product or service is not higher but I may get compensated for sharing.

Posted on 5 Comments

10 Essential Tools in Silhouette Studio for Beginners

Whether you are a beginner or experienced with the Silhouette software, there is always something new to learn in it. I don’t think any one person can remember every single thing this software is capable of. And speaking from my own personal experience, I think all users get in a routine of doing the same things with the same tools and sometimes we don’t even think of a “new” way to do things. For example, using the Quick Access Toolbar (QAT) versus the panels on the right side.

QAT copy

I am more comfortable using the panels on the right because I like the expanded panel and am just not in the habit of using the quick icons at the top. But, I am getting better at it.

Going through this series, I have learned a lot of new features that I just didn’t use on a regular basis. This is a very powerful graphics program!

Now, if the software seems overwhelming, I would suggest grabbing this free PDF and downloading it to your computer. When you open it and click on the titles, it will take you to a corresponding blog post with more details on that feature.

Header PDF file

Today let’s look at the top 10 posts from the “Let’s Explore v4” series that I think will help you learn the software and get you started or more comfortable with designing in the software.

Silhouette Secrets+ Top 10 Let’s Explore v4 Tools

1 – Text Tool & Text Style Panel Text is one of the first things any user will work with in the Silhouette software. The Text Tools are found on the left side of the software and the Text Style Panel, which allows you to change the properties of the text is on the right side.

Working with text copy

Learn more about text at the “Let’s Explore v4 – Text Style Panel” post HERE.

Text Style Panel main copy

2 – Fill Color Panel  I use the fill color panel every single time I open the Silhouette software. Not only does it help you see the design better and give you an idea of how the finished project will look, but it can also make it easier to select the object if it is filled with color.

Fill Color Panel copy

3 – Line Style Panel This panel can be very helpful if you want to change the line color of the design so it doesn’t show as a red line or if you are printing a design. Cut lines do not have any weight to them, so if you want to print the lines you would either need to increase the line thickness or choose to “print lines of selected shapes”.

Line Style Panel copy

4 – Align Tools This is another tool that I use every single time I open the software. I like to have my designs and text perfectly aligned and centered in my object.  The Align tools are found under the Transform Panel on the right side.

Transform Panel copy

5 – Trace Panel The trace panel can come in handy for many projects from creating basic designs to print and cut projects with jpeg or png files.

Trace Panel copy

6 – Drawing Tools These tools can come in handy when you want to create something yourself add your own weeding lines around a design, draw a frame around the design, and many other things. The more comfortable that you get with the software, the more options you will find to create things in it.

Drawing Tools close up copy

7 – Replicate Panel Want to create an exact copy of the design you just drew or make several copies with the click of 1 button? This can happen under the Replicate Panel.

Replicate panel copy

8 – Offset Panel Want to make that font a little thicker? The Offset Panel can help with that and so much more.

Offset Panel copy

9 – QAT – Quick Access Tool bar This is a fluid tool bar that will change depending on what you have selected on the design mat. You will notice that the icons will be the same as the panels on the right side.

With objects selected on the design screen these are the icons you might see in the QAT bar.

QAT bar copy

Look at all the information in the Quick Access Toolbar. All of this information can also be found on the right side in the Panels, but these are quick buttons to access it as well. There are multiple ways to do things in the software, no one way is right or wrong, but the best way is what works for you.

It is a fluid tool bar, which means that it changes depending on what is selected. If you have text selected on the design screen, then you will see text options in the tool bar.

QAT Text copy

10 – Edit Points While this isn’t something that I would label as a beginner tool. I do think knowing what those gray dots are when they pop up is a relief. You don’t need to understand how to work with them right now, but understanding why they appear & how to make them disappear is something I believe is very helpful.

Edit Points copy

There are so many different tools in the Silhouette software. The best thing you can do is just get started. Play, play, play. Start with 1 project and get that down and then move on to new things.

I would love to see what you create! Feel free to post on my Facebook group at Silhouette Secrets with EllyMae.

Save this for future reference by pinning the image below.

10 Let's Explore post to start Pin

Enjoy !

THANK YOU for your support! How can you help? Click HERE & buy a coffee. Every little bit helps with the cost of running the site.

Silhouette Classes

Never stop learning! Let me help you take the anxiety out of learning with Silhouette and get to creating faster! My Silhouette classes are heavily focused on software, so you can take the skills & techniques taught and apply them to many future projects!

Silhouette step-by-step Classes by Silhouette Secrets+

Silhouette Secrets+ with EllyMae

**This post may contain affiliate links. What that means is that I may receive compensation if you purchase through the links I have provided. The price you pay for the product or service is not higher but I may get compensated for sharing.

Posted on 10 Comments

Let’s Explore v4.3+ – Glyphs

If you have downloaded a v4.3 software version or higher, then you may see a few changes that have been made to a couple screens. A few icons, a few new options, etc.
We discussed the new Page Setup Panel look in this post a few weeks back – Let’s Explore v4.3 – Page Setup Panel and today let’s look at another change.

While this is not a big, big change. You may notice in some tutorials that the when referencing the glyphs panel, the icon has changed. That’s it – just the icon.

Glyphs icon comparing copy

If you are using a version of Silhouette that has the fancy A as the icon, check out this post – Let’s Explore v4 – Glyphs and Spellcheck.

Glyphs with Updated Icon

Tutorial written using Silhouette Studio v4.3.356
Affiliate links may be present in the following blog post.

Glyphs are any special characters that are an addition to a font file. These can include swirls, fancy letters, or shapes.

The Glyphs Panel is a Designer Edition upgrade feature. With the Designer Edition upgrade active on the Silhouette software you should see it as the 2nd tab at the top of the Text Style Panel.

The glyphs icon is the only thing that has changed in this panel at the moment. As we all know, changes happen. It’s better to know they are there than to be surprised someday in the future.

Glyphs Panel copy

1 – Text Search bar – Just like on Tab 1,  the name of the font that is selected will appear in this box or you can highlight it and type a name in the box and it will select that font.

2 – Glyphs – This area is where you will see the glyphs of the font that you are using show up.
Note: sometimes not all the glyphs will show up here and you will need to access those through Character Map (PC) or Fontbook (Mac).
It just depends on how the font was created.

3 – Recently Used Glyphs – This handy feature shows the ones you have recently accessed.

4 – Icon size – Those little icons can be hard to see.  Change the size of how the Icons appear in the glyphs panel. And when you hover over a glyph it magnifies it as well.

How do you use glyphs?

There are 2 ways I use glyphs.

1 – Type out the word you are using. Highlight the letter you want to replace and then click on the glyph icon one time to replace that letter with the new glyph.

2 – Double click on the glyph icon and it will add it to the top left corner of the design mat as an individual “letter”. You can continue to click on the glyph icons to add more or just click off of it to keep the design as a separate text box.

I use this second way most often when I am using Dingbat fonts that are a bunch of designs all in one font file or if I want to add a swirl onto the end of a letter.

Glyphs can be so fun to play with and add a little extra creative flair to your designs. Each font file will vary in the glyphs it may have. Some have just a few and others have lots.

I used the font called Bohemian Script by Typia Nesia – Design #296014 and it has a glyph count of 213.

Bohemian Script

Keep in mind the larger the number of glyphs, the longer it will take to load that font in the text style panel. Be patient with your computer as it processes the data.

I’d love to see how you are using glyphs in your projects!
Feel free to post on my Facebook group at Silhouette Secrets with EllyMae.

To save this for later reference pin the image below to Pinterest

Pinterest

Enjoy!

SS_Signature copySS Logo snip it

**This post may contain affiliate links. What that means is that I may receive compensation if you purchase through the links I have provided. The price you pay for the product or service is not higher but I may get compensated for sharing.
Posted on 9 Comments

Let’s Explore – Registration Marks v4.3

If you are using a v4.3 software version, you may have noticed that there are a few changes in the software panels from prior versions.

One of those panels is the Page Setup Panel – Tab 3 – Registration Marks, so let’s take a look at the difference.

Registration Marks Panel difference copy

If you are using version 4.0 to version 4.2, then the Page Setup Panel – Tab 3 will look like the one on the left side in the photo above – check out this post HERE for details on that.
If you are using version 4.3, then the Page Setup Panel – Tab 3 – Registration Marks will look like the one on the right.

As you can see the Registration Marks Style section has changed to an On or Off position now in version 4.3. While this is the only change you can see in this panel, when you are looking at videos or older tutorials, it will show the step to choose Type 1. This is great to know if you are new user to Silhouette or for someone just updating to the version 4.3 software.

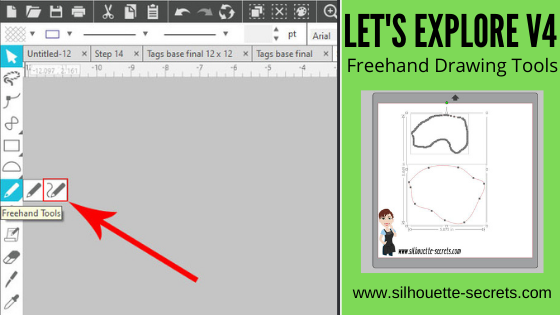
But, while we are here, let’s review the Registration Marks Panel and explain what it all means.

The Registration Marks Panel is the 3rd tab in the Page Setup Panel, which is the top right icon.

Registration Marks Panel copy

The print and cut registration marks can also be toggled on by the keyboard shortcut letter ‘M’. I see this happen often when a user is typing with text and then clicks off of the text, but still tries to type letters. This can activate keyboard shortcuts and the marks will toggle on and off.

Now, first before we go into the details of this panel, let’s first set up the page for the print and cut. I follow the same steps every single time I set up a print and cut project and I rarely have any issues. We will go through them here briefly, but check out this Print and Cut – Part 1 tutorial for more details – HERE. Keep in mind that this tutorial was written in a software version before the On and Off change in this panel.

Affiliate links may be present in the following blog post.

Setting up a Print and Cut Page

Step 1 – Open the Page Setup Panel – Tab 1
Step 2 – Choose the correct machine & cutting mat.
Step 3 – Choose the Media size. I choose “Printer” as the option when using letter size paper. You will find it at the bottom of the drop down box for Media Size.
Step 4 – Move transparency to 0%. This will help you see the page size better.
Step 5 – Choose the Portrait Orientation. This is the orientation I recommend as I see the least amount of issues with it.
Step 6 – Check the boxes next to Show Print Border and Show Cut border. This will show you the boundaries you have to work with.

Page Setup copy
Colorful Sloth – Stickers by Sandi Idleman – Design #312256

Now, that the page is set up, let’s move to the registration tab and turn the
Registration Marks On.

Registration Marks On copy

Some things to point out here.

When the Show Cut border box is checked on the Page Setup Panel – Tab 1, you will notice that the red cut boundary moves when you turn the registration marks On. Notice that the cut boundary is lined up with the registration marks that appeared on the page.

There is a cross-hatched area that shows up on the design screen. This does not print on your page. However, having a design, cut border, or background in this cross-hatched area can interfere with the optical eye reading the registration marks accurately. This can cause mis-cuts. Make sure that the design is away from the cross-hatched areas on the page.

Notice on the left and right side, I have circled and highlighted 2 problem areas. These would result in those 2 things not being cut completely, if there were no other errors because they are outside of the cut border.

I mentioned above, that I do the same exact steps every time I set up a print and cut project. The next step I do is click the Restore Defaults button.

Restore defaults copy

And I am ready to print. This Colorful Sloth – Stickers by Sandi Idleman – Design #312256 is set up as a print and cut design, so the cut lines are already there.
If you are creating your own cut file, you may need to trace or fill with color. Check out these posts on Print & Cut – Part 2 – Text and Print & Cut – Part 3 – Images for exactly how to do that.

I go to File > Print in the top left and make sure the printer is set up with the correct page settings for the printer I am using. If the Printer Setup has a Preview option, I would highly recommend using it to make sure that all of the registration marks will print correctly.

Printer Setup copy

But, what about all the other options on the Registration Marks Panel?

Yes, there are more options. However, I would highly recommend for a beginner with print and cut, if you’ve ever had problems with print and cut, or if you have a new printer to start with the defaults and establish a baseline.
This will eliminate so many things that could be an issue that gives you a registration error or mis-cut.

It printed beautifully on the Silhouette white sticker paper! Make sure to place the printed page in the top left corner of the cutting mat exactly as the page shows on the design screen. Place the page on top of the grid lines on the cutting mat or the Cameo may try to read the grid lines instead of the registration marks.

PNC Loaded copy

The left edge of the mat, should line up with the line on the left on the Cameo that the 2 arrows point to.

PNC Load line copy

Now, something I noticed after it printed was that the designer of the file had increased the line thickness of the cut lines, so when it printed the red lines printed too. This is not always desired, so make sure you double check the file before printing it out.

Line Thickness copy

I love print and cut and I rarely have an issue with it registering or mis-cutting. This is why I want to stress the importance of using the defaults at least the first time to set you up for the best chance of success.

PNC Cut copy

Registration Marks Panel Options

Once you have established a baseline with print and cut and have had success with the default settings, then I you can venture into testing the limits.

I often see users who have maxed out the registration marks to try to gain more space on their page and they end up with it not registering at all or if it does, the cut is far from accurate. While you can move the registration marks, each printer will vary in how far you can move those and still get an accurate cut.
This will take testing on your part to know what the limits are for your printer!
I rarely move my registration marks because I know at the defaults it cuts great every time. However, on the occasion I am feeling daring, I have moved them but tell myself the entire time that if it doesn’t cut, I will know why. While I’ve still been successful in moving the marks and getting accurate cuts, that is not what I see with the majority of users. So, just keep that in mind.

Registration Marks Panel detail copy

1 – On or Off – Turn the registration marks used for print and cut on or off by clicking the box next to each option.

2 – Length & Thickness – Adjust the length of the registration marks or the thickness of the marks.

3 – Inset – Adjust all 3 of the registration marks at the same time. The higher the number, the closer to the middle they move.

Inset example copy

4 – Advanced Options – Click on the arrow and it expands with more options to adjust the individual insets of the print and cut area.

Advanced Inset copy

5 – Restore Defaults – This will reset the registration marks to the default settings.
This is the #1 thing that I feel can make all the difference in getting an accurate cut. I highly recommend starting with the defaults first and then as you feel more comfortable, you can start changing things up. Especially on a file that you have purchased that is set up as a print and cut file. It may not have been saved with the default settings for the Silhouette. The designer may have been able to print it with their printer at those marks, but yours may not be the same. Or you could encounter someone who has just designed it but never printed it to test it.

6 – Orientation – Default vs Inverted – This changed the direction of the registration marks on the mat. Notice the direction of the arrow on the cutting mat. Inverted placed it on the opposite corner of the mat & moves the registration marks on the page.

Orientation demo copy

7 –Barcode  – This adds a barcode to the side of your page and it stores all of the cut settings data in the bar code that the Cameo 3 will read. This is a Business Edition feature only. There is also the option to save the information to the cloud account that is associated with the email address used to log in. 

I troubleshoot a lot on many platforms for print and cut and most often it is something that needs to be tweaked with the way the file is set up. Starting with those defaults will save you a lot of headache in the long run.

Don’t forget to Pin this image below to save these tips for the future!

Registration Marks pin

I would love to see the projects you have created feel free to post on my Facebook group at Silhouette Secrets with EllyMae.

Enjoy!

SS_Signature copySS Logo snip it

**This post may contain affiliate links. What that means is that I may receive compensation if you purchase through the links I have provided. The price you pay for the product or service is not higher but I may get compensated for sharing.
Posted on 2 Comments

5 Silhouette “Secrets” to start the New Year

The Let’s Explore v4 series continues to be a popular series and will continue into 2020 as there is so much information that can be explored in the Silhouette Studio v4 software. Find the full series HERE.

Today we will explore 5 “secrets” or tips to start the New Year off right with the Silhouette Studio software.

5 Silhouette Studio “Secrets” from Silhouette Secrets+

Now, are these really “secrets”? Nope, but many users may not know about these tips or resources that are available in the Silhouette Studio software. And these could save you some headache and frustration down the road.

  1. Back up the Silhouette library. 
    Do you store personal files in the Silhouette library? Even if you do not, it is still a good idea to create a backup of the library on a regular basis. And what a perfect time to start that to kick off 2020.Backing up the library will vary depending on what version of the Silhouette Studio Software you are using.

    How do you know what version of the software you are using?
    On a PC, in the top left corner, click on Help > About Silhouette.

    Software version

    On a MAC, navigate to the top left menu, click on Silhouette Studio, and then click on About Silhouette.

    MAC About Silhouette copy
    (Thanks Libby Ashcraft for this MAC screenshot!)

    This little window tells us a lot of information and is handy to have when troubleshooting an issue a user is having.

    About Silhouette info copy

    It tells me that I am using version 4.3.353 and that I have Silhouette Studio Business Edition (ssbe) active on my computer.

    Making a Back up
    For users who have v4.2+, make sure you are signed into the Silhouette library and the library is synced with the current date and time. 

    Click on the Library tab in the top right corner and then look in the bottom left corner to see when the last Sync is time stamped.

    Library sync copy.jpg

    Ensuring that the library is synced will give you the most up-to-date back up file.

    Next, click on your name in the top left corner of the Library tab and choose Library Export.

    Library export copy

    It will ask where to save the File. Choose browse and choose a safe location.

    Browse Location copy.jpg

    I have created a folder on my external hard drive called Backups and save all my back up files there for Silhouette. I also add the date to the back up file name so I can locate the most recent one easily.

    Folder location copy

    This backup file is not a file that can be opened outside of the Silhouette Studio software. It only serves as a file that can be imported back into the software if you ever need to. This file does not contain individual files and the information cannot be accessed unless it is imported back into the Silhouette Studio software (if needed).  Most users may never need this file, but it is still a good idea to have, just in case.

    Once you have chosen the location to save to, then choose Export on the Silhouette pop up window.

    Export copy

    Be patient as it may take some time to export the library. This all depends on how much data is in the Silhouette library that it needs to condense into this file.

    If you have received a new computer and want to transfer Silhouette to the new computer check out this post “Let’s Explore v4 – New Computer” for tips on getting everything set up.

    What about users not on v4.2+?
    For users on a software version prior to v4.2, check out this post on Silhouette Studio Library Tips to see how to export back up copies of both sections of the Silhouette library.

    Shape up your Silhouette Library copy

  2. Delete Recovered Documents
    Does the Recovered Documents panel open when you open Silhouette Studio? This is a feature that will Auto save a file if the software closes down or the computer is shut down unexpectedly. Each time the software is opened, each of those files is brought back up and the software remembers them. Clearing this out on a regular basis will keep your Silhouette software running smoother.For more information on why you want to keep this cleared and steps on how to clear this out check out this post on Recovered Documents.

    Header copy

  3. Set up the Library Snapshot feature
    A new feature of the software since v4.2 was released is the Library Snapshot. I love this feature! It will take a snapshot of the library and save it just in case something happens and you might need to revert back. For instance in the case of a corrupt file or downloading a “bad” font – these are 2 instances I’ve seen that a snapshot has helped users.For step by step details to set up the Library Snapshot, click HERE.

    Header Library Snapshot
    Keep in mind that the Library Snapshot will only capture when the software is closed and reopened, no matter what time frame that you have it set for. So if you leave the Silhouette Studio open on your computer for days or weeks, it will only take a snapshot after it’s been closed and reopened.

    Also, the Library Snapshot is computer specific, so if you use multiple computers or get a new computer, each computer will have it’s own snapshot log.

  4. Organize the Silhouette library into folders. 
    Designs in the Silhouette library can be organized into folders to organize in a way that you find helpful. Right click on the folder and choose New Folder.New Folder copy

    Type a new name for your folder and then hit Enter.

    New name copy
    Create folders for the different designs you have by categories like holidays, seasons, 3D designs, flowers, mermaids, unicorns, etc. However best your feel will help you to find your designs when you are trying to create.

    To move designs to a new folder, click on the file you want to move and drag it into the folder in the library tree on the left side. The design will disappear from the main folder and then the folder it was moved to should increase in the number of designs in it. To select multiple files, click on the 1st file, hold down the Shift key and then click on the last file you want to move. Then drag those files to the folder you want them to move to.

    Here is a quick video showing the files being moved to the new folders.

5. Create a back up of the library.
But, we already did this? Yes, however, if it is a good idea to do this before and after you have made any changes to the library. So, if you moved files around in the Silhouette library to organize it better, I would suggest creating a new backup that will reflect those changes.

There are so many things available in the Silhouette Studio software and I hope this helps you get the New Year kicked off to a fresh, smooth start!

Check out this video showing each of the 5 tips I shared above.

Feel free to post your project photos or questions on my Facebook group at Silhouette Secrets with EllyMae. We love seeing what you create!

Enjoy!

SS_Signature copySS Logo snip it

**This post may contain affiliate links. What that means is that I may receive compensation if you purchase through the links I have provided. The price you pay for the product or service is not higher but I may get compensated for sharing.