Posted on 2 Comments

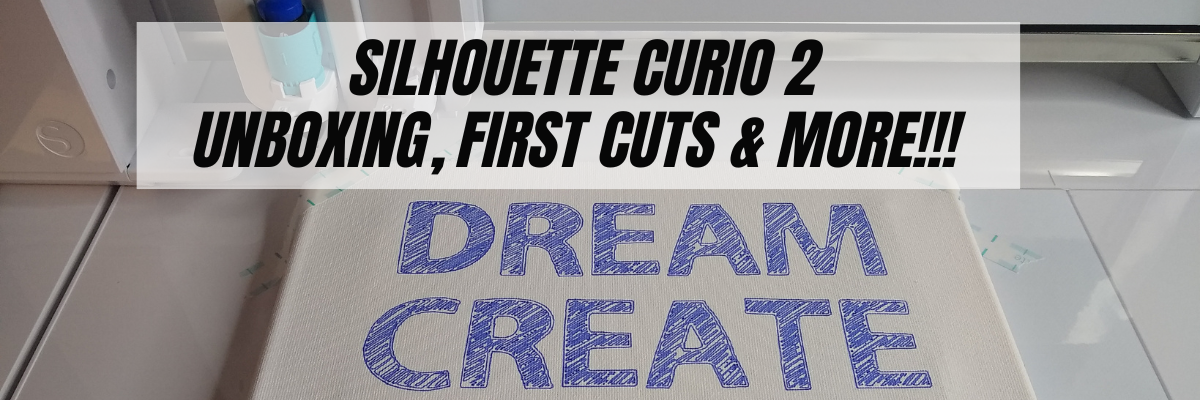
Silhouette Curio 2 – Unboxing, First Cuts & More!!!

What an exciting week it’s been! The new Silhouette Curio 2 arrived on my doorstep this week and I’m having a ball playing with it and testing it out!

If you have followed me for any time, you’ll know that I am proficient with the Curio 1 and love all the fantastic projects that can be made with it. It is still a good machine and if you have one, you can still use it! I can help with that too!

On the Silhouette Secrets+ Teachable site you will find 10 step-by-step classes that are all focused on the Curio 1. Check it out HERE.

Now that the Silhouette Curio 2 has been released, I’ll be developing step-by-step classes for that too! So watch the Silhouette Secrets+ Teachable site for future classes.

Affiliate links may be present in the following blog post and as an Amazon Associate I earn from qualifying purchases.

For all the details regarding the 3 new machine models released at the Silhouette Summit 2023, check out this post – New!!! Curio 2, Cameo 5, and Portrait 4

Now, before I go too much farther, I do want to let you know that the Curio 2 is limited in quantity in 2023. What is currently available is what is the inventory for the rest of 2023. But, don’t panic! There will be more coming in 2024 and there is lots of time to learn this new machine.

If you want to add the new Silhouette Curio 2 to your toolbox right now, you can find it at CrafterCuts HERE.

Whether you are diving into using the Silhouette Curio 2 or watching and waiting, I have resources that can help with this new machine.

I have been updating my Silhouette Secrets+ YouTube channel with new videos as I am testing the machine.

And to make it easy to find machine specific information, I’ve created a Silhouette Curio Playlist on the Silhouette Secrets+ YouTube channel. Find that HERE.

The Silhouette Curio 2 is a completely different machine than the first model! It is a large machine too! The footprint of the machine measures in at 20″ x 24″ and will need a dedicated space to function properly. Please consider that before you purchase!

However, I had a group member bring up a really good point. While the Silhouette Curio 2 is a large footprint that needs a dedicated space for it, it does take up less room than if you purchased a Silhouette Cameo 5 and the new Electrostatic Bed for the Cameo 5. It really depends on what your specific situation is and how your workflow is for you! Each user might be different and one machine may work better for one person vs another.

I am having a blast with the new Silhouette Curio 2! It is a new machine and it will take time to learn! I feel that every single person could be successful with this machine IF you take time to learn it and use it properly. If you do not, you will likely hate it. That is not a machine fault, it is simply a personal preference.

I want to share a few projects I’ve been doing with the Silhouette Curio 2.

Here are my first cuts on Vellum paper using the Electrostatic (ES) bed on the Silhouette Curio 2.

Such clean cuts. Check out my Silhouette Curio 2 First Cuts video HERE to see how I did, what issues I encountered, and how I worked through it.

I had several questions about print and cut, so of course I had to test that! Here is a letter size sheet of sticker paper that was cut on the Curio 2 using the new ES bed. The new ES bed means that you no longer have to use a cutting mat for materials that are flat and smooth. The materials can be held in place by static charge. The ES bed is new for the Silhouette Cameo 5, Curio 2, and Portrait 4. It will take time to learn and you will need to set it up properly, but I can see so many new possibilities on projects and successful cuts when using it. The ES bed comes with the Silhouette Curio 2 in the box.

Check out my videos on Silhouette Curio 2 Print and Cut with the ES bed and Tips for Success with the New Electrostatic Mat HERE.

I used Koala sticker paper and a design by Wispy Willow Designs called Small Business Sticker Sheet.

And then of course, once I showed this someone else asked about 12″ x 12″ cardstock, so that was the next project on my list.

This is Recollection Cardstock from Michaels and I used several designs from Diva Watts Designs.

And you probably guessed it, I shared it on YouTube too! Find the video on Silhouette Print and Cut – 12″ x 12″ HERE. See how easy it was with the new ES bed and cutting cardstock.

On a side note, while at the Silhouette Summit 2023, I also was able to meet several of the Silhouette Design Store Designers for the first time – Wispy Willow Designs, Diva Watts Designs, and Sarah Hurley. We spent several meals together and it was a blast. Check out my introduction video direct from Summit HERE. Make sure to follow these amazing designers too, they are a few of my favorites from the Design Store. I look forward to future collaborations with them! Stay tuned!

One of the new features of the Silhouette Curio 2 is it has a clearance of 20 mm. WOW! Yes, 20 mm. This is clearance under the tool housing. It is NOT cutting depth.

It also has auto detection of material thickness. This is awesome!

This means it opens up the possibilities of what projects can be done with the Silhouette Curio 2. Such as sketching on canvas and other thicker materials.

I used a Silhouette sketch pen in the blue sketch pen adapter and sketched out this design on a 8″ x 10″ canvas with a sketch font called SNF Sketchbook by Illustration Ink. There is also a new sketch pen holder (Type C) coming for the Tool 2 housing that will be compatible with the Silhouette Cameo 5 and the Silhouette Curio 2.

You will notice that the canvas is taped down on top of the ES Protective Sheet. I did have the ES bed on so the ES Protective sheet was secure and then taped the canvas to the machine so it would not move. Due to the surface of the backside of the canvas, it will not build up a charge directly on the ES bed to secure it. I also have a piece of wood inside the middle of the canvas for support.

I did try to use the Silhouette Type A pen holder in the Carriage 1 housing, but 3 different pens I tried did not reach the material. I will need to test that some more and figure out why it wasn’t working like it normally would.

Watch for a new video showing the sketch project on the Silhouette Secrets+ YouTube channel soon!

I can’t wait to share more! So many projects, so little time!

Save this for future reference by pinning the image below.

Sign up for the Silhouette Secrets+ Newsletter too! Tips, “secrets”, announcements, tutorials, classes, and more delivered to your inbox each Friday.

Silhouette Secrets+ Newsletter

Never miss out on the news, tips, “secrets”, deals, classes, and more that I share on Silhouette Secrets+. Sign up for the newsletter and get information delivered to your inbox every Friday.
Unsubscribe at anytime.

Enjoy !

THANK YOU for your support! How can you help? Click HERE & buy a coffee.
Every little bit helps with the cost of running the site.

Silhouette Classes

Never stop learning! Let me help you take the anxiety out of learning with Silhouette and get to creating faster! My Silhouette classes are heavily focused on software, so you can take the skills & techniques taught and apply them to many future projects!

Silhouette step-by-step Classes by Silhouette Secrets+

**This post may contain affiliate links. What that means is that I may receive compensation if you purchase through the links I have provided. The price you pay for the product or service is not higher but I may get compensated for sharing.
Posted on Leave a comment

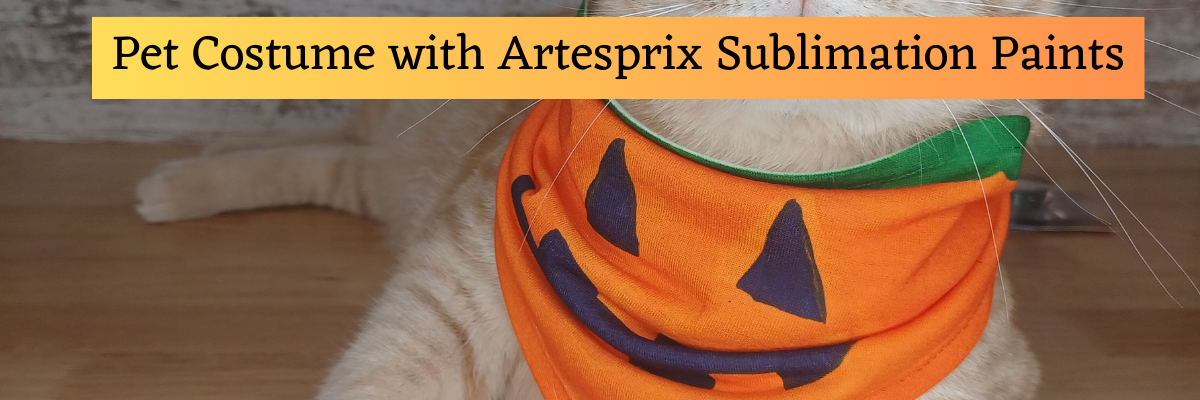
Halloween Costume with a Pet Bandana and Artesprix Sublimation Paints

Affiliate links may be present in the following blog post and as an Amazon Associate I earn from qualifying purchases.

Have you ever tried to have a photo shoot with your pets?
This month I was working with the Artesprix Sublimation paints and the Artesprix pet bandanas to create pet costumes. I needed a few good models.

Bader was pretty dashing in his bow tie.

However, Goldy was not having any of it and took off right after I snapped this photo.

But Bader was such a good sport and actually came back for more photos after his sister decided she was not participating.

Or it could have been the treats he was getting too!

And my daughter grabbed one and decided it was now hers for her stuffy to dress up for Halloween.

It was easy to do and even though I’m no artist I freehanded the designs to show how easy it can be done.

Check out the new video HERE on the Artesprix YouTube channel.

Artesprix Sublimation Supplies

Here is a list of the supplies I mentioned and demonstrated in the new YouTube video:
Artesprix Sublimation Paints
Artesprix Pet Bandana
Artesprix Protective Mat
Artesprix Protective Paper
Artesprix Heat Tape
– Heat Source that reaches 400 degrees
I used a Siser 9″ x 12″ Heat Press
– Other supplies: copy paper, pencil, scissors, paint brushes

Check out the new YouTube video HERE.

I’ll be sharing more so make sure to follow Artesprix on social media to see more projects!
Artesprix YouTube channel
Artesprix Blog
Artesprix Facebook Page
Artesprix Iron-on-Ink Inspirational Group

Save this for future reference by pinning the image below.

Grab some Artesprix sublimation products and get to creating today!

Enjoy !

THANK YOU for your support! How can you help? Click HERE & buy a coffee.
Every little bit helps with the cost of running the site.

Silhouette Classes

Never stop learning! Let me help you take the anxiety out of learning with Silhouette and get to creating faster! My Silhouette classes are heavily focused on software, so you can take the skills & techniques taught and apply them to many future projects!

Silhouette step-by-step Classes by Silhouette Secrets+

SS Logo snip it
**This post may contain affiliate links. What that means is that I may receive compensation if you purchase through the links I have provided. The price you pay for the product or service is not higher but I may get compensated for sharing.
Posted on 2 Comments

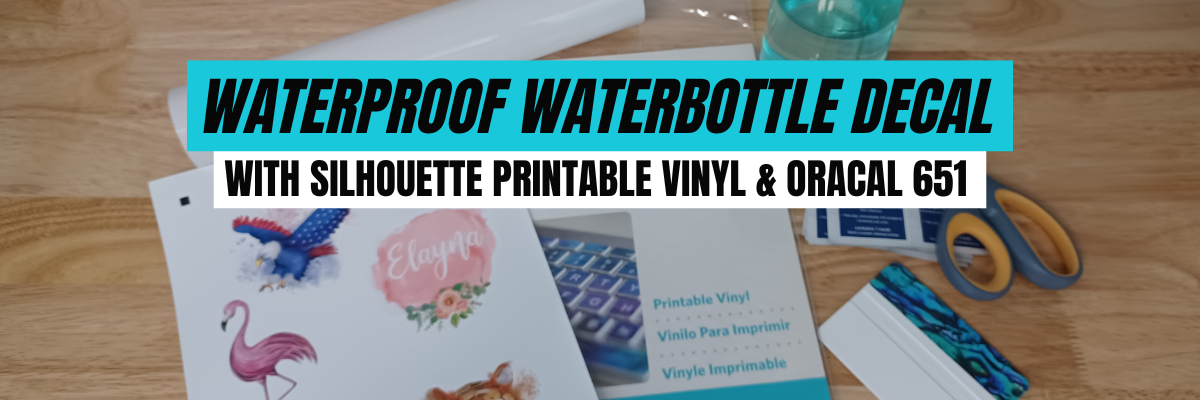
Waterproof decals with Oracal 651 & Silhouette Printable Vinyl

This post has been sitting on my to-do list for the past year. Yes! An entire year, but I guess all things have their timing. In this case, I made these water bottle decals over a year ago and they are still holding up amazing. So I can share how I did it and share also the longevity of it.

Affiliate links may be present in the following blog post and as an Amazon Associate I earn from qualifying purchases.

Waterproof Water Bottle Decals with Silhouette

For this project, I used Silhouette Printable Vinyl and Oracal 651 clear adhesive vinyl to create the waterproof decals.

Now, the first thing I want to emphasize is that if you are creating decals to sell, this is probably not the method for you. But, it is a great option for personal use. I’ll explain a bit more as we go through the tutorial.

Supplies used for Waterproof Water Bottle Decals

Designs used in this project:

Creating the Waterproof Decals

Check out the video tutorial on the Silhouette Secrets+ YouTube channel HERE or find the written tutorial below.

Since this was a project for my daughter, she helped with the entire process.

First was picking the designs and setting them up to print and cut with Silhouette.

Once the file was set up, we sent it to the printer.

Make sure that the ink is completely dry before touching when you are doing print and cut. You do not want any part of the design, including the registration marks to smear. Smeared registration marks can affect the accuracy of a print and cut with Silhouette.

After printing, we placed it on the cutting mat and sent it through the Silhouette to cut around the design.

Find more tutorials on Print and Cut with Silhouette HERE or check out my Silhouette class on Teachable – Silhouette Print and Cut Basics to Design Files to Troubleshooting Course HERE.

Next, it was time to setup the offset with the Oracal 651 clear. I recommend saving this file and then using File > Save As to save a file with the offsets, just in case you want to come back to this project later.

Silhouette makes this so easy with Offset Panel. Adjust the distance as needed for your project and your design.

When creating the offset, keep in mind that it’s designed to keep water out. I’d recommend a good size offset, but you don’t want it larger than necessary. Clear as mud right! Each project & design may vary. You want to make sure that the printed material is well protected so water doesn’t sneak in under it.

For more details on Offset in Silhouette, check out this post – Let’s Explore v4 – Offset Panel HERE

I no longer need the graphics or the original cut lines, so I can arrange the offset cut lines to maximize my space on my material and then send this to cut out of Oracal 651 clear.

Clean the surface of the blank with alcohol and allow it to dry. This gets rid of any oils or debris that could interfere with a clean adherence.

Weed the excess away from the Silhouette printable vinyl and the Oracal 651 clear.

Then simply apply the Oracal 651 clear over top of the printed design as centered as possible.

I’m sure you could find many ways to get it lined up exactly perfect, but in reality, I just eyeballed it. If I mess up, I can reprint and recut – So Simple!

It turned out fantastic! Here are the original photos on the day it was created.

That was in August 2022 and it has held up so well. A year later here is what it looks like.

There are a few nicks and dings where she dropped it and some residue from other stickers she thought she could add to it. Those “stickers’ didn’t last through the first wash.

She was headed out the door for her first day of school and we snapped these photos. As you can see it has held up nicely, even with ice water and extended use through an entire year.

Now, a few more tips for success!

  • Make sure to clean the surface of your blank, so you get the best adhesion with your materials.
  • After applying the decal, wait 48 – 72 hours prior to use. I’d recommend 72 hours. This allows the adhesive on the material and vinyl to set up or cure.
  • Then hand wash, no picking, no scrubbing, no dishwasher for best results.

Now, I mentioned at the beginning that if you are a seller, this probably isn’t the best method. Why?

Well, there are few reasons.

  1. The method I used is not UV safe. So it’s not recommended for outdoor use.
    It has worked great for water bottles used daily, but they aren’t out in the sun.
  2. It may not be efficient for mass production. After applying the Oracal 651 clear layer to the printed material, if it’s left too long it could start to cure to the backing of the printed material. For best results, I would recommend for immediate application. But, you never know until you try.

It has worked great for my daughter’s water bottle that she has used almost daily for an entire year and is still going strong.

Save this for future reference by pinning the image below.

Enjoy !

THANK YOU for your support! How can you help? Click HERE & buy a coffee.
Every little bit helps with the cost of running the site.

Silhouette Classes

Never stop learning! Let me help you take the anxiety out of learning with Silhouette and get to creating faster! My Silhouette classes are heavily focused on software, so you can take the skills & techniques taught and apply them to many future projects!
Silhouette step-by-step Classes by Silhouette Secrets+

SS Logo snip it
**This post may contain affiliate links. What that means is that I may receive compensation if you purchase through the links I have provided. The price you pay for the product or service is not higher but I may get compensated for sharing.
Posted on Leave a comment

Create a Custom Bottle Opener Gift with Artesprix Markers & Stamp Pads

Affiliate links may be present in the following blog post and as an Amazon Associate I earn from qualifying purchases.

This month I had a blast creating custom bottle openers with the Artesprix sublimation markers and stamp pads.

Check out the new video HERE on the Artesprix YouTube channel.

I used my Siser Juliet cutting machine and set it up to sketch out my text. You could use any cutting machine that the Artesprix sublimation markers fit in or even hand letter a design too!

I briefly covered how I set up the sketch in the Artesprix video.
For a more detailed look at sketching with Siser Juliet or Romeo, check out this new video on the Swift Creek Customs YouTube channel.

And then I did some experimenting as well with color saturation on the backside.
I LOVE how these have a bright, metallic look to them!

Artesprix Sublimation Supplies

Here is a list of the supplies I mentioned and demonstrated in the new YouTube video:
Artesprix Sublimation Bottle Openers
Artesprix Sublimation Markers
Artesprix Sublimation Stamp Pads
Artesprix Protective Mat
Artesprix Protective Paper
Artesprix Heat Tape
– Heat Source that reaches 400 degrees
I used a Siser 9″ x 12″ Heat Press
– Other supplies: copy paper, pencil, scissors, blending brushes

Check out the new YouTube video HERE.

I’ll be sharing more so make sure to follow Artesprix on social media to see more projects!
Artesprix YouTube channel
Artesprix Blog
Artesprix Facebook Page
Artesprix Iron-on-Ink Inspirational Group

Save this for future reference by pinning the image below.

Grab some Artesprix sublimation products and get to creating today!

Enjoy !

THANK YOU for your support! How can you help? Click HERE & buy a coffee.
Every little bit helps with the cost of running the site.

Silhouette Classes

Never stop learning! Let me help you take the anxiety out of learning with Silhouette and get to creating faster! My Silhouette classes are heavily focused on software, so you can take the skills & techniques taught and apply them to many future projects!

Silhouette step-by-step Classes by Silhouette Secrets+

SS Logo snip it
**This post may contain affiliate links. What that means is that I may receive compensation if you purchase through the links I have provided. The price you pay for the product or service is not higher but I may get compensated for sharing.
Posted on 2 Comments

Summer Days of Downloads!!!

Affiliate links may be present in the following blog post and as an Amazon Associate I earn from qualifying purchases.

We are seeing some cooler temperatures here and in a short time the kids will be headed back to school. The summer has gone too fast!

Although I do enjoy Fall and the cooler temperatures, maybe we can hang onto that summer feeling a little bit longer….

The Summer Days of Downloads hosted
by Heat Transfer Warehouse

I’m so excited to be participating in this!
Heat Transfer Warehouse sent out a request and I’m so glad I answered the call. I love a good challenge and I love learning new things! I’ve been designing in the Silhouette Studio software for over 10 years now and I love to create things!

Grab free designs on the Heat Transfer Warehouse website that are created by other crafters and influencers like me and have fun!

I love how this turned out!!!

Grab the free SVG file HERE at Heat Transfer Warehouse.

I used Siser EasyColor DTV and print and cut with the Silhouette to create my design, but you can use the SVG file for any materials you want to cut it out of! Adhesive vinyl, HTV, cardstock, and more!

And I have a new video out on the Silhouette Secrets+ YouTube channel sharing how I used the file HERE.

I am sharing it all!!! I ran into some issues and things did not go perfect, but I’m going to share how I made it a successful project in the end. From printer issues to user error, I’ll show you how I fixed both!

I love Siser EasyColor DTV and have been using it for over a year now! My shirts have been through 30+ washes and still look awesome! I wear some of them almost weekly. The biggest thing is to follow the directions for Siser EasyColor DTV exactly!
I have several tutorials and updates on my Siser EasyColor DTV results HERE.

Behind-the-Scenes Look

I’ll be sharing a how-to video soon showing the exact steps I took to create this design in the Silhouette Studio software. The hardest part is coming up with the design idea, well…. actually, the hardest part is picking fonts for me. And in this case, I had to use fonts that I knew had a commercial use license and allowed designs to be created and shared.
Make sure to read those terms of use for the fonts and designs you get and know exactly what they can be used for!!!

Here is a behind-the-scenes look at my creation process.

I save my work in many steps along the way in case I mess up or change my mind. Now, this is my working file and I started saving as a back up file along the way too! This way if anything happened, I had something to fall back on and I didn’t lose all the hours of work.

It did take time, but I loved it! I love being able to create things and sometimes I lose track of that in all the hustle and bustle!!! I thrive off of being able to create!

Now, let’s zoom in and did you see these color palettes next to my design?

These color palettes helped me to choose colors for my design! So simple!

Check out this tutorial – Create Custom Color Palettes in Silhouette HERE
I show you exactly how you can use color palettes in your creations!
Want to change up the colors of my SVG file? You can! And you can use color palettes to help too!

Want to create something with this design or simply collect it – grab the file HERE

I would love to see what you create with it!
Feel free to share on the Silhouette Secrets+ with EllyMae Facebook group HERE.

And stay tuned for a how-to video coming soon! I’ll post the link here when it’s complete!

Save this for future reference by pinning the image below.

Enjoy !

THANK YOU for your support! How can you help? Click HERE & buy a coffee.
Every little bit helps with the cost of running the site.

Silhouette Classes

Never stop learning! Let me help you take the anxiety out of learning with Silhouette and get to creating faster! My Silhouette classes are heavily focused on software, so you can take the skills & techniques taught and apply them to many future projects!

Silhouette step-by-step Classes by Silhouette Secrets+

SS Logo snip it
**This post may contain affiliate links. What that means is that I may receive compensation if you purchase through the links I have provided. The price you pay for the product or service is not higher but I may get compensated for sharing.
Posted on Leave a comment

Designing in Silhouette – Circle Frame with Basic Tools

Designing in Silhouette Studio does not have to be difficult or complicated. With a few basic tools, you can create your own designs to use in projects.

Anyone can do this! Yes – that means you! Let me show you how!

Check it out HERE on the Silhouette Secrets+ YouTube channel.

This technique could be used for a variety of projects from adhesive vinyl, heat transfer vinyl, cardstock and more! It is how I created the Swift Creek Customs logo that my husband and I use for our shirts, social media logos, project creations, watermarks, and more!

What would you use it for? Let us know below.

————————–

Updates and News

As social media evolves and followers are seeing less and less of what they want, there are 2 additional ways you can follow along with Silhouette Secrets+ and get information direct to your inbox.

Blog Notifications

Subscribe to the blog below – this means you will get notified by email each time a new blog post is published on the Silhouette Secrets+ website.

Weekly Newsletter

– Subscribe to the weekly newsletter – New! Subscribe HERE
Every Friday I will publish a newsletter that features tips, “secrets”, tutorials, and more. Sign up for the weekly newsletter and get information delivered straight to your inbox. No more relying on social media to show you information I share!

Enjoy !

THANK YOU for your support! How can you help? Click HERE & buy a coffee.
Every little bit helps with the cost of running the site.

Silhouette Classes

Never stop learning! Let me help you take the anxiety out of learning with Silhouette and get to creating faster! My Silhouette classes are heavily focused on software, so you can take the skills & techniques taught and apply them to many future projects!

Silhouette step-by-step Classes by Silhouette Secrets+

SS Logo snip it
**This post may contain affiliate links. What that means is that I may receive compensation if you purchase through the links I have provided. The price you pay for the product or service is not higher but I may get compensated for sharing.
Posted on Leave a comment

3 Ways to Work with Rhinestones

Have you seen all the possibilities with rhinestone designs?

In this post, I’ll share 3 ways you can work with rhinestones.

Rhinestone Design Created in Silhouette Studio

Affiliate links may be present in the following blog post and as an Amazon Associate I earn from qualifying purchases.

Let’s Add Bling!
3 Ways to Work with Rhinestones

1. Create Your Own Rhinestone Designs

If you have the Silhouette Studio software Designer Edition upgrade (or higher), you can easily create your own rhinestone designs that can be cut out of rhinestone flock.

Rhinestone Template Material

I share how the Rhinestone Panel in Silhouette Studio Designer Edition works in this tutorial in the Let’s Explore v4 series
Let’s Explore v4 – Rhinestones

I also have a step-by-step class where I share how to create 4 different rhinestone designs and give tips for working with pre-made rhinestone designs, how to make your own, and how make faux rhinestone designs as well!

Silhouette Design & Rhinestone Class

Designing with Rhinestones – Creating 4 Projects on Teachable HERE

And there are even more options!
If you have the Silhouette Studio Business Edition upgrade, you can also create the rhinestone design and export as a svg file. This means that other cutting machine users could also use the svg file or you could use a different machine to cut the rhinestone flock for the template as needed.
As always, you would need to test with your specific cutting machine to find out the cut settings that work best.

Check out these tutorials for more details on
Saving as a SVG file and Perfect Cut Settings

To create your own rhinestone designs does require some additional supplies. Here is a list of the supplies I used in the Designing with Rhinestones class.

Supply list

– Silhouette Studio Software
– Silhouette Studio Designer Edition upgrade
at Crafter Cuts (use code SECRETS to save 10%)
Check for additional sales at Silhouette America The Vinyl SpectrumSwing Design
Hot Fix Rhinestones
Rhinestone Template Material
Hot Fix Transfer Tape
Siser Glitter HTV
– Blanks: zipper bagshirt, bag, etc.
Trim paint brush
– Tools: Scissorssharp weeding toolSilhouette Pick Me Up ToolSilhouette Spatula
– Optional: Rhinestone scoop, Rhinestone Supplies at The Rhinestone World ,
Bead ScoopLarger Trim Paint brushPaper TrimmerLint RollerTool Kit
– Silhouette cutting machine (or another cutting machine model)
– Heat Source: Siser Heat Press

In the class, I used a few more project specific designs.
Find all the details HERE or directly on Teachable HERE.

2. Order Pre-Made Rhinestone Transfers

Maybe you don’t want to invest in the supplies to cut designs out of rhinestone flock and make your own.

You can still create with bling!

I recently ordered some rhinestone transfers from Heat Transfer Warehouse to test.

Sure I could have made them on my own, but once I saw the prices, I ordered a few.
Well, maybe more than a few!

Here is one I ordered for my daughter to wear.

And of course I couldn’t pass this one up.

These are as easy as ordering and pressing according to the instructions.
Bing, bang, bling!

The most difficult part about rhinestone designs is getting a good photograph.
It is so hard to capture the sparkle and bling on these designs.
I have more to apply in the future too!

Check it out HERE

3. Order Custom Rhinestone Transfers

Do you have a custom design you want to have made with rhinestones?
Maybe you don’t have all the colors of the rhinestones you need or it is just too complex or it is cheaper to purchase than to create?

Heat Transfer Warehouse also offers custom transfers as well.

Custom Rhinestone Design by Heat Transfer Warehouse

Prices will vary depending on the size, color, and complexity of the design.

Check it out at Heat Transfer Warehouse HERE!

And have fun!
So many projects on my list for the future!
Hope you’ll continue on this journey with me!

Save this for future reference by pinning the image below.

3 Ways to Work with Rhinestone Designs with Silhouette

Enjoy !

THANK YOU for your support! How can you help? Click HERE & buy a coffee.
Every little bit helps with the cost of running the site.

Silhouette Classes

Never stop learning! Let me help you take the anxiety out of learning with Silhouette and get to creating faster! My Silhouette classes are heavily focused on software, so you can take the skills & techniques taught and apply them to many future projects!

Silhouette Step-by-Step Classes

SS Logo snip it
**This post may contain affiliate links. What that means is that I may receive compensation if you purchase through the links I have provided. The price you pay for the product or service is not higher but I may get compensated for sharing.
Posted on 2 Comments

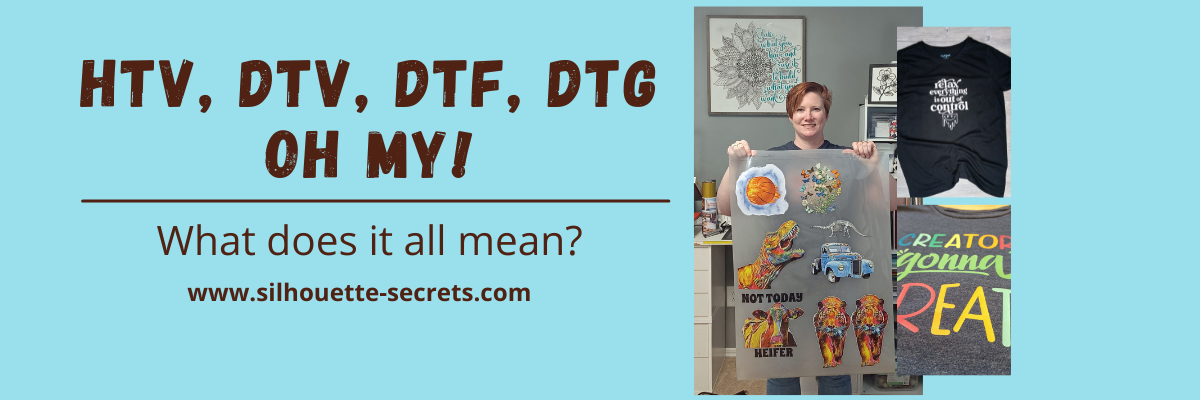
HTV, DTV, DTF, DTG, Oh my! – What does it all mean?

There are a lot of letters out there floating around in the industry right now and lots of places to get confused about what they all mean.

So let’s take a look at the basics of what each of these terms mean and then you may have a better idea if you want to look into each one a little bit further.

Affiliate links may be present in the following blog post and as an Amazon Associate I earn from qualifying purchases.

What is what?

HTV = Heat Transfer Vinyl

Heat transfer vinyl is a product that can be applied to fabric. The adhesive on heat transfer vinyl is heat activated and the adhesive melts into the fabric.

Siser Easyweed HTV Design - Relax Everything is Out of Control

Relax Everything Is Out of Control by Sophie Gallo – Design #436898

There are many brands and types on the market worldwide.
I use Siser Easyweed HTV and other Siser specialty HTV the most in my projects.

The primary purpose of HTV is for fabric and materials, however, you will see some apply it to other surfaces as well. I see mixed results with these methods and it is always good to test what you plan to do.

For more details, tips, tutorials, projects, and classes on HTV
Click HERE

Siser Easyweed HTV White - Cat Mom Design

Cat Mom by Erica Digital Design – Design #377246
Peeking Cat by Erica Digital Design – Design #353053

DTV = Direct to Vinyl

Siser EasyColor DTV is a product that was released in the Fall of 2022. It is a heat transfer vinyl that can be printed on with an inkjet printer.

Siser EasyColor DTV - Sarcasm Loading Printable HTV

Periodic Table Sarcasm design by Suzanne Cannon – Design #298890

I love Siser DTV!!!
I’ve had great success and my shirts have been washed well over 20+ times.

For more details on Siser EasyColor DTV
CLICK HERE

Creators Gonna Create design with Siser EasyColor DTV - printable HTV

Creators Gonna Create design by Jamie Lynn Designs – Design #295352

Siser DTV is great for being able to add graphics or multi-color designs using a home printer without having to cut and layer multiple colors of HTV.
Grab some Siser EasyColor DTV in a variety of sizes at The Vinyl Spectrum HERE.

Make sure to follow the instructions from Siser on printing, pressing, and washing for best results!

DTV is not the same as Heat Transfer Paper.
Heat Transfer Paper was an alternative before Siser EasyColor DTV was released. But it is not vinyl, even though many use the terms interchangeably.
Find more on Heat Transfer Paper HERE.

DTF = Direct to Film

Direct to Film is a printer that prints onto a film that is used to transfer the design to a blank. This can be a great for heavy graphic images that you do not want to layer or if you have a lot of one design that you are using for a project.

DTF designs ordered from 143Vinyl

Here is a sheet of DTF prints I ordered to test from 143Vinyl.com.
Cut them apart and heat press to your shirt or blank.
Done!

Backside of a DTF print ordered from 143Vinyl

Here is a look at the backside of a DTF print.

This is not your everyday at home printer, but can be useful if you run a business.
If you are interested in investing in a DTF printer, you can find more details on printers and supplies at Heat Transfer Warehouse or Swing Design.

If you are like me and don’t want to invest in a DTF printer or have no need to, then I’d recommend ordering some DTF prints to try out.
Check out 143vinyl.com and order today!
(Note: 143Vinyl is currently upgrading equipment as this post is published and DTF ordering is on hold)

Butterfly DTF design from 143Vinyl

You can either upload your own image or use their image library. I chose to use the Image library for my first round to test it out, but mostly because it takes me forever to decide on a design that I want and even longer to create it.

Make sure to follow all their instructions for submissions if you upload your own images.

Vintage Truck DTF print from 143Vinyl

I have also seen a lot of mention about DTF “hacks”. Keep in mind that it may or may not have the same results or longevity. It is all a process of experimentation.
The only way to know is to test it, if you decide to go down that road.

DTG = Direct to Garment

Direct to garment is another specialized printer and not your ordinary, average home printer. This printer type allows you to print directly onto a shirt or other blank.

Both a DTF or a DTG printer are a serious investment, so I would recommend doing a bit of research before diving into that, but it can be a great option for a small business that is growing.

Check out more on DTG printers at Swing Design HERE.

For me as an everyday crafter, a DTF or DTG printer are not in my list of must haves for my studio as I do not think they would be utilized enough.

Vinyl

Vinyl is a general term that can be used in reference to many different products.
Often times it is used so generically, that we have to clarify what the user is wanting to do before we can advise on information they are looking for.

There is adhesive vinyl, HTV, specialty vinyl, and also things like sticker paper and heat transfer paper that get lumped into the “vinyl” category.

Oracal 651 Adhesive Vinyl Intricate Mandala Design - Take what you have and use it to build what you want

If you are looking for more on adhesive vinyl, check out these tutorials HERE.

I wanted to keep this very basic in explaining what each meant. It can be very confusing when you see the terms thrown out there and sometimes used incorrectly.

I hope this information helps to give you an idea if you would like to explore more on a certain area that might be helpful to your future projects or business!

Save this for future reference by pinning the image below.

HTV, DTV, DTF, DTG what does it mean

Enjoy !

THANK YOU for your support! How can you help? Click HERE & buy a coffee.
Every little bit helps with the cost of running the site.

Silhouette Classes

Never stop learning! Let me help you take the anxiety out of learning with Silhouette and get to creating faster! My Silhouette classes are heavily focused on software, so you can take the skills & techniques taught and apply them to many future projects!

Silhouette step-by-step Classes by Silhouette Secrets+

SS Logo snip it
**This post may contain affiliate links. What that means is that I may receive compensation if you purchase through the links I have provided. The price you pay for the product or service is not higher but I may get compensated for sharing.
Posted on 2 Comments

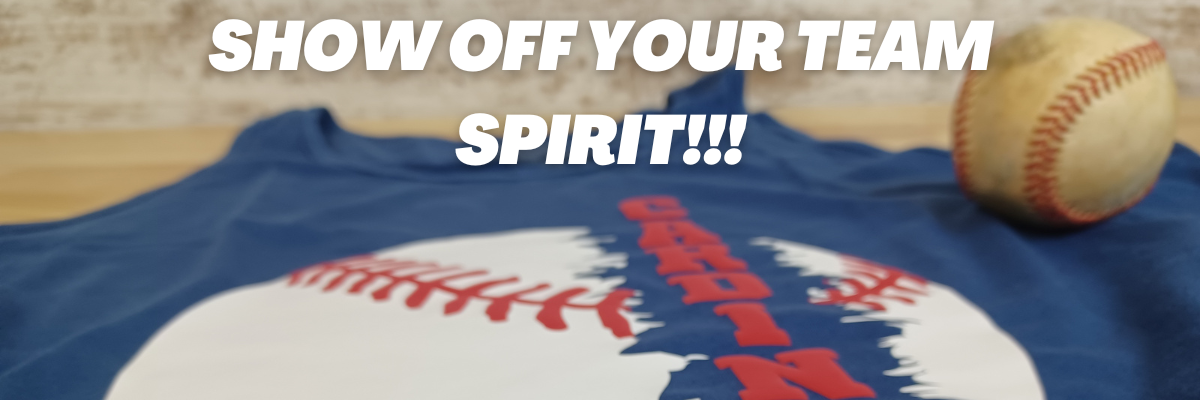
Show Off Your Team Support!!!

If you have a cutting machine, the possibilities are wide open for being able to show off your team spirit! You could make or embellish anything from shirts, bags, earrings, decals, and so much more!!!

And you can do it without using any trademarked images too!
I see so many trademark infringements daily and it’s such as hot topic that I wanted to share some ways that you can show your team spirit with other design ideas.

I have always been a sports fan and played several different sports growing up. Moving locations across the U.S. over the years we have gotten into supporting the local teams where we move.
When we moved to the St. Louis region, my friends warned me… Don’t become a Cardinals fan! I had no idea what they were talking about. I didn’t really follow baseball.

And then the first thing the Orthodontist told us was,
“The only thing to do around here is watch baseball.”
And that the rest is history!

Now I am a baseball fan. In fact, I’m watching right now as I type this post.

No matter what your team or sport, we can still be friends and you can find designs that you like and will show your team spirit off.

I hope this sparks some creative thinking for your future projects!
Here are just a few that I’ve created.

Affiliate links may be present in the following blog post and as an Amazon Associate I earn from qualifying purchases.

Siser Easyweed HTV T-shirt with Baseball theme

Supplies used:
Distressed baseball SVG from Franky Design found HERE
White Siser Easyweed HTV
Goodfellow t-shirt from Target

Cardinals Baseball design with Siser Easyweed HTV & Puff HTV

Supplies used:
Baseball Custom Name svg by SVGStoreShop
LW Coach Font by Lori Whitlock – Design #274417
White Siser Easyweed HTV
Wine Siser Easy Puff HTV
Make Market Women’s Tank from Michaels

I am so excited for this one! Like jump up and down, spin around in a happy dance excited!!!
I have tried and tried to get Siser Easy Puff to look good and puff up correctly.
And I did it! Yay! I think my past problems were my press and getting accurate temperature.

This time I used my new Siser Heat Press and it worked! Even when I had to press it a 2nd time, I didn’t lose the puff completely!

Siser Puff HTV with a Cardinals Baseball Design

It would probably be a bit puffier if I didn’t have to press that 2nd time, but I am still doing a happy dance that I got it to puff up. I know what errors I was making and I will continue to “perfect the puff”.

Siser Easy Puff is such a neat texture on blanks and I cannot wait to make more!

Don’t give up! If you’ve had issues with a project, just keep trying. Figure out what might be wrong and then try again. The Siser Easy Puff does require a very specific temperature, time, and pressure. But, I knew someday I would get it, if I just kept trying.

Custom Stadium bag with baseball design using Oracal 651 adhesive vinyl

Supplies used:
Baseball Let’s Do This by Sarah Hurley – Design #440716
Oracal 651 Adhesive vinyl in black and red
Clear Stadium Bag

Custom baseball spirit gear to wear and take to the game

And I’m ready for the game at Busch Stadium!

Oh! One more thing!!!

Earrings to complete the outfit!!!
This is a pair I made last year when we went to the game.

Faux Leather baseball earrings for spirit wear at the game

Supplies used:
Baseball earrings svg by MagicArtLab
Red Siser Easyweed HTV
E6000 glue
White faux leather/leatherette from Craft Chameleon
Fish hook earring hardware
Jewelry Pliers – used 2 pair

Sometimes it is hard to stop once I get doing down the path of creating. There is always something more that I want to do!

Here are a few more designs I have purchased for my future projects as well.

Baseball SVG Template Bundle 2 by SVG Cuttables
This one contains 27 designs that could be customized for your use if you are a baseball fan.

Baseball Patches by Moonlark Designs

I actually have this one already printed on Siser Easycolor DTV but just haven’t settled on what to put it on or how to position it.

Siser EasyColor DTV baseball designs - printable HTV

Anyone else get something cut and then have a hard time committing? Or maybe you get hung up deciding on a design to cut, that’s also what takes me a long time to decide on. I really don’t know what my hold up is. It is just a t-shirt and I could always print and cut more Siser EasyColor DTV. I just have to do it!

If you have not played with Siser EasyColor DTV, I love it! I have made quite a few shirts with it and have had great results.
Find more information on Siser EasyColor DTV
HERE.

And a few more designs I have plans for….
Baseball Distressed svg by Planet of Magic
Baseball Distressed svg by AlexSVGStudio
Distressed Baseball svg by MoveAsBees

I might have a thing for distressed designs.

But you may not like my style or you may find other designs that catch your eye or are looking for a completely different sport!
Check out the list of recommended design sites HERE and search for your topic of choice at each. Add them to your wishlist if you don’t want to buy right now so you can come back to easily find them later.

Save this for future reference by pinning the image below.

Show off your team spirit with custom designs Pinterest

I would love to create!
Feel free to share on the Silhouette Secrets+ with EllyMae Facebook group or the Creating with Siser – Juliet & Romeo Cutting Machines Facebook Group.

Enjoy !

THANK YOU for your support! How can you help? Click HERE & buy a coffee.
Every little bit helps with the cost of running the site.

Silhouette Classes

Never stop learning! Let me help you take the anxiety out of learning with Silhouette and get to creating faster! My Silhouette classes are heavily focused on software, so you can take the skills & techniques taught and apply them to many future projects!

Silhouette step-by-step Classes by Silhouette Secrets+

SS Logo snip it
**This post may contain affiliate links. What that means is that I may receive compensation if you purchase through the links I have provided. The price you pay for the product or service is not higher but I may get compensated for sharing.
Posted on Leave a comment

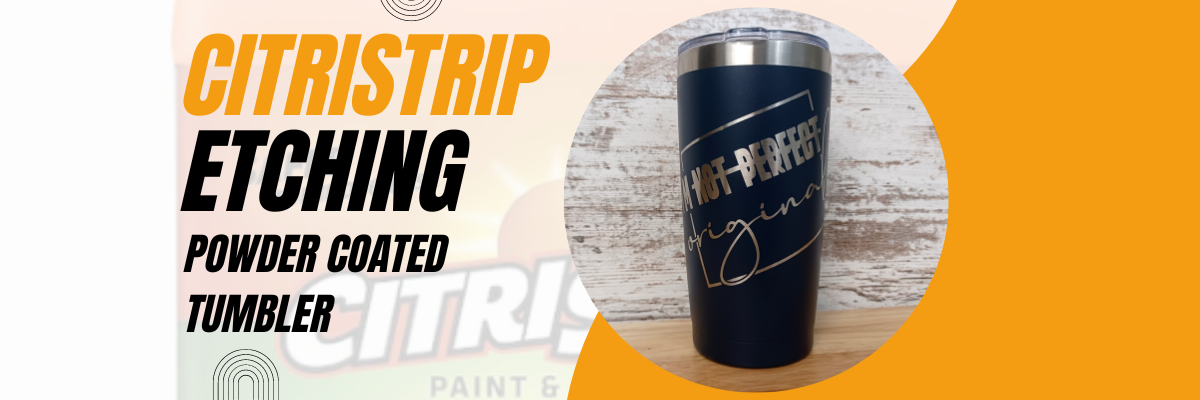
CitriStrip Etching on Powder Coated Tumbler

This has been a very popular technique that has popped up in the last year.
I have made several tumblers with it and love it!

Etched Powder Coated Tumbler with CitriStrip and Silhouette

Affiliate links may be present in the following blog post and as an Amazon Associate I earn from qualifying purchases.

Did you know you could etch a design on a powder coated tumbler?
Well, it’s not really “etching”, but that is still the term used in the industry.
It’s really the same process as glass etching with an etching cream such as Etchall or Armour Etch. The etching cream is “eating” away at the surface of the object. In the case of glass, it’s an acid etching the glass. But, the same process is done with CitriStrip, which is a paint stripper. So it’s basically “eating” the powder coated surface off the tumbler.

I have another new video that I’ve just released on the Silhouette Secrets+ YouTube channel showing this technique and sharing tips for success with the CitriStrip Etching.

CitriStrip Etching a Powder Coated Tumbler

Check out the new video HERE or click the photo above.

The process of creating the stencil could be done with any cutting machine model.

Supplies for the CitriStrip Etching

I’m Not Perfect by Tanya Batrak – Design #326840 (modified details below)
Powder Coated Tumbler
*not all tumblers work – the ones I’ve linked I have had great success with. Other styles that are painted vs powder coated, I have not.
Oracal 651 Adhesive Vinyl
Transfer Tape
Citristrip Paint Stripper
Painters Tape
Gloves
Weeding tool
Paper towels, water
Optional: Artesprix Project Mat
*this is great for working with sublimation projects or a safe surface so your tumbler doesn’t roll

Want to learn how to create your own designs?

The CitriStrip video demonstration was created for a class I developed earlier this year that does just that!

In the video class, you will learn how to create 4 different designs in the Silhouette Studio software, including how I modified the design used in the video demonstration.

Silhouette Class Creating Unique Designs in Silhouette Studio

For more details on the class check out the full description HERE on Teachable.

I also have a Glass Etching class on my Teachable site too!

Glass Etching with Silhouette

Find all the details on the Glass Etching Class HERE

I have been teaching Silhouette classes since 2016 and cover a wide variety of topics.
What are you looking for?

Silhouette step-by-step classes by Silhouette Secrets+ with EllyMae

Check out all the classes available on the Silhouette Secrets+ Teachable site HERE.

The classes are designed to help you get started faster and take the guess work out of designing or creating projects with your Silhouette.
No more anxiety or guessing, follow along at your own pace and watch as many times as needed to fully understand and retain the information.
I hope you find something that will help you in your Silhouette journey!

If you have a suggestion on a class you’d like to see in the future, I would love to hear your ideas. You can make those suggestions HERE.

As I mentioned above, I have made several of these tumblers.
Here is one of the first ones we made.

Powder Coated Tumblers for Swift Creek Customs with CitriStrip and Silhouette Studio

You can find the video on us creating the ones pictured above HERE on the Swift Creek Customs YouTube channel too! This was a video I partnered with my husband on and was really a test to see if it really worked!

I hope you have a chance to be creative today!

Save this for future reference by pinning the image below.

Pinterest Citristrip Etching a Powder Coated Tumbler

Enjoy !

THANK YOU for your support! How can you help? Click HERE & buy a coffee.
Every little bit helps with the cost of running the site.

Silhouette Classes

Never stop learning! Let me help you take the anxiety out of learning with Silhouette and get to creating faster! My Silhouette classes are heavily focused on software, so you can take the skills & techniques taught and apply them to many future projects!
Silhouette step-by-step Classes by Silhouette Secrets+

SS Logo snip it
**This post may contain affiliate links. What that means is that I may receive compensation if you purchase through the links I have provided. The price you pay for the product or service is not higher but I may get compensated for sharing.