Posted on 2 Comments

Brilliant Living Digital Kit by Nitwit Collections – Crafting Creativity

Silhouette Secrets+ with EllyMae

A digital design preview featuring a card cluster with floral elements, butterflies, and a colorful plaid pattern, promoting 'Brilliant Living' by Nitwit Collections.

A handcrafted greeting card featuring colorful floral designs, a purple butterfly, and the text 'brightest wishes for you' from the Brilliant Living digital kit. The card is placed on a wooden surface in front of a cutting machine.

Here is a look at the print and cut page printed out ready to cut around each of the layers.

Crafting project featuring a colorful card design with floral elements, a butterfly, and text that reads 'brightest wishes'. The card design is on a mint green cutting mat placed on a wooden surface.

There are so many options with a digital kit and you can mix and match, add more layers, decrease the layers, or only print one layer for a project as well.

If you are mailing the card, you may need to keep the thickness of the layers in mind when creating it.

So for the next cards, I stacked elements together and then was able to print 2 card fronts on one sheet of paper. Each of these designs have different elements that can be layered together.

A printed design featuring two cards with the message 'brightest wishes,' surrounded by colorful flowers, butterflies, and ladybugs, set against a white background.

Here is a look at the final results from this printed page.

Two greeting cards featuring colorful butterflies and flowers from the Brilliant Living Digital Kit, with the text 'brightest wishes for you' prominently displayed.

The card on the left side only has the “for you” and the “ladybug layered”, while the card on the right has the “wishes, for you, and the ladybug layered”.

Two colorful ladybug cutouts with red bodies and black spots, placed on a grid background.

There were a couple intricate areas that may not cut well for all users. I was able to get these ladybugs with their antennae’s to cut, but had to be extremely careful removing them off the cutting mat.
However the butterfly antennae’s were just too delicate, which is another reason you may want to add that layer directly to the card background instead of trying to add it as a 3-D layer.
But you never know until you try. The Silhouette machine might amaze you in the cut it can get.

Three greeting cards featuring colorful floral designs, butterflies, and the text 'brightest wishes for you' on a wooden surface. 
Created with the Brilliant Living Digital Kit

Watch how I created these layered card designs with Silhouette in this video on the Silhouette Secrets+ YouTube channel – Layered Card Design with Brilliant Living Digital Kit – Step-by-step Silhouette tutorial

Video tutorial HERE

Being able to create your own designs means that you can make them any size you want and create as many as you need in the moment. I started with the idea to create only 2 tags, but it ended up being 4 complete designs.

A crafting workspace featuring a cutting machine, several colorful tags with floral designs and text, a roll of tape, scissors, and decorative embellishments on a wooden surface.
Tags created with the Brilliant Living Digital Kit

I used 2 sheets of paper to print and created 1 layered tag and one simple print and cut tag on each sheet.

A colorful greeting card design featuring floral elements and the text 'wishes' displayed on a crafting machine workspace.

Here is a look at one of the layered tags using the foam tape to pop up the dimension.

The great part about creating your own tags is there are no rules. Flower hangs off the edge, no problem! Want the design to be flush on the edges – no problem! Or mix and match. And using a digital kit allows you to mock it up first in the Silhouette software before you even cut the elements out.

Four decorative tags with floral designs and the word 'wishes' displayed on a wooden surface, alongside a cutting machine, promoting a step-by-step tutorial in Silhouette Studio.

Video tutorial HERE

I used the same techniques I shared in the step-by-step video tutorial – Layered Card Design on the Silhouette Secrets+ YouTube channel and created a little bit different layout for two 5″ x 7″ cards.

Two greeting cards displayed on a wooden surface, featuring floral designs, butterflies, and the word 'wishes'. The left card has a striped border while the right card showcases a different layout with a colorful pattern.
Created with the Brilliant Living Digital Kit

Here is a look at the card designs in Silhouette Studio.

A digital design featuring two greeting card layouts with floral patterns, featuring butterflies, ladybugs, and the word 'wishes'. The left card has a white background with pink and red flowers, while the right card displays a blue background with a plaid pattern.

And then I simply chose letter size paper and rotated the designs 90 degrees so I could print 2 on a page.

A screenshot of Silhouette Studio software displaying the design for a card featuring floral motifs, butterflies, and the word 'wishes'. The design area shows two card layouts and various setup options on the right.

A few slices with my paper trimmer and my card front were ready to attach to a base.

Quick and easy cards in minutes with the Brilliant Living Knick Knack kit by Nitwit Collections.

Digital designs worked perfectly for sublimation projects! I created 4 sublimation project designs on 1 sheet of sublimation paper.

A collection of crafting materials including a decorative metal panel, multiple colorful greeting cards featuring flowers and butterflies, and bookmarks, arranged on a wooden table next to a cutting machine.
Created with the Brilliant Living Digital Kit

I made a decorative panel, cover for a compact mirror case, a bookmark, and a coaster.

The colors are so bright and brilliant with these projects, except the center of the coaster turned out a bit washed out. This can happen with hardboard at times and moisture affecting the outcome.

A colorful decorative panel featuring floral patterns, a purple butterfly, and bold text that reads 'brightest wishes' alongside an arrow and additional decorative elements.
Created with the Brilliant Living Digital Kit

Watch how I created these sublimation projects with Silhouette and sublimation blanks on the Silhouette Secrets+ YouTube channel HERE.

An image showcasing a decorative card with floral and butterfly designs, featuring the text 'brightest wishes' and other colorful embellishments, alongside crafting materials on a wooden table.

Video tutorial HERE

Supplies Used:

Make sure to follow Nitwit Collections for more amazing designs:

Sign up for the Silhouette Secrets+ newsletter HERE so you don’t miss out on future collaborations.

A flat lay of various sublimation projects including a decorative coaster, a compact mirror, tags, and a greeting card featuring colorful floral designs and the text 'brightest wishes'.

Silhouette step-by-step Classes by Silhouette Secrets+

Silhouette Secrets+ with EllyMae
**This post may contain affiliate links. What that means is that I may receive compensation if you purchase through the links I have provided. The price you pay for the product or service is not higher but I may get compensated for sharing.

Posted on Leave a comment

Crafting Creativity: 1 Bunny File, 5 Creative Projects with Studio Ilustrado

Silhouette Secrets+ with EllyMae

A cute paper craft scene featuring a gray bunny in a hot air balloon shaped like a carrot, surrounded by colorful flowers and pastel eggs on a checkered tablecloth.

Collage of spring-themed crafts featuring bunny and carrot designs, including greeting cards, decorative items, and crafting tools.

A colorful paper craft depicting a bunny in a hot air balloon shaped like a carrot, with a basket and flowers in a grassy landscape.

I had the Silhouette Curio 2 out from testing with the Silhouette Leather Carving Knife, so it was the machine I used to cut this card. Almost all the pieces were cut out using scraps from my stash. I love being able to use my scraps!

Look at these tiny details!

A hand holding a gray paper cutout of a smiling bunny with long ears.

To be honest, I wasn’t sure if it would cut well with the electrostatic mat on the Curio 2, but it did! Especially using a scrap piece of cardstock with the Silhouette Electrostatic Mat.

Sometimes we all just need a little bit of help and taping down the cardstock scraps on the Electrostatic Mat can be that help. It just added a little bit more security to hold my scraps in place and get a successful cut with the Electrostatic Mat. I love this new technology that Silhouette has. While it does not work with all materials, it has saved me hours of time cutting cardstock.

Close-up of a cutting machine with two tool holders, one equipped with a blade and the other empty, and a piece of gray material on the cutting mat.

While I used the Silhouette Curio 2 to cut the projects, any Silhouette machine could be used to create these projects.

Watch a bit of the behind-the-scenes on creating this project in this video – Creative Projects with Studio Ilustrado Designs – Bunny Carrot Balloon Card HERE

A colorful, three-dimensional craft display featuring a bunny in a basket, surrounded by green grass and flowers, with a large carrot above.

A yellow gift box shaped like a carton with a bunny illustration on the front, placed on a crafting table alongside a roll of adhesive tape, a tape dispenser, and a crafting tool.

The bunny made the perfect peeking addition to this gable box card. Don’t let the name of a design fool you either. The title of the box is called Christmas Gable Box by Studio Ilustrado, but it can be used for so much more!

Now here is one of my “secrets” – while the Silhouette machines can cut acetate for the window of this box card, I can cut it faster and with less headache.

Digital design software interface showing a cut template with instructions to cut a shape from cardstock.

I cut the window shape from a piece of cardstock using the Silhouette machine and then used it as a template to make a few quick snips with scissors and I was on my way to assembly. It doesn’t have to be perfect since it will be hidden inside the box. And I saved myself time, headache, and didn’t dull my blade.

Crafting workspace with a yellow paper cutout featuring bunny designs, scissors, and various crafting supplies including glue and other tools.

I used my laser to cut this out of wood, but you could also use other materials such as cardstock too! Even though I have a laser machine, I started with a 12 inch wood round blank, which you could use as your backing board too.

A decorative wall hanging featuring a cartoon bunny in a hot air balloon shaped like a carrot, with the words 'Hoppy Spring' at the bottom, set against a blue background.

I used the SVG file, opened it in Silhouette and made a few modifications to the file to be able to create the layers for cutting on wood. Since the wood has more thickness to it than a material such as cardstock, I had to add a layer behind the bunny and cut multiples to make it sit flush with the sign and balloon basket. The knife tool in Silhouette helped me to cut the bunny’s little feet off so it would sit flush on the balloon for this design. That sounds so bad when I type it out, but if you have designed in Silhouette, you’ll know exactly what I mean.

A workspace with various craft supplies including a blue sign that says 'SPRING', a cute wooden bunny cutout, and several Uni Posca markers in different colors.

I used a combination of Posca Paint Markers and Deco Arts Paint for finishing out the sign.

A decorative wall hanger featuring a cute gray bunny with pink ears peeking over a white picture frame. The word 'SPRING' is spelled out in yellow letters beside the frame.

I drew out a skinny rectangle, made a copy and rotated it 90 degrees. Aligned the right edges and welded it together to make the corner. Then sized the bunny and welded the bunny background to the rectangles to sit on top. Next, I added letters down the right side. Before welding the letters, I made a copy so I could cut them out and layer on top for color and dimension.

Before you go to cut the design, make sure it’s all flush. I forgot to cut the bunny’s feet with the knife tool, but I didn’t realize it until after he was all cut out, so he sits a little bit higher on the top of the door. In this case, it wasn’t worth recutting the design simply because you can’t really tell on our door frame.

I love these little door corner designs, even if we only have a few door frames that I can add them to in our house because the previous owner used the wrong trim to frame out the doors or the frame is too close to the wall. It is a fun way to add a bit of decoration without putting another hole in the wall.

Supplies Used:

I used the knife tool again, but not to cut off any bunny feet. Instead I cut the carrot off the design and used it to create a couple corny cards.

Four handmade cards featuring carrot designs and playful phrases, displayed on a crafting mat with various crafting tools in the background.

I used a Silhouette Black Glitter sketch pen and a font called BFC Rustic Cherry Farmhouse to sketch out the sentiment. I love the look of this glitter black pen, but it’s very difficult to photograph and show how it really looks.

A craft workspace featuring a Silhouette cutting machine, with a blank page laid out displaying fun carrot-themed quotes and phrases, alongside two markers.

I used the Silhouette Curio 2 to sketch this design using the electrostatic mat because that was the machine on my desk this week, but sketching can be done with any Silhouette machine model.

Two handmade cards on a crafting desk. The left card features a carrot with the text 'I CARROT FOR YOU'. The right card depicts a potted plant with the text 'BLOOM WHERE YOU ARE PLANTED'.

The clay pot was drawn in Silhouette Studio using basic shapes and adjusting the bottom edit points on a rectangle too!

Unlock your creativity by learning more about Silhouette. You never know where it will take you! Even making cards with carrots.

Four greeting cards featuring playful carrot designs and puns. The cards read: 'YOU'RE ONE IN A BUNCH', 'BLOOM WHERE YOU ARE PLANTED', 'THANKS A BUNCH!', and 'I CARROT FOR YOU', showcasing colorful carrot illustrations.

Collage of five craft projects featuring bunnies, plants, and colorful decorations, with a central text overlay reading '5 projects 5 1 file'.

Silhouette step-by-step Classes by Silhouette Secrets+

Silhouette Secrets+ with EllyMae
**This post may contain affiliate links. What that means is that I may receive compensation if you purchase through the links I have provided. The price you pay for the product or service is not higher but I may get compensated for sharing.

Posted on Leave a comment

Silhouette Cameo5α (Alpha) Unboxing

Silhouette Secrets+ with EllyMae

The Silhouette Cameo5α (Alpha) model is the latest machine released by Silhouette America. It was announced at the Silhouette Summit 2025 in Japan in September 2025 and was released shortly after the Summit.

A boxed Silhouette Cameo 5 cutting machine, labeled with dimensions and brand, placed on a concrete surface.

Affiliate links may be present in the following blog post and as an Amazon Associate, I earn from qualifying purchases.

I was not able to attend the Silhouette Summit in Japan, but did order the Silhouette Cameo5α as soon as it was available on the Silhouette America website. At the time of the release, only the white Silhouette Cameo5α models were available and there was no timeline on the other colors being released, so I grabbed it. However, if I would have had choices, I would have selected the Bianco Carrara pattern. When this pattern was first released, I was not impressed, until I had one in my hands and it is my new favorite pattern.

I released 2 unboxing videos on the Silhouette Secrets+ YouTube channel sharing a quick setup as well as an in-depth look at the new machine model.

So far the in-depth unboxing and setup has been the most popular.

I did not get a blog post out at the time of releasing the unboxing, but sometimes a delay can also be a good thing as I’ve had some time to work with the Silhouette Cameo5α and really test it out. This means that I can add more information and real world experience to the blog post.

Here is one of the first projects I cut out after unboxing the Silhouette Cameo5α.

Crafting materials laid out on a wooden table, including cutouts of a skeleton, coffin, and various decorative pieces, with a Silhouette cutting machine in the background.

This project had many intricate cuts from the wood layers to the small skeleton hands. At this size, the cardstock makes a huge difference too! The first one I cut, the cardstock paper layers were separating and I had to switch to a higher quality smooth cardstock for these details.

Three white paper cutouts of hands placed on a brown surface, with a crafting tool nearby.

Here is a close up look at this finished project of the 3-D Skeleton Coffin with all of the details.

A decorative wooden chest with chains and a padlock, featuring skull and bony hands, set against the backdrop of a cutting machine.

This was just one piece to my Halloween busted canvas project, but it was a great test to really see what the Silhouette Cameo5α was capable of.

A decorative coffin with a skeleton figure inside, resting next to a white cutting machine on a wooden surface.

But, of course, I couldn’t stop there! The coffin was only the first piece of my Halloween busted canvas project.

A Halloween-themed decoration featuring a skeleton seated in a spooky graveyard setting, surrounded by a decorative wreath made of black netting, yellow and black patterned ribbons, and faux bones, with a miniature coffin and tombstone that reads 'R.I.P.'

I continued to cut out pieces for the 3-D Tombstone and put the Silhouette Cameo5α to the test. Within a short amount of time from unboxing the machine, I had a lot of cut hours into testing it out.

Watch the video – 3D Tombstone & Skeleton Halloween Art | Creative Process with Silhouette HERE.

A 3D Halloween-themed display featuring a skull behind wooden planks with chains and a padlock on one side, and a gravestone marked 'R.I.P.' on the other side, surrounded by paint supplies.

How Is This Model Different?

The Silhouette Cameo5α is an updated model of the original Cameo 5. The original Silhouette Cameo 5 model is no longer manufactured.

The Silhouette Cameo5α features a new roller design and I do like how it is much more visible to see the rollers and if ever there is a need, easier to clean them as well. It also has a pinch pressure button locking mechanism on the right roller that is so much nicer than the original model design.

Close-up view of the interior of a Silhouette cutting machine, showcasing the rollers and blade holders on a wooden surface.

It also has an additional 0.3 mm clearance on the roller bar for the Silhouette Cameo5α. At the Silhouette Summit, they mentioned this in reference to use with the Silhouette Electrostatic Mat. With the Silhouette Electrostatic Mat, there is a protective sheet that goes on top of the mat before you place your materials on it to be cut. This protective sheet adds height to what is rolling through the machine. I have not had any issues with this, however, they must have received some feedback from users who were using multiple layers of materials, such as stickers with a laminate on top of it which is thicker than your average cardstock. So the clearance was increased a tad bit.

Keep in mind that when you are talking about clearance, the material also has to “clear” the bottom of the tool that is being used. So even if it clears the bottom of the roller bar, thicker materials also have to allow the blade or tool to clear it as well. And even if a material can clear both the roller bar and tool tip, that does not guarantee that it is a cuttable material with the Silhouette. There are many factors that go into whether a material is going to cut well with a Silhouette.

Close-up image of a cutting machine with a white exterior, displaying the interior components and cutting blade holder system.

With the Silhouette Cameo5α, you do have to use a Silhouette software version of 5.0.402 in order for the machine to be recognized. As I type this up, there are still many bugs and issues with version 5 and I am not recommending version 5 for all users. But, if you are a Silhouette Cameo5α owner, you do have to use version 5 and there is no way around that. I recommend using version 5.0.402 at this time and not the current version (5.0.414) as we have seen some issues with the current version. We have seen some issues of machines being bricked or recognized as a regular Cameo 5 and not a Silhouette Cameo5α. If you encounter any of those issues, please contact Silhouette Support and be as detailed as possible in your request for assistance. Including photos and video can help them help you faster as well.

The Silhouette Cameo5α also uses the 4 point registration marks for print and cut projects. This was first released with the Silhouette Cameo Pro MK II model and now is available with the Silhouette Cameo5α model. Silhouette states that this is supposed to improve accuracy of the print and cut results. However, I have not seen any significant improvements in my testing. The biggest issues we see with print and cut are still due to setup and user errors.

Screenshot of a design project in Silhouette Studio, featuring two card designs with floral and butterfly elements, along with text 'wishes' and 'for you'. The page setup settings are displayed on the right.

I shared a little more on using the 4 point registration marks and testing it with the same design on both the older style marks and the newer style marks in this video – Layered Card Design with Brilliant Living Digital Kit – a Step-by-Step Silhouette Tutorial.

Image shows two layered greeting cards featuring floral designs and butterflies, with crafting materials like tape and scissors in the background. The text above indicates a step-by-step tutorial using a digital kit.

This 4 point registration mark system is only available if the Silhouette software has recognized a Silhouette Cameo5α or a Silhouette Cameo Pro MK II has been connected.

What Do I Use?

I use both the Silhouette Cameo 5 original model and the Silhouette Cameo5α. It really just depends on what I am doing and what the project might be.

Anytime I get a new machine, I like to put it through the paces to see what works and what doesn’t. This means testing both the machine and the Silhouette Studio software.

Here are some print and cut projects I did while testing it.

A crafting workspace featuring a cutting machine, colorful papers, printed floral designs, and various crafting tools arranged on a wooden table.

I do love that I can create meaningful cards and gifts for friends and family, no matter what the circumstances are.

A greeting card featuring a floral design with the text: 'May you find comfort in sweet memories, strength in those you love & hope in each new day,' placed next to a crafting machine on a wooden table.

Check out more projects I cut using the Silhouette Cameo5α in this blog post – 5 Card Designs from One Template with Quietfire Designs.

A collage featuring five unique card designs made with one template, showcasing themes like winter, birthdays, flowers, Halloween, and a friendly ghost.

I really do wish cutting machines came with a cut hours timer. Within the first few weeks of owning the machine, I racked up a lot of cut hours.

Save this for future reference by pinning the image below.

A woman wearing a black shirt with the word 'create' is standing at a table, pointing towards a Silhouette Cameo 5 cutting machine. The background features various craft supplies and organizational tools.

Enjoy !

THANK YOU for your support! How can you help? Click HERE & buy a coffee.
Every little bit helps with the cost of running the site.

Silhouette Classes

Never stop learning! Let me help you take the anxiety out of learning with Silhouette and get to creating faster! My Silhouette classes are heavily focused on software, so you can take the skills & techniques taught and apply them to many future projects!

Silhouette step-by-step Classes by Silhouette Secrets+

Silhouette Secrets+ with EllyMae
**This post may contain affiliate links. What that means is that I may receive compensation if you purchase through the links I have provided. The price you pay for the product or service is not higher, but I may get compensated for sharing.

Posted on Leave a comment

Silhouette Tutorial: Layered Card Design with Brilliant Digital Kit

Silhouette Secrets+ with EllyMae

New video out on the Silhouette Secrets+ YouTube channel!!
In this video I share step-by-step how I created a layered card design in the Silhouette Studio software using a digital kit by Nitwit Collections.

A colorful greeting card featuring a purple butterfly, a red tulip, and the text 'brightest wishes for you' on a floral background, positioned in front of a cutting machine.

Affiliate links may be present in the following blog post and as an Amazon Associate, I earn from qualifying purchases.

This is the first Crafting Creativity project for the month of March that I shared with newsletter subscribers.

Watch this below.

I love the bright colors Knick Knack kit by Nitwit Collections. This kit is exclusive to newsletter subscribers for the month of March and then will be available in their shop for purchase later.

Image showcasing a collection of card designs featuring floral elements, butterflies, and decorative layers. The layout includes a bright and colorful card cluster with the text 'brightest wishes for you', accompanied by matching envelopes and various themed graphics.

Subscribe to the weekly newsletter HERE. It comes straight to your inbox each Friday.

Two decorative greeting cards featuring the text 'brightest wishes for you,' adorned with purple butterflies, red roses, and colorful floral patterns.

This Brilliant Living Knick Knack kit coordinates with the Brilliant Living Collection that can be found on the Nitwit Collections shop.

A colorful collage featuring various decorative elements and phrases related to celebration, joy, and friendship from the NitWit Collections' Brilliant Living Collection.

View this tutorial on creating a layered card in Silhouette Studio on the Silhouette Secrets+ YouTube channel HERE.

Save this for future reference by pinning the image below.

Two layered greeting cards featuring floral designs and butterflies, with the text 'brightest wishes for you.' A Silhouette cutting machine is visible in the background.

Enjoy !

THANK YOU for your support! How can you help? Click HERE & buy a coffee.
Every little bit helps with the cost of running the site.

Silhouette Classes

Never stop learning! Let me help you take the anxiety out of learning with Silhouette and get to creating faster! My Silhouette classes are heavily focused on software, so you can take the skills & techniques taught and apply them to many future projects!

Silhouette step-by-step Classes by Silhouette Secrets+

Silhouette Secrets+ with EllyMae
**This post may contain affiliate links. What that means is that I may receive compensation if you purchase through the links I have provided. The price you pay for the product or service is not higher, but I may get compensated for sharing.

Posted on Leave a comment

Crafting Creativity: 1 Design, 5 Stunning Projects with Flavir Design

Silhouette Secrets+ with EllyMae

A decorative floral crown made of paper flowers in warm colors and green leaves, arranged on a simple gold circular base.

A flat lay image featuring two large, colorful paper flowers - one yellow and one orange - with green leaves on a crafting mat. Surrounding the flowers are a hot glue gun, a sponge, a pen, and small squares of paper. Silhouette flower projects

Screenshot of Silhouette Studio software showing a design featuring leaf shapes outlined in orange, with settings for cutting cardstock on the right side of the screen.

A close-up view of two artificial flowers, one yellow and the other orange, adorned with green leaves, placed on a wooden background. Silhouette flower projects
A close-up of vibrant paper flowers in shades of yellow and orange, accompanied by green leaves, with the text 'Behind the Blooms' prominently displayed.

A handmade birthday card featuring a large pink flower, green leaves, and a glittery gold accent band. The card has a watercolor-like pink background and includes the text 'HAPPY BIRTHDAY' on a white banner. Silhouette flower projects

A handmade birthday card featuring a large pink flower, a gold glitter strip, and the text 'HAPPY BIRTHDAY' on a white banner. The background is a vibrant pink splatter design with green leaves. A crafting workspace with various tools and supplies is visible in the background. Silhouette flower projects

A vibrant pink paper flower with intricate petals sits on a textured card background, accompanied by green leaves and a glittery gold strip. The card features a banner reading 'HAPPY'. Silhouette flower projects

Two decorative paper flowers in teal and pink placed on geometric boxes, with a background featuring pink spray and floral shapes. Silhouette flower projects

A pink cherry flower box design displayed alongside details of its purchase options and features.

Screenshot of Silhouette Studio software displaying a digital pattern design for a box with a grid background.

A hand holding a sheet of paper with a grid pattern and an abstract shape on it, placed on a cutting mat in front of a cutting machine.

Close-up of a hand holding a piece of paper with a grid pattern, showcasing a cut-out shape on the paper.

Five decorative paper boxes with colorful paper flowers on top, displayed on a wooden surface. Silhouette flower projects

A digital design workspace displayed on a computer screen, featuring various bookmark designs with floral elements and motivational text phrases like 'Just one more page' and 'Your only limit is your mind.' The design software's page setup and customization options are visible on the right side of the screen.

Print preview of bookmark designs featuring motivational quotes and leaf patterns.

Close-up of a crafting machine applying gold foil to a textured surface with a red light indicator and patterned tape.

A close-up of foil packaging with an irregular cutout, revealing a textured silver surface underneath. The surrounding area features pastel colors and decorative elements.

Close-up of a textured background with blue floral designs and the phrase 'Just One More Page' in gold lettering.

A close-up of a decorative fabric featuring blue leaf patterns and the inspirational phrase 'Live Your Dream' in gold lettering.

A collection of five decorative bookmarks with motivational quotes on a wooden surface, accompanied by a craft machine and a pink scraping tool. Silhouette flower projects

Supplies Used:

A close-up view of a textured surface covered in green moss and adorned with pink fabric flowers, featuring a wooden structure in the backdrop. Silhouette flower projects

Screenshot of Silhouette Studio software showing two floral background designs, one with a pink and yellow gradient and the other with a pink bokeh effect.

A digital design workspace showing a pink and yellow flower background with yellow flowers and red heart shapes in the design software Silhouette Studio.

A crafting workspace featuring a cutting machine, pink paper flowers, and heart shapes on a wooden table. Scissors and a crafting tool are also visible.

A collection of small pink flower-shaped embellishments scattered on a black surface, with scissors and other crafting materials in the background. Silhouette flower projects

A vibrant handmade birthday card featuring a large pink flower and the text 'Happy Birthday', surrounded by colorful paper crafts.

Silhouette step-by-step Classes by Silhouette Secrets+

Silhouette Secrets+ with EllyMae
**This post may contain affiliate links. What that means is that I may receive compensation if you purchase through the links I have provided. The price you pay for the product or service is not higher but I may get compensated for sharing.

Posted on Leave a comment

Creating Layered Paper Flowers with a Silhouette Cameo: A Behind-the-Scenes Crafting Process

Silhouette Secrets+ with EllyMae

Creating shaped & layered paper flowers is all about the details. In Creating Layered Paper Flowers with a Silhouette Cameo: A Behind-the-Scenes Crafting Process, I’m sharing a closer look at the full creative journey behind my layered paper flower bouquet. This blog post goes hand in hand with the new YouTube video, where I walk through the behind-the-scenes process, helpful cutting tips, shaping techniques, and see the complete supply list below too. You’ll see how flat paper designs can be transformed by adding dimension, shaping each layer, and assembling them together to create full, eye-catching paper flowers using the Silhouette Cameo.

Affiliate links may be present in the following blog post and as an Amazon Associate, I earn from qualifying purchases.

Watch the Video & See the Details!

Head over to the Silhouette Secrets+ YouTube channel to catch the full behind-the-scenes video, then scroll down to explore the finished flower photos and the complete supply list for creating your own layered paper flower bouquet.

A close-up view of two vibrant paper flowers, one orange and one yellow, surrounded by green leaves, with the text 'Behind the Blooms' prominently displayed.

Supplies Used for Layered Paper Flowers:

Additional Resources:

Finished Layered Paper Flower Bouquet

A top-down view of two large paper flowers, one yellow and one orange, surrounded by green leaves and crafting tools, including a hot glue gun and a pen, on a cutting mat.

A close-up image of two vibrant paper flowers, one bright yellow and one orange, accompanied by green leaves, resting on a wooden surface.

A vibrant arrangement of paper flowers featuring a large yellow flower and a smaller orange flower, accompanied by green leaves, set against a light wooden background.

I had so much fun creating these layered paper flowers and greenery. Time is the key factor to completing projects like this. Enjoy the creative process!

Find this design in the Silhouette Design Store by Flavir Design.

A decorative floral wreath featuring paper flowers in orange, yellow, and pink hues with green leaves, set on a circular gold frame.

Save this for future reference by pinning the image below.

Close-up of a decorative yellow paper flower with layered petals and green leaves on a wooden surface.

Enjoy !

THANK YOU for your support! How can you help? Click HERE & buy a coffee.
Every little bit helps with the cost of running the site.

Silhouette Classes

Never stop learning! Let me help you take the anxiety out of learning with Silhouette and get to creating faster! My Silhouette classes are heavily focused on software, so you can take the skills & techniques taught and apply them to many future projects!

Silhouette step-by-step Classes by Silhouette Secrets+

Silhouette Secrets+ with EllyMae
**This post may contain affiliate links. What that means is that I may receive compensation if you purchase through the links I have provided. The price you pay for the product or service is not higher but I may get compensated for sharing.

Posted on Leave a comment

One Tag Design, 4 Creative Craft Projects

Silhouette Secrets+ with EllyMae

Creativity doesn’t have to start from scratch—sometimes it begins with one simple design. In this Crafting Creativity feature, I’m sharing how one tag design by Rabea Bilz can be taken far beyond its original purpose. With a single file as the foundation, we’ll explore four creative tag craft projects that spark ideas and show just how versatile a good design can be. From paper crafting to dimensional and decorative projects, this is all about inspiration, creative possibilities, and seeing your designs in a whole new way.

Affiliate links may be present in the following blog post and as an Amazon Associate, I earn from qualifying purchases.

Four pink tag designs with dotted outlines, featuring different shapes including rectangular, oval, and triangular tags, presented in a creative layout.

Crafting Creativity with a Layered Tag Design

Don’t feel limited to using a design for just one project. When you start thinking outside the box, a single file can open the door to countless creative possibilities. Try mixing materials, changing sizes, or adapting the design for completely different purposes—you may be surprised by what you can create. I hope this inspires you to stretch your creativity and even expand your supplies in new ways as you discover just how versatile your designs can be.

Project #1 – Layered Tag Design with Print and Cut

A collection of various holiday-themed gift tags featuring illustrations of trees, reindeer, and decorative elements, displayed on a crafting table with tools and materials.

After I had the tags assembled I decided to grab a couple Gelly Roll pens and add a few special touches to the print and cut design.

A workspace scene featuring various gift tags designed with holiday themes, including reindeer and Christmas trees. Nearby, Gelly Roll pens in red, pink, and yellow are placed next to the tags. A cutting machine is visible in the background.

Just a little bit of additional color or shine can really make things stand out on custom projects.

A close-up of a festive gift tag featuring a reindeer design with a decorative border, held by a hand. Several more tags and colorful gel pens are visible in the background.

Supplies Used:

Additional Resources:

Project #2 – Monogrammed Faux Leather Bag Tags

I created these as a custom monogrammed bag tag, but they could also be keychains or even a gift tag that’s reusable, multi-purpose, or part of the gift itself. 

Two layered tag designs featuring the letters 'E' and 'V' adorned with floral illustrations, displayed on a craft mat next to a crafting machine.

These are double sides bag tags. Make sure to mirror the design when creating a double-sided design so that it will match up exactly. For these particular shapes, they are symmetrical, so it’s not a necessity, but it is a good habit to get into, especially if you did not create the design yourself. This way the front and back will line up exactly with each other.

Two metal tags featuring detailed designs: one with flowers and crystals, and the other with a cute calf illustration, both attached to keychains.

I used Siser Easyweed Adhesive HTV in the middle to glue the layers together. Faux leather or leatherette can also be glued with fabric glues, but I’m really loving the ease of use with the Siser Easyweed Adhesive HTV. Cut the HTV the same shape as the tag and then press on the backside of one, remove the carrier sheet and line up the layers and press again. Done!

A workspace featuring a Silhouette cutting machine, various crafting supplies, and tags ready for decorating. The image shows colored materials, a cutting mat, and decorative elements indicating a crafting project.

Supplies Used:

Additional Resources:

Project #3 – Shaker Tags

Have you ever created a shaker card? What about a shaker tag? Or any other “shaker” project. Basically, to create a shaker, you are making a “pocket” where some material such as glitter, sequins, or fake snow can be contained.

I saw these new Gingerbread Cookie designs by Rabea Bilz and knew I had to use them!

Three shaker tags featuring a gingerbread man, a reindeer, and a Christmas tree design on a crafting workspace with various supplies and a cutting machine in the background.

This design is 4 layers. The background is a solid piece of cardstock, then a layer of Kraft cardstock with the Gingerbread design, a layer of clear transparency to hold the snow in, and then a final layer of the Kraft cardstock. Here is a look at my file in the Silhouette Studio software.

Screenshot of Silhouette Studio software displaying shaker tag design pieces, including a Christmas tree, a reindeer, and a gingerbread character.

Rather than use my machine to cut the transparency, I simply used a scrap piece of cardstock to cut a template for the size I needed and then used scissors to cut the transparency down to size. This saved time finding the right cut settings and saved a blade since cutting plastic can dull it quicker.

Crafting workspace featuring layered tag designs made of cardstock, scissors, adhesive tape, and a cutting machine.

Once the pieces are all cut, it’s time to assemble. I used the Precision Glue Press to adhere the Gingerbread layer to the backing and then set that part aside to dry. Next I used an adhesive tape runner to secure the transparency to the backside of the top layer. Then added double sided foam tape to the edges. Since it’s a shaker project, it has to be completely taped off so the shaker bits are contained.
Then I added in the fake snow. You will have to test how much to add. Too much and it won’t move around easily.
Then carefully remove the backing off the foam tape and secure the back layer over top of the foam tape.

And then the fun part – give it a shake!

A hand holding a layered tag design featuring a gingerbread decoration with fake snow inside, showcasing a DIY crafting project.

I don’t know which one is my favorite.

A hand holding a gingerbread man shaker tag with a transparent layer, set against a crafting workspace featuring scissors and a silhouette machine.

The Moose, Gingerbread Boy, or the Tree?

A hand holding a layered shaker tag featuring a Christmas tree and gingerbread man design, with snow-like material inside.

Supplies Used:

Additional Resources:

Project #4 – Ornaments

For this one, I used the tag design to create ornament designs that could be sent to my Glowforge to cut, but you could also create ornaments with other materials that could be cut with the Silhouette machine such as cardstock, acetate, adhesive vinyl, sketch pens, and more!

Three decorative Christmas tags featuring 'Merry Christmas' text, the year '2025', and a snowflake design on a wooden background.

Check out the video on making the interactive ornament HERE.

An interactive ornament DIY project featuring layered wooden designs, showcasing the year 2025 and decorated snowflakes, with a finger pointing to the ornament.

Supplies Used:

Additional Resources:

A great big thank you to Rabea Bilz for contributing the free file for the Silhouette Secrets+ newsletter! If you missed grabbing the free design during the month, grab it HERE and start creating!

Find designs by Rabea Bilz at:

Follow along with Rabea Bilz on Instagram HERE

Each month I offer a free file for Silhouette Secrets+ newsletter subscribers. I love designing in the Silhouette Studio software and have shared some of my creations as well as look forward to collaborating with more artists in the future too!

Silhouette Secrets+ Newsletter

Never miss out on the news, tips, “secrets”, deals, classes, and more that I share on Silhouette Secrets+. Sign up for the newsletter and get information delivered to your inbox every Friday.
Unsubscribe at anytime.

Sign up for the weekly newsletter HERE to have information delivered direct to your inbox and grab each month’s new freebie.

I hope this inspired you to look at your designs a little differently! It’s amazing how a single file can turn into so many unique projects when you let creativity lead the way. I loved exploring new themes and possibilities while showcasing just how versatile this design can be. If you’re craving even more inspiration, helpful tips, and creative project ideas, be sure to visit the Crafting Creativity section on the Silhouette Secrets+ website — click HERE to explore what’s waiting for you!

Save this for future reference by pinning the image below.

A collection of crafted tags showcased around a cutting machine, featuring festive designs including a tree, an 'E' monogram, and holiday messages, all highlighting creative project possibilities.

Enjoy !

THANK YOU for your support! How can you help? Click HERE & buy a coffee.
Every little bit helps with the cost of running the site.

Silhouette Classes

Never stop learning! Let me help you take the anxiety out of learning with Silhouette and get to creating faster! My Silhouette classes are heavily focused on software, so you can take the skills & techniques taught and apply them to many future projects!

Silhouette step-by-step Classes by Silhouette Secrets+

Silhouette Secrets+ with EllyMae
**This post may contain affiliate links. What that means is that I may receive compensation if you purchase through the links I have provided. The price you pay for the product or service is not higher but I may get compensated for sharing.

Posted on Leave a comment

Custom Tumbler Sublimation Made Easy with Artesprix Inks | Step-by-Step DIY

Creating a custom sublimation tumbler doesn’t have to be complicated! In this step-by-step DIY tutorial, I’m sharing an easy and creative way to make vibrant, one-of-a-kind tumblers using Artesprix Sublimation Inks. This project combines simple techniques like plastic wrap and heat resist mask to achieve stunning results—perfect for beginners, girls’ nights, craft nights, handmade gifts, or even small business projects. In this post, you’ll find the full video tutorial, a complete supply list, and helpful tips to confidently create your own custom sublimation tumblers from start to finish.

Affiliate links may be present in the following blog post and as an Amazon Associate I earn from qualifying purchases.

Two custom sublimation tumblers featuring vibrant colors and designs, surrounded by Artesprix sublimation inks in various shades.

Want to know what I love about the Artesprix sublimation inks, paints, markers, and stamp pads. They make me step outside my comfort zone and accept what comes. That each project I create is unique and even if I did the same exact steps the next time, it would still look different.

For these custom wine tumblers, I used the Artesprix Heat Resist Mask and cut a monogram out with my Silhouette.

Digital design workspace in Silhouette Studio featuring various monogram letters for a wine tumbler project.

Here is a look at my design file. The letter ‘E’ is one of those that can look really ugly in many fonts and always takes me forever to find one I really like. On the left side, I have the keepers, until I find the one that speaks to me the most.

In the video you’ll see that the first monogram I tried was just the letter and because I didn’t have a solid background it is a “hidden message” monogram. I couldn’t stop there and had to create another, so I added a frame around the letter too.

Close-up of hands applying a monogram letter 'E' to a white sublimation tumbler, on a black surface with a colorful background.

I have better luck with securing the Artesprix Heat Transfer Resist directly to the blank and then there is no space for the sublimation gases to leak in underneath during the process. For a design that has pieces like the second one with the frame, I used transfer tape to transfer it to the blank just like you do with adhesive vinyl.

A person holding a piece of plastic wrap above a custom sublimation tumbler with a purple design, in a crafting workspace.

The shape of the tumbler and the crinkled paper gave it a unique look on the bottom.

I think it turned out unique and it completely shows that sometimes you just have to take “control” and throw it out the window. Now, I kind of want to try the wrinkle, cloudy technique on purpose. While I cannot control the final outcome on colors and pattern, I was able to “fix” the monogram so it’s no longer a “hidden message” and it turned out so crisp.

Two custom sublimation tumblers side by side, one with a purple and pink swirl pattern featuring a white monogram 'E', and the other with an abstract orange and yellow design.

I don’t waste any of the sublimation ink. Anytime there is extra paint or ink, I will grab a sheet of copy paper and make a new print, let it dry, and then add it to my stash. As long as the sublimation pages don’t get wet or aren’t subjected to high heat, you can use them for a year or longer after they’ve been made.

Here is a look at the “hidden message” monogram on the right.

Two custom sublimation tumblers, one featuring a purple swirl design with a white monogram 'E', and the other showcasing a blue and red abstract design. Surrounding them are various bottles of Artesprix sublimation inks.

Looking for the step-by-step video?
It’s linked right below the supplies section.

Supplies for Custom Sublimation Wine Tumblers:

Watch this tutorial on these sublimation wine tumblers HERE on the Artesprix YouTube channel.

Check out more of my Artesprix sublimation creations HERE.

I’ll be sharing more so make sure to follow Artesprix on social media to see more projects!
YouTube channel
Blog
Facebook Page
Iron-on-Ink Inspirational Facebook Group

Save this for future reference by pinning the image below.

Two custom sublimation wine tumblers, one featuring a purple and white marbled design with a monogram 'E', and the other with an orange and yellow gradient. Bottles of Artesprix sublimation inks are visible in the background.

Grab some Artesprix sublimation products and get to creating today!

Enjoy !

THANK YOU for your support! How can you help? Click HERE & buy a coffee.
Every little bit helps with the cost of running the site.

Silhouette Classes

Never stop learning! Let me help you take the anxiety out of learning with Silhouette and get to creating faster! My Silhouette classes are heavily focused on software, so you can take the skills & techniques taught and apply them to many future projects!

Silhouette step-by-step Classes by Silhouette Secrets+

Silhouette Secrets+ with EllyMae
**This post may contain affiliate links. What that means is that I may receive compensation if you purchase through the links I have provided. The price you pay for the product or service is not higher but I may get compensated for sharing.
Posted on 2 Comments

5 Card Design Ideas from One Template with Quietfire Designs

Silhouette Secrets+ with EllyMae

Have you ever found a card template so versatile that it instantly becomes a go-to favorite? That’s exactly what happened when I started creating with the Accordion Filled Gatefold – Card Blank by Quietfire Designs. This beautiful, interactive card base is the perfect foundation for endless creativity—and in today’s Crafting Creativity feature, I’m sharing five completely different card designs, all made from this one stunning template.

Affiliate links may be present in the following blog post and as an Amazon Associate, I earn from qualifying purchases.

A colorful accordion-filled gatefold card template showcasing floral designs, featuring a mix of light blue and purple colors.

From a spooky Halloween card, to a warm and cheerful hello friends, to a vibrant bouquet of flowers, a playful Open If You Dare theme, and even a classic happy birthday design, this single cut file transformed effortlessly to fit every style. Each project highlights just how easy it is to take one card template and customize it for any season, celebration, or creative idea.

If you love stretching your Silhouette files and want inspiration for making more with what you already have, you’re going to love exploring the versatility of this Quietfire Designs favorite. Suzanne at Quietfire Designs has amazing designs and this is just one. I hope this gives you some ideas on how you can expand your supplies!

Each month in the Crafting Creativity series, I take one design file and explore just how many unique projects it can inspire. I love showing how a single cut file—like this month’s Accordion Filled Gatefold card template—can be transformed into cards for any theme or occasion. These posts are all about stretching your Silhouette skills, sparking fresh ideas, and proving that one thoughtfully designed file can open the door to endless creative possibilities. Whether you’re a longtime Silhouette user or brand new to cardmaking, Crafting Creativity is here to help you imagine, explore, and create with confidence!

Crafting Creativity with Accordion Filled Gatefold Card Blank

Suzanne at Quietfire Designs has amazing designs and this is just one of the card templates available in the Silhouette Design Store or check out the bundle of card templates HERE. Suzanne also has assembly videos on the Quietfire Designs YouTube channel too! It makes it so easy to assemble the card designs – find those HERE.

I hope this gives you some ideas on how you can expand your supplies!

Project #1 – Halloween Card

I grabbed some Halloween themed paper in my stash and created this themed card.

A purple accordion fold card featuring Halloween-themed paper with a ghost embellishment, positioned next to a crafting machine.

I added a ghost onto the belly band from a file called Ghost Farm – Card in a Box design found HERE.

A Halloween-themed card with a ghost design on a purple belly band, set in front of a cutting machine.

And once I got started, it was hard to stop and I had to create the entire Ghost Farm – Card in a Box too!

A Halloween-themed card box featuring white cut-out ghosts and a bat decoration, with a 'U-Pick Ghost Farm' label, displayed next to a cutting machine.

Supplies Used:

Project #2 – Hello Friends Card

This one I had a lot of fun collecting “friends” to share from different files by Quietfire Designs.

A close-up of two creatively designed cards on a wooden surface. One card features a snowflake design with the text 'hello friend,' while the other card includes playful winter characters, including a penguin, gingerbread cookies, and snowmen, along with the phrase 'MISS YOU.' A cutting machine is visible in the background.

Once I gathered all of the designs I wanted to use, I turned the cut files into a print and cut so I could do it all on one sheet.

Here’s a look at my print and cut design file. I always like to fill up my page when doing print and cut, so I ended up making two card designs using different patterned papers.

A digital design workspace displaying various festive characters including penguins, snowmen, gingerbread figures, and snowflakes, alongside holiday-themed text elements such as 'MISS YOU' and 'hello, friend.'

I did modify the designs a bit in order to use these pieces from the individual designs. Since each one was different, I used different steps including the knife tooledit pointsgrouping and ungroupingreleasing the compound path, and text to path.

Once I had all the designs I wanted for the card sized to fit, I turned them all into a print and cut page. Since these were designed to cut each individual piece, I simply selected them all and on the Send tab chose “Cut Edge”.

Additional Resources:

Supplies Used:

Project #3 – Bouquet of Flowers Card

A colorful accordion-style card featuring a bouquet of flowers, displayed beside a pink belly band adorned with small flowers. The backdrop shows a cutting machine in a crafting workspace.

I used the flowers and greenery design from the Flower Posy Gift Card Box – Design #346522 and cut 9 to layer inside the card. When needed, I would snip off sections of the greenery that didn’t fit well and then glue them in underneath the flowers in other spots to fill it in and make it unique.

The front section has 3 of the flowers and greenery placed together and I enlarged the bow on the design to “wrap” around all 3.

I ended up with an extra set of flowers and added that to the front belly band for the card closure.

Supplies Used:

Project #4 – Open If You Dare Card

This card is another combination of designs by Quitefire Designs.

A Halloween-themed gatefold card featuring the text 'OPEN IF YOU DARE,' with a skull and skeleton graphics, placed on a crafting surface with a cutting machine in the background.

And if you are daring enough to open the card, here is a look at the inside.

A pop-up Halloween card featuring a spooky graveyard theme with bats, gravestones, and skeleton cutouts, alongside an 'Open If You Dare' message.

I started with an idea in my head and then simply cut out the pieces I knew I wanted to use from each of the design files. Then started moving them around and seeing where they would best fit.

Supplies Used:

Project #5 – Happy Birthday Card

A bright, fun card filled with balloons! And… it was all created with scraps. This was another card that was “built” as I went along. It may be a little over the top with balloons, but that’s the best part – you can customize it however you like!

A Silhouette cutting machine on a worktable with a colorful birthday card featuring balloons in the foreground.

I drew the balloon using the Flexishapes tool in Silhouette and then just cut a bunch from different colors. The Happy Birthday is a sentiment from the Dinosaur Birthday Card in a Box by Quietfire Designs. I sized and arranged the words together, then made an Offset around it.

A colorful birthday card with various balloon shapes and colors, featuring the text 'HAPPY BIRTHDAY' prominently displayed. The card is positioned in front of a crafting machine and surrounded by crafting supplies.

This was the perfect sentiment for the card as both Happy and Birthday are both welded together, so it was easy to glue using my new Precision Glue Press.

A person holding a black 'HAPPY' cutout while preparing to glue it next to a white 'BIRTHDAY' cutout, with crafting tools visible in the background.

Supplies Used:

Find designs by Quietfire Designs at:

Follow along with Quietfire Designs on FacebookYouTubeInstagram.

A great big thank you to Suzanne at Quietfire Designs for contributing the free file for the Silhouette Secrets+ newsletter for the month of October! If you missed grabbing the free design in October, grab it HERE and start creating!

This year I started offering a free file each month for Silhouette Secrets+ newsletter subscribers. I love designing in the Silhouette Studio software and have shared some of my creations as well as look forward to collaborating with more artists in the future too!

Silhouette Secrets+ Newsletter

Never miss out on the news, tips, “secrets”, deals, classes, and more that I share on Silhouette Secrets+. Sign up for the newsletter and get information delivered to your inbox every Friday.
Unsubscribe at anytime.

Sign up for the weekly newsletter HERE to have information delivered direct to your inbox and grab each month’s new freebie.

Did this spark some creative ideas for you? It’s always exciting to see how one card template can lead to so many completely different designs! I had such a great time dreaming up each of these themed creations and showing just how versatile the Accordion Filled Gatefold file can be. If you’re looking for even more inspiration, tips, and creative project ideas, be sure to browse the Crafting Creativity section on the Silhouette Secrets+ website — click HERE to explore!

Save this for future reference by pinning the image below.

A collage of five card designs made using a single accordion filled gatefold template, featuring themes like Halloween, friendship, flowers, and birthday celebrations.

Enjoy !

THANK YOU for your support! How can you help? Click HERE & buy a coffee.
Every little bit helps with the cost of running the site.

Silhouette Classes

Never stop learning! Let me help you take the anxiety out of learning with Silhouette and get to creating faster! My Silhouette classes are heavily focused on software, so you can take the skills & techniques taught and apply them to many future projects!

Silhouette step-by-step Classes by Silhouette Secrets+

Silhouette Secrets+ with EllyMae
**This post may contain affiliate links. What that means is that I may receive compensation if you purchase through the links I have provided. The price you pay for the product or service is not higher but I may get compensated for sharing.

Posted on 1 Comment

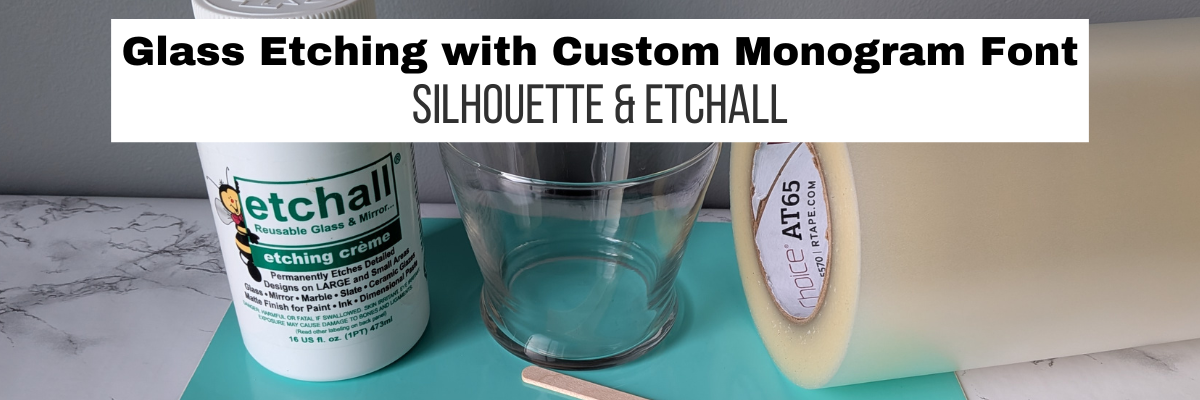
DIY Etched Glass Tiered Tray Using Etchall and Silhouette

Silhouette Secrets+ with EllyMae

If you’ve ever spotted a hidden gem at a thrift store and talked yourself out of it… this project is your reminder to turn back and grab it! That’s exactly how this Etched Tiered Tray came to life. I found a gorgeous three-tiered glass tray tucked behind a stack of dishes, walked away, and then thankfully circled back to bring it home. Today I’m sharing how I transformed that thrifted treasure using custom-designed stencils created in Silhouette Studio and Etchall etching creme. With the right design setup and a few simple steps, you can get beautifully crisp results that make any glass piece look high-end and completely personalized.

A three-tiered glass tray with floral etchings on the plates, showcasing a decorative design.

Affiliate links may be present in the following blog post and as an Amazon Associate, I earn from qualifying purchases.

If you have a cutting machine, you have unlimited possibilities of custom designs at your fingertips.

Supplies Used for Custom Etched Tiered Tray:

I started by measuring each level of the tiered tray. This gives me a starting point to draw out a template in Silhouette Studio to design within. If the tiered tray has a curve to it, then you’ll want to make sure to account for that. Adding a stencil onto a curved area can get a bit tricky to lay it straight and flat. I created my stencils so the design would be on the flat area before the curve starts.

Three-tiered glass tray with a metal handle, resting on a wooden surface.

Here is a look at my working file in Silhouette Studio.

Screenshot of the Silhouette Studio software showcasing various floral designs and templates for crafting projects.

On the left side are some designs I was playing around with to decide what I wanted to work with. I settled on using the Cherry Blossom Design by Tanya Batrak. On the right you can see the design for each level of the tiered tray. The outer oval is the template from my measurements and then I was able to design within the template for each level.

I knew I wanted something that went all the way around and I designed an oval frame using the same technique that I shared in the video tutorial on the Silhouette Secrets+ channel – Creating a Circle Frame in Silhouette Studio with Basic Tools.

Screenshot of the Silhouette Studio interface showing various circle frame designs and a tutorial title 'Creating a Circle Frame in Silhouette Studio'.

Then I brought in the Cherry Blossom Design and scaled it to the size I wanted and placed it on top of the oval frame.

I modified the design a bit by cutting off the branch on one side and then for the largest tiered tray, I cut off the top 3rd flower and used edit points to make the design smooth. So each layer of this tiered tray is a bit different. Here is a close up look at my final designs.

A design layout in Silhouette Studio showcasing three oval templates featuring hibiscus flowers, with a focus on creating custom stencils for crafting projects.

I then made an offset of the entire design and subtracted the offset from the circle frame to give the design some space and set it apart.

Here is a look at my stencil file on the Send tab in Silhouette. I used the Cut by Line Color tab so I could set up 2 different settings and have it kiss cut around the stencil and then cut the red cut line all the way through on the offset around the entire design. This way the center of the design was cut out for me by the Silhouette machine.

Screenshot of the Silhouette Studio software showing a design with three oval frames adorned with floral elements, intended for use in crafting.

Then I grabbed a color of Oracal 651 adhesive vinyl that has been in my stash for awhile and not used. Scraps or colors that you don’t use often are great for stencils.

Once the designs were cut, then carefully weed out the design. And if you mess up in the weeding or application process, grab another sheet of vinyl and cut another one. I messed up along the way on one decal and ended up cutting another stencil. So glad I have this option with owning a cutting machine!

A close-up of a hand using a crafting tool to weed an intricate stencil design featuring cherry blossoms, with a grid cutting mat in the background.

If your tiered tray comes apart easily, it may be easier to apply the stencils and etch by taking it apart. My husband suggested I do this, but with the rubber rings separating each layer, I didn’t want to mess something up taking it apart or putting it back together, so I worked with it fully assembled.

This meant that I needed to cut the stencil apart for 2 of the layers to wrap it around and apply to the bottom of the tier.

A person's hand holding a craft knife over an orange stencil design featuring cherry blossoms on a cutting mat.

I looked for a good section of the design to slice it apart at that would be easy to line up and get connected again when I was applying.

Find some way to set up so your glass is secure and is as flat as possible for the stencil application and while the etching creme is on the glass.

Since I left my tiered tray assembled, I propped it up using my bulk roll of AT65 Transfer Tape.

A tiered glass tray sits on a table surrounded by crafting supplies, including etching cream, a cutting machine, and various tools.

This was actually a really sturdy way to hold my tiered tray and it was stable, secure, and level the entire time.

Make sure to clean the area where you’ll be applying the adhesive vinyl with alcohol first to remove any dirt and debris so you get a good adhesion. And then let it dry completely.

The bottom layer was the easiest since it was the most accessible and that is where I started. I applied the Oracal 651 adhesive vinyl stencil and then I applied a bit of heat to help the adhesive vinyl to adhere well. I have some intricate areas and I wanted to give myself the best chance of success and not have any bleed. While this is step is not mandatory for glass etching, I do think whatever you can do to set yourself up for success saves your time and money.

Not all glass etches too! And I wasn’t sure if this would work or not on the tiered tray. Starting with the bottom layer first, this was my test. I heated it a bit and then carefully smoothed down the vinyl edges all along. Be careful as hot glass looks the same as cold glass. I then waited for the glass to cool completely before applying the Etching creme so that the adhesive could set up and less likely to move around on the smooth surface.

A person using a heat gun to apply a stencil on a glass tiered tray, featuring a Cherry Blossom design, in a home crafting setting.

The next step isn’t mandatory either, but I do feel it will help you be successful! Tape off the edges around the stencil in case any etching creme gets outside of where you want it to be. It never fails that if the etching creme even touches an area you don’t want it to etch, it will.

A close-up view of a glass tiered tray with a stencil design featuring cherry blossoms being prepared for etching, surrounded by crafting tools.

Use painter’s tape or in this case, I had lots of excess transfer tape and since it was an oval object on a curved surface, I ended up cutting smaller sections of the AT65 transfer tape and applying it around the outer edge and the inside edge of my stencil.

For flat objects, you can simply make your stencil larger to cover a larger area of the object. However, on a curved object that can be more difficult to lay the adhesive vinyl completely flat, so I chose this method.

Next, I applied the Etchall etching creme around the entire design. And set my timer for 20 minutes.

Close-up view of a glass tiered tray with a stencil applied, surrounded by painter's tape and etching creme, showcasing the crafting process.

The next steps are very important! After 20 minutes, carefully remove any excess Etchall etching creme and put it back in the bottle. It can be reused over and over again. Then I take a paper towel and wipe away any excess. And once all the excess has been removed, I will run water in my sink and then washed the entire design and remove the stencil while under running water.

It worked!!! So I dried it off and then repeated the same steps on the other 2 layers of the tiered tray.

A close-up view of a glass tiered tray being prepared for etching, with tape securing an oval stencil around the rim and etching creme applied within the stencil area.

As you can see I have 2 different colors of adhesive vinyl as I messed up weeding the top layer stencil. Easily remedied by cutting another stencil with my Silhouette machine.

A close-up view of a tiered glass tray with an intricate design being applied, featuring painter's tape and etching creme around the edges.

All the extra steps to secure with heat and taping off the design paid off!

A close-up of an etched glass tray featuring a floral design, with a metal stand in the center and a towel nearby.

This etched tiered tray project turned out fantastic!!!

A three-tiered glass tray with etched cherry blossom designs on each layer, displayed on a wooden table.

The hardest part about glass etching is getting a good photo and in this case, getting a good photo that shows all 3 levels off well.

A three-tiered glass tray with floral etchings and a metallic handle, showcasing a DIY glass etching project.

I love being able to create custom and unique projects. This one was quickly claimed by my youngest, who put it to work immediately. I asked if she could to a “lifestyle” photo for me to use and this is what she did.

A three-tiered glass tray displaying various pieces of jewelry and accessories, including earrings, bracelets, and decorative items.

It is definitely being put to good use and she loves it.

Check out more information for even more creative ideas and tips to take your crafting to the next level HERE!

Additional Resources:

Save this for future reference by pinning the image below.

A beautifully etched three-tiered glass tray featuring a floral design, showcasing the effect of glass etching with the Etchall etching creme.

Enjoy !

THANK YOU for your support! How can you help? Click HERE & buy a coffee.
Every little bit helps with the cost of running the site.

Silhouette Classes

Never stop learning! Let me help you take the anxiety out of learning with Silhouette and get to creating faster! My Silhouette classes are heavily focused on software, so you can take the skills & techniques taught and apply them to many future projects!

Silhouette step-by-step Classes by Silhouette Secrets+

Silhouette Secrets+ with EllyMae
**This post may contain affiliate links. What that means is that I may receive compensation if you purchase through the links I have provided. The price you pay for the product or service is not higher but I may get compensated for sharing.