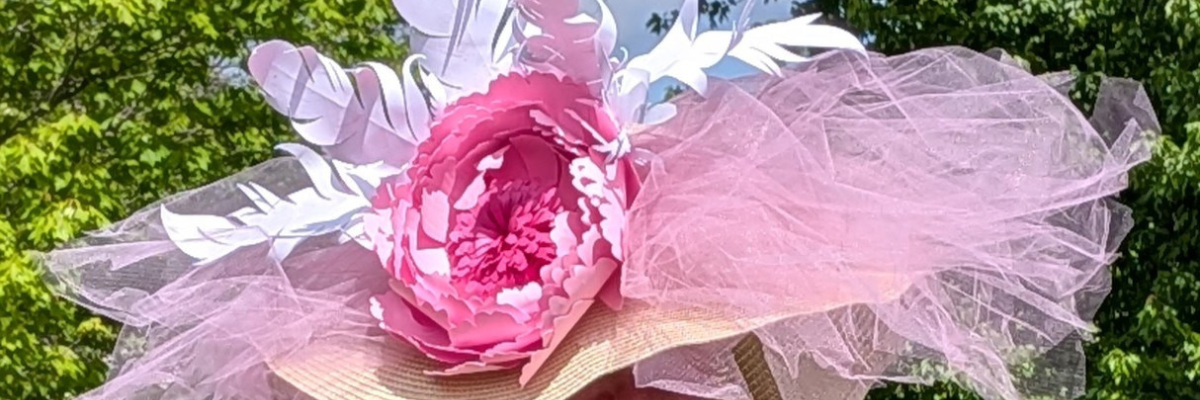
Creating shaped & layered paper flowers is all about the details. In Creating Layered Paper Flowers with a Silhouette Cameo: A Behind-the-Scenes Crafting Process, I’m sharing a closer look at the full creative journey behind my layered paper flower bouquet. This blog post goes hand in hand with the new YouTube video, where I walk through the behind-the-scenes process, helpful cutting tips, shaping techniques, and see the complete supply list below too. You’ll see how flat paper designs can be transformed by adding dimension, shaping each layer, and assembling them together to create full, eye-catching paper flowers using the Silhouette Cameo.
Affiliate links may be present in the following blog post and as an Amazon Associate, I earn from qualifying purchases.
Watch the Video & See the Details!
Head over to the Silhouette Secrets+ YouTube channel to catch the full behind-the-scenes video, then scroll down to explore the finished flower photos and the complete supply list for creating your own layered paper flower bouquet.
I had so much fun creating these layered paper flowers and greenery. Time is the key factor to completing projects like this. Enjoy the creative process!
Save this for future reference by pinning the image below.
Enjoy !
THANK YOU for your support! How can you help? Click HERE & buy a coffee. Every little bit helps with the cost of running the site.
Silhouette Classes
Never stop learning! Let me help you take the anxiety out of learning with Silhouette and get to creating faster! My Silhouette classes are heavily focused on software, so you can take the skills & techniques taught and apply them to many future projects!
**This post may contain affiliate links. What that means is that I may receive compensation if you purchase through the links I have provided. The price you pay for the product or service is not higher but I may get compensated for sharing.
Creativity doesn’t have to start from scratch—sometimes it begins with one simple design. In this Crafting Creativity feature, I’m sharing how one tag design by Rabea Bilz can be taken far beyond its original purpose. With a single file as the foundation, we’ll explore four creative tag craft projects that spark ideas and show just how versatile a good design can be. From paper crafting to dimensional and decorative projects, this is all about inspiration, creative possibilities, and seeing your designs in a whole new way.
Affiliate links may be present in the following blog post and as an Amazon Associate, I earn from qualifying purchases.
Crafting Creativity with a Layered Tag Design
Don’t feel limited to using a design for just one project. When you start thinking outside the box, a single file can open the door to countless creative possibilities. Try mixing materials, changing sizes, or adapting the design for completely different purposes—you may be surprised by what you can create. I hope this inspires you to stretch your creativity and even expand your supplies in new ways as you discover just how versatile your designs can be.
Project #1 – Layered Tag Design with Print and Cut
After I had the tags assembled I decided to grab a couple Gelly Roll pens and add a few special touches to the print and cut design.
Just a little bit of additional color or shine can really make things stand out on custom projects.
I created these as a custom monogrammed bag tag, but they could also be keychains or even a gift tag that’s reusable, multi-purpose, or part of the gift itself.
These are double sides bag tags. Make sure to mirror the design when creating a double-sided design so that it will match up exactly. For these particular shapes, they are symmetrical, so it’s not a necessity, but it is a good habit to get into, especially if you did not create the design yourself. This way the front and back will line up exactly with each other.
I used Siser Easyweed Adhesive HTV in the middle to glue the layers together. Faux leather or leatherette can also be glued with fabric glues, but I’m really loving the ease of use with the Siser Easyweed Adhesive HTV. Cut the HTV the same shape as the tag and then press on the backside of one, remove the carrier sheet and line up the layers and press again. Done!
Have you ever created a shaker card? What about a shaker tag? Or any other “shaker” project. Basically, to create a shaker, you are making a “pocket” where some material such as glitter, sequins, or fake snow can be contained.
I saw these new Gingerbread Cookie designs by Rabea Bilz and knew I had to use them!
This design is 4 layers. The background is a solid piece of cardstock, then a layer of Kraft cardstock with the Gingerbread design, a layer of clear transparency to hold the snow in, and then a final layer of the Kraft cardstock. Here is a look at my file in the Silhouette Studio software.
Rather than use my machine to cut the transparency, I simply used a scrap piece of cardstock to cut a template for the size I needed and then used scissors to cut the transparency down to size. This saved time finding the right cut settings and saved a blade since cutting plastic can dull it quicker.
Once the pieces are all cut, it’s time to assemble. I used the Precision Glue Press to adhere the Gingerbread layer to the backing and then set that part aside to dry. Next I used an adhesive tape runner to secure the transparency to the backside of the top layer. Then added double sided foam tape to the edges. Since it’s a shaker project, it has to be completely taped off so the shaker bits are contained. Then I added in the fake snow. You will have to test how much to add. Too much and it won’t move around easily. Then carefully remove the backing off the foam tape and secure the back layer over top of the foam tape.
For this one, I used the tag design to create ornament designs that could be sent to my Glowforge to cut, but you could also create ornaments with other materials that could be cut with the Silhouette machine such as cardstock, acetate, adhesive vinyl, sketch pens, and more!
A great big thank you to Rabea Bilz for contributing the free file for the Silhouette Secrets+ newsletter! If you missed grabbing the free design during the month, grab it HERE and start creating!
Each month I offer a free file for Silhouette Secrets+ newsletter subscribers. I love designing in the Silhouette Studio software and have shared some of my creations as well as look forward to collaborating with more artists in the future too!
Silhouette Secrets+ Newsletter
Never miss out on the news, tips, “secrets”, deals, classes, and more that I share on Silhouette Secrets+. Sign up for the newsletter and get information delivered to your inbox every Friday. Unsubscribe at anytime.
Sign up for the weekly newsletter HERE to have information delivered direct to your inbox and grab each month’s new freebie.
I hope this inspired you to look at your designs a little differently! It’s amazing how a single file can turn into so many unique projects when you let creativity lead the way. I loved exploring new themes and possibilities while showcasing just how versatile this design can be. If you’re craving even more inspiration, helpful tips, and creative project ideas, be sure to visit the Crafting Creativity section on the Silhouette Secrets+ website — click HERE to explore what’s waiting for you!
Save this for future reference by pinning the image below.
Enjoy !
THANK YOU for your support! How can you help? Click HERE & buy a coffee. Every little bit helps with the cost of running the site.
Silhouette Classes
Never stop learning! Let me help you take the anxiety out of learning with Silhouette and get to creating faster! My Silhouette classes are heavily focused on software, so you can take the skills & techniques taught and apply them to many future projects!
**This post may contain affiliate links. What that means is that I may receive compensation if you purchase through the links I have provided. The price you pay for the product or service is not higher but I may get compensated for sharing.
Creating a custom sublimation tumbler doesn’t have to be complicated! In this step-by-step DIY tutorial, I’m sharing an easy and creative way to make vibrant, one-of-a-kind tumblers using Artesprix Sublimation Inks. This project combines simple techniques like plastic wrap and heat resist mask to achieve stunning results—perfect for beginners, girls’ nights, craft nights, handmade gifts, or even small business projects. In this post, you’ll find the full video tutorial, a complete supply list, and helpful tips to confidently create your own custom sublimation tumblers from start to finish.
Affiliate links may be present in the following blog post and as an Amazon Associate I earn from qualifying purchases.
Want to know what I love about the Artesprix sublimation inks, paints, markers, and stamp pads. They make me step outside my comfort zone and accept what comes. That each project I create is unique and even if I did the same exact steps the next time, it would still look different.
For these custom wine tumblers, I used the Artesprix Heat Resist Mask and cut a monogram out with my Silhouette.
Here is a look at my design file. The letter ‘E’ is one of those that can look really ugly in many fonts and always takes me forever to find one I really like. On the left side, I have the keepers, until I find the one that speaks to me the most.
In the video you’ll see that the first monogram I tried was just the letter and because I didn’t have a solid background it is a “hidden message” monogram. I couldn’t stop there and had to create another, so I added a frame around the letter too.
I have better luck with securing the Artesprix Heat Transfer Resist directly to the blank and then there is no space for the sublimation gases to leak in underneath during the process. For a design that has pieces like the second one with the frame, I used transfer tape to transfer it to the blank just like you do with adhesive vinyl.
The shape of the tumbler and the crinkled paper gave it a unique look on the bottom.
I think it turned out unique and it completely shows that sometimes you just have to take “control” and throw it out the window. Now, I kind of want to try the wrinkle, cloudy technique on purpose. While I cannot control the final outcome on colors and pattern, I was able to “fix” the monogram so it’s no longer a “hidden message” and it turned out so crisp.
I don’t waste any of the sublimation ink. Anytime there is extra paint or ink, I will grab a sheet of copy paper and make a new print, let it dry, and then add it to my stash. As long as the sublimation pages don’t get wet or aren’t subjected to high heat, you can use them for a year or longer after they’ve been made.
Here is a look at the “hidden message” monogram on the right.
Looking for the step-by-step video? It’s linked right below the supplies section.
THANK YOU for your support! How can you help? Click HERE & buy a coffee. Every little bit helps with the cost of running the site.
Silhouette Classes
Never stop learning! Let me help you take the anxiety out of learning with Silhouette and get to creating faster! My Silhouette classes are heavily focused on software, so you can take the skills & techniques taught and apply them to many future projects!
**This post may contain affiliate links. What that means is that I may receive compensation if you purchase through the links I have provided. The price you pay for the product or service is not higher but I may get compensated for sharing.
Have you ever found a card template so versatile that it instantly becomes a go-to favorite? That’s exactly what happened when I started creating with the Accordion Filled Gatefold – Card Blank by Quietfire Designs. This beautiful, interactive card base is the perfect foundation for endless creativity—and in today’s Crafting Creativity feature, I’m sharing five completely different card designs, all made from this one stunning template.
Affiliate links may be present in the following blog post and as an Amazon Associate, I earn from qualifying purchases.
From a spooky Halloween card, to a warm and cheerful hello friends, to a vibrant bouquet of flowers, a playful Open If You Dare theme, and even a classic happy birthday design, this single cut file transformed effortlessly to fit every style. Each project highlights just how easy it is to take one card template and customize it for any season, celebration, or creative idea.
If you love stretching your Silhouette files and want inspiration for making more with what you already have, you’re going to love exploring the versatility of this Quietfire Designs favorite. Suzanne at Quietfire Designs has amazing designs and this is just one. I hope this gives you some ideas on how you can expand your supplies!
Each month in the Crafting Creativity series, I take one design file and explore just how many unique projects it can inspire. I love showing how a single cut file—like this month’s Accordion Filled Gatefold card template—can be transformed into cards for any theme or occasion. These posts are all about stretching your Silhouette skills, sparking fresh ideas, and proving that one thoughtfully designed file can open the door to endless creative possibilities. Whether you’re a longtime Silhouette user or brand new to cardmaking, Crafting Creativity is here to help you imagine, explore, and create with confidence!
Crafting Creativity with Accordion Filled Gatefold Card Blank
Suzanne at Quietfire Designs has amazing designs and this is just one of the card templates available in the Silhouette Design Store or check out the bundle of card templates HERE. Suzanne also has assembly videos on the Quietfire Designs YouTube channel too! It makes it so easy to assemble the card designs – find those HERE.
I hope this gives you some ideas on how you can expand your supplies!
Project #1 –Halloween Card
I grabbed some Halloween themed paper in my stash and created this themed card.
This one I had a lot of fun collecting “friends” to share from different files by Quietfire Designs.
Once I gathered all of the designs I wanted to use, I turned the cut files into a print and cut so I could do it all on one sheet.
Here’s a look at my print and cut design file. I always like to fill up my page when doing print and cut, so I ended up making two card designs using different patterned papers.
Once I had all the designs I wanted for the card sized to fit, I turned them all into a print and cut page. Since these were designed to cut each individual piece, I simply selected them all and on the Send tab chose “Cut Edge”.
I used the flowers and greenery design from the Flower Posy Gift Card Box – Design #346522 and cut 9 to layer inside the card. When needed, I would snip off sections of the greenery that didn’t fit well and then glue them in underneath the flowers in other spots to fill it in and make it unique.
The front section has 3 of the flowers and greenery placed together and I enlarged the bow on the design to “wrap” around all 3.
I ended up with an extra set of flowers and added that to the front belly band for the card closure.
This card is another combination of designs by Quitefire Designs.
And if you are daring enough to open the card, here is a look at the inside.
I started with an idea in my head and then simply cut out the pieces I knew I wanted to use from each of the design files. Then started moving them around and seeing where they would best fit.
A bright, fun card filled with balloons! And… it was all created with scraps. This was another card that was “built” as I went along. It may be a little over the top with balloons, but that’s the best part – you can customize it however you like!
I drew the balloon using the Flexishapes tool in Silhouette and then just cut a bunch from different colors. The Happy Birthday is a sentiment from the Dinosaur Birthday Card in a Box by Quietfire Designs. I sized and arranged the words together, then made an Offset around it.
This was the perfect sentiment for the card as both Happy and Birthday are both welded together, so it was easy to glue using my new Precision Glue Press.
A great big thank you to Suzanne at Quietfire Designs for contributing the free file for the Silhouette Secrets+ newsletter for the month of October! If you missed grabbing the free design in October, grab it HERE and start creating!
This year I started offering a free file each month for Silhouette Secrets+ newsletter subscribers. I love designing in the Silhouette Studio software and have shared some of my creations as well as look forward to collaborating with more artists in the future too!
Silhouette Secrets+ Newsletter
Never miss out on the news, tips, “secrets”, deals, classes, and more that I share on Silhouette Secrets+. Sign up for the newsletter and get information delivered to your inbox every Friday. Unsubscribe at anytime.
Sign up for the weekly newsletter HERE to have information delivered direct to your inbox and grab each month’s new freebie.
Did this spark some creative ideas for you? It’s always exciting to see how one card template can lead to so many completely different designs! I had such a great time dreaming up each of these themed creations and showing just how versatile the Accordion Filled Gatefold file can be. If you’re looking for even more inspiration, tips, and creative project ideas, be sure to browse the Crafting Creativity section on the Silhouette Secrets+ website — click HERE to explore!
Save this for future reference by pinning the image below.
Enjoy !
THANK YOU for your support! How can you help? Click HERE & buy a coffee. Every little bit helps with the cost of running the site.
Silhouette Classes
Never stop learning! Let me help you take the anxiety out of learning with Silhouette and get to creating faster! My Silhouette classes are heavily focused on software, so you can take the skills & techniques taught and apply them to many future projects!
**This post may contain affiliate links. What that means is that I may receive compensation if you purchase through the links I have provided. The price you pay for the product or service is not higher but I may get compensated for sharing.
If you’ve ever spotted a hidden gem at a thrift store and talked yourself out of it… this project is your reminder to turn back and grab it! That’s exactly how this Etched Tiered Tray came to life. I found a gorgeous three-tiered glass tray tucked behind a stack of dishes, walked away, and then thankfully circled back to bring it home. Today I’m sharing how I transformed that thrifted treasure using custom-designed stencils created in Silhouette Studio and Etchall etching creme. With the right design setup and a few simple steps, you can get beautifully crisp results that make any glass piece look high-end and completely personalized.
Affiliate links may be present in the following blog post and as an Amazon Associate, I earn from qualifying purchases.
If you have a cutting machine, you have unlimited possibilities of custom designs at your fingertips.
I started by measuring each level of the tiered tray. This gives me a starting point to draw out a template in Silhouette Studio to design within. If the tiered tray has a curve to it, then you’ll want to make sure to account for that. Adding a stencil onto a curved area can get a bit tricky to lay it straight and flat. I created my stencils so the design would be on the flat area before the curve starts.
Here is a look at my working file in Silhouette Studio.
On the left side are some designs I was playing around with to decide what I wanted to work with. I settled on using the Cherry Blossom Design by Tanya Batrak. On the right you can see the design for each level of the tiered tray. The outer oval is the template from my measurements and then I was able to design within the template for each level.
I knew I wanted something that went all the way around and I designed an oval frame using the same technique that I shared in the video tutorial on the Silhouette Secrets+ channel – Creating a Circle Frame in Silhouette Studio with Basic Tools.
Then I brought in the Cherry Blossom Design and scaled it to the size I wanted and placed it on top of the oval frame.
I modified the design a bit by cutting off the branch on one side and then for the largest tiered tray, I cut off the top 3rd flower and used edit points to make the design smooth. So each layer of this tiered tray is a bit different. Here is a close up look at my final designs.
I then made an offset of the entire design and subtracted the offset from the circle frame to give the design some space and set it apart.
Here is a look at my stencil file on the Send tab in Silhouette. I used the Cut by Line Color tab so I could set up 2 different settings and have it kiss cut around the stencil and then cut the red cut line all the way through on the offset around the entire design. This way the center of the design was cut out for me by the Silhouette machine.
Then I grabbed a color of Oracal 651 adhesive vinyl that has been in my stash for awhile and not used. Scraps or colors that you don’t use often are great for stencils.
Once the designs were cut, then carefully weed out the design. And if you mess up in the weeding or application process, grab another sheet of vinyl and cut another one. I messed up along the way on one decal and ended up cutting another stencil. So glad I have this option with owning a cutting machine!
If your tiered tray comes apart easily, it may be easier to apply the stencils and etch by taking it apart. My husband suggested I do this, but with the rubber rings separating each layer, I didn’t want to mess something up taking it apart or putting it back together, so I worked with it fully assembled.
This meant that I needed to cut the stencil apart for 2 of the layers to wrap it around and apply to the bottom of the tier.
I looked for a good section of the design to slice it apart at that would be easy to line up and get connected again when I was applying.
Find some way to set up so your glass is secure and is as flat as possible for the stencil application and while the etching creme is on the glass.
Since I left my tiered tray assembled, I propped it up using my bulk roll of AT65 Transfer Tape.
This was actually a really sturdy way to hold my tiered tray and it was stable, secure, and level the entire time.
Make sure to clean the area where you’ll be applying the adhesive vinyl with alcohol first to remove any dirt and debris so you get a good adhesion. And then let it dry completely.
The bottom layer was the easiest since it was the most accessible and that is where I started. I applied the Oracal 651 adhesive vinyl stencil and then I applied a bit of heat to help the adhesive vinyl to adhere well. I have some intricate areas and I wanted to give myself the best chance of success and not have any bleed. While this is step is not mandatory for glass etching, I do think whatever you can do to set yourself up for success saves your time and money.
Not all glass etches too! And I wasn’t sure if this would work or not on the tiered tray. Starting with the bottom layer first, this was my test. I heated it a bit and then carefully smoothed down the vinyl edges all along. Be careful as hot glass looks the same as cold glass. I then waited for the glass to cool completely before applying the Etching creme so that the adhesive could set up and less likely to move around on the smooth surface.
The next step isn’t mandatory either, but I do feel it will help you be successful! Tape off the edges around the stencil in case any etching creme gets outside of where you want it to be. It never fails that if the etching creme even touches an area you don’t want it to etch, it will.
Use painter’s tape or in this case, I had lots of excess transfer tape and since it was an oval object on a curved surface, I ended up cutting smaller sections of the AT65 transfer tape and applying it around the outer edge and the inside edge of my stencil.
For flat objects, you can simply make your stencil larger to cover a larger area of the object. However, on a curved object that can be more difficult to lay the adhesive vinyl completely flat, so I chose this method.
Next, I applied the Etchall etching creme around the entire design. And set my timer for 20 minutes.
The next steps are very important! After 20 minutes, carefully remove any excess Etchall etching creme and put it back in the bottle. It can be reused over and over again. Then I take a paper towel and wipe away any excess. And once all the excess has been removed, I will run water in my sink and then washed the entire design and remove the stencil while under running water.
It worked!!! So I dried it off and then repeated the same steps on the other 2 layers of the tiered tray.
As you can see I have 2 different colors of adhesive vinyl as I messed up weeding the top layer stencil. Easily remedied by cutting another stencil with my Silhouette machine.
All the extra steps to secure with heat and taping off the design paid off!
This etched tiered tray project turned out fantastic!!!
The hardest part about glass etching is getting a good photo and in this case, getting a good photo that shows all 3 levels off well.
I love being able to create custom and unique projects. This one was quickly claimed by my youngest, who put it to work immediately. I asked if she could to a “lifestyle” photo for me to use and this is what she did.
It is definitely being put to good use and she loves it.
Check out more information for even more creative ideas and tips to take your crafting to the next level HERE!
Save this for future reference by pinning the image below.
Enjoy !
THANK YOU for your support! How can you help? Click HERE & buy a coffee. Every little bit helps with the cost of running the site.
Silhouette Classes
Never stop learning! Let me help you take the anxiety out of learning with Silhouette and get to creating faster! My Silhouette classes are heavily focused on software, so you can take the skills & techniques taught and apply them to many future projects!
**This post may contain affiliate links. What that means is that I may receive compensation if you purchase through the links I have provided. The price you pay for the product or service is not higher but I may get compensated for sharing.
There’s still time to grab the Glassboard Studio Black Friday deals and get free products too!
Affiliate links may be present in the following blog post and as an Amazon Associate, I earn from qualifying purchases.
Here is the Holiday Sale Schedule for Glassboard Studio and there are still 2 freebies left on the schedule. Make sure to use my affiliate code SILHOUETTESECRETS to save 20% during their Black Friday sale and 15% any time after that – shop at this link HERE.
I was asked what freebies would be the best and I think that depends on each user’s preference. I use both the pawn magnets and the craft catchers. If you want to have matching colors for the pawn magnets, then I’d recommend ordering those in the color you want.
The Craft Catcher’s are new and so useful! I store everything from tools, Silhouette blades, earring hardware, project pieces, and more in mine.
I shared a video on Instagram and Facebook when the new magnetic ink pad holders and the craft catcher’s were released. Check that out here on Instagram or on Facebook.
Here is a look how I was using them while creating in October.
I have now added several new tools from Glassboard Studio to my craft room this year. It took me a bit to talk myself into investing in it, but I’m so glad I did.
Check out this video HERE where I’m using the Glassboard mat as a palette while painting my Halloween 3-D busted canvas elements. Such easy cleanup.
I love that I can use this as a palette with many different medias. I made my mom a custom zipper bag and drew a design on it using Sharpie Creative Markers. I even used it to practice my initials that I sign because I was having a “moment” and had forgotten exactly how I’ve been signing things.
I pulled out some of the creations I’ve been working on this year since taking a class with artist Tracy Weinzapfel for inspiration and reference as I drew on the black zipper bag. Since it was a black bag, I did need to use several layers of the markers to get the colors I wanted. If a marker picked up color from another section, I could easily scribble it a bit to get it back to it’s original color. I left the scribbles on there for a couple weeks as I was out of my studio and it still cleaned up easily when I got back to it.
And then Glassboard Studio released a new Scrapbook Magnetic Glassboard Craft Mat! This one fits 2 – 12″ x 12″ Scrapbook layouts completely on top of it. Something you may not know is that my crafting journey started with scrapbooking. One craft leads to another and here we are. Paper crafting is one of my favorite and when I was asked if I’d be interested in this size mat, I knew it was meant to live in my studio.
After I purchased my first Magnetic Glassboard mat, Pinterest showed me a photo of a gorgeous pattern called Oceanside, which was no longer available. I told myself if it ever became available again, that I would jump on ordering it simply because it makes me happy to look at. And wouldn’t you know, after they released the new Scrapbook Craft Mat, they also announced several special edition mats were coming back for a limited time. I guess, be careful what you tell yourself!
The ocean is calling and if I can’t go to it, why not bring it to me. I may have to play some ocean sounds and just stare at it and pretend I’m really there. My shipping information says it will arrive later today after this is published, but watch the Silhouette Secrets+ social channels and I’ll share an unboxing on there (YouTube, Facebook, Instagram).
I know, I know… how many magnetic Glassboard mats does one person need? I started the year with 0 and now own 3. But, I do have several work spaces in my craft studio, so I know they will be used.
Want to see more on how I’m using this in my studio & some project inspiration too? Check out this blog post HERE and see how I’ve put it to use.
Make sure if you do invest in some new tools for your craft room that you use code SILHOUETTESECRETS to save at this link HERE. During the Glassboard Black Friday sale save 20% and after Black Friday is over, you can still save 15% on your order any time with my code.
I know these new tools may not be for everyone and it did take me time to talk myself into getting one. I just kept seeing their awesome patterns and something tugged at me that it was right for my craft space. Timing is everything. It may not be the right time for you, but maybe you picked up some inspiration by the projects I shared above.
Thanks so much for reading!
Save this for future reference by pinning the image below.
Enjoy !
THANK YOU for your support! How can you help? Click HERE & buy a coffee. Every little bit helps with the cost of running the site.
Silhouette Classes
Never stop learning! Let me help you take the anxiety out of learning with Silhouette and get to creating faster! My Silhouette classes are heavily focused on software, so you can take the skills & techniques taught and apply them to many future projects!
**This post may contain affiliate links. What that means is that I may receive compensation if you purchase through the links I have provided. The price you pay for the product or service is not higher but I may get compensated for sharing.
Looking for a unique and elegant gift idea? This custom glass etched decanter set is the perfect project to showcase both creativity and craftsmanship! Using Silhouette Studio to design the stencil and cutting it from Oracal 651 adhesive vinyl with the Silhouette Cameo 5, I created crisp, intricate, and detailed stencils that made the etching process a breeze. With a little help from Etchall etching creme, each piece transformed into a beautifully personalized set — perfect for gifting or adding a touch of class to your own home bar. Keep reading for a full supply list, a look at the step-by-step process, and plenty of inspiration photos of the finished project!
Affiliate links may be present in the following blog post and as an Amazon Associate, I earn from qualifying purchases.
The best part about this project is that it came together for less than $20! I found the perfect glassware and decanter set during a quick trip to Goodwill, and I couldn’t pass it up. It was a very successful shopping trip to Goodwill for glassware.
After a good cleaning, the glass pieces were like new and ready for a makeover. My husband had the idea to create our own custom etched decanter set, and it turned out even better than we imagined. It just goes to show — with a little creativity (and a great thrift store find!), you can create something beautiful, personal, and completely unique without spending a fortune.
Ready to make your own custom etched decanter set? Here’s a look at the supplies and tools I used to bring this project to life — from the thrifted glassware to the vinyl stencil and etching cream that made the magic happen!
Now that you’ve got your supplies ready, let’s take a look at how this custom etched decanter set came together! I snapped a few photos along the way to show each step — from creating the stencil in Silhouette Studio to applying the Etchall etching creme and revealing the final design.
I started by using a file I purchased on Etsy and then did some clean up on the file to make it more suitable for the glass etching project. I did not need all of the fine, intricate details of the original design at the size I was creating with. On the left is the original design I purchased, and on the right is the file I used for my stencil.
Creating a clean cutting stencil can take some test cut attempts just to make sure that the details you want will remain and you won’t have any cutting issues. I started with one stencil, adjusted my design a bit after seeing how it cut, and then cut the rest of the stencils I needed.
I used scraps of Oracal 651 adhesive vinyl for this project. Or if you have a color in your stash that isn’t your favorite, this is the perfect project for it!
I applied the stencils using AT65 Transfer Tape and then I highly recommend adding painters tape around the edges of your stencil design, especially on a curved object. Etching cream is awesome and can work super quick, especially if it gets onto a spot of the glassware that you do not want to be etched. It seems like those mistakes always seem to etch the fastest.
The next step I took is optional, but since I knew my stencils were detailed, I thought it was worth the extra step to apply a bit of heat to the adhesive vinyl and make sure it had a really good adhesion. I grabbed my Heat It Gun by Ranger and applied it for a few seconds all around. Be careful as hot glass looks like cold glass. I let it cool completely so the adhesive vinyl would be well stuck.
I really like this Heat Gun by Ranger as it has more of a direct heat towards your project and doesn’t blow the hot air out around as much. I know that sounds odd, but it’s one of those things that you don’t really “get” until you have used the tool. I used it in a class at Creativation 2025 and came home and bought myself one even though I have several embossing guns already in my tool box.
Here is a close up look at the etching cream as it sneaked off my stencil and why I highly recommend using the painters tape. With curved objects, it’s not always easy to simply make the stencil bigger. That can be more difficult to get a smooth application on the glass object, so the painters tape is a great way to help add an additional barrier.
I leave the etching cream on for 20 minutes and then this is IMPORTANT! Scrape off any excess etching cream and put it back in the bottle!!! It can be reused over and over again. I’ve had bottles of Etchall Etching Creme for many years, and it is still good to use, no matter what color it turns into.
Then I take a paper towel and wipe off any excess etching cream before rinsing it thoroughly in the sink.
They turned out FANTASTIC! And I was doing a happy dance. I do believe that taking the extra time to heat the adhesive vinyl and let it cool before applying the etching cream helped to seal the edges of the stencil to prevent any seepage of the etching cream and give it crisp, smooth lines.
The next step – put them to the test & enjoy our new custom decanter set.
For our project, we thought that Buffalo Trace fit it perfectly and filled the decanter well. (*not sponsored or a promotion for Buffalo Trace – please enjoy responsibly)
Whether you’re creating a special gift or adding a custom touch to your own space, glass etching is a simple way to make something truly unforgettable. With your cutting machine, Oracal 651 vinyl, and a little Etchall etching creme, you can personalize glassware, mirrors, and so much more! I hope this project inspires you to give etching a try and see just how easy it is to get professional-looking results at home. Check out more information for even more creative ideas and tips to take your crafting to the next level HERE!
Save this for future reference by pinning the image below.
Enjoy !
THANK YOU for your support! How can you help? Click HERE & buy a coffee. Every little bit helps with the cost of running the site.
Silhouette Classes
Never stop learning! Let me help you take the anxiety out of learning with Silhouette and get to creating faster! My Silhouette classes are heavily focused on software, so you can take the skills & techniques taught and apply them to many future projects!
**This post may contain affiliate links. What that means is that I may receive compensation if you purchase through the links I have provided. The price you pay for the product or service is not higher but I may get compensated for sharing.
This edition of Crafting Creativity is full of heartwarming inspiration straight from the Hundred Acre Wood! Using the Classic Pooh: Friend Like You digital stamp set by Katie Pertiet Designs, I created several sweet and timeless projects featuring Pooh and his friends. From layered cards to charming home décor, each piece highlights how versatile digital stamps can be when paired with your Silhouette. Get ready to see how these delightful designs can bring warmth, friendship, and nostalgia to your craft table.
Affiliate links may be present in the following blog post and as an Amazon Associate, I earn from qualifying purchases.
Did you know that the Classic Pooh is now in the public domain in the U.S.? Classic Pooh entered the public domain on January 1, 2022. The Disney version is not in public domain. *Outside of the U.S., please refer to trademark laws & regulations for your area.
Each month in the Crafting Creativity series, I dive into a single design file and transform it into a variety of unique projects to inspire your own creativity. From cards and stickers to home décor and custom tags, I love exploring all the possibilities one file can offer. These posts are designed to show you how versatile a single design can be and to spark ideas for using your Silhouette in new and exciting ways. Whether you’re a seasoned crafter or just starting out, Crafting Creativity is full of tips, tricks, and inspiration to help you make the most of every design!
Crafting Creativity – Classic Pooh Projects
Digital stamps are incredibly versatile and perfect for creating a wide range of projects. Pair them with your Silhouette for precise print-and-cut projects, and suddenly one file becomes the foundation for endless creative possibilities. Whether you’re crafting for holidays, birthdays, or everyday inspiration, digital stamps make it easy to bring your ideas to life!
Project #1 – Flip Action Interactive Cards
These came together so easily and I was able to fit the print and cut designs for 6 cards onto one letter size sheet of paper. Here is a look at my print and cut page setup.
I posted a quick video of cutting the pieces for this project using the Electrostatic Mat. Check out the video on Instagram or Facebook.
And I used these designs in this video tutorial to show how to match colors in the Silhouette Studio software with the eyedropper too!
Digital stamps are perfect for creating custom stickers — you can size them exactly how you want, print them on your favorite sticker paper, and even cut them out perfectly with your Silhouette! They’re a fantastic way to bring digital designs into the physical world for planners, journals, cards, and more.
I received several questions about how to use digital stamps inside Silhouette Studio, so I created a step-by-step tutorial showing exactly how I set up, trace, and print and cut these adorable Classic Pooh images. It’s easier than you might think, and once you try it, you’ll be hooked on making your own personalized sticker sheets!
The first set I created using the Silhouette Super Fine Heat Pen with silver foil. I had a couple issues with the foil tearing which smeared a few parts, but otherwise they turned out great! They are a bit more work to set up with extra steps for the foiling, but if you are looking for a WOW factor! This can do it!
I used a different sketch font on each one and one I drew a balloon using the Flexishapes and the line drawing tool.
But I couldn’t stop there! I also went ahead and simply changed the line color on all the sketch fonts to black and then did the tags as a print and cut. This does not have the shine to it, but it was less steps to set up to have it all printed.
When working with sketch fonts, make sure to click on the Send tab and look at the bold red lines. That is exactly how it would sketch or print through a printer. Text defaults to “cut edge”, which can make sketch fonts act a bit goofy if they are close to single line fonts. They may not look complete and that is exactly how they would sketch or print.
Take the steps and tips I shared and create your own unique custom digital background too! Have you seen the shirts where the husband takes a photo of the wife or vice versa and puts it onto a shirt for special occasions like birthdays? I just had to do it! So I made my husband custom gift wrap for his birthday.
All of these projects were completed using just 1 digital stamp set by Katie Pertiet. She has a store full of amazing digital supplies and also produces physical products as well, such as stamps and more!
This year I started offering a free file each month for Silhouette Secrets+ newsletter subscribers. I love designing in the Silhouette Studio software and have shared some of my creations as well as look forward to collaborating with more artists in the future too!
Silhouette Secrets+ Newsletter
Never miss out on the news, tips, “secrets”, deals, classes, and more that I share on Silhouette Secrets+. Sign up for the newsletter and get information delivered to your inbox every Friday. Unsubscribe at anytime.
Sign up for the weekly newsletter HERE to have information delivered direct to your inbox and grab each month’s new freebie.
Did this spark some creative ideas for you? It’s amazing how one digital stamp set can be transformed into so many unique projects! I had such a wonderful time brainstorming, designing, and bringing each of these Classic Pooh creations to life. You can find even more inspiration and project ideas in the Crafting Creativity section on the Silhouette Secrets+ website — click HERE to explore!
Save this for future reference by pinning the image below.
Enjoy !
THANK YOU for your support! How can you help? Click HERE & buy a coffee. Every little bit helps with the cost of running the site.
Silhouette Classes
Never stop learning! Let me help you take the anxiety out of learning with Silhouette and get to creating faster! My Silhouette classes are heavily focused on software, so you can take the skills & techniques taught and apply them to many future projects!
**This post may contain affiliate links. What that means is that I may receive compensation if you purchase through the links I have provided. The price you pay for the product or service is not higher but I may get compensated for sharing.
Looking for a fun and creative way to take your sublimation projects to the next level? In this tutorial, I’m sharing how to combine Artesprix Sublimation Inks with embossing folders to create beautiful, designs on textured sublimation coasters! 🎨 This unique technique adds incredible depth and dimension to your projects—perfect for gifts, décor, or one-of-a-kind keepsakes. I’ll walk you through the full process step-by-step in the video below, along with a complete list of the supplies you’ll need to get started. Grab your favorite embossing folders, your Artesprix inks, and let’s create something truly unique!
Affiliate links may be present in the following blog post and as an Amazon Associate I earn from qualifying purchases.
My favorite is the single color with the white of the textured coaster coming through. I think it really makes it pop, but there are so many different color options that you could do.
THANK YOU for your support! How can you help? Click HERE & buy a coffee. Every little bit helps with the cost of running the site.
Silhouette Classes
Never stop learning! Let me help you take the anxiety out of learning with Silhouette and get to creating faster! My Silhouette classes are heavily focused on software, so you can take the skills & techniques taught and apply them to many future projects!
**This post may contain affiliate links. What that means is that I may receive compensation if you purchase through the links I have provided. The price you pay for the product or service is not higher but I may get compensated for sharing.
Looking for stencil craft ideas to spark your creativity? This week, I’m sharing how one stencil design can be transformed in six fun and unique ways! Using the Hand Carved Flower Stencil by Kassy’s Parlour, created by artist Kassandra Louise Designs, I turned this single file into a home décor sign, cup decal, jewelry pendants, painted canvas, and more. It’s incredible how one design can inspire so many creative projects.
Affiliate links may be present in the following blog post and as an Amazon Associate, I earn from qualifying purchases.
When you look at a design file, do you see one project idea, or can you envision it on multiple projects? I started the Crafting Creativity series to help spark ideas and inspiration to do more with your files.
These are cut from 6 mil stencil material and it cut beautifully.
Here is a look at the stencil before I unloaded it from the machine. For harder to cut materials, checking the cut before unloading the machine is a great habit to get into. If the cut did not complete, you can send it again and it should cut in the same place. This is great for materials such as stencil materials that dull blades quicker and may need extra passes to cut through.
Once the stencil is cut, it can be used for many different projects and mediums.
One thing to keep in mind is that stencil material is plastic and plastic will dull the blade quicker than other materials. It is perfectly normal to have to increase the blade settings or passes the more that is cut. And if you are cutting this material a lot, you may go through more blades than other thinner, easier to cut materials.
I cut this 6 mil stencil material using the preset for Stencil Material in the Silhouette Studio software. All I changed was to increase the passes to 2 and then when that started having a few hang ups, I increased it to 3 passes.
Have you ever used a Gel Press or Gelli Plate before? This is such a fun technique!
Basically, a gel press is a jelly plate that you can add paint or other mediums on top of and then you press a piece of paper over top of it and pull the paint off. You can layer colors, add textures, and have lots of options.
Here are a couple of pulls that I did using the stencil on top of the Gel Press.
These can turn out so neat and each one is unique. Once dry the pages can be used for many projects such as cards, mixed media pages, tags, backgrounds and more!
I used two of the gel prints to make this card and then stamped with black ink directly on top of the print. It turned out pretty neat with the paint showing through the black ink.
For this project, I opened the stencil design, changed the fill color to transparent and then right clicked and chose “Release Compound Path”. This will break up the design into pieces. I then deleted all the pieces around the full flower design. Then selected all of the flower pieces, right click and choose “Make Compound Path”.
I am using a 8″ frame, so drew a square and sized it to 8″ x 8″. I selected the flower design and filled it with black, just to see it better. Then started playing around with patterns. I filled the flower design with a pattern and decreased the transparency in the Fill Color panel. Then I started filling the background square with patterns and testing them out.
Here is a look at my working file where you can see the different pattern options I was playing around with.
Then I printed the design onto Epson Presentation Paper – Matte and cut it with my paper trimmer.
When there are straight lines and a larger image as shown above, an old school paper trimmer does the trick versus trying to set up for a print and cut. I use Silhouette Studio to do the design work and printing and then with 4 swipes, my paper trimmer has the project ready to go.
And the best part about this is, you can change it out whenever you feel like. Print a new image and swap it out to coordinate with the season, your decor, or your mood.
I cut several flower decals from patterned adhesive vinyl to decorate my new travel coffee cup. I used the same technique as described above to separate the flower design from the stencil and cut individual flower decals.
After I weeded the decals, I cut them apart and then applied transfer tape and placed each one individually around the cup, so I could control where they were and how they fit together.
Here is a close up of the decal where I hope you can see a bit of it’s sparkle & shine.
Tips for Creating Cup Decals with Adhesive Vinyl
Surface Area
When applying adhesive vinyl to a surface that may be handled often, you want to keep in mind the size of the pieces of the design. The smaller the piece, the less adhesive there is to stick to the surface of the blank. So thin letters, intricate flourishes, delicate designs may not stick well to the surface of an object that’s handled or washed.
Even if using “permanent” adhesive vinyl, that doesn’t mean it will never come off or lift. Permanent adhesive vinyl simply means it has a stronger adhesive on the backside than “temporary” vinyl once cured. You can still peel it off, pick it off, scrape it off, etc.
The greater the surface area of the solid pieces of the design, the more adhesive there is to stick to the object.
There are a couple things you can do to help with a decal staying put longer.
thicken fonts or enlarge small areas of the design
eliminate the smaller or tiny sections of a design if possible
clean the surface of the cup with an alcohol swab & let it dry completely – this cleans off any dust or oils off the surface that can repel the adhesive
after applying the decal, let it sit for 48-72 hours for the adhesive to set up
apply a bit of heat to help the adhesive vinyl stick – not too much, you don’t want to melt it
Surface of the Cup
Stain resistant, nonstick, or silicone surfaces are designed to repel anything from sticking to it. Even if you are able to get a decal to stick initially, it usually does not for long.
It doesn’t just apply to cups though. There are a lot more stain resistant paints on the market and being used to paint interior walls of homes. Stain resistant is designed so things don’t stick to it, so even a “permanent” adhesive vinyl decal may not stick.
Textured surfaces can also be more difficult for a decal to stick to or it may not last long on a texture surface.
Placement of the Decal
When placing decals onto a cup, keep in mind where it is placed. I purposely placed my designs higher up on the cup knowing that it would be set into a car cup holder.
The more a cup is handled, the greater chance there is that the decal can catch, lift, or come off. This would include things like someone picking at the design, washing the cup, scrubbing the cup, sliding in and out of a car cup holder, being tossed around in a bag, etc.
And…
Sometimes things just happen and it won’t last. The best part about having a cutting machine is that you can cut another one. Or you can take the current one off, clean the cup, and apply a new decal to fit your mood.
I tried several different things with these and they are still a work in progress. Some things didn’t turn out such as using the stencil with white sharpies or sponging on white texture paste. I had too much bleed, so I ended up painting another layer to cover it up.
When the white Sharpie and texture paint didn’t work out on this one, I switched gears and cut a stencil from Silhouette adhesive backed stencil material and started filling it in with TCW Stencil Butter. OH MY! I have to say that the Silhouette adhesive backed stencil material worked AWESOME! Even with the texture of the canvas, it worked great! I will definitely be using this more in the future. The only drawback is that it is letter size and I would have loved to create a larger stencil.
But I made it work. I had to let the first flower dry and then I added more.
All I need now is the perfect saying to add to it. Let me know if you have any ideas that jump out at you when you see the project!
The next one has several layers of paint on it, but ultimately, I ended up with a solid pink background. I had cut a 12″ x 12″ stencil to use with this, but then I started looking at all of those negative pieces that were left over from the stencil and wondered if I could use those in some way.
I ended up applying transfer tape and picking up all of those pieces that I then used as a negative stencil on the wet paint. It was really just a “let’s see what happens moment”. I just laid the transfer tape on top of the wet paint with the negative pieces attached and smoothed it down to see what would happen.
It gave it an interesting pattern. Once the paint was dry, I then simply traced around with the white Sharpie Creative Maker and then I added a layer of Mod Podge Sparkle on top of it.
I am not sure if it’s finished yet or if I will add more to it. Just waiting a bit to see where the art goes.
A great big thank you to Kassy for contributing the free file for the Silhouette Secrets+ newsletter for the month of August! If you missed grabbing the free design in August, it is available in the HERE.
This year I started offering a free file each month for Silhouette Secrets+ newsletter subscribers. I love designing in the Silhouette Studio software and have shared some of my creations as well as look forward to collaborating with more artists in the future too!
Silhouette Secrets+ Newsletter
Never miss out on the news, tips, “secrets”, deals, classes, and more that I share on Silhouette Secrets+. Sign up for the newsletter and get information delivered to your inbox every Friday. Unsubscribe at anytime.
Sign up for the weekly newsletter HERE to have information delivered direct to your inbox and grab each month new freebie.
Did this spark your imagination? ✨ It’s amazing how one single file can be transformed into so many unique projects! I loved exploring all the creative possibilities with this design. You can find even more inspiration and project ideas in the Crafting Creativity section on the website — check it out HERE.
Save this for future reference by pinning the image below.
Enjoy !
THANK YOU for your support! How can you help? Click HERE & buy a coffee. Every little bit helps with the cost of running the site.
Silhouette Classes
Never stop learning! Let me help you take the anxiety out of learning with Silhouette and get to creating faster! My Silhouette classes are heavily focused on software, so you can take the skills & techniques taught and apply them to many future projects!
**This post may contain affiliate links. What that means is that I may receive compensation if you purchase through the links I have provided. The price you pay for the product or service is not higher but I may get compensated for sharing.
THANK YOU for your support! How can you help? Click the link to buy a coffee. Every little bit helps in the cost of running the site.