Posted on 1 Comment

Maker’s Sign with the Cameo Pro

When I first learned I would be getting the Cameo Pro 24” cutting machine, I started out by making a list of projects that I would want to create, started gathering large wood blanks, and started looking through my Silhouette designs in order to decide what I wanted to create.

I don’t know about you, but settling on a design to make on a project can sometimes be the most time-consuming part for me. Or if I am creating the design, the actual design creation, is the most time consuming because I am overly critical of my design work.

Affiliate links may be present in the following blog post and as an Amazon Associate, I earn from qualifying purchases.

When I saw this design, I thought it would be perfect to add to my Studio/Office. I wanted to take the Cameo part and stretch it to be more like a 24″ cutting machine like the Pro.

I had purchased a large sign blank from Hobby Lobby and started off by measuring the space I had to create the design. Then I drew a rectangle using the Drawing tools on the left and scaled it to the size I had measured of my design area on the sign using the Transform Panel – Scale tab.

I then opened the Makers Gonna Make file by Planeta Silhouette – Design #324370.

The design opens about 9.6” in size, so I grabbed the corner bounding box and scaled it larger.

Since I have a large size, I want the design to be even larger to fit the space, but just stretching it may not look ok. I right clicked on the design & chose Release Compound Path. For this particular design ungroup was not an option. Each design may vary in what you need to do to adjust and alter it if desired. The easiest way to work with this right now is if I change the color of the rectangle and the design to be transparent under the Fill Color Panel.

When the compound path is released, it breaks the design up into individual pieces.

Notice that each piece now has a selection box around it. This includes the insides of the k, a, e, o. It takes the design apart. Now, we have to put each piece back together so when we move the design it all moves as one piece and when filled with color it will look normal again.

Compound paths can be one of the hardest things for a Silhouette user to understand. Check out this post for more details & examples of compound paths and working with them – Compound Paths.

Select the entire word of Make, including the insides of the a, k, e, and r. Then right click and choose Make Compound Path.

There are multiple ways that you can select multiple objects together in the Silhouette software.

Here are 2 ways:

1 – Click on the red line of the object, hold the Shift key down on the keyboard and then click on each of the red lines of the other objects you want selected, keeping the Shift key held down the entire time.

2 – Left click the mouse button and hold it down and drag it across the entire design making sure to touch each object you want selected. Whatever the selection box touches when you do this will be selected.

You can double check that the Compound Path worked properly by filling the design with color after you have completed this step. For example, here is how it would look before and after the compound path is made.

For all the objects that have multiple pieces, select the full design, right click, and choose Make Compound Path. For this design, that is everything except the hearts.

Now, I can start adjusting the individual pieces of the design.

Since my sign is 26.75” wide, I can stretch the design to fit this size, starting with the Cameo machine image. Since I now have a 24” Cameo Pro, I wanted it to resemble that as close as it can without distorting the image. Keep in mind that you can stretch a design lengthwise, but it may not always look the best when you do. Each design is going to be different in how it reacts.

Adjust the design until you are satisfied and then click on the Send tab in the top right corner. Choose the Material and adjust the cut settings if needed.

Do a test cut! I’ll say that one again. Do a test cut!
The test cut will be your best friend and save you from wasting a whole lot of materials before you send your full design to cut and find it did not work.
You can either use the test cut feature on the Send tab in the bottom right corner or create your own by typing out a capital B and then using that and moving it around the design mat as needed.

And then after you have double checked the material settings and done the test cuts, click on the Send tab in the bottom right corner to send your design to cut.

Note: the video speed has been increased on this video.
The total cut time was approximately 8 minutes.

After it’s been cut comes the time to weed and apply the transfer tape. Keep in mind that this video is a time lapse video and took much longer than the 7-minute video total.

The 2 biggest tips I can suggest are to be patient with yourself and it takes practice to work with the large decals. I don’t even want to tell you how many times I cut and weeded this design. Here is one “oops” to show you.

It all goes great until the very end! And that is just how it happens. Kick myself a little bit and then the best part is, I can go back to my machine and cut it again. It is all a learning experience.

It will take time to practice working with large designs.

And I love it in my Studio/Office!
That space needed something and I think this fit just perfect!

I can’t wait to share the other projects I’ve been creating with the Cameo Pro.

For more information on the Cameo Pro, check out these 2 posts:
Just Released – Cameo Pro 24″ cutting machine
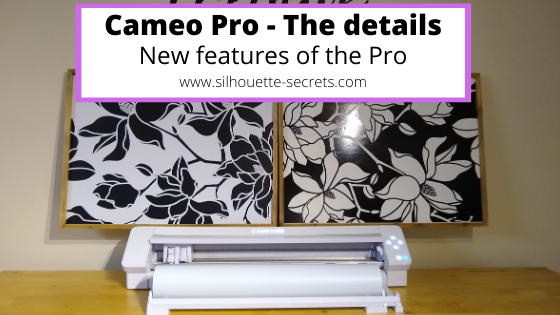
Cameo Pro – The details – New features of the Pro
Find the Pro at Michaels HERE with FREE shipping too!
Pre-order from Swing Design HERE
they are estimating shipping beginning at the end of November to beginning of December

Now, do you HAVE to have a Cameo Pro to complete this project. The answer is NO! You could ungroup this design and cut it in sections with any Silhouette machine, even the Portrait. You would just apply the vinyl in the sections that you cut it in individually on the wood board.

I would love to see and hear about what you are creating on my Facebook group at 
Silhouette Secrets with EllyMae.

Save this for future reference by pinning the image below.

Enjoy!

This image has an empty alt attribute; its file name is logo.jpg

THANK YOU for your support! How can you help? Click HERE & buy a coffee.
Every little bit helps with the cost of running the site.

Or if you are looking for more in-depth, step-by-step classes, check out all of my online Silhouette classes on my Teachable site HERE.

SS Logo snip it
**This post may contain affiliate links. What that means is that I may receive compensation if you purchase through the links I have provided. The price you pay for the product or service is not higher but I may get compensated for sharing.
Posted on 10 Comments

Cameo 4 Pro New Features

Cameo 4 Pro New Features

I’m so excited to be able to bring this to you and let you know the new features that the Cameo 4 Pro machine has available.

First, here is an unboxing video of the Cameo 4 Pro. When I watched the replay of the video I had to laugh because I could see how excited I was to open it up and reveal everything. That was my first glimpse of the machine and the new features.

Affiliate links may be present in the following blog post and as an Amazon Associate, I earn from qualifying purchases.
Sponsored post. I was asked to test the machine prior to release and I put in a lot of machine hours putting it through the paces to see how it would perform.
All opinions are my own and from hours of testing with the machine.

If you are looking for the new Cameo Pro, find it at Silhouette America HERE.
Or grab it at Michaels HERE with FREE shipping too!
Pre-order from Swing Design HERE
they are estimating shipping beginning at the end of November to beginning of December

Signs from Hobby Lobby and measure 19.75″ x 26.75″ inside the frame. Decals were cut as one solid piece of vinyl.

First, I will say that I never thought I would have a need for a machine this size. Now, that I’ve had it though, it has not been put away and is always ready for me to start a new project. I have been creating much larger projects than I ever thought I would and am loving it!!! I cannot wait to share those with you.

New Features of the Cameo Pro

The biggest new feature is – it is a 24” cutting machine.
WOW! I know users were asking why only 20” when it was announced at the 2019 Silhouette Summit.
Well, it’s here and it is 24”!!!

New Roller bar – the roller bar on the Cameo 4 Pro has been redesigned and is no longer a roller bar, but a long rectangle bar with the rollers inside of it.

The rollers are located under the bar next to the load lines

And the right roller is under the tab on the right that adjusts along the bar

New guides – with a new roller bar design the guides have also been re-designed. These can be moved along the roller bar to help provide assistance in keeping the material from bubbling up in between the rollers. Position the guides evenly on the material between the rollers for best results. If you look closely under the bar, you will see that they are small wire coils.

New roll feeder – the new roll feeder comes in separate pieces that have to be set under the front of the Cameo Pro. Check out how to add them in the Unboxing video above.
Here is how it should look when set up to cut with a cutting mat. The middle has a larger support to help in supporting the cutting mat as it feeds in and out of the machine. I would highly recommend if you are using a 24” x 24” cutting mat that you have it fully supported in the front and not hanging down at all, for best results.
This may mean that you need to have it set up on a larger work surface.

Here is how the setup should look if you are using it to cut off of a roll. The right side of the roll feeder assembly slides in to accommodate smaller rolls.

The new roll feeder has white rollers on it to allow the rolls to smoothly roll back and forth as it’s fed into the machine. On the left and right side, the back white roller can be adjusted for larger or smaller rolls by unscrewing the knob and sliding the white roller in or out, depending on the size of the roll.

Here is the setup for a large roll

And here is the setup for a smaller roll of material. Unscrew the knob on the roll feeder and then slide the back white roller out. Then screw the knob back down to secure the roller.

While I keep my roll feeder setup all the time, all the parts can be nested together for storage except the stability bar. Just make sure to keep all the pieces in a safe place that you will remember for when you need them next.

New load lines – since it is a cutting width of 24” there are now 2 load lines for lining up the materials depending on whether you are using a 24″ cutting mat or no mat.

 Here is a photo showing vinyl loaded in the machine when cutting off a roll.

New Autoload feature – this was released with the v4.4.270 software and works for all Cameo 4, Cameo Plus, and Cameo Pro machines. Tap the load button on the machine and it will begin to blink. Then hold the material or mat up to the rollers and the machine will pull it into the machine.

This is the material/mat sensor that the machine uses to identify that a material has been placed up to the rollers. Make sure that this is free and clear of debris

Keep in mind, if the material is not pulled in evenly on both ends, you may have cutting issues. Unload the material and try again for best results until it loads evenly on both ends.

New software version – with each new machine release, a new software version has to be released in order for that machine to be recognized by the Silhouette software. At the time of release the software version is v4.4.280 and you will need to download that version or higher directly from the Silhouette website in order for the software to show the Pro options or recognize the Pro.

I cut all of the Oramask stencil vinyl for my Halloween décor and all the vinyl for my front door decorations with the Pro and it worked awesome!
Check out this post to see all the signs that I created with it.

In the past few weeks, I have cut yards and yards of vinyl. I have also had lots of user error when testing out this new machine as well. None of it was the machines fault. Just a learning curve to working with much larger decals than I could previously cut in one piece.

Just as a note, when testing a new machine, think twice before sending a set of designs that measure 90” in total all at one time. There was no need to send them all at once to cut, but I tried it. It worked for the most part. Live and learn!

I have been having a ball testing this new 24” cutting machine and what it can do.
Stay tuned for more tips & projects completed with the Cameo Pro.

Want to add this new tool to your studio, find it here at Silhouette America HERE.
Or grab it at Michaels HERE with FREE shipping too!
Pre-order from Swing Design HERE
they are estimating shipping beginning at the end of November to beginning of December

I would love to see and hear about what you are creating on my Facebook group at 
Silhouette Secrets with EllyMae.

Save this for future reference by pinning the image below.

Enjoy!

This image has an empty alt attribute; its file name is logo.jpg

THANK YOU for your support! How can you help? Click HERE & buy a coffee.
Every little bit helps with the cost of running the site.

Or if you are looking for more in-depth, step-by-step classes, check out all of my online Silhouette classes on my Teachable site HERE.

SS Logo snip it
**This post may contain affiliate links. What that means is that I may receive compensation if you purchase through the links I have provided. The price you pay for the product or service is not higher but I may get compensated for sharing.
Posted on 2 Comments

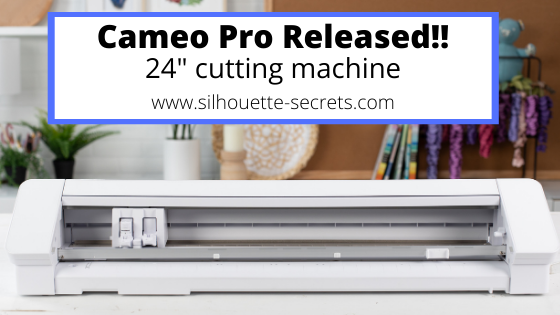
Just released!!! Cameo Pro 24” cutting machine

It’s here! It’s finally here! I know some of you are thinking that right now.
But, guess what, it’s even better than originally thought.

Affiliate links may be present in the following blog post and as an Amazon Associate, I earn from qualifying purchases. Sponsored post.

The Cameo Pro is a 24” cutting machine.

Already know you want it – grab it at Silhouette AmericaHERE
or keep reading for all the details!
Or grab it at Michaels HERE with FREE shipping too!
Pre-order from Swing Design HERE
they are estimating shipping beginning at the end of November to beginning of December

It was originally announced at the Silhouette Summit in May of 2019 as a 20” cutting machine. What we saw at the Summit was only a prototype, which means that it is not completely finished product. And that also means that they decide to change it and make it 24” for the final release. Yay!!!!

I’ve been testing this for the past couple of weeks and while I never thought I’d need a 24” cutting machine – I LOVE IT! I have been creating larger projects than I thought I would want. I cannot wait to share those with you, but for now let’s talk details.

Cameo Pro – 24” cutting machine

The Cameo Pro comes with an Autoblade, a Silhouette wrench, and a blue sketch pen adapter.

A 24” cutting mat

The new roll feeder pieces

Usb cord and power cord
Setup card inside the box and on the inside flap of the box

And here are the official specs:

Machine features include:
• 24-inch cutting width
• Adjustable roll feeder for rolled materials with widths up to 24 inches
• Built-in crosscutter to trim vinyl or heat transfer right from the roll
• Matless cutting capabilities (see Tech Specs for full details)
• Compatible with additional tools (sold separately) for more cutting options
• 3 mm clearance
• Automatic tool detection capabilities
• Sleek, compact aesthetic with a sliding lid and a backlit, feather-light touch panel
• Wireless cutting with Bluetooth® connectivity
• Print & Cut registration capabilities
• PixScan™ compatible
• Driven by Silhouette Studio®, giving you limitless design options to customize your projects

Contents:
• Silhouette Cameo® 4 Pro
• Cameo 4 Pro cutting mat (24 inches by 24 inches)
• AutoBlade
• Roll feeder and mat support pieces
• Silhouette Studio® software (digital download)
• 100 exclusive designs (digital download)
• 1-month Silhouette Design Store subscription (available with tool registration)
• Adapter for Silhouette Sketch Pens
• Basic Instruction Guide (digital download)
• Power and USB cables

Where to find the Cameo Pro 24” cutting machine

Right now, you can find this new machine at Silhouette America – check it out HERE
Or grab it at Michaels HERE with FREE shipping too!
Pre-order from Swing Design HERE
they are estimating shipping beginning at the end of November to beginning of December

Unboxing the Cameo Pro

Want to see this machine – check out my Unboxing video HERE

Grab the Cameo Pro 24” machine while it in stock HERE and get to creating!
Or grab it at Michaels HERE with FREE shipping too!
Pre-order from Swing Design HERE
they are estimating shipping beginning at the end of November to beginning of December

Check out this post – Cameo Pro New Features – for all of the in-depth details regarding the Cameo Pro machine.

I would love to see what you are creating with your Silhouette machines!
Feel free to share on my Facebook group at 
Silhouette Secrets with EllyMae.

Save this for future reference by pinning the image below.

Enjoy!

This image has an empty alt attribute; its file name is logo.jpg

THANK YOU for your support! How can you help? Click HERE & buy a coffee.
Every little bit helps with the cost of running the site.

Or if you are looking for more in-depth, step-by-step classes, check out all of my online Silhouette classes on my Teachable site HERE.
SS Logo snip it
**This post may contain affiliate links. What that means is that I may receive compensation if you purchase through the links I have provided. The price you pay for the product or service is not higher but I may get compensated for sharing.
Posted on 17 Comments

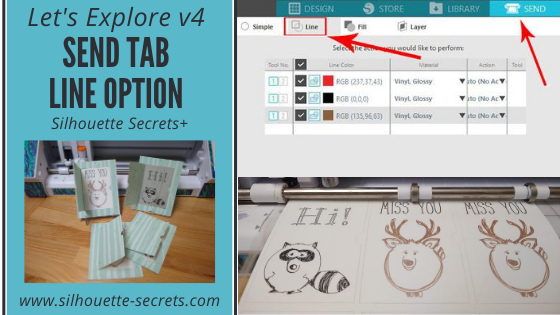
Let’s Explore v4 – Line Effects

If you have been around the Silhouette software for awhile, you may or may not have noticed that there was a change in the software. This change seemed to happen overnight and it’s not one that would severely impact a user, but you may see the differences in tutorials.
With the release of v4.2.479, the Sketch Panel changed to the Line Effects Panel.
With this new change came a few more options.

Let’s take a look at the Line Effects Panel and what it looks like in versions v4.2.479 and higher.

Tutorial is written in Silhouette Studio v4.3.372

If a user only has the Basic (free) Silhouette software, then they will have less options in their Line Effects Panel. This is also a change from before. In versions prior to v4.2.479, you didn’t have the option to select anything under the Sketch Panel in the basic version.

If a user has the Designer Edition, Designer Edition Plus, or Business Edition upgrades they will see several more options in the Line Effects Panel.

Line Effects Settings

Let’s take a look at the sections on the Line Effects Panel.

1 – Fill Effects
Add a sketch fill to any design.
The options include: grid, stripe, concentric, spiral, zig-zag, curly, cross-hatched, scribble, and charcoal.

Each of these fills will act differently depending on the design being applied to. Change the Spacing and Angle to see what will look best for the design.

2 – Edge Effects
Add a sketch line to the outside edge of a design.
The options include: plain, scribble, double effect, curly, rough, and charcoal.

3 – Release Effects
Releasing the sketch when it’s finished takes it out of editable sketch mode and then makes it a vector design.

This opens up a whole new world of possibilities in editing your sketch design. Once the sketch is released, then you can access individual point editing on the sketched design and can manipulate it how you like.

Each of the gray points is an edit point that can be manipulated in this design.
Now, not only do you have the gray edit points, but the sketch fill lines have been released so you can move those as well. Keep in mind that a red dot means that it is an open point and not a closed object, so you will not be able to fill this with color. You can move the red dots towards each other and connect the dots to change the sketch fill.
For more information on Edit Points check out this post HERE.

Each of the red lines you see on the screen is a sketch line.
When a design is filled with line style fills, each line is more data. Be patient with your computer in processing all of this data.

On the 2nd tab of the Line Effects Panel, there are even more options that you can adjust the sketch fills with.

Each has multiple options and varies according to what fill and edge effects you have chosen to start with.

Each design you choose is going to vary in what sketch fill looks good, what spacing might work, what angle might work, etc.

The best way to see what is going to work is to just start playing around with your design.

Affiliate links may be present in the following blog post and as an Amazon Associate I earn from qualifying purchases.

I am going to use 3 Fall Leaves by Lori Whitlock – Design #33053 as an example.

Here is the Scribble fill with the spacing adjusted up and the Scribble edge effects.

Here is the cross-hatched fill with the double edge effect.

Here is the curly fill effect with the rough edge effect.

And here is the zig-zap fill effect with the charcoal edge effect.

As you can see, each line effects fill & edge effect will give you a different look.

Now, something to keep in mind is that when you fill the object with sketch fills, you are adding more data with each red line that you add in. This demo page took over 75 minutes to sketch out. There is one drag mark on the page and that is from when it rolled back through to the starting point. I could adjust it a little bit and try to prevent that for future projects. The more you do it, the more comfortable you will feel with it.

You can also add in a cut line, change the color of the cut line, and then use the Cut/Sketch by Line Color to cut out around the sketch designs as desired.
Since I am using a Cameo 4, I do need to swap out the tools, but that just takes a second.
By using the Sketch/Cut by Line Color, I can turn on and off the line color I want to work with so it allows me time to swap out the tools. Just make sure you do not unload the cutting mat after it’s done sketching.

For more information on the Cut/Sketch by Line Color, check out this post HERE.

Sketching can be a lot of fun and give your projects a unique look. Whether you are using a design that you have filled with a Line Style effect or are using the sketch pens with a sketch design as shown below, they are a lot of fun to play with.

I would love to see what you are creating with your Silhouette machines!
Feel free to share on my Facebook group at 
Silhouette Secrets with EllyMae.

Save this for future reference by pinning the image below.

Enjoy!

This image has an empty alt attribute; its file name is logo.jpg

THANK YOU for your support! How can you help? Click HERE & buy a coffee.
Every little bit helps with the cost of running the site.

Or if you are looking for more in-depth, step-by-step classes, check out all of my online Silhouette classes on my Teachable site HERE.

SS Logo snip it
**This post may contain affiliate links. What that means is that I may receive compensation if you purchase through the links I have provided. The price you pay for the product or service is not higher but I may get compensated for sharing.
Posted on 1 Comment

Let’s Explore v4 – Color Fonts

Have you seen these new fun designs called Color Fonts?

I say “new” but they have been around for quite awhile. These have become very popular in the past year or so and the Silhouette Design Store has quite a selection of them.

Affiliate links may be present in the following blog post and as an Amazon Associate I earn from qualifying purchases.

What are Color Fonts?

These are actual font files that contain full graphic images for each letter in the font file. These are graphic images that would be used for print and cut projects. They are not cut files with individual pieces to fit together. It is one image per letter.
Some of these font files may also need to be installed directly onto your computer fonts folder in order to be fully assessible.
Check out Installing Fonts HERE.

The first important thing about Color Fonts is that you have to use a Silhouette Studio version of v4.2.279 or higher in order to access those. A user could still purchase these font styles in the Silhouette Design Store, however, they will not be able to access the file in Silhouette unless they have v4.2.279 or higher.

Next, let’s take a look at an example –
October Monogram Banner Color Font by ScrapNfonts – Design #332495

I am using the Text Tool on the left side, typing out a capital H, and then choosing the Font Style in the Text Style Panel on the right side.

You could also access the font characters under the Glyphs Panel for a specific font style as well. Click on the Text Style Panel – Tab 2 for the Glyphs and then double click on the glyph or character that you want to choose.
The Glyphs Panel is available to those who have the Designer Edition software upgrade or higher.

Notice that the glyphs do not show in full color in the panel, but when you double click on the glyph it will be added to the top left corner of the design mat and show in full color.
You can also increase the size of the icons using the slider bar at the bottom of the
Glyphs Panel.

After the glyph is on the page, click off to deselect it and click back on it one time and you can use the corner bounding box to resize it.

Color fonts are designed as a graphic design to be printed. These are not files that contain individual pieces to cut out and layer on a project.

Click on the Send tab to see the bold red cut lines around the design. You may notice that there are fuzzy, bold red cut lines around the design and that is because it is text. In the v4.3+ software versions, text automatically defaults to Cut Edge and why it appears fuzzy. You can click on the design to select it and then choose Cut and it will smooth out, however, it is only a visual on the screen and does not affect the cut
(unless you are working with text that needs to be welded).

Now for these Color Fonts for most projects, you will want to set it up as a print and cut project in order for the Silhouette machine to read where the design is on the printed page.
For tips on how to set up a Print and Cut project check out this Print and Cut Basics post
HERE.

There is one big thing to note about Color Fonts.

Color Fonts found in the Silhouette Design Store cannot be changed in any way such as welding, converting to path, or releasing the compound path. They have to be used in the exact format that they type out as or they will lose their color formatting.

Check out this quick video demonstration of changing the file.

Color Fonts can be a great addition to your Silhouette supplies!

Heat Transfer Paper applied to a canvas.

Have you tried Color Fonts?
Feel free to share on my Facebook group at 
Silhouette Secrets with EllyMae.

Save this for future reference by pinning the image below.

Enjoy!

This image has an empty alt attribute; its file name is logo.jpg

THANK YOU for your support! How can you help? Click HERE & buy a coffee.
Every little bit helps with the cost of running the site.

Or if you are looking for more in-depth, step-by-step classes, check out all of my online Silhouette classes on my Teachable site HERE.

SS Logo snip it
**This post may contain affiliate links. What that means is that I may receive compensation if you purchase through the links I have provided. The price you pay for the product or service is not higher but I may get compensated for sharing.
Posted on 1 Comment

A Fun Card with Silhouette

Have you been joining in on the Silhouette and Michael’s free Zoom classes?

I have and I am loving them!

Blog post written in Silhouette Studio v4.3.372
Affiliate links may be present in the following blog post and as an Amazon Associate I earn from qualifying purchases.

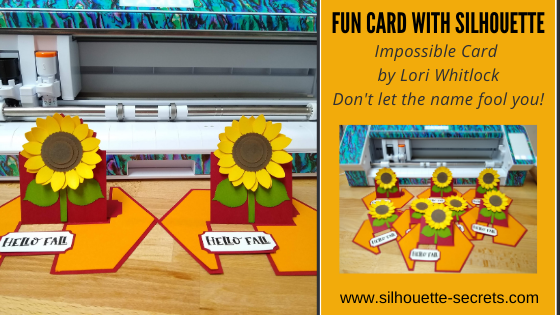
This weeks class was with Lori Whitlock and she showed how to cut and assemble the Impossible Card SunflowerDesign #330051.
Don’t let the name trip you up! They are pretty easy to assemble!

I thought I’d share a few tips that I like to do when I’m working with cards or projects like this.

Tips

Cut multiples of the Design

When I’m working with something like this, especially cards that have multiple pieces to cut, if I can fit more than one of the main card piece on a sheet of 12″ x 12″ cardstock, I’ll cut multiples out.

Since I am already cutting one out, it is not much more effort to cut a couple extras. Whether I assemble them all at the same time or set them aside for later, I will have the cutting part done.

Cut material down to the size needed.

By cutting the material down to the size I need, I can fit multiple colors onto the cutting mat to cut it all at one time and it can save the adhesive on the cutting mat as well.

How does this save the adhesive on the cutting mat?
Yes, there is still cardstock covering most of the cutting mat.
However, by cutting it down to the size I need in each color, I am only placing it on the mat one time versus putting 3 full sheets of cardstock on the cutting mat and removing it after each cut.
That right there will add a bit more life to your cutting mat.

For more tips on getting the most out of your cutting mats click HERE.

How do you know where to line up the colors?

I use the Transparency slider on the Page Setup Panel to reveal the grid of my cutting mat so I can line up the design and see where I need to place the cardstock on the cutting mat.

If you are using a Silhouette cutting mat, the grid on the cutting mat lines up with the cutting grid on the Silhouette software if the cutting mat is loaded properly.

Use the Textured Cardstock setting

I use the Textured Cardstock Setting to cut almost all cardstock. However, I do prefer to cut smooth cardstock as textured can be more of a headache to cut because of that textured surface. That does not mean you cannot cut textured cardstock, however, it may not always give you the clean cut you want.

Now, not all cardstock is the same so the best thing you can do is a Test Cut. My go to cardstock is Recollections brand from Michaels or Close to My Heart cardstock.

Test cut, Test cut, Test cut!!!

Why did I say it 3 times? It is one of the most important habits that you can get into when cutting on the Silhouette. This will save you a lot of time and wasted materials if you start with a test cut anytime you are using a new material or changing materials.

You can use the Test Cut feature in the software that is located at the bottom right corner of the Send tab.

Or my preferred method is to type out a capital B and move that around on my design mat as needed.

Why a B?
There is nothing magic about a capital B and it doesn’t have to be a specific font, the default font is fine. A capital B has straight lines, corners, and curves. This makes it perfect for seeing how the settings and your blade will work for the material you are cutting.

Keep a dedicated cardstock blade

Keeping separate blades for each materials can help the blades last longer. Different materials dull the blade at a different rate. It is just like having separate scissors for fabric vs paper.

Add designs for future projects to a print and cut page

If there is a print and cut aspect to the project, add more designs onto the page to fill it up. Set those extras aside for when you get a chance to cut out the pieces for those cards.

I cut 8 of the Impossible Card Sunflower design but still had extra space on the print and cut page so I looked in my library for future cards I might make and had 2 more of the Impossible cards. I opened each file and then copied the sentiment from the file to my print and cut page. I cut several of each to fill up my page. Now my print and cut portion is done for those future projects. Make sure to keep them some place safe that you remember for later.

For more tips on print and cut check out these two posts:
Print and Cut Basics
More Print and Cut Tips

and my final tip for the day….

Take advantage of these free Zoom classes hosted by Silhouette and Michaels.
When you join the call, come to pick up the tips and tricks from the instructor.
Watch the video and soak up the creative energy and then later create the project!
I wouldn’t recommend trying to create at the same time as the class. They are typically quick, 1 hour classes and it is hard to keep track of it all at once.
Don’t forget that you can come back and watch the replay after it’s posted.

Check out this video on Michaels YouTube channel HERE.

I am loving these Zoom classes to connect with other Silhouette users and spark that creative energy again. This has been an interesting year and at least this is one good that has come out of it – more online classes.

Find Lori Whitlock’s designs in the Silhouette Design Store or on her website HERE.
She is an amazing graphic designer and has some awesome cut files!
And you will find that she has a wide selection of tutorials to go along with those cut files HERE.

I hope these tips have helped give you some ideas on how you can be more productive with your Silhouette machines.

What are you creating with your Silhouette? I’d love to hear!
Feel free to post photos or questions on my Facebook group at 
Silhouette Secrets with EllyMae.

Save this for future reference by pinning the image below.

Enjoy!

SS Logo snip it
**This post may contain affiliate links. What that means is that I may receive compensation if you purchase through the links I have provided. The price you pay for the product or service is not higher but I may get compensated for sharing.

Posted on 72 Comments

Let’s Explore v4 – Working Offline Message

Silhouette Secrets+ with EllyMae

Does your Silhouette software show “Working Offline”?

Since the Silhouette software does not have to have an internet connection in order to use it, you can set the software to “work offline”.
This means that the Silhouette library will not automatically sync on it’s own.

However, I am finding that the software will also kick it into “offline” mode in some other instances as well, even when the user has not put it to “work offline”.
One that I believe happens often is if the internet connection is interrupted, lost, or changed on the computer. This can happen if you have to change connections, such as traveling, crafting at a friends, router is reset, etc.
You may see a little message in the bottom left corner that says “Working Offline” and pressing the Sync button does not do anything.

This can be fixed very easily.

First, make sure you are logged in to the Silhouette library.

Once logged in, it may prompt the library to sync.

If not, click on your name in the top left corner.

Then check and uncheck the box next to “work offline”.

Does the library start to sync?

This should force the sync to begin again.

Updated 9/2/24 with a new quick video on the Silhouette Secrets+ YouTube channel HERE.

Silhouette Working Offline

If those steps above do not get it synced up properly, I would suggest getting in touch with Silhouette support and they can look at why it might not be syncing properly.
Silhouette Support is open M-F 8 am – 4 pm MST.

Library Tips

I do have one bit of caution here regarding the library.
The Silhouette Design Store files will automatically download files from the store to the Silhouette library. These files do NOT count against the cloud storage.
However, the cloud storage on the Silhouette library is limited in size. While you can store your personal files in the Silhouette library, it is designed as a syncing device and not an all inclusive storage area. The only files that Silhouette can guarantee to recover are those from the Silhouette Design Store.

This also means that if you are downloading the Design Store files direct to your hard disk and then adding them to the library, those files are counting against the cloud storage because it did not download direct.

Most users have 1 GB of cloud storage in the library. If you have a Design Store subscription or are a Club Silhouette member, then that is increased to 5 GB.
You can see in the photo above that I have 5.0 GB of cloud storage since I have a Silhouette Design Store subscription.

Nothing is 100% safe!
The safest way to store files is in multiple locations. Personally, I use an external hard drive and then back up that hard drive a couple of times a year.
Each user will need to use the best methods that work for them. Whether that is an external drive, online storage, etc.
But, the safest place is in multiple locations.

Here are a couple more tips that will help with your Silhouette software and files.

Save this for future reference by pinning the image below.

Enjoy !

THANK YOU for your support! How can you help? Click HERE & buy a coffee.
Every little bit helps with the cost of running the site.

Silhouette Classes

Never stop learning! Let me help you take the anxiety out of learning with Silhouette and get to creating faster! My Silhouette classes are heavily focused on software, so you can take the skills & techniques taught and apply them to many future projects!

Silhouette step-by-step Classes by Silhouette Secrets+

Silhouette Secrets+ with EllyMae
**This post may contain affiliate links. What that means is that I may receive compensation if you purchase through the links I have provided. The price you pay for the product or service is not higher but I may get compensated for sharing.
Posted on 5 Comments

Let’s Explore v4 – Group vs Ungroup

Today, let’s explore what does Group and Ungroup mean.

Basically, if a design is grouped it means that you have separate pieces of a design that are acting together and move as one object. It can be resized or moved together and the changes apply to all the elements.

Ungrouped means that each piece can be selected separately and if only 1 piece is selected, that is the only one changes will apply to.

Affiliate links may be present in the following blog post and as an Amazon Associate I earn from qualifying purchases.

Let’s take a look at this Sloth Card by Daniela Moscone – Design #288765.

When you open the file, this is how it looks.

It opens with all the pieces since it is designed to be cut from cardstock and you will cut each piece separately. When open, the pieces are all grouped together and you can see the selection box around the entire design. This file can be scaled by grabbing the bounding box and moving it in or out to increase or decrease the size. All of the pieces act together.

To ungroup this design, right click on the photo and choose Ungroup.

Notice that all the pieces have their own selection box around each of them.

Now, click off the design to deselect it and then each piece can be selected and moved individually.

It will ultimately depend on the design in how they saved the file and if the file is grouped when it is opened or not.
Each file may vary.

Grouping and Ungrouping can also be found in the Quick Access Toolbar at the top of the Silhouette software. This Quick Access Toolbar is only active when objects are selected and it will vary what tools show up in the toolbar depending on what the objects are.

How is Grouping different than Making a Compound Path?

Grouping selects all the pieces together and they function as one object, but they are still separate pieces. Compound paths change the design and combine the 2 objects that are selected.

For more information on Compound Paths, check out this post on the Modify Panel – Part 2.

I would love to see what you create with your Silhouette machines & software.
Feel free to post photos or questions on my Facebook group at 
Silhouette Secrets with EllyMae.

Save this for future reference by pinning the image below.

Enjoy!

SS Logo snip it
**This post may contain affiliate links. What that means is that I may receive compensation if you purchase through the links I have provided. The price you pay for the product or service is not higher but I may get compensated for sharing.
Posted on 6 Comments

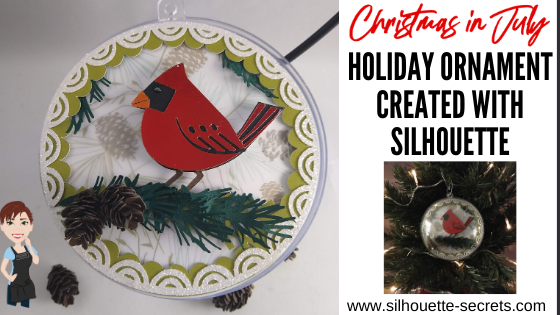
Christmas in July – Holiday Ornament

Why not get an early start this year? It hasn’t been a typical year yet, right?
This year I am creating a Christmas in July ornament!

This is the Winter Bird design from the Silhouette Holiday Ornament kit.

Affiliate links may be present in the following blog post and as an Amazon Associate I earn from qualifying purchases.
Sponsored post.

The Holiday Ornament kit includes: 6 clear plastic ornaments (100 mm size), 6 sheets cardstock (8.5 in. x 11 in.), 6 ornament hooks, and an exclusive download card redeemable on the Silhouette Design Store for 10 pre-selected layered ornament designs
It is on sale for $10.00 (Retail value $19.99) with my code SILSECRETS.
Here is one of the designs in this Holiday Ornament kit.

Today I’m going to show you how you can take this design and go farther!

You can cut the design as is like this.

Or the best part about the Silhouette software is that the options are limitless to what you can do.
You can make it unique to you.
Here I’ve added some dimension with foam tape, a few branches, cut a few types of paper, and added 3-D paper pinecones.
All created using Silhouette Studio tools and cut with the Cameo.

You are the one that can decide what you want to create with it!

You know what it takes the most of?
Time
But, the end result can be so worth it!

This Silhouette Holiday Ornament kit is awesome in that it is an open 4″ ball that you can add dimension to and create an awesome scene inside. I got so excited as I was testing and creating things to add to it. I hope I am not the only one that still does a little happy dance when a project turns out or turns out better than it did in my head.
And it’s open on both sides, so you can make it double sided too!

Let’s take a look at how I created this scene using the design provided with the kit.
I used just a few tools in the software to make it go farther.
And I believe that any user can do this!
Also, at the end of the post is a video clip of how I assembled all the pieces and a supply list of what I used.

This is what the design looks like when opened from the Silhouette library.

Next, I moved the pieces off the design mat and changed the color of the designs using the Fill Color Panel, just so they would show more accurately of how I would cut them.
Or you can use the Quick Access Tool bar in the top left and change the color too.
The backing piece I changed to white and the green bird shape I changed to transparent.

I started with the bird piece first. To break this bird design up, right click and choose Release Compound Path. It will separate the cut lines into individual pieces.

Here you can see the design has multiple selection boxes around the individual pieces.

Next, I moved the circle off the cutting mat and made a copy. In one circle I added a pattern, using the Pattern Fill panel. This will be my patterned piece of paper I cut and is just to designate visually what piece is which. The other circle I added a white fill to and decreased the transparency. This is my vellum piece that will be cut.

Now, let’s work with the bird. The red bird piece on the left will be the top layer of the bird and cut out of a red metallic foil paper. But, I wanted additional layers to make the bird thicker and to stand out.

First, I’m going to use the Line drawing tools on the left side and draw a new beak and this will be cut out of an orange metallic foil paper.

Then I selected both of the beak pieces that were just drawn, moved them away from the bird, grouped them together, and filled them with orange.

And now we will do a little bit of point editing on the bird to create the full bird shape to make our figure. Double click on the red cut line of the bird to bring up the Edit Points.

Next, I deleted a couple of the edit points and then moved a couple out to the edge of the beak. I moved the orange beak back on top to adjust the outline of the bird’s beak exactly how I wanted, so it matched up and I had a solid bird background.

Now that the base bird outline is created, I needed to make several copies.
One white as the very back layer of the bird. This is so the eye will show up as white.
Next, I selected the bird and the circle for the eye, right clicked, and chose Make Compound Path. This bird I filled with black and made 3 more copies of.
And then 1 more copy of the bird that I filled with brown.

Next, I zoomed in on the brown bird and used the Knife tool to cut the feet away from the body. I used the Polygon Knife tool and unchecked the Auto Apply so I could verify exactly where I wanted the knife to cut before it did.

Once it is where you want, then click the Apply option in the Knife Toolbar.

Next, delete the top of the bird. All that is needed is the legs. And I want to make a small offset just to thicken them up a bit as they will be the top layer added on top of the black bird legs. I used the Offset Panel and added a 0.020″ distance offset.
Delete the inside brown legs and fill the offset with brown.
Select both the feet offsets, right click, and group them together.

Now, I have all the pieces I need to cut the design out. I arrange the pieces on my design mat and decrease the Transparency on the Page Setup Panel so I can reveal the cutting grid. Then I cut my papers down to the size needed and place them on the cutting mat.

You can also cut each color out separately on the design mats, but I find once you get the hang of this method I can send almost all the design pieces through to be cut on only a few times through the machine. I line up my design with the cutting mat grid on the screen and then place the materials in the same location on the design mat.
I also find that this saves adhesive on my cutting mat too as I’m not sticking a full sheet of each material down on all the adhesive.
Find more cutting mat tips click HERE.

And I continued to move pieces on and off the mat as needed to be cut until all the pieces were cut.

All ready for assembly.

And you don’t have to stop there.
Create a few more design to incorporate and make your design unique.
I took a Pinecone 3-D Miniature design by Snapdragon Snippets – Design #279267 and scaled the size down to 33% of the original using the Transform Panel – Scale Tab.

I also added the Evergreen Sprigs by Snapdragon Snippets – Design #170614 to give it more dimension too.
Check out the post on 3-D designs in Silhouette to see how I created the “baby” pinecones HERE.

The next step is to start adding glue to each piece and layering it on top of each other. I used a variety of different adhesives to give it dimension and get it to adhere.
A full supply list is at the bottom of this post.
Check out this video on the Silhouette Secrets+ YouTube channel HERE on how I assembled the design. I ended up cutting 2 of each piece and gluing it together once everything was dry to use both sides of this ornament.

I had so much fun creating this ornament from the Holiday Ornament kit by Silhouette. Make both sides the same or add a different element like fake snow to the design as well.

There really is no right or wrong way to create these projects.
Just have fun and try some new things!

I am excited to see what I can fill the other 5 ornaments with.

In this post we covered several different tools and features in the Silhouette software. I said at the beginning that I thought any user could do this and the thing it takes the most of is TIME!
Here are the tools I used in this post.
Click on each to learn more about those tools or features.
Fill Color Panel
Release & Make Compound Path
Pattern Fill
Line Drawing Tools
Edit Points
Knife Tool
Offset Tool
Page Setup Panel – Transparency
Tips to getting the most out of the Silhouette Cutting Mats
Transform Panel – Scale Tab
Many times you are using a lot of these tools without even thinking about it in the software. The more you do it, the more comfortable you will get with it.

In the video above, I did use a variety of adhesives to assemble this. Over the years working with paper, I’ve found certain adhesives work better on certain papers and that quality is a must. Each user will find the best ones that they like for their projects.
Here are the supplies I used to create this Winter Bird Design:
Silhouette Holiday Ornament kit
Winter Bird Bauble design – Design #30131 (included with kit)
Patterned Cardstock
Vellum Paper
Colored cardstock: medium green, dark green, white, black, brown – I used Recollections cardstock from Michaels
White Glitter Cardstock
Metallic Foil Cardstock from Michaels: red and orange for the bird
Liquid Glass adhesive
3-D Foam Tape
Scrapbook Adhesive E-Z Tape Runner
Scrappy Tape or Score Tape
Broad Tipped Glue Pen
Xyron Sticker Maker
E6000 Adhesive

I would love to see what you create with your Silhouette machines & software.
Feel free to post photos or questions on my Facebook group at 
Silhouette Secrets with EllyMae.

Save this for future reference by pinning the image below.

Enjoy!

SS Logo snip it
**This post may contain affiliate links. What that means is that I may receive compensation if you purchase through the links I have provided. The price you pay for the product or service is not higher but I may get compensated for sharing.