Posted on 2 Comments

A Guide to Silhouette Cameo 5 Blades and Tools + Free PDF Chart

Let’s talk tools. Tools for the Silhouette Cameo 5 and Cameo 5 Plus model machines specifically in this post.

Affiliate links may be present in the following blog post and as an Amazon Associate, I earn from qualifying purchases.

With the release of the Silhouette Cameo 5, a couple new tools were released that can be used with the new machines. These include the Embossing tools, Heat Pen Set, and Pen Holder Type C.

I’ve created a free PDF chart listing all the tools compatible with the Silhouette Cameo 5 and Cameo 5 Plus. This chart is available as a free download exclusively for confirmed newsletter subscribers.

Join the Newsletter

Subscribe to get our latest content by email.
    We respect your privacy. Unsubscribe at any time.

    I always recommend stocking up on extra blades and cutting mats to have on hand. It can be very frustrating to be in the middle of a project with a dull blade or and adhesive mat that is no longer sticky. It is also one of the fastest ways to rule out a cutting issue you might have.

    You can find blades & tools at Silhouette America, Crafter Cuts, or check out the other retailers in the Silhouette Secrets+ Recommended Retailers list HERE.
    *use code SECRETS at CrafterCuts to save 10% off supplies and free shipping on orders over $35

    Let’s take a look at all the blades and tools that can be used in the Silhouette Cameo 5. For some of the specialty tools listed below I have also included links for tutorials and more information on their usage as well.

    Silhouette Blades

    Silhouette Autoblade Type B

    Silhouette Autoblade – Type B
    Carriage 1
    Used for paper, cardstock, sticker sheets, adhesive vinyl, HTV, Chipboard, Acetate, and select specialty materials.
    Materials under 1 mm thick
    Available at Silhouette America or Crafter Cuts
    *This is the blade I use most often. Most cut issues occurring with this blade can be fixed by following the steps in this video HERE – Troubleshooting Cut Issues


    Silhouette 1 mm Manual Blade
    Carriage 1
    Used for paper, cardstock, sticker sheets, adhesive vinyl, HTV, Chipboard, Acetate, and select specialty materials.
    Materials under 1 mm thick

    Silhouette 1 mm Manual Blade

    Silhouette 2 mm Manual Blade

    Silhouette 2 mm Manual Blade
    Carriage 1
    Used for paper, cardstock, sticker sheets, adhesive vinyl, HTV, Chipboard, Acetate, Craft Foam, and select specialty materials.
    Materials under 2 mm thick


    Silhouette 2 mm Kraft Blade – Type B
    Carriage 1
    Used for chipboard, acetate, craft Foam, leather, and select specialty materials
    Materials up to 2 mm thick
    *15+ Tips for using the Kraft blade found HERE

    Silhouette Kraft blade 2 mm - Type B

    Silhouette Adapter Set

    Silhouette Tool Adapter Set
    Carriage 1
    Adapters are color coded for specific blades/tools
    Black adapter = Silhouette blade (ratchet) & Premium blade
    White adapter = 2 mm Kraft blade
    Gray adapter = Deep Cut blade
    Blue adapter = Silhouette Sketch pens


    Silhouette Blade – often referred to as a “ratchet” blade but the official name is Silhouette blade
    Carriage 1 with black adapter
    Used for paper, cardstock, sticker sheets, adhesive vinyl, HTV, Chipboard, Acetate, and select specialty materials.
    Materials under 1 mm thick

    Silhouette ratchet blade

    Silhouette Premium blade

    Silhouette Premium Blade
    Carriage 1 with black adapter
    Used for paper, cardstock, sticker sheets, adhesive vinyl, HTV, Chipboard, Acetate, and select specialty materials.
    Materials under 1 mm thick


    Silhouette Deep Cut Blade
    Carriage 1 with gray adapter
    Used for paper, cardstock, sticker sheets, adhesive vinyl, HTV, Chipboard, Acetate, Craft Foam, and select specialty materials.
    Materials under 2 mm thick

    Silhouette Deep Cut blade

    Silhouette Kraft Blade 2 mm

    Silhouette 2 mm Kraft Blade
    Carriage 1 with white adapter
    Used for chipboard, acetate, craft Foam, leather, and select specialty materials
    Materials up to 2 mm thick
    *15+ Tips for using the Kraft blade found HERE


    Silhouette 3 mm Kraft Blade
    Carriage 2
    Used for chipboard, acetate, craft Foam, leather, and select specialty materials
    Materials up to 3 mm thick
    *15+ Tips for using the Kraft blade found HERE

    Silhouette 3 mm Kraft blade

    Silhouette Rotary Blade

    Silhouette Rotary blade
    Carriage 2
    Used for fabrics, crepe paper, felt, wool, and select specialty materials
    *Rotary Blade Tutorial HERE

    Additional Silhouette Tools

    Silhouette Pen Holder Type B
    Carriage 1
    Use with a variety of pen styles to sketch onto materials such as cardstock, paper, faux leather paper, etc.
    *Step-by-step Sketching Class HERE
    **More tutorials on sketching HERE

    Silhouette Pen Holder - Type B

    Silhouette Punch Tool

    Silhouette Punch Tool
    Carriage 2
    Used with adhesive vinyl or HTV to punch a hole to designate where to weed the material out.
    Also used with the Cameo 5 for etching on Silhouette metal sheets.
    *12+ Tips for Etching with the Silhouette Cameo 5 HERE


    Silhouette black bodied sketch pens
    Carriage 1 with blue adapter
    Used to sketch onto materials such as cardstock, paper, faux leather paper, etc.
    *Step-by-step Sketching Class HERE
    **More tutorials on sketching HERE

    Silhouette Sketch Pens

    Silhouette Pen Holder Type C

    Silhouette Pen Holder – Type C
    Carriage 2
    Use with a variety of pen styles to sketch onto materials such as cardstock, paper, faux leather paper, etc.
    Type C Pen Holder has a broader barrel on the end so you can use wider bodied pens and markers


    Silhouette Embossing Tool Set – Type C
    Carriage 2
    Embosses onto materials such as cardstock, embossable foil, etc.
    Set includes a fine and wide tip.

    Silhouette Embossing Tools

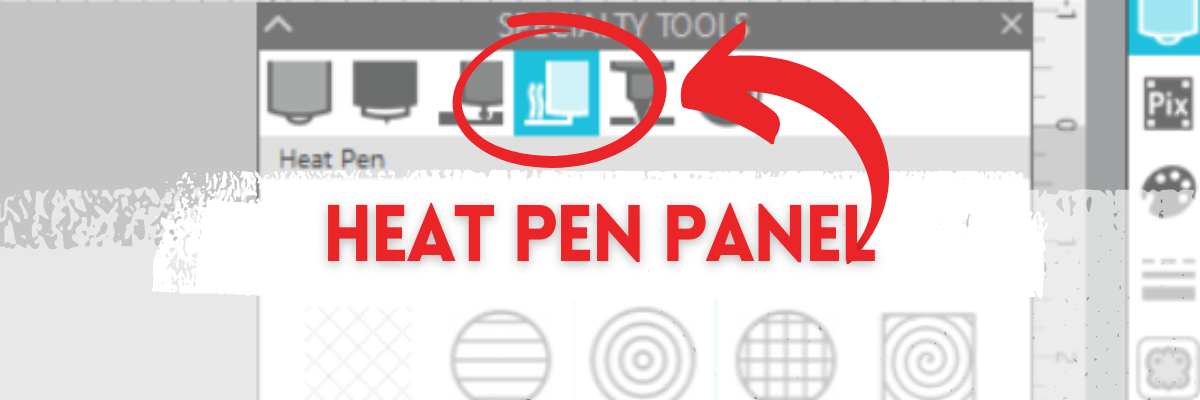
    Silhouette Heat Pen Set

    Silhouette Heat Pen Set – Powered Tool
    Carriage 2
    Applies foil transfer material to surfaces of many materials such as cardstock, faux leather, etc.
    Cordless design and powered by the Cameo 5 Tool 2 housing – 1 mm & 2.5 mm tip
    *Heat Pen Setup & Foiling tutorials HERE

    Silhouette Heat Pen Super-Fine
    Carriage 2
    Applies foil transfer material to surfaces of many materials such as cardstock, faux leather, etc.
    Cordless design and powered by the Cameo 5 Tool 2 housing
    0.5 mm Super Fine Tip

    Additional Supplies

    There are a few additional supplies for use with some of the specialty tools listed above.

    Silhouette 12″ x 12″ Embossing Mat
    For use with the Silhouette Embossing Tools

    Silhouette Embossing Mat

    Silhouette Heat Transfer Foil

    Silhouette Heat Transfer Foil – Gold & Silver
    For use with the Silhouette Heat Pen Set
    2 heat foil rolls (3 in x 33 feet)
    *Heat Pen Setup & Foiling tutorials HERE


    Silhouette Electrostatic Bed
    Uses static electricity to hold materials in place while being cut with the Cameo 5 models
    *Tips for using the Silhouette Electrostatic Bed HERE

    Silhouette Electrostatic Bed

    Silhouette Electrostatic Protector Sheet

    Silhouette Electrostatic Protection Sheet
    12″ x 12″ – 2 per pack
    Protects the Electrostatic Bed from damage.

    There are a lot of options now available with the Silhouette Cameo 5 and Cameo 5 Plus.

    Grab the free PDF chart of all Silhouette Cameo 5 tools for future reference when you subscribe to the Silhouette Secrets+ newsletter.
    *chart is the current tools available for the Cameo 5 and Cameo 5 Plus January 2024

    Join the Newsletter

    Subscribe to get our latest content by email.
      We respect your privacy. Unsubscribe at any time.

      Find even more information on the Silhouette Cameo 5 HERE including an unboxing, setup, first cuts, and the Electrostatic Bed.

      Please let me know if you have any questions in the comments below.

      Save this for future reference by pinning the image below.

      Image of a tool chart for the Silhouette Cameo 5 and Cameo 5 Plus, featuring various cutting tools and their specifications, along with a 'Free PDF' label.

      Enjoy !

      THANK YOU for your support! How can you help? Click HERE & buy a coffee.
      Every little bit helps with the cost of running the site.

      Silhouette Classes

      Never stop learning! Let me help you take the anxiety out of learning with Silhouette and get to creating faster! My Silhouette classes are heavily focused on software, so you can take the skills & techniques taught and apply them to many future projects!

      Silhouette step-by-step Classes by Silhouette Secrets+

      **This post may contain affiliate links. What that means is that I may receive compensation if you purchase through the links I have provided. The price you pay for the product or service is not higher but I may get compensated for sharing.
      Posted on 2 Comments

      New Computer Tips

      New computer – Now what?

      Are you a Silhouette owner and just got a new computer? Not sure where to go from there?

      It is pretty easy to get setup and running with a new computer and I’m going to share a few tips.

      First when you get a new computer, be prepared that it will take a little bit for it to be ready for you to start using. There will be some computer setup instructions for you to follow. And if you are a PC owner, you may find that you have a lot of Windows updates that need to install in order to get it ready for use.
      Be patient and let it setup correctly. I know you are excited, believe me, I was too when I got my new computer last year. But, there really is no rushing it.
      The updates will finish when they finish.

      Silhouette Studio Software Installation

      When you get a new computer, you will first need to download the software on to the new computer.
      This can be found on the Silhouette America website.
      Click on Software & then Get Software

      Next, you will see a web page that will show all the software from Silhouette that’s available.

      For the Silhouette cutting machines, you will select the Silhouette Studio option.

      You will need to start with the Basic software. The current version is listed at the top.

      For Legacy versions, continue scrolling down the page.

      Choose the current version and then click on the either the Mac or the Windows option. This will download the installer to your computer and you will open that to start the installation.

      Click HERE to go directly to the Software download page.

      There may be some pop ups that come up that need approval in order to proceed. Watch the bottom task bar for any flashing shields if the pop up doesn’t actually pop up.

      Bottom taskbar copy.jpg

      If a flashing shield appears, click on it and then approve all the pop ups.

      Once the installation is complete, you can open the Silhouette Software.

      If by chance you have a new Windows PC and it is running in S mode, it will not let any program that is outside of the Microsoft Store install on the computer. You will need to take it out of S mode in order to install any programs, including the Silhouette software.
      For more information on how to take it out of Windows S mode click HERE.

      Silhouette Studio Upgrades

      Affiliate links may be present in the following blog post and as an Amazon Associate I earn from qualifying purchases.

      Silhouette software upgrades include Designer Edition, Designer Edition Plus, and Business Edition. These upgrades unlock features that are in the software. To see what each upgrade unlocks, click the comparison area to find out more information.
      Find this HERE

      This will bring up a chart you can scroll down through to see what features are with each upgrade.

      Check out my favorite features of the software upgrades HERE in this post on
      Software Upgrade – My Favorite Features.

      Upgrades activation on current software

      If you are using a software version of v4.4.554 or higher, you do not need to enter your upgrade codes in the software. Click on Help – Apply Upgrade Edition and enter your log in information. Do NOT enter your upgrade codes. Once you log in with your Silhouette account info, your upgrade should be active on any computer you log in to.

      This is a new feature and is only available in software versions of v4.4.554 or higher. The upgrade can only be active on 3 computers at a time. If you log into a 4th computer, it will deactivate on the oldest computer that has not been active.

      For more information on this in detail, check out this post
      Let’s Explore v4 – How to Activate an Upgrade

      Upgrades activation on legacy software

      For older software, software upgrades do not automatically activate when you download the Silhouette software to a new computer. If you have ever entered an upgrade code, you will need enter the upgrade codes in the order that you purchased them for it to activate on the new computer. So if you purchased the Designer Edition and then the Business Edition later, you would need to enter the code for Designer first and then Business next. If you try to enter Business Edition first, you will get an error and it will not activate.

      If you are a brand new user, there is a new system that is in process and you can activate the upgrade on the Silhouette America website to be used on any computer you log into. This is still very new and only available for those that are brand new and have never entered an upgrade code as of 10/15/21.

      If you do not remember what the codes were, you can easily access them under your Silhouette account information in the Silhouette Design Store. Open the Silhouette Design Store, make sure you are signed in, move the mouse over the person icon in the top right corner, and then choose Account Settings.

      Design Store screenshot copy.jpg

      Then click on the License Keys section.

      Log into the Silhouette Library

      Once the software is open, click in the top right corner on the Library tab.

      Library tab copy.jpg

      Enter your Silhouette Account information and all of the files that are in the Silhouette Cloud should Sync up. It will depend on how many files you have in your Silhouette library on how long it will take to fully sync. Another hurry up and wait moment.

      Plug in Silhouette machines to computer & turn on

      If you have an older model Silhouette machine of a Cameo 3 or older, the free files download to the library once the machine is recognized. Plug in the Silhouette machine, turn it on, and click on the Send tab.
      Once it has recognized the machine, then the files will download to the library.
      You will need to do this for ALL machines that you have had plugged into your software to get those free files to download.

      If you have multiple machines, click on the little machine icon in the bottom right corner of the Send tab to choose the machine you want active.

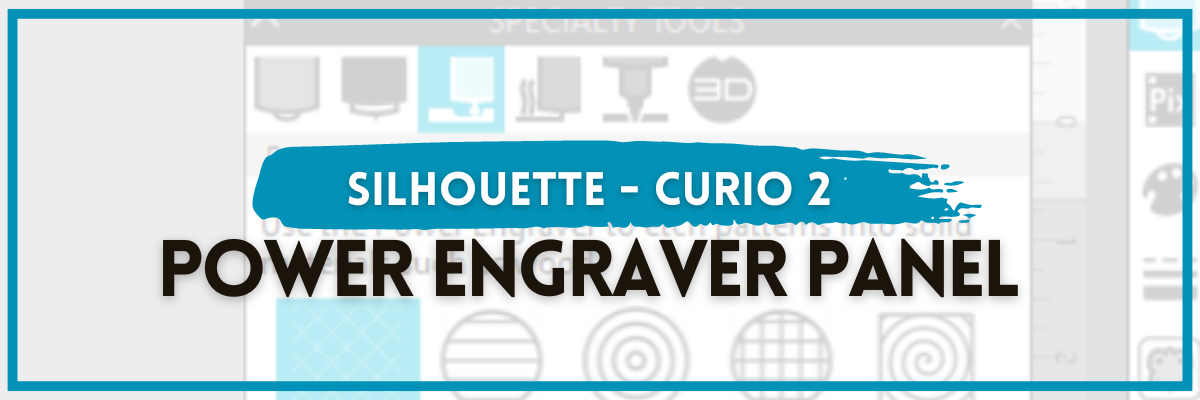
      This will also unlock any panels that are associated with a particular machine such as the Emboss Panel for the Curio or the Stipple Panel for the Cameo 4, Cameo 3, Portrait 2, and Curio machines.

      Exporting files on old computer

      Note: this is only needed if files cannot be recovered in another way

      If there are files that did not show up when you logged in and the library synced, the first reason would be they are the free with machine and I would suggest looking at the above information again. If you have done that, then it could be because those files were only stored on the Local User section of the old computer. This will be dependent on the Silhouette software version you were using before. If you were using a version prior to v4.1, you will find more tips on exporting the library in this post – Library Tips (v4.1).

      If you have a library backup file, it can then be imported into the Silhouette library by clicking on your name in the top left of the Library and choose Library Import, then select the location of the file backup.

      Screenshot from v4.4.892

      But this only needs to be done if files are missing and you cannot get them to sync up any other way.

      Install fonts on the new computer

      Keep in mind that when you set up a new computer, you are starting from scratch. That means you will need to install any program or file that you were using on the old computer, if you want it on the new computer. This includes fonts. The new computer comes loaded with the default fonts only and these can vary by computer.

      While I have heard of others being able to copy and paste the entire font file from their computer programs folders on the old computer and then pasting it into the new computer fonts folder, I was unable to do this on my new computer. I had to right click on the font and choose “Install for All Users”.

      Luckily, I had saved all my font files that I’ve collected onto a folder in my external hard drive, so I could access them direct from the external drive. While I still had to install over 500 fonts, I did get to also pick and choose which ones I really “needed” on the new computer.

      I have had 2 new computers in the last several years and on one I had to install each font and on the other, some worked by copy and paste.

      Keep in mind that if you created designs using certain fonts, when you open the design file, if that font is not installed on the computer you are using to open the file, the font will revert to the default font style on that computer.

      Export User Designs from Silhouette Library – New Feature!

      If you have downloaded the current version or a version higher than v4.4.552, there is also a new feature that allows you to export all User Designs from the library as individual files.

      Click on your name in the top left corner of the library tab and choose Export User Created Designs.

      While I do NOT recommend storing your personal files in the Silhouette library, there are times that it is handy when you are accessing files on multiple computers or using Pattern Fills in the Silhouette software.

      One big thing to note

      when exporting these User Designs is that it will export the entire library folder structure. However, any designs from the Silhouette Design Store, the folders will be empty. Only the user created designs will be exported. This is due to the proprietary nature of the .studio files and to protect the designers of those files from theft.

      I would HIGHLY recommend using this export feature when you update to the software of v4.4.552 or higher because it is a really nice feature.
      However, as a general note, I do not recommend that all users update to this version or higher. There are many factors that I consider before advising a user on whether they should update. It really comes down to the user’s choice, however, before I make a recommendation I do ask for more information.
      If you would like to know what I’d recommend for your situation, feel free to post on the
      Silhouette Secrets+ with EllyMae Facebook group and we can take a look at the factors.

      Keep in mind that the Silhouette library is not designed as an all inclusive storage area but as a syncing device. This is one reason the Silhouette cloud storage is limited in size. All users get 1 GB of storage space, but if you are a Silhouette Club Member or a Silhouette Design Store Subscriber, you get 5 GB of storage.

      I hope this helps you start enjoying that new computer and your Silhouette software a little bit quicker!
      The biggest tip I can say is to be patient! I am not the most patient person when it comes to setting up a new computer, but if I tell myself that in the beginning sometimes it helps.

      We love seeing what you are creating with your Silhouette machines or software.
      Feel free to post photos or questions on my Facebook group at 
      Silhouette Secrets with EllyMae.

      Save this for future reference by pinning the image below.

      Enjoy!

      This image has an empty alt attribute; its file name is logo.jpg

      THANK YOU for your support! How can you help? Click HERE & buy a coffee.
      Every little bit helps with the cost of running the site.

      Or if you are looking for more in-depth, step-by-step classes, check out all of my online Silhouette classes on my Teachable site HERE.

      SS Logo snip it
      **This post may contain affiliate links. What that means is that I may receive compensation if you purchase through the links I have provided. The price you pay for the product or service is not higher but I may get compensated for sharing.
      Posted on 1 Comment

      Home Decor with Silhouette

      Using the Silhouette Software to Help Design Home Décor

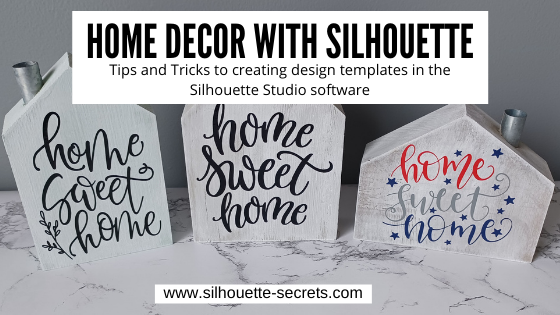
      I always have my eye out for things that I can use in creating with my Silhouette machine. Target had these little wooden houses available in their Dollar section.

      After debating with my inner self, I finally picked up a set.
      I always have this inner dialog on – can I make that? Will I make that?
      Yes, I can cut the wood, but when will I get it done?
      Right now, in the process of moving, our wood shop is not set up, so I did it.
      I bought wood shapes.

      If you have access to a saw, you could create your own shapes. This tutorial is not limited to these little house shapes, but think about the supplies you have on hand and you can use this same technique for any blanks you use.

      Affiliate links may be present in the following blog post and as an Amazon Associate I earn from qualifying purchases.

      Next, gather the rest of the supplies.
      – Paint
      – Foam brush
      – Paint palette or small dish
      – Sponge
      – Painters Tape
      – Adhesive Vinyl
      – Transfer Tape
      – Squeegee
      – Weeding tool

      Tape off any sections needed with the painters tape. In this case, each house has a metal chimney.

      Paint the houses any color you want.
      I chose to paint a solid color of gray, light blue, or dark gray as the first coat and then used the white chalk paint with the sponge on top of that to give it a distressed look.

      Let the wood blanks dry completely.

      Next, measure the space of each blank and write that down.

      This is just a rough draft and does not have to be perfect or to scale.

      Using the information from your measurements and drawing, draw shapes in the Silhouette software to design use as “design templates”.

      For these houses I started by using a rectangle under the Drawing Tool on the left side and then used the Edit Points to pull up a point in the roof.

      Check out this video tutorial showing the full process of drawing the shapes in Silhouette Studio.

      Find this video on YouTube HERE

      Once you have the template shapes, then you can decide on the designs to fill those shapes. Some designs will work better in the shapes than others.

      I used the following designs on my double sided houses:
      Home Sweet Home by Angele Camp – Design #233239
      Hello Fall by Lilium Pixel SVG – Design #300125
      Home Sweet Home by Diva Watts Designs – Design #346001
      Home Sweet Home by Diva Watts Designs – Design #347923
      Home Sweet Home by Design Hooked – Design #354446
      Fall Bouquet by Tanya Batrak – Design #159397

      Once all the designs are sized how you want them to cut, move the designs around on the virtual mat to cut out each color vinyl you want them in.

      Then send to the Silhouette machine to cut all the adhesive vinyl pieces. I cut everything from Oracal 651 adhesive vinyl.
      I have been having an issue with the vinyl cutting too deep into the backing using the preset settings, so I am using the settings of:
      Blade depth – 2
      Force – 5
      Speed – 5
      With a Silhouette Autoblade and it is cutting, weeding, and transferring beautifully.

      Cut settings depend on many variables and test cuts will be the way to find out what is going to work best with your material and blade. For more tips on cut settings check out this post – Perfect Cut Setting in Silhouette.

      Carefully weed the excess vinyl from around the designs.

      This takes practice and the cut settings can make a big difference in the ease of weeding.
      Do not rip it off like a bandaid.

      After all the weeding is done, apply vinyl to blanks

      Here is a quick real time video of the application process on one of the wood blanks.

      In the above video, I reference a recent tutorial on the Smart Snapping lines. This can be a very helpful tool as shown in the video.
      Check out the Let’s Explore v4 – Smart Snapping post HERE

      And now you have some seasonal or year round décor.

      Double sided means that they can pull double duty in your seasonal decorations.

      And if I were to ever want to change the designs out, I would just carefully remove the vinyl. Sand it if needed and repaint, then cut and place new vinyl designs on them.

      Keep in mind that you can use these tips & techniques for any blanks you might have!

      I’d love see what you create & how you use the tools in Silhouette Studio
      Feel free to post on the
      Silhouette Secrets+ Facebook Group.

      Save this for future reference by pinning the image below.

      Enjoy!

      This image has an empty alt attribute; its file name is logo.jpg

      THANK YOU for your support! How can you help? Click HERE & buy a coffee.
      Every little bit helps with the cost of running the site.

      Or if you are looking for more in-depth, step-by-step classes, check out all of my online Silhouette classes on my Teachable site HERE.

      SS Logo snip it
      **This post may contain affiliate links. What that means is that I may receive compensation if you purchase through the links I have provided. The price you pay for the product or service is not higher but I may get compensated for sharing.
      Posted on 25 Comments

      Perfect Cut Settings for Silhouette

      Silhouette Secrets+ with EllyMae

      I know everyone is always looking for the “perfect cut settings” with Silhouette.
      Well, let’s just start with

      That is a myth!

      What you will see is many “suggested settings”.
      Even in the Silhouette software, there are “preset settings“.
      These are just a starting point.

      Why?

      Well, the first reason is
      Not all materials are created the same.
      You may have variances in products even within the same brand, colors, style, etc. There is no magic one size fits all cut setting.
      This is why you will see so many “suggestions” from user’s when someone asks on a Facebook post. It is also why you will see each different retailer have their own “suggested settings.”

      Materials pictured: Leather, Cardstock, Felt, Faux Leather, Crepe Paper, Fabric, Vinyl

      The next reason is
      There are many other factors that play into it.
      The settings that might work for one user may not work for another because the factors may not all be the same.

      The biggest of these factors is whether the blade is installed properly and adjusting correctly.
      This is still the #1 cutting error issue and it affects ALL Silhouette machines.

      Cameo 3 Autoblade and Silhouette black “ratchet” blade installation

      This is one of the best things you can learn to do for yourself & to save yourself headache in the future. It doesn’t matter if you are an experienced user or a beginner. If the blade is not installed properly with no gap and adjusting properly, you WILL have cut issues.
      This is an important step no matter what blade type you are using. If you have a gap between the lip of the blade and the housing, you will most likely experience inconsistent cut results.

      This is how the blade should be installed on a Cameo 4, Cameo Plus, Cameo Pro, or Portrait 3.

      There should be absolutely no gap between the lip of the blade and the housing.
      AND the lock on the front of the blade needs to be pushed in completely.

      For those using the Autoblade watch as the machine does it’s “tap dance” at the beginning of the cut, does the red line inside the blade adjust properly and to the correct number?

      If it does not, we can start troubleshooting it with a photo of the blade installed with the cutting mat or vinyl loaded if you post on the Silhouette Secrets+ Facebook group or check out this video by Silhouette America on Cutting Machine Maintenance and how to Reset the Motor at 4:38 in the video. This should reset the housing so that it is properly aligned to hit the adjustment holes correctly.

      After the blade installation other factors that play into a cut are:

      Blade life? How old is the blade? Or more importantly, how much as it been used.

      What else has the blade cut? I would recommend keeping dedicated blades for each material you do cut. This can increase the lifespan of the blades and get you better cuts. For instance, glitter eats a blade and can sometimes even take chunks out of it. If you’ve cut glitter and then go back to cutting vinyl, it may not cut well again. Or another examples is cutting cardstock. Paper dulls a blade at a different rate than vinyl.
      This is one reason that fabric people & people who sew have separate scissors for cutting fabric vs paper scissors.
      Also keep in mind that thicker, denser materials are going to dull a blade faster than thin materials.

      Cutting with a 3rd party mat? Third party mats can be different sizes and thicknesses. This can affect the cut quality. It is not recommended to use 3rd party mats for many reasons. It can affect not only the cut quality but also the lifespan of the machine’s rollers as well.

      Is the cutting strip damaged? This is a rubber strip under the blade housing that provides the pressure from the bottom of the mat/material. Any nicks, dings, holes, slices in it can affect the cut.
      Find more details on the cutting strip HERE.

      Are you re-sticking your mats? Re-sticking mat can cause all kinds of cutting issues. It can gum up the machine or blades. It can cause the rollers to not function properly. It is not advised.

      Cheap materials? Sometimes it’s a get what you pay for situation. Cheap vinyl/htv, etc. can be a headache and it may not be that you are doing anything wrong, it’s just difficult to work with.

      Silhouette machine model? Yes, each machine can vary because they are different.

      All of these are factors that can affect the cut quality.

      Affiliate links may be present in the following blog post and as an Amazon Associate I earn from qualifying purchases.

      So what do you do?

      TEST CUT

      Test cuts are going to be your BEST FRIEND!

      I start with the preset in the software that is the closest material to what I’m using.

      For instance, if I’m cutting a solid color Heat Transfer, I select Heat Transfer Smooth and do a test cut with the recommended settings. If I’m cutting Oracal 651, I start with the Vinyl – Glossy setting. If it doesn’t cut, adjust the cut settings and do another test cut. I recommend only changing 1 thing at a time and doing a new test cut. If you change too many things at once, you don’t really know what worked.

      As you do this more and more, you will start to see patterns. For instance, on the Cameo 4 models I find I have to increase the blade depth up 1 on almost all materials.

      There are 2 ways you can do a test cut.

      1 – Use the Test Cut feature in the Silhouette software on the Send tab.

      The default test cut option is in the upper left corner of either the mat or the material loaded.

      If you need to move the test cut to do it again, you can do so in 2 ways. You will need to move the test cut to the exact location you want it to cut on your material.

      To do this, use the arrows keys next to the test cut button on the Send tab in the software or the arrows on the Cameo touch panel on the right side.

      To move the housing, you will need to move it both over to the right and down. The housing will perform the test cut in the exact location it is placed. If it is only moved over to the right, it will cut the top of the cutting mat.

      Or the second way to do a test cut is use a shape or object.

      I use a capital B that I type out and then I will place it on my virtual mat where my design is not located at. I love this way because it is faster than adjusting the housing and a bit more accurate since you place it where you want.

      Click on the Send tab, click exactly on the design to select it and choose No Cut to turn the cut lines off on the design and only cut the capital B.

      Select the material you are cutting and click the Send button at the bottom of the Send tab to cut the B. Did it cut? If not, adjust the settings, move the B and send it to cut again.

      It is much better to use a small section of material to make sure the settings will work versus sending a full 20″ design and it didn’t cut well. This will save you both time and headache.

      Note: if doing a print and cut project, you do not want the test cut to cut from the top left of the printed page or it can interfere with the reading of the registration marks.

      You can also either change the Line Color or the Fill Color of the B and then use the Cut by Line or Cut by Fill color options to turn the cut lines on or off.

      This was one of the habits that I found the hardest to get into. I was a Silhouette user for many years before I knew about the test cut feature. But, if you think about it, it makes complete sense and it will save you time, materials, and headache in the long run!

      While there are NO one size fits all “cut settings”, the more you cut, you will get familiar with what you are working with.

      Once you have found those “perfect” cut settings for your material, you can create a custom setting in Silhouette for your materials. Find out more on Custom Cut Settings HERE.
      And if you do use custom cut settings, make sure you are backing those up or writing them down somewhere too!

      Now the next question I see all the time is “How long should a blade last?

      Again, there is no “perfect” answer to this!

      As a beginner I do feel you will go through blades and cutting mats faster than an experienced user.
      Why?

      Because you are learning!
      Learning how this work, learning how things cut, learning what works and what doesn’t.
      As you continue to cut things, you will find tips and tricks that work for you!

      Many of the same factors go into the blade life as the cut settings, such as materials you are cutting or settings you are using.

      While I know that may not be the news you want to hear – that there is no “magic” button to cut all materials, I hope that it will help save you some frustration and headache in the long run.
      Test cut, test cut, test cut. Now repeat it to yourself!

      Whether you are a new user or an experienced user, I would love to see what you create with your Silhouette machines & software.
      Feel free to post photos or questions on my Facebook group at 
      Silhouette Secrets with EllyMae.

      Save this for future reference by pinning the image below.

      Enjoy !

      THANK YOU for your support! How can you help? Click HERE & buy a coffee.
      Every little bit helps with the cost of running the site.

      Silhouette Classes

      Never stop learning! Let me help you take the anxiety out of learning with Silhouette and get to creating faster! My Silhouette classes are heavily focused on software, so you can take the skills & techniques taught and apply them to many future projects!

      Silhouette step-by-step Classes by Silhouette Secrets+

      Silhouette Secrets+ with EllyMae
      **This post may contain affiliate links. What that means is that I may receive compensation if you purchase through the links I have provided. The price you pay for the product or service is not higher but I may get compensated for sharing.

      Posted on 5 Comments

      Cutting HTV on the Cameo 4, Plus, or Pro – Troubleshooting

      Cutting HTV on the Cameo 4, Cameo Plus, or Cameo Pro
      Troubleshooting

      Are you having issues with getting HTV to cut properly on the Cameo 4, Cameo Plus, or Cameo Pro? Or are you noticing issues with the HTV feeding properly through the machine?

      Recently, I was cutting HTV with my Cameo Pro and was having feed issues. I see several times each week on Facebook where users are having cut issues with their machines. I kept loading and unloading the HTV and began to notice a pattern.

      Note: these tips will work for all Silhouette machines, but you may find that you notice it more on a Cameo 4, Cameo 4 Plus, or Cameo Pro models

      If you are having cutting or feed issues with your Cameo machine
      is your HTV curled?

      As I watched the machine load and feed through, I noticed that the HTV was curled.
      If it is, this will affect your cutting and HTV feeding through the machine 100%!
      If you lay your HTV flat and the edge curls up, this can cause issues.

      Typically, HTV comes in a roll and is shipped that way, especially if you are buying it in longer sections. Depending on how it’s rolled, it can retain that shape and then it will not roll flat through the machine.

      Why do you have cut or feed issues?

      Since the HTV is curled, it will catch inside of the machine as it rolls through.
      This is not a machine fault, this is due to the HTV being curled.

      First, the number one thing that needs to be checked is that the blade is installed properly. I cannot even tell you how many posts I see daily on Facebook that the blade is not installed properly. This is one of the best things you can learn to do for yourself & to save yourself headache in the future. It doesn’t matter if you are an experienced user or a beginner. If the blade is not installed properly with no gap and adjusting properly, you WILL have cut issues.

      This is how the blade should be installed on a
      Cameo 4, Cameo Plus, Cameo Pro, or Portrait 3.

      There should be absolutely no gap between the lip of the blade and the housing.
      AND the lock on the front of the blade needs to be pushed in completely.

      Then watch as the machine does it’s “tap dance” at the beginning of the cut. Does the red line inside the blade adjust properly and to the correct number?

      If it does not, we can start troubleshooting it with a photo of the blade installed with the cutting mat or vinyl loaded if you post on the Silhouette Secrets+ Facebook group or check out this video by Silhouette America on Cutting Machine Maintenance and how to Reset the Motor at 4:38 in the video. This should reset the housing so that it is properly aligned to hit the adjustment holes correctly.

      Once the blade is installed properly and adjusting properly, the next place to look is where this curled HTV can cause issues.

      3 places to watch for curled HTV catching

      1 – The Roller bar
      Is the HTV loading properly and straight?
      If the HTV is curled too much, it may not be securely under the rollers and the machine cannot grip it well. This means that it may be pulling it in at an angle.

      Here is an example of what it might look like if the HTV is not securely caught between both the rollers. One side may pull in more than the other.

      It can also catch on the bottom of the blade in the Tool 1 or Tool 2 housing.
      If the HTV is curled and you do get it loaded straight, the curl on it can catch on the bottom of the blade(s) as it rolls back and forth.

      Here is an example of what it might look like if it gets caught on the bottom of the Tool(s).

      If the material does not load straight, unload and try again. If it loads crooked, you will most likely have an issue with it feeding properly. It is better to try again until it is loaded straight or try one of the other solutions below.

      2 – The middle bar in the machine.

      If you look at your machine, you will see there is a white piece that sort of has a curl up on the front that runs behind where the blade housing moves. The curl on the machine is designed so when a material is loaded and moves toward the back, it directs the material down and through the machine.

      However, if the HTV (or other materials) is curled, when it gets to the white piece in the machine, it will go up instead of going down. This means the HTV is not moving freely through the machine and may get caught. This can cause both cut and feed issues.

      Watch as the HTV is moving through the machine to see if it’s catching here.

      3 – The back of the machine

      If it makes it past the first 2 areas, then the last place it might catch is the back of the machine and you may or may not see this as the vinyl coming up behind the metal bar that runs the length of the Cameo 4 models. If you listen close, you will be able to hear this when it catches or you might actually see it come up behind that metal bar as well.

      All of these areas can affect the cut or feed of the HTV. Since the HTV is curled, it cannot roll smoothly and flat through the machine. The machine is functioning properly, but since the material is curled, it will catch.

      Now, I’m sure you may be wondering how I figured this out. When I noticed there was an issue, I tested. And I tested. And I tested. I watched how the machine was grabbing the materials. I watched how it was moving through. And I watched what parts of the machine were moving when everything was happening.
      This is a great way to learn your machine and what it doing!

      Now, how do you fix it?

      Solutions to curled HTV

      Tip 1 – Feed the material through the machine until the curl is out the backside.

      To advance the material through the machine, press the down arrow on the right touch panel on the Cameo 4, Cameo Plus, or Cameo Pro machine.

      Or you can advance the material by using the down arrow key next to the Test Cut button on the Send tab in the software. This would work for all machine models.

      Now, this is not always the most ideal or conservative way to work with your HTV roll because you will be advancing it into the machine about 4″ or more to get past that curl.

      However, if you are pressed for time, it may be the fastest way to work with it.

      Tip 2 – Roll the HTV backwards when you get it.

      Once you have identified this as a possible issue you may have, you can then re-roll the HTV rolls when you receive your order. This can help the curl “relax” a bit. And then store the vinyl this way.

      If the HTV roll came with a piece of tape on it, tape it securely so it will start to retain the new shape. When you want to use it, the inside of this roll will hopefully be relaxed a bit and less curled.

      If you do not have the tape from the original roll, grab a core from an old roll and then place the new roll inside so it will conform to the shape more and be held securely.

      Tip 3 – Use a cutting mat to hold the vinyl down.

      If the design will fit on the cutting mat and you cannot get it to feed properly, then I would suggest a good sticky cutting mat to help hold that vinyl down as flat as possible.

      I do know some users who will even use painter’s tape and tape the HTV so it lays flat. My only caution here is to not place the painter’s tape on the left or right edges where the rollers may roll over it as it may lose it’s grip because of the difference in surface area and cause the mat to skew.

      If you do place tape in the roller paths, just be aware if the mat skews or the cut is off, that this could be one reason why. If the left roller is gripping a different material, say the smooth surface of the mat, but the right roller is rolling on painters tape, it can cause it to roll at different rates. This can cause the mat to twist in the machine.

      This can also be the case if the right roller is rolling across the adhesive on the cutting mat. It can not only cause your roller to get gummed up, but can affect the feeding of the mat as well since it is rolling on the adhesive and not on the smooth edge of the cutting mat.

      Tip 4 – Slow the speed of the cut down.

      On the Send tab in the Silhouette software, you can adjust the speed. Faster is not always better. If you continue to have an issue, slowing the speed of the cut down can help not only in the cut, but in also being able to identify the cause of an issue.

      Wine Tasting Team Captain by Megan Hardy Designs – Design# 322093

      Tip 5 – Test cut with a capital B you type out placed below the design area.

      If you are not doing test cuts before you send the design to cut, I highly recommend getting in the habit of it. It only takes a few seconds, but can save you time, wasted materials, and big headaches!

      This is my favorite way to do a test cut!
      I use the Text Tool on the left side and type out a capital B. Move the B to a place that is below your design or towards the bottom in the negative space.

      Why so far down?

      By placing the capital B test cut at the bottom of the design, you will be able to see how the machine and HTV will track as it goes. It will have to roll all the way to the bottom of where the design will be and perform the cut. By doing this, any issues may show up before you’ve actually tried to cut the full design and it didn’t work properly.

      One More Tip

      This one actually has nothing to do with the machine itself, but it more on the software.

      I would suggest reading through this next section entirely so you understand how this one works and also how to “fix” it.

      In 2016, there was a new “pop-up” message that was released into the software for Heat Transfer materials called the Mirror pop up.

      For heat transfer materials you are generally placing the material face down on the cutting mat and then cutting through the backside of the material. This means that you have to “mirror” the design so it will cut properly.
      How many times have you cut heat transfer material only to have that “head smack” moment after when you realized you forgot to mirror the image?
      So the idea behind the “pop-up” message is great!

      If you have never cut HTV before or are just getting started, then I would suggest this
      Silhouette “Secrets” for HTV – Beginner Tips & Tricks
      blog post to get started.

      However, this “new” Mirror pop-up released in 2016, did not just mirror the design in the exact place that it was on the design mat. It flipped the entire mat when it mirrored the image, but it does not show that on the screen. So the design that shows on the screen on the left side of the mat/material, is really going to cut on the right side if you choose
      Send Mirrored” and let the software mirror it for you.

      If you choose “Send As Is” it will send it to cut in the exact location and exactly as you see it on the screen.

      Now, I know that may seem like “old news” since this “bug” has been in the software since 2016. Some users got used to it this way while other users would learn to flip the design themselves and just choose “send as is”.

      Now, let’s move to the present.
      A few months back, I started to notice users commenting that their HTV was not cutting as it should. They would tell the software to mirror it and it wasn’t cutting in the right spot. I reported the issue and found out that the old mirror “bug” was changed in February 2020 the software release.
      Now, it would flip the design in the exact location you have it placed on the mat, but still does not show you that on the screen.
      However, if you have anything else on the design file, it will mirror all of the objects. Whether they are in the “holding area” off the cutting mat or not.

      If you choose “Send Mirrored“, it could mirror all of the designs on the file.
      So when it flips it, this is how it would cut.

      Now that would come as a complete surprise when you cut and it’s not what you thought it would be.
      Note: the above screen shot is a representation of how it may cut, you do not see this change on the software screen at all.

      This is present in the software versions from v4.4.247 until v4.4.438.

      From v4.4.438 and higher, the software now is back to mirroring the design on the opposite side of the design mat than what shows on the screen.

      How to work with this?

      In the grand scheme of things, this is not a big deal, if you know about it and know how to work with it.

      My suggestion to you is to mirror the design yourself.

      The fastest way to do that is to right click on the design on the Design tab before you go to cut and choose Flip > Horizontal.

      This will flip the image on the screen, in front of your eyes.

      And it will then cut in that exact spot if you choose “Send As Is” on the Send tab.

      If you do not have right click menus enabled on your computer, you can also find this in the top menus under Object > Mirror > Flip Horizontally too.

      I use the Mirror Pop up as my final reminder and it has caught me several times when I forgot to mirror the design. Then I go back and mirror it myself before I’ve sent the design to cut.

      Hopefully with those tips above, you will be well on your way to cutting HTV smoothly and being able to troubleshoot when you do have an issue.

      Wine Tasting Team Captain by Megan Hardy Designs – Design# 322093

      For more tips on the Cameo Pro and troubleshooting check out this post
      5 Steps to Setting Up the Cameo Pro & Troubleshooting
      that also includes a free, downloadable PDF document for future reference.

      I would love to hear if this helped you in identifying a problem or if you just learned something new in today’s post. Feel free to comment below or post on the
      Silhouette Secrets+ Facebook Group.
      We love to see what you are doing and creating with your Silhouette machines!

      Save this for future reference by pinning the image below.

      Enjoy!

      This image has an empty alt attribute; its file name is logo.jpg

      THANK YOU for your support! How can you help? Click HERE & buy a coffee.
      Every little bit helps with the cost of running the site.

      Or if you are looking for more in-depth, step-by-step classes, check out all of my online Silhouette classes on my Teachable site HERE.

      SS Logo snip it
      **This post may contain affiliate links. What that means is that I may receive compensation if you purchase through the links I have provided. The price you pay for the product or service is not higher but I may get compensated for sharing.
      Posted on 1 Comment

      Designing in Silhouette Studio

      Creating your own designs in the Silhouette Studio software

      Let’s use some of the Silhouette Studio tools to create our own designs. We will be using the text, rotate, offset, and subtract tools to create this design.

      Affiliate links may be present in the following blog post and as an Amazon Associate I earn from qualifying purchases.

      Start by selecting the Text Tool on the left side and click on the design mat to type out a letter.

      Using the Fill Color Panel, fill it with a color. This will help to work with it easier, but mostly it is just to be able to see it better.

      Click off the text to deselect it and then click back on it one time.
      Then open the Text Style Panel and choose the font style.
      I am using LW Game Day font by Lori Whitlock – Design #205489.

      Make a copy of the text and move it off the mat to the holding area, so there is always an original to go back to.

      Right click on the design and choose Convert to Path.
      This will change the design from editable text to a vector design.

      When it is in editable text mode, the font has to account for all characters in the font file. This will included any special characters, flourishes, glyphs, etc. in that font file and it has to account for that in the spacing you see around the design. This is why you will see excess space on the top and the bottom of a letter between the letter and the selection box.
      Each font will vary since each font file is different.
      What it has to do is account for the spacing, in case you decide to change the text.

      Once the Convert to Path is chosen, it is now considered a vector design. It is no longer editable text and the selection box and measurements around the image are more accurate.

      Grab the corner bounding box and increase the size of the letter as desired.
      By using the corner bounding box, the design is scaled proportionally.
      If you would rather have exact sizes, you could also use the Transform Panel – Scale tab or the Scale icon in the top Quick Access Toolbar.

      The size of the design will depend on what type of project you are making. After the entire design is created, it can all be selected and resized to get the final size for your cuts.

      Next, click on the Text Tool on the left side again and then type out the word you want.
      Fill the text with color using the Fill Color Panel.
      In the Text Style Panel, choose the font style.
      I used the All Stars font by Erin Doran – Design #307688.
      Make a copy of it and enlarge it just a bit.
      Then right click on it and choose Weld so that any overlapping letters weld together and cut as one piece.
      Then right click and choose Group or use Ctrl+G as the keyboard shortcut.
      This will allow the entire design to move as one piece.

      Move the text word onto the design mat.
      Using the Transform Panel – Rotate Tab, rotate the word 90 degrees.
      Then using the corner bounding box, scale it up as desired.
      Once the text word is placed where you like it, select both the background letter and the word together and use the Align – Middle tool either in the Quick Access Toolbar (QAT) or in the Transform Panel – Align Tab.

      To select multiple objects, left click in the top left above the design and hold the left mouse button down and drag across the entire design.
      Anything the mouse touches will be selected together.
      Or click on one object, hold down the Shift key on the keyboard and click on another object. As long as the Shift key is held down, everything that is clicked on will be selected together.

      Click off the design to deselect it and then click back on the word only to select only it.

      With only the word selected, open the Offset Panel and click Offset.
      The default distance is 0.125″ and this is what I used and clicked Apply.
      When the offset is applied, it will weld any overlapping parts of the offset together automatically and the offset will now be the object selected on the screen.
      The distance on the offset can be adjusted as you desire and what works for the design can vary according to your taste and the design being created.

      Since the Offset is already selected, hold down the Shift key and then click on the background letter. Now, the offset and the big letter should be selected together.
      Open the Modify Panel and choose Subtract.
      This will subtract the offset shape from the background letter.
      Now all the little pieces will be individual designs. The design will need to be grouped together so it moves as one piece. Either press Ctrl+G on the keyboard or right click on the big letter and choose Group.

      Ta-da! You have created your own design.

      Move the design around as needed to cut out of the material you are using.

      I cut mine from Siser Easyweed Heat Transfer Vinyl so I moved the Bobcats off the mat, right clicked on the B and chose Flip > Horizontal and then placed it in the top left corner of the mat to cut.

      Once that was cut, I moved the B off the mat and moved the Bobcats onto the mat, rotated it back 90 degrees, right clicked and chose Flip > Horizontal and cut it.

      Check out this post – Silhouette “Secrets” Beginner HTV Tips & Tricks post for more information on cutting HTV.

      I love my new shirt and of course, my kids asked for their own too!
      I love being able to create custom shirts with my Silhouette and they love wearing them!

      But, I’m not going to tell them I like mine better.

      Each design may turn out a little bit different depending on the letters, text, and font style chosen. Grab your favorite drink and get to creating!
      Here are a couple more that I created using the same steps above.

      I’ve also created this as a video tutorial that can be found on my YouTube channel.

      I would love to see what you create with the Silhouette Studio tools.
      Feel free to post on the Silhouette Secrets+ Facebook Group.

      Save this for future reference by pinning the image below.

      Enjoy!

      This image has an empty alt attribute; its file name is logo.jpg

      THANK YOU for your support! How can you help? Click HERE & buy a coffee.
      Every little bit helps with the cost of running the site.

      Or if you are looking for more in-depth, step-by-step classes, check out all of my online Silhouette classes on my Teachable site HERE.

      SS Logo snip it
      **This post may contain affiliate links. What that means is that I may receive compensation if you purchase through the links I have provided. The price you pay for the product or service is not higher but I may get compensated for sharing.
      Posted on Leave a comment

      Holiday decor with Silhouette

      This year has definitely been an interesting one. I haven’t really felt like pulling all of the Christmas decorations out, but still wanted to do something.

      While cruising on Pinterest one night, I saw this and thought it would be perfect for a bit different look on our buffet in our dining area this year.

      Affiliate links may be present in the following blog post and as an Amazon Associate, I earn from qualifying purchases.

      This is a Christmas village that is constructed out of black cardstock and the window inserts on printable vellum. So it was fairly easy to put together.
      The file can be found HERE – on the Adventure in a Box website.
      I purchased the full file so I was able to get right to the project instead of creating my own images.

      Now, they hand cut all of the files, but I’m not much up for that. Since you can open PDF files in the Silhouette software directly with the Designer Edition upgrade or higher, you can bring it right into the Silhouette software to set up to cut for you.

      Let’s take a look at how that is done.

      Make sure you are using the PDF file for this design. I used the png images for the silhouette parts and it was not the same size as the PDF file silhouettes, so they were a little bit big for the cutouts of the houses.

      First, like I said above, you will need at least the Designer Edition upgrade or higher to open the pdf file.

      Download the file, save it to a safe place, and then unzip/extract the file.
      Next, in the top left corner of the software choose File > Open in the Silhouette software and choose the PDF file.

      When you open a PDF file, it will give you a couple of options. I always try the
      Import as vector” first because in some cases, depending on how the file was created, it may open up with cut lines already done. The only way to know is to open as a vector and click on the Send tab to see if the cut lines are there.

      If the PDF file has more than 1 page to it, you will want to choose which page to open first.

      In this case, the first 3 pages are instructions, so we don’t need those at the moment. They can be handy for assembly if you need them. I chose Page 4 and then click on Import in the bottom right corner to open the file.

      Now, use the Basic Trace, increase the threshold until it turns as smooth of yellow on the black as possible.

      Now click Trace and then move the original design away. Since the original design does not have “score” lines to fold the building on for it to stand up, I added those in myself.

      Using the Line Drawing tool on the left side, hold the Shift key down and draw a line that almost touches from one end to the next. I didn’t want the score line to cut edge to edge, so I made the line a little bit smaller.
      Next, on the Line Style Panel on the right side, change the Style of the line to a dashed line. This will act like a score line and not be fully cut through and the cardstock can easily be folded on this line. Adjust the line between the outer cut lines as needed.

      Select the entire design and the score lines and then right click and choose Group, so the entire design moves as one piece. Using the Transform Panel – Rotate Tab, rotate the design 90 degrees on the page.

      Fill it with color to see what it will look like when cut. Now, save the design.

      You will do this for all of the pages with the house designs.
      Then I cut each out of black cardstock.

      Next, we will open the next page of the PDF file for the silhouettes in the windows. Using File > Open once again, choose the PDF file, then page 5, and choose open as a vector.

      This is how it will open up.

      Next, using the Draw Rectangle tool on the left side, draw a rectangle around each of these window images. We do not need all of the black grid lines to print, only the images.
      Make sure to give yourself some clearance around the images so there is area to add glue to.

      Now, select the entire design and drawn rectangles.
      You can either hit Ctrl+A to select all on the page or left click and hold the mouse button down and drag it across the entire design touching each object you want to select.
      Then open the Modify Panel on the right side and choose Crop.

      Now, let’s use the Transform Panel – Rotate Tab to turn the designs to work with a little bit easier.

      Now, save this file.

      I then opened up all of the silhouette files and cropped the images down. Then copied and pasted them all onto one design mat. And then we can set this file up as a Print and Cut project. I would suggest saving each Print and Cut page as a new design, just in case you have to go back and recut the pieces for some reason.

      For tips on setting up a Print and Cut projects, check out this Print and Cut Basics post HERE.
      I recommend printing using all of the defaults for the print and cut, for the best results.

      Once you have the page setup with the registration marks, print each page on printable vellum. I used this I found on Amazon HERE.
      I printed using the photo quality for matte paper. Printing at photo quality allows the ink to be laid down on the paper at a slower rate and allows it to dry better when working with specialty papers.

      The first 2 pages I cut with had no issues what so ever and then the 3rd page would not cut correctly. I ended up printing it 5 times, just trying it over and over.
      When I should have done this little trick in the first place.
      Place white paper underneath the registration marks in each corner. This allows the optical eye a better chance at picking up only the registration marks printed and not other interference. Make sure the white paper is cut large enough that it would be the same size as the cross-hatched area for best results.

      Keep in mind that the Silhouette optical eye is just a laser that turns on when you have registration marks on your page. This laser eye is looking for black marks on the page. However, it’s just a laser eye, it will pick up any black marks on the page. This includes the Silhouette grid lines if the paper is translucent or clear. This is also why the cross-hatched area around the registration marks is so important! And why, for the best results you should not have your design or cut lines in the cross-hatched area. As I said, it worked for the first 2 pages, but it didn’t like that 3rd page.

      And that little trick was all it took for it to pick up the registration marks and cut accurately. Again, this is only something that might need to be added if the paper you are using is translucent or clear.

      Once it’s all cut out of the black paper and the printable vellum, I used a bit of Scrapbook tape runner adhesive to glue it to the backside of the black cardstock, folded the score lines, and set it up.

      I added some tea lights behind the designs to let it shine through and I have a new piece of holiday décor in our dining room.

      Supplies used:
      Christmas Village file – Adventure in a Box
      Black Cardstock
      Printable Vellum
      Scrapbook Adhesive tape runner
      Tealights

      Whether you create the same file, design your own silhouette images to fit in the Christmas Village, or follow the same techniques as I used above for another project; I hope you will share that on my Facebook group here
      Silhouette Secrets with EllyMae.
      If you have questions feel free to post below or on the Facebook group too!

      Save this for future reference by pinning the image below.

      Enjoy!

      This image has an empty alt attribute; its file name is logo.jpg

      THANK YOU for your support! How can you help? Click HERE & buy a coffee.
      Every little bit helps with the cost of running the site.

      Or if you are looking for more in-depth, step-by-step classes, check out all of my online Silhouette classes on my Teachable site HERE.

      SS Logo snip it
      **This post may contain affiliate links. What that means is that I may receive compensation if you purchase through the links I have provided. The price you pay for the product or service is not higher but I may get compensated for sharing.
      Posted on 7 Comments

      Custom Gift Wrap with Silhouette

      The Silhouette Studio software is so powerful in what it can do and what you can create with it. The biggest limit is YOU! The more time you take to learn about the Silhouette software and how to do things in it, the more you can expand your skills and apply those to your future Silhouette projects. This is why I have the “Let’s Explore v4” series and most of my blog posts focus on tools and techniques in the software.
      It is the key to it all!

      If you learn how one tool functions and all it can do in the software, then you can take that knowledge and apply it to so many future projects.

      Affiliate links may be present in the following blog post and as an Amazon Associate, I earn from qualifying purchases.
      This is a sponsored post.

      Today I’m going to share how I created a custom pattern that could be used for gift wrapping and making a matching gift tag.

      As you may know from reading the blog, I am a Silhouette Elite Affiliate, and occasionally they will ask if we want to participate in an activity.
      This month it was a gift wrap & tag challenge.

      The only supplies needed to create this pattern are cardstock/paper, designs from the Silhouette Design Store, and a printer.

      Supplies used:
      11″ x 17″ copy paper or 12″ x 12″ cardstock
      Printer – I am using a Canon TS9521C Craft printer, but any good quality printer will do
      This printer is a borderless printer, which allows me to print edge to edge.
      Designs:
      White Poinsettia Flower Watercolor by Little Luxuries Loft – Design #334862
      Pink Poinsettia Flower Watercolor by Little Luxuries Loft – Design #334859
      Dark Red Poinsettia Flower Watercolor by Little Luxuries Loft – Design #334858
      Holly Branch Watercolor by Little Luxuries Loft – Design #334864
      Holly Sprig Watercolor by Little Luxuries Loft – Design #334863

      Once you have the pattern created, you can create all kinds of projects with it.

      Print on a light weight paper like copy paper and use it as wrapping paper.

      I also used it to create the bow to add to the top of the package to match. This bow is called Layered Gift Bow by Jamie Lane Designs – Design #284007.
      The bow is originally 2 layers and I printed the pattern on copy paper cut it, then did an offset of the pattern layer and cut out of Close to My Heart gold glitter cardstock.

      And then the final layer was the red cardstock. I followed the assembly instructions and put it together. I would recommend if you are doing 2 or 3 layers of cardstock to use a really strong glue.

      Print the pattern on cardstock and use it to create gift boxes where no wrapping paper is needed.

      Embossed Leather Earrings created on the Curio
      Etched Acrylic ornament created on the Curio
      Classes for both can be found on my Teachable site HERE
      Pizza Box with Square Window by Pebbles in my Pocket – Design #320302
      Earring Jewelry Gift box by Sweet Afton – scaled up –
      Design #133208

      Use the flower designs individually to create matching tags to go with your gift wrap or gift boxes.

      Add a little bit of shimmer to your project with a Clear Shimmer brush.

      Or use the patterned paper to create a card.
      The possibilities are endless and you can make a few designs go a long way in your supplies.

      Merry Christmas Red Truck by Lori Whitlock – Design #281993
      Print and Cut class on my Teachable site HERE
      FREE Z-fold card cut file HERE

      I had so much fun creating this idea and putting it into action. It’s amazing how when you get involved with a project hours can go by and you don’t even realize it.

      Creating a custom pattern with designs

      Now, let’s take a look at how I created this. It is actually very simple.

      I started by opening up each design and placing it on the design mat. To open multiple designs on the same design mat, right click on the file in the library and choose Merge.

      If you are opening the file from outside the software, use File > Merge to bring a design onto the current design mat. Or drag and drop the design from the Windows Explorer or Finder window.

      Once all of the designs are on the same design mat, select them all and scale them to the size you would like. This will ultimately depend on the designs that you are using, but in this case, I wanted all of the flower designs to be proportional to each other and the holly sprigs to be smaller to fit in between.

      Rearrange and duplicate the designs on the page as desired.
      Each user is going to find what they prefer and like in designing.
      However, the one thing that I have found that is common among all users is that we are often most critical of our own work. If you are feeling like something is not quite right, don’t scrap it. Save the design file and then come back to it at a later moment. You might find that given some time you open up that file and it is just perfect the way it is!

      I started by creating a 12″ x 12″ page size and then I also created a separate 11″ x 17″ page size as well. How large you can print is going to be determined by your printer capabilities.

      When I am doing a print project, I always use the Print Preview before I send to my printer. This has saved me on so many occasions to catch something that doesn’t look right before it prints.

      For instance, one time while creating this design, I sent it to print and a 3″ section at the bottom showed up blank. The design was on the screen, but it didn’t show up in the print preview. It just turned out to be a glitch and a save and software restart solved it, but if it had printed that way, it would have not been good.

      And wahlah! You have a custom designed patterned to print and use in projects!

      I would love to see and hear about what you are creating on my Facebook group at 
      Silhouette Secrets with EllyMae.

      Save this for future reference by pinning the image below.

      Enjoy!

      This image has an empty alt attribute; its file name is logo.jpg

      THANK YOU for your support! How can you help? Click HERE & buy a coffee.
      Every little bit helps with the cost of running the site.

      Or if you are looking for more in-depth, step-by-step classes, check out all of my online Silhouette classes on my Teachable site HERE.

      SS Logo snip it
      **This post may contain affiliate links. What that means is that I may receive compensation if you purchase through the links I have provided. The price you pay for the product or service is not higher but I may get compensated for sharing.
      Posted on Leave a comment

      Silhouette Classes – 2 new classes released!!!

      This week I released 2 new classes on my Teachable site.
      A Silhouette print & cut class and a Curio metal etching placement class!

      Here are the details of each class:

      Silhouette Print and Cut – Basics to Design Files to Troubleshooting

      Join me in 2+ hours of video course that covers Silhouette Print & Cut from step-by-step setup, to working with many different file types for print and cut, and my troubleshooting tips. This course is divided out into 3 main videos covering each of these topics in depth.
      By following these steps & tips, print and cut can expand your Silhouette skills.
      Let’s take the anxiety out of print and cut and get started.

      Course includes:
      Class Overview
      Class Supply List

      Print and Cut – Part 1 – Step-by-step Setup Video – 1 hour 3 minutes
      – Step-by-Step setup for print and cut
      – Establishing a baseline print and cut
      – Print and cut a single design
      – Print and cut with a sticker set

      Print and Cut – Part 2 – Designs and more Video – 1 hour 6 minutes
      – working with excess backgrounds on designs
      – print and cut with text
      – print and cut with Color Fonts
      – turning a cut file into a print and cut – 3 examples
      – altering a cut file to create a print and cut – 2 examples
      – tips on registration marks
      – print and cut in large format

      Print and Cut – Part 3 – Troubleshooting Tips Video – 18 minutes
      In this section we will discuss 11 tips for troubleshooting print and cut when things don’t work and tips for getting the best success.

      Check out this online video course on my Teachable site HERE.

      Curio Advanced Beginner – Metal Etching placement video course

      Course includes:
      Class Overview
      Class Supplies list

      Basics of the Curio video – 38 minutes

      Advanced Beginner Curio – Metal etching with blanks & placement on the Curio video – 24 minutes
      – Setting up the Curio base to etch with the blank
      – Measuring the blank
      – Securing the blank
      – Setting up the Silhouette design mat for the etch design
      – Design placement for etching on blanks
      – Tips for working with text & alignment
      – Emboss fill for etching
      – Etching on the Curio
      – Examples of etching on blanks

      Check out this new Curio class HERE

      If you are looking to expand on your Silhouette skills and want to dive in and learn from all of my testing and tricks, check out the rest of the Silhouette courses available:

      Silhouette Beginner Setup & First Cuts
      Silhouette Print and Cut – Basics to Design Files to Troubleshooting
      Curio Setup & First Cuts with Cardstock & Vinyl
      Beginner Curio Metal Etching
      Curio Advanced Beginner Metal Etching Placement
      Basic Acrylic Etching with the Curio
      Embossing Leather with the Curio
      Creating a vinyl decal & layering using the Silhouette Studio software
      Cutting & Layering HTV in Silhouette Studio
      Glass Etching with Silhouette
      Heat Transfer Paper Print & Cut Lesson with Silhouette
      Creating a Knockout Design with HTV & Bonus HTV & Subtract
      Creating a Rhinestone Design in Silhouette Studio

      All of these are designed as step-by-step classes that are taught just like an in-person lesson.

      The more you get into Silhouette and start playing with it the more you will pick up. Sometimes it can be overwhelming and testing can take a long time to get it just right. Let’s take that anxiety out of your Silhouette projects and get started!

      For more information and to see each class details – CLICK HERE.

      I would love to see and hear about what you are creating on my Facebook group at 
      Silhouette Secrets with EllyMae.

      Save this for future reference by pinning the image below.

      Enjoy!

      This image has an empty alt attribute; its file name is logo.jpg

      THANK YOU for your support! How can you help? Click HERE & buy a coffee.
      Every little bit helps with the cost of running the site.

      Or if you are looking for more in-depth, step-by-step classes, check out all of my online Silhouette classes on my Teachable site HERE.

      SS Logo snip it
      **This post may contain affiliate links. What that means is that I may receive compensation if you purchase through the links I have provided. The price you pay for the product or service is not higher but I may get compensated for sharing.
      Posted on 6 Comments

      Wood-burning with Gunpowder & Silhouette

      Yes, you read that right. Gunpowder wood-burning!

      I was first introduced to this technique by my friend Kat G. last year when she submitted it for a class at the All Things Silhouette Conference. Once I told my husband about it we started looking into it a little bit more and found there are many gunpowder wood-burning artists out there. It is so fascinating to watch. While I am no artist that can hand draw things, especially with gunpowder, I can use my Silhouette to create a stencil to wood-burn with.

      I was cruising on Pinterest one night and showed my husband a design and he suggested we do the wood-burning with gunpowder again. I added this to my growing list of Cameo Pro projects. Since the Pro can cut up to 24″ wide, the 17″ wood round was no problem for this design.

      Affiliate links may be present in the following blog post and as an Amazon Associate, I earn from qualifying purchases.

      Supplies needed for this project:
      17″ wood round – Home Depot or other hardware store
      Cameo Pro Silhouette machine – smaller machines could do it in smaller stencil sections
      Accurate 4350 Smokeless Gunpowder from Midway USA – slow burning is better
      Oracal 651 24″ vinyl
      Oracal Transfer Tape
      Oak Stain
      Wipe on Polyurethane
      Clock parts
      Fonts and design to create your project:
      Elegance font by Silhouette – Design #255706
      Wine Tasting by Deborah Stine – Design #57438

      The first thing I did was take a photo of the wood blank I would be using, or one similar and then open that photo in the Silhouette software. This allows me to use the photo of the blank to design on and create a “mock-up” of the design so I know what it might look like.

      Keep in mind that photo file can come in quite large, depending on the size of the image. I then used the Scale option in the top Quick Access Toolbar (QAT) to scale the image down to a size I could see next to my design mat.

      Next, I drew a circle to 17″ using the Draw Ellipse tool on the left side. Hold the Shift key down when drawing and it will create a perfect circle. The Transform Panel – Scale Tab can also be used after it is drawn in order to get the exact dimensions as well.

      I have increased the line thickness so you can see the red cut line of the 17″ circle drawn.

      I then scaled the wood round image to fill the 17″ circle by using the corner bounding boxes.

      Select both the photo image and the circle drawn and then using the Modify > Crop tool, I could eliminate the excess around the wood round image.

      Now, I have the image to use when creating my design.

      I add things to my design page and move things around, test out different fonts, and usually create quite the creative “mess” on my working file. Keep in mind the more data you add to the file, the larger it is, so make sure that you save your file often.

      Do your files look like that?
      I love the ability to be able to create and move things and test what I think is going to work. This file took me several weeks of back and forth with font styles and designs to get it how I liked it.

      And then I sent the full design through the Cameo Pro to cut. It is awesome to be able to cut this stencil decal all in one solid piece. While you could still accomplish this with a smaller Silhouette machine, it would have to be done in pieces and then hand placed.

      With large decals I find that that hinge method works great for applying the decal as you can keep it held in place with painter’s tape so it will not move while you secure it down.
      Here is a quick video to show the hinge method

      If viewing on email, click on the photo and YouTube should open.

      Next, I taped off the edges. I found that making the decal slightly smaller than the wood round helped me to align the design so it was easier to center. Then taping off the edges of the wood round ensured that it didn’t get burned in places outside of the decal.

      And then comes the fun part! Applying the gun powder & burning!

      Now, first let’s talk a little bit about safety.
      I know that doesn’t sound very fun, but it is necessary.
      Safety precautions: fire extinguisher, safety goggles, no wind, long lighter, safe area outside away from buildings, vehicles, and children
      While the gun powder does not burn for too long, it is an explosive.
      You should have seen the UPS guy drop the package at our house and run – lol!

      Now that that’s out of the way…..

      Spread the gun powder out on the design and do small sections at a time. The extra time it takes to do it in small areas will be well worth it. We also burned each area twice to get a good solid fill with the burning.

      We found out with our first large round that trying to do it all at once just lead to the vinyl melting into the wood and made it difficult to remove. Here is a photo of our first attempt, which I will later sand down and use for something else.

      With a little more time and controlling the burning a little bit more, we ended up with a successful 17″ round burned with the design. Check it out here:

      If viewing on email, click on the photo and YouTube will open.

      After all the burning is done, remove the adhesive vinyl. I did not let it sit too long because I did not want the adhesive to set up.

      Finish off the wood round as desired. I used an oak stain on top and then a coat of wipe on polyurethane.

      And I love how it turned out! Perfect for my dining room wine décor!

      I love all the possibilities that are available when using the Silhouette machine!
      The possibilities are endless!
      What do you think? Something you would try or does it get the creative juices flowing?
      Comment below or on my Facebook group.

      I would love to see and hear about what you are creating on my Facebook group at 
      Silhouette Secrets with EllyMae.

      Save this for future reference by pinning the image below.

      Enjoy!

      This image has an empty alt attribute; its file name is logo.jpg

      THANK YOU for your support! How can you help? Click HERE & buy a coffee.
      Every little bit helps with the cost of running the site.

      Or if you are looking for more in-depth, step-by-step classes, check out all of my online Silhouette classes on my Teachable site HERE.

      SS Logo snip it
      **This post may contain affiliate links. What that means is that I may receive compensation if you purchase through the links I have provided. The price you pay for the product or service is not higher but I may get compensated for sharing.