Posted on 12 Comments

Let’s Explore v4 – Replicate Object on Path

Replicate Panel – Object on Path

I am sure you have seen other projects where people had a design replicated multiple times in a shape and you’ve said “How did they do that?”

Well, today we are going to explore how to do that right in the Silhouette Studio v4.

The Replicate Object on Path tab can be found under the Replicate Panel on the right side and is tab 3 on the panel.

Replicate Object on Path copy

First add the design and the shape you want the design to follow onto the design mat.

For this design, I drew a heart using 2 circles and a square turned 45 degrees, then placed them overlapping and welded them. I resized the heart down to a manageable size. And then drew a perfect circle by holding down my Shift Key and dragging my Draw Ellipse tool out.

Replicate Object start

Now let’s take a look at the Object to Path tab.

Replicate Object detailed copy

  1. Show Grab Handle – Click on the Object you want to move to the shape to select it, then click on Show Grab Handle button in the panel. A grab handle will appear in the object and you click and drag that towards your shape.Show Grab Handle copyWhen you drag it on to the shape, it will replicate copies of that object around the shape. And you get another little circle (drag handle) on the shape to the right of the original object. By clicking and dragging on this drag handle you can increase or decrease the spacing between the objects on the path, this will also change the number of objects around the shape.

    *If for some reason the object will not snap to the path, try this – right click on it and choose Make Compound Path. Sometimes strange things happen and even though a design isn’t really a compound path at all, this seems to work to help it to decide it can snap to a path. 

    Drag to shape copy

    Here I moved the drag handle so there is more space between the objects. Notice that the numbers change on the panel as well under the Position.

    Drag copies copy

  2. Perpendicular – Change the orientation of the object on the path by leaving this box checked or un-check it to change the angle of your object.Perpendicular copy
  3. Start Angle – Change the rotation angle of your object on the path to an exact angle.Start Angle copy
  4. Increment Angle – Change how each object is placed in relation to the previous object. In this case, each heart is rotated 90 degrees from the previous heart.Increment angle
    This creates a pattern of your design around the shape. With this option, you can make many variations of the same design.
  5. Start Position – Change the position of the original object on the shape by changing. In this photo, I have changed the position to 0, which places the original object at the 3 o’clock position. You can also move the grab handle on the original object and move it manually too.Start Position copy
  6. Section Length – Changes the length between the beginning and end object on your path.Section Length copy
  7. Number of Repeats – Change the number of times the object is replicated on the path.Number of repeats copy
  8. Step length – Change the distance between each object on the path by adjusting this figure. This will change number of objects on the path.Step Length copy
  9. Release Copies – When the design is complete, click on this to release the objects from the path and remove the shape your were using as your path.Release CopiesAt this point, all of your objects are now single objects, as you can see by the selection boxes around each. I would suggest grouping these together before you go further, so you don’t accidentally move one.Release copies 2

And there you have the Replicate Object on Path – how cool is that?

What will you do with this neat feature?

Replicate final

Want to start at the beginning of the Let’s Explore v4 series – click HERE.


Enjoy !

THANK YOU for your support! How can you help? Click HERE & buy a coffee. Every little bit helps with the cost of running the site.

Looking for more in-depth, step-by-step classes, check out all of my online Silhouette classes on my Teachable site HERE.

SS Logo snip it
**This post may contain affiliate links. What that means is that I may receive compensation if you purchase through the links I have provided. The price you pay for the product or service is not higher but I may get compensated for sharing.

Posted on 2 Comments

Layered vinyl decal for a teacher gift

Today I am creating a vinyl decal that could be applied to a variety of items that would be great for a teacher.

Vinyl decal

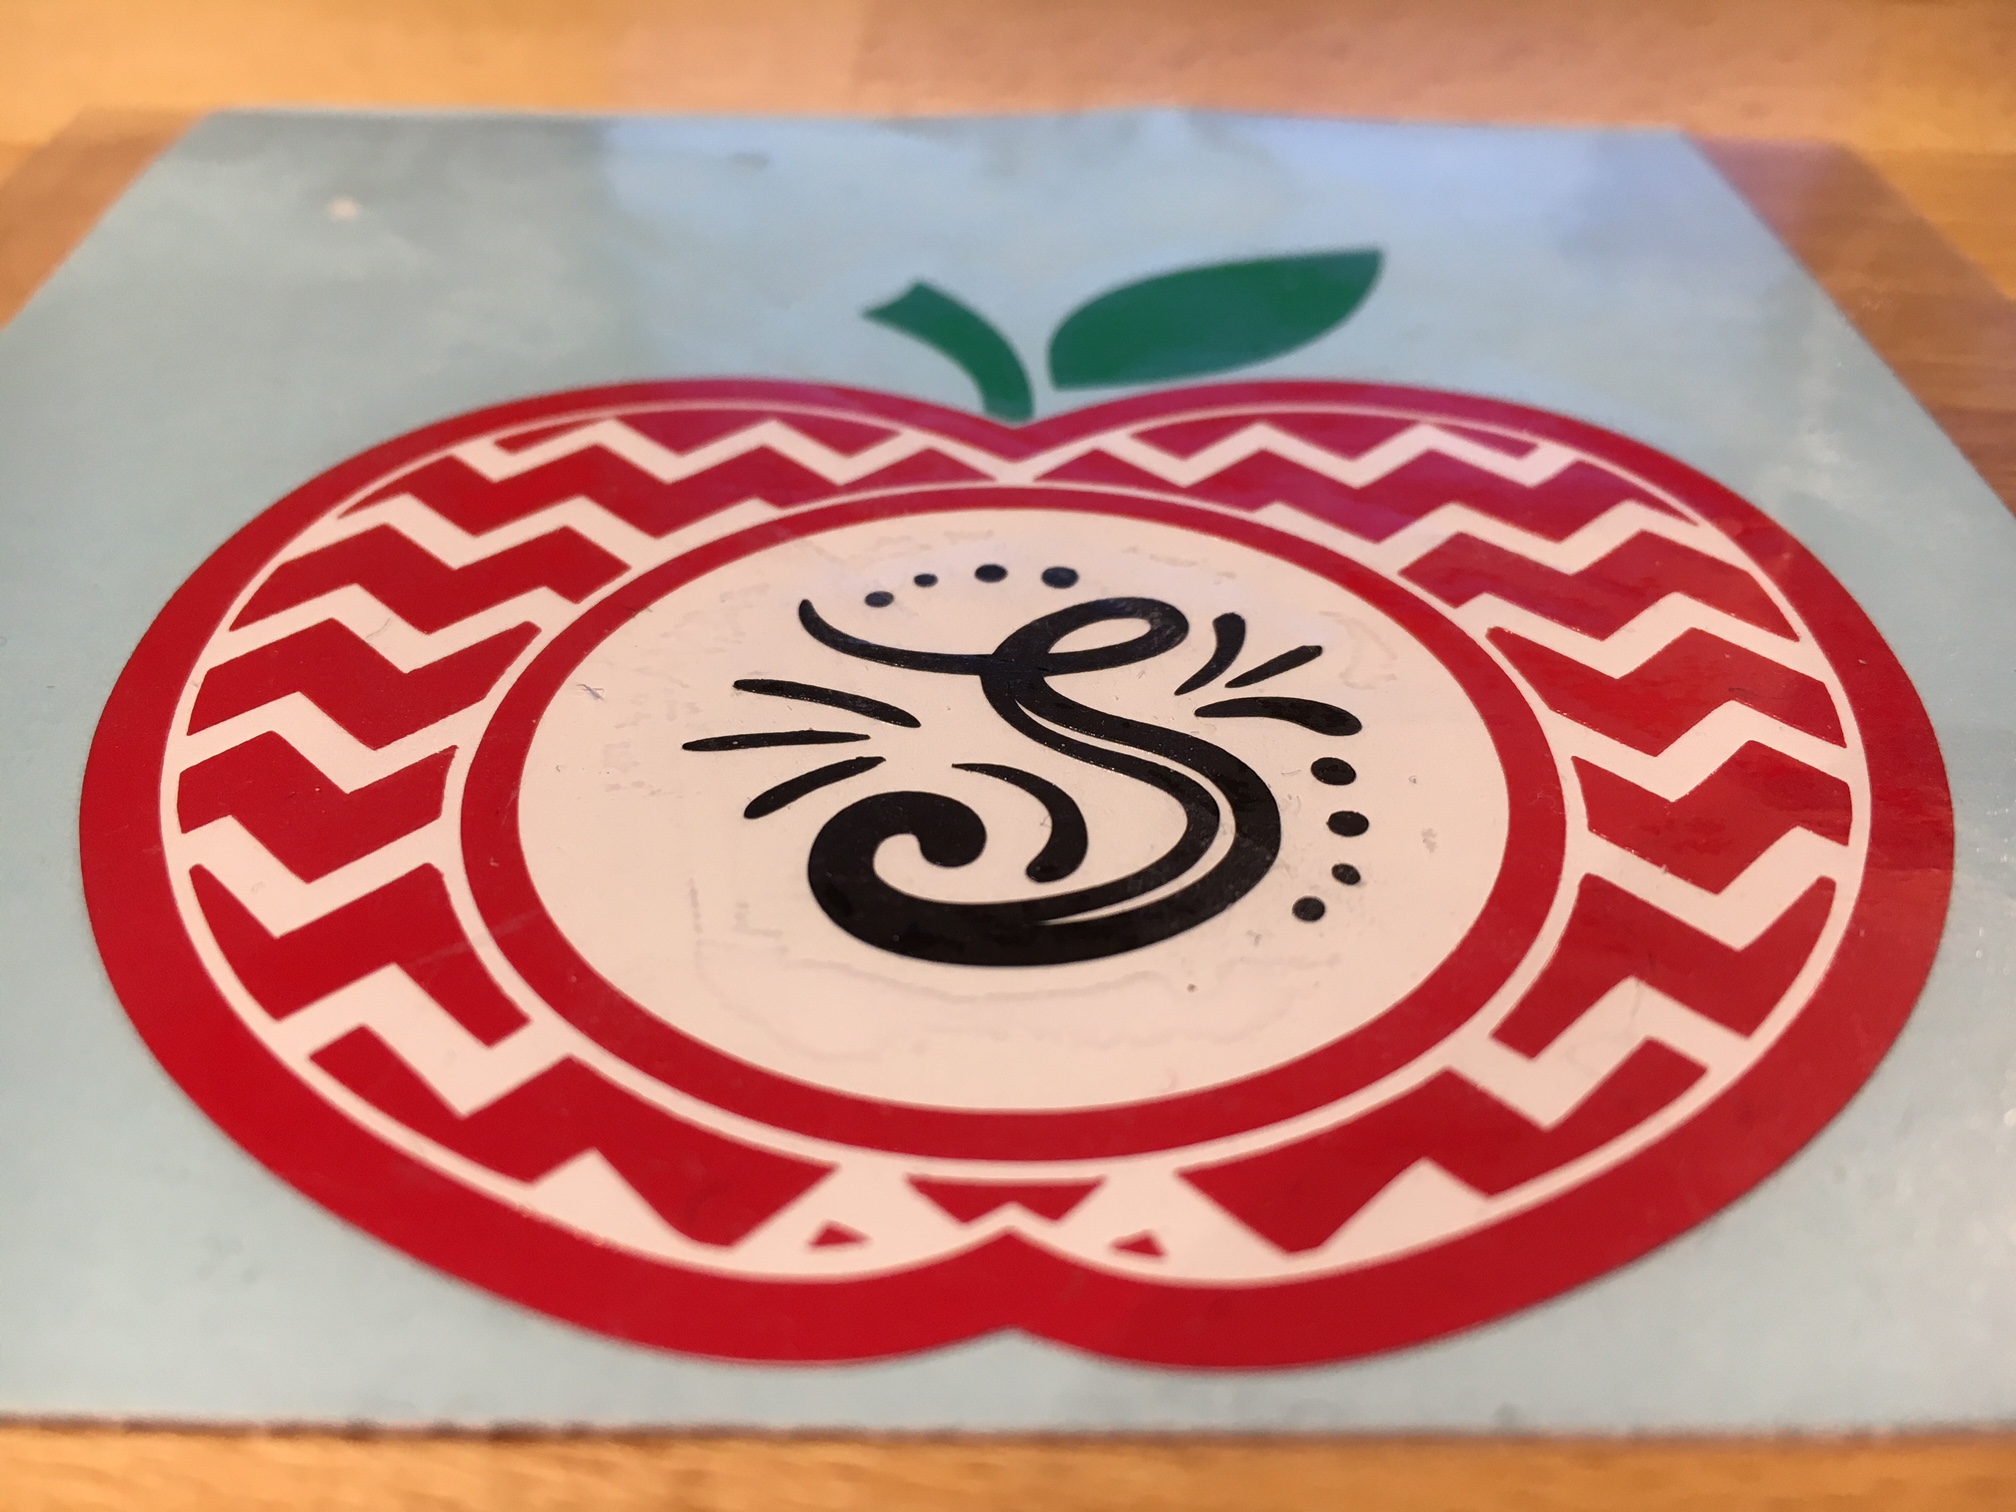
For this decal, I am combining 2 files found in the May Bundle at SoFontsyApple Monogram Frames and A-Z Hand lettered Initials.

Measure and create your design to the size you want. I added an apple layer of white behind the red, so that gives this design 4 colors to layer.

The mat is revealed at 50% here so I can see where on the cutting mat my decal would fit.

Vinyl decal demo copy

Since there are 4 colors to this decal, replicate the design with the registration marks so there are 4 copies on your design mat.

Replicate copy

Check out more information on the Replicate Panel HERE.

Move the copies to separate areas on your design mat, then un-group the design and delete the color on each copy that you do not want to cut. Make sure you do not move the design in any way when you are deleting the layers, as it is lined up properly with those registration marks.

It’s also helpful to pull off another copy of the original to the side of the mat, just in case you need to go back.

Vinyl decal copies

Now, you have all the layers of your decal ready to cut on one cutting mat. Cut your material or grab your scraps of vinyl and place them in the same location on the cutting mat as they are on the design screen. I am using Oracal 651 vinyl for my decal.

You’ll notice that I did not weed the bottom black layer. Since it had some small dots in the design I chose to apply the Oracal transfer tape first and use the Reverse weeding technique on it to keep those pieces in place.

IMG_3165

The first time I used the reverse weeding I did not like it as the vinyl stuck to me. But, it definitely has it’s uses and works great for those detailed images. With a little practice, you get the hang of it.

When you are layering the vinyl, you want to start with the top layer first and then work your way down. I started with the black, then green, then red and then white.

IMG_3167

I love how this decal turned out.

What would you apply it to? A coffee mug? An acrylic blank?

Enjoy !

THANK YOU for your support! How can you help? Click HERE & buy a coffee. Every little bit helps with the cost of running the site.

Looking for more in-depth, step-by-step classes, check out all of my online Silhouette classes on my Teachable site HERE.

SS Logo snip it

**This post may contain affiliate links. What that means is that I may receive compensation if you purchase through the links I have provided. The price you pay for the product or service is not higher but I may get compensated for sharing.
Posted on 18 Comments

Let’s Explore v4 – Replicate Panel

Want to make a copy of your design, font or an object? Then the Replicate Panel can be very helpful!

This is found on the right side of the Silhouette Studio v4.

Replicate panel copy

This tool works great if you are wanting to replicate several copies of your design. Let’s Explore the Replicate panel!

Replicate panel detailed copy

  1. Duplicate – Choose which way you want 1 copy of your design to replicate left, right, down or up.
  2. Rows or Columns – Choose to Replicate 2 copies right, 3 copies right, 2 copies down or 3 copies down.Replicate rows columns copy
  3. Fill Page – Choose to Replicate the design as many times as it takes to fill the page.Fill Page copy
  4. Mirror – Choose to Mirror 1 copy of the design down, up, left or right.MirrorSomething to note about the Replicate and Mirror tools above is that it may look like the designs are overlapped, however, they are placed just perfect so when you cut, it will cut both lines.Replicate placement As you can see in the photo above, there is no overlap in the cut lines and both copies will cut just fine.
  5. Rotate Copies – Choose to Replicate and rotate 1 copy, 2 copies, 3 copies or 5 copies.Rotate copies

The second tab under the Replicate Panel gives you even more options on choosing how many and where to replicate the design to.

Number of Copies tab copy

Number of Copies detailed copy

  1. Number of copies – Choose how many copies you would like to replicate of your design.
  2. Position of each Copy – Choose what direction you would like the copies to replicate in.
  3. Rotate each Copy – Choose a certain degree to replicate those copies to.Rotate number copies copyIn the photo above, I chose to make 3 copies, rotated to the right at 30 degrees. So each copy will rotate 30 degrees from the previous one.

There is so much that you can do with this Silhouette software and every time I open it, I love seeing what it can do.

The design I used in my example can be found in the May bundle at SoFontsy – it’s called Sports Ball Love/Mom Hearts by Svg Cuttables.

Web

I hope you have fun playing with the Replicate Panel – it can really come in handy when you are designing.

Enjoy !

THANK YOU for your support! How can you help? Click HERE & buy a coffee. Every little bit helps with the cost of running the site.

Looking for more in-depth, step-by-step classes, check out all of my online Silhouette classes on my Teachable site HERE.

SS Logo snip it

**This post may contain affiliate links. What that means is that I may receive compensation if you purchase through the links I have provided. The price you pay for the product or service is not higher but I may get compensated for sharing.

Posted on 4 Comments

Let’s Explore – Transform – Shear

Today we are on the final tab of the Transform Panel – the Shear tab. This Panel is available if you have the Designer Edition upgrade to the software.

This is another tool that is often overlooked. Why would you use it?

You can change the look of a basic shape, design or even font to give it a new look.

The Shear tab is found on the rights side of the Silhouette Studio v4 under the Transform Panel.

Shear Panel copy

Below I have a few examples of how you can use this tool to change the look for a font or design.

Shear examples

Let’s check it out and see some examples.

Shear Panel detail copy

  1. Horizontal Shear Preset- Shear or skew by preset degrees on a horizontal line – choose between -30, -15, 0, 15, or 30 degrees.Horizontal Preset shear
  2. Horizontal Custom – Shear or skew by typing in a custom number and it will shear to that degree on the horizontal line.Custome Horizontal shear
  3. Vertical Shear Preset – Shear or skew by preset degrees on a vertical line – choose between -30, -15, 0, 15, or 30 degrees.Vertical Shear Presets
  4. Vertical Shear Custom – Shear or skew by typing in a customer number and it will shear to the degree on the vertical line.Vertical Shear Custom
  5. Show Shear Handles – Check the box to show the Shear Handles that you can grab and skew your design manually instead of putting in a certain degree designation.Show Shear Handles copy

This can make the designs or shape you have in your library go a lot further when you know that you can manipulate and change them.

For instance, I took 2 basic shapes and created this rough sun design.

Sun demo

By cutting a circle in half, I created the main sun part. Then I took a rectangle and used the Shear Handles to manipulate each copy of the streaks.

Want to give your signature a more realistic slant to how it would be written?

Signature shear

Do you have a font that does not have the Italic option? Then create your own.

Italic demo

Whether you are creating your own designs or just want to play around, the Shear tool is definitely something to play around with.

Enjoy !

THANK YOU for your support! How can you help? Click HERE & buy a coffee. Every little bit helps with the cost of running the site.

Looking for more in-depth, step-by-step classes, check out all of my online Silhouette classes on my Teachable site HERE.

SS Logo snip it

**This post may contain affiliate links. What that means is that I may receive compensation if you purchase through the links I have provided. The price you pay for the product or service is not higher but I may get compensated for sharing.

Posted on 27 Comments

Cutting without a mat on the Cameo

Did you know you could cut without a mat with the Cameo? Yes! You can! The Portrait and all the Cameo machines have the ability to cut certain materials without a mat.

IMG_2940 copy

I see this asked a lot so let’s take a look at how to set it up properly to get a good cut.

You can only cut materials that have a backing without a mat on the Silhouette machines. Materials that have a backing would include adhesive vinyl or Heat Transfer vinyl (HTV), these are the most common ones I see. Single layer materials such as cardstock or fabric need to be placed on a mat or you risk jamming your machine when it cuts.

First, you want to set up the software to tell the Cameo that you are cutting without a mat.

No Mat setup copy

  1. Change the Page Size to the size of material you are using.
  2. Change the Cutting Mat to None. The arrow on the screen is indicating where the material will be loaded into the Cameo.
  3. Check the box to “Show Cut Border”. This will bring up a red cut border and will show you the maximum cut-able area of your vinyl.

No Mat setup - cut space

Next, something to keep in mind when cutting without a mat, you lose 1/4″ of cut-able space on your material on the left & right side and 1″ of cut-able space on the backside. This is so that your Cameo can hold the material securely in the machine while it cuts.

I have seen many times when someone tries to “trick” the machine to tell it the material is longer than it is, so they can get the design to cut in that last 1″ space, but most times, it will lose grip on the material and fall out the backside. Then you have wasted that cut of vinyl. So I don’t recommend that. Just know in advance that you have to work within those parameters on your material and checking the “Show Cut border” helps visualize that.

So now that we’ve told the software we are cutting without a mat, let’s set the machine up.

First, you need to make sure that your blade is installed correctly. The #1 issue I see is not having the blade installed in the machine with no gap. It should look like this with no gap at all between the blade and the housing. This is for all blades, not just the Autoblade, but it is especially important with the Autoblade as it cannot adjust correctly if it is not in properly.

Autoblade with arrow

Next, you want to move your right roller in to grab the edge of the vinyl. There are 4 positions that the right roller can be locked on the roller bar. These are all indicated by the blue arrows, which line up to grooves on the roller bar that the lock sits in.

IMG_2970

These are the only places that the right roller can be locked in on the roller bar. If you do not have the roller securely set in the groove, it will not lock in place. It may look like it’s locked but it is not.

Now, to move your right roller. Flip the roller bar lock down to release it (unlock). This lifts the right side of the roller bar, so you can move the roller.

Roller bar lock copy

Next, turn the right side of the Roller lock to the unlocked position. It is very difficult to see but there is a definite lock and unlock and a notch that has to be securely in place.

Roller bar lock zoom_edit

Once it is in the unlock position, you can carefully slide it along the roller bar until it securely sits in the groove that you want it in. Then make sure to turn the roller lock back to the locked position and turn the roller bar lock so it is pointing up. The terminology can get confusing so here is a visual.

Roller bar vs roller lock copy

Now, once your roller is securely locked in place and your roller bar lock is pointed up in the locked position, we want to make sure we are loading our vinyl correctly.

Place your vinyl next to the blue line on the left side, just like you would load the mat and the top edge of the vinyl up against the rollers. Don’t push it in, just hold it up to the rollers, so when you push the load button it will pull the vinyl into the machine.

Blue line

Now, see how the rollers are firmly gripping the edges of the vinyl.

Vinyl edges

Remember what I said earlier about losing 1/4″ of cut-able space on your left and right side of your vinyl? This is why. The rollers need that space to securely hold the vinyl in the machine.

Also, something to take note of is that your design will start cutting exactly at the top of your vinyl that is loaded in the machine. As you can see in this photo, the red cut border starts at the very top of the vinyl.

Cut at top of vinyl

It does not have to account for the extra space of the mat, so it begins cutting immediately.

Once your vinyl is loaded, you may also choose to advance the vinyl through the machine in order to see how it will track. On the Cameo touchscreen, click on the directional arrow icon in the bottom right corner.

Track feed

Then press on the down arrow to get it to feed through the machine.

Track through

This can help you identify any issues you may encounter with it feeding through the Cameo straight.

Now, that the software and the Cameo are set up correctly, we are ready to Send the design to Cut.

Creative cut

You want to keep the vinyl as straight as possible going into and coming out of the Cameo. If you are cutting something that is really long and have the vinyl hanging that can create an issue if the vinyl is pulling. Or if the vinyl doesn’t have room on the backside to pass through, then it can cause issues too.

It will depend on the length of the vinyl you are cutting, but I prefer to use my Silhouette roll feeder when cutting long length. I feel that I don’t have to babysit the cutting as much once I have the roll feeder set up, as long as the backside is clear.

IMG_2979

Now, I know it doesn’t look like much but it will hold your 9″ and 12″ vinyl rolls in place. I will be completely honest and say that I didn’t think I would have any use for it. But, I was wrong! I use this every time I have a large vinyl decal to cut.

The Cameo machine sits securely on top of the Silhouette Roll Feeder and the vinyl is fed through so it goes into the machine straight.

IMG_2980

Here is the video I watched by Silhouette to set up the roll feeder – The Silhouette Roll Feeder.

You can find the roll feeder here: Swing Design Silhouette America Amazon

I would highly suggest practicing this technique of not using a mat before you are under pressure to get a project done. And I still will always recommend that a beginner start by using a mat, so you can see how the machine works before you start changing too much of it.

IMG_2983

This is a great feature to have the ability to cut materials without a mat for things longer like this 12″ x 33″ wall decal!

I used Oracal 631 for this project and used the Vinyl, Matte setting in the Silhouette software to get a beautiful cut.

Cut settings

Can’t wait to see what you decide to cut without a mat! Share photos of your creations on my Facebook group at Silhouette Secrets+ by EllyMae.

Enjoy !

THANK YOU for your support! How can you help? Click HERE & buy a coffee. Every little bit helps with the cost of running the site.

Looking for more in-depth, step-by-step classes, check out all of my online Silhouette classes on my Teachable site HERE.

SS Logo snip it

**This post may contain affiliate links. What that means is that I may receive compensation if you purchase through the links I have provided. The price you pay for the product or service is not higher but I may get compensated for sharing.

Posted on 7 Comments

Let’s Explore v4 – Transform = Move

Did you know that you can Move objects on your Silhouette Design mat specifically into place?

Pretty neat when you start to look at it.

Under the Transform Panel on the right side, then the 4th tab at the top of the Panel is the “Move By” tab.

4-25 Transform -Move copy

This allows you to move an object to an exact location on the Design mat.

4-25 Transform -Move detail copy

  1. Directional arrows – Move left, move right, move up, move down – choose which direction you want to move your design.
  2. Distance – Set the exact distance you want your design to move.
    Here is the original design placed on my design mat:
    Distance before
    *Running Out Wine Cardio design #222003 by Megan Hardy Design

    Now see how it moved exactly 3.25″ when I select the design and click on the Move right directional arrow.

    Distance after

  3. X and Y coordinates – Set the exact X and Y location of your design on your mat.
    If you look in my above photo, when I moved it 3.25″ to the right, it also added in the X and Y coordinates. This means that I can also move something by changing those numbers. Here I entered my X as 5, so it moved it 5″ from the left side and my Y as 3″, so it moved it 3″ down from the top.X and Y

    You can also choose how it applies the X and Y coordinates by selecting the position on the square that you want it to apply from.
    My photo above has it applied in the top left corner.X Y position copy
    But you can choose what position works best for you, whether it’s the Center of the design or another location as well.

  4. Apply – Click here to apply the Move or hit Enter.

And that is how you can move things on your design screen to the exact location you want.
Can you move it manually? Yes, you sure can!
Drag and move it where you want.
Or you can use the Move tools and place it exactly.
Just like so many other functions in the Silhouette software – there are multiple ways to do things!

Enjoy !

THANK YOU for your support! How can you help? Click HERE & buy a coffee. Every little bit helps with the cost of running the site.

Looking for more in-depth, step-by-step classes, check out all of my online Silhouette classes on my Teachable site HERE.

SS Logo snip it
**This post may contain affiliate links. What that means is that I may receive compensation if you purchase through the links I have provided. The price you pay for the product or service is not higher but I may get compensated for sharing.

Posted on 4 Comments

Bus Driver Appreciation gift

Over on the Silhouette School blog today I showed how to use the Cut by Fill Color option to create a layered vinyl decal for perfect placement.

 IMG_2823

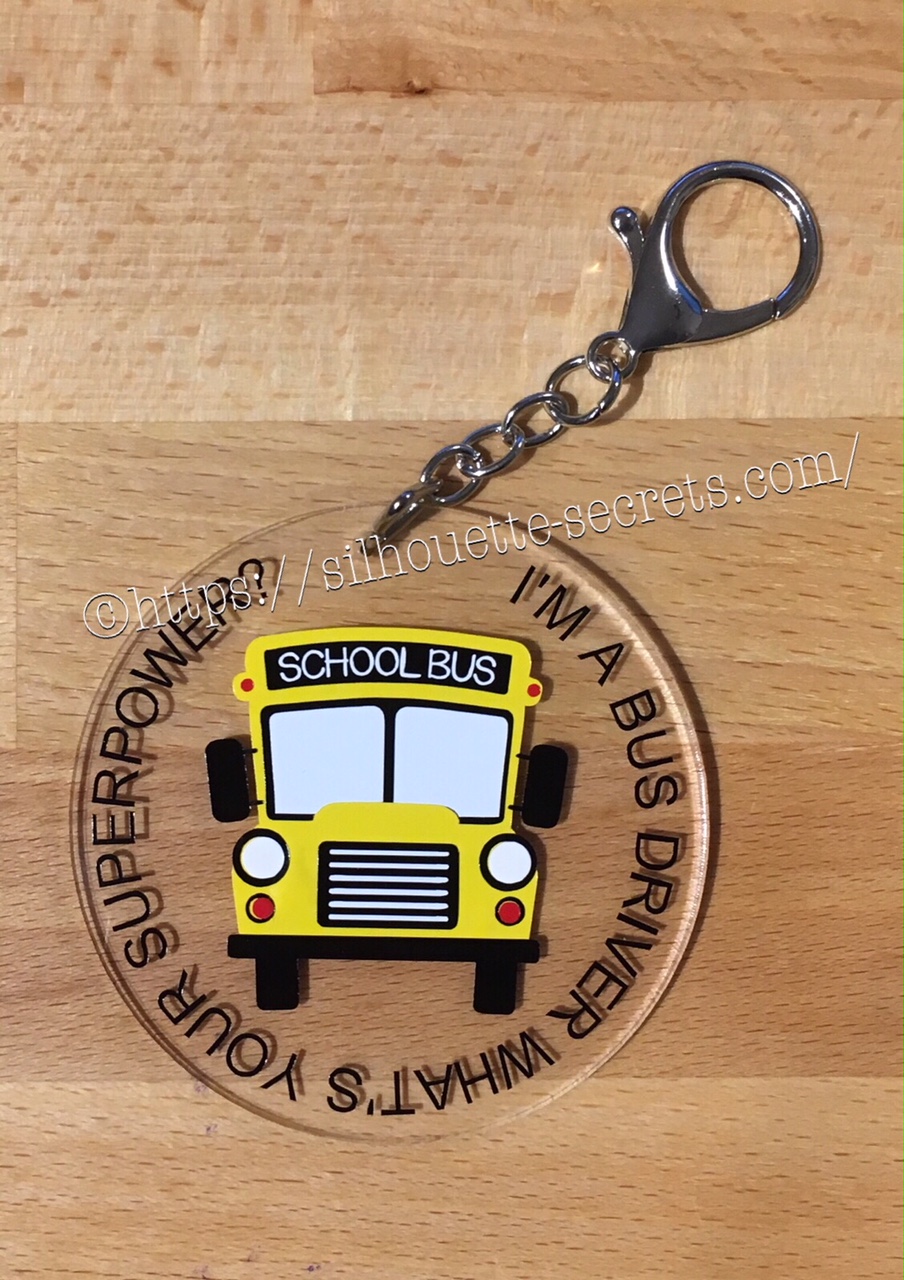
Now I’m going to show you how I took that design, shrunk it down and used the same technique to create a bag tag for our Bus Driver.

I started with a 3″ clear acrylic circle blank from Craft Chameleon.

IMG_2824

I love that Craft Chameleon acrylics come with a cut file included. I opened up the template for this shape and copied and pasted it to a new design mat to use as my base. Or you could draw a perfect circle by holding down the Shift key and then resizing the circle to the exact dimensions under the Transform Panel – Scale tab.

Base Template

Now, I can use this to create my design in.

I took the School bus design by Kelly Lollar Designs that I used as an example in my guest post, and shrunk it down with the registration (layering) marks. I wanted to make sure that the bus fit in the center of the acrylic shape with space around the edges for text.

 Bus centered

Now, I duplicated my circle and made it a little bit smaller. This is so the text will fit down inside of the acrylic shape better. Move the original 3″ circle off the mat as it’s not needed any longer or you can delete it.

Then select just the bus and the circle and use the Align Tab in the Transform Panel to Align Center or from the QAT (Quick Access Toolbar). Do not include the registration (layering) marks in this, as it is just the bus and circle we want to center together.

Align center copy

Now, type out the text, select the font style and size. Double click back on the text to get the circle in the bottom left corner. Grab that circle and drag it to your circle shape.

Typing text copy

As you drag it to the circle you will notice it attaches to the circle. Play around with the alignment of the text to your liking and then use the slider bar to increase the distance from the circle either inside or outside of the circle.

Text to shape copy

Now, I decided to increase the Character Spacing under the Text Style Panel, just a bit on my letters to spread it out a bit. And then readjust your words around the circle. Each Font style that you choose will give you different looks, so you will need to adjust for whatever you choose.

Character spacing copy

Now, once the text is modified, it will no longer be editable text. This is a good time to make a copy of the text & circle and pull it off the mat, just in case you want to edit it later. If you select only the text to pull it off, it will release from the shape, so you want to select both the text and the shape and make a copy.

In order to separate the text from the circle, right click on the text and choose Convert to Path.

Convert to Path copy

And now, move the circle off the mat as we do not want it to cut.

Circle released

Now, we are ready to cut out decal just as I detailed in the Silhouette School guest post.

Once we have our decal cut out and layered together, we are ready to apply to the acrylic shape.

I went ahead and placed the shape on my Silhouette cutting mat on the sticky side, so it wouldn’t move while I applied the decal. The acrylic blanks come with a protective covering on them to prevent scratching before use, so make sure to peel that off before you add your decal.

IMG_2814

And then I lined the decal up and placed it down, burnishing it well and took the transfer tape off.

IMG_2815_edited

And with any project there’s always 1 piece that may not work just right. As you can see I’m missing the School bus title on it. This did not weed well when I was layering the decal and after messing with it, I decided I’d just re-cut it and apply.

I duplicated the design and then un-grouped everything and deleted all but the School Bus. Then I duplicated the School bus 3 times just in case…. if I had only cut it once you know it wouldn’t have weeded correctly, but since I cut it 3 times….. all 3 weeded beautifully with reverse weeding.

IMG_2817_edited2

Then I gathered the rest of the tools to attach the pieces of the bag tag.

IMG_2819

I just received these bent nose pliers from Craft Chameleon and using them 1 time, I’m in love with them. They are one of those tools like my Close to My Heart nonstick scissors that will be my go to tools. Now, I could have just gone to the garage and “borrowed” a couple pairs of pliers from there, but these were the perfect size for my hands and worked wonderfully. I am so glad I ordered them after watching Craft Chameleon’s live FB video a few weeks ago.

And now I have a little gift to give to the bus driver.

temp

Can you think of things you might layer with adhesive vinyl? Those first few times you attempt it can seem daunting, but it is another project that takes practice and the layering (registration) marks make it much more manageable to layer a design. What will you design and cut?

Enjoy !

THANK YOU for your support! How can you help? Click HERE & buy a coffee. Every little bit helps with the cost of running the site.

Looking for more in-depth, step-by-step classes, check out all of my online Silhouette classes on my Teachable site HERE.

SS Logo snip it

**This post may contain affiliate links. What that means is that I may receive compensation if you purchase through the links I have provided. The price you pay for the product or service is not higher but I may get compensated for sharing.

Posted on 13 Comments

Let’s Explore v4 – Rotate

Hi everyone! This week we are continuing on our journey to explore more of Silhouette Studio v4.

We are looking today at the Transform Panel – Rotate tab. You will find this on the right side of the Silhouette Studio v4 as shown below.

Rotate main copy

If  you want to manually rotate an object, you can do that on the design screen by grabbing the green circle at the top of the design when it’s selected and hold down the mouse button and drag it left or right.

Manual rotate copySoftball Mom by SM Designs

But if you want something more precise, then you want to use the Rotate tab on the Transform Panel.

Let’s take a look at how this can help.

Rotate detail copy

  1. Rotate to 0, 90, 180 or 270 degrees – Choosing one of these options will rotate your object to the exact degree you choose.Rotate 90 degrees copy
  2. Custom – Change the numbers in the box to a specific degree you would like it to rotate to.Custom rotation copy
  3. Rotate by 45 or 90 degrees, 180 degrees, -90 or -45 degrees – Using this option will move the design exactly the distance you select. For example, in my photo above, I have it selected at 30 degrees. If I now choose -45, it will rotate it to the left exactly -45 degrees from where it started at 30 degrees, placing it at 345 degrees.Rotate by -45 copy
  4. Custom – Type in a custom amount if you want something in between the standard options.
  5. Apply – You can click this after changing the custom amount or just hit the Enter key.

There are many reasons that you would use these rotate tools.

For instance, let’s draw a heart. Now, you’ll notice that the Drawing tools on the left side does not have a heart shape. So let’s make one. Select the Draw and Ellipse tool and then hold down the Shift key and drag your mouse on the design mat. This will draw a perfect circle. Now, let’s fill it with color so it’s easier to work with. (Check out the Let’s Explore Fill Panel here)

Draw heart

Next, make a copy of your circle. There are several ways to do this – Ctrl+c and Ctrl+v, right click & choose copy and then again for paste or hold down the Alt key and drag a copy off, or use the toolbar (QAT) at the top.

And then draw a perfect square by choosing the Draw a Rectangle tool and holding the Shift key down. Fill your square with color as well.

Draw heart2

Now let’s use the Rotate tab to turn our square to a 45 degree angle.

Draw heart3

Next move the square up to meet the circles and align them how you like it. You may need to enlarge your circles (select them both and resize) to get the dimensions of the heart to align.

Draw heart final

And there you have drawn a heart shape using just the basic shapes in the Silhouette software and the Transform panel – Rotate tab. Make sure to select all your shapes and choose weld or it will cut out the individual shapes.

Heart no weld.JPG

After you weld the shapes together you will have your heart design.

Heart weld

And there is one way you would use the Rotate tab and as a bonus you learned how to draw a heart from basic shapes.

Hope you’ve enjoyed the Let’s Explore v4 session today! Check out all the previous panels we’ve explored HERE.

Enjoy !

THANK YOU for your support! How can you help? Click HERE & buy a coffee. Every little bit helps with the cost of running the site.

Looking for more in-depth, step-by-step classes, check out all of my online Silhouette classes on my Teachable site HERE.

SS Logo snip it

**This post may contain affiliate links. What that means is that I may receive compensation if you purchase through the links I have provided. The price you pay for the product or service is not higher but I may get compensated for sharing.

Posted on 38 Comments

Let’s Explore v4 – Scale tab

Welcome back to Let’s Explore v4!

Today we are on to Tab 2 of the Transform Panel – the Scale tab. This is another tool I use almost every time I open my Silhouette program.

Just like almost all the other tools, there are many ways to do things in the software. While you can grab the corners of the Selection box and drag your design to the correct size, sometimes you need a more accurate measurement of your design.

Selection box copy
*I Craft Therefore I Hoard Phrase by Kolette Hall Design #152410

For instance, I am making these stencils for my husband to use in a woodworking project and he wants a maximum of 6.5 inches for the design, so it fits on the board he has. With the Transform Panel, it is possible to achieve this easily.

Stencil demo copy

Let’s take a look at the Scale Tab.

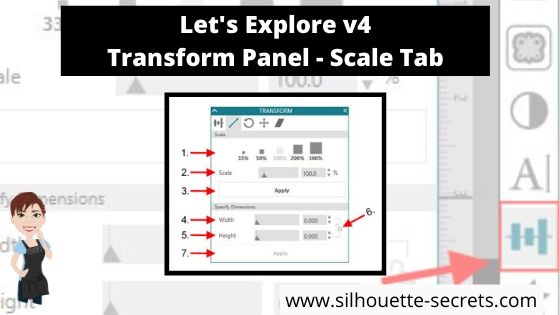
Scale tab details copy
  1. Scale by percent – There are a couple of preset percentages that you can choose for quick resizing of an object. Anything below 100% will decrease the size and higher than 100% increases the size.
    Scale percent
  2. Adjustable Scale – Highlight the number in the box and choose your custom percentage to resize the design.Resize custom percentage copy
  3. Apply – After changing the customized Scale option, click Apply (or hit Enter).
  4. Width – Highlight the numbers and replace or use the increase/decrease arrows  to a specific dimension.
  5. Height – This works the same as the width, highlight the numbers and replace or use the increase/decrease arrows Arrow up down copy to a specific dimension.
  6. Lock Aspect – This is a very important icon! The default is set to the unlock position. If you want to keep the proportions of a design the same when you resize it, click this icon to change it from unlocked Unlock copy to locked Locked copy.
    Specific dimensions copy

    What does that mean? If I change the Width of my design while it is unlocked, then it will adjust only the width of the design and I end up with some distorted shape the design. You can see here that now my state of Montana design, does not look how it should.Lock AspectVersus if I click on the Lock Aspect and lock it in, then it will adjust both the width and the height, keeping the proportions the same.

    Locked Aspect
    That makes quite a difference in the design.
  7. Apply – After making changes to the Width and Height you can click on Apply or hit Enter for the software to make the changes.

And now you have a better understanding the Scale Tab found under the Transform Panel in Silhouette Studio v4.

You can also find some of these tools in the QAT (Quick Access Toolbar) at the top of you program when your design is selected. How it appears on your screen, will be dependent on your screen size and you will notice that each person’s varies for that reason.
Some of the tools will have a fly out box and others will be fully visible as my width & height are.

QAT copy

I hope you take a few minutes to check out this Scale panel and see what it’s all about!

Check out the other posts in the Let’s Explore v4 Series HERE.

Save this for future reference by pinning the image below.

I would love to see what you are creating with your Silhouette! Feel free to join my Facebook group – Silhouette Secrets+ with EllyMae and share!

Enjoy !

THANK YOU for your support! How can you help? Click HERE & buy a coffee.
Every little bit helps with the cost of running the site.

Looking for more in-depth, step-by-step classes, check out all of my online Silhouette classes on my Teachable site HERE.

SS Logo snip it
**This post may contain affiliate links. What that means is that I may receive compensation if you purchase through the links I have provided. The price you pay for the product or service is not higher but I may get compensated for sharing.

Posted on 38 Comments

Let’s Explore v4 – Transform Panel – Align

Today we are exploring the Transform Panel – Align Tab.

This is a very important and useful panel when you are creating designs & one I use almost every time I open the Silhouette software.

Transform Panel copy

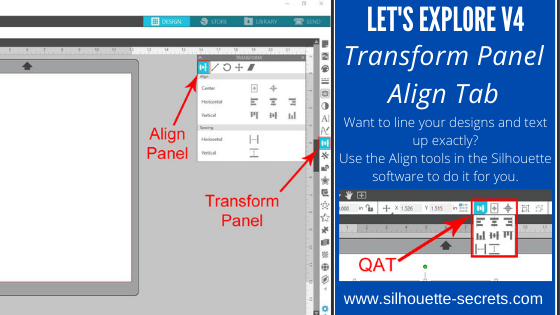
The Transform Panel is on the right side of Silhouette Studio v4 and the first tab on this panel is the Align Tab.

Let’s take a look at the entire Align tab.

Transform Panel details copy

  1. Center – This icon  Center to Page icon copy is the Center to Page and it will center the design in relation to the Page Size you have set under the Page Setup Panel – Page Size. Here I have resized my design (Softball Mom by SM Designs) and then hit the Center to Page icon and it centered that to my 12″ x 12″ page size.Center to Page demoThen you have the Center multiple objects copyCenter multiple objects icon. When multiple objects are selected, this will center those objects to each other. If I draw a circle and select both objects, click on the center multiple objects, it will center those designsCenter multiple objects demo
  2. Horizontal – There are 3 options here: (A) left edge, (B) center, (C) right edge.Horizontal Alignments copy (Dots Nice – A Dotty Handwritten font by One Oak Designs)
  3. Vertical – There are 3 align options here: (A) top, (B) center, (C) bottom edge.Vertical Alignment copy (SG Beach Vacay Dingbats Font by Sophie Gallo – Design #240727)
  4. Horizontal Spacing – With multiple objects selected (more than 3), this will space those objects equal distance apart horizontally.Horizontal spacing copy
  5. Vertical Spacing – With multiple objects selected (more than 3), this will space those objects equal distances apart vertically.Vertical spacing copy

And there you have the details of the Align tab in the Transform Panel of Silhouette Studio v4. Now, there is no need to eye-ball the spacing or alignment, let the software do the work for you.

You can also find the same icon in the Quick Access Toolbar (QAT) at the top when more than one object is selected.

QAT Align2

Check out the other posts in the Let’s Explore v4 Series HERE.

Save this for future reference by pinning the image below.

Transform Panel - Align Tab Pin

I would love to see what you are creating with your Silhouette machine. Feel free to post on my Facebook group Silhouette Secrets with EllyMae. If you have questions feel free to post below or on the Facebook group too!

Enjoy !

THANK YOU for your support! How can you help? Click HERE & buy a coffee. Every little bit helps with the cost of running the site.
Looking for more in-depth, step-by-step classes, check out all of my online Silhouette classes on my Teachable site HERE.

SS Logo snip it

**This post may contain affiliate links. What that means is that I may receive compensation if you purchase through the links I have provided. The price you pay for the product or service is not higher but I may get compensated for sharing.