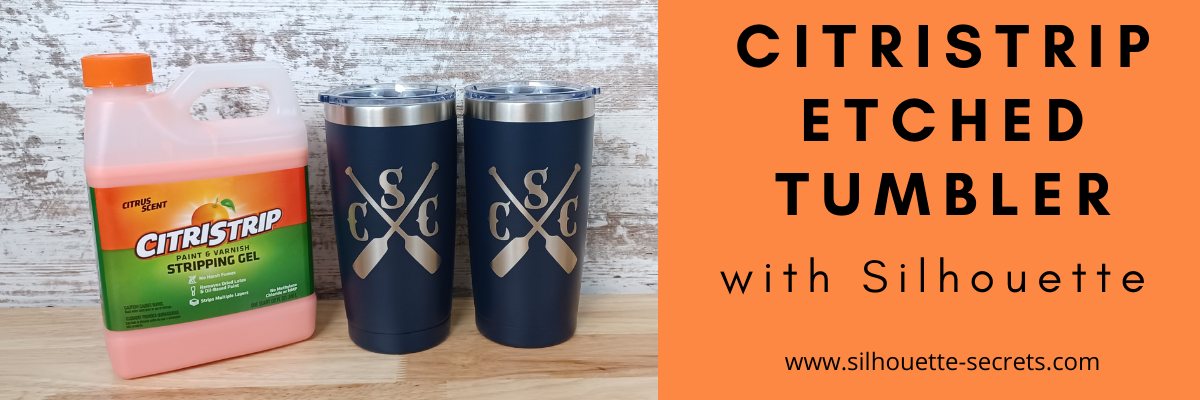
Have you seen the etched powder coated tumblers using CitriStrip?
I’ve seen it popping up on social media and we always like to try something new!
It turned out fantastic!
I bought all the supplies needed and then set up to record how we did it, whether it was going to turn out or not, we were going to share. We had so many microphone issues it took us several attempts to get it recorded. All we could do was laugh!
We had a bit of fun while making the video! You never know what you might see or hear in our videos. We hope to bring you more project videos in the near future. Make sure to Like and Subscribe to the Swift Creek Customs and Silhouette Secrets+ YouTube channels to be notified of new content!
Having a Silhouette machine makes it so easy to do custom things!
I cut a stencil using the Silhouette Cameo and Oracal 651 scraps.
When cutting a stencil vs a decal, you weed out the design so you are left with the negative space open, instead of weeding around the design.
Affiliate links may be present in the below and as an Amazon Associate I earn from qualifying purchases.What that means is that I may receive compensation if you purchase through the links I have provided. The price you pay for the product or service is not higher but I may get compensated for sharing.
I would love to see what you are creating with your Silhouette software or machines! Feel free to post on my Facebook group at Silhouette Secrets with EllyMae.
Save this for future reference by pinning the image below.
Enjoy !
THANK YOU for your support! How can you help? Click HERE & buy a coffee. Every little bit helps with the cost of running the site.
Or if you are looking for more in-depth, step-by-step classes, check out all of my online Silhouette classes on my Teachable site HERE.
**This post may contain affiliate links. What that means is that I may receive compensation if you purchase through the links I have provided. The price you pay for the product or service is not higher but I may get compensated for sharing.
The CAMEO Pro was released almost 2 years ago. I am one of the original testers of the CAMEO Pro before it was released and have hundreds of cut hours into this machine. Since the release of the CAMEO Pro, we have troubleshot thousands of user’s cut issues.
Today I am releasing 2 new series for troubleshooting the CAMEO Pro.
The first series is a 5 part series that is on my Silhouette Secrets+ YouTube channel and it’s meant to be a quick view of the top 5 issues we have seen for cutting issues with the CAMEO Pro.
The second series is an in-depth look at the CAMEO Pro on my Teachable site.
Become a PRO at Troubleshooting Your CAMEO Pro
I want you to be the most successful you can be using your CAMEO Pro!
There are a lot of variable that can be the source of a cutting issue on the CAMEO Pro or any model Silhouette machine. If you do not find the exact issue that is causing the cut issue, you will most likely continue to experience inconsistent cuts until that is found.
Join me as we take an in-depth look at the CAMEO Pro!
This course is an in-depth look at the CAMEO Pro! I held nothing back. I’ll be honest, some of you won’t make it through. Some of you will give up! But those of you who make it completely through the YouTube series and this Teachable course WILL be Pros at your Silhouette CAMEO Pro AND You will be able to troubleshoot 99% of the issues you have with this machine!
I want you to be successful with your CAMEO Pro!
I would highly recommend that you watch both all the way through, especially if you are a new user or if you are having cutting issues!
You can be a PRO at troubleshooting on the Cameo Pro and save yourself time & frustration!
Most times in our troubleshooting we find that it is just a few small things that need to be adjusted for a user to correct a cut or feed issues.
I would love to see what you are creating with your Silhouette software or machines! Feel free to post on my Facebook group at Silhouette Secrets with EllyMae.
Save this for future reference by pinning the image below.
Enjoy !
THANK YOU for your support! How can you help? Click HERE & buy a coffee. Every little bit helps with the cost of running the site.
Or if you are looking for more in-depth, step-by-step classes, check out all of my online Silhouette classes on my Teachable site HERE.
**This post may contain affiliate links. What that means is that I may receive compensation if you purchase through the links I have provided. The price you pay for the product or service is not higher but I may get compensated for sharing.
Have you ever wanted a handy chart that shows what blades are what? What is each blade used for? Does it need an adapter or does it fit with no adapter? What materials is each designed to cut?
Today I wanted to share a free resource that I’ve created that gives information on the current blades and tools available for the Cameo 4 , Cameo Plus, and Cameo Pro.
Cameo 4 , Cameo Plus, and Cameo Pro Tool Chart
This free PDF chart is is available as a free download exclusively for confirmed newsletter subscribers.
Download this to your computer and open it. Click the blue links in the chart for more resources on that particular tool.
Print the PDF file out for visual reference as well.
Don’t forget to check out the Silhouette classes on my Teachable site while you are there! Step-by-step classes taught for many Silhouette projects and software techniques. And the best part – once registered, you can access any time and as many times as you need to take the class! Never stop learning & creating!
**Please note that these may be affiliate links which means that by using these links and/or codes, I may received a small compensation for sharing the links with you. The price you pay for the product or service is not higher. Thank you for using affiliate links as it provides a way for me to continue doing what I do as an Instructor, blogger, and event organizer.
I hope this helps you get to know your Silhouette Cameo machine a little bit better!
I have lots more things on my project list to share in the future!
I would love to see what you are creating with your Silhouette software or machines! Feel free to post on my Facebook group at Silhouette Secrets with EllyMae.
Save this for future reference by pinning the image below.
Enjoy !
THANK YOU for your support! How can you help? Click HERE & buy a coffee. Every little bit helps with the cost of running the site.
Silhouette Classes
Never stop learning! Let me help you take the anxiety out of learning with Silhouette and get to creating faster! My Silhouette classes are heavily focused on software, so you can take the skills & techniques taught and apply them to many future projects!
**This post may contain affiliate links. What that means is that I may receive compensation if you purchase through the links I have provided. The price you pay for the product or service is not higher but I may get compensated for sharing.
This week I cut the pieces to make up 40 card kits for an event I’m teaching at. I set the video camera up to record a time lapse of the entire cutting process.
This was 3 hours of real time cutting. 23 – 12″ x 12″ sheets of cardstock cut on a 24″ x 24″ cutting mat with the Cameo Pro 40 card bases 80 daisy pieces 320 flower center pieces 80 leaves
I have added the video to my YouTube channel HERE. It is condensed down to 7 minutes for the 3 hours in real time it took.
I’m sharing more tips below too!
Tips for cutting 4 sheets of cardstock on the Cameo Pro at one time.
Guides
Use Guides in the Silhouette Studio software placed at the 12″ marks to show where your pages will meet. Keep the design away from the edges of the cardstock.
One of the biggest issues I see when troubleshooting issues on the Cameo Pro is not having an adequate workspace setup for it to function properly.
This machine is big and it needs a large workspace to function and feed properly. It cannot work against gravity or the cuts will not line up consistently.
If you are using the 24″ cutting mat, it should have a workspace of 38″- 40″ in width for the machine to be securely and stable on and 52″ of length that is absolutely flat. This allows for 22″ in front and 22″ behind the machine for it to feed the cutting mat as flat as possible in and out of the machine as it cuts.
Make sure the right roller is locked in position properly
The right roller should be rolling on the edge of the cutting mat and not across the adhesive on the cutting mat. The middle indent of the right roller should be lined up with the gray arrow on the machine at the 24″ mat mark.
The right roller can only be locked in place where the gray arrows point to on the machine roller bar. For the 24″ cutting mat, that is the far right gray arrow.
If you look at your machine closely, you will see that the right roller is directly under the indent on the white pinch bar. That is the only place that the roller makes contact with the surface underneath, so placement is very important for feeding properly.
If the right roller is not placed properly you may experience future cut issues which can include: – gumming up the roller and there is no easy way to clean this roller on the Pro – wearing a groove in the cutting mat which causes an uneven surface for cutting – mat can get stuck inside the machine – feed issues as the rollers do not roll at the same rate of speed because the right roller is either getting stuck or the roller is slipping on the material – affect print and cut accuracy if the rollers are rolling at different rates – cuts not connecting – mat can skew Note: the rollers rolling at different rates is not something you can usually see with the naked eye, even when studied closely. However, you can see it when the cuts do not connect completely.
Cutting Mat is loaded properly
The Cameo Pro is different than other machine models. It has 2 load lines. The line on the left side of the arrows is ONLY for the 24″ cutting mat.
The line on the right side of the arrows is for ALL other sizes of materials and cutting mats.
If the cutting mat is not loaded properly it can cause feed issues or it to skew in the machine as it’s cutting.
Above I shared a photo of the right roller, but where is the left one exactly? If you look closely at the left roller, it is directly below the dot on the roller bar. This is where the roller grips the mat or material.
The 24″ x 24″ mat is a monster of a cutting mat and it has heft to it. The load line and the right roller placement is very specifically designed to gripe each side of the mat so it can feed it in properly.
If the mat catches on something or does not load completely straight, unload it and load it again – as many times as needed. If it does not start off straight, it’s not going to cut in the properly locations and the cuts may be off. On my 1st set of daisies being cut, I did not notice that the mat was slightly off and it did affect a few of the flowers getting cut off a bit. It happens – plan for it! If in doubt, always reload the cutting mat.
Use the Autoload feature whenever possible
This will help to ensure that you are able to support the mat and hold it up to the rollers as even as possible. The monster mat can be difficult to get the hang of, but keep on practicing and you will get it. It is much easier to load if you have the proper clearance in front of the machine to help keep the mat flat and not hanging down over the edge.
Any debris on the cutting mat can interfere with the cut being clean as it creates an uneven cutting surface. Clean off any previous bits of debris left behind by the materials.
In the video I shared above, when I load the 2nd set of white cardstock, you can see me smoothing it down to secure it to the mat. When I did, I noticed uneven areas under the cardstock and I lifted it to clean it and placed it back down. Any debris can affect your cuts.
Weed carefully.
Sure you see videos of people all the time that seem to just rip off the excess of the material whether it’s for cardstock or vinyl. But, it is not always the case.
Go slow when weeding and you will find you can save your design most times. My Autoblade is very well used and it’s still cutting well, but the design I was using had interior corners and cuts. It cut, but by carefully removing the excess cardstock, I didn’t rip off any petals from the flowers or pieces of the centers.
I hope these tips have helped to show you a few things about the Cameo Pro! For more tips and troubleshooting on the Cameo Pro – check out the header on the blog HERE.
I would love to see what you are creating with your Silhouette software or machines! Feel free to post on my Facebook group at Silhouette Secrets with EllyMae.
Save this for future reference by pinning the image below.
Enjoy !
THANK YOU for your support! How can you help? Click HERE & buy a coffee. Every little bit helps with the cost of running the site.
**This post may contain affiliate links. What that means is that I may receive compensation if you purchase through the links I have provided. The price you pay for the product or service is not higher but I may get compensated for sharing.
The Cameo Pro is Silhouette’s 24 inch wide cutting machine that was released in November 2020. It is a big machine!
In order to have the ability to cut 24″ wide, it has to have a wide footprint.
One of the biggest things we see with cut issues on the Cameo Pro is not having it fully supported in order to cut properly.
Since it is a big machine, it HAS to have a big workspace. It is NOT a machine that can work against gravity.
If you are using a 24″ cutting mat or cutting long lengths of vinyl with the machine I recommend your table surface be at least 40″ wide by 52″ long. The machine CANNOT work against gravity, so the mat or materials have to be fully support in the FRONT and the BACK of the machine or you can experience cut issues.
When I received my Cameo Pro to test it for Silhouette, my husband immediately thought that we should build a custom stand/table for it and set to work on planning it. (It may have been motivated by the fact that I took over his gaming table.) We completed the DIY Cameo Pro Stand and have shared those instructions for free HERE.
However, we also understand that not everyone has the ability to get the wood or pieces cut and assemble themselves, so I am also going to provide a few suggestions of work surfaces that could be alternatives for you.
Cameo Pro Workspace
Let me start by explaining what is needed and why I recommend this.
Keep in mind that any workspace for the Cameo Pro should be at least 40″ wide and I recommend 58″ long.
Why do I recommend this?
The Pro machine itself is 34.5″ wide, so you could probably get away with 36″, but the extra little bit means it’s more secure. I recommend 40″ wide for stability. I have seen many, many photos where a user does not have it fully on a table and each end is hanging off. This is not fully supported and the Cameo Pro is too big of an investment to risk something happening to it. If the Pro is not fully supported, it can cause cut or feed issues.
For best cut results, the Pro should be used with the roll feeder/mat support set up at all times.
Why?
These roll feeder/mat support parts provide support for the cutting mat or vinyl to roll as flat as possible into the machine. If materials are hanging down in front (or behind) it can affect how the machine feeds, which will affect the cuts.
And the roll feeder/mat support NEEDS to be fully flat on a table. It should NOT be hanging off the table as it can cause stress on the points where the roll feeder/mat support attaches to the machine and can decrease the lifespan on the parts. The roll feeder parts are not replaceable parts.
With the Cameo Pro set up properly with the roll feeder/mat support and stability bar installed, it is 14″ from front to back. So you will need a workspace that is one solid piece and I would suggest at least 15-17″ front to back. We built our stand 22″ front to back so it is stable and set up full time in that stable position.
Now, if you are planning to use the 24″ cutting mat or long lengths of vinyl, I recommend that you have at least 22″ of flat surface in front and behind the machine. This means that a flat, secure workspace of 58″ is necessary for the machine to function properly with a 24″ x 24″ cutting mat. If the cutting mat is not fully supported, you can experience feed issues as the rollers cannot work against gravity to pull the weight of the mat into the machine.
If you are experiencing feed issues or cuts overlapping and you do not have this large workspace, I suggest placing it on the floor to cut with and see if that solves it. If not, then there may be other factors at play and I would suggest taking a close look at this post 5 Steps to Setting Up & Troubleshooting the Cameo Pro
If the Pro is not set up properly, it will not cut properly and consistently. These are the 2 biggest things we see when troubleshooting issues: – workspace too small – machine not set up properly
Affiliate links may be present in the following blog post and as an Amazon Associate I earn from qualifying purchases.
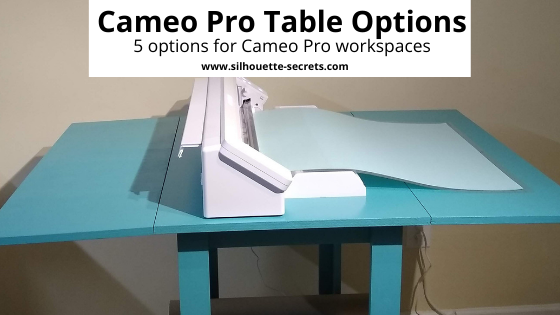
Cameo Pro Table Options
Make sure first off that you have the space to be able to expand the table as needed for the full workspace necessary.
Option 1 – Large table
Any large table such as a kitchen table or a large piece of plywood securely on top of a table would work as long as it is 36″- 40″ wide x 58″ long.
This is actually what I started with when I was testing the Pro. Well, to be honest, I first had it on my video table that you can see in this unboxing video. https://youtu.be/Qb6CsliXSlA And I quickly found that it was not sufficient enough to use the 24″ cutting mat or long lengths of vinyl.
All of my recommendations are based on my real-time mis-cuts and feed issues during testing and my own cutting, due to the machine not being able to pull it in against gravity.
This plywood tabletop worked well for me during the hundreds of testing hours I performed from September – November 2020 before the machine was released to the public. It is not a smooth surface, so I did have to be careful not to get splinters. However, while not fancy, it got the job done.
This table would work with the dimensions of 58.75″ W x 36″ D x 30.25″-39.25″ tall with the Cameo Pro machine fully supported in the center panel. In order to have the roll feeder/mat support installed, one side would need to be extended at all times.
The wheels are smaller, so be careful if you have any uneven surfaces such as tile floors or plan to move this around often.
It also has a couple baskets and shelf that could be used for storage.
The table dimensions are 36″ L x 59″ W x 35″ H (open) and 36″ L x 13″ W x 35″ H (closed).
It is very similar to Option 2 and would need to have one side extended to have the setup correct. It also has smaller wheels as well. Only something to note to be careful with from someone who has broken wheels off furniture moving it around my tile floors.
This table measures 59″ L x 35.8 W x 29″-39″ H (open) or 17.5″ L x 35.8 W (closed). According to the description dimensions, the top is just barely large enough to have the Pro with the roll feeder/mat support setup without a side extended. The Pro width is 34.5″ wide, so while I say I recommend 36″-40″, I think this would be stable enough.
This table also has 2 shelves below that could be used for storage. The wheel size looks the same as previous options.
Option 5 – Drop leaf table
You can find these in used furniture shops, but they are also making a comeback. It is the idea we used for the design of our DIY Cameo Pro stand.
I have seen recommendations on one from Ikea, but in my search, the ones I found we not quite wide enough. Again, my recommendations is 36″-40″ wide so the Cameo Pro can sit securely without hanging over the edge of the table.
—–
Now, are these the only options? No.
But, they are a few that might work for you or at least give you some idea of what you are looking for.
If I were to choose between the options above, I would choose either Option 4 or Option 5. But, it really just depends on what will work best for you. For me, I will probably be using our DIY stand forever, but one of these other tables may find their way into my craft studio in the near future for another workspace.
The biggest thing that I want to emphasize is that you need an adequate workspace to have the Cameo Pro function properly. If the machine is not set up properly and on a large work space, it is NOT the machine’s fault if it’s not working right. It HAS to be set up properly to cut properly.
We troubleshoot a lot of Silhouette issues each week. Hundreds into the thousands and in most cases we can get the user up and cutting again, no matter their Silhouette machine model, IF they are willing to troubleshoot with us.
If you have hung in there and are still reading, I hope you have gathered some tips and things to think about.
Save this for future reference by pinning the image below.
Enjoy!
THANK YOU for your support! How can you help? Click HERE & buy a coffee. Every little bit helps with the cost of running the site.
Or if you are looking for more in-depth, step-by-step classes, check out all of my online Silhouette classes on my Teachable site HERE.
**This post may contain affiliate links. What that means is that I may receive compensation if you purchase through the links I have provided. The price you pay for the product or service is not higher but I may get compensated for sharing.
This class has taken a lot of time, testing and materials to put together, but it was so much fun doing so!
Cutting Leather with the Cameo 4 & 3 mm Kraft blade is now released on my Teachable site with all the other Silhouette classes I currently have available.
If you were a May All Things Silhouette Conference attendee, then you’ve already received access to this class. Make sure you view it before July 31st for regular attendees or if you purchased the Ultimate Experience, you have until September 30, 2021 to watch this class.
Here are some of the designs created during the testing and recording of this class.
For the class I did a quick video explaining some of the types of leather and tips on why some work and some do not. This is also included with the class and I’d recommend anyone who wants to cut leather check it out prior to buying the leather.
A full class supply list can be found on the Leather class page on my Teachable site HERE.
This class is an intermediate class level, however, I do believe that if the instructions are carefully followed, any user will have success with the projects.
Save this for future reference by pinning the image below.
Enjoy!
THANK YOU for your support! How can you help? Click HERE & buy a coffee. Every little bit helps with the cost of running the site.
Or if you are looking for more in-depth, step-by-step classes, check out all of my online Silhouette classes on my Teachable site HERE.
**This post may contain affiliate links. What that means is that I may receive compensation if you purchase through the links I have provided. The price you pay for the product or service is not higher but I may get compensated for sharing.
In October 2019 I released a cover cut file for the Silhouette Cameo 4. This is a cut file that can be used to cut out of adhesive vinyl and then applied to the Silhouette machine cover to customize it how you like.
I’ve updated the cover cut files and created a couple others that you will find below.
If you would like to see how I created these cut files, check out the original post HERE Cameo 4 Cover & More
Find the Silhouette machine cover files by clicking on the links below:
Note: this file is for models that say “Cameo Pro” at the top. For international machines that say “Silhouette Cameo Pro” the cutout for the top middle panel will need to be extended. I will update the file when I get measurements.
Note: You will notice that I have not fully committed here to adding vinyl to my Pro machine. I am just not sure what I want to add to it. I did cut and test the file for all the pieces and then used Scotch tape to add it to the front of the machine to verify and test. This is also a great way to help in placing it on the machine and getting it exactly where you want it before you commit permanently to peeling that backing off the adhesive vinyl. When you are ready, lift one side, peel the backing off and cut about halfway down. Smooth the vinyl down on one side and then lift the next side and peel the backing. This hinge method can save you some headache of getting it on straight the first time. I did cut with scissors around the edges of the decal pieces to line it up better.
Note for International users outside of the U.S. & Canada: due to regulations in your countries, the Silhouette logo on the front of the Cameo 4 model machines may be different. Regulations require it to say Silhouette Cameo, Silhouette Cameo Plus, or Silhouette Cameo Pro versus just Cameo, Cameo Plus, or Cameo Pro. This does change the measurement of the inside rectangle of the top panel where it is backlit on the machine. The Cameo 4 – 12″ model file does contain the alternate panel and I am working on getting measurements and creating the alternates for the Cameo Plus and Pro models.
Silhouette Portrait – I do not have a cut file for this as the Portrait has quite a curve to the front of it and it is more difficult to get a vinyl to wrap with no wrinkles on this surface area. Personally, unless you are very experienced with curved vinyl wraps, I would cut a design decal and apply it to your Portrait. But, the only way to know is to practice it. To see how I created the original cut file check out this post HERE.
If you do create a cover for your Silhouette machine, please share on a photo of the finished project on my Facebook group. Silhouette Secrets+ Facebook Group We love seeing the different selections of vinyl used to customize the cover.
As always, please understand that I have measured and created these files for personal use only. If you do share, please direct Silhouette user’s to this blog post to download the file direct. And thank you for sharing!
Save this for future reference by pinning the image below.
Enjoy!
THANK YOU for your support! How can you help? Click HERE & buy a coffee. Every little bit helps with the cost of running the site.
Or if you are looking for more in-depth, step-by-step classes, check out all of my online Silhouette classes on my Teachable site HERE.
**This post may contain affiliate links. What that means is that I may receive compensation if you purchase through the links I have provided. The price you pay for the product or service is not higher but I may get compensated for sharing.
Just released! New online video class with tips, tricks, and troubleshooting for sketching with your Silhouette.
I had no idea how popular this class would be when I submitted it for the May All Things Silhouette Conference. I had a limited window of opportunity right after conference to get this recorded and edited, but I’m happy to announce that after 18 hours of video production – IT’S HERE!!!
This is a total video time of around 2 hours, however, the class will take approximately 3 hours to complete with all the sketching and design time.
In this class you will learn all about sketch pens & creating sketch designs. We discuss different pen styles, adapters, sketch designs, fonts, filling designs, and trouble-shooting too. We will be doing some testing, demos, and finished projects. At the end of the class, you will have a better understanding of what works and doesn’t work for sketching with your Silhouette machine. This class can be completed with a Portrait, Cameo, or Curio machine.
Affiliate links may be present in the following blog post and as an Amazon Associate, I earn from qualifying purchases.
There are some differences between the different Silhouette model machines on the supplies you might need for this class, so I am including the class supply information below.
Sketching Supplies:
Cameo 4, Cameo Plus, Cameo Pro, and Portrait 3 owners
Save this for future reference by pinning the image below.
Enjoy !
THANK YOU for your support! How can you help? Click HERE & buy a coffee. Every little bit helps with the cost of running the site.
Silhouette Classes
Never stop learning! Let me help you take the anxiety out of learning with Silhouette and get to creating faster! My Silhouette classes are heavily focused on software, so you can take the skills & techniques taught and apply them to many future projects!
**This post may contain affiliate links. What that means is that I may receive compensation if you purchase through the links I have provided. The price you pay for the product or service is not higher, but I may get compensated for sharing.
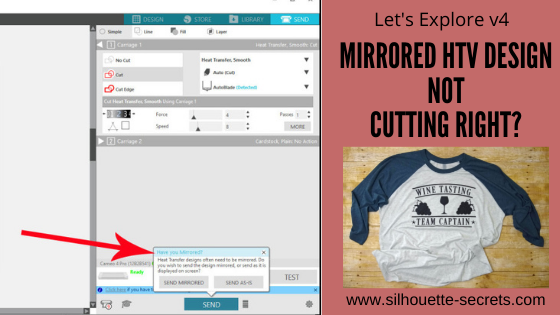
Having issues with mirroring HTV and it not cutting right? Did you let the software mirror it for you and it still didn’t cut right? Did it cut what was off the cutting mat in the holding area and not your design?
I’ve been seeing this pop up a lot and I originally posted this information at the bottom of an HTV troubleshooting post called Cutting HTV with the Cameo 4, Plus, or Pro – Troubleshooting However, it is at the end of the post and I am seeing many user’s post with questions on why it’s not mirroring it correctly. Hopefully these details below will explain why and how to fix it for your project so you can get back to creating.
Affiliate links may be present in the following blog post and as an Amazon Associate I earn from qualifying purchases.
I would suggest reading through this next section entirely so you understand how this one works and also how to “fix” it.
In 2016, there was a new “pop-up” message that was released into the software for Heat Transfer materials called the Mirror pop up.
For heat transfer materials you are generally placing the material face down on the cutting mat and then cutting through the backside of the material. This means that you have to “mirror” the design so it will cut properly. How many times have you cut heat transfer material only to have that “head smack” moment after when you realized you forgot to mirror the image? So the idea behind the “pop-up” message is great!
However, this “new” Mirror pop-up released in 2016, did not just mirror the design in the exact place that it was on the design mat. It flipped the entire mat when it mirrored the image, but it does not show that on the screen. So the design that shows on the screen on the left side of the mat/material, is really going to cut on the right side if you choose “Send Mirrored” and let the software mirror it for you.
If you choose “Send As Is” it will send it to cut in the exact location and exactly as you see it on the screen.
Now, I know that may seem like “old news” since this “bug” has been in the software since 2016. Some users got used to it this way while other users would learn to flip the design themselves and just choose “send as is”.
Now, let’s move to the present. A few months back, I started to notice users commenting that their HTV was not cutting as it should. They would tell the software to mirror it and it wasn’t cutting in the right spot. I reported the issue and found out that the old mirror “bug” was changed in February 2020 the software release. Now, it would flip the design in the exact location you have it placed on the mat, but still does not show you that on the screen. However, if you have anything else on the design file, it will mirror all of the objects. Whether they are in the “holding area” off the cutting mat or not.
If you choose “Send Mirrored“, it could mirror all of the designs on the file. So when it flips it, this is how it would cut.
Now that would come as a complete surprise when you cut and it’s not what you thought it would be. Note: the above screen shot is a representation of how it may cut, you do not see this change on the software screen at all.
This is present in the software versions from v4.4.247 until v4.4.438.
From v4.4.438 and higher, the software now is back to mirroring the design on the opposite side of the design mat than what shows on the screen.
How to work with this?
In the grand scheme of things, this is not a big deal, if you know about it and know how to work with it.
My suggestion to you is to mirror the design yourself.
The fastest way to do that is to right click on the design on the Design tab before you go to cut and choose Flip > Horizontal.
This will flip the image on the screen, in front of your eyes.
And it will then cut in that exact spot if you choose “Send As Is” on the Send tab.
If you do not have right click menus enabled on your computer, you can also find this in the top menus under Object > Mirror > Flip Horizontally too.
I use the Mirror Pop up as my final reminder and it has caught me several times when I forgot to mirror the design. Then I go back and mirror it myself before I’ve sent the design to cut.
Hopefully with those tips above, you will be well on your way to cutting HTV smoothly and being able to troubleshoot when you do have an issue.
Save this for future reference by pinning the image below.
Enjoy!
THANK YOU for your support! How can you help? Click HERE & buy a coffee. Every little bit helps with the cost of running the site.
Or if you are looking for more in-depth, step-by-step classes, check out all of my online Silhouette classes on my Teachable site HERE.
**This post may contain affiliate links. What that means is that I may receive compensation if you purchase through the links I have provided. The price you pay for the product or service is not higher but I may get compensated for sharing.
All of the Silhouette machines can do print and cut projects. This is where you can set up a graphic image to be printed through the printer connected to your computer and then have the Silhouette cut around that shape. It uses a process called registration marks to find where the design is on the page.
This tutorial is written in v4.4.476 of the Silhouette Studio software.
No matter if you are an experienced user or brand new to the Cameo Pro, I would suggest starting with all the basics, using all the defaults, and doing a test print and cut project to see how the new Cameo Pro is going to work. This will save you hours of frustration and materials.
What I find most often when I am troubleshooting with a user is that they have been setting things up so far away from the defaults for so long and have been lucky that it’s worked on the older model machines. However, with a new machine, I would highly recommend starting at all the defaults and basics and then once you have a successful cut, then start playing with things and seeing how far you can adjust them.
I use the basic setup and default setting for all my print and cut projects and rarely ever have an issue with a mis-read or mis-cut.
Affiliate links may be present in the following blog post and as an Amazon Associate I earn from qualifying purchases.
Note: this post contains both photos and videos
Let’s take a look at the different options for the Cameo Pro.
Print and Cut with the 24″ mat
The Cameo Pro comes with a monster of a cutting mat. This is great news for bigger projects! Since this is the mat that comes with the machine, we will start there, but I would highly recommend that you get a smaller cutting mat to use if your print and cut project will fit on it. It is much easier to use the smaller mat for these smaller projects than the 24″ mat.
Print and Cut Setup for 24″ mat – letter size media
On the Page Setup Panel choose #1 – Machine = Cameo Pro #2 – Mat = 24″ #3 – Media Size = Letter (whatever page size you are printing on)
Notice how the software places the media size in the top left corner, but with a 24″ mat it is a very specific location. This will be important when we place the material on the cutting mat.
On the Page Setup Panel, check the box next to Show Print border and Show Cut border. Print border = gray line Cut border = red line
On the Page Setup Panel, click on the 3rd tab for the Registration Marks. Click the circle next to On. Then click on the Restore Defaults button.
When the registration marks are turned On, you will see 3 marks appear on the media size. This is how the Silhouette machine “reads” where the design is placed on the page. Click on the Restore Defaults button. This is going to be where the Silhouette machine gives the most accurate read and cut.
Since the Show Print border is on, the gray border will show what the printer margins are with the current printer that is connected to the computer for the media size set under the printer setup. The biggest thing you want to look for here is that the bottom left registration mark is not outside of this Print border (gray line). If it is, you will need to click on the Advanced Options on the Registration Marks Panel and bump up the bottom registration mark until it will print completely. All 3 of the Registration Marks have to be on the printed page in order for it to read accurately. I only suggest this if the mark is showing outside of the print border.
If this is the first time doing a print and cut or the first time doing this process on the new Cameo Pro, I would suggest doing a test print on cardstock first. All this means is to pick a print and cut design, place it on the design mat within the boundaries, and then print on cardstock as a test. This will save you from using more expensive materials and having something go wrong.
With a print and cut project, you want to make sure to keep the design out of the cross-hatched areas on the page and within the red cut border. The cross-hatched areas do not print on your final page, however, this is the clearance that the optical eye under the blade housing of the Cameo needs in order to read the registration mark accurately. If there is a design in the cross-hatched area or dark colors near the area, it can interfere with the reading of the marks and either give a registration error or an inaccurate cut.
In some cases, the optical eye does not like any design between the 2 cross-hatched areas at the top of the page. It can interfere with reading accurately.
Once the page is all setup and ready to print. Click on File > Print in the top left corner.
In the v4.4 software, a “print preview” will pop up (unless you’ve turned it off). You can review this for any things that look out of place and to get to the printer preferences will click Print in the bottom right corner.
Now, the printer window will come up. This may look a bit different for each user because of the different printers being used. Choose the printer the job will be sent to.
Then I choose Preferences on my printer panel. Under this selection I can change my page size, media type, and have the option for an additional print preview. I highly suggest this as it has saved my butt a few times and I’ve caught things before wasting ink and paper.
Click Ok. And then click Print.
Note: If you changed the page size that will be printed on, click on the Apply button and then cancel. Then choose cancel again on the Print Preview and start over at File > Print. This will ensure that the printer margins are showing accurately on the page size you changed to.
Since I enabled the additional Print Preview, I get a new Preview window that pops up where I can verify that it all looks correct and that all 3 registration marks will print completely on the page. This may seem like an extra step, but it has saved me more times than I can count.
Once it’s all good, click on Print. Make sure to let the printer ink dry before handling the page. If the registration marks get smeared on the page, it can affect the reading of the marks.
Place the printed page on the 24″ cutting mat exactly as it shows on the software screen. This will be 1/2″ to the right of the outside grid line on the left edge of the cutting mat. Make sure that the top of the page is covering the grid lines or the Cameo can pick up the black of the grid lines as it reads.
With the Cameo 4 and the 24″ mat, you will need to have the mat fully supported in the front and behind the machine. This means that you will need 22″ of clearance and support in the front and in the back. The cutting mat needs to roll in and out of the machine as flat as possible. It cannot hang down on either the front or backside as it cannot work against gravity. If the mat is hanging down, it can affect both the reading of the registration marks and the cut accuracy of any project. (This is another reason I’d recommend a smaller mat if the project allows)
I would recommend using the roll feeder supports with the additional mat support at all times for best results with the 24″ mat.
Load the 24″ cutting mat in the Cameo. The left edge of the cutting mat should be next to the line on the left side. The rollers should be rolling across the edges of the cutting mat and not across the adhesive on the mat.
One of the neat features of the Cameo 4 models now is the Autoload feature. Press the load button and it will start to flash. The Cameo will automatically load the mat/material 6 seconds after the sensor is covered. The mat /material needs to be held up to the rollers securely (not pushed under) and the rollers will grab it and pull it in after 6 seconds.
Note: If the mat/material does not load straight, press unload and try again. If the machine “loads” before you are ready with the material up to the rollers, press unload and try again. The machine will think it’s loaded if you do not press unload.
Check out this quick video showing the Autoload feature.
Back in the software, click on the Send tab in the top right corner. Verify that the design has cut lines around it. Bold red lines = cut lines.
Note: it is very important that nothing be moved on the design page after the page has been printed or it can affect the cut accuracy.
Choose the Material that is being cut. Verify that all the settings are correct.
Note: if this is the first time cutting this material, a test cut is always recommended. However, you do not want to test cut in the top left corner of a print and cut project or it can interfere with the reading of the registration marks. I like to use a capital B and place that in a blank area on the design page to perform the test cuts. Turn the cut lines off for the full design and then cut only the capital B. Or use a scrap piece of the same material to perform the test cuts.
Once everything has been set and verified, (cross your fingers) click on the Send button in the bottom right corner.
The Cameo will now begin to look for the Registration Marks. It starts at the top left square, then moves down to the bottom left corner, and then moves up to the top right corner.
By following these same steps each time, I have great success with print and cut.
Print and Cut Setup for 24″ mat – large format media sizes
How large can you print and cut on the Silhouette machines?
This is determined more by the size of your printer capabilities than the limits of the Silhouette machine. I have a Canon TS9521C printer and love it! I love the ability to print on 12″ x 12″ cardstock for projects, especially when creating multiples of a design.
If you have a large format printer, then you can set up print and cut projects with the same size you can print. However, keep in mind, print and cut is most accurate when using a cutting mat. While it can be done without a mat, there is greater chance of feeding errors and mis-reads, so especially for a beginner, I would highly recommend practicing with a cutting mat first.
The setup steps will be the same for any size you can print.
Here are 2 examples:
12″ x 12″ media size setup in the Silhouette software
12″ x 12″ page on the 24″ cutting mat
11″ x 17″ media size setup in the Silhouette software
Like I said at the start, I highly recommend getting a smaller cutting mat to use if your project will fit on it. Not only will it be easier to manage, but it will save a few dollars in the long run since you are not having to replace the 24″ mat when it’s no longer sticky.
The setup for Print and Cut is the same no matter what size cutting mat you are using. The same steps apply as outlined above with a 24″ mat, you will just adjust according to the smaller mat in the software and loading the mat.
On the Page Setup Panel choose #1 – Machine = Cameo Pro #2 – Mat = 12″ #3 – Media Size = Letter
Notice how the software places the media size in the top left corner. The media is covering the grid lines in the top and on the left side. This exactly how you should place the material on the cutting mat.
On the Page Setup Panel, check the box next to Show Print border and Show Cut border. Print border = gray line Cut border = red line
On the Page Setup Panel, click on the 3rd tab for the Registration Marks. Click the circle next to On. Then click on the Restore Defaults button.
When the registration marks are turned On, you will see 3 marks appear on the media size. This is how the Silhouette machine “reads” where the design is placed on the page. The machine reads best with the default settings. While the software allows the marks to be moved or changed, the defaults are the most accurate and where they can guarantee the best results. I suggest starting with all the defaults to test and then you can adjust things to see what will still work for you after you’ve had successful registration and cuts. Changing things too much and too fast can lead to frustration, registration errors, and inaccurate cuts.
Since the Show Print border is on, the gray border will show what the printer margins are with the current printer that is connected to the computer for the media size set under the printer setup. The biggest thing you want to look for here is that the bottom left registration mark is not outside of this Print border. If it is, you will need to click on the Advanced Options on the Registration Marks Panel and bump up the bottom registration mark until it will print completely. (see above for examples) All 3 of the Registration Marks have to be on the printed page in order for it to read accurately. I only suggest this if the mark is showing outside of the print border.
Like I mentioned above with the 24″ mat, if this is the first time doing a print and cut or the first time doing this process on the new Cameo Pro, I would suggest doing a test print on cardstock first. All this means is to pick a print and cut design, place it on the design mat within the boundaries, and then print on cardstock as a test using all the defaults. This will save you from using more expensive materials and having something go wrong.
Make sure to keep the design out of the cross-hatched areas on the page and within the red cut border. The cross-hatched areas do not print on your final page, however, this is the clearance that the optical eye under the blade housing of the Cameo needs in order to read the registration mark accurately. If there is a design in the cross-hatched area or dark colors near the area, it can interfere with the reading of the marks and either give a registration error or an inaccurate cut.
In some cases, the optical eye does not like any design between the 2 cross-hatched areas at the top of the page. It can interfere with reading accurately.
Once the page is all setup and ready to print. Click on File > Print in the top left corner.
The steps to print are the same as directed under the 24″ cutting mat section above. I follow the same steps each time I print a job.
Here is a quick video screen grab of the Print Process that follows the same steps as written directions above.
Keep in mind that each printer may vary in the menus that it brings up and your printer menu and preferences may not match mine exactly. But, the steps will be the same no matter what your printer menu looks like.
Once the page is printed and completely dry, place it on the 12″ cutting mat exactly as it shows on the software screen. Make sure that the top of the page is covering the grid lines or the Cameo can pick up the black of the grid lines as it reads.
Adjust the rollers so they are securely locked in place to roll across the edges of the cutting mat and not across the adhesive. Something to keep in mind with the Cameo Pro is that the rollers are now under the square roller bar. There is no easy way to clean these rollers if they get gummed up from rolling across the adhesive on the cutting mat.
Roller is directly under the embossed rectangle on the white piece.
Here is an example of where the right roller should be for the 12″ cutting mat.
Load the 12″ cutting mat in the Cameo Pro. The left edge of the cutting mat should be next to the line on the right side.
Back in the software, click on the Send tab in the top right corner. Verify that the design has cut lines around it. Bold red lines = cut lines. Choose the material and verify it all looks good. Then click the Send button in the bottom right.
The Silhouette machine will begin looking for the marks starting in the top left corner with the square, then move down to the bottom left corner, and then up to the top right corner. Keep in mind that if there is any part of the design in the cross-hatched area it can interfere with the accurate reading of the marks and can cause a registration error or a mis-cut.
I follow the same basic steps for Print and Cut each time no matter which machine I am using and rarely have an issue with registration errors or inaccurate cuts. I would recommend setting it up exactly as the tutorial shows above for the most accurate read and cut. If you are still experiencing issues, here are a few tips to try.
Troubleshooting Print and Cut with the Cameo Pro
Tip #1 – Use the default settings I cannot stress this enough! Not only for new users or new to the Cameo Pro users, but in general – start with the defaults to eliminate a lot of the things that could be the issue and then continue troubleshooting from there.
Tip #2 – Use the mat supports. No matter what size mat you are using, the mat needs to roll in and out of the machine as flat as possible. The mat support with the roll feeder set up properly can make a big difference.
Tip #3 – Make sure the mat is fully supported. The cutting mat has to be fully supported and not hanging down in the front or in the back at all. The machine needs the proper clearance, proper support, and stability in order to function well.
Tip #4 – Make sure the mat is loaded correctly. This will vary depending on the size of the cutting mat you are using.
24″ cutting mat Load the left edge next to the line on the left side.
12″, 15″, 8″ cutting mats all get loaded with the left edge next to the line on the right side
Tip #5 – Make sure the registration marks on the page printed correctly. The marks should match on the printed page exactly as they show in the Silhouette software on the media page.
Tip #6 – Hold the mat up a bit higher than level If you still encounter a registration mark or cut issue, try holding the cutting mat up a bit higher than flat as it reads the marks.
Tip #7 – Use a smaller cutting mat when possible. While you can use a 24″ mat for projects, it is a large mat and can take practice to get the hang of handling. A smaller cutting mat can be easier to complete those smaller projects with.
Print and Cut is one of my favorite things and I do have many other resources as well if you are still having issues.
Resources:
Print and Cut Basics to Design to Troubleshooting Course HERE
Save this for future reference by pinning the image below.
Enjoy!
THANK YOU for your support! How can you help? Click HERE & buy a coffee. Every little bit helps with the cost of running the site.
Or if you are looking for more in-depth, step-by-step classes, check out all of my online Silhouette classes on my Teachable site HERE.
**This post may contain affiliate links. What that means is that I may receive compensation if you purchase through the links I have provided. The price you pay for the product or service is not higher but I may get compensated for sharing.
THANK YOU for your support! How can you help? Click the link to buy a coffee. Every little bit helps in the cost of running the site.