Posted on 4 Comments

Let’s Explore the Silhouette Roll Feeder

Silhouette Roll Feeder – Cameo 4

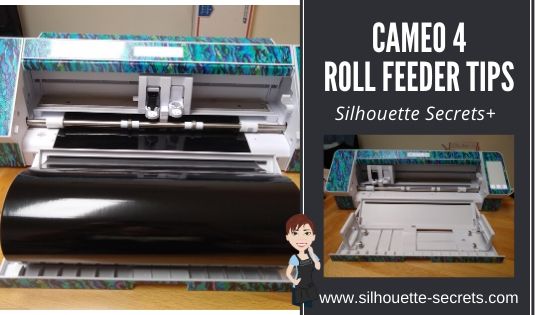
On the Cameo 4, the roll feeder is built into the machine with a slide out drawer on the front.

Cameo 4 with built in roll feeder

Typically, I don’t need to use of the roll feeder so it stays tucked safely inside of the machine and I use a mat for most of my vinyl cuts. However, I was cutting lots of vinyl and several long cuts that were over 24″, so I put it through the test.

To set up to cut without a mat, there are a few steps you want to take to get a successful cut.

1 – Set up the Silhouette software on the Page Setup Panel for no cutting mat and for the correct page size or media size.

Keep in mind that you will lose 1/4″ of cuttable space and 1″ of cuttable space on the back end of the material. This is so the Silhouette machine can hold the material securely in the machine. Make sure to check the “Show Cut Border” on the Page Setup Panel so the maximum red cut border shows on the design page.

2. Move the right roller in one groove for 12″ materials. This will help the Silhouette grip the material securely.
To move the roller on a Cameo 4, flip the roller bar lever down on the right side to release the roller bar. Then press the lock button on the roller and slide the roller to the left until it settles into the groove on the roller bar. Then flip the roller bar lever up to lock the roller bar in place.

Move right roller in

3. Setup the roll feeder on the Cameo 4. Carefully, pull the roll feeder storage drawer out. Carefully, flip the roll feeder guide up. Then carefully, open up the roll feeder supports on the right and left sides. The right roll feeder support slides in to allow for 9″ and 12″ rolls of vinyl to be used.

Cameo 4 Roll Feeder Setup

4. Place the material roll in between the roll feeder supports and slide the right support to the left to the edge of the roll. Place the material through the roll feeder guide.

Roll Feeder Setup

5. Load material in the machine with the left edge of the material next to the load line on the left side. Press the load button. Make sure that both rollers are gripping the material securely. If the material is pulled in crooked or unevenly, this can affect how it rolls and the cut quality. If needed unload the material and reload to get it loaded as straight as possible.

For more tips on setting up a Silhouette to cut without a mat check out this post
Cutting without a Mat HERE

Roll Feeder Tips

1- Place the material on a cardboard roll.
I have seen many users have an issue with the roll feeder sliding back into the machine while in use. I did notice it worked much better when the vinyl was on a roll.

Oracal 651 vinyl on roll

If the roll feeder support was up against the edge of a cardboard roll, it was smoother going in and out of the machine.

If the vinyl was not on a roll or was longer than the roll being used, it caught more on the edge of the roll feeder support as it was trying to move in and out. The cardboard roll was a smoother surface than the plastic edge of the vinyl itself.

Vinyl longer than roll

In the photo above, you can see how the vinyl was just a bit longer than the cardboard roll that was being used. The vinyl didn’t roll back and forth as easily as if it was just against the cardboard of the tube.

2. Tightly rolled materials did not roll as freely through the machine as it had to pull against the material harder to feed it into the machine as it was cutting. This could explain why some users have the roll feeder pull back in towards the machine while cutting.

Tightly rolled vinyl

These rolls above have been tightly rolled since I ordered them. (I don’t even want to admit how long ago that was)

I had the best luck with these tightly rolled vinyl colors when I rolled it onto a cardboard tube from a previous vinyl purchase. I have hoarded the cardboard tubes and glad I did for just this moment.

Roll vinyl onto a cardboard tube

3. Each design may vary.
A more complex design may require the vinyl to roll in and out of the machine more versus a longer design with less cut lines. Keep this in mind when you place the vinyl in the roll feeder. The more freely the material can move in the roll feeder, the better.

4. Use the new cross cutter feature on the back of the machine.
On the Send tab, under the Preferences change the Feed Option to Feed to have it feed out the back.
More information HERE on the Send Tab.

Cross Cutter on backside of Cameo 4

5. Test it out. It is always a good idea to test something before you are working on a deadline.

I hope this gives you a few tips to try if you are having issues with the roll feeder on the Cameo 4.

Looking to upgrade your Silhouette machine or for a first time machine?
Find the Cameo 4 here:
Amazon
Expressions Vinyl
Heat Press Nation
Silhouette America
Swing Design

If you have an older model of the Silhouette machine, there is still a roll feeder available that can be used with it. Find it HERE.

And check out this post on Cutting without a mat to see how it is used HERE.

Save this for future reference by pinning the image below.

I would love to see what you create!
Feel free to post on my Facebook group at Silhouette Secrets with EllyMae.

Enjoy!

SS_Signature copy
SS Logo snip it
**This post may contain affiliate links. What that means is that I may receive compensation if you purchase through the links I have provided. The price you pay for the product or service is not higher but I may get compensated for sharing.
Posted on 1 Comment

Let’s Explore v4 – Print & Cut Specialty Media

Specialty Media and Print & Cut with Silhouette

Affiliate links may be present in the following blog post and as an Amazon Associate I earn from qualifying purchases.

Silhouette recently released some new specialty media types and I think I’m in love with these new Brushed Metal Sticker Sheets.

Let’s take a look at how to this set up.

I first set up the design for print and cut, using all the defaults for the registration marks.
For a step-by-step tutorial on setting up print and cut, check out this post
Let’s Explore v4 – Print and Cut Basic.

Something to note for these specialty materials is that the instructions are very specific in saying to use the default settings for the registration marks. That is due to how the sticker sheets are set up. For the best results and printing quality, the corners of the sticker sheets are cut out so the marks can be read with more accuracy.

The corners are a matte finish vs the glossy finish of the sticker sheet area. This is not something that you notice until the package is opened.

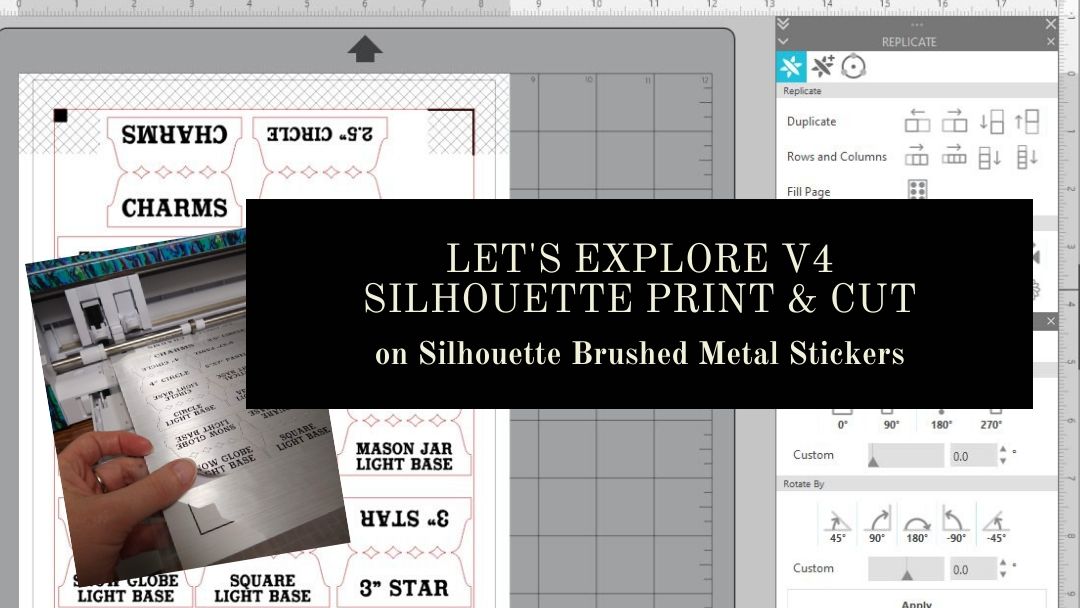
I needed some labels for organizing my collection of Curio templates. I used a tab from the file 3 Tabs by Lori Whitlock – Design #6387 and added text to each of the tab sides using Vintage Sign Font by Lori Whitlock – Design #252472.

Using the Replicate Panel and the Rotate Panel, I could duplicate the text to add to the other side of the tabs.

I am using a Canon TS9521C printer and found that it needed to be printed using the Photo Paper Glossy setting with the print quality as High. Printing at the higher quality settings slows the rate that the image is printed which allows the ink to dry on the media longer before it is finished.

After the design is printed, click on the Send tab and I don’t want the text to cut out. All of the text needs to be selected, by clicking on it, and then choosing the No Cut option to turn the cut lines off.

You may notice that the text looks fuzzy. This is something that has changed in the v4 software. Text now defaults to Cut Edge on and why it is showing up as fuzzy. It will still cut and there is nothing wrong with the text or cut lines. However, by having the text default to Cut Edge, you no longer have to weld fonts that overlap. It will cut the edge of all the text that is connected versus cutting out each individual letter.

In this case, I don’t want the text to cut. But, it is something that has changed in the software and I see many questions on why it’s now fuzzy. If you want the text to show “normal”, then select all of it and choose “Cut” on the Send tab and the lines will clear up a bit. Just keep in mind that you will need to weld the text manually if you do that.

Since I only want the tabs to cut, I turned off all the Cut lines on the text.

The bold red cut lines will turn off on each object that is selected when the “no cut” option is chosen.

After it’s printed, place it on the Silhouette cutting mat, exactly as it shows on the Silhouette design screen. The page should be lined up in the top left corner of the cutting mat and on top of the cutting grid. For best results, you want it to be lined up exactly as it shows on the screen. This means that the page should be covering the grid lines on the left side and along the top edge in the top left corner.

Lining it up properly will help in getting an accurate reading on the registration marks. If the cutting grid is showing, then it can sometimes try to read the cutting grid instead of the printed registration marks and give you a registration error.

Make sure to load the cutting mat properly in the machine with the left edge of the mat next to the line on the left that the arrows point to.

I used the Cardstock – Textured setting to cut these Brushed Metal Sticker Sheets and it cut well.

A good habit to get into is to check the cut before pressing the Unload button. If the design did not cut well, then you could send it back through for a second pass.

I added the tabs onto sheet protector that I can easily slide the Curio Templates in and out of. This is just a portion of the templates I have, so it is going to be great that the ones I use the most are now labeled and organized.

Here is an example of these Curio Templates. These are designed to fit the Craft Chameleon acrylic blanks and help to hold the blank in place and line up the design to the template space.

These plastic Curio templates line up with the pegs on the Curio cutting base and then the acrylic blank sits down in it while etching. I still like to add a layer of double sided tape to my acrylic blank as well, just for another layer of security in holding it in place. The etch is permanent, so if that blank moves at all, it may not line up and etch in the correct location.

Now, I added these all in one location. I picked this accordion folder up a few months back when I first was brainstorming this idea and now I can find them a little easier.

Now, that is one more thing crossed off my to do list. Back to more Silhouette projects!

From now until April 15th, you can get 40% off materials at Silhouette when you use my code SILSECRETS and FREE shipping on orders over $50.

Check out more information on all the April sales happening at Silhouette in this post HERE.

Save this for future reference by pinning the image below.

I would love to see what you create!
Feel free to post on my Facebook group at Silhouette Secrets with EllyMae.

Enjoy!

SS_Signature copy
SS Logo snip it
**This post may contain affiliate links. What that means is that I may receive compensation if you purchase through the links I have provided. The price you pay for the product or service is not higher but I may get compensated for sharing.
Posted on 3 Comments

Silhouette Print and Cut Tips

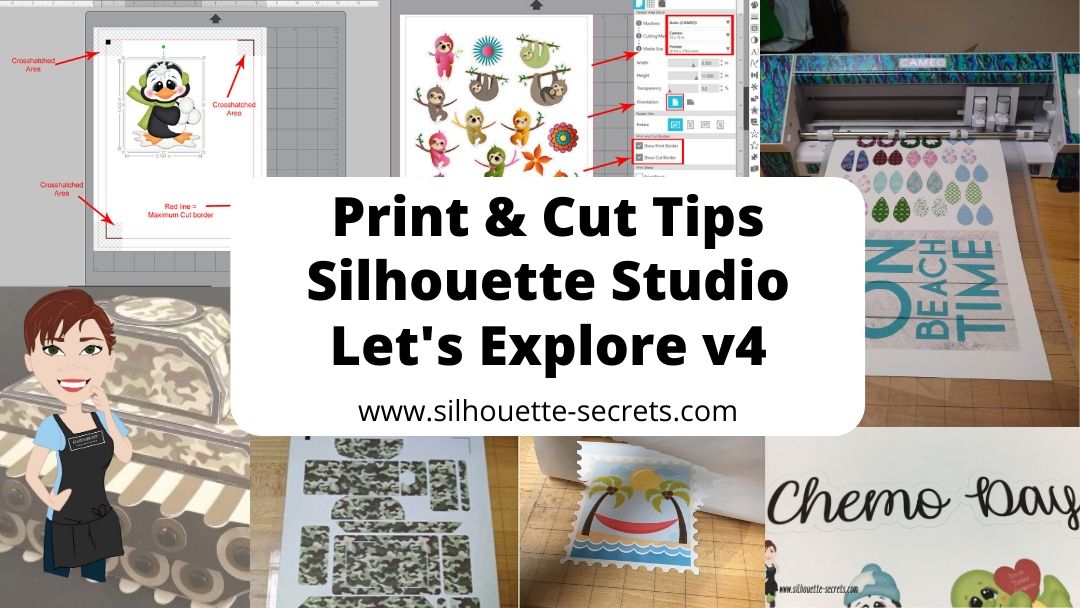
No matter what kind of print and cut project you are doing, I recommend starting with all the basics. I have several posts on print and cut and wanted to give you one landing page to check them all out at and decide which one is going to be the best for your situation.

Print and cut with the Silhouette is one of my favorites and it is often the one issue I troubleshoot a lot with users. Most often it is something that needs to be tweaked on the user’s end on why the Silhouette is not reading the marks. And there is no one solution fits all when it comes to troubleshooting and it’s not always what the user wants to hear, but the first step is to start at the beginning. Otherwise, it’s like throwing mud against a wall and seeing if it sticks. You can try all kinds of things and still end up with the same issue.

So let’s get you headed in the right direction.

Print and Cut Basics is where I would suggest starting if you are new to Silhouette, new to print and cut, or are having problems getting the Silhouette to read your printed page. It is a step-by-step to doing a test print and cut to make sure it’s all working properly.

Print and Cut – Part 1 is a great place to start with setting up a design made for print and cut. It gives tips and tricks to getting the design set up correctly, printing within all the borders, and also several troubleshooting steps if you are having issues.

Print and Cut – Part 2 – Text will show you how to create text and discuss whether you want the text to cut, or how to change it so that text does not cut each piece out.

Print and Cut – Part 3 – Images goes through the steps of creating a print and cut design out of a jpeg or png file that does not have cut lines.

Want to cut larger than letter size? If you have a large format printer, you can cut several larger sizes. The main limit is how large the printer can print. Check out tips on How to Print & Cut Larger with Silhouette HERE.

With the release of v4.3, the Registration Marks Panel has had a little bit of a change. There is no longer options, but you can turn them on and off. Find out more here in Registration Marks & Print and Cut in v4.3.

Print and cut is another great option if you don’t have the exact paper pattern on hand to create a project. You can make your own and then cut it for your project. Check out how to use the Pattern Fill Panel HERE.

With the options of Pattern Fill in the software, it can definitely keep a project alive versus having to wait on finding that perfect piece of cardstock in the store. I used the Pattern Fill in this 3D Tank project also.

Pattern Fills

Affiliate links may be present in this blog post.

I see it asked often what the patterns in the Silhouette Design Store could be used for. They are a great option for creating unique projects or work in a pinch when you don’t have the right pattern to fit your projects.

Silhouette Design Store Patterns Section

Check out all the options for all kinds of patterns in the Silhouette Design Store HERE and then how to use them in the Let’s Explore v4 – Pattern Fills. I love that you don’t have to print the entire page with the pattern, but can fill any section of the design and manipulate that pattern to your liking by adjusting the pan and zoom.

Hopefully this has opened up some new doors to Silhouette projects for you!

I would love to see what you creating with your Silhouette machine! Feel free to post on my Facebook group at Silhouette Secrets with EllyMae.

Enjoy!

SS_Signature copy
SS Logo snip it
**This post may contain affiliate links. What that means is that I may receive compensation if you purchase through the links I have provided. The price you pay for the product or service is not higher but I may get compensated for sharing.
Posted on 2 Comments

Let’s Explore v4 – Software upgrades

Let’s Explore v4
Silhouette Studio Software Upgrades

Affiliate links may be present in the following blog post.

Software upgrades are on sale right now over at Swing Design. So let’s explore a little bit about them.

Swing Design Upgrades

What is an upgrade?

A software upgrade is an additional purchase that gives you a code to unlock additional features in the software.

Do I need it?

That is all going to depend on each individual user. I highly recommend at least the Designer Edition upgrade for all of my students. It makes life easier and saves you time and headache. It is well worth the investment!

Which one to I get?

First, that depends on how far you want to go. Like I said above, I highly recommend the Designer Edition upgrade for all students. But, I love the Business Edition because all the features are unlocked and you never have to question if something is available to you.

Next, you have to consider if you already have an upgrade. There are different levels and you want to make sure to buy the correct level.

If you have the basic (free) software, you would want to purchase 1 of 3 options depending on what upgrade you want to go to:
Option 1 – Silhouette Studio to Designer Edition (highly recommend at least this)
Option 2 – Silhouette Studio to Designer Plus (unlocks a few more features – see below)
Option 3 – Silhouette Studio to Business Edition (unlocks it all)

SD upgrades

Now here is the important part, if you already have one of the upgrades above, you only need to purchase the step up to the next level you want.

For instance, if you already have the Designer Edition upgrade but you want to go to Business Edition, you want to buy the Designer Edition to Business Edition upgrade. You do not need to buy the full upgrade. You would purchase the level that you need to go from to the level you want to be at.

The options are:
Option 1Designer Edition to Designer Edition Plus (personally I would just go to Business)
Option 2Designer Edition to Business Edition
Option 3Designer Edition Plus to Business Edition

SD Upgrades 2

Now, keep in mind, if you purchase the upgrades in steps it is no different than purchasing the upgrade all together, except that you will need to enter the codes in that same order if you install it on another computer or have to re-enter your codes for any reason.

So how do you activate the code?

In the Silhouette software, click on Help in the top left menu. Then choose Upgrade and a pop up window will show up. Enter the information in the window and type the upgrade code exactly as you received it.
Make sure you are entering the codes in the order that you purchased them in.

Help Upgrade copy

For example, if you ordered Designer Edition and then the Business Edition upgrade later. To activate it on a computer, you would need to enter it in that order. First the Designer Edition code and then the Business Edition code.

If you purchased the Silhouette Studio to Business Edition code right off the bat, then you only have 1 code to enter.

Software Upgrade Details

What do each of the upgrades offer?

To see the full comparison chart, click HERE to go directly to the Silhouette America website and see the full chart. Click on the video camera icon next to each feature to see a short demo.

But, lets briefly name some of the features I find the most useful in each of the upgrades.

Designer Edition unlocks:
– Ability to open svg and pdf file directly in the software
Rulers and guides can now be activated
– Additional Knife tools
– Additional sketch effects
Trace by Color
Magnet Trace
Glyphs Panel
– Ability to create Rhinestone designs
Warp Templates
And more…..

Designer Edition Plus unlocks all of the above and …..
Flexishapes
– Ability to open some embroidery file types (PES, DST, EXP, JEF, and XXX)
Puzzle Generator
Conical Warp
And more…..

Business Edition unlocks all of the above and …..
– Import Ai/CDR/EPS Files
Weed Line Feature
Multi-cutter Support (I use this one all the time)
– Multiple Undo/Redo (one of my favorites)
– Export SVG, PDF, JPG
– Edition Toggle (this is great for those of us who teach, so we can see exactly what the students see in their version)
And more…..

Now, the list above is not the extensive list of all the features unlocked with each upgrade. However, it is a list of the features I find the most useful in each upgrade.
For the complete comparison chart click HERE to go look at Silhouette America.

I am all about making a Silhouette user save time and frustration in working with their software AND getting the best cut possible. I would highly recommend at least the Designer Edition to all users, for the ability to open a svg file, as that is generally the higher quality cut file when you compare it to a trace or dxf file.
Check out this post – Let’s Explore v4 – How to open a svg

If you have question about an upgrade just let me know. Comment below or post on my Facebook group at Silhouette Secrets with EllyMae.

I would love to see what you creating with your Silhouette machine!

Enjoy!

SS_Signature copySS Logo snip it

**This post may contain affiliate links. What that means is that I may receive compensation if you purchase through the links I have provided. The price you pay for the product or service is not higher but I may get compensated for sharing.
Posted on 6 Comments

Let’s Explore v4 – Designing in Silhouette

Creating Designs in the Silhouette v4 Software

Affiliate links may be present in the following blog post and as an Amazon Associate I earn from qualifying purchases.

This project has been on my to-do list for a long while and now we are all home all day long together, I sat down to get it done.

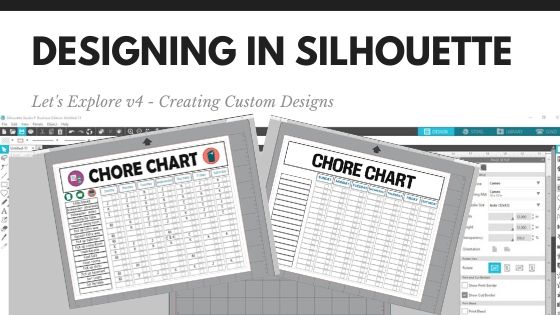
Using some basic features in the Silhouette software – Drawing tools, Replicate Panel, Alignment tools – you can create your own custom projects.

Check out this video below on how I created a chore chart.

I added a couple Chore Chart Icons by Amy Robinson – Design #256141 to the chart to give it a little more color and character than just a boring lines chart.

Chore Chart image copy

Now, you may have been putting this off like I was or just haven’t had the time to make a chore chart. So I am also offering this as a free file you can download below.

Chore Chart free file copy

Click the photo above or download this free file HERE.

Save this for future reference by pinning the image below.

Pinterest Chore Chart

I would love to see what you create!
Feel free to post on my Facebook group at Silhouette Secrets with EllyMae.

Enjoy!
SS_Signature copySS Logo snip it

**This post may contain affiliate links. What that means is that I may receive compensation if you purchase through the links I have provided. The price you pay for the product or service is not higher but I may get compensated for sharing.

Posted on 14 Comments

Let’s Explore v4 – Knife Tool

The Silhouette Studio software is jam-packed with Tools and features that can be used to design with. One of those is the Knife Tool.

In the Silhouette software, Tools are located on the left side panel and Panels are located on the right side.

Tools vs Panels copy

The Knife Tool is located on the left side of the Silhouette v4 software.

Knife Tool copy

Keep in mind that the knife and eraser tool are changing a lot of data when they are in use. There are many factors that will affect what a user sees when using these tools. These could be the design being changed, the computer processing power, the version of software a user has, etc.

A user may need to be patient with their computer when they are using these tools as the computer processes the change in data. If a design is “complex”, then there may be other options to alter the design versus the knife or eraser tools, such as Releasing the Compound Path and deleting. Keep in mind, that each design might react differently.

Knife Tool

Tutorial written in v4.3.372

Let’s take a look at a circle shape and how the knife options work with it. I used the drawing tools on the left side to draw a circle and then replicated it on the right side and filled it with color using the Fill Color Panel.

Tip: holding down the Shift key on the keyboard will make the Knife (or line drawing tools) cut in a straight line either vertically, horizontally, or at a 45 degree angle.

Solid Option

Knife Solid copy

With the Solid option chosen, the shape will be cut and create 2 solid images.

Knife Solid2 copy

Each piece is now independent of the other and can be moved.

Outline Option

Knife Outline copy

With the Outline option selected notice that the unfilled shape reacts differently than the color filled shape.

A shape with no fill, will cut apart the design and leave the shape open. It is cutting a closed shape apart and making it 2 open paths.

Open Paths copy

Open paths react differently than a closed path. Open paths can be found by double clicking on the line of the design and bringing up the Edit Points.
If there are any red dots, that means it is an Open Path.

What you see above, is 2 semi-circle lines that have been cut from a circle. Open Paths cannot be filled with color and will only cut from 1 red dot to the next red dot.
It will not connect the cut.

Knife Outline closed path copy

If a shape is filled with color, then it reacts differently when the Knife – Outline option is used. It will result in 2 closed shapes.

Knife Set Tools

Each user with the basic (free) Silhouette software has access to the basic knife function as shown above.
If a user has a software upgrade such as Designer Edition, Designer Plus, or Business Edition there are more knife options available.

Knife Options copy

With the software upgrades, there are several more fun options for the knife tool.

Knife Options zoomed copy

Let’s take a look at a couple of these options.

Knife Options 2 copy

Notice that the unfilled shape behaves differently than the color filled shape. There are open paths on the unfilled shape and you do not see the knife design. But, the filled shape the knife tool creates the shape according to the design option you have chosen.

Auto Apply or Apply

Auto apply vs Apply copy

Next on the knife tool bar is the options to either Auto Apply the knife option when the mouse button is clicked or to manually choose Apply to have the knife finish. This gives the user the chance to decide whether they want the knife selection before it starts the process of changing the data.

This is all a matter of personal preference. However, if Auto Apply is chosen, then you do not get the chance to adjust the knife selection before it applies to the design.

Some of the knife tool options have an additional slider that appears when you draw with it that can adjust the shape of the chosen knife.

Preferences

Under the Preferences, there are options for how a user wants the Knife Tool to act. After Using the Knife can be set to “Continue Using Knife” or “Choose Select“.

Preferences copy

If it is set to “Continue Using Knife“, then you will need to click on the Select Arrow in the top left corner when done with the knife to turn it off.

Select Arrow copy

Check out more Preference options in this post
Let’s Explore v4 – Preferences – Tools

Do you use the knife tool?

Save this for future reference by pinning the image below.

Pinterest

I would love to see what you create!
Feel free to post on my Facebook group at Silhouette Secrets with EllyMae.

Enjoy!

Signature

SS Logo snip it

**This post may contain affiliate links. What that means is that I may receive compensation if you purchase through the links I have provided. The price you pay for the product or service is not higher but I may get compensated for sharing.

Posted on 9 Comments

How to Install Fonts for Use in Silhouette

Silhouette Secrets+ with EllyMae

You found some really neat fonts; now how do you get those to show up in the Silhouette Software? In this tutorial, I’ll share how to install fonts on the computer so they will show up in software programs and are available when you want to use them.

The fonts used in the Silhouette software are found in the Text Style Panel are pulled in from the computer programs Fonts folder.

How to Download Fonts

Affiliate links may be present in the following blog post and as an Amazon Associate, I earn from qualifying purchases.

Let’s start with fonts from the Silhouette Design Store. **on 5/22/24 the Silhouette websites did a massive migration to a new system and the new website has a new look. Access the downloads in your Account, download direct, install the font as instructed below.

Some simple fonts that have just the basic 26 letters and numbers may install just by syncing the library. That is because they are simple files, straight from the Design Store. However, fonts have recently become larger files with “extra characters” called glyphs – these are called Premium Fonts. For these larger font files, you will need to install those directly onto the computer for them to show up.

After you purchase a font in the Silhouette Design Store, click on the person icon (Account Tools) icon in the top right corner.

Then click on “Download” and click on the Order # that includes the fonts purchased.

Once the order opens, check the box next to Download on the individual fonts file.

The file will begin the download process.

I keep all my fonts in folders on my external hard drive, then I can transfer them to a new computer in the future if I need to.

MAC users – instructions listed below the PC instructions

How to Install Fonts on a Windows Computer

When files download to your computer, whether it is designs or fonts, they will most likely be in a zipped file. This is a condensed file format so large files can easily be stored and downloaded.

In order to access designs and fonts, the folder has to be unzipped or extracted in order to view and access the information inside completely.

Note: some users may be able to access font files without unzipping the folder. I am sharing my process that I’ve found to have fewer issues for a user. 

Compressed or zipped files are designated by a zippered folder icon as shown below.

Zipped files copy

As you can see, all of these folders except the top are zippered folders.

A Windows computers have a built-in file extraction; however, you may have to tell the computer to use it. To do this, right click on the file and choose “Properties”.

File Properties copy

Then change the “Opens with:” to the “Windows Explorer”. You may need to click on the “Change” button to find this option.

Open With copy

Now, you should have the option to “Extract” the file

Extract All copy

Extracting the folder will now give you access to all of the files inside of it. It will pop up a window asking where you want to save it. Choose Extract and the folder will be ready to use.

Extract All Window copy

After the file is extracted, there will be 2 folders. One without a zipper and one with a zipper. I delete the zippered file, and this is how I know which fonts I’ve finished installing on my computer. As you can see, I have several zippered folders. This tells me that those have not been installed yet.

Next, close the Silhouette Software. Once a font is installed the software has to be closed and reopened after the fonts are installed in order to pull up the new font in the Text Style Panel.

Go back to the Windows folder where the fonts are saved. Double click on the unzipped font folder. This will open up the contents of the font file. Each font file may contain different things. There may be terms of use documents, more zippered files, instructions, etc. in the folder.

Font File copy

As you can see in this folder I downloaded, there are several font files in this download and 2 of them have further folders that need to be extracted to access the font files.

There are 2 types of font files – .otf files and .ttf files. If the font has the .otf font option, that is the one you want to choose as it’s the newer font file and contains any special characters that are in the font file. For more information on the differences in these font file types, I would suggest checking out this post by Cutting for Business – “Fonts – OTF versus TTF – What is the difference?”

Install for All Users copy

Right click on the .otf (or .ttf) file and choose “Install for all users”. A window will pop up that indicates it’s installing on the computer programs folder and then it will disappear when it’s done.

For Windows 11 users, if you do not see “Install for all users”, choose “Show More Options” in the right click menu and select “Install for all users”. This is a VERY important step in the process. If this option is not used, then the fonts may not show up in some software programs. It is a change that Microsoft did, not Silhouette. (see below for screenshots)

If you get a message that the font has already been installed, do you want to replace it, just choose no. This can happen on some Silhouette Design store fonts as I referenced above because they are “simple” font files and were able to install directly on their own.

If there are multiple fonts in the folder or you have more fonts to install, open each folder and repeat the installation process.

Ta-Da! Fonts installed.

Now, open the Silhouette software and open the Text Style Panel. The font should appear in the Text Style Panel once all the fonts load in the program.

Text Style Panel copy Mermaid Font by Rivka Wilkins – Design #303522

Updated 6/23/22 Windows 11 users

With the release of Windows 11, Microsoft has hidden some menus within menus. If you do not see the “Install for All Users” after right clicking on the font file, choose “Show More Options”. Show More options copy

Then you should see the “Install for All Users” option.

Install for all users copy

MAC users continue reading below the MAC instructions for more information. 

How to Install Fonts on a MAC

Now, I am a PC gal, so I recruited some help from my friend & TJC Licensed Silhouette Instructor colleague Libby with LibbyAshcraft.com. — Thank you Libby for the MAC info!

Installing a font on a Mac is quick and easy. If the font is included in a Zip file, you can just double left click on the font name and the file will be unzipped.

Photo 1

Open the font folder. Double click on the font file itself (either TTF or OTF). Font Book will open a window.

Photo 2

Click Install Font. Font Book will open and show you the installed font in your list of fonts.

Photo 3

Close Font Book.

If your Silhouette Studio was open during the installation of the font, close Studio and reopen it. Your font will be in the font drop down list.

You can also select more than one font at a time. To do this, click on the first font. Hold the CMD key down and click on the next font you want to install.

Photo4

With both fonts selected, right click and select Open With and select Font Book from the fly-out menu. (You can also double click on one of the selected fonts to open the Install Windows.)

Photo5

The Install Font windows for the selected fonts will open in a cascade.

Photo6

Click on Install font in the first window. Close the window and click on Install font for the next font. Repeat for all the fonts you wish to install.

Just like when you installed a single font, Font Book will show you the installed font in the Font Book list.

Restart your Silhouette software and use your new fonts!

Photo7

More Font Tips

– When you click on the Text Style Panel, that is when the software loads all the fonts to the program. Be patient and give it some time to load all the fonts. The more fonts you have the longer it will take for all of them to load in the program and be available. You may notice if you try to scroll down or search by name in the Text Style Panel, it will jump back up to the top. This indicates it is still loading fonts in the software.

– The more fonts you have installed on your computer, will affect all programs, not just Silhouette Studio in loading the fonts. I have started being very selective in the fonts that I choose. I don’t grab every single free font I see but ask myself if I will use it or not. It also can make the design process a lot longer because you have so many options to choose from.

– If you don’t see the font by the main name, look for it under another name. Such as the designer’s initials in front of the font name, etc. For instance, a Lori Whitlock font may be named “LW Wide Marker” in the Text Style Panel or a “PN Handicraft Script” font is for ScrapNFonts.

– When you close the software after installing new fonts, you may get a message that Silhouette is installing fonts and will ask you to approve the changes. Click OK and then approve the pop up to make changes.

– While I used a Silhouette Design Store font for the example above, the same steps apply to all font files wherever you would collect them from.

Now that you know how to install new fonts, so they show in the Silhouette software, on to creating fabulous designs!

Save this for future reference by pinning the image below.

Fonts Install Pinterest

Enjoy !

THANK YOU for your support! How can you help? Click HERE & buy a coffee. Every little bit helps with the cost of running the site.

Silhouette Classes

Never stop learning! Let me help you take the anxiety out of learning with Silhouette and get to creating faster! My Silhouette classes are heavily focused on software, so you can take the skills & techniques taught and apply them to many future projects!

Silhouette step-by-step Classes by Silhouette Secrets+

Silhouette Secrets+ with EllyMae

**This post may contain affiliate links. What that means is that I may receive compensation if you purchase through the links I have provided. The price you pay for the product or service is not higher but I may get compensated for sharing.

Posted on 11 Comments

How to Print & Cut Larger in Silhouette

I loved that the Silhouette Studio offers the feature of print and cut for projects. There are just some times that it is much easier to print out a detailed design than to layer it with adhesive vinyl or HTV. It also gives the project a little different look.

For the basics of this feature – check out the
Let’s Explore v4 – Print and Cut Basics” post HERE.
This is where I would encourage any new user to start or if you have been having issues getting an accurate cut.

Print and Cut Basics header

Do some test print projects and get that baseline developed for the print and cut. Just like any new project, I would encourage you to get a feel for how it works and turns out before you start adjusting things.

But, what if you want to print and cut larger? Is it possible? Yes! Let’s explore how.

This tutorial is written using the v4.3.370 Silhouette studio software. For versions prior to v4.3 you may see a few differences in the software, the steps will be the same. However, you may find this Print and Cut Part 1 tutorial to be helpful too.
Affiliate links may be present in the following blog post and as an Amazon Associate I earn from qualifying purchases.

What is the largest you can print and cut with the Silhouette?

Well, the first answer to that is – what size can you print?
Do you have a large format printer?

That is going to be the first limit you have. How large can you print?

I have the Canon TS9521C Crafting printer and I hesitated at first to invest in it. But, I have not regretted that purchase one bit. I have gotten great quality prints out of this printer and love it.

IMG_20200304_093422772 copy

You can find this printer on Amazon HERE.

Let’s start with a 12″ x 12″ print and cut project.
I am just using white Recollections cardstock from Michael’s. It works well.

First, I use the rear tray when I am printing on cardstock or for the larger formats. Even if I’m using letter size cardstock, I find that the rear tray where it feeds in straight and doesn’t have to curl inside the printer turns out better. I get less errors on the prints or jams in the printer.

Open a new design mat.
On the Page Setup Panel, choose the Media Size of the paper – in this case a 12″ x 12″ media size.

Check the box next to Show Print Border & Show Cut Border.

12 x 12 page setup copy

The gray outline that shows up on the design mat is the Print border. This is set by the default printer that is connected to your computer.
Currently the printer is set to print on a Letter size sheet of paper.

To print larger, that needs to be adjusted.
Click on File in the top left corner of the Silhouette software & choose Print.

File Print copy

This will open up a Printer menu. Note that the printer menus may be different depending on computer and printer model.
I am using a Windows PC with the Canon TS9521C printer.

File Print Preferences copy

Then click on the Preferences option
(could also say Advanced Options or another term – depending on the printer).

Print Preferences copy

If there is the option to “Preview before printing” I suggest choosing that. It can save you a lot of headache on a mis-print.

Then make sure there are no features checked such as “borderless printing” or “fit to page” – these can alter the page from printing accurately and can cause registration errors.

Choose the Media type – in this case it is Cardstock.

Set the Printer Paper Size. The list that pops up is going to be determined by the options  available for the current default printer chosen. I chose “Square – 12″ x 12”.

Set Paper Source. I selected “Rear Tray”.

Then click on Ok. And then click Apply.

Print Border copy

Now, notice that the Print Border has now adjusted to a 12″ x 12″ page.

Let’s set up the Print and Cut now.
Click on the Page Setup Panel – Registration Marks Tab.

Registration Marks copy

Choose “On” for the registration marks and then I highly recommend clicking on the “Restore Defaults” button. This will help you in establishing a baseline for your print and cut. I print almost all my projects at the default Registration Marks and I have no issues getting it to register.

While the registration marks can be moved, the farther they are moved increases the chances of an inaccurate cut. I recommend to start, use the defaults and as you get more comfortable, you can start changing things.

Notice the Cut border now changes to line up with the Registration Marks.

Now, let’s add designs to the page. If you are opening designs from the Library, right click on the image and choose “Merge” – this will place it on the current design mat we have set up. If you open a file from outside the library, go to File > Merge and then locate the file to open.

Llama card copy
Changing Scene Birthday Llama by Lori Whitlock – Design #304249

Double check that the cut lines have a line width of zero under the Line Style Panel before printing. And also that no part of your design appears in the cross-hatched area of the print and cut. This can affect the reading of the registration marks.
Check out more tips HERE.

Then choose File > Print and if you have set up the print preview it will spool the print job and a preview will pop up on the screen. This is a great habit to get into as you can often spot an error before you’ve sent the entire job to print.

Keep in mind that the time to spool from the computer to the printer can vary. This will depend on the amount of data you have in the file and also whether the printer is hard wired or wireless can affect it as well.

Print Preview copy

Double check that the bottom left registration mark shows it will print completely. This is one of the top errors I see with print and cut is the default registration marks may be outside of the printer margins. This will vary by printer, so some users may experience it more than others.

If you need to change something or it doesn’t look right, choose Cancel Printing.
If it all looks good, then click on Start Printing.

IMG_20200304_172713815 copy

Place it on the cutting mat, exactly as it shows on the design screen. Make sure you are lining the paper up so that it covers the grid lines on the Silhouette cutting mat.

IMG_20200304_193647789 copy

These turned out so cute! I will definitely be making more of Lori Whitlock’s changing scenes cards.

Now, let’s talk bigger.

I have a sheet of 11″ X 17″ media. I changed the cutting mat to a 12″ x 24″ mat and set the Printer Page Setup under File > Print the exact same way as outlined above, except I chose the 11″ x 17″ paper size.

11 x 17 PNC copy

Notice the Print border adjusts according to the page size set under the File > Print setup.

Turn the Registration Marks on and then add the design(s) to the page.

11 x 17 PNC print copy

Again, I always like to turn the Print Preview on as my last fail safe to catch an error before it prints the entire sheet.

Once it’s done printing, place it on your mat, choose your Cut settings and send it to cut.

IMG_20200304_211312196 copy

Print and cut can be used for so many different projects from cards, stickers, printable heat transfer, etc.

IMG_20200307_165626058 copy

Now, with the larger machines being released – Cameo Plus 15″ (available) and the Cameo Pro 20″ (coming soon) – the big question is “How big can you print and cut?”

Again, the 1st answer is – How big can you print? That will be the first limit.

And then, the 2nd answer is – How big is your media you are printing on?
That will be the next limit.

I printed on both a 12″ x 12″ piece of cardstock and then a sheet of 11″ x 17″ heat transfer paper. Is your media bigger than that? Both of these were cut on a Cameo 4 machine which has a cutting width of 12″ and it could also be cut on either of the larger machines coming out.

Here is an image of the design space of a Cameo Plus. If you are using higher than v4.3.370 of the Silhouette software, you would be able to change to this in the software even without owning a Cameo Plus.

Cameo Plus copy

Notice that the Print border stayed at my 11″ x 17″ size. I did not change it so, it stayed the same, as it recognizes what the default printer is set at. But, if I add the registration marks to the page, you can see that they will show up.

Again, it will depend on both the size of media you can print on and the size of media you have available to print on.

Have some time? Just sit down and play in the software. You never know when you will stumble across something new!

For more print and cut help check out these posts as well
Let’s Explore v4 – Print and Cut Basics
Print and Cut Part 1
Print and cut Part 2 – Text
Print and cut Part 3 – Images
Print and cut with Heat Transfer Paper

Save this for future reference by pinning the image below.

Pinterest 1

I would love to see what you create!
Feel free to post on my Facebook group at Silhouette Secrets with EllyMae.

Enjoy!

SS_Signature copySS Logo snip it

**This post may contain affiliate links. What that means is that I may receive compensation if you purchase through the links I have provided. The price you pay for the product or service is not higher but I may get compensated for sharing.

Posted on 5 Comments

5 “Secrets” to Cutting Crepe Paper

Update: re-published blog post can be found here: https://silhouette-secrets.com/2022/05/16/5-secrets-to-cutting-crepe-paper-with-the-cameo-4/

I have been having an awesome time learning to make crepe paper flowers. Now that the Cameo 4 can cut crepe paper with the rotary blade, I have several bouquets & individual flowers in my studio.

I just started working with this in November/December of 2019, so it is all fresh and new to me. But, I am loving it. Just a warning though – it is addictive!

Today, I am a guest blogger over on Terri Johnson Creates blog sharing my 5 “secrets” to cutting Crepe paper with the Cameo 4. Check it out HERE.

Rose bouquet copy

There are so many fabulous things that you can do with a Silhouette machine and my project list just continues to grow!

Head over to Terri’s blog to check out my “Secrets” and then make sure you share what you’ve been working on with your Silhouette on my Facebook group
Silhouette Secret+ with EllyMae.
We love to see what you have been creating!

Enjoy!

SS_Signature copySS Logo snip it

**This post may contain affiliate links. What that means is that I may receive compensation if you purchase through the links I have provided. The price you pay for the product or service is not higher but I may get compensated for sharing.

Posted on 5 Comments

10 Essential Tools in Silhouette Studio for Beginners

Whether you are a beginner or experienced with the Silhouette software, there is always something new to learn in it. I don’t think any one person can remember every single thing this software is capable of. And speaking from my own personal experience, I think all users get in a routine of doing the same things with the same tools and sometimes we don’t even think of a “new” way to do things. For example, using the Quick Access Toolbar (QAT) versus the panels on the right side.

QAT copy

I am more comfortable using the panels on the right because I like the expanded panel and am just not in the habit of using the quick icons at the top. But, I am getting better at it.

Going through this series, I have learned a lot of new features that I just didn’t use on a regular basis. This is a very powerful graphics program!

Now, if the software seems overwhelming, I would suggest grabbing this free PDF and downloading it to your computer. When you open it and click on the titles, it will take you to a corresponding blog post with more details on that feature.

Header PDF file

Today let’s look at the top 10 posts from the “Let’s Explore v4” series that I think will help you learn the software and get you started or more comfortable with designing in the software.

Silhouette Secrets+ Top 10 Let’s Explore v4 Tools

1 – Text Tool & Text Style Panel Text is one of the first things any user will work with in the Silhouette software. The Text Tools are found on the left side of the software and the Text Style Panel, which allows you to change the properties of the text is on the right side.

Working with text copy

Learn more about text at the “Let’s Explore v4 – Text Style Panel” post HERE.

Text Style Panel main copy

2 – Fill Color Panel  I use the fill color panel every single time I open the Silhouette software. Not only does it help you see the design better and give you an idea of how the finished project will look, but it can also make it easier to select the object if it is filled with color.

Fill Color Panel copy

3 – Line Style Panel This panel can be very helpful if you want to change the line color of the design so it doesn’t show as a red line or if you are printing a design. Cut lines do not have any weight to them, so if you want to print the lines you would either need to increase the line thickness or choose to “print lines of selected shapes”.

Line Style Panel copy

4 – Align Tools This is another tool that I use every single time I open the software. I like to have my designs and text perfectly aligned and centered in my object.  The Align tools are found under the Transform Panel on the right side.

Transform Panel copy

5 – Trace Panel The trace panel can come in handy for many projects from creating basic designs to print and cut projects with jpeg or png files.

Trace Panel copy

6 – Drawing Tools These tools can come in handy when you want to create something yourself add your own weeding lines around a design, draw a frame around the design, and many other things. The more comfortable that you get with the software, the more options you will find to create things in it.

Drawing Tools close up copy

7 – Replicate Panel Want to create an exact copy of the design you just drew or make several copies with the click of 1 button? This can happen under the Replicate Panel.

Replicate panel copy

8 – Offset Panel Want to make that font a little thicker? The Offset Panel can help with that and so much more.

Offset Panel copy

9 – QAT – Quick Access Tool bar This is a fluid tool bar that will change depending on what you have selected on the design mat. You will notice that the icons will be the same as the panels on the right side.

With objects selected on the design screen these are the icons you might see in the QAT bar.

QAT bar copy

Look at all the information in the Quick Access Toolbar. All of this information can also be found on the right side in the Panels, but these are quick buttons to access it as well. There are multiple ways to do things in the software, no one way is right or wrong, but the best way is what works for you.

It is a fluid tool bar, which means that it changes depending on what is selected. If you have text selected on the design screen, then you will see text options in the tool bar.

QAT Text copy

10 – Edit Points While this isn’t something that I would label as a beginner tool. I do think knowing what those gray dots are when they pop up is a relief. You don’t need to understand how to work with them right now, but understanding why they appear & how to make them disappear is something I believe is very helpful.

Edit Points copy

There are so many different tools in the Silhouette software. The best thing you can do is just get started. Play, play, play. Start with 1 project and get that down and then move on to new things.

I would love to see what you create! Feel free to post on my Facebook group at Silhouette Secrets with EllyMae.

Save this for future reference by pinning the image below.

10 Let's Explore post to start Pin

Enjoy !

THANK YOU for your support! How can you help? Click HERE & buy a coffee. Every little bit helps with the cost of running the site.

Silhouette Classes

Never stop learning! Let me help you take the anxiety out of learning with Silhouette and get to creating faster! My Silhouette classes are heavily focused on software, so you can take the skills & techniques taught and apply them to many future projects!

Silhouette step-by-step Classes by Silhouette Secrets+

Silhouette Secrets+ with EllyMae

**This post may contain affiliate links. What that means is that I may receive compensation if you purchase through the links I have provided. The price you pay for the product or service is not higher but I may get compensated for sharing.