Posted on 13 Comments

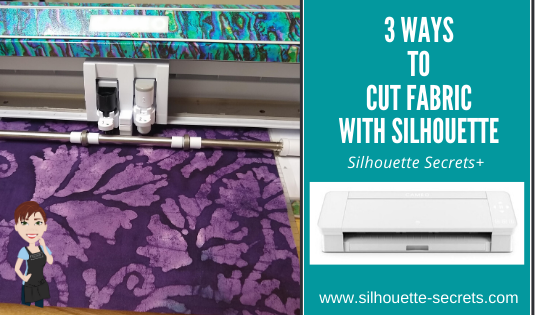
3 ways to use your Silhouette to cut fabric

Silhouette Secrets+ with EllyMae

Today we are going to look at 3 different ways you can cut fabric using your Silhouette machine. The technique that you use may vary depending on the easiest to use and also which Silhouette machine you currently are using.

Affiliate links may be present in the following blog post and as an Amazon Associate I earn from qualifying purchases.

For this post, I am a face mask file that was in the Silhouette Design Store.

Once you have the file, open it in the Silhouette software.

Use the Transform – Scale Panel to size the pattern to what you need by entering the exact percentage to size the pattern up or down.

Now, let’s take a look at 3 different options you have for using the Silhouette to make these fabric masks.

Option #1 – Cut a template with the Silhouette.

I used the Face Mask Sewing Pattern file to cut a template out of cardstock.
I then labeled each panel for future use.

I was cutting several of the same fabric, so I could layer the fabric and cut through multiple layers with a hand held rotary blade.

If you are using this method, you only need to cut 1 of each panel for the template.
I folded the fabric over several times to get both sides and then pinned the template to the fabric. I was able to cut the outer panel for 2 masks of each size.
You could cut more at the same time depending on how much fabric you have and how many masks you want.

I did the same with the Liner fabric.

I found this way to be the fastest way as you could cut multiple layers of fabric at the same time. You could also cut with scissors around the template if you don’t have a hand-held rotary blade.

Option #2 – The Cameo 4 with the rotary blade

If you have a Cameo 4, Cameo 5, or Curio 2 you have the option of using the Rotary blade in the Tool 2 housing. The Rotary blade is only compatible in the Cameo 4 machine.
*Updated to include new Silhouette machine models compatible with rotary blade.

You will want to use a super sticky cutting mat to hold the fabric in place.
A strong grip mat will work well or grab a brand new regular cutting mat.
A brayer is also a good idea to roll over your material to make sure it is good and stuck to the cutting mat. In order for it to complete the cut, the fabric needs to stay stuck to the mat.

For more tips on using the Rotary blade check out this post –
First Cuts with the Rotary blade.

Option #3 – Stabilize the fabric and cut with a new sharp blade.

Stabilized fabric can be cut with the Cameo 3 Autoblade, Cameo 4 Autoblade, Black Silhouette blade, Premium blade, or even the Deep Cut Blade
(although I wouldn’t recommend the Deep Cut as a first choice).

What is stabilized fabric?

Stabilized fabric means that you have applied something to it to help “stabilize” it or make it stiffer.

My favorite method is using Terial Magic and this is what I used in this tutorial.

To use Terial Magic, spray the entire fabric down with the solution.

Let it dry for 20-40 minutes.
Don’t get rid of those hangers from clothes you buy – they work perfect for projects like this or hanging swim suits to dry.
Then press it with an iron to dry completely.

This makes the fabric stiff and almost like paper.
Now, with a sharp Silhouette blade, it will cut like butter.

I used the Fabric, Cotton Print setting with a Black Silhouette blade, also called a “ratchet” blade.
The pattern above is enlarged 115% for the Large size.

Look at those nice, crisp cut edges.

Perfect cuts each time!

I do have to say, this is my favorite way to cut fabric with the Silhouette machines.
It will work on all Silhouette machines with a regular, sharp blade.

It does require pre-treatment, but it is so worth it for the end result!

The other awesome thing about Terial Magic, is that it washes out, so it is perfect for applique, quilting, or these fabric masks.

Another alternative to Terial Magic is Heat and Bond sewable.

You do not want to use a product like starch or other stabilizers that are not sewable, or you may gum up the cutting blade.

For this design, once it was cut, I followed the step-by-step tutorial on the Silhouette 101 blog for assembling this face mask.

I am not an expert at sewing. Basically, I can sew a straight line.
And I used a basic Brother sewing machine to finish these masks out while following the tutorial on my ipad.

So grab your favorite fabric and create something!

Go MSU Bobcats!

And then try to get a photo where your kids aren’t acting up.

See that sideways Momma look?
This was not the first take on the photo – lol.

What will you create with your Silhouette machine?
My kids are already requesting more masks in other fabric patterns and shirts too!
Stay tuned for more on that!

Additional Resources:

Save this for future reference by pinning the image below.

Enjoy !

THANK YOU for your support! How can you help? Click HERE & buy a coffee.
Every little bit helps with the cost of running the site.

Silhouette Classes

Never stop learning! Let me help you take the anxiety out of learning with Silhouette and get to creating faster! My Silhouette classes are heavily focused on software, so you can take the skills & techniques taught and apply them to many future projects!

Silhouette step-by-step Classes by Silhouette Secrets+

Silhouette Secrets+ with EllyMae

**This post may contain affiliate links. What that means is that I may receive compensation if you purchase through the links I have provided. The price you pay for the product or service is not higher but I may get compensated for sharing.

Posted on 15 Comments

Let’s Explore v4 – Eraser Tool

Let’s explore the eraser tool today in the Silhouette Studio software.

Tutorial created in v4.3.372

To start, the eraser and the knife tool are both very heavy data tools.
This is because both of these tools are changing a large amount of data when in use. The computer and software has to reorganize this data and why the computer may take time to process or some users may even experience a software shut down. This will depend on 2 main factors.: the design that is being used and the user’s computer. This means that each user may experience different results when the eraser tool.

The eraser tool is found on the left side of the Silhouette Studio software.
Or the keyboard shortcut to activate the Eraser is Shift+E.

Once you click on the Eraser tool, the features of the tool will show up in the Quick Access Toolbar along the top of the Silhouette software.

There are several options that you have to customize the eraser you are using.

Solid vs Outline

The solid eraser will erase the section and if the eraser connects to the other side, break that design up into solid pieces.

The outline eraser will erase the section and break the design up into solid lines as shown above.

If an object is filled with color, the eraser will break the design up into solid pieces because of the fill color. It will act the same no matter if Solid or Outline is selected.

Square tip or Circle tip

The 2 choices for the eraser tip style are either a square or a circle.

Size

The size of the eraser can be changed depending on what you want to work with.

The smallest size is 0.375″ and you can see the small blue eraser tip above.

The largest size being 3.875″ as shown above.

And that is it. The eraser tool is a very powerful tool, but keep in mind that it can be very data heavy depending on what you are working with.

Let’s take a look at an example of this data.

Affiliate links may be present in the following blog post and as an Amazon Associate I earn from qualifying purchases.

On the left I have opened up a Mandala by Sarah Hurley – Design #276072 and on the right I have drawn a square. I selected both of the designs and then double clicked on them to bring up the Edit Points.

Edit points are the data points for the software to tell the Silhouette machine to move to connect the cut.
(Find out more about edit points HERE)
As you can see, the mandala design has a LOT more data points than the square.
This means that using the eraser tool on it will take more processing power to change the design because there is more information in that design to change.

Now, each user may experience something a little bit different.
You may see your computer taking longer to process.
You may hear your computer start running more.
You may experience a software crash.
Since each user’s computer varies, the results may vary in what the computer can handle.

And what you may find is that the Eraser Tool might not be the best tool for the job.

Eraser Tips

If the design can be ungrouped and pieces deleted, that will help with the data processing. An ungrouped design means you are changing the data of a single line or two, versus the data of the entire design all at once.

A design may not be able to be ungrouped, but you might be able to release the compound path and delete pieces, which can help with the data processing.

Learn more about Compound Paths HERE

User’s may experience different results with the eraser, such as creating new lines or the design disappearing. Both of these are indicators of data processing. Try ungrouping or releasing the compound path to make it less data being changed at a time.

I would suggest just playing around with the eraser tool and just seeing what will happen.

I would love to see what you are creating with your Silhouette!
Feel free to post photos or questions on my Facebook group at 
Silhouette Secrets with EllyMae.

Save this for future reference by pinning the image below.

Enjoy!

SS Logo snip it
**This post may contain affiliate links. What that means is that I may receive compensation if you purchase through the links I have provided. The price you pay for the product or service is not higher but I may get compensated for sharing.
Posted on 10 Comments

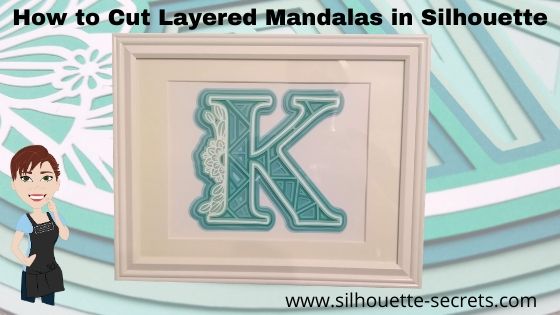
Layered Mandala files in Silhouette

Have you seen the layered mandala files that have started circulating?

They are becoming extremely popular and I’m hooked!
Coming into the Silhouette world, I was a papercrafter. What am I saying? I still am a papercrafter, but now I have so many other materials I use as well.

These layered mandalas are pretty simple to cut and assemble.
Of course, that is designer dependent.

While I was browsing Pinterest one night, I pinned this to my future Silhouette projects and it came up in my Facebook group this past week.
So that means it was time to grab these files and create!

This is a free layered mandala alphabet svg file by Special Heart Studio.

Now, there are 2 things I want you to do.
1. Click HERE to go to Pinterest & pin this file so you don’t lose it.
2. Go grab these FREE svg files directly on the Special Heart Studio website.

Now, that you have the files. Let’s take a look at how to use them in the Silhouette software.
Like I said above, it’s pretty easy with these files the way they are created.

Make sure to download the files HERE and then open the svg file.
Don’t know how to open the svg file?
Click HERE for the detailed instructions on how to unzip and open downloaded svg files.

Letter K Mandala file by Special Heart Studio

When the file opens, all of the layers are ungrouped.
Select the entire design and you will see the selection box around each of the layers.

If the file is grouped together, right click on it and then choose Ungroup to separate the layers.

Draw a rectangle on the left side of the cutting mat in the gray holding area.
I am working with a frame that is for a 8″ x 10″ photo.
Using the Transform Panel – Scale Tab, change the dimensions to 8″ wide by 10″ high.

I am using this 8″ x 10″ rectangle to size my design so I know it will fit in the space I have in my frame.

Next, select all the of the layers of the design.
Left click in the top left above the design, hold the left mouse button down, and drag it across the entire design to the bottom right.
This will select any object that the mouse cursor touches.

Move the design into the drawn rectangle on the left side. With the entire design still selected, use the corner bounding box to scale the design down to fit inside the rectangle as you chose.

Once you have the size you want, you are ready to start cutting the layers.

I started with the bottom layer and worked my way up.
Grab the layer you want to cut and move it to the top left corner of the cutting mat.

I use the Transparency (reveal) option on the Page Setup Panel to see the grid lines of my cutting mat so I know how much material that I need for the design.

I grabbed some Recollections Paper packs from Michaels that work great for these projects and the different shades of color for the mandalas. Great quality cardstock and takes the guessing game out of me trying to match colors up.

Then I cut my material down using my paper trimmer to the size I need. I find that this helps to save the adhesive on my cutting mat, which makes it last longer and gives me scraps of material that are even sizes for future projects.
More tips on getting the most out of the cutting mats HERE.

Load the cutting mat into the Silhouette machine.

Click on the Send tab in the top right corner.

Choose Cardstock Textured as the material. I use this setting for cutting almost all cardstock and it works well. While the Silhouette can cut textured cardstock, I prefer to cut smooth as it is much less of a headache. Depending on the textured nature, it can be a bit more finicky to get clean cuts on.

Click Send in the bottom right corner and watch it work.
After the cut is complete, unload the cutting mat, flip it over and peel the cutting mat from the cardstock. This will help it to release from the adhesive.

Click back on the Design tab.
Move the first layer off to the right side and grab the next layer to cut and place in the top left corner of the design mat.

Click back on the Send tab and verify that the Material has not changed.
Place the next color cardstock on the cutting mat and load it into the machine.
Then click on the Send button in the bottom right corner of the Send tab.

Repeat this process until all layers have been cut.

*Note: as you cut a lot of cardstock, you may find that your not getting as clean of cuts. This can be due to the blade getting duller. As the blade dulls, you can increase the blade depth or force if necessary to get a clean cut. I have used this blade to cut lots of cardstock and during these cuts, I did increase the blade depth by 1 to get a cleaner cut.

When you get to the top layer. Notice that it is a bit more intricate of a design. I turned on the Overcut feature to help with this.
To learn more about what the overcut feature does click HERE.

I found that this gave it a bit cleaner cut on the corners for the top layer of this design.
With the top white layer, be gentle with it getting it off the cutting mat and take the time to carefully remove the cut pieces from the design. I promise it will be worth it.

Once all the pieces are cut, you are ready to assemble.
Since the top layer was rather intricate, I used a Broad Tip Glue pen from Close to My Heart to add adhesive to the backside. Then I glued it down to the first color.

Then I used foam tape to add dimension between the layers.
I used the Thin 3-D Foam Tape by Close to My Heart since I was putting it in a regular frame, I didn’t want to add too much thickness to it, but I still wanted it to have some dimension.

And then sometimes, even when you think you have the right size and you use a rectangle to draw out the size of space you have, don’t always assume the frame/mat is the size it says.
Turns out that my K was just a bit too wide. I should have measured to double check and after cutting the first layer, looked to see if it would fit.

But, I turned it and it fit perfectly the other direction in this frame. If it had not, it wouldn’t have been a lost cause. I would have just reassessed the game plan.

I love the dimension on this!

Once you start, it is hard to stop. I grabbed another layered file from Special Heart Studio for a layered floral heart mandala and started cutting using the same steps as above.

I am loving all the detail and dimension on these layered mandalas.

These layered mandala designs are picking up in popularity and I am seeing them all over Pinterest and Facebook group. Grab one and play today!

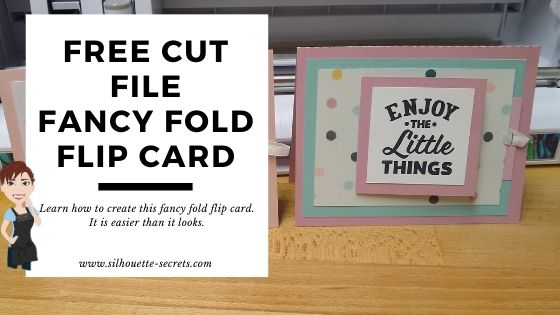
If this is a little too much to get you started with cardstock, check out the free card cut file I shared last week on the blog HEREFancy Fold Flip Card.

I would love to see your Silhouette projects!
Feel free to post photos or questions on my Facebook group at 
Silhouette Secrets with EllyMae.

Save this for future reference by pinning the image below.

Enjoy!

SS Logo snip it
**This post may contain affiliate links. What that means is that I may receive compensation if you purchase through the links I have provided. The price you pay for the product or service is not higher but I may get compensated for sharing.
Posted on 4 Comments

Let’s Explore v4 – Free PDF diagram – Updated

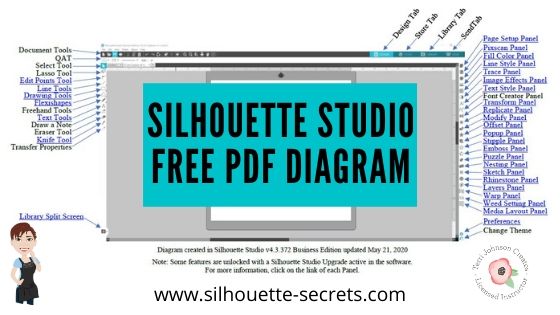
Last year I created a free PDF document that is a diagram of the Design Tab in the Silhouette Studio software. Each of the tools and features is labeled and links back to more information on that feature or tool.

I have just updated this PDF file, so if you grabbed it before make sure to delete the old one and download this new one for future reference.

Click HERE to download or the photo below.

To use this file, download it HERE to a safe place on your computer.

Open the PDF file and then click on any of the blue titles to be taken to more information on that topic.

Note: this is a fluid document and will be updated as needed

Ta-da!
You are now on your way to learning more about the Silhouette Studio software.
Take some time and learn a new feature or tool today!

Check out the full “Let’s Explore v4” series directly on the blog HERE.

Save this for future reference by pinning the image below.

I would love to see what you are creating with your Silhouette!
Feel free to post photos or questions on my Facebook group at 
Silhouette Secrets with EllyMae.

Enjoy!

SS Logo snip it
**This post may contain affiliate links. What that means is that I may receive compensation if you purchase through the links I have provided. The price you pay for the product or service is not higher but I may get compensated for sharing.
Posted on 11 Comments

Create a Flip Action Interactive Card in Silhouette Studio: Step-by-Step Tutorial

Silhouette Secrets+ with EllyMae

What inspires you?

That may sound like an odd question. But, stop and think about it.

Where do you get ideas from? What sparks the creative thoughts flowing? Have you been feeling in a slump lately?

With everything going on right now, I am sure that many are not feeling like their peppy selves or are maybe finding a hard time feeling “creative”.

Keep looking!
Keep looking for that creative spark!

*Blog post updated 10/25/25

A few weeks back I saw a Virtual Crop being hosted by 2 fellow Close to My Heart Consultants. This Creative Collaboration duo team is made up of Susan Williams (USA) and Chris Robertson (Canada). I signed up last minute to attend it because I saw a couple card designs that I wanted to learn to recreate. I have followed Susan Williams before and purchased several of her scrapbook and card kits in the past. So I knew it would be good!

But, what I didn’t count on was how good it was for me! It really gave me a boost to watch them create and start creating along with them.

For this event, we were given a recipe sheet. What’s that?
It’s a page that tells you all the supplies needed to recreate the projects, dimensions needed to cut for each paper, plus tips along the way.

I took that and put it into the Silhouette software and created my own cut file for this card design. I reached out to Susan for permission and today I am sharing this free card file with all of you!
Thank you Susan Williams for permission to share!

Affiliate links may be present in the following blog post and as an Amazon Associate I earn from qualifying purchases.

First, gather the supplies needed to complete this card. It is really not much.

Supplies:

Creating the Cut File

Next, let’s take a look at this file in the Silhouette software.

I drew the card pieces using the drawing tools on the left side of the Silhouette software and then used the Scale panel to resize each to the exact dimensions that were provided to us in the recipe.

Drawing tools on the left
Transform Panel – Scale Tab on the right

To create the score lines, I used the line drawing tools and the Move by tool to place the score line exactly where I needed it on the card piece.

Next, with the line selected, I used the Line Style Panel to create a dashed line for the score line.

I followed the same steps to create the “faux stitching” lines. I duplicated the outside card piece shape, decreased the size, used the alignment tool to center, and then used the Line Style Panel to change it to a dashed line.

Grab the cut file HERE or click on the photo below

When you are ready to cut, open the cut file. Then choose File > Save As and save a new copy as the “working file”. This way you always have an original copy to go back to.
Now, move the text out of the way and move the pieces on and off the cutting mat as needed to cut out of each color.
I use the Textured Cardstock Setting in the software to cut almost all cardstock, but I prefer to cut smooth cardstock as textured can be a bit more finicky sometimes.

Then check out this video on how to assemble this card. I promise it is easier than it looks.

Additional options:

1. Use patterned paper

2. Stamp sentiments on cards

3. Print patterned paper
Using the print and cut process along with digital patterns in the Silhouette library, print your own patterns on cardstock for the pieces as desired.

How do you use the digital patterns & print and cut?
Check out these posts for more information on digital patterns and print and cut:
Print and Cut Basics
Patterns and Print Bleed
Let’s Explore v4 – Pattern Fill

4. Print Sentiments with print and cut.
Following the same steps above for print and cut, I moved copied the Sentiment pieces to a new design mat and made copies. Then I filled each with different sentiments.

You could either type out the text and choose a Text Style or use designs to fill the pieces.
I used a couple different Dingbat fonts to add sentiments in the pieces.
SG Inspirational Sentiments Dingbats by Sophie Gallo – Design #276558
SG Happy Birthday Dingbats by Sophie Gallo – Design #276562
Fancy Sentiments by Sarah Hurley – Design #273562

Cut a bunch and assemble to have on hand for any occasion. Leave the sentiment blank until needed, or stock up on cards you frequently use, such as Birthday or Anniversaries.

This is such a great card design and can be used for so many occasions all year long.

Save this for future reference by pinning the image below.

Enjoy !

THANK YOU for your support! How can you help? Click HERE & buy a coffee.
Every little bit helps with the cost of running the site.

Silhouette Classes

Never stop learning! Let me help you take the anxiety out of learning with Silhouette and get to creating faster! My Silhouette classes are heavily focused on software, so you can take the skills & techniques taught and apply them to many future projects!

Silhouette step-by-step Classes by Silhouette Secrets+

Silhouette Secrets+ with EllyMae
**This post may contain affiliate links. What that means is that I may receive compensation if you purchase through the links I have provided. The price you pay for the product or service is not higher but I may get compensated for sharing.

Posted on Leave a comment

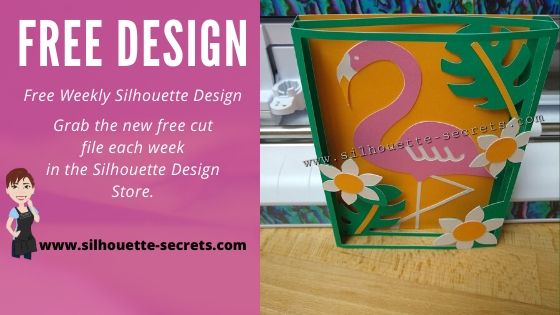
Silhouette Weekly Free Design

Did you know that the Silhouette Design Store has a weekly free cut file?

Each week it will vary from a regular cut file, print and cut file, 3D design file, or a cut file from a featured designer.

This week it is this awesome 3D Flamingo Box Frame. This is perfect for someone who has been wanting to try out 3D paper crafts or loves 3D designs.

Affiliate links may be present in the following blog post and as an Amazon Associate I earn from qualifying purchases.

Flamingo Box Frame click HERE

Why is it perfect? Because it’s free, right now for a week.

Grab it HERE

Want to know another “secret”?

You can choose the Commercial Use license and the svg option for FREE too!

Why would you want these option?

The commercial use license gives you the rights to be able to make an item and then sell that physical item. You may not need it right now, but why not grab it while it’s FREE.

You can find the full commercial use terms of use for the Silhouette Design Store HERE. This will tell you all the things you CAN and CANNOT do with the file.

For more information on licenses and terms of use, check out this post
Understanding Licenses on Cutting Files, Designs, and Fonts” by Cutting for Business.
It is definitely something you will want to understand if you are selling or plan to sell anything you create in the future.

The svg option is a fairly new option to the Silhouette Design Store and confuses a lot of new Silhouette users.

You do not NEED the svg option if you are only using the file in the Silhouette software. However, it is not an option for those who use other cutting machines that open svg files.

Then why select that option too?
Because it’s FREE, so why not. You never know when it might come in handy in the future.

And here is another “secret”?

I cut my materials down to the size I need and place multiple colors on the same cutting mat to not only save adhesive on my cutting mat, but to send it all through at one time to be cut.

In the software, I ungrouped the design and moved each color together and placed it on the virtual cutting mat where I wanted it to cut. Then I cut my materials down to the exact size using a paper trimmer and placed them on my cutting mat as shown above.

By cutting the materials down, I find that it saves the adhesive on my cutting mat and makes it last longer because I am not placing a full sheet of material on the adhesive and peeling it back off again.

For more cutting mat tips check out this post
Tips to Getting the Most out of your Cutting Mats

I used the Transparency option on the Page Setup Panel to reveal the cutting grid, so I knew exactly the size I needed and where to place the cardstock on my cutting mat.

Grab the FREE design this week and play.
Check back each Tuesday for a new free design from the Silhouette Design Store.

I’d love to see what you are creating with your Silhouette!
Feel free to post photos or questions on my Facebook group at 
Silhouette Secrets with EllyMae.

Save this for future reference by pinning the image below.

Enjoy!

SS Logo snip it
**This post may contain affiliate links. What that means is that I may receive compensation if you purchase through the links I have provided. The price you pay for the product or service is not higher but I may get compensated for sharing.
Posted on 3 Comments

Let’s Explore – 5 tips for Silhouette users

I’ve been seeing a lot of frustration on the Silhouette Facebook groups lately and that prompted me to create a list of the 5 most common causes that might cause this frustration.

5 Silhouette Tips

Tutorial created in Silhouette Studio v4.3.372

Tip #1 – Make sure the USB cord is plugged in correctly.
While this may sound silly, this is especially important to take note of with the new Cameo 4 machine.
The USB plug has a specific way to go into the port on the Cameo 4.

The curve of the USB plug should be facing down and the straight part facing up. Do not force the USB plug into the port or you could damage the connection.

If the USB plug is not inserted correctly, the Silhouette software will not pick up the Silhouette machine connection.

Tip #2 – Make sure the blade is installed properly.
There should be no gap at all between the lip of the blade and the housing of the machine.

Cameo 4 Autoblade installation

To ensure that the blade is completely down in the housing, lift up on the front of the lock carefully as you install the blade. Then hold pressure down on the top of the blade as you push the lock in.

If you still have questions on proper blade installation, check out this video from Silhouette on installing the blade in the Cameo 4 – HERE.

If you are using a Silhouette black “ratchet” blade, make sure the fin of the blade is at the 6 o’clock position and there is no gap between the housing and the lip of the blade.

Ratchet blade parts
Cameo 3 blade installation

It does not matter which Silhouette machine you are using.
The blade installation applies for all Silhouette machines.

If you are using a black “ratchet” blade, premium blade, or deep cut blade in the Cameo 4; make sure you are using the correct adapter and installing in the Tool 1 housing.

Tip #3 – Make sure the mat is loaded properly.
There are only 2 ways the Silhouette cutting mat can be loaded properly in the machine. The cutting mat has specific dimensions and the left and right sides are narrower than the top and bottom margins.

New Silhouette cutting mat

With a new Silhouette cutting mat, there are 2 arrows designating the top and bottom of the mat. The cutting mat can be loaded in the machine with the arrow in.
On an older Silhouette cutting mat, there may be only 1 arrow. The cutting mat can be loaded in the machine arrow in or arrow out.

Place the left edge of the cutting mat next to the line on the left that the arrows point to.

Load icon on Cameo 4

Gently hold the cutting mat up to the rollers and then press the Load button on the Cameo and the machine will pull it into the machine. If the cutting mat does not pull in evenly, press the unload button and load it again.

If you are using a Cameo 3 or Cameo 4, the Autoblade needs access to the adjustment holes on the left side. If the cutting mat or material is loaded too far to the left or sideways, the blade cannot hit those adjustment holes properly to adjust the blade correctly.

Tip #4 – Make sure the Page Setup Panel options are set correctly.
The Page Setup Panel is where you tell the software what you are working with.
This is where you set up your machine, cutting mat, and media size.

Setting up the Page Setup Panel is very important in knowing where the design will cut.
For more information on the Page Setup Panel check out this post “Let’s Explore v4” post HERE.

If you are cutting without a mat, the cuttable area is different than cutting with a mat.
For more information on cutting without a mat click HERE or on this post about the roll feeder HERE.

Tip #5 – Make sure that the design is set up with cut lines.
When you are ready to send the design to cut, make sure there are bold red cut lines showing on the Send tab around the design.

Affiliate links may be present in the following blog post and as an Amazon Associate I earn from qualifying purchases.

If there are no bold red cut lines around the design, the software has nothing to communicate to the Silhouette machine to cut.

Click on the design to select it. This is the most important part.
If the design is not selected then there is nothing to change.

Once the design is selected, choose Cut on the right side and bold red lines should appear.

If bold red lines do not appear around the image where you want to cut, what file type are you cutting?

A .studio file from the Silhouette Design Store, cut lines should turn on.

A .svg file, the cut lines should turn on if you have the Designer Edition upgrade or higher and have opened the file correctly.
Find out more information on svg files HERE.

Breathe Mandala by On the Spot Studio

A .jpeg or .png file is a graphics file only and does not have cut lines. Most often when you choose cut the bold red cut lines show up in a rectangle or square around the design. Jpeg or png file will need to be traced to get cut lines.
Find our more information on tracing HERE.

And just because I can’t stop there, here are a few other tips.

Bonus Tip #1
Make sure you have the correct material chosen on the Send tab before sending to cut.

Bonus Tip #2
Do a test cut.
This will save you frustration and materials. You can either use the test cut in the software or create your own by typing out a capital ‘B’ to use.
Check out this Beginner HTV post for more information on using your own test cut.

Make sure to unload the mat and reload it before you send the design to cut. There are currently some versions of the software that do not reset the blade housing to the same location after a test cut and the design may not cut in the correct location if the mat is not unloaded after a test cut.

Bonus Tip #3
Make sure the Registration marks are OFF.
These are marks that are only used for print and cut, but I see many new users accidentally turn them on without realizing it.

If a new user is trying to type out text and presses the ‘M’ when not in text typing mode, the registration marks will appear on the screen.
The keyboard shortcut is the letter ‘M’ or they can be turned off on the Page Setup Panel – Tab 3 – Registration Marks.

Registration Marks Explanation created in v4.2 software – 12/27/17

Troubleshooting Tip

If you run into cutting issues and post on a Facebook group asking for help, post a photo of the blade installed in the machine with the mat loaded.

If you have followed me on Facebook, you have probably noticed that is the first question I will ask a user when they are experiencing cutting issues.
It is the #1 place to start no matter if you are a new user or experienced user.

Why?

Most issues start with the blade, however, there are many things we can tell by looking at a blade photo such as: which Silhouette machine it is, alignment of the blade housing, are there cracks in the blade, is there material stuck in the housing, is the mat loaded properly, has the packing material been removed, etc. and YES – is the blade installed correctly.
But, it is not always just about the blade being installed correctly in the machine.

And sometimes, it is not what we are looking for but what might be off. It is not always easy to explain what we look for when troubleshooting but it is the first place to start when troubleshooting.

If you are just unboxing a new Silhouette machine check out these 2 unboxing videos:
Unboxing the Cameo 4
Unboxing the Curio

If you are still having issues getting started or are feeling overwhelmed, check out the new Beginner Video Class I created after so many users struggling with the same issues when getting started.

Save this for future reference by pinning the image below.

I’d love to see what you are creating with your Silhouette!
Feel free to post photos or questions on my Facebook group at 
Silhouette Secrets with EllyMae.

Enjoy!

SS Logo snip it
**This post may contain affiliate links. What that means is that I may receive compensation if you purchase through the links I have provided. The price you pay for the product or service is not higher but I may get compensated for sharing.
Posted on 2 Comments

Silhouette Curio Virtual Retreat Highlights

We just wrapped up the first Silhouette Curio Virtual retreat this past weekend that was hosted by Terri Johnson Creates and it was a success! 3 days of diving into Curio projects that included metal etching, acrylic etching, leather embossing, more acrylic etching, and sketching on wood.

This event was originally scheduled as a hands-on retreat, but due to the current situation we made the decision not to cancel it but to move it to a virtual online retreat. Students received class supply kits, written instructions, access to recorded video lessons for each project, video conference calls for discussion & questions, and support through our private Facebook group during the event.

Let me tell you, I have been testing these class projects for months, over and over. And by the end of an event, I will admit I sometimes feel that I just don’t need another project with my initial on it.

But, these attendees blew me away. They watched the video classes and created some fabulous projects! I hope these project photos will inspire you just like they have me!

Silhouette Metal Etching

Affiliate links may be present in the following blog post and as an Amazon Associate I earn from qualifying purchases.

Thank you Silhouette for sponsoring this class using the Silhouette metal etching sheets!

Acrylic Etched Coasters with the Curio

Thank you Craft Chameleon for sponsoring this class.

We used the Acrylic Coaster, Curio Coaster Template and Mandala Heart design by Sophie Gallo – Design #275077.

Embossed Leather Earrings & Key Fob

Thank you to Silver Creek Leather Co. for sponsoring this class.
We used ReaLeather tooling leather in this project with the Silhouette Embossing Tool.

Check out this short video showing the Curio in action on the leather.

Etched Acrylic Panel & Silhouette Design

Thank you Craft Chameleon for sponsoring this class.

Sketching on Wood

We used the Pine Cone sketch design by Tanya Batrak – Design #236611 for the main sketching design and then the attendees got creative and branched out.

While we could not meet in person due to the circumstances, we had a great time meeting together in the first Virtual Curio retreat.

For more information on the Silhouette Curio, check these out:
Curio Unboxing Video
Let’s Explore – The Curio – Getting Started
Beginner Curio Metal Etching
Basic Acrylic Etching with the Curio

The feedback we received from the event was amazing!
Here are just a few of the reviews from this weekend.

“I was glad when it was announced that this would be a virtual class. I wasn’t going to be able to attend otherwise. I was a little skeptical of taking a virtual class like this since I am not self motivated to watch online videos. But I found that I was very motivated to keep up with the class schedule and projects. Loved being able to watch the classes and stop, back up, and go over a technique several times if I needed to. Would love to take more classes like this with Terri and Elly. Fantastic instructional classes and awesome instructors. Thank you for taking us to another level of learning.” Carol R

“A truly wonderful virtual experience. It was so relaxing to go at your own pace and rewind the videos when you “didn’t quite get it” as many times as you needed or refer back to the written instructions when that worked better. Terri and EllyMae were always there for you when you needed to reach out and the ZOOM calls opened you to questions and answers you might not have thought about. I would definitely take another virtual class. You can see just how much time and detail was put in to these classes. Thank you Terri and EllyMae for a fantastic experience and loving all the knowledge I gained.” Jean S

“Thanks so much for offering this virtually. We had contact with other participants through Zoom, the projects were varied and fun, and the instruction was superb!. The videos were well-organized, thorough, and well paced. It was helpful to be able to go back and repeat sections. The workbook is an excellent resource going forward. I hope you continue to offer virtual retreats. “ Boo M.

“This retreat was a blast! Everything – from materials to instruction sheets to instructional videos – was so thought out down to the tiniest detail. Terri and EllyMae, as well as the retreat helpers, are experts in all things Curio – how it works, how to troubleshoot, about the materials, cut/etch settings, Silhouette software, etc. They are genuine, professional, personable, and very patient. I learned some new techniques and how to use some materials I had never thought of. My mind is now in overdrive thinking of all the projects and possibilities. I would so do this again – either in person or virtual.” Leigh W

“This was an outstanding weekend. I would definitely take another class in this format. I had all my materials available to me in my space, I was able to go at my own pace & could rewind if I needed to listen to something again. I loved it!! Judy A.”

Those are just a few and I’ll share more in the future.

We are all finding ourselves in a new time with the current events happening and this virtual retreat was definitely a new experience for us all.

Make sure to get signed up on the Terri Johnson Creates blog and subscribe to this blog on the right side to get notified for future events!
You will also find us on Facebook at:
Terri Johnson Creates Page
All Things Silhouette Facebook Group
Silhouette Secrets+ Page
Silhouette Secrets + with EllyMae Facebook Group

Save this for future reference by pinning the image below.

We want to say a great big THANK YOU to all our sponsors!
From class sponsorship’s to goody bag items to your support, we cannot do this without YOU!
Atlanta Stylish Point
Craft Chameleon
Silhouette America
Silver Creek Leather Co.
Sparkleberry Ink
THANK YOU!

I’d love to see what you are creating with your Silhouette!
Feel free to post photos or questions on my Facebook group at 
Silhouette Secrets with EllyMae.

Enjoy!

SS Logo snip it
**This post may contain affiliate links. What that means is that I may receive compensation if you purchase through the links I have provided. The price you pay for the product or service is not higher but I may get compensated for sharing.
Posted on 7 Comments

Let’s Explore v4 – Patterns, Print Bleed & Show/Hide Library

It is so hard to just show one feature in a post. This post started out as a one to show you how to add patterns to your designs so that you can print unique creations and use digital papers. But, then it morphed.

Today we will talk about 3 features in the v4 software.

  • Adding patterns to your design to create unique projects
  • Print Bleed
  • Show/Hide Libary feature

What are patterns used for?

Patterns can add a unique element to your creations that you can print out.

You can access patterns under the Fill Color Panel – Patterns Tab located on the right side.

Affiliate links may be present in the following blog post and as an Amazon Associate I earn from qualifying purchases.

Filling a design with a pattern can open a whole new world of possibilities. I have these card pieces on my design mat and I want to fill them with one of the new digital pattern that’s available at Sparkleberry Ink called Choose Happy Digital Pattern Collection.
With everything going on right now, these patterns were released to bring out a little bright color and happiness. I saw them and knew I had to create something with them.

Select the objects you want to fill with the pattern and then in the Fill Color Panel – Patterns Tab (Tab 3), choose the Pattern you want to fill it with. And watch the magic happen.

I set up my page to do a Print and Cut and then printed a 12″ x 12″ page with my Canon TS9521C printer.

I use the same steps each time that I set up a print and cut project and have great success with it. It is one of my favorite things to do.
Find more information on print and cut check out these posts:
Print & Cut Basics
Print & Cut Tips
How to Print & Cut Larger with Silhouette

Adding patterns to the Silhouette library is a Designer Edition upgrade feature. Find out more about the Pattern Fill Panel HERE.

Print Bleed

Something that is new in the v4 software is a feature called Print Bleed.
What this does is it will bleed the outside edge of your design color out away from the design. This helps when you are doing a print and cut to eliminate a white border that you may have around the design.

The Print bleed can be found in the v4.4 software on the Page Setup Panel – Registration Marks Panel.

Print Bleed in v4.4

In previous versions of v4, the Print Bleed is found on Tab 1 of the Page Setup Panel.

Once the Print Bleed option is checked, then you can adjust the distance you want the bleed to have from the design. However, something to note here is that the print bleed does not show up on the design screen and it applies to all objects on your screen.

As each design is different, it can also affect designs differently. For instance, a design that is made up of different parts that are all individual pieces and colors, it will bleed all of those colors of the individual pieces. Print bleed works well on a single object, a graphic file, or print and cut design.

I printed 3 different patterns from the Sparkleberry Choose Happy Digital Patterns Collection and then I picked one from the Silhouette Design Store called Arrows Background Paper by Miss Kate Cuttables – Design #296677.

This time when I added the pattern I used a different method though. On the Design tab in the bottom left corner, there is now a Show/Hide Library option.

Show/Hide Library on Design Tab

Click on this little folder and the Library will expand out from the left side, so you have a split screen and can see both designs in the library and on the design mat at the same time.
Of course, your screen size will determine if this is a suitable feature for you to use or not.

Show Library Split Page Design Tab

Select the object on the screen and choose one of the patterns from the Patterns folder in the library and it will fill with that pattern.
This will work for adding other designs to your current design mat in the software too.
(Sometimes you may notice it will add an extra pattern piece, you can just delete what you don’t need.)

In the Advanced Options of the Fill Color Panel – Patterns tab (3rd tab), you will find options for panning the pattern, rotating it, or scaling it as well.

Sometimes I find it hard to see the little patterns that show up in the Patterns Tab on the Fill Color Panel. They are not well organized and the pattern photo is small, so using the Show Library split panel can be an option to make it easier to find a pattern you are looking for.

Cutting aftermath

Go big or go home, right? When I cut out papercraft projects that have several pieces to them, I tend to make extras. I can set these pieces aside to assemble at a later date or have extras on hand. In this case, I cut the pieces to make 6 each of 4 different pattern designs. So I have 24 cards that I can now send out to friends.

Card pieces

Once the file is set up in the Silhouette software is it just a matter of loading and unloading the cutting mat each time and I just started making piles for each set of cards.

Craftermath from cutting

A couple hours later and I had all the pieces to assemble these cards. About half way through I had the thought that I could hook up another machine and then cut from multiple machines at the same time to make it go faster. But, I was enjoying cutting with the Cameo 4 and didn’t go that route.

But it’s an option – check out how to use multiple Silhouette machines at the same time HERE.

24 finished cards

Now here is the really fun part!

Flip card video

I love being able to create custom designs with my Silhouette and make the cutting of all the pieces go so smooth. I embellished these cards with a few stamps from Close to My Heart and they are ready to send off.

What are you creating with your Silhouette today?
I’d love to see it over on my Facebook group at Silhouette Secrets with EllyMae.

Save this for future reference by pinning the image below.

Enjoy!

SS Logo snip it
**This post may contain affiliate links. What that means is that I may receive compensation if you purchase through the links I have provided. The price you pay for the product or service is not higher but I may get compensated for sharing.

Posted on 4 Comments

Just Released – Beginner Video Class

I have helped so many users these past few weeks on Facebook who are frustrated and having issues getting the Cameo 4 setup for their first cuts.
So, I set to work this week on creating a Beginner video class.

This video class is created in the same way I would teach a private face-to -face lesson to a new student.

Even though this is labeled a “beginner” class, there is still a lot of information in it that I think any user could get out of it. But, it is a video course that I believe can also get a user started from opening the box to getting their first cuts.
I have also included a bonus 24 minutes video on my troubleshooting tips and things I look for when cuts aren’t going as planned.
Whether you are a brand new user or one with a little experience, I think it contains some tips for all users.

While this class features a Cameo 4 in the setup and presentation, the setup tips and instruction for the first cuts apply to all Silhouette machines.
If you are a Curio user, I would suggest also checking out the Curio Unboxing video on YouTube and the Let’s Explore – The Curio – Getting Started post on the blog.

What does this class contain?

Course outline:

Pre-course: Cameo 4 Unboxing video
I highly recommend watching this before starting the main course
This video is also available on my YouTube channel HERE.

Main Course
Cameo Setup & Blades – 20 minute video
Designing in Silhouette & First Cuts – 1 hour 12 minute video
Bonus – Blade cleaning & Troubleshooting – 24 minute video

Additional Resources mentioned in the video

If you are having issues with your cuts or are nervous about getting started, this video course is full of information to get your Cameo out of the box, setup properly, and cutting.

Check it out HERE

You can see all of the video courses available on my Teachable site HERE

Silhouette Secrets+ Teachable Classes

I hope this will help get you feeling a little more comfortable with your new Silhouette machine or one that’s been calling your name for awhile.

Save this for future reference by pinning the image below.

I would love to see what you create!
Feel free to post on my Facebook group at Silhouette Secrets with EllyMae.

Enjoy!

SS Logo snip it
**This post may contain affiliate links. What that means is that I may receive compensation if you purchase through the links I have provided. The price you pay for the product or service is not higher but I may get compensated for sharing.

Share this: