Affiliate links may be present in the below and as an Amazon Associate I earn from qualifying purchases.What that means is that I may receive compensation if you purchase through the links I have provided. The price you pay for the product or service is not higher but I may get compensated for sharing.
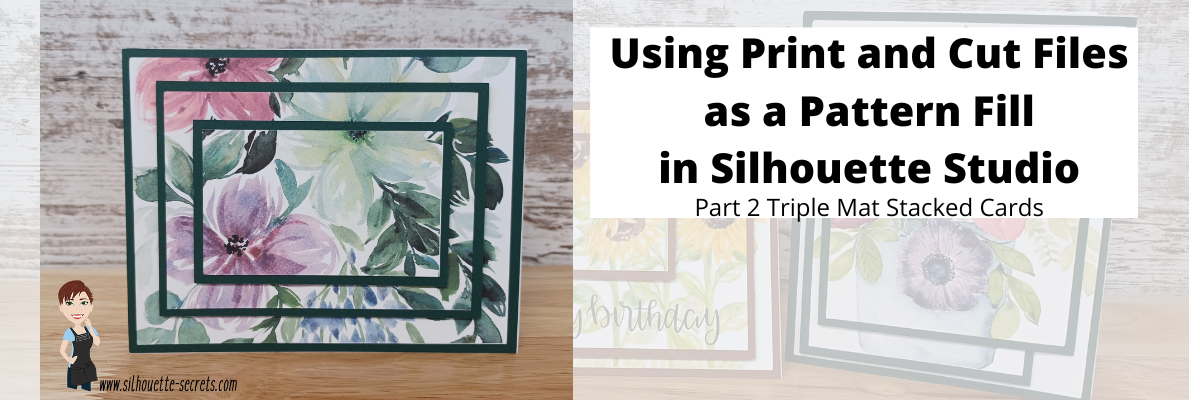
In Part 2, I am sharing how you can use a print and cut file and use it as a pattern fill.
I hope you get into the Silhouette software and play today!
I would love to see what you are creating with your Silhouette software or machines! Feel free to post on my Facebook group at Silhouette Secrets with EllyMae.
Save this for future reference by pinning the image below.
Enjoy !
THANK YOU for your support! How can you help? Click HERE & buy a coffee. Every little bit helps with the cost of running the site.
Or if you are looking for more in-depth, step-by-step classes, check out all of my online Silhouette classes on my Teachable site HERE.
**This post may contain affiliate links. What that means is that I may receive compensation if you purchase through the links I have provided. The price you pay for the product or service is not higher but I may get compensated for sharing.
Check out the description on the video for links to the supplies used in the video and more information on each Silhouette Studio tool used to create this project.
Watch for the written tutorial coming on Sunday.
Hope you have a fabulous day!
Save this for future reference by pinning the image below.
Enjoy !
THANK YOU for your support! How can you help? Click HERE & buy a coffee. Every little bit helps with the cost of running the site.
Or if you are looking for more in-depth, step-by-step classes, check out all of my online Silhouette classes on my Teachable site HERE.
**This post may contain affiliate links. What that means is that I may receive compensation if you purchase through the links I have provided. The price you pay for the product or service is not higher but I may get compensated for sharing.
Want to take your Silhouette projects to the next level? Print and cut designs with foil embellishments might be the next project for you!
Combining techniques such as adding Foil Quill accents to a print and cut project can give it a little pop.
This technique takes two amazing features and combines them together. It can be as simple or complex as you want to make it and the end result can be amazing and unique.
This post is inspired by my friend Teresa P. who does some amazing Foil Quill work and combines it with print and cut. The credit goes to her for this post as she is a big inspiration!
You won’t use all of these tools at the same time, but each tool serves a purpose and one may work better for you on a certain graphic versus another. You may find that you know more than you realize in the software.
What does it mean to combine a print and cut project with Foil Quill? Basically, you are telling the software that you want to foil certain areas on top of a print and cut. Since a print and cut has registration marks, it can read where the design is on the page to know where you are telling it to foil.
However, each design may vary in what you need to do to tell it where to foil. You may have to create a “cut” line by tracing, drawing, etc. in order for it to know where you want to foil on top of the print and cut.
Tutorial written in Silhouette Studio v4.4.552 Affiliate links may be present in the following blog post and as an Amazon Associate, I earn from qualifying purchases.
How to Add Foil Accents to Print and Cut Projects
Set up print and cut page with the design to be used.
On the Page Setup Panel – Tab 1, choose the machine, cutting mat, and media size. Check the boxes next to Show Print Border and Show Cut Border.
Tip – It helps to place the design towards the bottom of the page if possible. You do not want to unload the mat after it’s foiled, so you can send the design to be cut after it’s foiled.
On the Page Setup Panel – Tab 3, turn the Registration Marks on and click the Restore Defaults button.
Tip: using the system defaults will give you the most accurate print and cut. I recommend using the defaults especially if you are just getting started with print and cut.
Use File > Print > Print to print the page.
Tips: – Once the page is printed, do not move the design on the page. If you accidentally move the design use the Undo button. – This is a great time to use the Layers Panel and lock the layer with the graphic image on it so it does not move. Create a new “working layer” to complete the following steps.
Place the printed page on the cutting mat in the exact location (top left corner) on the cutting mat as it shows on the design screen.
Using drawing tools or the trace panel, create cut lines where you want to add foil quill.
In this example, I used the Freehand Drawing Tools to trace around the areas of the design that I wanted to fill with the Foil Quill.
Add a fill to the shape using the Line Effects/Sketch fill panel.
I used a crosshatched fill with 0.010″ spacing and an edge effect in the Line Style/Sketch Panel.
Set the sketch lines to a different color than the cut line color using the Line Style Panel – Tab 2.
I use red for my cut lines and blue for sketch lines.
Secure foil on top of the area to be foiled.
Tips: – Use washi tape or a low tack tape to secure the foil onto the page. Be careful when removing so as not to tear the paper or remove the ink. – Keep the foil & tape away from the registration marks area so it does not interfere with the reading of the print and cut. – Make sure the foil is secure and will not catch as the mat moves back and forth in the machine.
Click on the Send tab. Choose the cut by Line Color.
Choose the Material settings on the Send tab for each color.
Uncheck the line color(s) for the cut lines and only have the Foil Quill lines checked.
Send it to foil.
DO NOT unload the cutting mat when finished.
Carefully check the foil and remove carefully.
Uncheck the foil color lines and check the cut lines.
Switch the tools from the Foil Quill to a blade if needed and send it to cut.
Enjoy your foil accented print and cut design.
Now it’s time to practice!
Choose designs and then decide what will work best for creating the cut lines to fill with a line effect/sketch fill to foil accents with.
This could be a great addition to cards, stickers, scrapbook pages, or many more projects.
Here are a few examples I created using the same techniques.
Anniversary card with sentiment & accents in gold foil. Happy Anniversary created with Samantha Craft font found HERE.
I would love to see what you are creating with your Silhouette software or machines! Or if you have any questions, feel free to post photos or questions on my Facebook group at Silhouette Secrets with EllyMae. Check out the Foil Quill Album on the Facebook group HERE.
Save this for future reference by pinning the image below.
Enjoy!
THANK YOU for your support! How can you help? Click HERE & buy a coffee. Every little bit helps with the cost of running the site.
Silhouette Classes
Never stop learning! Let me help you take the anxiety out of learning with Silhouette and get to creating faster! My Silhouette classes are heavily focused on software, so you can take the skills & techniques taught and apply them to many future projects!
**This post may contain affiliate links. What that means is that I may receive compensation if you purchase through the links I have provided. The price you pay for the product or service is not higher but I may get compensated for sharing.
Yesterday I shared a post on printing from Silhouette using a png file for sublimation.
But what if you do not have a sublimation printer?
There are still options for you. One of those is heat transfer paper that can be printed on your home printer.
Now, a couple things to keep in mind here are the brand of heat transfer paper, the ink/printer used, and the printer quality settings will all be factors in how well this turns out for you. The only way to know for sure is to test it. Heat Transfer Paper can also be used on more apparel than sublimation prints. You do not have to worry having a high polyester content like you do with sublimation.
Tutorial written in Silhouette Studio v4.4.552 Affiliate links may be present in the following blog post and as an Amazon Associate I earn from qualifying purchases.
You do want to make sure that whatever brand you are using is going to be compatible with your current printer. The Silhouette Heat Transfer for darks is compatible with inkjet printers only and not laser printers. If you are looking for laser compatible, Heat Press Nation has some options – find those HERE.
Not all brands of heat transfer paper will be created the same and the only real way to know what will hold up is to test it. I have seen many failures from store bought brands. I have also heard some failures with the Silhouette brand as well, but it has held up well for me. I have been surprised that shirts have lasted 1-3 years and I will fully admit that I have not followed the care instructions. All my laundry just gets thrown in together and in the dryer as well. For best results, follow the manufacturer’s care instructions.
This is an example that I created for my online Heat Transfer Paper Print & Cut lesson with Silhouette using the Jetpro for lights. This shirt lasted for almost 3 years before the image started to look really worn. And it was washed a lot as a kid’s shirt.
With Heat Transfer Paper, it does need to be set up to cut around the design as a print and cut. For detailed instructions on setting up a print and cut project, check out the Let’s Explore v4 – Print and Cut Basics found HERE. I would recommend practicing with cardstock or copy paper until you have a good cut before you use the more expensive heat transfer paper.
The process of print and cut is the same no matter what materials you are printing and cutting on. I would highly recommend using the default registration marks to get the most accurate cut. This also eliminates many things that can be the cause of inaccurate cuts or misreads when doing a print and cut project. The biggest issues we see with print and cut are usually something in the setup – this can range from registration marks moved, page size not set right, mat hanging down in front, design interfering with the reading of the optical eye, etc.
Since we are using a png file, it will either need to be Traced or the Autotrace feature used in order to get cut lines around it. A png is a graphic image that has no cut data. So you may need to create that cut data by Tracing to get a cut line. The biggest thing about tracing is that every single design or image will be different in what might work for it. Practice is the only way to know what works best. I usually trace and then increase the Threshold up until everything I want turns yellow, then I trace it. For the most part that works well.
In this case, with the png image I’m using, it was designed for sublimation so it has transparent areas inside of the design that do not trace. But, we can still work with that.
After I traced the original png image, I did an Offset of the trace. Make sure after you use the Offset feature, you remove the original trace or it will cut too!
Now, do you have to do this with all images? No. Every image you use can vary because they are all created differently. The more you do this and work with things in the software, you will start to recognize patterns and start to see what you might need to do.
For this png image that I am using, what that means is that with the Heat Transfer Paper for darks, it will leave a white border around the entire design. The biggest thing here to keep in mind is that all images and designs can vary in what they need to make them work.
Once the file is all set up, the next step is to Print it. Make sure to follow the directions for the Heat Transfer Paper that you are using. For this Silhouette Heat Transfer it says Do Not Mirror.
Keep in mind that the print quality is going to be dependent on the settings you choose. I print on Heat Transfer Paper with the highest quality Photo Matte option especially if it’s going to be on a shirt that will be washed. I also like to select the Print Preview just to check it once more before it uses up my ink and paper.
Once printed, click on the Send tab in the top right corner and set the cut settings. This is where you can check where the bold red cut border is and if it will cut where you want.
Make sure that you do not move anything on the file after it is printed. For print and cut projects, it has to match up exactly with what was printed or it may not work.
Load the printed page on the cutting mat exactly as it shows on the screen in the top left corner of the cutting mat.
Whenever you are cutting a new material, test cut! However, with print and cut you do not want the test cut to be in the default location or it can interfere with the reading of the registration marks. Type out a capital B and move that to a location outside your design and use it for your test cut. I share more details on how I use the B in this post HERE.
I ended up increasing the blade depth up to a 2 on this material. My blade is well used and a 1 just didn’t “cut it”.
Weed away the excess.
Carefully peel the heat transfer paper off the backing and place onto the object to be pressed on. I immediately cover with parchment paper as the heat transfer may start to curl when it’s close to heat.
Follow the directions for the brand of Heat Transfer Paper you are using. I found heat press instructions on the Silhouette website for pressing this material. Find those instructions HERE.
I am using a Craft Pro 15″ x 15″ press from Heat Press Nation and I love the pull out bottom platen so I can get my object prepped without burning my knuckles. Mine is plain old white, but they have more colors available now.
It is a little bit different look but it is still an option to use designs like these without a sublimation printer. The best part about Heat Transfer Paper is that you can use it on colors and cotton shirts or materials. You are not as limited by only polyester or specially treated products for sublimation.
I would recommend waiting at least 24 hours before you wash, just like you would for any HTV or sublimation prints. No need to take any chances too soon after creating your project. And I’d recommend following the manufacturer’s care instructions for your garment. Unless you are a little daring like me…. but really, it’s more because I’m lazy and just throw the laundry in.
In 2019 I taught a class at the All Things Silhouette Conference using heat transfer paper and I found you could use it for all kinds of projects if you want to add graphics to them. Check out the Print and Cut with Heat Transfer Paper post HERE for more ideas on what you can do with it.
I would love to see what you are creating with your Silhouette software or machines! Or if you have any questions, feel free to post photos or questions on my Facebook group at Silhouette Secrets with EllyMae.
Save this for future reference by pinning the image below.
Enjoy !
THANK YOU for your support! How can you help? Click HERE & buy a coffee. Every little bit helps with the cost of running the site.
Or if you are looking for more in-depth, step-by-step classes, check out all of my online Silhouette classes on my Teachable site HERE.
**This post may contain affiliate links. What that means is that I may receive compensation if you purchase through the links I have provided. The price you pay for the product or service is not higher but I may get compensated for sharing.
All of the Silhouette machines can do print and cut projects. This is where you can set up a graphic image to be printed through the printer connected to your computer and then have the Silhouette cut around that shape. It uses a process called registration marks to find where the design is on the page.
This tutorial is written in v4.4.476 of the Silhouette Studio software.
No matter if you are an experienced user or brand new to the Cameo Pro, I would suggest starting with all the basics, using all the defaults, and doing a test print and cut project to see how the new Cameo Pro is going to work. This will save you hours of frustration and materials.
What I find most often when I am troubleshooting with a user is that they have been setting things up so far away from the defaults for so long and have been lucky that it’s worked on the older model machines. However, with a new machine, I would highly recommend starting at all the defaults and basics and then once you have a successful cut, then start playing with things and seeing how far you can adjust them.
I use the basic setup and default setting for all my print and cut projects and rarely ever have an issue with a mis-read or mis-cut.
Affiliate links may be present in the following blog post and as an Amazon Associate I earn from qualifying purchases.
Note: this post contains both photos and videos
Let’s take a look at the different options for the Cameo Pro.
Print and Cut with the 24″ mat
The Cameo Pro comes with a monster of a cutting mat. This is great news for bigger projects! Since this is the mat that comes with the machine, we will start there, but I would highly recommend that you get a smaller cutting mat to use if your print and cut project will fit on it. It is much easier to use the smaller mat for these smaller projects than the 24″ mat.
Print and Cut Setup for 24″ mat – letter size media
On the Page Setup Panel choose #1 – Machine = Cameo Pro #2 – Mat = 24″ #3 – Media Size = Letter (whatever page size you are printing on)
Notice how the software places the media size in the top left corner, but with a 24″ mat it is a very specific location. This will be important when we place the material on the cutting mat.
On the Page Setup Panel, check the box next to Show Print border and Show Cut border. Print border = gray line Cut border = red line
On the Page Setup Panel, click on the 3rd tab for the Registration Marks. Click the circle next to On. Then click on the Restore Defaults button.
When the registration marks are turned On, you will see 3 marks appear on the media size. This is how the Silhouette machine “reads” where the design is placed on the page. Click on the Restore Defaults button. This is going to be where the Silhouette machine gives the most accurate read and cut.
Since the Show Print border is on, the gray border will show what the printer margins are with the current printer that is connected to the computer for the media size set under the printer setup. The biggest thing you want to look for here is that the bottom left registration mark is not outside of this Print border (gray line). If it is, you will need to click on the Advanced Options on the Registration Marks Panel and bump up the bottom registration mark until it will print completely. All 3 of the Registration Marks have to be on the printed page in order for it to read accurately. I only suggest this if the mark is showing outside of the print border.
If this is the first time doing a print and cut or the first time doing this process on the new Cameo Pro, I would suggest doing a test print on cardstock first. All this means is to pick a print and cut design, place it on the design mat within the boundaries, and then print on cardstock as a test. This will save you from using more expensive materials and having something go wrong.
With a print and cut project, you want to make sure to keep the design out of the cross-hatched areas on the page and within the red cut border. The cross-hatched areas do not print on your final page, however, this is the clearance that the optical eye under the blade housing of the Cameo needs in order to read the registration mark accurately. If there is a design in the cross-hatched area or dark colors near the area, it can interfere with the reading of the marks and either give a registration error or an inaccurate cut.
In some cases, the optical eye does not like any design between the 2 cross-hatched areas at the top of the page. It can interfere with reading accurately.
Once the page is all setup and ready to print. Click on File > Print in the top left corner.
In the v4.4 software, a “print preview” will pop up (unless you’ve turned it off). You can review this for any things that look out of place and to get to the printer preferences will click Print in the bottom right corner.
Now, the printer window will come up. This may look a bit different for each user because of the different printers being used. Choose the printer the job will be sent to.
Then I choose Preferences on my printer panel. Under this selection I can change my page size, media type, and have the option for an additional print preview. I highly suggest this as it has saved my butt a few times and I’ve caught things before wasting ink and paper.
Click Ok. And then click Print.
Note: If you changed the page size that will be printed on, click on the Apply button and then cancel. Then choose cancel again on the Print Preview and start over at File > Print. This will ensure that the printer margins are showing accurately on the page size you changed to.
Since I enabled the additional Print Preview, I get a new Preview window that pops up where I can verify that it all looks correct and that all 3 registration marks will print completely on the page. This may seem like an extra step, but it has saved me more times than I can count.
Once it’s all good, click on Print. Make sure to let the printer ink dry before handling the page. If the registration marks get smeared on the page, it can affect the reading of the marks.
Place the printed page on the 24″ cutting mat exactly as it shows on the software screen. This will be 1/2″ to the right of the outside grid line on the left edge of the cutting mat. Make sure that the top of the page is covering the grid lines or the Cameo can pick up the black of the grid lines as it reads.
With the Cameo 4 and the 24″ mat, you will need to have the mat fully supported in the front and behind the machine. This means that you will need 22″ of clearance and support in the front and in the back. The cutting mat needs to roll in and out of the machine as flat as possible. It cannot hang down on either the front or backside as it cannot work against gravity. If the mat is hanging down, it can affect both the reading of the registration marks and the cut accuracy of any project. (This is another reason I’d recommend a smaller mat if the project allows)
I would recommend using the roll feeder supports with the additional mat support at all times for best results with the 24″ mat.
Load the 24″ cutting mat in the Cameo. The left edge of the cutting mat should be next to the line on the left side. The rollers should be rolling across the edges of the cutting mat and not across the adhesive on the mat.
One of the neat features of the Cameo 4 models now is the Autoload feature. Press the load button and it will start to flash. The Cameo will automatically load the mat/material 6 seconds after the sensor is covered. The mat /material needs to be held up to the rollers securely (not pushed under) and the rollers will grab it and pull it in after 6 seconds.
Note: If the mat/material does not load straight, press unload and try again. If the machine “loads” before you are ready with the material up to the rollers, press unload and try again. The machine will think it’s loaded if you do not press unload.
Check out this quick video showing the Autoload feature.
Back in the software, click on the Send tab in the top right corner. Verify that the design has cut lines around it. Bold red lines = cut lines.
Note: it is very important that nothing be moved on the design page after the page has been printed or it can affect the cut accuracy.
Choose the Material that is being cut. Verify that all the settings are correct.
Note: if this is the first time cutting this material, a test cut is always recommended. However, you do not want to test cut in the top left corner of a print and cut project or it can interfere with the reading of the registration marks. I like to use a capital B and place that in a blank area on the design page to perform the test cuts. Turn the cut lines off for the full design and then cut only the capital B. Or use a scrap piece of the same material to perform the test cuts.
Once everything has been set and verified, (cross your fingers) click on the Send button in the bottom right corner.
The Cameo will now begin to look for the Registration Marks. It starts at the top left square, then moves down to the bottom left corner, and then moves up to the top right corner.
By following these same steps each time, I have great success with print and cut.
Print and Cut Setup for 24″ mat – large format media sizes
How large can you print and cut on the Silhouette machines?
This is determined more by the size of your printer capabilities than the limits of the Silhouette machine. I have a Canon TS9521C printer and love it! I love the ability to print on 12″ x 12″ cardstock for projects, especially when creating multiples of a design.
If you have a large format printer, then you can set up print and cut projects with the same size you can print. However, keep in mind, print and cut is most accurate when using a cutting mat. While it can be done without a mat, there is greater chance of feeding errors and mis-reads, so especially for a beginner, I would highly recommend practicing with a cutting mat first.
The setup steps will be the same for any size you can print.
Here are 2 examples:
12″ x 12″ media size setup in the Silhouette software
12″ x 12″ page on the 24″ cutting mat
11″ x 17″ media size setup in the Silhouette software
Like I said at the start, I highly recommend getting a smaller cutting mat to use if your project will fit on it. Not only will it be easier to manage, but it will save a few dollars in the long run since you are not having to replace the 24″ mat when it’s no longer sticky.
The setup for Print and Cut is the same no matter what size cutting mat you are using. The same steps apply as outlined above with a 24″ mat, you will just adjust according to the smaller mat in the software and loading the mat.
On the Page Setup Panel choose #1 – Machine = Cameo Pro #2 – Mat = 12″ #3 – Media Size = Letter
Notice how the software places the media size in the top left corner. The media is covering the grid lines in the top and on the left side. This exactly how you should place the material on the cutting mat.
On the Page Setup Panel, check the box next to Show Print border and Show Cut border. Print border = gray line Cut border = red line
On the Page Setup Panel, click on the 3rd tab for the Registration Marks. Click the circle next to On. Then click on the Restore Defaults button.
When the registration marks are turned On, you will see 3 marks appear on the media size. This is how the Silhouette machine “reads” where the design is placed on the page. The machine reads best with the default settings. While the software allows the marks to be moved or changed, the defaults are the most accurate and where they can guarantee the best results. I suggest starting with all the defaults to test and then you can adjust things to see what will still work for you after you’ve had successful registration and cuts. Changing things too much and too fast can lead to frustration, registration errors, and inaccurate cuts.
Since the Show Print border is on, the gray border will show what the printer margins are with the current printer that is connected to the computer for the media size set under the printer setup. The biggest thing you want to look for here is that the bottom left registration mark is not outside of this Print border. If it is, you will need to click on the Advanced Options on the Registration Marks Panel and bump up the bottom registration mark until it will print completely. (see above for examples) All 3 of the Registration Marks have to be on the printed page in order for it to read accurately. I only suggest this if the mark is showing outside of the print border.
Like I mentioned above with the 24″ mat, if this is the first time doing a print and cut or the first time doing this process on the new Cameo Pro, I would suggest doing a test print on cardstock first. All this means is to pick a print and cut design, place it on the design mat within the boundaries, and then print on cardstock as a test using all the defaults. This will save you from using more expensive materials and having something go wrong.
Make sure to keep the design out of the cross-hatched areas on the page and within the red cut border. The cross-hatched areas do not print on your final page, however, this is the clearance that the optical eye under the blade housing of the Cameo needs in order to read the registration mark accurately. If there is a design in the cross-hatched area or dark colors near the area, it can interfere with the reading of the marks and either give a registration error or an inaccurate cut.
In some cases, the optical eye does not like any design between the 2 cross-hatched areas at the top of the page. It can interfere with reading accurately.
Once the page is all setup and ready to print. Click on File > Print in the top left corner.
The steps to print are the same as directed under the 24″ cutting mat section above. I follow the same steps each time I print a job.
Here is a quick video screen grab of the Print Process that follows the same steps as written directions above.
Keep in mind that each printer may vary in the menus that it brings up and your printer menu and preferences may not match mine exactly. But, the steps will be the same no matter what your printer menu looks like.
Once the page is printed and completely dry, place it on the 12″ cutting mat exactly as it shows on the software screen. Make sure that the top of the page is covering the grid lines or the Cameo can pick up the black of the grid lines as it reads.
Adjust the rollers so they are securely locked in place to roll across the edges of the cutting mat and not across the adhesive. Something to keep in mind with the Cameo Pro is that the rollers are now under the square roller bar. There is no easy way to clean these rollers if they get gummed up from rolling across the adhesive on the cutting mat.
Roller is directly under the embossed rectangle on the white piece.
Here is an example of where the right roller should be for the 12″ cutting mat.
Load the 12″ cutting mat in the Cameo Pro. The left edge of the cutting mat should be next to the line on the right side.
Back in the software, click on the Send tab in the top right corner. Verify that the design has cut lines around it. Bold red lines = cut lines. Choose the material and verify it all looks good. Then click the Send button in the bottom right.
The Silhouette machine will begin looking for the marks starting in the top left corner with the square, then move down to the bottom left corner, and then up to the top right corner. Keep in mind that if there is any part of the design in the cross-hatched area it can interfere with the accurate reading of the marks and can cause a registration error or a mis-cut.
I follow the same basic steps for Print and Cut each time no matter which machine I am using and rarely have an issue with registration errors or inaccurate cuts. I would recommend setting it up exactly as the tutorial shows above for the most accurate read and cut. If you are still experiencing issues, here are a few tips to try.
Troubleshooting Print and Cut with the Cameo Pro
Tip #1 – Use the default settings I cannot stress this enough! Not only for new users or new to the Cameo Pro users, but in general – start with the defaults to eliminate a lot of the things that could be the issue and then continue troubleshooting from there.
Tip #2 – Use the mat supports. No matter what size mat you are using, the mat needs to roll in and out of the machine as flat as possible. The mat support with the roll feeder set up properly can make a big difference.
Tip #3 – Make sure the mat is fully supported. The cutting mat has to be fully supported and not hanging down in the front or in the back at all. The machine needs the proper clearance, proper support, and stability in order to function well.
Tip #4 – Make sure the mat is loaded correctly. This will vary depending on the size of the cutting mat you are using.
24″ cutting mat Load the left edge next to the line on the left side.
12″, 15″, 8″ cutting mats all get loaded with the left edge next to the line on the right side
Tip #5 – Make sure the registration marks on the page printed correctly. The marks should match on the printed page exactly as they show in the Silhouette software on the media page.
Tip #6 – Hold the mat up a bit higher than level If you still encounter a registration mark or cut issue, try holding the cutting mat up a bit higher than flat as it reads the marks.
Tip #7 – Use a smaller cutting mat when possible. While you can use a 24″ mat for projects, it is a large mat and can take practice to get the hang of handling. A smaller cutting mat can be easier to complete those smaller projects with.
Print and Cut is one of my favorite things and I do have many other resources as well if you are still having issues.
Resources:
Print and Cut Basics to Design to Troubleshooting Course HERE
Save this for future reference by pinning the image below.
Enjoy!
THANK YOU for your support! How can you help? Click HERE & buy a coffee. Every little bit helps with the cost of running the site.
Or if you are looking for more in-depth, step-by-step classes, check out all of my online Silhouette classes on my Teachable site HERE.
**This post may contain affiliate links. What that means is that I may receive compensation if you purchase through the links I have provided. The price you pay for the product or service is not higher but I may get compensated for sharing.
This year has definitely been an interesting one. I haven’t really felt like pulling all of the Christmas decorations out, but still wanted to do something.
While cruising on Pinterest one night, I saw this and thought it would be perfect for a bit different look on our buffet in our dining area this year.
Affiliate links may be present in the following blog post and as an Amazon Associate, I earn from qualifying purchases.
This is a Christmas village that is constructed out of black cardstock and the window inserts on printable vellum. So it was fairly easy to put together. The file can be found HERE – on the Adventure in a Box website. I purchased the full file so I was able to get right to the project instead of creating my own images.
Now, they hand cut all of the files, but I’m not much up for that. Since you can open PDF files in the Silhouette software directly with the Designer Edition upgrade or higher, you can bring it right into the Silhouette software to set up to cut for you.
Let’s take a look at how that is done.
Make sure you are using the PDF file for this design. I used the png images for the silhouette parts and it was not the same size as the PDF file silhouettes, so they were a little bit big for the cutouts of the houses.
First, like I said above, you will need at least the Designer Edition upgrade or higher to open the pdf file.
Download the file, save it to a safe place, and then unzip/extract the file. Next, in the top left corner of the software choose File > Open in the Silhouette software and choose the PDF file.
When you open a PDF file, it will give you a couple of options. I always try the “Import as vector” first because in some cases, depending on how the file was created, it may open up with cut lines already done. The only way to know is to open as a vector and click on the Send tab to see if the cut lines are there.
If the PDF file has more than 1 page to it, you will want to choose which page to open first.
In this case, the first 3 pages are instructions, so we don’t need those at the moment. They can be handy for assembly if you need them. I chose Page 4 and then click on Import in the bottom right corner to open the file.
Now, use the Basic Trace, increase the threshold until it turns as smooth of yellow on the black as possible.
Now click Trace and then move the original design away. Since the original design does not have “score” lines to fold the building on for it to stand up, I added those in myself.
Using the Line Drawing tool on the left side, hold the Shift key down and draw a line that almost touches from one end to the next. I didn’t want the score line to cut edge to edge, so I made the line a little bit smaller. Next, on the Line Style Panel on the right side, change the Style of the line to a dashed line. This will act like a score line and not be fully cut through and the cardstock can easily be folded on this line. Adjust the line between the outer cut lines as needed.
Select the entire design and the score lines and then right click and choose Group, so the entire design moves as one piece. Using the Transform Panel – Rotate Tab, rotate the design 90 degrees on the page.
Fill it with color to see what it will look like when cut. Now, save the design.
You will do this for all of the pages with the house designs. Then I cut each out of black cardstock.
Next, we will open the next page of the PDF file for the silhouettes in the windows. Using File > Open once again, choose the PDF file, then page 5, and choose open as a vector.
This is how it will open up.
Next, using the Draw Rectangle tool on the left side, draw a rectangle around each of these window images. We do not need all of the black grid lines to print, only the images. Make sure to give yourself some clearance around the images so there is area to add glue to.
Now, select the entire design and drawn rectangles. You can either hit Ctrl+A to select all on the page or left click and hold the mouse button down and drag it across the entire design touching each object you want to select. Then open the Modify Panel on the right side and choose Crop.
I then opened up all of the silhouette files and cropped the images down. Then copied and pasted them all onto one design mat. And then we can set this file up as a Print and Cut project. I would suggest saving each Print and Cut page as a new design, just in case you have to go back and recut the pieces for some reason.
For tips on setting up a Print and Cut projects, check out this Print and Cut Basics post HERE. I recommend printing using all of the defaults for the print and cut, for the best results.
Once you have the page setup with the registration marks, print each page on printable vellum. I used this I found on Amazon HERE. I printed using the photo quality for matte paper. Printing at photo quality allows the ink to be laid down on the paper at a slower rate and allows it to dry better when working with specialty papers.
The first 2 pages I cut with had no issues what so ever and then the 3rd page would not cut correctly. I ended up printing it 5 times, just trying it over and over. When I should have done this little trick in the first place. Place white paper underneath the registration marks in each corner. This allows the optical eye a better chance at picking up only the registration marks printed and not other interference. Make sure the white paper is cut large enough that it would be the same size as the cross-hatched area for best results.
Keep in mind that the Silhouette optical eye is just a laser that turns on when you have registration marks on your page. This laser eye is looking for black marks on the page. However, it’s just a laser eye, it will pick up any black marks on the page. This includes the Silhouette grid lines if the paper is translucent or clear. This is also why the cross-hatched area around the registration marks is so important! And why, for the best results you should not have your design or cut lines in the cross-hatched area. As I said, it worked for the first 2 pages, but it didn’t like that 3rd page.
And that little trick was all it took for it to pick up the registration marks and cut accurately. Again, this is only something that might need to be added if the paper you are using is translucent or clear.
Once it’s all cut out of the black paper and the printable vellum, I used a bit of Scrapbook tape runner adhesive to glue it to the backside of the black cardstock, folded the score lines, and set it up.
I added some tea lights behind the designs to let it shine through and I have a new piece of holiday décor in our dining room.
Whether you create the same file, design your own silhouette images to fit in the Christmas Village, or follow the same techniques as I used above for another project; I hope you will share that on my Facebook group here Silhouette Secrets with EllyMae. If you have questions feel free to post below or on the Facebook group too!
Save this for future reference by pinning the image below.
Enjoy!
THANK YOU for your support! How can you help? Click HERE & buy a coffee. Every little bit helps with the cost of running the site.
Or if you are looking for more in-depth, step-by-step classes, check out all of my online Silhouette classes on my Teachable site HERE.
**This post may contain affiliate links. What that means is that I may receive compensation if you purchase through the links I have provided. The price you pay for the product or service is not higher but I may get compensated for sharing.
I first set up the design for print and cut, using all the defaults for the registration marks. For a step-by-step tutorial on setting up print and cut, check out this post Let’s Explore v4 – Print and Cut Basic.
Something to note for these specialty materials is that the instructions are very specific in saying to use the default settings for the registration marks. That is due to how the sticker sheets are set up. For the best results and printing quality, the corners of the sticker sheets are cut out so the marks can be read with more accuracy.
The corners are a matte finish vs the glossy finish of the sticker sheet area. This is not something that you notice until the package is opened.
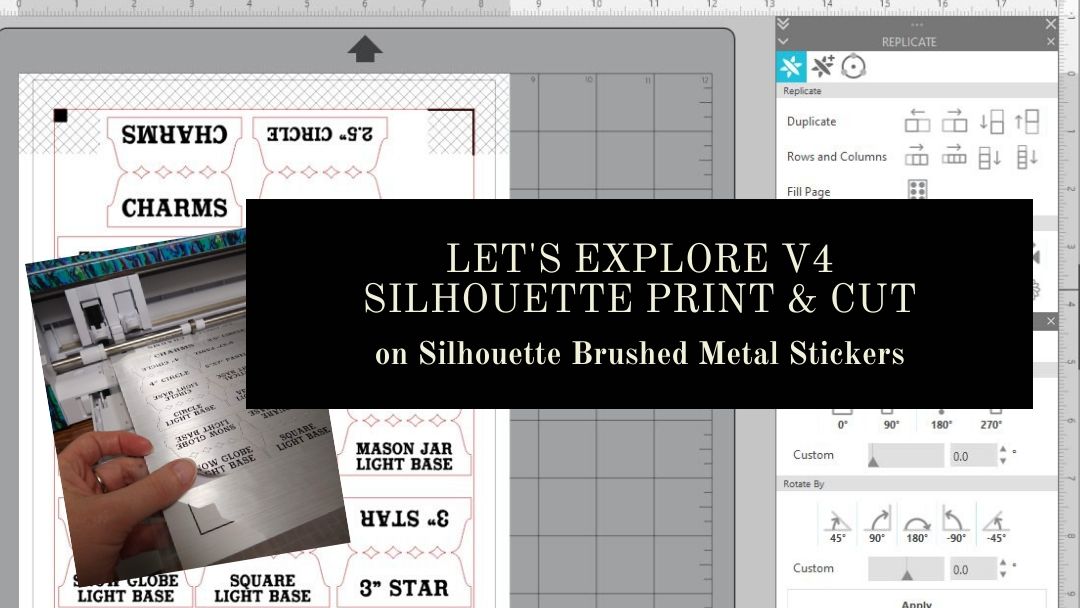
I needed some labels for organizing my collection of Curio templates. I used a tab from the file 3 Tabs by Lori Whitlock – Design #6387 and added text to each of the tab sides using Vintage Sign Font by Lori Whitlock – Design #252472.
Using the Replicate Panel and the Rotate Panel, I could duplicate the text to add to the other side of the tabs.
I am using a Canon TS9521C printer and found that it needed to be printed using the Photo Paper Glossy setting with the print quality as High. Printing at the higher quality settings slows the rate that the image is printed which allows the ink to dry on the media longer before it is finished.
After the design is printed, click on the Send tab and I don’t want the text to cut out. All of the text needs to be selected, by clicking on it, and then choosing the No Cut option to turn the cut lines off.
You may notice that the text looks fuzzy. This is something that has changed in the v4 software. Text now defaults to Cut Edge on and why it is showing up as fuzzy. It will still cut and there is nothing wrong with the text or cut lines. However, by having the text default to Cut Edge, you no longer have to weld fonts that overlap. It will cut the edge of all the text that is connected versus cutting out each individual letter.
In this case, I don’t want the text to cut. But, it is something that has changed in the software and I see many questions on why it’s now fuzzy. If you want the text to show “normal”, then select all of it and choose “Cut” on the Send tab and the lines will clear up a bit. Just keep in mind that you will need to weld the text manually if you do that.
Since I only want the tabs to cut, I turned off all the Cut lines on the text.
The bold red cut lines will turn off on each object that is selected when the “no cut” option is chosen.
After it’s printed, place it on the Silhouette cutting mat, exactly as it shows on the Silhouette design screen. The page should be lined up in the top left corner of the cutting mat and on top of the cutting grid. For best results, you want it to be lined up exactly as it shows on the screen. This means that the page should be covering the grid lines on the left side and along the top edge in the top left corner.
Lining it up properly will help in getting an accurate reading on the registration marks. If the cutting grid is showing, then it can sometimes try to read the cutting grid instead of the printed registration marks and give you a registration error.
Make sure to load the cutting mat properly in the machine with the left edge of the mat next to the line on the left that the arrows point to.
A good habit to get into is to check the cut before pressing the Unload button. If the design did not cut well, then you could send it back through for a second pass.
I added the tabs onto sheet protector that I can easily slide the Curio Templates in and out of. This is just a portion of the templates I have, so it is going to be great that the ones I use the most are now labeled and organized.
Here is an example of these Curio Templates. These are designed to fit the Craft Chameleon acrylic blanks and help to hold the blank in place and line up the design to the template space.
These plastic Curio templates line up with the pegs on the Curio cutting base and then the acrylic blank sits down in it while etching. I still like to add a layer of double sided tape to my acrylic blank as well, just for another layer of security in holding it in place. The etch is permanent, so if that blank moves at all, it may not line up and etch in the correct location.
Now, I added these all in one location. I picked this accordion folder up a few months back when I first was brainstorming this idea and now I can find them a little easier.
Now, that is one more thing crossed off my to do list. Back to more Silhouette projects!
From now until April 15th, you can get 40% off materials at Silhouette when you use my code SILSECRETS and FREE shipping on orders over $50.
Check out more information on all the April sales happening at Silhouette in this post HERE.
Save this for future reference by pinning the image below.
**This post may contain affiliate links. What that means is that I may receive compensation if you purchase through the links I have provided. The price you pay for the product or service is not higher but I may get compensated for sharing.
No matter what kind of print and cut project you are doing, I recommend starting with all the basics. I have several posts on print and cut and wanted to give you one landing page to check them all out at and decide which one is going to be the best for your situation.
Print and cut with the Silhouette is one of my favorites and it is often the one issue I troubleshoot a lot with users. Most often it is something that needs to be tweaked on the user’s end on why the Silhouette is not reading the marks. And there is no one solution fits all when it comes to troubleshooting and it’s not always what the user wants to hear, but the first step is to start at the beginning. Otherwise, it’s like throwing mud against a wall and seeing if it sticks. You can try all kinds of things and still end up with the same issue.
Print and Cut Basics is where I would suggest starting if you are new to Silhouette, new to print and cut, or are having problems getting the Silhouette to read your printed page. It is a step-by-step to doing a test print and cut to make sure it’s all working properly.
Print and Cut – Part 1 is a great place to start with setting up a design made for print and cut. It gives tips and tricks to getting the design set up correctly, printing within all the borders, and also several troubleshooting steps if you are having issues.
Print and Cut – Part 2 – Text will show you how to create text and discuss whether you want the text to cut, or how to change it so that text does not cut each piece out.
Want to cut larger than letter size? If you have a large format printer, you can cut several larger sizes. The main limit is how large the printer can print. Check out tips on How to Print & Cut Larger with Silhouette HERE.
With the release of v4.3, the Registration Marks Panel has had a little bit of a change. There is no longer options, but you can turn them on and off. Find out more here in Registration Marks & Print and Cut in v4.3.
Print and cut is another great option if you don’t have the exact paper pattern on hand to create a project. You can make your own and then cut it for your project. Check out how to use the Pattern Fill Panel HERE.
With the options of Pattern Fill in the software, it can definitely keep a project alive versus having to wait on finding that perfect piece of cardstock in the store. I used the Pattern Fill in this 3D Tank project also.
Pattern Fills
Affiliate links may be present in this blog post.
I see it asked often what the patterns in the Silhouette Design Store could be used for. They are a great option for creating unique projects or work in a pinch when you don’t have the right pattern to fit your projects.
Check out all the options for all kinds of patterns in the Silhouette Design Store HERE and then how to use them in the Let’s Explore v4 – Pattern Fills. I love that you don’t have to print the entire page with the pattern, but can fill any section of the design and manipulate that pattern to your liking by adjusting the pan and zoom.
Hopefully this has opened up some new doors to Silhouette projects for you!
I would love to see what you creating with your Silhouette machine! Feel free to post on my Facebook group at Silhouette Secrets with EllyMae.
Enjoy!
**This post may contain affiliate links. What that means is that I may receive compensation if you purchase through the links I have provided. The price you pay for the product or service is not higher but I may get compensated for sharing.
I loved that the Silhouette Studio offers the feature of print and cut for projects. There are just some times that it is much easier to print out a detailed design than to layer it with adhesive vinyl or HTV. It also gives the project a little different look.
For the basics of this feature – check out the
“Let’s Explore v4 – Print and Cut Basics” post HERE.
This is where I would encourage any new user to start or if you have been having issues getting an accurate cut.
Do some test print projects and get that baseline developed for the print and cut. Just like any new project, I would encourage you to get a feel for how it works and turns out before you start adjusting things.
But, what if you want to print and cut larger? Is it possible? Yes! Let’s explore how.
This tutorial is written using the v4.3.370 Silhouette studio software. For versions prior to v4.3 you may see a few differences in the software, the steps will be the same. However, you may find this Print and Cut Part 1 tutorial to be helpful too.
Affiliate links may be present in the following blog post and as an Amazon Associate I earn from qualifying purchases.
What is the largest you can print and cut with the Silhouette?
Well, the first answer to that is – what size can you print?
Do you have a large format printer?
That is going to be the first limit you have. How large can you print?
I have the Canon TS9521C Crafting printer and I hesitated at first to invest in it. But, I have not regretted that purchase one bit. I have gotten great quality prints out of this printer and love it.
Let’s start with a 12″ x 12″ print and cut project.
I am just using white Recollections cardstock from Michael’s. It works well.
First, I use the rear tray when I am printing on cardstock or for the larger formats. Even if I’m using letter size cardstock, I find that the rear tray where it feeds in straight and doesn’t have to curl inside the printer turns out better. I get less errors on the prints or jams in the printer.
Open a new design mat.
On the Page Setup Panel, choose the Media Size of the paper – in this case a 12″ x 12″ media size.
Check the box next to Show Print Border & Show Cut Border.
The gray outline that shows up on the design mat is the Print border. This is set by the default printer that is connected to your computer.
Currently the printer is set to print on a Letter size sheet of paper.
To print larger, that needs to be adjusted.
Click on File in the top left corner of the Silhouette software & choose Print.
This will open up a Printer menu. Note that the printer menus may be different depending on computer and printer model.
I am using a Windows PC with the Canon TS9521C printer.
Then click on the Preferences option
(could also say Advanced Options or another term – depending on the printer).
If there is the option to “Preview before printing” I suggest choosing that. It can save you a lot of headache on a mis-print.
Then make sure there are no features checked such as “borderless printing” or “fit to page” – these can alter the page from printing accurately and can cause registration errors.
Choose the Media type – in this case it is Cardstock.
Set the Printer Paper Size. The list that pops up is going to be determined by the options available for the current default printer chosen. I chose “Square – 12″ x 12”.
Set Paper Source. I selected “Rear Tray”.
Then click on Ok. And then click Apply.
Now, notice that the Print Border has now adjusted to a 12″ x 12″ page.
Choose “On” for the registration marks and then I highly recommend clicking on the “Restore Defaults” button. This will help you in establishing a baseline for your print and cut. I print almost all my projects at the default Registration Marks and I have no issues getting it to register.
While the registration marks can be moved, the farther they are moved increases the chances of an inaccurate cut. I recommend to start, use the defaults and as you get more comfortable, you can start changing things.
Notice the Cut border now changes to line up with the Registration Marks.
Now, let’s add designs to the page. If you are opening designs from the Library, right click on the image and choose “Merge” – this will place it on the current design mat we have set up. If you open a file from outside the library, go to File > Merge and then locate the file to open.
Double check that the cut lines have a line width of zero under the Line Style Panel before printing. And also that no part of your design appears in the cross-hatched area of the print and cut. This can affect the reading of the registration marks.
Check out more tips HERE.
Then choose File > Print and if you have set up the print preview it will spool the print job and a preview will pop up on the screen. This is a great habit to get into as you can often spot an error before you’ve sent the entire job to print.
Keep in mind that the time to spool from the computer to the printer can vary. This will depend on the amount of data you have in the file and also whether the printer is hard wired or wireless can affect it as well.
Double check that the bottom left registration mark shows it will print completely. This is one of the top errors I see with print and cut is the default registration marks may be outside of the printer margins. This will vary by printer, so some users may experience it more than others.
If you need to change something or it doesn’t look right, choose Cancel Printing.
If it all looks good, then click on Start Printing.
Place it on the cutting mat, exactly as it shows on the design screen. Make sure you are lining the paper up so that it covers the grid lines on the Silhouette cutting mat.
These turned out so cute! I will definitely be making more of Lori Whitlock’s changing scenes cards.
Now, let’s talk bigger.
I have a sheet of 11″ X 17″ media. I changed the cutting mat to a 12″ x 24″ mat and set the Printer Page Setup under File > Print the exact same way as outlined above, except I chose the 11″ x 17″ paper size.
Notice the Print border adjusts according to the page size set under the File > Print setup.
Turn the Registration Marks on and then add the design(s) to the page.
Again, I always like to turn the Print Preview on as my last fail safe to catch an error before it prints the entire sheet.
Once it’s done printing, place it on your mat, choose your Cut settings and send it to cut.
Print and cut can be used for so many different projects from cards, stickers, printable heat transfer, etc.
Now, with the larger machines being released – Cameo Plus 15″ (available) and the Cameo Pro 20″ (coming soon) – the big question is “How big can you print and cut?”
Again, the 1st answer is – How big can you print? That will be the first limit.
And then, the 2nd answer is – How big is your media you are printing on?
That will be the next limit.
I printed on both a 12″ x 12″ piece of cardstock and then a sheet of 11″ x 17″ heat transfer paper. Is your media bigger than that? Both of these were cut on a Cameo 4 machine which has a cutting width of 12″ and it could also be cut on either of the larger machines coming out.
Here is an image of the design space of a Cameo Plus. If you are using higher than v4.3.370 of the Silhouette software, you would be able to change to this in the software even without owning a Cameo Plus.
Notice that the Print border stayed at my 11″ x 17″ size. I did not change it so, it stayed the same, as it recognizes what the default printer is set at. But, if I add the registration marks to the page, you can see that they will show up.
Again, it will depend on both the size of media you can print on and the size of media you have available to print on.
Have some time? Just sit down and play in the software. You never know when you will stumble across something new!
**This post may contain affiliate links. What that means is that I may receive compensation if you purchase through the links I have provided. The price you pay for the product or service is not higher but I may get compensated for sharing.
With the v4.3 software released, the Registration Marks panel had a small change as well. For software version of v4.3+, there is now an On or Off on the Registration Marks Panel – find the full details on the panel HERE. If you are using a software version prior to v4.3, then you will see it a little bit different and for almost all users, you would choose Type 1 registration marks – find the full details on that HERE.
No matter what version of v4 software you are using, the Basics of setting up a print and cut project are the same.
I follow the exact same steps each time and have great success with each print and cut project.
Print and Cut Basics
This tutorial is written using the v4.3.356 Silhouette studio software. For versions prior to v4.3 you may see a few differences in the software, the steps will be the same. However, you may find this Print and Cut Part 1 tutorial to be helpful too.
Affiliate links may be present in the following blog post and as an Amazon Associate I earn from qualifying purchases.
First, you want to start out by setting the design page up.
Step 1 – Open the Page Setup Panel – Tab 1 Step 2 – Choose the correct machine & cutting mat. Note: users prior to v4.3 will notice the Page Setup Panel is a little different too. Find out more on that HERE. Step 3 – Choose the Media size. I choose “Printer” as the option when using letter size paper. You will find it at the bottom of the drop down box for Media Size. *NOTE: for users with software v4.4.450 or higher – choose Letter size – there is a change in the software with “media” size I have found as of 12/15/20. I have reported it and will update the post as I know more information in the future Step 4 – Move transparency to 0%. This will help you see the page size better. Step 5 – Choose the Portrait Orientation. This is the orientation I recommend as I see the least amount of issues with it. Step 6 – Check the boxes next to Show Print Border and Show Cut border. This will show you the boundaries you have to work with.
Next, open the design onto the cutting mat by either right clicking on the file in the Silhouette library and choosing merge or using File > Merge.
This will merge the design directly onto the page you have just set up.
As with any new project, I would recommend doing a test first. This is why I start with all the default settings. A test print can save you a lot of headache and frustration just like a test cut when you are cutting new materials or a new design.
With a print and cut, design placement is very important. The design cannot be in the cross-hatched areas of the design screen or over the cut border that is shown on the screen. This is why I turn the Show Cut border on first on the Page Setup Panel.
Make sure the design is away from the cross-hatched area. This is the area that the optical eye on the Cameo needs to read the registration marks accurately in order to find the design on the page. Making this area smaller or placing a design in it, can result in either a registration marks error message or an inaccurate cut.
Now it is ready to print.
There are 2 ways to do this.
Click on the Printer icon in the top left corner. This will send the print job directly to the printer that is set as the default printer connected to your computer.
In the top left corner, choose File > Print and you will get a pop up of Printer options. (Ctrl + P)
The options vary by the printer you have connected to your computer.
Choose the printer to send the job to.
Tip: If you have a Preferences button, click on that and look for a “Preview before Printing” option. This is a great feature to see if it is going to print how you want it to before actually committing to the print job.
Check the Preview before Printing box.
Then click OK.
And choose Print.
A Printer menu will pop up and the design can be previewed before committing to printing.
Note: this will be dependent on the printer and what the printer setup settings are. Not every user will have this and it can vary, but never hurts to look for it.
Tip: Check to make sure that the bottom left registration mark will print completely. I see a lot of print and cut issues and one is the registration marks were outside the users printer margins and did not print. This means you will either get a registration error or it will cut inaccurately because it doesn’t have all the information to read it correctly.
Once you’ve verified the settings are correct, click on Print and it will send it to the current default printer.
Grab it off the printer. I am using a Canon TS9521C Craft Printer and I love it. This printer has great quality and I love having the option to print on a 12″ x 12″ sheet of cardstock with it.
Place it on the Silhouette cutting mat exactly as it shows on the virtual design screen, in the top left corner of the cutting mat. Make sure that the page is covering the grid lines on the cutting mat, or the Cameo may try to read the black lines when it goes to register.
Load the left edge of the cutting mat next to the line on the left side of the machine.
Click on the Send tab in the top right corner and then choose the Material type you are cutting.
Once all the settings are correct, then choose the Send button in the bottom right corner.
Note: a test cut using the Test option in the software will result in part of the upper left registration mark being cut out and can interfere with reading the marks correctly. I would suggest doing a test cut on a spare piece of material or moving the test cut out of the top left corner.
I love print and cut!
I do the same steps every time when setting up the print & cut and rarely have an issue.
I find that in troubleshooting most print and cut issues, it is something in how it is set up or how the design printed. I recommend for all my students and those interested in print & cut, to start with all the default settings to establish a baseline before they start changing things up.
Now that we have a successful print and cut, let’s try another design.
Print and Cut Planner Stickers
Follow the same setup steps listed in the beginning of this tutorial for the Page Setup.
Use File Merge and open the design on the screen.
Open the Page Setup Panel – Tab 3 – Registration Marks and turn the marks on. Click Restore Defaults.
In the photo above, I have highlighted a few trouble areas of this design. On the left and right edge, the design is over the Cut border and in the bottom left corner, the design is in the cross-hatched area.
To fix this, I select the entire design & cut lines and then use the bounding box in the corner and scale it down just a bit to fit within the borders of my print and cut page. Then move the design to the center of the page.
Once it is all setup the same way, follow the same steps as listed above for printing and loading it in the machine. Click on the Send tab and choose the material type. I am using sticker paper for this set and Send it to the Cameo to cut.
Having print and cut issues? Feel free to post on the group and we will troubleshoot it with you.
Enjoy!
**This post may contain affiliate links. What that means is that I may receive compensation if you purchase through the links I have provided. The price you pay for the product or service is not higher but I may get compensated for sharing.
THANK YOU for your support! How can you help? Click the link to buy a coffee. Every little bit helps in the cost of running the site.