Posted on — 2 Comments

New! Curio Etching Classes released!

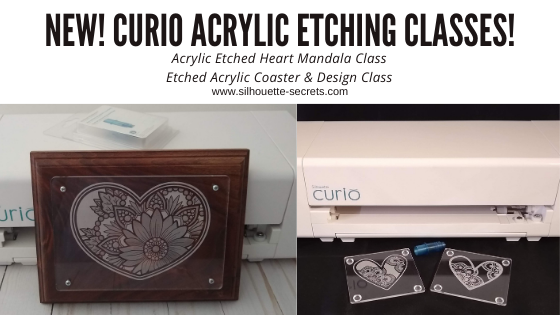
Just a quick note to share 2 new Curio acrylic etching classes that I’ve released on my Teachable site.

Acrylic Etched Coasters & Design with the Curio – found HERE

In this 1 hour 18 minute video class we will go through the step-by-step process of setting up an etch design in the Silhouette Studio software, setting up the Silhouette Curio machine to etch, and etching an acrylic blank. We will etch this coaster design 2 ways and work through the design process to get a different look for each coaster.
This class goes beyond just the basics of etching and dives into changing a design up and filling it with different emboss fills to achieve a different end result.

Curio Etched Heart Mandala Class – Advanced Beginner – found HERE

In this 1 hour 50 minute video class we will go through the step-by-step process of setting up a heart mandala etch design in the Silhouette Studio software, setting up the Silhouette Curio machine to etch, etching on an acrylic panel, and mounting it to a backing board.

All of my online Silhouette classes can be found HERE.
These are step-by-step classes taught exactly the same as if we were face-to-face.

I would love to see what you create with your Silhouette!
Feel free to post on my Facebook group
Silhouette Secrets with EllyMae.
If you have questions feel free to post below or on the Facebook group too!

Save this for future reference by pinning the image below.

Enjoy!

This image has an empty alt attribute; its file name is logo.jpg

THANK YOU for your support! How can you help? Click HERE & buy a coffee.
Every little bit helps with the cost of running the site.

Or if you are looking for more in-depth, step-by-step classes, check out all of my online Silhouette classes on my Teachable site HERE.

SS Logo snip it
**This post may contain affiliate links. What that means is that I may receive compensation if you purchase through the links I have provided. The price you pay for the product or service is not higher but I may get compensated for sharing.
Posted on — 3 Comments

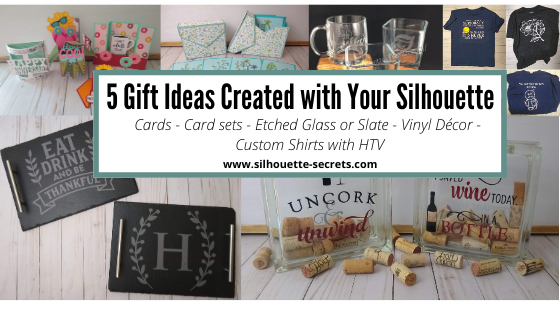
5 Gift ideas created with Your Silhouette machine

There are so many possible things that you can create using your Silhouette machine. Today let’s take a look at some possible gift ideas you can create.

Each one of these gifts can be tailored to your needs or personalized in their own way.

5 Gift ideas

1 – Cards
2 – Card sets
3 – Custom Etched projects
4 – Glass block décor
5 – Custom t-shirts with HTV

I’ve provided more details on each project below such as examples, supply lists, and resources. Perfect to get started with gifts for the year!

Gift idea details

Affiliate links may be present in the following blog post and as an Amazon Associate I earn from qualifying purchases.

1 – Cards

The great part about cards is anyone can do it!
They can be simple 2 color cards or range up in complexity.

A hand-made card is a special gift, no matter if the recipient appreciates that or not. It is because you created it! You used your time & talent to create it!

Supplies used:
Cardstock
– Michael’s Recollection cardstock
– Close to My Heart cardstock
– any high quality cardstock will work, cut settings may vary by brand
Adhesive
– Scrapbook EZ Runner tape runner
– Scrappy Tape or Score Tape
– Xyron Sticker Maker
– Glue Dots
– Foam Tape
– I use a variety or combination of whatever is best for the project
Assorted Embellishments or Tools as needed
– Silhouette sketch pens*
– Watercolor pencils*
– Water brush*
*used in the sketch cards above

You can use as little or as much as you want on the cards.

Resources:
Cards with your Silhouette
Cutting Cards with the Silhouette
Creating Cards with Your Silhouette – Free Z-fold card cut file
Let’s Explore v4 – Creating a Card – Free Fancy Fold Flip Card cut file
A Fun Card with Silhouette
Sketching with Silhouette

2 – Card sets

Need a special gift for someone who has everything.
A set of Thank You cards or Birthday cards might be the perfect idea!

Make a custom card box for the cards to be stored and gifted in to add to it.

Supplies used:
– Floral Border Sketch by Silhouette – Design #67187
– Sketched Florals by Silhouette – Design #334152
– Sketch font of your choice
– A2 Card Envelope box by Lori Whitlock – Design #315108
– Cardstock and Adhesive – *see card details above for suggestions

3 – Custom Etched Projects

Etched glass

Etched slate serving tray

Supplies used:

– Glass coffee mug from Target
– Glass candle holders from Dollar Tree
– Slate:
Serving tray in photo above from Johnson Plastics Plus
Other slate: Cheese board, hexagon coasters, circle coasters also can be found on Amazon
– Etchall Etching cream
Some use Armour Etch, but I prefer Etchall and get a perfect etch each time. I have used Armour Etch in a pinch and it was ok, but highly recommend using in a well ventilated area for either.
– Oracal 651, 631, or Oramask 813 for stencil
– Transfer tape
Adhesive vinyl and transfer tape can be found at:
Expressions Vinyl, Heat Press Nation, Silhouette America or Swing Design
Pretty much anything that can stick and seal well so the etching cream does not seep underneath can be used as a stencil

Designs used:
Glass Etched designs:
– Coffee Pulse by Sophie Gallo – Design #149882
– Yay Coffee by Dawn Nicole Designs – Design #188578
– Shells by Tanya Batrak – Design #205625
– 1 Piece Flower by Samantha Walker – Design #7833
Etched Slate designs:
– Eat Drink and Be Thankful by Jillibean Soup – Design #280222
– Monogram Family 6 by Lori Whitlock – Design #271080

Resources:
Step-by-step Glass Etching Class on Teachable

4 – Glass block décor

Supplies used:
– Glass blocks from Hobby Lobby or other (these have a hole to insert objects inside)
– Adhesive Vinyl and transfer tape
Adhesive vinyl and transfer tape can be found at:
Expressions Vinyl, Heat Press Nation, Silhouette America or Swing Design

Designs Used:
– Uncork & Unwind Phrase by Kolette Hall – Design #142100
– I Saved Some Wine Today Phrase by Kolette Hall – Design #131228

Resources:
– Layering Vinyl
– Layered Vinyl decal for a teacher gift
– Layered Vinyl Acrylic Ornament
– Creating a Vinyl Decal & Layering Adhesive Vinyl class on Teachable

5 – Custom shirts with HTV

Here are a few shirts I created for family members. Having the ability to customize and create designs in the Silhouette software is a big plus.

These VooDoo designs had jumped in my cart at some point in the past and it was perfect for a couple family members having surgery and who have chronic pain.
They loved them!

Supplies used:
– Shirts
– Siser HTV
Can be found at the following retailers:
Expressions Vinyl, Heat Press Nation, Michaels or Swing Design

Designs used:
– LW Love Letters Font by Lori Whitlock – Design #240682
– Smiley Face Whatever by Loni Stevens – Design #8114 with a yellow circle behind it
– Magnolia Flower by Sophie Gallo – Design #341162
– Voodoo Doodles by Jamie Lane Designs – Design #332386
– CG Create Font by Carina Gardner – Design #290474

Resources:
– Silhouette “Secrets” Beginner HTV Tips & Tricks
– Subtracting Text for HTV
– Cutting & Layering HTV in Silhouette Studio Class on Teachable
– Creating a Knockout Design with HTV – Bonus Subtracting HTV Class on Teachable

Whether you go big or go small, the ability to create a custom or handmade gift with your Silhouette is awesome!

I always see user’s frantically creating gifts at the end of the year for the holidays, but why not start now. Use these gift ideas for birthdays, anniversaries, house warming gifts, and holiday gifts as well!

I would love to see what you create with your Silhouette!
Feel free to post on my Facebook group
Silhouette Secrets with EllyMae.
If you have questions feel free to post below or on the Facebook group too!

Save this for future reference by pinning the image below.

Enjoy!

This image has an empty alt attribute; its file name is logo.jpg

THANK YOU for your support! How can you help? Click HERE & buy a coffee.
Every little bit helps with the cost of running the site.

Or if you are looking for more in-depth, step-by-step classes, check out all of my online Silhouette classes on my Teachable site HERE.

SS Logo snip it
**This post may contain affiliate links. What that means is that I may receive compensation if you purchase through the links I have provided. The price you pay for the product or service is not higher but I may get compensated for sharing.
Posted on — 4 Comments

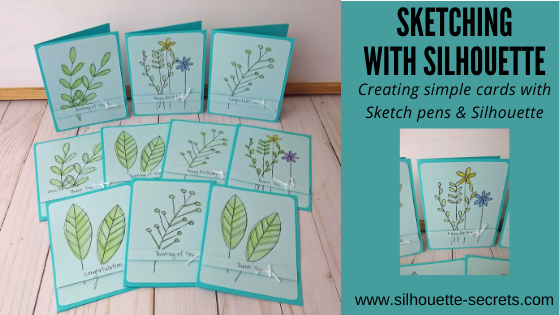
Sketching with Silhouette

Have you seen the classes that Silhouette and Michael’s have been hosting online?

I’ve been attending the Silhouette and Michael’s online classes when I see one that is of interest. In the most recent one that I attended, Kelly Wayment with Finding Time to Create showed how to create some simple cards by using sketch pens in the Silhouette software.

In these classes, I prefer to watch when they do the class live and then complete the project later at my own pace. I decided to make a couple sets to have on hand for different occasions.

Affiliate links may be present in the following blog post and as an Amazon Associate, I earn from qualifying purchases.

Check out this class on the Michael’s YouTube channel HERE.
Grab a cup of your favorite drink and sit back and watch Kelly create.
Then gather your supplies and make up a few cards to have on hand.

Check out all of the upcoming classes on the Michael’s website HERE.

It is always fun to learn something new and to expand on your skills and Silhouette techniques.

I would love to see what you create with your Silhouette!
Feel free to post on my Facebook group
Silhouette Secrets with EllyMae.
If you have questions feel free to post below or on the Facebook group too!

Save this for future reference by pinning the image below.

Enjoy!

This image has an empty alt attribute; its file name is logo.jpg

THANK YOU for your support! How can you help? Click HERE & buy a coffee.
Every little bit helps with the cost of running the site.

Or if you are looking for more in-depth, step-by-step classes, check out all of my online Silhouette classes on my Teachable site HERE.

SS Logo snip it
**This post may contain affiliate links. What that means is that I may receive compensation if you purchase through the links I have provided. The price you pay for the product or service is not higher but I may get compensated for sharing.
Posted on — 4 Comments

Etching with your Silhouette machine

Today we are going to talk about etching with the Silhouette machines.

I am seeing a lot of questions regarding which Silhouette machines can etch and we are going to get into some of the nitty gritty details about it.

Updated 1/1/9/2024
New machine models with etching abilities
The Silhouette Curio 2 – more information HERE.
The Silhouette Cameo 5 can etch on Silhouette metal etching sheets. It is limited in etching capabilities due to the clearance on the machine.
More details on Etching with a Cameo 5 HERE.


Which Silhouette machine is designed for etching?

The Silhouette Curio is designed for etching.
It is the only machine that is designed by Silhouette for etching.

We will go into more details farther down on why.

Can I etch with my Silhouette Cameo or Portrait?

First, the Cameo or Portrait machines were not designed for etching.
This means that if you do decide to etch with the machine it can void the warranty on the machine and my biggest concern for you is it may decrease the lifespan on the machine.

How will it decrease the lifespan of my machine if I etch?

Etching is much more taxing on the housing than if you were just cutting.
Why? When you are etching, you are scratching away the surface of a harder material such as metal or acrylic. This is more taxing on the machine as it moves back and forth.

As an example, let’s take a look at this heart design. On the left side you can see the cut lines of a regular cut file. On the right side is the same file that I have etched on my Curio.

Now, I’ll zoom in on the etch file and you will see that this file has hundreds or thousands more lines in it that need to “etch” to fill the design in. Again, keep in mind that etching takes more force to scrap away the surface of the harder material vs just cutting through a material such as vinyl or cardstock.
It is a completely different action.

While some users will say they tried it and it worked, the Cameo or Portrait machines were not designed for this purpose. Which means that the machines were not tested for etching and the additional wear and tear it may have on your machine.

Yes, while it may work ok. What are the long term effects of that etching on your machine?
Let’s take a look at the Cameo 4 as an example.

Tools
To etch with it, users are squishing a 3rd-party tool into the adapter (if needed) and then squishing the tool into the housing. Over time, if you stretch that housing or put additional force on the tool holder, it could break or stretch. Third-party tools are often heavier than a normal Silhouette blade and could affect the tool housing with long term use.
Silhouette does not have an etching tool designed for the Cameo or Portrait because it is not something the machine was designed or tested for.
Click HERE for official information on 3rd-party tools in the Silhouette machine.

The clearance of the machine.
This will all depend on the machine you are using and how much clearance it has.
Most often I see tool marks in the materials that are etched on a Cameo 4 or a Portrait because it just does not have the proper clearance needed to not only fit the blank under the roller bar and under the tool tip once it’s installed.
A Cameo 4 has a clearance of 3 mm.

Bottom line – the lifespan of your machine.
How is the etching going to affect the lifespan of your machine?
On the Cameo 4, Tool 1 housing is the only housing for using a regular cutting blade in it and Tool 2 housing is for specialty blades. This is due to the 2 different motor types in the machine. They are designed for different purposes.
If your Tool 1 housing gets broken or is not functioning properly, you are toast!
You now have a Cameo 4 machine that can only utilize Tool 2 tools.
This is my biggest concern for users who are seeing that etching can be done with a Cameo or Portrait! I don’t want you to decrease the lifespan on your machine or encounter future issues because you have chosen to etch with it.

If something happens to your machine, who is responsible for replacing it? You!
Not the person who encouraged you to etch with it.
Not Silhouette because the machine was not designed for etching in the first place.

I know this is not what you want to hear, but my biggest concern is for YOU, your machine, and your success!
If you etch with your Cameo or Portrait it is a DO AT YOUR OWN RISK.
What I don’t want is someone doing it without knowing the risks and then being totally devastated when their machine no longer works properly.

For more details on the warranty on a Silhouette machine, click HERE.

The Silhouette Curio

Now, let’s talk about the Silhouette Curio and why it is the machine designed for etching.

Update: The Silhouette Curio 1 is no longer manufactured, however, it is still a great machine and you may still find it available used. The Silhouette Curio 2 was released in September 2023.

Stable base
The Curio has a solid, stable base that must be used when cutting or etching. There are 2 sizes. A small base which has a cutting mat space of 6″ x 8.5″ and a large base which has a cutting mat space of 8.5″ x 12″. The Curio cannot be used without a base and you cannot “trick” the Curio to use a large cutting mat on a small base or vice versa.

Adjustable platforms to accommodate thicker materials
The Curio base comes with several adjustable platforms which allow for up to 5 mm clearance. The platforms are stacked on the base and the embossed number plus the material thickness should add up to a 6, which is equal to 6 mm.

This platform system is what enables you to be able to place a 3 mm acrylic blank or a piece of tooling leather in the Curio and still have the clearance to work with the material.

Silhouette etching tool

The Silhouette etching tool is the only one designed by Silhouette for the Curio machine. I have used other 3rd party tools to test and I find that I get the best, most consistent etch with the Silhouette etching tool.

Yes, you do have to replace it as it wears down. Keep in mind you are scratching away at a hard surface when you are etching. It is just like replacing a blade. For me, the results are better with the Silhouette etching tool than any other, so it is well worth the cost of a replacement versus blanks with areas missing an etch.

Emboss Panel unlocked
When a Curio is plugged in and recognized by the software, the Emboss Panel is unlocked.
I feel this is the best method for the etch fills.

Each user will vary in what they prefer, but I like a tight cross-hatched etch fill to give me the best filled in look. Each design will vary in what is going to look the best and often you do not know how it will look until you’ve tested it.

Etch Action
In the Silhouette software, there are different “actions” for the different functions.
For instance, cut vs sketch vs etch vs Kraft cut vs Rotary cut, etc.

Each of these actions tells the software/machine to send the data in a different way.
When you choose the etch action you are telling the software exactly what you are doing with the tool and machine.
In my experience, the Emboss Panel with the etch action is much less data intensive on the Silhouette software and takes less time to etch vs using the Sketch Action or the Line Effects Panel.

Exact placement due to tool orientation to the same location
One of the best features of the Silhouette Curio is that if you have loaded the base properly, the tool housing aligns to the EXACT same place every single time!
This is awesome for placing your blanks on the cutting mat as the Silhouette design screen matches the cutting mat exactly.
Yes, on a Silhouette or Portrait the cutting mat on screen and physically match as well, but you also have user input when you load the cutting mat that can throw the alignment off.
That is less likely to happen with the Curio as long as the base is properly loaded.

For more information on how to set up and load the base in the Curio check out this post
The Curio – Getting Started.

Now, will the machine eventually wear out. Yes!
My original Curio is starting to see some wear and tear on it. However, I etch more than the “average” user. Since I teach classes at events, online, and private lessons – I have thousands of more machine hours into my Curio than most users would have. When I am preparing for a class, I will etch or emboss the same design over and over again to test the settings, time the design, and to write/create the class. For instance, for my Leather Embossing class, I have hundreds of hours into this class from researching to recording the class and here are just a few of the samples I created during the entire 6 month process of creating the class.

When I create an acrylic etching class, I may have a stack of acrylics 30 high that I’ve done testing on. It is all a process and I test the settings over and over to get the best etch results that are reproducible by a student who would be taking or viewing the class.

I etch way more than the “average” user and my machine is still etching 2+ years later.
I do wish there was a machine hours counter on it, so I could share with you how many real machine hours I have invested in it.
Again, I am seeing a bit of wear and tear on it, but I purchased a back up Curio machine because I do use it so much.

The average user should be able to see years of etching with their Silhouette Curio machine if it’s used and cared for properly.

You have heard the saying “The right tool for the job.”, right?
Well, in this case, I could not agree more.
Again my biggest concern for you is your machine, the machine’s life-span, and your success.

The Curio is a fantastic machine!

Need help getting started with the Curio?
Check out this post
Silhouette Curio Get Started Creating Fabulous Projects
for resources no getting started with the Curio

Want to see more projects created with the Silhouette Curio?
Check out this YouTube video collection of a “demo table” I created for a Curio event this past year.

Click the video above to open in YouTube if viewing in your email.

None of these can be completed on the Cameo or Portrait due to the clearance.

Interested in getting a Curio?
Check out Silhouette America, or Swing Design for Curio machines.

Now the Curio is a bit different to set up and get started with and the number one thing you will need time. This machine can do fabulous things, but you will need to learn how to set it up properly. I do believe that anyone can do these same types of projects!
Check out all of my Silhouette classes on the Curio on my Teachable site HERE.

I would love to see and hear about what you are creating on my Facebook group at 
Silhouette Secrets with EllyMae. If you have questions feel free to post below or on the Facebook group too!

Save this for future reference by pinning the image below.

Enjoy!

This image has an empty alt attribute; its file name is logo.jpg

THANK YOU for your support! How can you help? Click HERE & buy a coffee.
Every little bit helps with the cost of running the site.

Or if you are looking for more in-depth, step-by-step classes, check out all of my online Silhouette classes on my Teachable site HERE.

SS Logo snip it
**This post may contain affiliate links. What that means is that I may receive compensation if you purchase through the links I have provided. The price you pay for the product or service is not higher but I may get compensated for sharing.
Posted on — Leave a comment

Silhouette Classes – 2 new classes released!!!

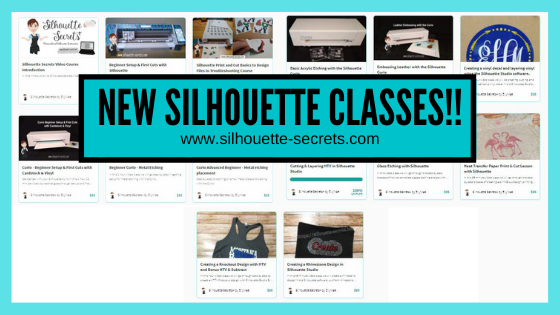
This week I released 2 new classes on my Teachable site.
A Silhouette print & cut class and a Curio metal etching placement class!

Here are the details of each class:

Silhouette Print and Cut – Basics to Design Files to Troubleshooting

Join me in 2+ hours of video course that covers Silhouette Print & Cut from step-by-step setup, to working with many different file types for print and cut, and my troubleshooting tips. This course is divided out into 3 main videos covering each of these topics in depth.
By following these steps & tips, print and cut can expand your Silhouette skills.
Let’s take the anxiety out of print and cut and get started.

Course includes:
Class Overview
Class Supply List

Print and Cut – Part 1 – Step-by-step Setup Video – 1 hour 3 minutes
– Step-by-Step setup for print and cut
– Establishing a baseline print and cut
– Print and cut a single design
– Print and cut with a sticker set

Print and Cut – Part 2 – Designs and more Video – 1 hour 6 minutes
– working with excess backgrounds on designs
– print and cut with text
– print and cut with Color Fonts
– turning a cut file into a print and cut – 3 examples
– altering a cut file to create a print and cut – 2 examples
– tips on registration marks
– print and cut in large format

Print and Cut – Part 3 – Troubleshooting Tips Video – 18 minutes
In this section we will discuss 11 tips for troubleshooting print and cut when things don’t work and tips for getting the best success.

Check out this online video course on my Teachable site HERE.

Curio Advanced Beginner – Metal Etching placement video course

Course includes:
Class Overview
Class Supplies list

Basics of the Curio video – 38 minutes

Advanced Beginner Curio – Metal etching with blanks & placement on the Curio video – 24 minutes
– Setting up the Curio base to etch with the blank
– Measuring the blank
– Securing the blank
– Setting up the Silhouette design mat for the etch design
– Design placement for etching on blanks
– Tips for working with text & alignment
– Emboss fill for etching
– Etching on the Curio
– Examples of etching on blanks

Check out this new Curio class HERE

If you are looking to expand on your Silhouette skills and want to dive in and learn from all of my testing and tricks, check out the rest of the Silhouette courses available:

Silhouette Beginner Setup & First Cuts
Silhouette Print and Cut – Basics to Design Files to Troubleshooting
Curio Setup & First Cuts with Cardstock & Vinyl
Beginner Curio Metal Etching
Curio Advanced Beginner Metal Etching Placement
Basic Acrylic Etching with the Curio
Embossing Leather with the Curio
Creating a vinyl decal & layering using the Silhouette Studio software
Cutting & Layering HTV in Silhouette Studio
Glass Etching with Silhouette
Heat Transfer Paper Print & Cut Lesson with Silhouette
Creating a Knockout Design with HTV & Bonus HTV & Subtract
Creating a Rhinestone Design in Silhouette Studio

All of these are designed as step-by-step classes that are taught just like an in-person lesson.

The more you get into Silhouette and start playing with it the more you will pick up. Sometimes it can be overwhelming and testing can take a long time to get it just right. Let’s take that anxiety out of your Silhouette projects and get started!

For more information and to see each class details – CLICK HERE.

I would love to see and hear about what you are creating on my Facebook group at 
Silhouette Secrets with EllyMae.

Save this for future reference by pinning the image below.

Enjoy!

This image has an empty alt attribute; its file name is logo.jpg

THANK YOU for your support! How can you help? Click HERE & buy a coffee.
Every little bit helps with the cost of running the site.

Or if you are looking for more in-depth, step-by-step classes, check out all of my online Silhouette classes on my Teachable site HERE.

SS Logo snip it
**This post may contain affiliate links. What that means is that I may receive compensation if you purchase through the links I have provided. The price you pay for the product or service is not higher but I may get compensated for sharing.
Posted on — 1 Comment

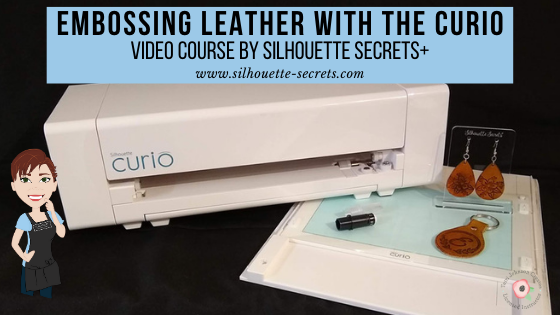
Embossing Leather with the Silhouette Curio

I am so excited to be able to release this new video course on embossing leather with the Silhouette Curio!

We have held 2 Curio virtual retreats in 2020 and it has been a big hit for Curio projects!
Click HERE to go directly to the class or keep on reading for more information.

I have to say, while this has to be the class that has taken the most time to research, write, record, and produce; it is also one of my favorites too!

These are just a few of the test subjects that were made during the creation of this Curio course.

And now you can join me in creating fabulous embossed leather projects with your Curio too! I share all my tips and tricks in how I created these leather embossing projects in the Silhouette software step-by-step in this Embossing Leather with the Silhouette Curio.

What does the video course include?

This is a 1 hour and 56 minute video course that goes step-by-step through the process of creating the embossing design in the Silhouette software, embossing and cutting the leather, finishing and dying the leather, and assembly of the earrings and key fob.

In addition to the Embossing Leather course, I have also added a Basics of the Curio Video (38 minutes) at the beginning of the course for those who are just getting started with the Curio or need a refresher.

Here is the full course content:

Class Extras (at the beginning to get you started):
Curio Unboxing video – viewable on YouTube here: https://youtu.be/bYllH6Inl3M
Class Supplies List – complete list of supplies used in the video course
Basics of the Curio video – 38 minutes

Leather Embossing with the Silhouette Curio Video Course – 1 hour 56 minutes
Part 1 – Setup of the design in the Silhouette software using the Emboss Panel for the earrings & key fob design
Part 1.1 – Embossing & cutting the design on tooling leather with the Curio
Part 2 – Final cuts and burnish of the leather key fob and earrings
Part 3 – Leather dying & final assembly of hardware
Additional Resources
Class Conclusion
Terms of Use

Click HERE to access the
Embossing Leather with the Curio course!

Check out this brief video on the Curio in action embossing on leather to see what you will be doing in the video class.

Are you excited?
I hope this video course opens up new ideas and sparks that creative energy to create fabulous things with your Curio!

Check out all of my Silhouette classes available on my Teachable site
HERE!

I cannot wait to see what you create with your Silhouette Curio!
Feel free to post photos or questions on my Facebook group at 
Silhouette Secrets with EllyMae.

Save this for future reference by pinning the image below.

Enjoy!

SS Logo snip it
**This post may contain affiliate links. What that means is that I may receive compensation if you purchase through the links I have provided. The price you pay for the product or service is not higher but I may get compensated for sharing.
Posted on — Leave a comment

Curio Virtual Retreat – Round 2

The first Curio Virtual Retreat was such a success and we had so many requests to do it again, that it is now scheduled for August 14-16, 2020.

This event is limited to 40 attendees and the best part is no travel!
Right from your own computer, tv, or other viewing source.
You work at your own pace to follow all of the step-by-step video courses.
Join us on the weekend of August 14-16 for Zoom calls and online support.
Class kits will be mailed to you and include written handouts too!

Check out this Curio Retreat Highlights post to see a little bit about what happened at our last event.

I loved seeing all the projects that the attendees created and shared with us after going through the step-by-step classes.
These include:
– Curio Basics & Setup
– Curio Tips
– Metal Etching
– Acrylic Etching
– Leather Embossing
– Sketching on Wood

And the projects keep rolling in that they are creating since attending the event!
I love seeing them all!

The weekend includes:
– Class kits mailed to you to complete all the projects
– Instructional step-by-step video classes that are available for you to watch for 30 days following the event
– Online support through scheduled Zoom calls and a private Facebook group

Student Testimonies

Here are a few reviews from the previous weekend:

“The event exceeded my expectations. The prerecorded segments were excellent. Really far better than anything I have found in the internet.” Doug B.

“The virtual retreat was very educational. The ability to be able to follow along with notes, pause the video, take my own notes, at my own pace was amazing and increased my comfort level and education experience.” Charlee R.

“I appreciated all the experience and effort that went into the written materials and the instructional videos – so thorough yet easy to follow! It was great to be able to re-watch portions of the videos while working through the projects. The Zoom chats and the Facebook group were fun and perfectly rounded out this virtual retreat. I will definitely attend in the future!” – Linda M

“Learned a ton from the virtual Curio retreat this weekend and had so much fun completing the projects! EllyMae is a fabulous teacher and we had a lot of great support throughout the weekend. Thank you TJC for this wonderful event!” Kathy S.

“At first I wondered how this would work. Worried about not having the hands on mostly. But I will have to say that it turned out better than I could have ever imagined. Loved that I could watch the video, pause and rewind, and repeat. The notes were great and I believe they will help me in re-creating new projects.” Nancy C

Curio Demos

Want to see a virtual demo table of things I’ve created using my Curio?
Check out this video on my YouTube channel HERE.

And here is a little demo of the Curio in action embossing on leather.

Registration

Register HERE for this event!
Attendance is limited to 40 attendees.

I always love to see what you are creating!
Feel free to post photos or questions on my Facebook group at 
Silhouette Secrets with EllyMae.

Enjoy!

SS Logo snip it

**This post may contain affiliate links. What that means is that I may receive compensation if you purchase through the links I have provided. The price you pay for the product or service is not higher but I may get compensated for sharing.

Posted on — Leave a comment

Silhouette Online Classes

NEW!!!
Curio Beginner Setup & First Cuts with Cardstock & Vinyl class released.

Curio Beginner Setup & First Cuts with Cardstock & Vinyl

This 1 hour and 12 minute video class includes:
– Setting up a design page using a Silhouette file to cut
– Setting up the software to cut cardstock
– Setting up the Curio to cut cardstock
– Test cuts
– Setting up a design page using a Silhouette file to cut adhesive vinyl
– How to move a test cut
– Weeding adhesive vinyl
– Applying transfer tape to adhesive vinyl

Find this class information HERE.

Don’t own a Curio, no problem! Other Silhouette classes are available too!
Click HERE for the full list or keep scrolling below to view.
These classes are created in the Silhouette Studio v4 software and include all my tips, tricks, and supply lists to complete each class. All of the classes are created using the same class content that I use when teaching a hands-on, in-person lesson and have as little video editing as possible, in order for you to get the full class effect.

Silhouette Beginner Setup & First Cuts – Get started the with Cameo

Basic Acrylic Etching with the Silhouette Curio

Cutting & Layering HTV in Silhouette Studio

Glass Etching with Silhouette

Heat Transfer Paper Print & Cut lesson with Silhouette

Creating a vinyl decal & layering vinyl using the Silhouette software

Creating a Knockout Design with HTV and Bonus HTV & Subtracting

Creating a Rhinestone Design in Silhouette Studio

However, you learn the Silhouette machine, the best way is to play, play, play.
Each user may be different in how they learn best.
I get a lot of requests for online classes.
Want to see student testimonies?
Click HERE.

What ever tools you use to learn your Silhouette machine, the key is to do it!
Don’t let it sit in the box. Get it out and start playing with it!

Enjoy!

Want to save this information for later – pin the image below!

SS Logo snip it
**This post may contain affiliate links. What that means is that I may receive compensation if you purchase through the links I have provided. The price you pay for the product or service is not higher but I may get compensated for sharing.
Posted on — 4 Comments

Just Released – Beginner Video Class

I have helped so many users these past few weeks on Facebook who are frustrated and having issues getting the Cameo 4 setup for their first cuts.
So, I set to work this week on creating a Beginner video class.

This video class is created in the same way I would teach a private face-to -face lesson to a new student.

Even though this is labeled a “beginner” class, there is still a lot of information in it that I think any user could get out of it. But, it is a video course that I believe can also get a user started from opening the box to getting their first cuts.
I have also included a bonus 24 minutes video on my troubleshooting tips and things I look for when cuts aren’t going as planned.
Whether you are a brand new user or one with a little experience, I think it contains some tips for all users.

While this class features a Cameo 4 in the setup and presentation, the setup tips and instruction for the first cuts apply to all Silhouette machines.
If you are a Curio user, I would suggest also checking out the Curio Unboxing video on YouTube and the Let’s Explore – The Curio – Getting Started post on the blog.

What does this class contain?

Course outline:

Pre-course: Cameo 4 Unboxing video
I highly recommend watching this before starting the main course
This video is also available on my YouTube channel HERE.

Main Course
Cameo Setup & Blades – 20 minute video
Designing in Silhouette & First Cuts – 1 hour 12 minute video
Bonus – Blade cleaning & Troubleshooting – 24 minute video

Additional Resources mentioned in the video

If you are having issues with your cuts or are nervous about getting started, this video course is full of information to get your Cameo out of the box, setup properly, and cutting.

Check it out HERE

You can see all of the video courses available on my Teachable site HERE

Silhouette Secrets+ Teachable Classes

I hope this will help get you feeling a little more comfortable with your new Silhouette machine or one that’s been calling your name for awhile.

Save this for future reference by pinning the image below.

I would love to see what you create!
Feel free to post on my Facebook group at Silhouette Secrets with EllyMae.

Enjoy!

SS Logo snip it
**This post may contain affiliate links. What that means is that I may receive compensation if you purchase through the links I have provided. The price you pay for the product or service is not higher but I may get compensated for sharing.

Share this:

Posted on — 13 Comments

Silhouette “Secrets” for HTV – Beginner Tips & Tricks

HTV or Heat Transfer vinyl is vinyl that has a heat activated adhesive that can be applied to fabrics and other materials.

I always recommend starting with high quality products and in my experience, you will have less headache when creating your projects. Throughout the post I will share what brands I used on the shirts created, tips to cutting & applying, and share recommendations on where I buy those supplies.

Final product copy

Affiliate links my be present in the following blog post and as an Amazon Associate I earn from qualifying purchases.

The Basics of Cutting HTV with Silhouette

Step 1 – Create the design you want to cut.

Step 2 – Place the HTV correctly on the cutting mat in the same location on the grid as what shows on the Silhouette Studio software or load the vinyl directly into the machine to cut without a mat (click HERE for more tips on Cutting without a Mat).

For most HTV, you will place the shiny side down on the cutting mat. This is the carrier sheet and you are cutting through the backside of the vinyl. However this is not for ALL types of vinyl. For instance, some patterned vinyl it is laid pattern side up, cut through the front, and then a Heat Transfer carrier sheet is applied to transfer it to the shirt.

Step 3 – Mirror the design, if needed. This is for most HTV, but not all.

Step 4 – Choose the cut settings for the brand of HTV.

Step 5 – Send to the machine to cut.

Now, that we have the basics, let’s take a look at specific examples.

Ultimately, how you cut the design is going to be dependent and differ depending on the design you use. For instance, is it a one color design? Is it a multi-color design? Are parts of the colors overlapping? Is the design layered?
In this post, we will cover some basics and cut with 1 color.

My first tip for a beginner or for any of my students is that while you can cut without a mat with the Silhouette machines (except the Curio), I still recommend cutting with a mat until you get used to how the machine cuts. Then when you are feeling comfortable you can branch out and test the waters with cutting without a mat. This will help eliminate a few possible issues that can occur as a beginner because you are simplifying things.

Two resources I want to share here are:

Tips to Get The Most Out of Your Silhouette Mat
This will come in handy to make those mats last longer
Cutting Without A Mat
When you are feeling adventurous or a bit more comfortable with your machine you can test this out. While the tutorial is written with a Cameo 3, the tips will apply to all machines you can cut mat-less with.

Let’s start simple and work up from there.

Note: In the following photos, you will see me using a Cameo 4 machine to cut. While I used my Cameo 4, these tips will apply to all Silhouette machines. I am using software version v4.3.353 in this tutorial.

One color designs

Step 1 – Create or find the design you want and open it on the Silhouette Design mat and size it as needed.
I am using “I Tell Dad Jokes” by Honeybee SVG – Design #293250 from the Silhouette Design Store.

Dad Jokes design copyThe first thing I like to do is to change the Transparency  on the Page Setup Panel to 0%, so I can see the grid lines of my mat (in v4.2 & prior it is referred to as Reveal).
This is how I know how big of a piece of HTV that I will need. I will cut my HTV piece down to 12″ x 10″ and place it on my cutting mat shiny side down. I use a paper trimmer to cut down my 12″ vinyl to the size I need.

There are several reasons I do this, but the main one is that it helps make my cutting mats last longer. I am only placing my material on the mat where I am cutting and no peeling a full sheet of material off the mat each and every time.
Why use that adhesive where it is not going to cut?
For more tips on the cutting mat click HERE.

Step 2 – Flip the design (also called mirror) on the Silhouette Design screen. Right click on the image and choose Flip Horizontally or Object > Mirror > Flip Horizontal.

Flip Horizontal copy

Why do we need to mirror? For most HTV, the carrier sheet is attached to the vinyl. This means that you place the HTV upside down (shiny side down) on your cutting mat and you cut through the backside of the HTV.

Shiny Side Down copy

Now, there are exceptions to this and you will learn as you go and start working with different materials. One of these exceptions is some patterned vinyl, like Sparkleberry Ink HTV. It is amazing vinyl, but since it is printed with a pattern on it with a special printer, you will lay it pattern side up and cut through the top and then use a Heat Transfer Mask to transfer the vinyl to the shirt or other material.

Here is an example of Sparkleberry Ink printed vinyl found in this post using the Subtract feature with HTV. The patterned vinyl was cut pattern side up and a transfer mask applied and then the solid Siser Easyweed was cut the same as this tutorial.

temp_1

The next thing to note is that there is a “HTV Mirror” pop up that you will get when you use a preset cut setting in the Silhouette software. I prefer to mirror (flip horizontal) the object myself so I know exactly where it is going to cut on the cutting mat. Since I have flipped my image, when I get to that pop up, I choose “Send As Is“.

Send As Is copy

While you can let the software “mirror” it for you, it flips the entire mat and does not reflect that visually on the screen. For example if I have a smaller design than what I’m cutting above, if I let the software mirror the design by using the Pop up when I send to cut, it will cut where the yellow square is. So if I have placed my HTV material on the left side of my mat as it shows on the design screen, it is not going to cut on my material.

NOTE: I’ve recently found there is a new bug in the v4.4 software – when letting the software mirror the image, it will also mirror the objects that are off the cutting mat as well.
I would highly recommend right clicking and choosing Flip > Horizontal and mirror the design yourself to avoid either of these issues.

Mirror pop up copy
Wine Bottled Up by Jillibean Soup – Design #242851

And also, it’s just habit because the Mirror pop up was not always around. However, it does save me on occasion when I have forgotten to mirror the design myself.

Step 3 – Cut the HTV to size and place on the cutting mat. I am using Siser Easyweed HTV in white for this project.

HTV on cutting mat copy

Now, something to note here is that when you order vinyl on a roll, it may not always be 12″ wide. This is pretty common as it is cut from a bigger roll originally.
Just like wood is not the exact size.
It is also the reason that I did not cut without a mat using this roll of Siser Easyweed HTV. It just barely fit under my rollers and I didn’t want to take the chance that it wasn’t securely in the machine. Plus it gave me a little more cut-able space by cutting it down and placing on the cutting mat.

Resize the design and make sure that the design on the screen shows in the same place as it is placed on the cutting mat.

Step 4 – Click on the Send tab in the top right corner to set up the cut settings.
Choose the material type in the Material drop down box.
I am using Siser Easyweed HTV and find that the Heat Transfer, Smooth option works well.To be honest, I find that the preset cut settings work well for almost all materials. But, keep in mind that blade sharpness, cutting mat stickiness, etc can all affect cut quality too!

Send tab copy

Step 5 – Test cut – VERY IMPORTANT feature that can save you materials & time.
Any time I am cutting a new material, I will use the test cut to make sure that I will get a good cut.

There is nothing like cutting a full design on HTV, unloading the cutting mat, and finding out it didn’t cut well. It’s a great learning opportunity but let’s save some time & materials and get the habit of a test cut.
I promise it will help.

There are 2 ways I’ll share on how to do a test cut.

1. In the bottom right corner of the Send tab is a little button that says Test. This will cut a small square with a triangle out of it in the top left corner of the cutting grid.

Test Cut copy

If the first test cut doesn’t work, you can move it by using the directional arrows next to the Test cut button.

Test Cut buttons copy.jpg

You can also change which Tool does the Test cut by choosing 1 or 2.
On software versions prior to v4.3, it will show as a red circle (Tool 1) or a blue circle (Tool 2). This is for the Cameo 3, Cameo 4, and Curio machines only.

2. Make your own Test Cut.
I use a capital ‘B’ as my test cut object often. The biggest thing you want is something that has both corners and curves to it. This will give you a good indication of how it’s going to cut.

Test Cut B copy

Place the test cut object – the letter ‘B’ in a space on the HTV that will not be cut with the design, as shown by the bold red A above.

Next, select the design by clicking on it. This is very important. You will see a gray selection box appear around the object on the screen that is selected, as shown by the bold red B. If there is no object on the screen selected, it will not change the Action.
With the design selected, choose No Cut next the bold red C above. This will turn the cut lines OFF for the design and it will only cut the letter ‘B’ as the test cut.

If it cuts well the first time, you can either move the ‘B’ off the design mat or delete it. Then turn the cut lines back on for the design by selecting it again & choosing Cut.

If it doesn’t cut well, move the ‘B’ to a different free space on the HTV and adjust the cut settings to get a good cut.

Step 6 – Load the cutting mat. After double checking the settings, load the cutting mat in the machine. The left edge of the cutting mat should line up with the line on the left side that the 2 arrows on the machine point to.

Loading mat copy

When using a cutting mat, the rollers should roll on the left and right edges of the cutting mat as shown by the 2 top red arrows in the photo above.

Step 7 – Click on the Send button in the bottom right of the Send tab. When the cut lines are turned ON you will see bold red cut lines around the design, on this Simple cut option.

Send button copy

If the HTV Pop up appears, click ‘Send As Is’ if you have mirrored (flip horizontal) the design yourself.

Send As Is copy.jpg

Step 8 – Before you unload the mat check that it cut well.
This is another great habit to get into.

Before unloading copyIf for some reason that it did not cut well, you could send it back through again for a 2nd pass. However, if you remove the cutting mat, you will not get it lined up in the exact same place and it won’t cut in the same spot.

Step 9 – Unload the cutting mat. 

Step 10 – Place the protective cover shiny side up on the table and flip the cutting mat upside down on top of it. Carefully peel the cutting mat away from the material. This is another way to help the material release and extend the life of the cutting mat – more tips HERE.

Flip Mat copy

Why do I place the protective cover down on the table with the shiny side up? First, it protects the mat in any areas that have the adhesive exposed. By placing the shiny side (i.e. non-stick) side up, it will stick to my mat and debris won’t.

Why do I flip the mat over and peel the mat away from the material?
First, it helps to release the material from the adhesive with less force. Pulling up on the material from the mat, adds more force which can pull the adhesive off the mat. Second, it will help with the material not curling when it’s taken off the mat. This works especially well with cardstock and paper materials.

Step 11 – Weed away the excess vinyl from the design. I start with the outer edge of the design when I weed so that I know where my letters are and am not “picking” at the design.

Weeding copy

As you do it, you will develop methods that work for you. Such as weeding tools. My personal favorite are the reverse tweezers from EK Tools. I love them so much that I have 3 pair, just in case one is put in a really “safe” place and I can’t find it when needed. I love the sharp tip for getting the vinyl started and then the tweezers to help peel it off.

Each brand, color, type of HTV will vary in how much you can see the cut lines. Some colors or glitter HTV are harder to see on. The more you do it the more comfortable you will get at what works.

Make sure to get all the little pieces like the insides of the A, D, P, etc. If I have a question as to what needs to be weeded out vs what stays, I look at the design on the screen to see what is filled with color and what is not.

And go slow, it’s not a band-aid you rip off. If you go slow and watch, if there is a spot that didn’t cut well, you can still salvage the design most times.

Step 12 – Press the HTV onto the shirt or other fabric object using the manufacturer recommendations.
I love that Siser has this on their site and also a handy app too!
Check out the full Siser site HERE.
On the Left side of the home page, move the mouse over the HTV header and it will expand. Choose your HTV type and then scroll down the page for the Cutter Settings and Application settings.

Siser settings

I set my heat press to 305 for 15 seconds for Siser Easyweed and it works every time.

Final product copy

And there you have a single color design, cut with the Silhouette, and pressed onto a shirt.

Q & A

Let’s talk about a few more things because I’m sure you have a question or two.

Do I recommend a heat press? Yes.
I recommend a heat press if you plan press a lot of HTV.
Especially if you plan to do a bunch of shirts or plan to make a business of this.
It will save you time & muscle power

Why do I recommend a heat press?
1. It is easier. Set the time. Set the temperature. Press for 15 seconds (or recommended time). And done!
2. Even pressure and more accurate heat.

What heat presses do I own?
I started with a use 15″ x 15″ Power Press that I received. It was great! These are often found on Amazon, however, be very careful in reading the reviews on the seller. I don’t think they are as good as they used to be and have seen them arrived damaged or non-functional. Just like anything else, check out the reviews.

I gave that heat press to a friend when I found a great deal on another 15″ x 15″ Craft Pro Press from Heat Press Nation. I LOVE that this has a slide out drawer on it and it was something I couldn’t pass up. The slide out drawer helps in getting the design placed on the shirt easier, so you are not reaching in under the hot top platen of the press.
Is it a necessity? No, but it sure is nice.

Heat Press copy

Personally, I need to have a 15″ x 15″ press. The shirt I pressed above is a 4XL shirt and I make those sizes often, so I feel it is well worth it.

But, if you don’t need that size, there is a Craft Pro 9″ x 13″ press with the slide out drawer as well. Find that HERE.

I also have this smaller press. I use this one when I am traveling for classes as it weighs only 35 lbs. The 15″ x 15″ press above is not 35 lbs.

stx-craft-2

This Pink Craft Press can be found here at Heat Press Nation or Swing Design.

What other products would I recommend when using HTV?
Pressing pads or pillows. What are these? These are items that you place inside a garment such as a tshirt or bodysuit to lift up the area you are pressing to keep the seams from interfering with the pressure you are applying. If you press a shirt and there is a seam in between the top & bottom of the press, the press hits that seam and doesn’t get full pressure down on the area of the shirt or garment that is needed. This can interfere with getting a good, solid adhesion with the HTV.

I have the Tee Pad It from Heat Press Nation and love them. It is cost effective as you get all 5 sizes for 1 low price.

tee-pad-it-set_1

Slide these in to the shirt under where the design will be placed, adjust the pressure on the heat press, and get that good pressure needed for the HTV to adhere.

Pressing pillows are another option, but I found they are a lot more expensive and condense a lot more when you press them, which if pressing multiple items can take longer.

Teflon sheets – I get mine on Amazon and they last a long time. This will help protect your top platen of the heat press or an iron.

EZ Off cleaner for when you have a boo-boo and accidentally melt HTV to the top platen of the press. Shhhhh…… it happens.
It can be found here are Heat Press Nation or on Amazon.

Do you have to have a heat press to use HTV? General answer – No.
However, you want a brand of vinyl that can be pressed with a home iron if you do not have a press. Siser is one of those brands. The 2 biggest factors with HTV is heat and pressure. You have to have both or the HTV will not adhere to the material and last. Some brands like ThermoFlex are designed to be used with a heat press.

If you only have a home iron or a Cricut Easy Press, I recommend checking out this video – How to Iron On Siser HTV by Joe at Siser for great tips on what to do and what not to do.

Can you over press HTV? Yes.
Again I’m going to refer you to the experts here in this video – lots of great tips!
Check out this video by Siser called Over Pressing HTV HERE.

Now, that is a lot of links and recommendations to throw at you.

Do you need them all right now? No. But, I want you to have the resources to go to on where to find the same products that I recommend.

For other product recommendations check out my Amazon store HERE or feel free to ask on my Facebook group at Silhouette Secrets with EllyMae.

I hope that this helps provide you with some “secrets” to getting started with HTV. Or even if you have already been using HTV, maybe you picked up a few tips. I would love to hear if you did!

If you want to dive deeper into HTV check out these 2 video courses I have available. They are step-by-step courses taught just as I teach an in-person class, but available at your convenience.
Cutting & Layering HTV in Silhouette Studio – 45 minute video class
Creating a Knockout Design with HTV & Bonus HTV & Subtract in Silhouette – 1 hr class

Did this information help? Don’t forget to Pin it for future use!

Beginner HTV Pin

Enjoy!

SS_Signature copySS Logo snip it

**This post may contain affiliate links. What that means is that I may receive compensation if you purchase through the links I have provided. The price you pay for the product or service is not higher but I may get compensated for sharing.