Posted on 2 Comments

New! Silhouette Online Classes

I get a lot of requests to put my classes online. And it’s been a work-in-progress and a learning experience too!

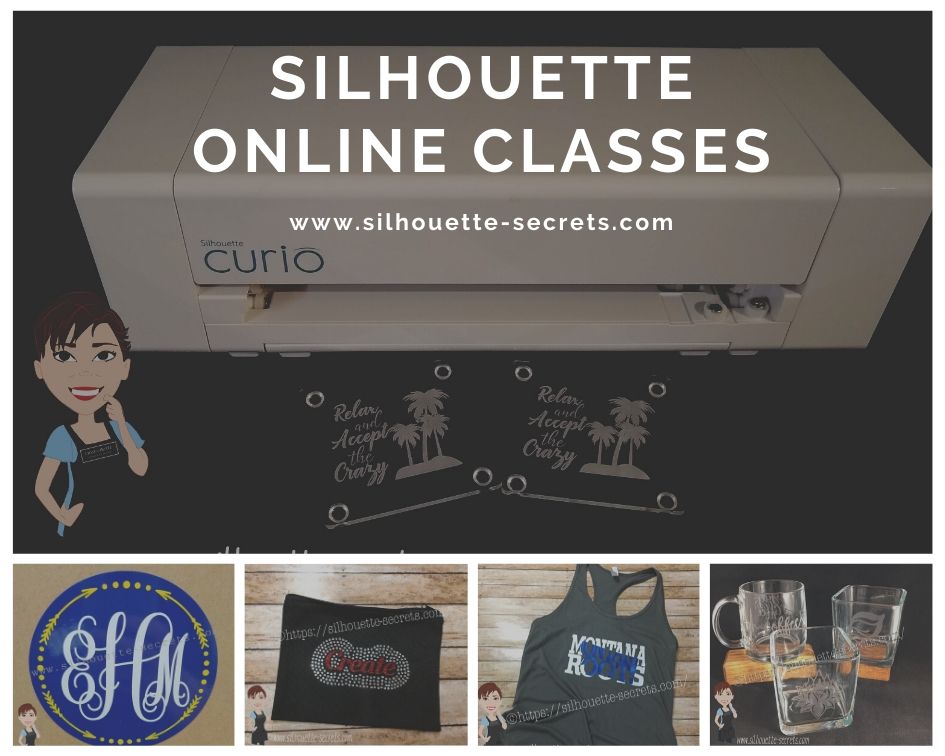
I currently have 7 Silhouette classes available online on my Teachable site. These have been developed in response to requests by my students and followers.

Silhouette online classes

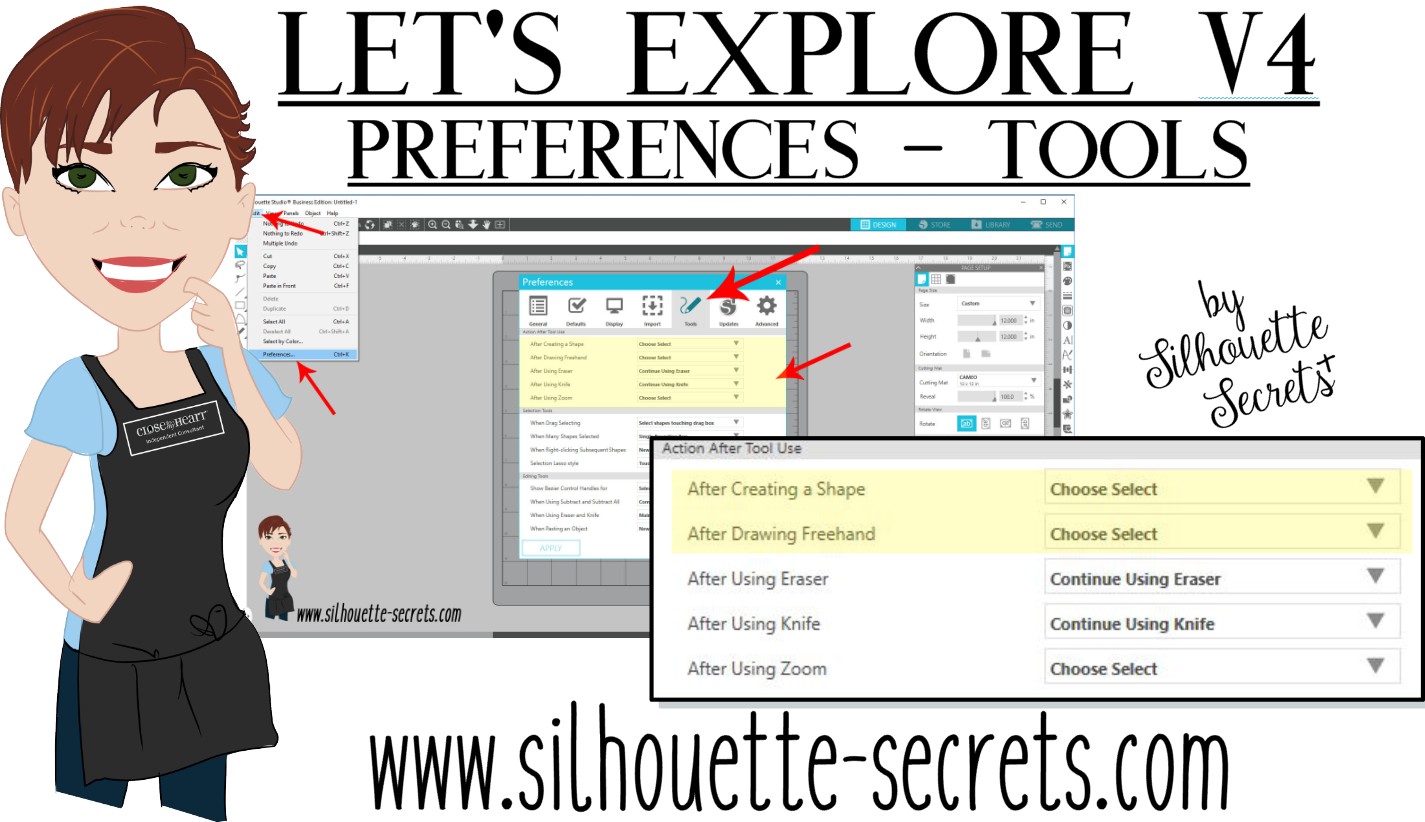
These classes are created in the Silhouette Studio v4 software and include all my tips, tricks, and supply lists to complete each class. All of the classes are created using the same class content that I use when teaching a hands-on, in-person lesson and have as little video editing as possible, in order for you to get the full class effect.
You don’t want to hear me bumble over one tongue-twisting word 10 times, watch the Curio etch for 40 minutes, or see the frustration of a mic not working, so there are some areas that are edited or the speed increased (etching).

What are the online video classes available?

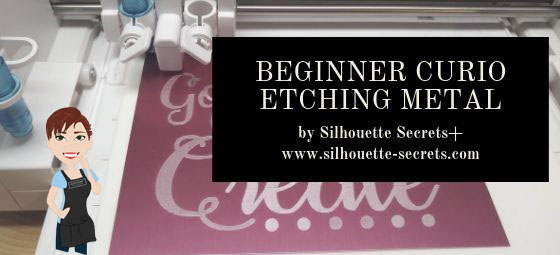
1. Basic Acrylic Etching with the Silhouette Curio

SilSecrets Curio Etching copy

This is a 1 hour video class that is step-by-step in setting up a design, setting up the Curio, and etching on acrylic using the Silhouette Curio.

The Silhouette Curio is an amazing machine that can accommodate thicker materials and works great for etching on metal and acrylic.
If you are just getting started or have an interest in the Curio, check out the
Let’s Explore the Curio – Getting Started post.

This little machine can definitely add that personal touch to projects that others cannot.
Check out this post on Silhouette Inspiration to see a few more projects I’ve created with the Silhouette Curio.

Silhouettesecrets+Curio_projects

2. Creating a vinyl decal & layering vinyl using the Silhouette

Sil_Secrets_layeredvinyl copy

This is a 1 hour class showing the entire process of creating, cutting, and layering an adhesive vinyl decal in the Silhouette Studio software.

This class uses the Monogram Script Arrow font by Rivka Wilkins to create a 3 color decal using Oracal 651 adhesive vinyl.

3. Cutting & Layering HTV in Silhouette Studio

Layered vinyl copy

This is a 45-minute video class that is a step-by-step process of cutting & applying a multi-color HTV design.

I used the Sparkle Like a Unicorn design by Sarah Hurley with Siser HTV to create this body suit gift in the video class.

4. Glass Etching with Silhouette

Silhouette-Secrets+_GlassEtchingPhoto copy

This glass etching video class is approximately 1 hour and 13 minutes showing the process of setting up a design to create a stencil for glass etching, cutting a stencil with Oracal 651 adhesive vinyl & Oramask 813, and using Etchall glass etching cream.

5. Heat Transfer Print & Cut with Silhouette

CQLG3491 copy

In this 35-minute video class go through the step-by-step process of creating a print & cut design, printing on heat transfer paper, cutting, and applying the heat transfer paper.
This class can apply to all print and cut projects no matter what material you are printing on.

I used a Flamingo Clipart Mega Pack for the design and JetPro SS Heat Transfer Paper from Heat Press Nation for this class.

6. Creating a Knockout Design with HTV
Bonus HTV & Subtract

SilSecrets_Knockout copy

This is a 1 hour video class to create a HTV Knockout design with Silhouette Studio, cutting, and applying the HTV. A short bonus software video with using HTV & subtracting the design is also included.

I used the USA States Dingbat Font by Sandi Idleman and Siser HTV in this class.

7. Creating a Rhinestone Design in Silhouette Studio

SilSecrets_Rhinestone copy

This is a 45 minute class creating a rhinestone design in the Silhouette software, cutting from rhinestone template material, and applying the rhinestone design to a zippered bag.

I used Siser Glitter HTV,  rhinestone materials from The Rhinestone World, and a Cotton Zipper bag from Craft Chameleon in this class.
The Designer Edition software upgrade or higher is required to create a rhinestone design in the Silhouette software.

Why online classes?

Every user is going to vary in where they are located. Maybe they cannot get to an in-person lesson with an instructor, a workshop, or an event. Maybe their schedule does not work for booking a lesson in-person. It can vary for all users.

Each user learns differently. Some people can learn by reading a tutorial and pick it up with no issues, while others prefer a video that they can pause and re-watch whenever they want. What I have learned by doing in-person lessons is that there can be a lot of information discussed during a 1 hour lesson and rarely do students remember everything that was discussed. This is one reason that I also provide a follow up email to my in person students to highlight some of the topics discussed. With a video lesson, you can control that and hear it again when you need to.

Video class suggestions

As I mentioned above, these classes were created at the request of students and followers. Feel free to provide suggestions on video classes that you would like to see by joining my Facebook group – Silhouette Secrets+ with EllyMae or sending an email to silhouettesecretsplus@gmail.com

I do keep a list of videos to create and there are several in the process, but they do take time to create. It has definitely been a learning process for me. I know the Silhouette software and love teaching that, but recording, video editing software, video hosting sites…. that is all a new world to me.

I would love to see how you are using your Silhouette machines!
Feel free to post on my Facebook group at Silhouette Secrets with EllyMae.

Enjoy!

SS_Signature copySS Logo snip it

**This post may contain affiliate links. What that means is that I may receive compensation if you purchase through the links I have provided. The price you pay for the product or service is not higher but I may get compensated for sharing.
Posted on 13 Comments

Cameo 4 Cover and more!

Look what I did!
(Read to the end and you’ll find a surprise!)

SilSecrets_Cover copy

*This post may contain affiliate links. Please see the bottom of the post for more information.

Now, usually I am not one who can decide what design to put on my machine. But, when I saw Sparkleberry Ink release this Laura’s Abalone design, I just knew what I wanted to do with it.

Note: you will need a piece of Sparkleberry Ink vinyl or other brand that is at least 12″ x 24″ long.

I created this Cameo 4 cover all by using a tape measure, the drawing tools in the Silhouette software, and cutting test cuts of the templates to make sure they would fit before cutting my precious Sparkleberry Ink vinyl.

So how did I do it?

I started out by measuring each space that I wanted to add a piece of vinyl to and writing that down.

IMG_20191016_190707132

Cameo 4 cover_updated copy

Then I chose the draw rectangle tool in the software and created a rounded rectangle (6.285″ x 2.420) for the top left panel (E).

Drawing rounded rectangle copy

Next, I drew a rectangle (6.285″ x 2.687″). I used the Align tools to center the rectangles together and then moved them together until the total width of the panel was 2.682″. Then I selected both the rounded and regular rectangle and made a copy, this way I have an original shape to go back to. And I’m so glad I did because I had to cut this one a couple of times to get the right rounded rectangle angles.

Next, I right clicked and chose Weld.

Weld copy

Then I cut it from cardstock to see how well it fit. Here are a few of the pieces I test cut to see how they would work for the panels.

IMG_20191016_165058335 copy

Then I continued to measure each and draw the shapes according to those measurements.

IMG_20191016_165117249 copy

By cutting it out of cardstock, I could place the cardstock up to the space available and see how it fit. If it was too big, I could scale it down. If it was too small, I could scale it up a little bit.

I added all my pieces of my design to a “working file” that I saved, just in case something happened.

Working file copy

Once I knew the piece would fit, I then moved it to my original cut file and positioned it on the mat, so I could get the most out of the 12″ x 24″ cutting space.

Silhouette file photo copy

Then I did something daring. I wanted mine to have sparkle to it. So I took a 12″ x 24″ piece of Glitter Laminate Overlay and I applied it to the top of the Sparkleberry InkLaura’s Abalone adhesive vinyl.

Why is this daring? Well, anytime you add a layer on top of another layer, you have the chance of getting bubbles. But, I went for it!

I followed these instructions HERE for using the Glitter Laminate Overlay and it worked! Would I recommend this for all users – No, probably not. I would definitely recommend practicing with a smaller piece first. But, sometimes you just have to go for it 😉 !

IMG_20191011_200646477 copy

Look at it sparkle!

This is definitely one of those times that you feel all giddy when a project is coming together. If you look really close on the right side in the photo above, you may even see a few bubbles. I’m good with that.

IMG_20191011_205303758 copy

After all the pieces were cut, I cut them apart, added transfer tape and started applying 1 panel at a time. I of course started with the largest panel first, the cover.
Well, at this point – might as well go big.

IMG_20191011_205311771 copy

Since this Laura’s Abalone pattern was directional, I realized after I cut the first one, I had turned a couple of the panels to fit on the mat and that affected the way the pattern was. So I ended up re-cutting a few pieces so the entire pattern matched.
(I corrected that in the final cut file – see below)

IMG_20191012_082222452 copy

I was happy with it as it shows above, however, my kids came to inspect it and my 10 year old said, “Mom, what about the top? Aren’t you going to do the top pieces, so when the lid is open, it all flows.”

Very good point!

Cameo 4 cover copy

And the final pieces were created.

Updated – 1/12/20 to include right panel & UK top panel option
IMG_20200112_093933194 copy

Now, is it perfect? Nope, it has a few bubbles in it. But, I’m ok with that and hopefully as it settles, those will work themselves out or I can help them a little bit.

But, I have to say I love it!
It sits on my desk next to my computer and just sparkles at me.

Now, I did all the measuring and test cutting, but you don’t have to!

Feel free to grab this free cut file of the Cameo 4 cover I created HERE.

Silhouette file photo copy

Cameo 4 cover FREE cut file

Header photo copy

Now, what if you do not have a Cameo 4 yet or don’t plan to buy one? Well, you can still use some pretty Sparkleberry Ink vinyl to add a little color to your Cameo if you would like, no matter what model you have.

I’ve updated and created a full cover file for the Cameo 3 model as well.
Grab this free cut file HERE

Cameo 3 cover example copy

I did cut without a mat when creating this one since it is a larger surface area, however, you could use a 12″ x 24″ cutting mat as well and arrange the pieces on it. Just keep in mind that if you pattern has a direction to it, you want to keep the same consistency in how the pattern goes across the cuts.

I’d also suggest going slow and taking your time when applying, especially on the lid. It is a large surface to get lined up. In this cut file, the pieces are designed slightly smaller than the actual panel sizes, so there is a little bit of machine color showing through to break up the pattern.

For more details on cutting without a mat, check out this post HERE.

Cameo 3 and 4 copy

Cameo 3-4 lid closed copy

I did not cover the inside of the Cameo 3 lid as it has some instructions inside. If you would choose to do so, I would recommend measuring the inside and then drawing a rectangle that same size. I used cardstock and cut out a piece that was the same length top to bottom and held it up to the machine to make sure it was the correct size, before I committed a full sheet of adhesive vinyl.

Or if you have other model machines, grab this Silhouette Cameo Cover Template from the Silhouette Design Store, some of your favorite Sparkleberry Ink vinyl & maybe some Glitter Laminate Overlay too and get to cutting.
*Note this file contains cuts for the Cameo 1 panels, Cameo 2 panels, and Cameo 3 lid.

Silhouette cover

I would love to see how you decorate your Silhouette machine!

Here is my Silhouette Mint Stamp machine decorated in another Sparkleberry Ink pattern called Cute Crawlers Lime.

IMG_20190831_190213600

Feel free to post your machine decoration or any Silhouette projects on my Facebook group at Silhouette Secrets with EllyMae.

Enjoy!

SS_Signature copySS Logo snip it

**This post may contain affiliate links. What that means is that I may receive compensation if you purchase through the links I have provided. The price you pay for the product or service is not higher but I may get compensated for sharing.

Posted on 3 Comments

Let’s Explore v4 – Silhouette Designs – Part 2

Last week in the Silhouette Designs – Part 1, I showed how to make designs go farther by using some of the tools in the software such as releasing the compound path, grouping different pieces of the design together, and making new compound paths to create a different look.

Today let’s take it a step further and I’ll show you how I created this stacked pumpkin design by moving the Layers around, and then welding the black background together..

eZy_watermark_23-09-2019_01-03-40 copy

Again, don’t get overwhelmed here. I did not get it in the first try but kept on testing different steps to get it to do what I wanted.

Let’s take a look at how I did it.

First, open all the pumpkin files that we created in last week’s post –
Silhouette Designs – Part 1.
We will be using the Modify Panel and the Layers Panel to create the pumpkin stack.

Stack Pumpkins copy

If you have grouped the design back together, right click on it and ungroup. Move the green stems away from the 2 bottom pumpkins. They will not be needed and could be deleted.

Layers panel copy

Open the Layers Panel. Once the pumpkin is ungrouped, each piece of the pumpkin will show as a separate item in the Layers Panel. The black background of the bottom pumpkin is selected and the item labeled “Polygon” that matches will highlight. Polygon is a general name because it’s a shape, if you right click on it, the option to rename the layers is available.
I did not ungroup the pumpkin at the top of the page. In the Layers Panel, you can see that this object is labeled “Group”. When this object is ungrouped, it will break up into separate items in the Layers Panel, like the others show below in the layers list.

Layers Panel renamed copy

I have renamed all of the Layers in the panel so it is easier to know which ones match the design.

To make this design stack on each other and cut the black shadow out of all one piece. I moved the layers around so the black shadow layers are next to each other by grabbing the name in the Layers Panel and dragging it down the list.

Organize layers copy

Now I can select the black bottom and the black middle pumpkin layers and right click and choose Weld. Notice that the orange pumpkin part is now overlapping. We will use the OffsetModify Panels in a minute to fix that.

Weld bottom layers copy

When you weld the 2 layers together, notice that the name changes back to “Polygon”. It can be renamed again if needed.

To make this easier to work with and selecting the correct part of the design, I selected all of the design and changed the Fill Color to transparent.

Select the middle pumpkin, open the Offset Panel, create a small offset of 0.040″, and click Apply.

Offset copy

With the Offset selected, hold the Shift key down and select the bottom pumpkin.

Open the Modify Panel and choose Subtract. This will subtract the middle pumpkin offset from the bottom pumpkin, leaving a space between the pumpkins.

Subtract copy

Fill the pumpkins with orange and the back layer with black to see how the design will look.

Here is a comparison of how the design looks with the Offset vs without the Offset.

Comparison copy

Now, did I have to do this? No, but I wanted the pumpkin designs to be separated in some way so they didn’t look like one giant orange blob.

Now, to add the top pumpkin to the stack, we will repeat the steps for that pumpkin.

Move the top pumpkin above the bottom 2, position as desired, and ungroup the design.

Top Pumpkin copy.jpg

Once the top pumpkin is ungrouped, the layers will separate in the Layers Panel and it will show 3 new Polygon layers. I have gone ahead and renamed the layers to make it easier to see.

Top pumpkin layers copy

In the Layers Panel, move the black background layer of the top pumpkin down the list next to the Black background of the design. With both the black layers selected, right click and choose Weld.

Top pumpkin black layer copy.jpg

Now, you’ll see the top and the middle pumpkin overlap.

Select the top pumpkin, open the Offset Panel, and create a 0.040″ offset. It may be easier to select the designs if the color is removed from the design first.

Top pumpkin offset copy

With the top pumpkin offset selected, hold the Shift key down, and select the middle pumpkin. Using the Modify Panel, choose Subtract. Now the Offset is subtracted from the middle pumpkin and you have a separation between the designs.

Fill the design back in with color to see how it will look.

Full design with color copy

Scale the design to the size you want. I knew I had about 24″ to work with in my area, so I sized the design about 19″ tall. You can use a 12″ x 24″ cutting mat or cut without a mat.
Check out this post on Cutting Without a Mat for tips on setting up for a successful cut without a mat.

Full design scaled copy

I added layering marks to the top of the design by drawing a rectangle, making a copy, aligning the rectangles, and grouping them together. Now, I will cut these layering marks with each color of the design, so I can use them to line the image up. Check out this post on Layering Vinyl for more information on how to create the layering marks.

I also moved the green stem off the design mat, so it did not cut with the 2 long layers. I can cut that from a much smaller piece of vinyl and add it on separate.

Then I used the Cut by Fill Color option and chose which colors I wanted it to cut each time.

Cut by Fill Color copy

Click on the Send tab in the top right corner. Then choose Fill Color in the menu just below the Send menu.

Check the box next to the colors that you want to cut. I want the layering marks to cut with both the black layer and the orange layer, so the light green will remain checked for both cut.

When a color is selected by clicking on the box next to it, you will notice that the cut lines of the design on that color will become bold. In the photo above, the black and the light green have bold cut lines around them. When cutting by Fill Color, the cut lines will be the same color as the Fill color.

I cut the black first, then unchecked the black and checked the box next to the orange.

Cut by Fill orange copy

After the design is all cut, weed away the excess and then layer the design together using the layering marks to line it up.

Check out this time lapse video of piecing this design together.

This is the longest decal that I have attempted to layer. I would suggest starting with a smaller size and practicing with the layering marks to line things up before attempting a large design.

eZy_watermark_23-09-2019_12-57-56

I repeated the process for the evil jack-o-lanterns on the right side.

And yes, even though the bottom right jack-o-lantern decided to go rogue and not stay in his designated spot when I placed him, I just let him be his own self. I do think there was a vinyl issue when I was cutting and the vinyl got stuck a little bit and caused the cut to be off. It happens and it happens to us all.

The designs used in this post are all from the Silhouette Design Store and can be found here:
Pumpkin by Wild Pilot – Design #274430
Pumpkin by Wild Pilot – Design #274429
Pumpkin by Wild Pilot – Design #274427
Pumpkin by FoxSister – Design #273881
Pumpkin by FoxSister – Design #273880
Pumpkin by FoxSister – Design #273879

Now, I played with pumpkins, but this can be used for any design.
What will you play around with and see what you can create?

I would love to see your projects feel free to post on my Facebook group at Silhouette Secrets with EllyMae.

Enjoy!

SS_Signature copySS Logo snip it

**This post may contain affiliate links. What that means is that I may receive compensation if you purchase through the links I have provided. The price you pay for the product or service is not higher but I may get compensated for sharing.

Posted on 3 Comments

Let’s Explore v4 – Silhouette Designs – Part 1

Today I’m going to show you how to make the most out of your designs that you purchase. Now, each design will be different because all designs are created differently, but let’s take a look at how we can make a few changes to the designs and get a different look.

Last year, I cut out this position-able skeleton and put him up on my front door for the “Let’s Explore v4 – Warp Panel” post – HERE.

Skeleton door sign
Position-able Skeleton by Samantha Walker – Design #4828

Well, the kids did not want me to take him down, but they decided that we should decorate him all year long.

For the holidays, he received a new hat.

IMG_6844 copy
Santa hat from Santa & Friends Photo Props by Kolette Hall – Design #35760

For Easter he received a make over and dressed up as a bunny.
Check out these posts Designing with ShapesCreating Your Own Designs.

Silhouette_Secrets_skeleton

And for the Spring, he debuted as a ball player helping me show how to change the Selection Preferences in the software and helping hold our No Soliciting sign. What a great helper! Since putting up this sign we do not have constant sales people knocking on our door. No one has brought wine or done my laundry but I’m ok with that if I don’t have to listen to sales pitches.

IMG_20190429_144932346_HDR

Now, he has decided he is a Pirate. He has gone almost a full year without a name, so I think I’ll call him Jack.

Sil_Secrets_FallDoor copy
Pirate Photobooth Props by Rivka Wilkins – Design #49887

How to Make Your Designs Go Farther

**Tutorial written in Silhouette Studio v4.3.263 – you may see additional icons or options on my screen that are available in v4.3. All techniques are available in previous versions of the software. 

One way to get your money out of a design is to keep it up all year long. But, that wasn’t actually the reason I started writing this post.

I try to ask the kids what they would like when we change out the door decorations each season. This time they said jack-o-lanterns in addition to dressing “Jack” up as a pirate.
So I grabbed these designs from the Silhouette Design Store.
Pumpkin by Wild Pilot – Design #274430
Pumpkin by Wild Pilot – Design #274429
Pumpkin by Wild Pilot – Design #274427
Pumpkin by FoxSister – Design #273881
Pumpkin by FoxSister – Design #273880
Pumpkin by FoxSister – Design #273879

I’ll take one of these (Design #274430) and use it to show how you can alter it to get a couple different looks using some of the features we’ve covered in the
“Let’s Explore v4” series.

When Pumpkin – Design #274430 is opened, this is what you will see.

Pumpkin 274430 copy

I always fill my designs or text with color using the Fill Color Panel to see how it will look when cut or if there are additional things I need to do, such as Make a Compound Path of the design.

Fill Color Panel copy

The design must be selected in order to change the property of it. Click on the red line of the design and the Selection box should appear around the image, then click on a color in the Fill Color Panel to add a color.

Once the design is filled with color, it can be selected by clicking anywhere in the color of the object. You do not have to be as precise in clicking on the red line of the design to select it. This is another reason I fill my designs with color as it makes

You can see in the above photo that if I cut this out exactly as it opens, it will cut the outline of the pumpkin and the face features inside. There is no background to the pumpkin and that can work for many designs, but I wanted a background.

I made a copy of the pumpkin so you will see the comparison.

Right click on the Pumpkin – Design #274430 and choose Release Compound Path.

Release Compound Path copy

This takes the design and releases all the pieces that make up the design. This will allow us to work with the pieces of the design individually and change it how we want.
You will notice that since we have filled it with color, it is now all the same color.

Release CP color copy

Click on the Fill Color Panel and choose the Transparent option to take the color back out.

Each file may be different in the exact steps you will need to take on how you get it all broken down into pieces. However the same features and tools will work, but they may need to be completed in a different order. This is dependent on how the designer created the file. But, knowing how each feature works will help you in deciding what steps you need to try to get it to the results you want.

You will notice in the photo above, that after the compound path is released, the selection box is still 1 around the entire design. This file is all grouped together. Right click on the design and choose Ungroup.

Ungroup copy

Now, the design is broken up into some pieces.

Left click on the mouse in the top left corner above the design, hold the left mouse button and drag across the entire design. All the objects that the drag box covers will be selected.
Hold the Shift key on the keyboard down and then click on the outer edge of the pumpkin and the 2 stem pieces. This will deselect those pieces.
Next, right click and choose Make Compound Path. This will compress all of those pieces back into 1 object.

Next, to see how the compound path worked, use the Fill Color Panel again and fill that section with color.

Select the stem pieces. Click on 1 piece of the stem and hold down the Shift key on the keyboard, then select the 2nd piece of the stem. Right click and choose Group. Then fill the stem with green.

2nd copy copy.jpg

Select the outer edge of the pumpkin and fill that with black.

Now you can see that we have taken a few additional steps and have a design that is more than just an outline of the pumpkin.

Compound paths can be something that takes a little bit of working with to really understand how they work. Check out this post on the Modify Panel – Part 2 to see more examples of Compound Paths.
The best way to reinforce the concept is to take a design and just play with it.

eZy_watermark_23-09-2019_01-03-40 copy

I did the same thing for all 3 of these happy pumpkins and these not-so-happy jack-o-lanterns.

eZy_watermark_23-09-2019_01-03-20 copy

Don’t look too close or you will see that my bottom jack-o-lantern decided to mess with me and not follow the rules. He decided to go rogue and not to lay in his designated spot.
It happens!

Next week, we will explore how I stacked the pumpkins all together, combined the black backgrounds to cut it all out of one piece of black vinyl, and how I pieced it together.
Find Part 2 HERE – Silhouette Designs – Part 2.

I love that I can take one design and turn it into another or modify it in a way that I can use bits and pieces if I want. With a few of the tools in the Silhouette software the possibilities of what you can do are endless.

As I mentioned above, each design may vary in the steps that it may take to alter it and this is dependent on how the designer saved the design.
But, it sure is fun to play around with!

I would love to see your projects feel free to post on my Facebook group at Silhouette Secrets with EllyMae.

Enjoy!

SS_Signature copySS Logo snip it

**This post may contain affiliate links. What that means is that I may receive compensation if you purchase through the links I have provided. The price you pay for the product or service is not higher but I may get compensated for sharing.

Posted on 1 Comment

Cameo 4 Unboxing

Just wanted to pop in here really quick and post the video I did unboxing my new Cameo 4. Whether you have decided to add one to your Silhouette family or are waiting a bit, check out the video to see what’s in the box and the first cut with it.

If you have any question feel free to ask on my Facebook group at
Silhouette Secrets+ with EllyMae.

If you do decide to order here are 3 places I’d recommend:
Silhouette America
Heat Press Nation
Swing Design

I am so excited for the new tools – Rotary blade, Kraft blade 3 mm (Cameo 4), Punch Tool, and Kraft blade 2 mm (Cameo 3 & Curio) and can’t wait to show you!

Now matter what machine you have, get that baby out and start cutting with it!

I would love to see what projects you create with any Silhouette machines! Feel free to post on my Facebook group at Silhouette Secrets with EllyMae.

Enjoy!

SS_Signature copySS Logo snip it

**This post may contain affiliate links. What that means is that I may receive compensation if you purchase through the links I have provided. The price you pay for the product or service is not higher but I may get compensated for sharing.
Posted on 5 Comments

Silhouette America Home Office Tour

Another one of my dreams has come true! A Silhouette Home Office Tour!

IMG_20190909_162031317_HDR

I had the privilege of getting invited to the Silhouette Cameo 4 launch and they offered a home office tour. We flew directly from the Silhouette Getaway weekend to Utah & with a quick drop off of our luggage to the hotel, headed to Silhouette Headquarters.

It was so inspiring to see all the creative projects displayed around the office!

There are 2 things that I cherish the most about any of my Silhouette travel adventures. First, the people! The relationships with those people. That is what this is all about! Whether it’s a hands on retreat, workshop, All Things Silhouette Conference, or even my Facebook page and groups – it’s all about the people! I love that many of those who have attended lessons with me are now great friends and it blooms into so much more than just teaching them how to use their Silhouette. That is the connection that brings us together.

Second, the creative inspiration! It is all around.
No matter where I go I see projects that inspire me to Create!

Since I could not take you all along with me, I wanted to share my experience as much as I can. I am going to share some of my favorite parts of the Silhouette Home Office tour.
(Note – post contains many photos – so it will take time to load)

Libby photo

On our way to the Home Office tour. My friend and colleague Libby Ashcraft with Libby’s Loft. Libby and I have been roommates for a couple years when we travel to the Silhouette events and she helps me in so many ways. I am not a sewer, so she fields many of my questions on that niche of things.

Ben

Ben Wood with Silhouette America has become my friend and resource through the All Things Silhouette Conference. He was the head of Silhouette support when I first met him and as recently moved to a new role in Silhouette and we caught him right as he was leaving for the day. I have bugged Ben many times with a large variety of questions regarding Silhouette software and am always appreciative of his time and answers back to me. I will miss his Troubleshooting class at ATS Conferences, but want to congratulate him on his new position.

Group photo

Left to right: Spencer Livingston (Silhouette), Sarah Cannon (Silhouette), Libby Ashcraft, Barbara Foster, Terri Johnson, EllyMae Habets, Julie Huggins, Lycia Evanoff, Mandy Graham, Sierra Dungan (Silhouette).

This is the reception area of the Silhouette Home Office.
I am very blessed to have met each and every one of these people in this photo.

There were so many fabulous creative projects on display and I could have probably spent hours just photographing them all. In fact, they did have to circle back around at one point because we were loitering a little long with some Silhouette creative project designers. It was pretty funny!

Spencer

Spencer Livingston, Silhouette VP, with 10 years of Silhouette evolution.

Warehouse copy

On our tour was the Silhouette warehouse, which is at the back end of the Silhouette office. This may not look that exciting, but I loved seeing it! All these Silhouette goodies under one roof!

Studio

A glance at the newly re-decorated Studio where the magic happens in the videos Kelly Wayment creates and the new Maker’s Studio video that are posted on the Silhouette America Facebook page.

Studio shelves copy

Another view in the Silhouette Video Studio. Look at all those pretty colors and the video lighting stand-in when there is not a real person available for the job. It is amazing all the little details that go into creating a video.

Project shelves Showroom copy

Creative projects that are in the Office Showroom. I wish my Studio looked that great.

Project shelves copy

And many more projects created by Silhouette Creative Designers.

Chameleon photo

3D Chameleon – Design by Mesh & Crafts – Chameleon – Design #287227

Cake boxes copy

So many neat projects! These boxes are created with Cake Box design by Daniela Moscone in the Silhouette Design Store.

Coral cut on cardstock copy

Can the Silhouette machines cut intricate designs? I know I have had success with it but I also see many struggle too. This is a coral design cut out of cardstock that was hanging in the office. It can take some practice, good quality cardstock, and a sharp blade.

Faux Stained Glass dragonfly copy

Faux stained glass dragonfly created with Silhouette Shrink Plastic. I just do not have enough time for all these projects that can be created with the Silhouette machines.

Faux Stained glass butterfly copy

Another faux stained glass project. This butterfly is gorgeous and the photo does not do it justice. The projects that the Creative designers create are amazing and I would love to spend an entire day with them (write that down on the bucket list).

Faux Agate Art copy

Now, these Agate Art projects first caught my eye at the Silhouette Summit in May where there was one on display. These photos do not capture the beauty of these creations made from Silhouette Shrink Plastic. But, if you want to know how they are created, check out the Shrink Plastic Agate Art on the Silhouette 101 blog HERE. It is great to see all these amazing projects by Silhouette but it also adds to my ever growing project creation list that I’d like to do.

Sparkleberry Goody Bags

I spy Sparkleberry HTV on those goody bags being prepared for the Cameo 4 launch. I’ll share more on the Cameo 4 launch coming soon.

Now, you may be wondering where the other photos of the office are. Well, it is much like any other offices you may visit. The inside areas of the office space are filled with cubicles that house the retail, support, creative designers, and other desks.
All around the edges of the office are more offices.

IMG_20190909_170531425 copy

And I mentioned that I was one of the lingering tour attendees, talking with the creative designers and discussing product ideas. Our tour guides looped back around and found us pretty quick though and as the tour was coming to an end, the Product tester’s office was pointed out to me and I snapped a quick photo. There isn’t much to see but I did get to pick his brain at the Cameo 4 launch about all the materials he had been testing for the Cameo 4.
This is another section of the office that I would love to spend a full day observing.

Cameo 4- header copy

I can’t wait to get my Cameo 4 and start my own testing and sharing with you all too!
I was #4 to pre-order my Cameo 4 from Silhouette America as soon as it went live!
Pre-order yours direct from Silhouette America and get FREE shipping with my code SILSECRETS by clicking HERE.

Or you can also grab bundles at Heat Press Nation and Swing Design!

Whether you decide to get one now or stay with your current machine, I encourage you to get it out and play with it! All of the Silhouette machines are great machines & none are obsolete!

Silhouette Live

What did you think? Feel free to let me know what your questions are and what you thought of the tour on my Facebook group at Silhouette Secrets with EllyMae.

I’m off to work on classes for the All Things Silhouette Conference which I heard only had about 30 tickets left.
I hope you enjoyed my glimpse of the tour I received at the Silhouette Home Office.

All Things Silhouette Conference Collage

Photos of my current classes at the All Things Silhouette Conference.

Enjoy!

SS_Signature copySS Logo snip it

**This post may contain affiliate links. What that means is that I may receive compensation if you purchase through the links I have provided. The price you pay for the product or service is not higher but I may get compensated for sharing.

Posted on 1 Comment

Cameo 4 – New release – Pre-Order Now

At the Silhouette Summit in May they announced the release of the new Cameo 4 (check out my Summit Show & Tell post HERE) and I am excited to say that I am in Utah and attending the Silhouette Cameo 4 Launch.

Yesterday we had a tour of the Silhouette Headquarters and I will be sharing more on that and what I see & learn at the Cameo 4 launch later this week.

IMG_20190909_162031317_HDR

The Cameo 4 is available to Pre-Order starting at 12 pm MST through Silhouette America with my code SILSECRETS. And this code is also good for FREE shipping on your order! Keep in mind that this is a Pre-Order, so when the Cameo 4 machines are available to ship those who have pre-ordered will be the first ones to ship.

Cameo 4 copy

A few things you may be asking yourself….

Do I need a Cameo 4?
If you already own a Silhouette machine, the answer may be NO. While there are a few updates to the new Cameo 4, your current Silhouette machine will still work. All the Silhouette machines are great machines. I still have a Cameo 1 that is going strong and it is WELL used.

Do I want a Cameo 4?
The answer could be YES or NO. This answer will vary from user to user. Me personally, I will be getting the Cameo 4 for many reasons.

I want to test it out for cutting thicker materials.

I also teach on the Silhouette machines, so I feel that in order to teach Silhouette users, I need to know the machine. So I will be clicking buy at 12 PM MST when the Pre-Order goes live.

Do you need a Cameo 4 bundle?
Again, this is only a decision you can make for yourself. Me personally, I have the other supplies that a bundle might have and I’ll save that extra little bit for the specialty tools that will be coming soon.

However, if you are a new user or feel a bundle is right for you there are a couple of retailers who have bundles available.
Check them out here:
Heat Press Nation
Swing Design

*Please note that the white Cameo 4 machines will be the machines that are shipping the soonest and the color machines will follow later.

The only person that can make the decision on whether you “need” a Cameo 4 is YOU.

Once I receive a Cameo 4, I will begin testing and becoming familiar with all that this new machine can do.

But until it arrives at my house, I will continue to make lists of what projects I want to “test” on this new machine.

I would love to see what projects you create with any Silhouette machines! Feel free to post on my Facebook group at Silhouette Secrets with EllyMae.

Enjoy!

SS_Signature copySS Logo snip it

**This post may contain affiliate links. What that means is that I may receive compensation if you purchase through the links I have provided. The price you pay for the product or service is not higher but I may get compensated for sharing.
Posted on 7 Comments

Silhouette Curio Beginner Etching

Today I am guest over on the Terri Johnson Creates blog giving my “secrets” to getting started etching with your Silhouette Curio.

beginner curio Etching metal header copy

Head on over to her blog and find out more HERE.

If you have not taken that baby out of the box yet, check out this unboxing video

And more tips to getting started on this post – The Curio – Getting Started.

I hope this helps you to get the Curio out of the box or uncover it from it’s “safe” place and get to playing with it.

And join me at the All Things Silhouette Conference in November where we will have several different Silhouette Curio classes available.

Don’t have a Curio yet, but are in the market? Here are 3 places to shop for one:
Silhouette America
Swing Design
Amazon

I would love to see what you create – feel free to post on my Facebook group at
Silhouette Secrets+ with EllyMae.

Enjoy!

SS_Signature copySS Logo snip it

**This post may contain affiliate links. What that means is that I may receive compensation if you purchase through the links I have provided. The price you pay for the product or service is not higher but I may get compensated for sharing.

Posted on 8 Comments

Let’s Explore v4 – Pattern Fill

In the past several weeks I have been using the Fill Pattern option in the Silhouette software to create my own papers for projects that I needed. While I have a large paper collection, there are just times I do run into a project, that I want a specific paper for and I don’t have it – like this 3D Tank project I complete a few weeks back.

Header Tank post

Last week, I started a project with my daughter and we only had wood patterned paper to make 1 of the project. So the Silhouette Design Store, my Silhouette software and my Canon printer came to the rescue.

IMG_20190731_205738918 copy

This Lath Decorative Board is created completely out of cardstock. Paper A is a retired patterned paper from my Close to My Heart collection and paper B is one that I filled with the pattern fill option and printed through my Canon printer onto white cardstock.

Pattern Fill header copy

I posted this on my Silhouette Secrets+ Facebook page  when I was working on the project and asked for guesses on which one was printed. Almost all the guesses were for A as the printed paper. This is a great option if you do not have the specific pattern in your stash that you need.

Sil_Secrets_PatternFill

If I don’t have the supplies on hand, it usually means that this project would have been put on hold for the time being, but now with the option to print and cut my own paper designs, I can get to crafting.
The project above is a Lath Board with Flowers Project by Nilmara Quintela from the Silhouette Design Store.

Let’s take a look at how you can use the Pattern Fill option to expand your options in Silhouette Projects.

The Fill Pattern tab is found on the right side under the Fill Color Panel – Tab 3.

Fill Pattern Panel2

This short video shows how easy it is to fill shapes with patterns from the Silhouette library.

Once you have your design set up with the pattern fill, you can use the Print and Cut feature to print the design out with your home printer and then cut on the Silhouette machine.
Check out this post Print & Cut – Part I for my tips for a successful Print and Cut.

I hope you learned something new today in the “Let’s Explore v4” series!
There are so many options in the Silhouette Software and the only way to learn is one thing at a time! I hope you get a chance to play around with this and more soon!

The designs used in this post can be found in the Silhouette Design Store:
Combat Tank 3D Box by Snapdragon Snippets
Lath Board with Flowers Project by Nilmara Quintela
Bracket Label Thank You Card by Lori Whitlock
Ink Splat Pattern by Loni Harris
Mermaid Scales Purple Pattern by Studio Illustrado
Hibiscus Paper by Miss Kate Cuttables
Canvas by Digital Pink Ink

I would love to see what projects you create! Feel free to post on my Facebook group at Silhouette Secrets with EllyMae.

Enjoy!

SS_Signature copySS Logo snip it

**This post may contain affiliate links. What that means is that I may receive compensation if you purchase through the links I have provided. The price you pay for the product or service is not higher but I may get compensated for sharing.
Posted on 6 Comments

Let’s Explore v4 – Preferences – Tools

When you use the drawing tools in the Silhouette Studio software, does every click of your mouse continue to draw another shape?

Did you know that you can change this behavior within the software?

Click on the Preferences icon in the bottom right corner of the Design Tab or click on the Edit option in the top left menu & choose Preferences.

Preferences copy

Then choose the Tools tab at the top of the Preferences window.

If the software continues to draw shapes with each click of the mouse, this preference can be found under the “Action After Tool Use” section of the Tools tab.

After drawing Tools

I change the After Creating a Shape and the After Drawing Freehand to “Choose Select” then choose Apply and Ok.

Choose Select

Now when you choose a Drawing Tool or the Line Drawing Tool, it will go back to the selection arrow instead of continuing to draw shapes.

Tip: I keep the Eraser and the Knife tool as “Continue Using” because typically I will continue using the eraser or knife. I have the After Using Zoom set to “Choose Select” because I don’t want each click of my mouse to keep zooming in on the design. I prefer to have my selection tool again and if I need to zoom in more, I will choose zoom again.

Sometimes these defaults can get reset in the software, but after you know what they are and how to adjust them, you can easily go in and change it to what you prefer.

Each user will have a preference on how they like to work in the software. I prefer to draw one shape and then have the selection arrow as my next option as I am rarely drawing more than 1 of an item at a time when I’m designing.

Feel free to post your comments and questions below or on my Facebook group at Silhouette Secrets with EllyMae.

Enjoy!

SS_Signature copySS Logo snip it

**This post may contain affiliate links. What that means is that I may receive compensation if you purchase through the links I have provided. The price you pay for the product or service is not higher but I may get compensated for sharing.