Posted on 5 Comments

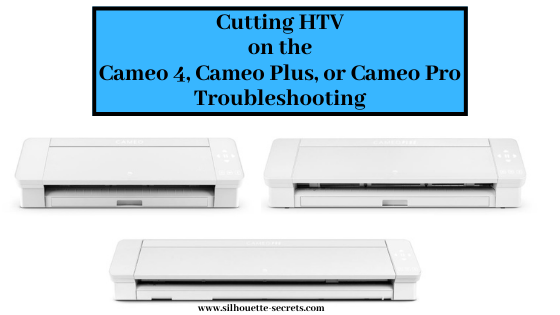
Cutting HTV on the Cameo 4, Plus, or Pro – Troubleshooting

Cutting HTV on the Cameo 4, Cameo Plus, or Cameo Pro
Troubleshooting

Are you having issues with getting HTV to cut properly on the Cameo 4, Cameo Plus, or Cameo Pro? Or are you noticing issues with the HTV feeding properly through the machine?

Recently, I was cutting HTV with my Cameo Pro and was having feed issues. I see several times each week on Facebook where users are having cut issues with their machines. I kept loading and unloading the HTV and began to notice a pattern.

Note: these tips will work for all Silhouette machines, but you may find that you notice it more on a Cameo 4, Cameo 4 Plus, or Cameo Pro models

If you are having cutting or feed issues with your Cameo machine
is your HTV curled?

As I watched the machine load and feed through, I noticed that the HTV was curled.
If it is, this will affect your cutting and HTV feeding through the machine 100%!
If you lay your HTV flat and the edge curls up, this can cause issues.

Typically, HTV comes in a roll and is shipped that way, especially if you are buying it in longer sections. Depending on how it’s rolled, it can retain that shape and then it will not roll flat through the machine.

Why do you have cut or feed issues?

Since the HTV is curled, it will catch inside of the machine as it rolls through.
This is not a machine fault, this is due to the HTV being curled.

First, the number one thing that needs to be checked is that the blade is installed properly. I cannot even tell you how many posts I see daily on Facebook that the blade is not installed properly. This is one of the best things you can learn to do for yourself & to save yourself headache in the future. It doesn’t matter if you are an experienced user or a beginner. If the blade is not installed properly with no gap and adjusting properly, you WILL have cut issues.

This is how the blade should be installed on a
Cameo 4, Cameo Plus, Cameo Pro, or Portrait 3.

There should be absolutely no gap between the lip of the blade and the housing.
AND the lock on the front of the blade needs to be pushed in completely.

Then watch as the machine does it’s “tap dance” at the beginning of the cut. Does the red line inside the blade adjust properly and to the correct number?

If it does not, we can start troubleshooting it with a photo of the blade installed with the cutting mat or vinyl loaded if you post on the Silhouette Secrets+ Facebook group or check out this video by Silhouette America on Cutting Machine Maintenance and how to Reset the Motor at 4:38 in the video. This should reset the housing so that it is properly aligned to hit the adjustment holes correctly.

Once the blade is installed properly and adjusting properly, the next place to look is where this curled HTV can cause issues.

3 places to watch for curled HTV catching

1 – The Roller bar
Is the HTV loading properly and straight?
If the HTV is curled too much, it may not be securely under the rollers and the machine cannot grip it well. This means that it may be pulling it in at an angle.

Here is an example of what it might look like if the HTV is not securely caught between both the rollers. One side may pull in more than the other.

It can also catch on the bottom of the blade in the Tool 1 or Tool 2 housing.
If the HTV is curled and you do get it loaded straight, the curl on it can catch on the bottom of the blade(s) as it rolls back and forth.

Here is an example of what it might look like if it gets caught on the bottom of the Tool(s).

If the material does not load straight, unload and try again. If it loads crooked, you will most likely have an issue with it feeding properly. It is better to try again until it is loaded straight or try one of the other solutions below.

2 – The middle bar in the machine.

If you look at your machine, you will see there is a white piece that sort of has a curl up on the front that runs behind where the blade housing moves. The curl on the machine is designed so when a material is loaded and moves toward the back, it directs the material down and through the machine.

However, if the HTV (or other materials) is curled, when it gets to the white piece in the machine, it will go up instead of going down. This means the HTV is not moving freely through the machine and may get caught. This can cause both cut and feed issues.

Watch as the HTV is moving through the machine to see if it’s catching here.

3 – The back of the machine

If it makes it past the first 2 areas, then the last place it might catch is the back of the machine and you may or may not see this as the vinyl coming up behind the metal bar that runs the length of the Cameo 4 models. If you listen close, you will be able to hear this when it catches or you might actually see it come up behind that metal bar as well.

All of these areas can affect the cut or feed of the HTV. Since the HTV is curled, it cannot roll smoothly and flat through the machine. The machine is functioning properly, but since the material is curled, it will catch.

Now, I’m sure you may be wondering how I figured this out. When I noticed there was an issue, I tested. And I tested. And I tested. I watched how the machine was grabbing the materials. I watched how it was moving through. And I watched what parts of the machine were moving when everything was happening.
This is a great way to learn your machine and what it doing!

Now, how do you fix it?

Solutions to curled HTV

Tip 1 – Feed the material through the machine until the curl is out the backside.

To advance the material through the machine, press the down arrow on the right touch panel on the Cameo 4, Cameo Plus, or Cameo Pro machine.

Or you can advance the material by using the down arrow key next to the Test Cut button on the Send tab in the software. This would work for all machine models.

Now, this is not always the most ideal or conservative way to work with your HTV roll because you will be advancing it into the machine about 4″ or more to get past that curl.

However, if you are pressed for time, it may be the fastest way to work with it.

Tip 2 – Roll the HTV backwards when you get it.

Once you have identified this as a possible issue you may have, you can then re-roll the HTV rolls when you receive your order. This can help the curl “relax” a bit. And then store the vinyl this way.

If the HTV roll came with a piece of tape on it, tape it securely so it will start to retain the new shape. When you want to use it, the inside of this roll will hopefully be relaxed a bit and less curled.

If you do not have the tape from the original roll, grab a core from an old roll and then place the new roll inside so it will conform to the shape more and be held securely.

Tip 3 – Use a cutting mat to hold the vinyl down.

If the design will fit on the cutting mat and you cannot get it to feed properly, then I would suggest a good sticky cutting mat to help hold that vinyl down as flat as possible.

I do know some users who will even use painter’s tape and tape the HTV so it lays flat. My only caution here is to not place the painter’s tape on the left or right edges where the rollers may roll over it as it may lose it’s grip because of the difference in surface area and cause the mat to skew.

If you do place tape in the roller paths, just be aware if the mat skews or the cut is off, that this could be one reason why. If the left roller is gripping a different material, say the smooth surface of the mat, but the right roller is rolling on painters tape, it can cause it to roll at different rates. This can cause the mat to twist in the machine.

This can also be the case if the right roller is rolling across the adhesive on the cutting mat. It can not only cause your roller to get gummed up, but can affect the feeding of the mat as well since it is rolling on the adhesive and not on the smooth edge of the cutting mat.

Tip 4 – Slow the speed of the cut down.

On the Send tab in the Silhouette software, you can adjust the speed. Faster is not always better. If you continue to have an issue, slowing the speed of the cut down can help not only in the cut, but in also being able to identify the cause of an issue.

Wine Tasting Team Captain by Megan Hardy Designs – Design# 322093

Tip 5 – Test cut with a capital B you type out placed below the design area.

If you are not doing test cuts before you send the design to cut, I highly recommend getting in the habit of it. It only takes a few seconds, but can save you time, wasted materials, and big headaches!

This is my favorite way to do a test cut!
I use the Text Tool on the left side and type out a capital B. Move the B to a place that is below your design or towards the bottom in the negative space.

Why so far down?

By placing the capital B test cut at the bottom of the design, you will be able to see how the machine and HTV will track as it goes. It will have to roll all the way to the bottom of where the design will be and perform the cut. By doing this, any issues may show up before you’ve actually tried to cut the full design and it didn’t work properly.

One More Tip

This one actually has nothing to do with the machine itself, but it more on the software.

I would suggest reading through this next section entirely so you understand how this one works and also how to “fix” it.

In 2016, there was a new “pop-up” message that was released into the software for Heat Transfer materials called the Mirror pop up.

For heat transfer materials you are generally placing the material face down on the cutting mat and then cutting through the backside of the material. This means that you have to “mirror” the design so it will cut properly.
How many times have you cut heat transfer material only to have that “head smack” moment after when you realized you forgot to mirror the image?
So the idea behind the “pop-up” message is great!

If you have never cut HTV before or are just getting started, then I would suggest this
Silhouette “Secrets” for HTV – Beginner Tips & Tricks
blog post to get started.

However, this “new” Mirror pop-up released in 2016, did not just mirror the design in the exact place that it was on the design mat. It flipped the entire mat when it mirrored the image, but it does not show that on the screen. So the design that shows on the screen on the left side of the mat/material, is really going to cut on the right side if you choose
Send Mirrored” and let the software mirror it for you.

If you choose “Send As Is” it will send it to cut in the exact location and exactly as you see it on the screen.

Now, I know that may seem like “old news” since this “bug” has been in the software since 2016. Some users got used to it this way while other users would learn to flip the design themselves and just choose “send as is”.

Now, let’s move to the present.
A few months back, I started to notice users commenting that their HTV was not cutting as it should. They would tell the software to mirror it and it wasn’t cutting in the right spot. I reported the issue and found out that the old mirror “bug” was changed in February 2020 the software release.
Now, it would flip the design in the exact location you have it placed on the mat, but still does not show you that on the screen.
However, if you have anything else on the design file, it will mirror all of the objects. Whether they are in the “holding area” off the cutting mat or not.

If you choose “Send Mirrored“, it could mirror all of the designs on the file.
So when it flips it, this is how it would cut.

Now that would come as a complete surprise when you cut and it’s not what you thought it would be.
Note: the above screen shot is a representation of how it may cut, you do not see this change on the software screen at all.

This is present in the software versions from v4.4.247 until v4.4.438.

From v4.4.438 and higher, the software now is back to mirroring the design on the opposite side of the design mat than what shows on the screen.

How to work with this?

In the grand scheme of things, this is not a big deal, if you know about it and know how to work with it.

My suggestion to you is to mirror the design yourself.

The fastest way to do that is to right click on the design on the Design tab before you go to cut and choose Flip > Horizontal.

This will flip the image on the screen, in front of your eyes.

And it will then cut in that exact spot if you choose “Send As Is” on the Send tab.

If you do not have right click menus enabled on your computer, you can also find this in the top menus under Object > Mirror > Flip Horizontally too.

I use the Mirror Pop up as my final reminder and it has caught me several times when I forgot to mirror the design. Then I go back and mirror it myself before I’ve sent the design to cut.

Hopefully with those tips above, you will be well on your way to cutting HTV smoothly and being able to troubleshoot when you do have an issue.

Wine Tasting Team Captain by Megan Hardy Designs – Design# 322093

For more tips on the Cameo Pro and troubleshooting check out this post
5 Steps to Setting Up the Cameo Pro & Troubleshooting
that also includes a free, downloadable PDF document for future reference.

I would love to hear if this helped you in identifying a problem or if you just learned something new in today’s post. Feel free to comment below or post on the
Silhouette Secrets+ Facebook Group.
We love to see what you are doing and creating with your Silhouette machines!

Save this for future reference by pinning the image below.

Enjoy!

This image has an empty alt attribute; its file name is logo.jpg

THANK YOU for your support! How can you help? Click HERE & buy a coffee.
Every little bit helps with the cost of running the site.

Or if you are looking for more in-depth, step-by-step classes, check out all of my online Silhouette classes on my Teachable site HERE.

SS Logo snip it
**This post may contain affiliate links. What that means is that I may receive compensation if you purchase through the links I have provided. The price you pay for the product or service is not higher but I may get compensated for sharing.
Posted on 1 Comment

Designing in Silhouette Studio

Creating your own designs in the Silhouette Studio software

Let’s use some of the Silhouette Studio tools to create our own designs. We will be using the text, rotate, offset, and subtract tools to create this design.

Affiliate links may be present in the following blog post and as an Amazon Associate I earn from qualifying purchases.

Start by selecting the Text Tool on the left side and click on the design mat to type out a letter.

Using the Fill Color Panel, fill it with a color. This will help to work with it easier, but mostly it is just to be able to see it better.

Click off the text to deselect it and then click back on it one time.
Then open the Text Style Panel and choose the font style.
I am using LW Game Day font by Lori Whitlock – Design #205489.

Make a copy of the text and move it off the mat to the holding area, so there is always an original to go back to.

Right click on the design and choose Convert to Path.
This will change the design from editable text to a vector design.

When it is in editable text mode, the font has to account for all characters in the font file. This will included any special characters, flourishes, glyphs, etc. in that font file and it has to account for that in the spacing you see around the design. This is why you will see excess space on the top and the bottom of a letter between the letter and the selection box.
Each font will vary since each font file is different.
What it has to do is account for the spacing, in case you decide to change the text.

Once the Convert to Path is chosen, it is now considered a vector design. It is no longer editable text and the selection box and measurements around the image are more accurate.

Grab the corner bounding box and increase the size of the letter as desired.
By using the corner bounding box, the design is scaled proportionally.
If you would rather have exact sizes, you could also use the Transform Panel – Scale tab or the Scale icon in the top Quick Access Toolbar.

The size of the design will depend on what type of project you are making. After the entire design is created, it can all be selected and resized to get the final size for your cuts.

Next, click on the Text Tool on the left side again and then type out the word you want.
Fill the text with color using the Fill Color Panel.
In the Text Style Panel, choose the font style.
I used the All Stars font by Erin Doran – Design #307688.
Make a copy of it and enlarge it just a bit.
Then right click on it and choose Weld so that any overlapping letters weld together and cut as one piece.
Then right click and choose Group or use Ctrl+G as the keyboard shortcut.
This will allow the entire design to move as one piece.

Move the text word onto the design mat.
Using the Transform Panel – Rotate Tab, rotate the word 90 degrees.
Then using the corner bounding box, scale it up as desired.
Once the text word is placed where you like it, select both the background letter and the word together and use the Align – Middle tool either in the Quick Access Toolbar (QAT) or in the Transform Panel – Align Tab.

To select multiple objects, left click in the top left above the design and hold the left mouse button down and drag across the entire design.
Anything the mouse touches will be selected together.
Or click on one object, hold down the Shift key on the keyboard and click on another object. As long as the Shift key is held down, everything that is clicked on will be selected together.

Click off the design to deselect it and then click back on the word only to select only it.

With only the word selected, open the Offset Panel and click Offset.
The default distance is 0.125″ and this is what I used and clicked Apply.
When the offset is applied, it will weld any overlapping parts of the offset together automatically and the offset will now be the object selected on the screen.
The distance on the offset can be adjusted as you desire and what works for the design can vary according to your taste and the design being created.

Since the Offset is already selected, hold down the Shift key and then click on the background letter. Now, the offset and the big letter should be selected together.
Open the Modify Panel and choose Subtract.
This will subtract the offset shape from the background letter.
Now all the little pieces will be individual designs. The design will need to be grouped together so it moves as one piece. Either press Ctrl+G on the keyboard or right click on the big letter and choose Group.

Ta-da! You have created your own design.

Move the design around as needed to cut out of the material you are using.

I cut mine from Siser Easyweed Heat Transfer Vinyl so I moved the Bobcats off the mat, right clicked on the B and chose Flip > Horizontal and then placed it in the top left corner of the mat to cut.

Once that was cut, I moved the B off the mat and moved the Bobcats onto the mat, rotated it back 90 degrees, right clicked and chose Flip > Horizontal and cut it.

Check out this post – Silhouette “Secrets” Beginner HTV Tips & Tricks post for more information on cutting HTV.

I love my new shirt and of course, my kids asked for their own too!
I love being able to create custom shirts with my Silhouette and they love wearing them!

But, I’m not going to tell them I like mine better.

Each design may turn out a little bit different depending on the letters, text, and font style chosen. Grab your favorite drink and get to creating!
Here are a couple more that I created using the same steps above.

I’ve also created this as a video tutorial that can be found on my YouTube channel.

I would love to see what you create with the Silhouette Studio tools.
Feel free to post on the Silhouette Secrets+ Facebook Group.

Save this for future reference by pinning the image below.

Enjoy!

This image has an empty alt attribute; its file name is logo.jpg

THANK YOU for your support! How can you help? Click HERE & buy a coffee.
Every little bit helps with the cost of running the site.

Or if you are looking for more in-depth, step-by-step classes, check out all of my online Silhouette classes on my Teachable site HERE.

SS Logo snip it
**This post may contain affiliate links. What that means is that I may receive compensation if you purchase through the links I have provided. The price you pay for the product or service is not higher but I may get compensated for sharing.
Posted on 5 Comments

New Tools for Cameo 4 models & Portrait 3

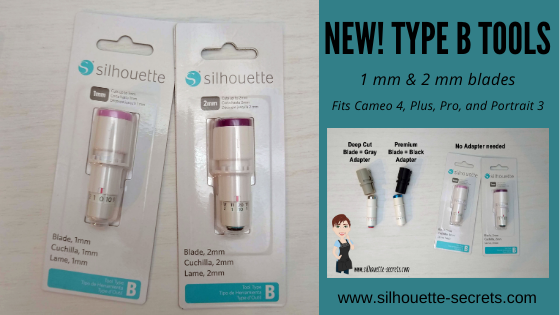
New Type B Tools – 1 mm and 2 mm blades releasing!
Coming Soon!

You asked and Silhouette America listened! Many said they didn’t like having to use the adapters with the Cameo 4 models or Portrait 3 machines. Well, they heard that and created a new 1mm Manual Blade and 2 mm Manual Blade. These are equivalent to the Premium blade (1 mm) and the Deep Cut Blade (2 mm) blades that currently are out, except the new ones fit directly in the housing.

Let’s take a closer look.

Affiliate links may be present in the following blog post and as an Amazon Associate I earn from qualifying purchases.

Ok, so first, as I write this post, these blades have been released in some International areas right now (February 2021). They are estimated to be released in the U.S. in March of 2021. Keep in mind that this is an estimated time and things are crazy right now as they have been this past year.

I am lucky enough to have International contacts and a big shout out to my FB group Admin (Teresa P.) who was able to order and ship them to me! Yay!
So I get to share this information with all of you!
Thank you Teresa P.!

Again, I want to make sure that for all my U.S. readers – these blades are coming, but have not been released in the U.S. yet. Estimated release of March 2021.

Here are the new Tool Type B tools.
On the left is the 1 mm Blade, which is the equivalent to the Premium blade. And on the right is the new 2 mm Blade, which is the equivalent to the Deep Cut blade.

So, let’s talk about the differences between these blades and the older style. The main difference is that the new Tool Type B tools will fit directly in the Tool 1 housing of the Cameo 4, Cameo Plus, Cameo Pro, or Portrait 3.

Tool Type B 1 mm Blade = older style Premium
Tool Type B 2 mm Blade = older style Deep Cut Blade

All of these blades are “manual” blades, which means that you will have to adjust the blade depth “manually” by turning the bottom of the blade to the correct blade depth. But, the best part is that with this manual style blade, you can actually go in between on the numbers if you want. For example, to do a 1.5 blade depth if needed.

Note: in the older software these blades will be called “ratchet” blades because of the manual setting. In the newer software versions being released, starting with v4.4.472, they will be called “manual” blades in the Tool Type on the Send tab. Both designations still mean the same thing. You have to “manually” adjust the blade depth, the machine does not do it for you.

Since you set the blade depth manually, there is no need to wait or watch to see if the blade adjusted to the correct depth like you do with the Autoblade. You set the blade depth and the software knows it’s a “ratchet” or “manual” blade and it gets to cutting.

How do you adjust these “manual” blades?

Here is a video explanation of adjusting the blades and the adapters that are needed with the older style blades.

What types of materials can these blades be used for?

The Premium blade and Tool Type B 1 mm blade can generally be used for any material that is under 1 mm in thickness. However, keep in mind that material density can play a factor into all materials that you cut. Even if something is thin, it may be dense and therefore more difficult to cut.

The most common materials that the blade is used for are: paper, cardstock, adhesive vinyl, heat transfer vinyl, sticker sheets, and other specialty materials.

The Deep Cut blade and Tool Type B 2 mm blade are generally used for any material under 2 mm in thickness. However, keep in mind that blade depth 1-10 is the same as a regular blade, the difference comes with the depths of 11-20.
Again keep in mind that with all blades and materials, the material density is going to play a factor.

The most common materials cut with this blade are: craft foam, thicker faux leather, thick cardstock, chipboard, coverstock, and other specialty materials.
If a regular blade set at a 10 and force of 33 is not cutting through a material, then I will give the Deep Cut blade a try and see if it will get the job done.

For more information on materials and settings check out this newly released video by Silhouette America on their YouTube channel called
Silhouette Support Series – Material Types and Settings.

Where can you find these blades?

Again, these are estimated for release in the U.S. in March 2021 and have already been released in some International locations.

These new blades will be available at Silhouette retailers as they get stock in.

Here are a few places you can look for them once they are released:
Silhouette America
Heat Press Nation
Swing Design
The Vinyl Spectrum

Note: Swing Design does have these listed under the blades section on their website. They are showing Sold Out, however did not miss out. They have not been released in the U.S and that is just how they show on the site at the moment.

And I know everyone is going to ask – What do they cost?

At the moment since they have not been released in the U.S., I do not know the U.S. retail value that retailers will be listing. Once released, I will update the post with more information.

Testing these new blades out

Now, I couldn’t just leave these new blades in the package.
Time for testing!

Testing the 1 mm Tool Type B blade

I first tested in the v4.4.463 software and it was recognized as soon as I put the blade in.

I first started with a blade depth of a 2 as that is what I have been using with my older blade in my Cameo Pro.

It weeded beautifully!

But, a brand new blade is really sharp and it cut a bit too deep.
Remember I said you can adjust the “manual” blades in between blade depths?

I placed it between the 1 and the 2. Perfect cut!

Testing the 2 mm Tool Type B blade

Now, I just grabbed some of my kid’s craft foam. I have no idea how long I’ve had it or where I got it.

I used the recommended settings for Craft Foam in the software.

I am now using the v4.4.472 software where the new “manual” blade is listed under the Tool section.

Always check the cut before you unload the mat. This way if it didn’t cut completely through, you can send it again. I did have to send the craft foam again to cut, but on the 2nd pass through, it cut completely and cleanly through.

Now, I have not cut a lot of craft foam, so I will be looking for more ideas.
But, why not test this a bit more.
I chose a smaller design, just to see what it could do.

This was a little bit more intricate of a design and after sending the design through to cut twice, so a total of 4 passes, I still had to “pop it out” a bit. But, I am thrilled with the results. I’ve only cut craft foam a couple of times and it definitely didn’t cut like this before.
Again, the craft foam brand can make a big difference to. I have no idea what I grabbed from the stash.

My son asked for a frog when I asked him what I should cut from craft foam.
I was not sure how this card would turn out, but it works!

I always recommend having extra blades and mats on hand. Through experience, there is nothing worse than being in the middle of a big project and not having cuts turn out.
A new blade or cutting mat can make a big difference!

Grab some extra mats and supplies at Silhouette America with my code SILSECRETS and save 30% right now through February 14, 2021.
Enter the code SILSECRETS at checkout and the savings will show.
I grabbed a few extra Strong hold cutting mats this month for an upcoming class
Cutting Leather with the Cameo 4 & Kraft blade.
Stay tuned for more details on that!

We would love to see what you are creating!
Share on the Silhouette Secrets+ Facebook Group.

Save this for future reference by pinning the image below.

Enjoy!

This image has an empty alt attribute; its file name is logo.jpg

THANK YOU for your support! How can you help? Click HERE & buy a coffee.
Every little bit helps with the cost of running the site.

Or if you are looking for more in-depth, step-by-step classes, check out all of my online Silhouette classes on my Teachable site HERE.

SS Logo snip it
**This post may contain affiliate links. What that means is that I may receive compensation if you purchase through the links I have provided. The price you pay for the product or service is not higher but I may get compensated for sharing.
Posted on 11 Comments

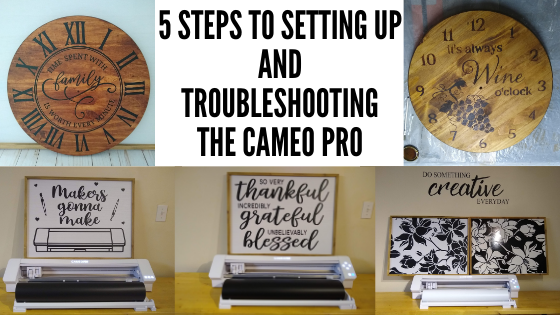
5 Steps to Setting Up and Troubleshooting the Cameo Pro

Cutting like a Pro with Your Cameo Pro

The Cameo Pro is the newest cutting machine released by Silhouette and I have loved creating larger projects with mine.

Today I have 5 tips for setting up the Cameo Pro.
These steps can also be used for troubleshooting any cutting or feed issues you may be having with the Cameo Pro.

If you are new to the Cameo Pro and just taking it out of the box, I would highly recommend watching the Unboxing video HERE to get started with the setup.

This post has a lot of information and is photo heavy. I am also making this available as a printable PDF download exclusively for confirmed newsletter subscribers.

Join the Newsletter

Subscribe to get our latest content by email.
    We respect your privacy. Unsubscribe at any time.

    I would suggest starting at Tip #1 and working through the list every single time. If one of the first 2 things is the cause of the problems, no matter what else you change, you will continue to have an issue until those are corrected.

    Affiliate links may be present in the following blog post and as an Amazon Associate I earn from qualifying purchases.

    Tips for the Cameo Pro

    Tip #1

    Make sure the Autoblade is installed properly.

    The Autoblade has to be installed with absolutely no gap at all between the lip of the blade and the housing.

    The locking tab on the front of the blade housing should be pushed all the way in so the hooks grab the blade and hold it in securely.

    If the blade does not look like this, take it out and reinstall it and lock it in place.

    If you still cannot get the blade installed with no gap, please check out this video by Silhouette America on properly installing the blade in the machine.
    4 Things to Remember About Your Silhouette Cameo 4
    This installation video applies to all Cameo 4 models and the Portrait 3.

    This is the #1 most important factor in getting the machine up and cutting properly.
    If the blade is not installed properly, it will not adjust or cut consistently and the issues you experience may just compound on each other.

    The Cameo Pro comes with an Autoblade and a blue sketch pen adapter only. If you want to use other older model blades in the Cameo Pro, you will need to purchase the blade adapter set or the new soon to be released Premium blade or Deep Cut blade that will fit directly in Tool 1 housing
    (estimated March 2021 release for the U.S).

    Tip #2

    Loading the cutting mat or vinyl properly.

    The first feature we should discuss is the Autoload feature. This is awesome since the cutting width is now 24″ and it is really hard to grow another arm/hand to help push the load button while holding the material up to the rollers.

    The Autoload feature works by pressing the Load button which will start flashing. You have 6 seconds to hold the mat/material up to the rollers and it will pull it in.
    If it does not load straight or you do not feel it loaded securely.
    Press the unload button and load it again for best results.

    Here is a demo of loading a 12″ roll of vinyl. The Autoload option has a little sensor on the left side of the machine that I point at in the video. Make sure this sensor is clear of debris or it may not work properly.

    There are several options of media/mat sizes here so we will go through each.

    Loading lined material in the Cameo Pro such as adhesive vinyl or HTV without a mat

    In the video above, you see how I loaded a 12″ roll of vinyl.
    Let’s take a closer look at the details.

    When cutting a smaller roll than 24″, the roller bar will need to be unlocked and the right roller moved over to the left so it is on the edge of the material to securely grip it.

    The roller bar is locked when the lever points up, release the right side of the roller bar by turning it to the front as the arrow shows on the machine.

    Do not force the roller lever release or turn it backwards.
    Doing so can damage the internal mechanisms.

    Once the roller bar is released, the right side of the roller bar will raise and you can slide the right roller along the bar to the correct position.
    Note: the left roller is stationary and the bar does not lift on the left side.
    The roller can be moved to any of the gray arrows (circled below) on the Cameo and then rolls from 9″-24″ can be utilized. Move the “guides” along as you move the right roller and position them evenly across the material being cut. These help to prevent the materials from bubbling up in the middle.

    There is a rectangle directly in the middle of the right roller and this should be lined up with the gray arrow on the machine for best results. If you look closely, you can see the right roller is directly under this rectangle in the middle of the white bar.

    Once the right roller is lined up with the gray arrow that is on the edge of the width of the material you are cutting, carefully turn the roller bar lever back up to the locked position.

    When cutting from a roll of material, you will adjust the roll feeder to fit the material as needed. Move the right side of the roll feeder in so it will be snug against the right edge of the material roll.

    Then adjust the slides on both sides depending on the size of the material roll.

    For a small roll the slides need to be moved out. Loosen the placement screw and then slide it out and tighten the placement screw again.

    For the larger rolls adjust as needed, following the same steps.

    Note: bulk rolls of vinyl may have issues with feeding properly. If you experience cut issues and you are using a bulk roll of vinyl, try making a smaller roll out of the larger bulk roll. It is a lot of weight to pull against a bulk roll of vinyl.
    If the vinyl is rolled too tight, you may also experience issues.

    The left edge of the material when cutting without a mat, should be lined up with the line on the right side.

    Press the Load button and then carefully hold the vinyl up to the rollers with the left edge of the material next to the line and the right side at the right roller. Make sure that the material loads straight. If it does not, hit the unload button and try again.
    Both sides of the vinyl should be held securely under the rollers or it can slip out during the cut.

    The material should be smooth and not bubbled in the middle. You want it to roll in and out of the machine as straight as possible.

    Now, let’s take a look at a 24″ roll.

    The right roller will be moved to the far right gray arrow and the roller bar lever locked back in place. Spread the guides out evenly between the 2 rollers.
    The right sliding piece of the roll feeder should be on the edge of the right side of the roll of the material.

    The load line stays the same for all widths of material that is cut without a mat.

    Loading materials with a cutting mat

    The Cameo Pro comes with a 24″ cutting mat.
    This sucker is a monster and will take some practice to get the hang of maneuvering, but I love having this option!

    First, remove the protective cover sheet off of the cutting mat.

    The load line is the far left line on the left side of the machine for the 24″ cutting mat.

    The roll feeder should still be set up and make sure you are using the middle mat support.

    The right roller should be lined up with the far right arrow.

    Now, here is probably the biggest thing you will need to keep in mind when using a 24″ cutting mat.
    The full length of the cutting mat has to be fully supported on the front and the backside. The machine cannot work against gravity to pull the mat into the machine. It is just not possible with the weight of the mat. That is a lot of excess weight working against gravity.
    This means that you will need to have a work surface that has approximately 22″ on the front and backside of the machine that is flat and allows the mat to roll in and out flat the entire time.

    Again, this is BIG!
    Not only the mat, but you will need to have it supported or the cuts will be off if it has to work against gravity.
    We built a table with extension for my Cameo Pro so that I am able to use it with the roll feeder as is, but if I need to use the 24″ cutting mat, I can use the extensions so it’s all fully supported.

    Check out this video on the Cameo Pro stand with more tips HERE.
    We have made these plans available for confirmed newsletter subscribers HERE.

    Once you are all set up on the machine and ready to load the cutting mat, press the load button and then hold the mat up to the rollers as straight and level as you can.
    The Autoload starts after 6 seconds.

    If the mat did not load straight or you were not ready in time. The machine will still think it is loaded, press the unload button and try again. This is where the Autoload feature comes in handy to make it easier to just focus on loading the mat and not pressing the button at the same time. However, it may take a bit of practice to get used to loading a mat this size.

    If you are working with a material that fits on a smaller size cutting mat, I would highly suggest using a smaller size. It will be easier to manage and extend the life on the 24″ cutting mat as well.

    Other size cutting mats: 8″ Portrait, 12″ Cameo, or 15″ Cameo Plus mats

    When using any cutting mat that is smaller than 24″, the load line is the line on the right side. The left edge of the cutting mat should be next to this line but not over top of it.

    Make sure to adjust the right roller in the same manner as listed above when using smaller rolls of materials.

    The right roller should always roll across the edge of the cutting mat and not across the adhesive part of the cutting mat. If the rollers are moving across the adhesive on the cutting mat, they can pick up the adhesive and start sticking. With the new design of the Cameo Pro, the rollers are underneath the roller bar and not accessible to clean easily.
    So I would highly recommend being mindful of where the rollers are placed on the cutting mat. Adhesive build up on the rollers can cause future cutting issues.

    The mat support should be attached and moved over to support under the cutting mat as it rolls through the machine according to which size cutting mat you are using. This will help in feeding the mat in as straight as possible.

    Tip #3 – Cut settings

    The Silhouette Studio software does have a list of preset settings. These are just a suggestion of what to start out with. It is not a full comprehensive list and all material types or brands may vary.

    With any machine, you will want to test the settings and see what might work best for the design, the material, and the blade.

    For instance, on my Cameo 4 models for Oracal 651, I choose the Vinyl – Glossy setting and then increase my blade depth to a 2. This cuts well for me and my machine.

    Or for Oramask 813, I use a bit different setting.

    Since I was cutting Oramask quite a bit, I created my own custom setting by clicking on the More button and adding in a new User Defined Setting.

    Will my settings work for you, there is no guarantee? Like I said, the preset settings are just a starting point. There are many factors that will play into it.

    How do you know what will work? For that we move to #4.

    Tip #4 – Test cut! Test cut! Test cut!

    I almost feel like repeating that again. Test cut is a great habit to get into!

    There is nothing like sending the full cut through only to find out that it did not cut right. And if you are using the automatic feed option on the Cameo Pro, there is no sending it back through to cut again since you have already fed the material out the back to the cross-cutter.
    Yes, speaking from experience!
    Even I do it because I think it will all work out.
    And I kick myself when it doesn’t turn out.
    It isn’t the Silhouette machines fault I didn’t use the test cut option.

    There are 2 ways you can do a test cut.

    1 – Use the Test Cut feature in the Silhouette software on the Send tab.

    The default test cut option is in the upper left corner of either the mat or the material loaded.

    Note: If using a 24″ cutting mat, you will notice that there is a 1/2″ of space on the left and right sides that does not have adhesive on it. That is because this is where the rollers roll and you do not want your material cemented to your cutting mat.
    This is cuttable space. However, if you are using a material that is less than 24″ wide, you will line up the material 1/2″ to the right of the grid edge, this is where the adhesive starts. Place the material on the cutting mat exactly as it shows on the design screen on the mat. There is also a new pop up that will show up in some versions of the Silhouette software when you go to Send a cut, as a reminder.

    However, currently in the software (I am using v4.4.463 & in prior versions), the test cut will cut in the top left corner of the 24″ cutting mat in the default position and does not adjust if your material is less than 24″ wide.

    You will need to move the test cut to the exact location you want it to cut on your material. To do this, use the arrows keys next to the test cut button on the Send tab in the software or the arrows on the Cameo touch panel on the right side.

    To move the housing, you will need to move it both over to the right and down. The housing will perform the test cut in the exact location it is placed. If it is only moved over to the right, it will cut the top of the cutting mat.

    Or the second way to do a test cut is use a shape or object.

    I use a capital B that I type out and then I will place it on my virtual mat where my design is not located at. I love this way because it is faster than adjusting the housing and a bit more accurate since you place it where you want.

    Click on the Send tab, click exactly on the design to select it and choose No Cut to turn the cut lines off on the design and only cut the capital B.

    Select the material you are cutting and click the Send button at the bottom of the Send tab to cut the B. Did it cut? If not, adjust the settings, move the B and send it to cut again.

    It is much better to use a small section of material to make sure the settings will work versus sending a full 20″ design and it didn’t cut well. This will save you both time and headache.

    Note: if doing a print and cut project, you do not want the test cut to cut from the top left of the printed page or it can interfere with the reading of the registration marks.

    You can also either change the Line Color or the Fill Color of the B and then use the Cut by Line or Cut by Fill color options to turn the cut lines on or off.

    Tip #5 – Start small

    Whether you are a new user or an experienced user, it is a new machine. Start by cutting out a small design versus sending a large design.

    I know it’s tempting and I will fully admit I sent a full 22″ design to cut the first time I cut with the Cameo Pro. And guess what? I still have that 22″ design sitting behind me in a pile of excess material because it didn’t cut completely through and I couldn’t send it again.

    It may not be the thing you want to hear and most experienced users will say “I got this.”, but if it does not cut right, all you can do is laugh at the choice to “go big” and start a pile like I have.

    5 Tips

    Those are the 5 main tips that I would suggest to anyone starting on the Cameo Pro or if you are having issues with cuts, feeding, etc. start at #1 and work your way down.
    But there is more!

    If you are a beginner and the Cameo Pro is the first cutting machine for you, I would highly recommend the Beginner First Cuts & Setup class to get started and get the first cuts under your belt.

    Those first cuts and getting the machine set up properly are the most important steps you can start with. As a beginner it is hard to know if it’s something not working properly on the machine setup or if it’s something that you are doing. This class can help eliminate some of the anxiety you may feel about getting started.

    The video class shows a Cameo 4 – 12″ model, but the same steps will apply to the Cameo Pro as well.

    Now, I know it’s a long post, but I can’t just leave it at that.
    Here are 5 additional tips:

    Bonus Tip #1 – When cutting long vinyl designs, you can use the arrow keys on the right touch panel on the Cameo Pro (or other models) to roll the material through prior to cutting to see how it will track. This will help you to see if the rollers are gripping the vinyl securely.

    The down arrow will not only move the housing down, but advances the materials through the machine.

    Bonus Tip #2 – Make sure the cross cutter is securely on the left or right side and the cross cutter flipped up. This is the cutting mechanism on the backside of the machine.

    If the cross cutter-blade is left in the middle or the cross-cutter bar has not been flipped back up, it will hinder the movement of the cutting mat or vinyl the next time you go to cut. Usually if this is the cause, you will hear some very odd noises as the material or mat is hitting the cross-cutter blade or bar.

    Another indicator is that the design is cutting over top of itself and not cutting correctly.

    Bonus Tip #3 – Reload the vinyl or the cutting mat until it is loaded straight. If it loads crooked, it may cut crooked or come out from under the rollers. The extra time to load it smooth and straight is well worth it.

    Bonus Tip #4 – If the edge of the vinyl is curled from being rolled, try to flatten it out or advance the vinyl farther in the machine by pressing the down arrow on the right side panel before sending it to cut. This will help in that curled edge not getting hung up on the working parts in the machine and roll as flat as possible through.

    Bonus Tip #5 – Make sure you have the adequate space needed for this machine.
    It is a large machine and needs to be fully supported.

    I would highly suggest that you have it placed securely on a work space that fits the entire width of the cutting machine and allows for the roll feeder to be completely on the table as well.

    If you are using a cutting mat, remember that the full length of the cutting mat needs to be supported on both the front and the backside in order for the machine to work properly and cut.

    Hopefully with those steps above, you will be well on your way to cutting like a
    Pro with your Cameo Pro!

    If you are up and cutting again after reading this with the Cameo Pro, let us know it helped you by commenting below.

    Like what you see, buy us a “coffee” on Ko-fi.
    Your support of Silhouette Secrets+ is greatly appreciated.

    I have also made this available as a downloadable for confirmed newsletter subscribers HERE.

    Save this for future reference by pinning the image below.

    Enjoy !

    THANK YOU for your support! How can you help? Click HERE & buy a coffee.
    Every little bit helps with the cost of running the site.

    Silhouette Classes

    Never stop learning! Let me help you take the anxiety out of learning with Silhouette and get to creating faster! My Silhouette classes are heavily focused on software, so you can take the skills & techniques taught and apply them to many future projects!

    Silhouette step-by-step Classes by Silhouette Secrets+

    **This post may contain affiliate links. What that means is that I may receive compensation if you purchase through the links I have provided. The price you pay for the product or service is not higher but I may get compensated for sharing.

    Posted on 2 Comments

    New! Curio Etching Classes released!

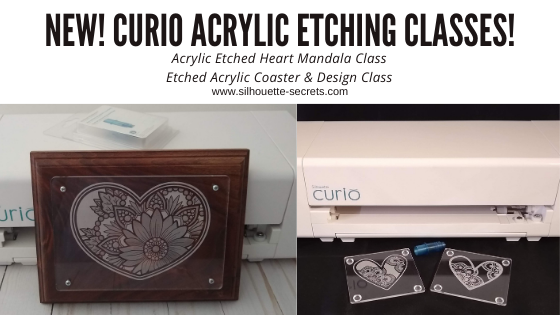
    Just a quick note to share 2 new Curio acrylic etching classes that I’ve released on my Teachable site.

    Acrylic Etched Coasters & Design with the Curio – found HERE

    In this 1 hour 18 minute video class we will go through the step-by-step process of setting up an etch design in the Silhouette Studio software, setting up the Silhouette Curio machine to etch, and etching an acrylic blank. We will etch this coaster design 2 ways and work through the design process to get a different look for each coaster.
    This class goes beyond just the basics of etching and dives into changing a design up and filling it with different emboss fills to achieve a different end result.

    Curio Etched Heart Mandala Class – Advanced Beginner – found HERE

    In this 1 hour 50 minute video class we will go through the step-by-step process of setting up a heart mandala etch design in the Silhouette Studio software, setting up the Silhouette Curio machine to etch, etching on an acrylic panel, and mounting it to a backing board.

    All of my online Silhouette classes can be found HERE.
    These are step-by-step classes taught exactly the same as if we were face-to-face.

    I would love to see what you create with your Silhouette!
    Feel free to post on my Facebook group
    Silhouette Secrets with EllyMae.
    If you have questions feel free to post below or on the Facebook group too!

    Save this for future reference by pinning the image below.

    Enjoy!

    This image has an empty alt attribute; its file name is logo.jpg

    THANK YOU for your support! How can you help? Click HERE & buy a coffee.
    Every little bit helps with the cost of running the site.

    Or if you are looking for more in-depth, step-by-step classes, check out all of my online Silhouette classes on my Teachable site HERE.

    SS Logo snip it
    **This post may contain affiliate links. What that means is that I may receive compensation if you purchase through the links I have provided. The price you pay for the product or service is not higher but I may get compensated for sharing.
    Posted on 2 Comments

    New! Curio cover file created

    It’s here! I finally was able to create the cover file and cut vinyl to decorate one of my Curio machines!

    Affiliate links may be present in the following blog post and as an Amazon Associate I earn from qualifying purchases.

    I used a Sparkleberry Ink pattern called Sea Glass Watercolor to create this cover.

    And if you look really close you can you can see the sparkle from the Glitter Laminate that I applied on top of it before I cut it.

    Grab this free cut file
    HERE

    This is the Curio machine I take when I teach classes at events, so I’ll definitely be able to tell which one is mine.
    Note: I did not cover the inside of the lid as it has instructions on it, but you could measure and create your own if you wanted to cut that too!

    I will be 100% honest in that I wasn’t sure if I was going to like it. I debated on the pattern to use on it and asked my kids and my husband for their thoughts. In the end, I chose one and just did it. And I love it! It was the perfect pattern.

    Check out the cover files I’ve created for the Cameo 3 and Cameo 4 too!

    Check out how I created these files in this post HERE and then grab the cut files here:
    Cameo 3 cover cut file
    Cameo 4 cover cut file

    I would love to see what you do with your Silhouette!
    Feel free to post on my Facebook group
    Silhouette Secrets with EllyMae.
    If you have questions feel free to post below or on the Facebook group too!

    Save this for future reference by pinning the image below.

    Enjoy!

    This image has an empty alt attribute; its file name is logo.jpg

    THANK YOU for your support! How can you help? Click HERE & buy a coffee.
    Every little bit helps with the cost of running the site.

    Or if you are looking for more in-depth, step-by-step classes, check out all of my online Silhouette classes on my Teachable site HERE.

    SS Logo snip it
    **This post may contain affiliate links. What that means is that I may receive compensation if you purchase through the links I have provided. The price you pay for the product or service is not higher but I may get compensated for sharing.
    Posted on 3 Comments

    5 Gift ideas created with Your Silhouette machine

    There are so many possible things that you can create using your Silhouette machine. Today let’s take a look at some possible gift ideas you can create.

    Each one of these gifts can be tailored to your needs or personalized in their own way.

    5 Gift ideas

    1 – Cards
    2 – Card sets
    3 – Custom Etched projects
    4 – Glass block décor
    5 – Custom t-shirts with HTV

    I’ve provided more details on each project below such as examples, supply lists, and resources. Perfect to get started with gifts for the year!

    Gift idea details

    Affiliate links may be present in the following blog post and as an Amazon Associate I earn from qualifying purchases.

    1 – Cards

    The great part about cards is anyone can do it!
    They can be simple 2 color cards or range up in complexity.

    A hand-made card is a special gift, no matter if the recipient appreciates that or not. It is because you created it! You used your time & talent to create it!

    Supplies used:
    Cardstock
    Michael’s Recollection cardstock
    Close to My Heart cardstock
    – any high quality cardstock will work, cut settings may vary by brand
    Adhesive
    Scrapbook EZ Runner tape runner
    Scrappy Tape or Score Tape
    Xyron Sticker Maker
    Glue Dots
    Foam Tape
    – I use a variety or combination of whatever is best for the project
    Assorted Embellishments or Tools as needed
    Silhouette sketch pens*
    Watercolor pencils*
    Water brush*
    *used in the sketch cards above

    You can use as little or as much as you want on the cards.

    Resources:
    Cards with your Silhouette
    Cutting Cards with the Silhouette
    Creating Cards with Your Silhouette – Free Z-fold card cut file
    Let’s Explore v4 – Creating a Card – Free Fancy Fold Flip Card cut file
    A Fun Card with Silhouette
    Sketching with Silhouette

    2 – Card sets

    Need a special gift for someone who has everything.
    A set of Thank You cards or Birthday cards might be the perfect idea!

    Make a custom card box for the cards to be stored and gifted in to add to it.

    Supplies used:
    Floral Border Sketch by Silhouette – Design #67187
    Sketched Florals by Silhouette – Design #334152
    Sketch font of your choice
    A2 Card Envelope box by Lori Whitlock – Design #315108
    – Cardstock and Adhesive – *see card details above for suggestions

    3 – Custom Etched Projects

    Etched glass

    Etched slate serving tray

    Supplies used:

    – Glass coffee mug from Target
    – Glass candle holders from Dollar Tree
    – Slate:
    Serving tray in photo above from Johnson Plastics Plus
    Other slate: Cheese board, hexagon coasters, circle coasters also can be found on Amazon
    Etchall Etching cream
    Some use Armour Etch, but I prefer Etchall and get a perfect etch each time. I have used Armour Etch in a pinch and it was ok, but highly recommend using in a well ventilated area for either.
    – Oracal 651, 631, or Oramask 813 for stencil
    – Transfer tape
    Adhesive vinyl and transfer tape can be found at:
    Expressions Vinyl, Heat Press Nation, Silhouette America or Swing Design
    Pretty much anything that can stick and seal well so the etching cream does not seep underneath can be used as a stencil

    Designs used:
    Glass Etched designs:
    Coffee Pulse by Sophie Gallo – Design #149882
    Yay Coffee by Dawn Nicole Designs – Design #188578
    Shells by Tanya Batrak – Design #205625
    1 Piece Flower by Samantha Walker – Design #7833
    Etched Slate designs:
    Eat Drink and Be Thankful by Jillibean Soup – Design #280222
    Monogram Family 6 by Lori Whitlock – Design #271080

    Resources:
    Step-by-step Glass Etching Class on Teachable

    4 – Glass block décor

    Supplies used:
    – Glass blocks from Hobby Lobby or other (these have a hole to insert objects inside)
    – Adhesive Vinyl and transfer tape
    Adhesive vinyl and transfer tape can be found at:
    Expressions Vinyl, Heat Press Nation, Silhouette America or Swing Design

    Designs Used:
    Uncork & Unwind Phrase by Kolette Hall – Design #142100
    I Saved Some Wine Today Phrase by Kolette Hall – Design #131228

    Resources:
    Layering Vinyl
    Layered Vinyl decal for a teacher gift
    Layered Vinyl Acrylic Ornament
    Creating a Vinyl Decal & Layering Adhesive Vinyl class on Teachable

    5 – Custom shirts with HTV

    Here are a few shirts I created for family members. Having the ability to customize and create designs in the Silhouette software is a big plus.

    These VooDoo designs had jumped in my cart at some point in the past and it was perfect for a couple family members having surgery and who have chronic pain.
    They loved them!

    Supplies used:
    – Shirts
    – Siser HTV
    Can be found at the following retailers:
    Expressions Vinyl, Heat Press Nation, Michaels or Swing Design

    Designs used:
    LW Love Letters Font by Lori Whitlock – Design #240682
    Smiley Face Whatever by Loni Stevens – Design #8114 with a yellow circle behind it
    Magnolia Flower by Sophie Gallo – Design #341162
    Voodoo Doodles by Jamie Lane Designs – Design #332386
    CG Create Font by Carina Gardner – Design #290474

    Resources:
    Silhouette “Secrets” Beginner HTV Tips & Tricks
    Subtracting Text for HTV
    Cutting & Layering HTV in Silhouette Studio Class on Teachable
    Creating a Knockout Design with HTV – Bonus Subtracting HTV Class on Teachable

    Whether you go big or go small, the ability to create a custom or handmade gift with your Silhouette is awesome!

    I always see user’s frantically creating gifts at the end of the year for the holidays, but why not start now. Use these gift ideas for birthdays, anniversaries, house warming gifts, and holiday gifts as well!

    I would love to see what you create with your Silhouette!
    Feel free to post on my Facebook group
    Silhouette Secrets with EllyMae.
    If you have questions feel free to post below or on the Facebook group too!

    Save this for future reference by pinning the image below.

    Enjoy!

    This image has an empty alt attribute; its file name is logo.jpg

    THANK YOU for your support! How can you help? Click HERE & buy a coffee.
    Every little bit helps with the cost of running the site.

    Or if you are looking for more in-depth, step-by-step classes, check out all of my online Silhouette classes on my Teachable site HERE.

    SS Logo snip it
    **This post may contain affiliate links. What that means is that I may receive compensation if you purchase through the links I have provided. The price you pay for the product or service is not higher but I may get compensated for sharing.
    Posted on 4 Comments

    Sketching with Silhouette

    Have you seen the classes that Silhouette and Michael’s have been hosting online?

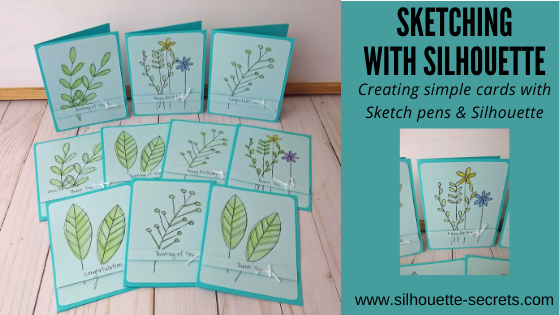
    I’ve been attending the Silhouette and Michael’s online classes when I see one that is of interest. In the most recent one that I attended, Kelly Wayment with Finding Time to Create showed how to create some simple cards by using sketch pens in the Silhouette software.

    In these classes, I prefer to watch when they do the class live and then complete the project later at my own pace. I decided to make a couple sets to have on hand for different occasions.

    Affiliate links may be present in the following blog post and as an Amazon Associate, I earn from qualifying purchases.

    Check out this class on the Michael’s YouTube channel HERE.
    Grab a cup of your favorite drink and sit back and watch Kelly create.
    Then gather your supplies and make up a few cards to have on hand.

    Check out all of the upcoming classes on the Michael’s website HERE.

    It is always fun to learn something new and to expand on your skills and Silhouette techniques.

    I would love to see what you create with your Silhouette!
    Feel free to post on my Facebook group
    Silhouette Secrets with EllyMae.
    If you have questions feel free to post below or on the Facebook group too!

    Save this for future reference by pinning the image below.

    Enjoy!

    This image has an empty alt attribute; its file name is logo.jpg

    THANK YOU for your support! How can you help? Click HERE & buy a coffee.
    Every little bit helps with the cost of running the site.

    Or if you are looking for more in-depth, step-by-step classes, check out all of my online Silhouette classes on my Teachable site HERE.

    SS Logo snip it
    **This post may contain affiliate links. What that means is that I may receive compensation if you purchase through the links I have provided. The price you pay for the product or service is not higher but I may get compensated for sharing.
    Posted on Leave a comment

    Let’s Explore v4 – Draw a Note

    Let’s Explore v4 – Draw a Note

    Did you know that you can add a note to your Silhouette file?

    This option has been in the software for awhile, but depending on what version you are using, it may work better in later versions. In the current v4.4 software version, it does seem to be behaving as it should.

    This tutorial is written in v4.4.455

    The Draw a Note tool is found on the left side.

    Click on the Draw a Note and your mouse will change to a text cursor.
    Click on the Design Space to add a note box.
    I would suggest clicking in the gray “holding area” off the cutting mat.
    In the past, there were some versions that the note would get “stuck” and you couldn’t delete or edit it. For this reason, I would not suggest placing it in the cutting space on the screen. Just in case.

    Type whatever information you would want to remember with this file such as text style names, sizes, colors, etc.

    Want to delete the note, click the X in the top right corner of the box.

    Want to change the size of the note, move the cursor on the outer edge and it will change to allow you to drag the size. This is limited in how much you can change the box.

    In the top left corner, when the Draw a Note feature is active, you will see options for changing the text color, font style, size, and other options.

    Note: each version of the Silhouette Studio software may vary. Older versions may not have these options and may still have some bugs in the Notes feature.
    This tutorial was written in v4.4.455.

    If you have questions feel free to post below or on the Facebook group too!
    Silhouette Secrets with EllyMae

    Save this for future reference by pinning the image below.

    Check out the full “Let’s Explore v4” series on the blog HERE as we go through each tool and feature in the v4 Silhouette Studio software in detail.
    The more familiar you become with the Silhouette software, the easier creating designs, working with designs, and creating your projects will be as you apply those skills to them.

    Enjoy!

    This image has an empty alt attribute; its file name is logo.jpg

    THANK YOU for your support! How can you help? Click HERE & buy a coffee.
    Every little bit helps with the cost of running the site.

    Or if you are looking for more in-depth, step-by-step classes, check out all of my online Silhouette classes on my Teachable site HERE.

    SS Logo snip it
    **This post may contain affiliate links. What that means is that I may receive compensation if you purchase through the links I have provided. The price you pay for the product or service is not higher but I may get compensated for sharing.
    Posted on 25 Comments

    Let’s Explore v4 – Quick Access Toolbar (QAT)

    QAT – Quick Access Tool bar

    The Quick Access Toolbar (QAT) is quick way to access many of the panels on the right side of the Silhouette software.

    QAT copy

    I am more comfortable using the panels on the right because I like the expanded window and am just not in the habit of using the quick icons at the top. This is probably because I started in the software before the QAT was around and old habits are hard to change.
    But, I am getting better at it.

    This is a fluid tool bar that will change depending on what you have selected on the design mat. You will notice that the icons will be the same as the panels on the right side.

    With objects selected on the design screen these are the icons you might see in the QAT bar.

    Look at all the information in the Quick Access Toolbar (QAT).
    All of this information can also be found on the right side in the Panels, but these are quick buttons to access it as well. There are multiple ways to do things in the software, no one way is right or wrong, but the best way is what works for you.

    This fluid tool bar, changes depending on what is selected. If you have text selected on the design screen, then you will see text options in the tool bar.

    QAT Text copy

    If a design is selected you will see the most commonly used options for an object in the QAT.

    Let’s look at the Alignment options as an example.

    The alignment tools can be found under the Transform Panel – Tab 1 on the right side.

    Or the same icon can be found in the top QAT when an object is selected.

    Note: the spacing options may not show in the QAT on older software versions. It was later added into the QAT options.

    If no object is selected, the toolbar will not show.

    The other thing to mention here, is what you see or what you might see on someone else’s screen may be expanded or condensed.
    This depends on the screen size of the user’s computer.

    On a smaller screen the options will be condensed and you will have little gray corners on the icons that will expand when you move the cursor over the icon.

    On a larger screen the options for the icons can expand more across the top of the software and not have as many fly-out menus.

    Either way the options are all still there just depends on what you have on the screen selected.

    I am finding that I use the QAT more and more, just a matter of getting used to clicking on the little button in the top menu vs opening the panel on the right side. There is no right or wrong way to use those tools.

    Which do you use most often?

    Feel free to post on my Facebook group
    Silhouette Secrets with EllyMae.
    If you have questions feel free to post below or on the Facebook group too!

    Save this for future reference by pinning the image below.

    Enjoy!

    This image has an empty alt attribute; its file name is logo.jpg

    THANK YOU for your support! How can you help? Click HERE & buy a coffee.
    Every little bit helps with the cost of running the site.

    Or if you are looking for more in-depth, step-by-step classes, check out all of my online Silhouette classes on my Teachable site HERE.

    SS Logo snip it
    **This post may contain affiliate links. What that means is that I may receive compensation if you purchase through the links I have provided. The price you pay for the product or service is not higher but I may get compensated for sharing.